What did you do to your M or Q Today ....

Forum for Infiniti M35 and M45, and Nissan Fuga owners.
User avatar
CPJ LB
Posts: 1026
Joined: Sat Aug 28, 2010 4:06 pm
Car: 12 G37X Sedan- stealthy modded
14 Altima 2.5
08 Tahoe
06 M35 S (gone)
14 Versa 4dr (gone)
Location: CA 2 CT

Post

stm37s wrote:those rims look nice but to me they look similar to ace alloy mesh 7
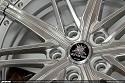
the BMW wheel pix was used only as an example of a wheel color that my Infiniti M sport wheels will be painted....I'm growing tired of my black wheels so going with a different look :biggrin:

I've always liked the stock M35/45 sport wheels, so going with a different color will be cool :dblthumb:

I'll probably get another set of H&R wheel spacers, too.

old pix with H&R spacers (15mm)
Image

spacers with stock sport wheels - sat flush with fenders
Image

old pix…..without spacers
Image
Last edited by CPJ LB on Tue Sep 10, 2013 12:40 am, edited 1 time in total.


Wangtang408
Posts: 579
Joined: Wed Apr 17, 2013 11:32 am
Car: 2006 Infiniti M35
Location: NorCal

Post

Got the Blox Racing 5/16 Plenum spacer installed. I can definitely feel more power and growl, well worth it since I got it for only 90bucks!

Image

Image

User avatar
CPJ LB
Posts: 1026
Joined: Sat Aug 28, 2010 4:06 pm
Car: 12 G37X Sedan- stealthy modded
14 Altima 2.5
08 Tahoe
06 M35 S (gone)
14 Versa 4dr (gone)
Location: CA 2 CT

Post

^congrats....I like that the spacer is black.... enjoy!!!

User avatar
CPJ LB
Posts: 1026
Joined: Sat Aug 28, 2010 4:06 pm
Car: 12 G37X Sedan- stealthy modded
14 Altima 2.5
08 Tahoe
06 M35 S (gone)
14 Versa 4dr (gone)
Location: CA 2 CT

Post

...I picked up my stock sport wheels from being powder coated...I went with Anthracite semi-gloss and matte black lug nuts and center caps.... here's some pix earlier today when I picked them up. I'll take other pix with my point and shoot camera - I think the iphone pix didn't get close enough...but overall, the rims came out really good. they repaired all of the curb rash. I'll probably get them installed this weekend...

Image

Image

Wangtang408
Posts: 579
Joined: Wed Apr 17, 2013 11:32 am
Car: 2006 Infiniti M35
Location: NorCal

Post

That is sick!!! Can wait to see how they look installed!!

User avatar
White-Rush
Posts: 363
Joined: Wed Feb 08, 2012 7:19 pm
Car: 06 M35S - Sold
11 M37S - Ran hard and sold
16 Q70S
Location: 757 - Virginia

Post

Those look damn good! Way to go bro.

User avatar
CPJ LB
Posts: 1026
Joined: Sat Aug 28, 2010 4:06 pm
Car: 12 G37X Sedan- stealthy modded
14 Altima 2.5
08 Tahoe
06 M35 S (gone)
14 Versa 4dr (gone)
Location: CA 2 CT

Post

^^thanks Wang & Rush!! I can't wait to get them on the car....I just need to order a pair of 245/40/19's -- my current set up is staggard, otherwise if the stock wheels can handle 275/35/19 I'd throw those suckers on :gapteeth:

I took some closer shots with my camera and it really shows the slight contrast with the black and Anthracite...I'm glad I went with semi-gloss Anthracite instead of matte...for you guys with white M's, I would like to see the Anthracite against the white...I'm sure it'll be HOT! I took some pix of the wheel in the sunlight and shade to show a difference in views...

Image

Image

Image

Image

Image

font976
Posts: 6
Joined: Mon Aug 12, 2013 4:49 pm
Car: 2007 M45 Sport

Post

Damn those look so nice. I have a white m45 sport and this just sparked my interest. How do it for you and how long did it take them? I'm in orange county.

User avatar
CPJ LB
Posts: 1026
Joined: Sat Aug 28, 2010 4:06 pm
Car: 12 G37X Sedan- stealthy modded
14 Altima 2.5
08 Tahoe
06 M35 S (gone)
14 Versa 4dr (gone)
Location: CA 2 CT

Post

thanks man...It'll look HOT on your white M!!!

if you're in the OC, the paint shop is really close to you...it's in Huntington Beach. Primo Powder Coating....ask for Dan -- he's the owner.

I dropped off the wheels (unmounted) prior to Labor Day weekend. Normal turnaround time is usually 3-5 days -- depending on what jobs he has. I was in no rush, but the wheels were ready this past Monday and I didn't get a chance to shoot down until yesterday to pick them up.

prices will vary depending on what color paint you choose...there's plenty to choose from, but I was sold on the Anthracite semi-gloss...

He powder coats a lot of other car parts and I was thinking of taking my upper plenum to him and get something done :naughty:

User avatar
stm37s
Posts: 1107
Joined: Sun Jun 16, 2013 12:12 pm
Car: '12 Chrysler 300 SRT8
'11 Infiniti M37 S
'06 Range Rover HSE (Wife's)
'12 Chevy Camaro LS (Wife's)
'95 Chevy Impala SS (sold)
'04 Chevy Impala SS (sold)
'12 Hyundai Veloster (Daughters)
Location: Snellville, Ga
Contact:

Post

those look good man

Larz
Moderator
Posts: 2894
Joined: Thu Feb 21, 2013 8:55 pm
Car: 2019 Q70-L RWD
Location: Ft Lauderdale, Florida
Contact:

Post

Absolutely staggering! What a brilliant job - even more so with the black lugs!

DeanM45
Posts: 552
Joined: Sun Apr 29, 2012 11:09 pm
Car: 2006 Infiniti M45 Sport 1 or 2 mods
Location: Woodland Hills, CA

Post

Those do look good. I'll have to check out the shop as well. Anthony, what are going going to do about the color of the valve stems?

User avatar
CPJ LB
Posts: 1026
Joined: Sat Aug 28, 2010 4:06 pm
Car: 12 G37X Sedan- stealthy modded
14 Altima 2.5
08 Tahoe
06 M35 S (gone)
14 Versa 4dr (gone)
Location: CA 2 CT

Post

thanks Larz & thanks Dean!! I got the wheels stored in my garage -- covered up -- so I won't be tempted to go and look at them... :gapteeth:

I'm really hoping for Saturday to get here faster!! LOL.

Larz, do you ever visit California?? You'll be impressed with all of the car mod shops around here...I can hook you up brotha :bigthumb:

anyway, I haven't thought about the valve stems yet, Dean...my wheel/tire guy was thinking the same thing but I guess we'll decide once the wheels are mounted to the car...I'm sure I'll be particular about it's looks/stance etc...you have any good ideas?? let me know :dblthumb:

I placed an order with Stillen this morning for my H&R DRM 15mm spacers - unfortunately they won't get here until next week, so I'll have to wait to throw those on....

anytime you're down this way Dean, let me know and we can link up...there's a lot of shops down this way that you can check out...Church's Auto Tuning, Primo Powdercoat, etc... what do you plan on getting powder coated?? hints please :naughty:

myother45isalesbaer
Posts: 955
Joined: Sun Nov 18, 2007 7:31 am
Car: 2004 M45 Q70 awd,4.5

Post

I slept in it. Lost my home. Now i am looking for a really warm sleeping bag. No money for gas, repairs. Thank you Congress with your stimulas programs.

User avatar
White-Rush
Posts: 363
Joined: Wed Feb 08, 2012 7:19 pm
Car: 06 M35S - Sold
11 M37S - Ran hard and sold
16 Q70S
Location: 757 - Virginia

Post

???

seriously or you kidding?

User avatar
stm37s
Posts: 1107
Joined: Sun Jun 16, 2013 12:12 pm
Car: '12 Chrysler 300 SRT8
'11 Infiniti M37 S
'06 Range Rover HSE (Wife's)
'12 Chevy Camaro LS (Wife's)
'95 Chevy Impala SS (sold)
'04 Chevy Impala SS (sold)
'12 Hyundai Veloster (Daughters)
Location: Snellville, Ga
Contact:

Post

he's joking bruh, lol, gotta be

User avatar
paulypotz
Posts: 70
Joined: Tue Jun 02, 2009 7:29 am
Car: 2006 M35x
Location: South NJ

Post

I did this project over the summer...

Fixed and painted stock rims glossy black
Fixed chipping headlight
Plastidiped rear valence
Plastidiped all rear emblems
Plastidiped the grill
Everything got 5 coats of black and 3 coasts of gloss.

Image

Image

Image

Image

Image

Cabo
Posts: 149
Joined: Thu Jul 21, 2011 8:16 am
Car: Infiniti M35 sport 2006
Nissan pathfinder LE 2002
Location: Massachusetts

Post

How did you clear your headlights?

User avatar
paulypotz
Posts: 70
Joined: Tue Jun 02, 2009 7:29 am
Car: 2006 M35x
Location: South NJ

Post

Cabo wrote:How did you clear your headlights?
If your headlight has chips in it and it kinda looks like paint chipping away, most likely its the UV layer of protection that is chipping off. You need to remove the entire layer of film before you can clear the headlight. I manually took the layer off by using water, plastic putty knives and 600 grit sand paper manually. Once you get the layer of film off, you can use a headlight restoration kit. I used Meguires http://www.autogeek.net/meguiars-plasti ... 4AodKhQAdw

When you use this kit be sure to use a POWER DRILL and NOT a cordless drill. You need all the power you can get

My headlight BEFORE:
Image

My headlight AFTER:
Image

rxmclaren7
Posts: 218
Joined: Mon Aug 13, 2012 9:10 pm
Car: 2006 Infiniti M35x
Location: Cortland, NY

Post

so a few days ago i hit a deer!! no one was injured (except Bambi....dont like deer anyway!!) car is currently in the shop and i have been told it could take 2-3 weeks!! :mad: but here are some before pics and i will upload some after pics once i have them!!

Image

Image

Image

the damage estimate is $4900!! good thing i only have to pay $500 of it!! :werd:

Larz
Moderator
Posts: 2894
Joined: Thu Feb 21, 2013 8:55 pm
Car: 2019 Q70-L RWD
Location: Ft Lauderdale, Florida
Contact:

Post

Bloody Nora! That's a long time to do without your car,mate. I reckon you're glad you paid the extra insurance to have a deductible instead of a body shop bill. Glad you weren't injured and best wishes on the body work!

DeanM45
Posts: 552
Joined: Sun Apr 29, 2012 11:09 pm
Car: 2006 Infiniti M45 Sport 1 or 2 mods
Location: Woodland Hills, CA

Post

rxmclaren7 - YIKES! Hopefully everything works out!
Since a lot of people are painting the rear trim piece I did the same but a bit different.
For anyone that wants to attempt this, removing the trunk finisher panel (the trim is attached from the back side) is a royal PAIN! The clips at the top are beeatch! Plate is still off because it must be removed to remove the finisher panel.

Anyhow, not completely done, still need to buff everything out in a week or so. Black urethane paint and then 2K clear do make it as durable as the chrome. Debating if I should add a black stripe to the lower chrome piece.

Image

Image

In case you haven't noticed, I like black surrounded by chrome! :gapteeth:

jlakst6
Posts: 18
Joined: Sat Jun 27, 2009 1:42 am
Car: M45s
Location: MD

Post

R2C Performance CAI

Image

Image

Larz
Moderator
Posts: 2894
Joined: Thu Feb 21, 2013 8:55 pm
Car: 2019 Q70-L RWD
Location: Ft Lauderdale, Florida
Contact:

Post

DeanM45 wrote:rxmclaren7 - YIKES! Hopefully everything works out!
Since a lot of people are painting the rear trim piece I did the same but a bit different.
For anyone that wants to attempt this, removing the trunk finisher panel (the trim is attached from the back side) is a royal PAIN! The clips at the top are beeatch! Plate is still off because it must be removed to remove the finisher panel.

Anyhow, not completely done, still need to buff everything out in a week or so. Black urethane paint and then 2K clear do make it as durable as the chrome. Debating if I should add a black stripe to the lower chrome piece.
I think doing the lower piece to match the upper would be brilliant! I did my trim with Plasti Dip but yours is amazingly better! How the heck did you get that piece off the car and how did you keep the letters chrome whilst painting the trim?

DeanM45
Posts: 552
Joined: Sun Apr 29, 2012 11:09 pm
Car: 2006 Infiniti M45 Sport 1 or 2 mods
Location: Woodland Hills, CA

Post

Larz wrote:
DeanM45 wrote:rxmclaren7 - YIKES! Hopefully everything works out!
Since a lot of people are painting the rear trim piece I did the same but a bit different.
For anyone that wants to attempt this, removing the trunk finisher panel (the trim is attached from the back side) is a royal PAIN! The clips at the top are beeatch! Plate is still off because it must be removed to remove the finisher panel.

Anyhow, not completely done, still need to buff everything out in a week or so. Black urethane paint and then 2K clear do make it as durable as the chrome. Debating if I should add a black stripe to the lower chrome piece.
I think doing the lower piece to match the upper would be brilliant! I did my trim with Plasti Dip but yours is amazingly better! How the heck did you get that piece off the car and how did you keep the letters chrome whilst painting the trim?
You have to remove the liner from the deck lid and then you will see all of the nuts holding the finisher panel on, I think there are 8 or 10. Remove the license plate. Then the finisher is just held on with two sided tape and clips at the top. I used a razor to slowly cut the tape as I lifted the panel. It is a long process but gets done eventually. To keep paint from sticking to something (letters) just coat them in wax but make sure not to get wax anywhere else. Then, once the paint is dray, it just wipes off.

User avatar
CPJ LB
Posts: 1026
Joined: Sat Aug 28, 2010 4:06 pm
Car: 12 G37X Sedan- stealthy modded
14 Altima 2.5
08 Tahoe
06 M35 S (gone)
14 Versa 4dr (gone)
Location: CA 2 CT

Post

Last night I kept hearing a 'motorized sound' near the front bumper and while I was in the drive thru at In-n-Out I could see the passenger-side headlight reflection on the car in front of me literally going up and back down slightly...really weird. I went home and lifted the hood and pinpointed the sound. It was coming from the back of the passenger-side headlight.

I did some research this morning and found that the light adjustments on our cars (AFS) have a motor on the outside of the headlight assembly... Either the motor was 'stuck' or couldn't adjust correctly - thus the light reflection was showing an up and down motion. Our cars have a height leveling sensor in the back (located by the driver-side rear wheel)... the height level sensor sends a signal to the AFS which makes the headlight adjust for height -- being that my car is lowered, I'm thinking it was trying to adjust but the motor may be going out...

long story short, to avoid hearing the 'motorized sound' and to stop the headlight from moving up and down continuously, I just unplugged the power source to the motor in back of the headlight :biggrin:

I heard that another way to fix this is to replace the entire headlight assembly.... :gotme I don't think I can justify spending $$$$ on a new headlight assembly.

I manually adjusted my headlights (for proper height setting) and my AFS still works (moving headlights from side-to-side)....no more noise :dblthumb:

TDot
Posts: 1183
Joined: Mon Oct 03, 2011 12:59 pm
Car: 2008 M35X, Lakeshore Slate/Tan
Location: NY

Post

Changed the brake fluid, wipers, and cabin filter.

User avatar
TXT
Posts: 363
Joined: Wed Jul 11, 2012 7:13 pm
Car: 2006 M45 Sport
Location: Mooresville, NC

Post

Got my car lowered today by Fat3oy. Saw his Turbo M35 in person which sounds and looks great!

Here are the pics. Is that plastic piece underneath of the car supposed to stick down so much? Looks like it's sagging but I can't confirm. Would need to compare with other M45's.

Image
Image

DeanM45
Posts: 552
Joined: Sun Apr 29, 2012 11:09 pm
Car: 2006 Infiniti M45 Sport 1 or 2 mods
Location: Woodland Hills, CA

Post

TXT wrote:Got my car lowered today by Fat3oy. Saw his Turbo M35 in person which sounds and looks great!

Here are the pics. Is that plastic piece underneath of the car supposed to stick down so much? Looks like it's sagging but I can't confirm. Would need to compare with other M45's.

Image
Image
I thought he was running a Vortec??

Anyhow, car looks MUCH better lowered!

Yes, the undercovers all sag: high heat and high air pressure when the car is moving push them down. I don't have any pictures but you can use a curtain rod and JB Weld/screw it into the little "channel" that is in the back of the piece. Mine sits flat now.

As for what I did today: removed the front mudflat pieces. Cleaned the look of the car up quite a bit. I'll put pictures up tomorrow. I **may** pull off the rear pieces as well.

User avatar
TXT
Posts: 363
Joined: Wed Jul 11, 2012 7:13 pm
Car: 2006 M45 Sport
Location: Mooresville, NC

Post

Yea I had to take off the front mudflaps because that became the lowest point of my car after the drop. Way to close to the ground and i heard it scrape at speed bumps, plus when ran it through the car wash, it kind of forcefully came off haha.


Return to “Infiniti M35 and M45 Forum”