What was done to your 240 today?
-
S14toRPS13
- Posts: 2333
- Joined: Mon Apr 03, 2006 1:11 pm
- Location: Back to CA

Re: what did you do to your 240 today
-
float_6969

- Moderator
- Posts: 17366
- Joined: Mon Aug 26, 2002 1:55 pm
- Car: CA18DET swapped 1995 Nissan 240sx (too many mods to list)
2015 SV Leaf w/QC & Bose (daily) - Location: Topeka, Kansas
- Contact:
Re: what did you do to your 240 today
I started the removal of the ES poly bushings in the rear of my S14 and the installation of the Megan Racing Hard rubber bushings.
-
_kouki_monster_
- Posts: 1
- Joined: Thu Dec 15, 2011 7:13 am
- Car: 89 s13 hatch
Re: what did you do to your 240 today
i started chassis harness and fuse box tuck. i have a dumb nico noob question can you get rid of the sponsor banner on the right side to see larger pics.
-
TroubleBound

- Posts: 1778
- Joined: Fri Aug 03, 2007 3:45 am
- Car: 1992 240SX Hatch
- Location: Richmond VA
Re: what did you do to your 240 today
I finally found a driver fender for my 92 hatch that i installed, and bled the clutch some more. Aligned it as best i could in the driveway now it will make it to the alignment shop no problem. Fixed the brakelights and put a new battery in it. Actually took it for a spin down the street a few times, started a whole 'nother list of stuff i need to do it before January.
-
SoCal-S13

- Posts: 804
- Joined: Sat Mar 20, 2010 3:14 pm
- Car: 1984 Z31 50th Anniversary Edition VG30ET
- Location: Glendora CA
Re: what did you do to your 240 today
drove her to the gas station and loaded her up with premium, as usual. saw my buddy there attempting to troubleshoot his S13 hatch idle issue in the lot. Helped him out and ended up giving him a maf connector with pigtail and wired it up for him. then we had a decent run up gmr. In the words of the wise Ice Cube, "Today was a good day."
-
float_6969
- Moderator
- Posts: 17366
- Joined: Mon Aug 26, 2002 1:55 pm
- Car: CA18DET swapped 1995 Nissan 240sx (too many mods to list)
2015 SV Leaf w/QC & Bose (daily) - Location: Topeka, Kansas
- Contact:
Re: what did you do to your 240 today
Finished installation of Megan Racing Hard Rubber bushings. They're awesome. I'll never run a poly bushing on a pivoting suspension arm again. Perfect balance of ride comfort and handling. And IMHO, the handling is BETTER than it was with the poly bushings, but I was running pretty low spring rate struts (NISMO S-Tune) so that might have contributed to the poly not working well.
Re: what did you do to your 240 today
Replaced garbage bearings with OEM bearings out of a junkyard, repacked with Mobil 1.
Had what sounded like tire rub when turning right at any speed but sound seemed to be coming from left wheel. After checking for play in the left, I pulled both wheels off and the right hub sounded like the Wheel of Fortune.


Had what sounded like tire rub when turning right at any speed but sound seemed to be coming from left wheel. After checking for play in the left, I pulled both wheels off and the right hub sounded like the Wheel of Fortune.
-
blkvrtswp

- Posts: 509
- Joined: Mon May 30, 2011 6:45 pm
- Car: 93 240SX Convertible
SR20DET FP 20G Turbo - Location: Poughkeepsie, NY
Re: what did you do to your 240 today
Scored a perfect coupe trunk with some unknown low-profile spoiler with LED 3rd brake light for my spring 'vert paint job. Exactly the style spoiler I was looking for - in NY no "permanently attached, functional" 3rd light = fail.
eBay $119 shipped!

eBay $119 shipped!
-
vas13hatch
- Posts: 87
- Joined: Sun Dec 30, 2012 12:20 pm
- Car: 91 s13 Hatch
- Location: butttthole VA
Re: what did you do to your 240 today
Started the clean up process on my new baby.
Before

After a quick mop out, need to get a shop vac to get all the crap out of the rest of the interior.

Doesn't anyone know how to wipe their gas-hole?

There, Mostly clean...

Ripped off these ugly arse body side moldings, before.

After, need to get the rest of the tape off next.

Took off the door panel, trying to troubleshoot my window not working...

I can hear the motor clicking when I hit the switch but nothing happens... Guess the motor is bad
Tommorow will be working my way forward cleaning inside and out...
Before
After a quick mop out, need to get a shop vac to get all the crap out of the rest of the interior.
Doesn't anyone know how to wipe their gas-hole?
There, Mostly clean...
Ripped off these ugly arse body side moldings, before.
After, need to get the rest of the tape off next.
Took off the door panel, trying to troubleshoot my window not working...
I can hear the motor clicking when I hit the switch but nothing happens... Guess the motor is bad
Tommorow will be working my way forward cleaning inside and out...
-
SoCal-S13
- Posts: 804
- Joined: Sat Mar 20, 2010 3:14 pm
- Car: 1984 Z31 50th Anniversary Edition VG30ET
- Location: Glendora CA
Re: what did you do to your 240 today
sold that s***. currently looking for kouki s14
Re: what did you do to your 240 today
Open up you amp and check the insides.
Mine melted some solder off, and it worked after I resoldered it.
Mine melted some solder off, and it worked after I resoldered it.
-
kouki munster

- Posts: 2195
- Joined: Wed Nov 09, 2005 6:13 pm
- Car: 97 base 240
- Location: Anderson, SC
Re: what did you do to your 240 today
Replaced the wastgate actuator, now I can finally run more than 14 ps1  , now I just have to figure out why it blows out the spark randomly over 16 psi.
-
float_6969
- Moderator
- Posts: 17366
- Joined: Mon Aug 26, 2002 1:55 pm
- Car: CA18DET swapped 1995 Nissan 240sx (too many mods to list)
2015 SV Leaf w/QC & Bose (daily) - Location: Topeka, Kansas
- Contact:
Re: what did you do to your 240 today
Same thing happened to my S14. Re-soldered all the connections on the circuit board on the window amplifier and all has been well ever since.Razi wrote:Open up you amp and check the insides.
Mine melted some solder off, and it worked after I re-soldered it.
-
vas13hatch
- Posts: 87
- Joined: Sun Dec 30, 2012 12:20 pm
- Car: 91 s13 Hatch
- Location: butttthole VA
Re: what did you do to your 240 today
Word I'll check it out and see what the deal is with that window.
Didn't do a thing to it today, damn flu blindsided my a**...
Didn't do a thing to it today, damn flu blindsided my a**...
Re: what did you do to your 240 today
Finally got it in the garage... tear down starts tomorrow.
-
vas13hatch
- Posts: 87
- Joined: Sun Dec 30, 2012 12:20 pm
- Car: 91 s13 Hatch
- Location: butttthole VA
Re: what did you do to your 240 today
I re-soldered my window amp, still don't work, got a new motor coming. I opened up some parts boxes like xmas!
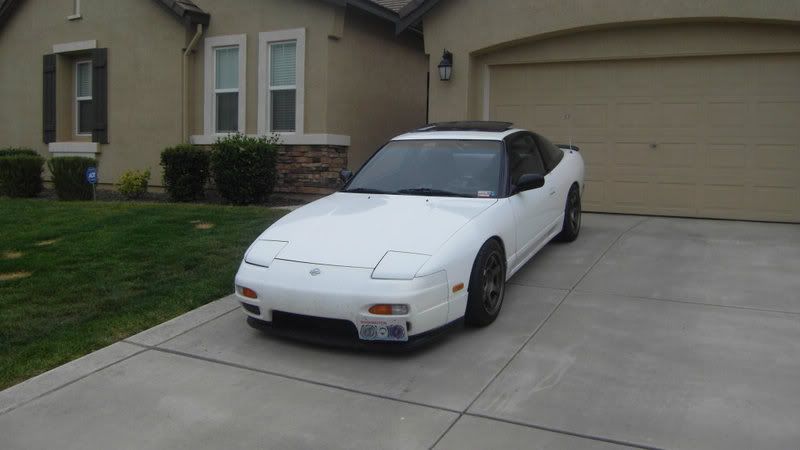
BTW does anyone know what kind of lip is on this car?
Thanks in advance
Sorry to the owner that u had to sell this beauty
BTW does anyone know what kind of lip is on this car?
Thanks in advance
Sorry to the owner that u had to sell this beauty
S14toRPS13 wrote:I sold it
-
float_6969
- Moderator
- Posts: 17366
- Joined: Mon Aug 26, 2002 1:55 pm
- Car: CA18DET swapped 1995 Nissan 240sx (too many mods to list)
2015 SV Leaf w/QC & Bose (daily) - Location: Topeka, Kansas
- Contact:
Re: what did you do to your 240 today
I finally had tires mounted on my wheels that I've had for months. The dark pic is of one of the fronts mounted. More pics to come.


-
SoCal-S13
- Posts: 804
- Joined: Sat Mar 20, 2010 3:14 pm
- Car: 1984 Z31 50th Anniversary Edition VG30ET
- Location: Glendora CA
Re: what did you do to your 240 today
replaced my old one.

-
vas13hatch
- Posts: 87
- Joined: Sun Dec 30, 2012 12:20 pm
- Car: 91 s13 Hatch
- Location: butttthole VA
Re: what did you do to your 240 today
Raining Today, but I got some presents in the mail!
Exhauststststs

Rear Strut Barrr

Air Intakee

Nismo Oil & Radiator Caps

SOHC Pistons & Rings!


Window Motor And Compressor Idler Pulley


Exhauststststs
Rear Strut Barrr
Air Intakee
Nismo Oil & Radiator Caps
SOHC Pistons & Rings!
Window Motor And Compressor Idler Pulley
-
vas13hatch
- Posts: 87
- Joined: Sun Dec 30, 2012 12:20 pm
- Car: 91 s13 Hatch
- Location: butttthole VA
Re: what did you do to your 240 today
Picked up some new wheels xxr 002 16x8...

I took the window amp apart and soldered the one pin that seems to break on all of them, still didnt fix it, so I ordered a new motor and fixed it today, it was pretty simple.
Lower Window, take 4 bolts out of window, pull it out the top of the door.

Remove 4 bolts in regulator, remove it through the top of the door.

Hmm I wonder why it didn't work... Old on left, new on right.

I dunno what went on with that motor before I got it, the rest of it was nowhere to be found.. Anyway got it all back together and it works nicely. Only took about 20 minutes. Just gotta get a new door panel that isn't falling apart...
Also got all the side molding tape off the sides and doors.
Before-

After-Shoulda taken the picture when it was still light out...

That body line should clean up decently, that crap in there is excess glue and algae growing on the paint.
Next is to remove that ugly pinstripe...

Can't clean it till the weather warms up a lil...

That's it for today
I took the window amp apart and soldered the one pin that seems to break on all of them, still didnt fix it, so I ordered a new motor and fixed it today, it was pretty simple.
Lower Window, take 4 bolts out of window, pull it out the top of the door.
Remove 4 bolts in regulator, remove it through the top of the door.
Hmm I wonder why it didn't work... Old on left, new on right.
I dunno what went on with that motor before I got it, the rest of it was nowhere to be found.. Anyway got it all back together and it works nicely. Only took about 20 minutes. Just gotta get a new door panel that isn't falling apart...
Also got all the side molding tape off the sides and doors.
Before-
After-Shoulda taken the picture when it was still light out...
That body line should clean up decently, that crap in there is excess glue and algae growing on the paint.
Next is to remove that ugly pinstripe...
Can't clean it till the weather warms up a lil...
That's it for today
-
vas13hatch
- Posts: 87
- Joined: Sun Dec 30, 2012 12:20 pm
- Car: 91 s13 Hatch
- Location: butttthole VA
Re: what did you do to your 240 today
Still wainting on my gaskets to come in before i tear down the engine for sohc pistons, new rings and valve seals. I shot it with some degreaser, definately gonna need some more. But I put it up on blocks gonna do all new bushings, lowering springs(temporary) and fix any rust under the car.


took the bumper off for easier access to the engine and because i'm removing all the a.c. components.

gross moldy s***

Only real rust on the front end. Right frame rail.

Hopefully my gaskets will be here soon.. Gonna be fun swapping pistons with the motor in the car...
took the bumper off for easier access to the engine and because i'm removing all the a.c. components.
gross moldy s***
Only real rust on the front end. Right frame rail.
Hopefully my gaskets will be here soon.. Gonna be fun swapping pistons with the motor in the car...
Last edited by vas13hatch on Thu Jan 24, 2013 12:14 pm, edited 1 time in total.
-
float_6969
- Moderator
- Posts: 17366
- Joined: Mon Aug 26, 2002 1:55 pm
- Car: CA18DET swapped 1995 Nissan 240sx (too many mods to list)
2015 SV Leaf w/QC & Bose (daily) - Location: Topeka, Kansas
- Contact:
Re: what did you do to your 240 today
I built a bracket to hold my 3rd Gen Toyota MR2 Electro-Hydraulic power steering pump. I would have taken pics, but the coat hanger I had it hung up with when I painted it decided to unbend itself and drop the damn thing on the ground, ruining my still wet paint. Ghey.
-
vas13hatch
- Posts: 87
- Joined: Sun Dec 30, 2012 12:20 pm
- Car: 91 s13 Hatch
- Location: butttthole VA
Re: what did you do to your 240 today
Still waiting on my gaskets but I figured I'd start taking some stuff apart.
Started removal of the air intake stuff.

good thing I got a new intake setup...

The whole stock intake assembly will be for sale or give away with shipping/boxing paid for...

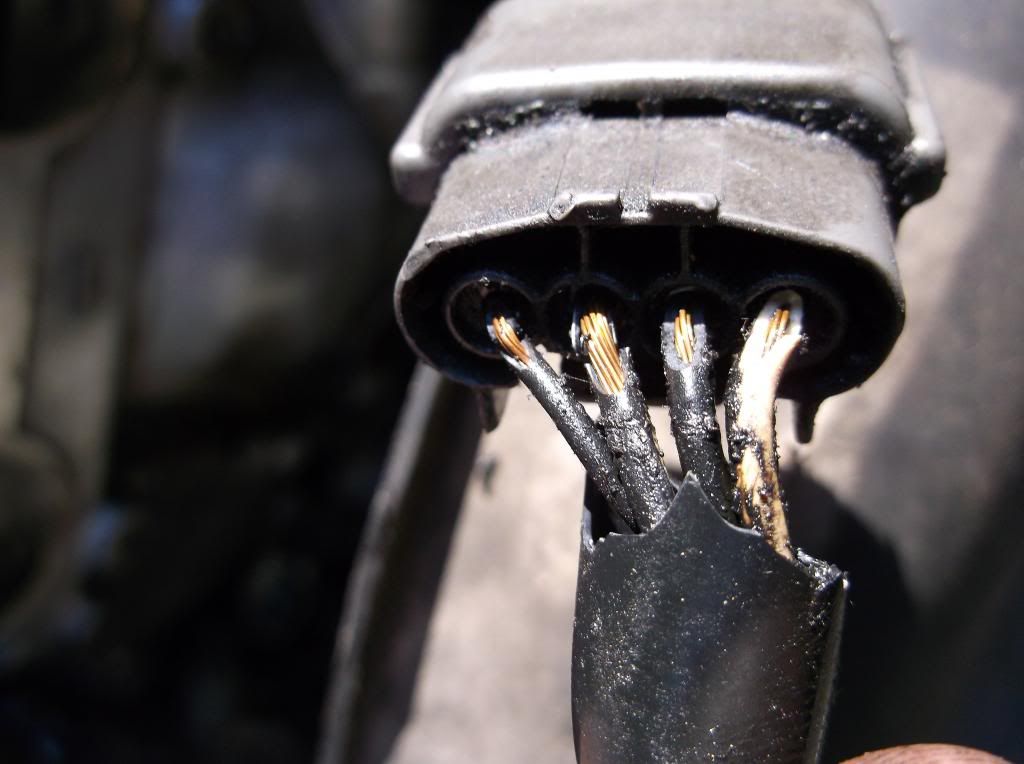
Disconnected the upper wiring harness and labeled some of the clips for easier reinstall.

Damn, gonna have to fix that dizzy wire clip...
Got that bs outta tha way sorta...

Got all the shroud stuff/fans out, will be selling all the a.c. components and shrouds...

Little more room in there now...

All these leaves were in between the rad and condenser, blocking almost all the air flow...

Also took off the exhaust manifold heat shield, and cat shield, also will be for sale or giveaway..

And i got my new steering wheel in the mail today!

Started removal of the air intake stuff.
good thing I got a new intake setup...
The whole stock intake assembly will be for sale or give away with shipping/boxing paid for...
Disconnected the upper wiring harness and labeled some of the clips for easier reinstall.
Damn, gonna have to fix that dizzy wire clip...
Got that bs outta tha way sorta...
Got all the shroud stuff/fans out, will be selling all the a.c. components and shrouds...
Little more room in there now...
All these leaves were in between the rad and condenser, blocking almost all the air flow...
Also took off the exhaust manifold heat shield, and cat shield, also will be for sale or giveaway..
And i got my new steering wheel in the mail today!
-
vas13hatch
- Posts: 87
- Joined: Sun Dec 30, 2012 12:20 pm
- Car: 91 s13 Hatch
- Location: butttthole VA
Re: what did you do to your 240 today
Received my gaskets and arp head studs today so it's time to start tearing the engine apart.
It's was too damn cold and windy so I didn't get as much as I would like done but I did get all the a.c. components out, anybody want these? PM me if you're interested
I may take the wiring from the driver side fuse box to the compressor and the wiring from the pass side fuse box to the evap thing out so it should be a plug and play if someone wants to add it to their car..(I'm not sure about interior climate control switches or other wiring harness parts?) My hose froze so I can't really clean it thoroughly yet.

Also removed the hood to get easier access. Little more room in there now, ps pump is up in fenderwell where air box went.
This engine is super dirty, some areas had over 1 inch of grease caked on.. Using lots of degreaser and hopefully my hose will be working tomorow and i can get it a little cleaner before removing the head etc...

Will be struggling to remove egr from the ex manifold, got some penetrating oil so fingers crossed i can get that pos off. Also wanna get my cat bolts off they are super rusty as well. Plan to gut it and slip a piece of pipe through it to make a sort of stealth test pipe. Did some research and I'm gonna start yankin vacuum lines off and pull the intake mani hopefully tomorow also.
It's was too damn cold and windy so I didn't get as much as I would like done but I did get all the a.c. components out, anybody want these? PM me if you're interested
I may take the wiring from the driver side fuse box to the compressor and the wiring from the pass side fuse box to the evap thing out so it should be a plug and play if someone wants to add it to their car..(I'm not sure about interior climate control switches or other wiring harness parts?) My hose froze so I can't really clean it thoroughly yet.
Also removed the hood to get easier access. Little more room in there now, ps pump is up in fenderwell where air box went.
This engine is super dirty, some areas had over 1 inch of grease caked on.. Using lots of degreaser and hopefully my hose will be working tomorow and i can get it a little cleaner before removing the head etc...
Will be struggling to remove egr from the ex manifold, got some penetrating oil so fingers crossed i can get that pos off. Also wanna get my cat bolts off they are super rusty as well. Plan to gut it and slip a piece of pipe through it to make a sort of stealth test pipe. Did some research and I'm gonna start yankin vacuum lines off and pull the intake mani hopefully tomorow also.
-
float_6969
- Moderator
- Posts: 17366
- Joined: Mon Aug 26, 2002 1:55 pm
- Car: CA18DET swapped 1995 Nissan 240sx (too many mods to list)
2015 SV Leaf w/QC & Bose (daily) - Location: Topeka, Kansas
- Contact:
Re: what did you do to your 240 today
I sent you a PM.
-
vas13hatch
- Posts: 87
- Joined: Sun Dec 30, 2012 12:20 pm
- Car: 91 s13 Hatch
- Location: butttthole VA
Re: what did you do to your 240 today
Got my Intake manifold upper and lower off.


Here's how to do the "two nut method" to get studs out in case any one wants a demonstration.
Thread nut onto stud then thread another on top of it. Take a wrench on the bottom nut to hold it in place and use either another wrench or socket to tighten top bolt to the bottom one.


I use the wrench on the bottom nut to break it loose then just use the socket on the top nut to remove it with the quickness...

Then when the stud is out tighten the bottom nut with the wrench and loosen the top nut with socket to separate them.

Had to cut off the egr on exhaust side, as well as the pair valve pipe...


Got the exhaust manifold off, just gonna let it hang out for now, only one stud came out, none broke though, that pentrating oil works well.


And got the cat off, only broke one stud and one ratchet...


Gutted and ready for piece of 2.5 inch tubing about 12 inches long(for off road use only )..
)..

Removed most of the emissions craaap...


Pulled the dizzy out, labeled the wires for easier reinstallation.


And drained the oil out thats all for tonite. Oh does anyone want to buy all my emissions stuff?
Here's how to do the "two nut method" to get studs out in case any one wants a demonstration.
Thread nut onto stud then thread another on top of it. Take a wrench on the bottom nut to hold it in place and use either another wrench or socket to tighten top bolt to the bottom one.
I use the wrench on the bottom nut to break it loose then just use the socket on the top nut to remove it with the quickness...
Then when the stud is out tighten the bottom nut with the wrench and loosen the top nut with socket to separate them.
Had to cut off the egr on exhaust side, as well as the pair valve pipe...
Got the exhaust manifold off, just gonna let it hang out for now, only one stud came out, none broke though, that pentrating oil works well.
And got the cat off, only broke one stud and one ratchet...
Gutted and ready for piece of 2.5 inch tubing about 12 inches long(for off road use only
Removed most of the emissions craaap...
Pulled the dizzy out, labeled the wires for easier reinstallation.
And drained the oil out thats all for tonite. Oh does anyone want to buy all my emissions stuff?
Re: what did you do to your 240 today
Aren't exhaust studs fun?
-
vas13hatch
- Posts: 87
- Joined: Sun Dec 30, 2012 12:20 pm
- Car: 91 s13 Hatch
- Location: butttthole VA
Re: what did you do to your 240 today
Haha yeah i was expecting the worst, but they all came off pretty easily and only one pulled out. I wanna buy some stock in liquid wrench lol
-
vas13hatch
- Posts: 87
- Joined: Sun Dec 30, 2012 12:20 pm
- Car: 91 s13 Hatch
- Location: butttthole VA
Re: what did you do to your 240 today
Damn bs weather... Today was a bust all i did was wipe the snow off it... Hopefully getting a deal on an uncracked dash, nicer console, nicer gauge bezel a new hatch and some more s13 cams soon.