Xiaphin's 1990 Fastback SR FP Big28 Build - Dyno Results

General discussion forum about the 240sx, and a great place to introduce yourself to the board!
User avatar
xiaphin
Posts: 256
Joined: Sat Nov 17, 2007 3:46 pm
Car: 10' Genesis Sedan 71' Datsun 510 90' S13 Fastback SR

Post

Rained all day but this did give me a chance to confirm my suspicions about Nissan CV axles. Since I cant find J30 axles or slide flanges I thought about combining the S13 and Z32 rear axles, this would give me the correct length and correct flange (5 bolt). BUT You cannot swap the inboard part of a Z32 CV Axle onto the S13. Splines are the same, 27, but OD is different. 1.1560" for the Z32 and 1.0835" for the S13. Z32 uses a cage, race, and ball where the S13 uses a tripod design. Also the overall flange lengths are different. 3.205" for Z32 and 2.961" for S13. Thought I might be able to swap the guts off another Nissan CV but Nissan only uses 2 different ends in their RWD and 4WD vehicles. Guess I'll just have to get lucky with the J30 stuff or break down and get some S14 VLSD w/ABS Slide Flanges from courtesynissan. Pics and chart below.

Image

Image

Image

Image

Image

Image


User avatar
xiaphin
Posts: 256
Joined: Sat Nov 17, 2007 3:46 pm
Car: 10' Genesis Sedan 71' Datsun 510 90' S13 Fastback SR

Post

Removed all front suspension. Cleaned engine cross member and took to powdercoat, along with engine pulleys and hotpipe. Hotpipe has to be redone, weird pools and splotches on it. Glass beaded front spindles and FLCA's painted them Chassis Black. Glass beaded Z31 dust shields and painted them High Temp Warm Brown. Installed bushings and Moog ball joints (K9633) into RLCA's. Removed ball joints and Installed bushings into FLCA's, still waiting on new ball joints to install. Oh yeah stabbed myself with a screwdriver, first time for me. Pic Dump.

Image

Image

Image

Image

Image

Image

Image

Image
Last edited by xiaphin on Wed Jun 02, 2010 5:47 pm, edited 1 time in total.

User avatar
s13_chris
Posts: 965
Joined: Sat Jun 09, 2007 6:45 pm
Car: 90 240sx Hatch

Post

Whats the pro/con of the cobra downpipe? Why'd you go with that?

User avatar
xiaphin
Posts: 256
Joined: Sat Nov 17, 2007 3:46 pm
Car: 10' Genesis Sedan 71' Datsun 510 90' S13 Fastback SR

Post

Heres my reasoning. You'll have to buy an elbow and downpipe both totalling $380-$400+ for quality pieces. Only turbo elbow that matches the quality of the PBM, that I've seen, is the Greddy $236 (Selling mine for $200 shipped UPS) It's 304SS, wastegate divider, slotted for T25/T28. Then u gotta buy a downpipe all stainless units are $200, not all have trans mount plus all aren't straight 80mm, all have neck. So why not spend the $380 or $400, depending on options for the PBM best on the market. I went this route even though I already had a Greddy Elbow.

As far as the PBM Cobra Flex Downpipe goes it is a work of art. Every weld is solid and both mounting flanges are thick. Pros - it is 304 Stainless Steel, has wastegate divider, has flex, is 80mm from flex back (no neck), has trans mount, has slotted hole so it can be used for either T25 or T28, price is right, can get extra O2 bung. Cons - none that I can think of. Other people that have installed it say it has more clearance than other downpipes.

Others thoughts??? OM3GA I know you'll chime in.

User avatar
xiaphin
Posts: 256
Joined: Sat Nov 17, 2007 3:46 pm
Car: 10' Genesis Sedan 71' Datsun 510 90' S13 Fastback SR

Post

Cant wait t finish what I'm doing now :facepalm2 ... killing rust with POR 15 and painting undercarriage, fender wells, and engine bay. I'm ready for the fun stuff. Received some more suspension parts, picked up subframe and engine crossmember from powdercoat (They look great!!) Was not impressed with the paint quality of the Suspension Techniques sway bars. Called Ant at Enjuku and he said since they switched over to the green its typical. Definitely gonna sandblast and paint those ugly things. I don't own a Honda. Weather permitting, hopefully have rear suspension and maybe front on car by Sunday. Post pics of rust killing and painting when finished...

Image

Image

Image

Image

Image

Image
Image

User avatar
xiaphin
Posts: 256
Joined: Sat Nov 17, 2007 3:46 pm
Car: 10' Genesis Sedan 71' Datsun 510 90' S13 Fastback SR

Post

Made some progress this weekend but it wasnt fast or easy. Got everything out of engine bay, washed it, cleaned rusted areas, applied POR 15 (twice), skin now stained for a week, scruffed it with 220 grit, cleaned it and all fender wells with 91% isopropyl alcohol, filled seams that were sanded/scraped away with 3M Allaround Auto Body Sealant, covered rest of car so I could paint, but it decided to rain so I put hood and car cover back on. Also fixed rusted spots in the rear and welded in some 11 GA steel pieces cut to fill in the badly rusted areas. Oh yeah also figured out why the driver side rear quarter panel has some rust on it, you'll know why too when you see the pic :confused:. The pics...

Image

Image

Image

Image

Image

Image

Image

Image

Image

Image

Image

Image
Had a hard time welding here. Metal was super thin and would blow through on thinnest metal setting so I had to bump the wire feed speed up to 90!! Got this area pretty hot, the crapet wrapping around the strut tower started to smoke :ohno: but didnt catch on fire. Close one.

Image
WTF is that doing in there??? Not sure but I pulled it out of the drain plug.

User avatar
xiaphin
Posts: 256
Joined: Sat Nov 17, 2007 3:46 pm
Car: 10' Genesis Sedan 71' Datsun 510 90' S13 Fastback SR

Post

Started my new job at LeeBoy, doing SolidWorks stuff, yesterday but still had time to paint. Used almost a whole quart of SEM Rust sheild black. Decided to use that instead of the chassis black since it can be sprayed out of an HVLP gun. Added hardener and 3-4 coats later heres what she looks like. Sorry about image quality, broke my crappy camera and havent figured out this other quite yet. Also pic of welded spots with a coat of POR 15.

Image

Image

Image

Image

Image
Last edited by xiaphin on Sun Jun 27, 2010 5:31 pm, edited 1 time in total.

User avatar
xiaphin
Posts: 256
Joined: Sat Nov 17, 2007 3:46 pm
Car: 10' Genesis Sedan 71' Datsun 510 90' S13 Fastback SR

Post

Not much work done lately since its been hot as hell and I'm workin full time. Got a few small things done and also received Z32 brake booster, MC, and e-brake cables. Pulled the gas tank, gonna flush it out and clean it up especially the filler neck and top of pump. If I cant get it clean enough hopefully the parts car has one in better condition. Any advice from ppl who have encountered this before?

Image

User avatar
xiaphin
Posts: 256
Joined: Sat Nov 17, 2007 3:46 pm
Car: 10' Genesis Sedan 71' Datsun 510 90' S13 Fastback SR

Post

Painted rear fenderwells and body using SEM Rust sheild black. Undercoated the trans tunnel SEM Rubberized undercoat. Might do another coat on the tunnel, looks a little light even though there are 2-3 coats.

Image

Image

Image

Image

Image

Image

Image

User avatar
badbob2121
Posts: 1989
Joined: Sat Jan 16, 2010 9:23 am
Car: '92 Nissan 240SXS13 Hatch ELLIS JUAN
'12 Ford Mustang GT RTR
Location: St. Louis

Post

looks great, nice job

User avatar
s13drifter88
Posts: 1111
Joined: Wed Jun 23, 2010 7:40 am
Car: 93 S13 Coupe CA18DET (Money pit)
1996 D21 Hardbody (Work truck/daily)
!993 Del Sol (Daily)
1987 Pontiac GTA (Drag project, other money pit)
1989 SOHC S13 Buzz Car
Location: Huntsville, AL

Post

sweet job bro... do work! lemme kno how those circuit sports arms work out. im thinkin of ordering them for mine after my KSport Pro coilovers come in. Keep up the good work, peace.

User avatar
xiaphin
Posts: 256
Joined: Sat Nov 17, 2007 3:46 pm
Car: 10' Genesis Sedan 71' Datsun 510 90' S13 Fastback SR

Post

SPL Subframe bushings installed. Freezer, grease, wood, hammer, sweat, bigger hammer, bigger piece of wood, more sweat, maul, and done.

Image

Image

Image

User avatar
S13AL
Posts: 444
Joined: Sun May 03, 2009 4:31 pm
Car: 1991 240sx hatch with blacktop s13 sr20det, HKS Hipermax III suspension, HKS Sport exhaust, Blitz downpipe, S15 Sylvia HLSD, 300zx/J30 5 lug and brakes, and mesh wheels
Location: Kirkland, Wa

Post

Good job on getting those bushings in. I would like to know how the NVH is with them in.

User avatar
daconkiftador
Posts: 2595
Joined: Sat Jan 14, 2006 5:27 pm
Car: '92 Coupe SE, '83 Rabbit GTi, '91 Golf GTi

Post

Your progress looks great! I was wondering, how exactly did you apply the isopropyl alcohol.. did you put it in a spray bottle and just spray it everywhere you wanted clean, then scrub? Im looking to strip and re-undercoat my wheel wells as well as the underside like you did, so any tips would be awesome, thanks! Keep up the good work.

User avatar
xiaphin
Posts: 256
Joined: Sat Nov 17, 2007 3:46 pm
Car: 10' Genesis Sedan 71' Datsun 510 90' S13 Fastback SR

Post

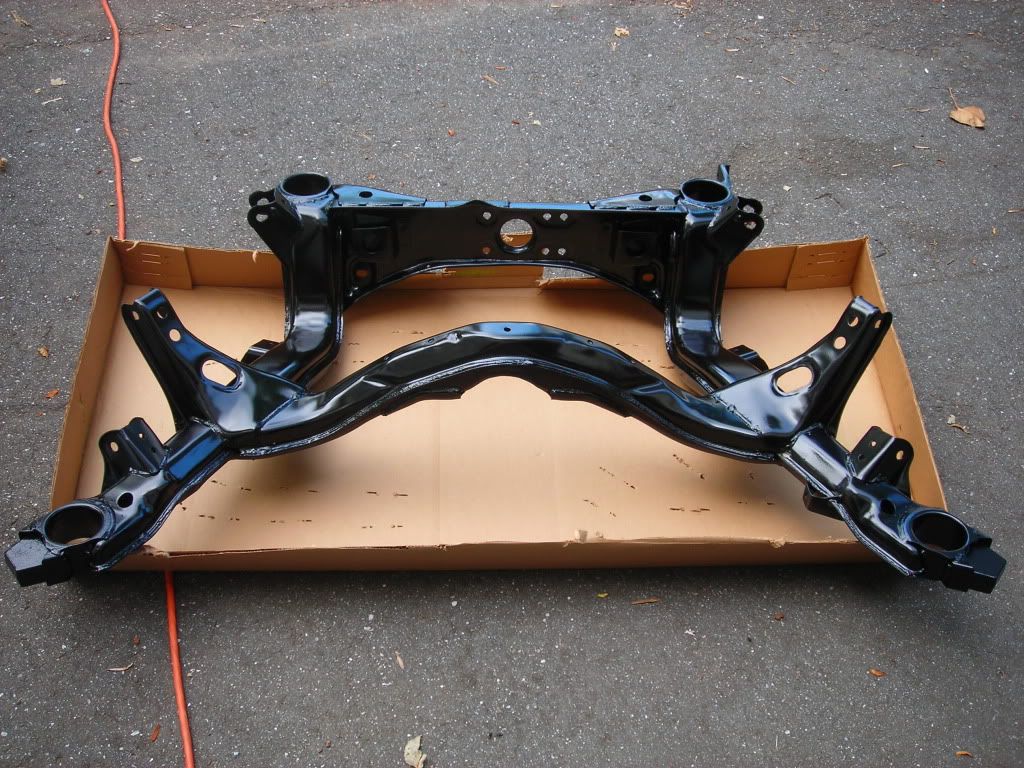
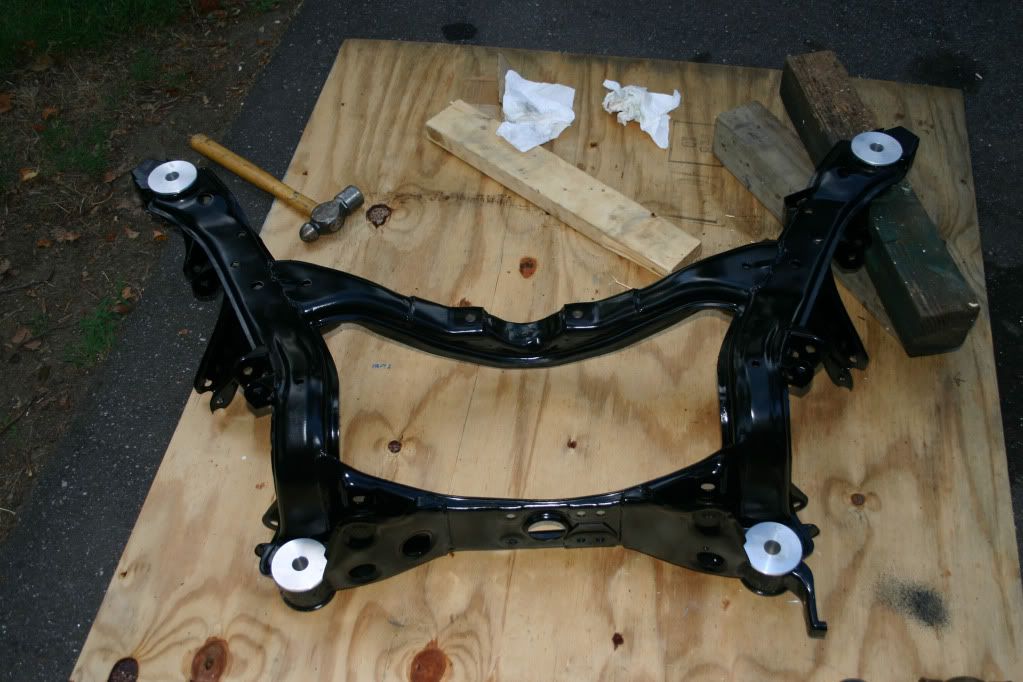
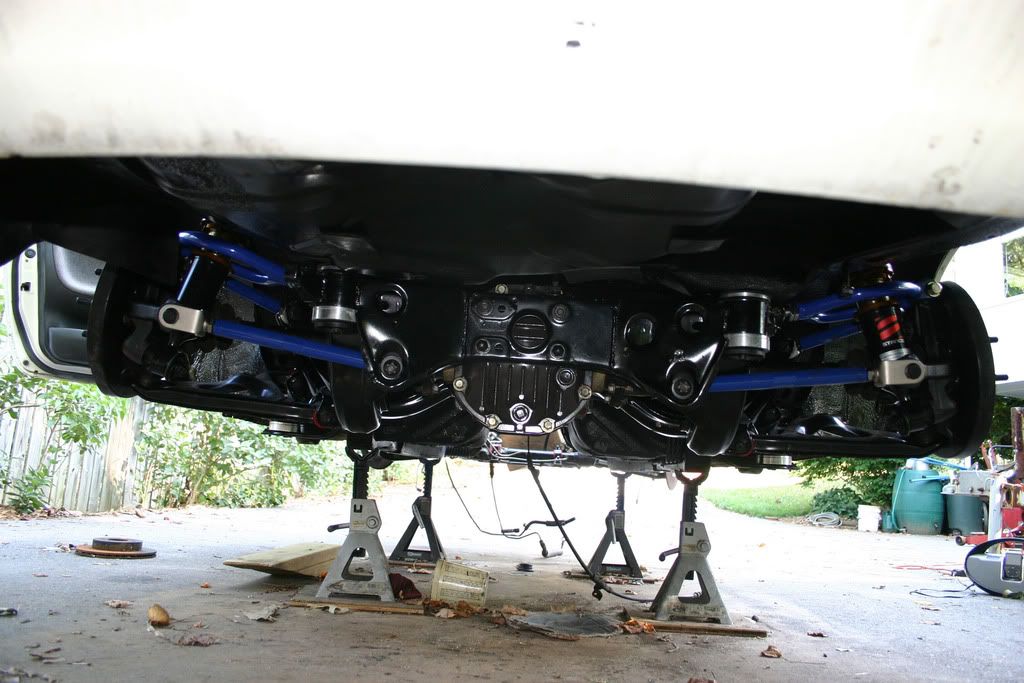
Subframe installed onto car. Rubber isolator and one collar used above subframe.

Image

Image

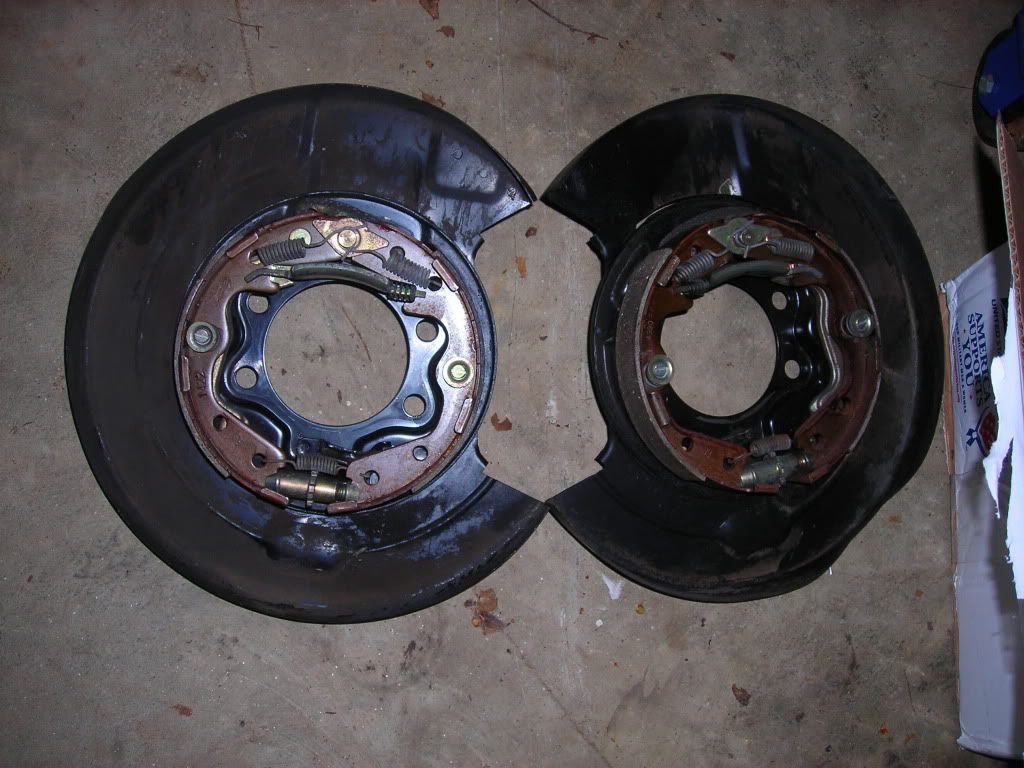
Removed bushings from Diff. Checked stackup of solid bushings bought off E-bay. Bushings are .026" too thick and will need to be sanded in order for the diff to sit flush.

Image

Image
daconkiftador wrote:Your progress looks great! I was wondering, how exactly did you apply the isopropyl alcohol.. did you put it in a spray bottle and just spray it everywhere you wanted clean, then scrub? Im looking to strip and re-undercoat my wheel wells as well as the underside like you did, so any tips would be awesome, thanks! Keep up the good work.
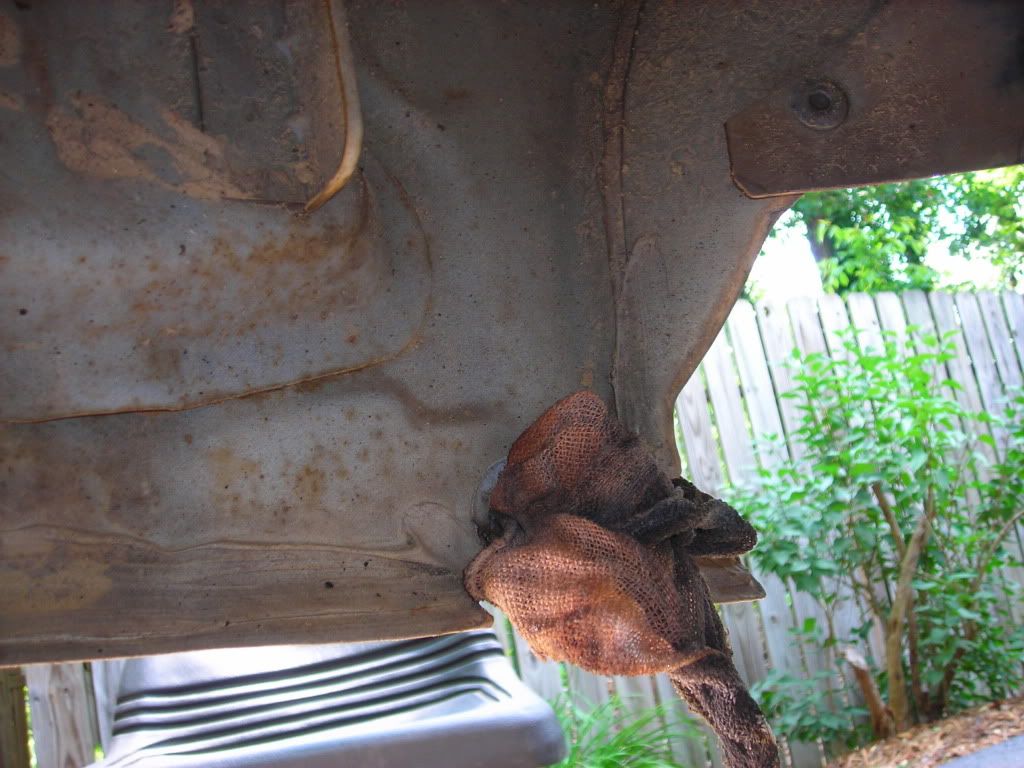
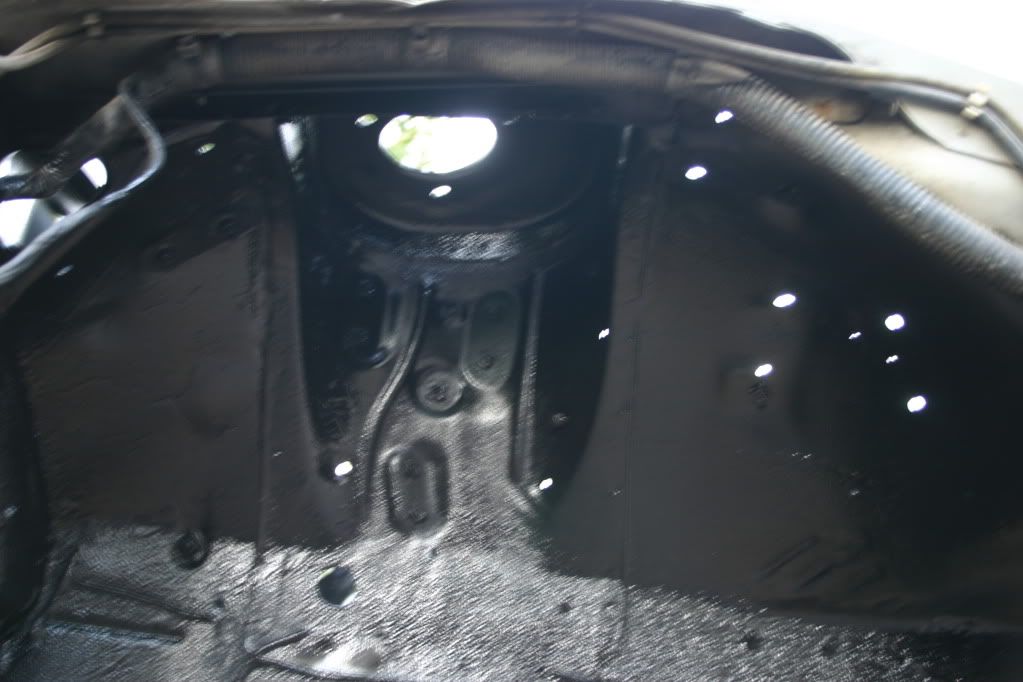
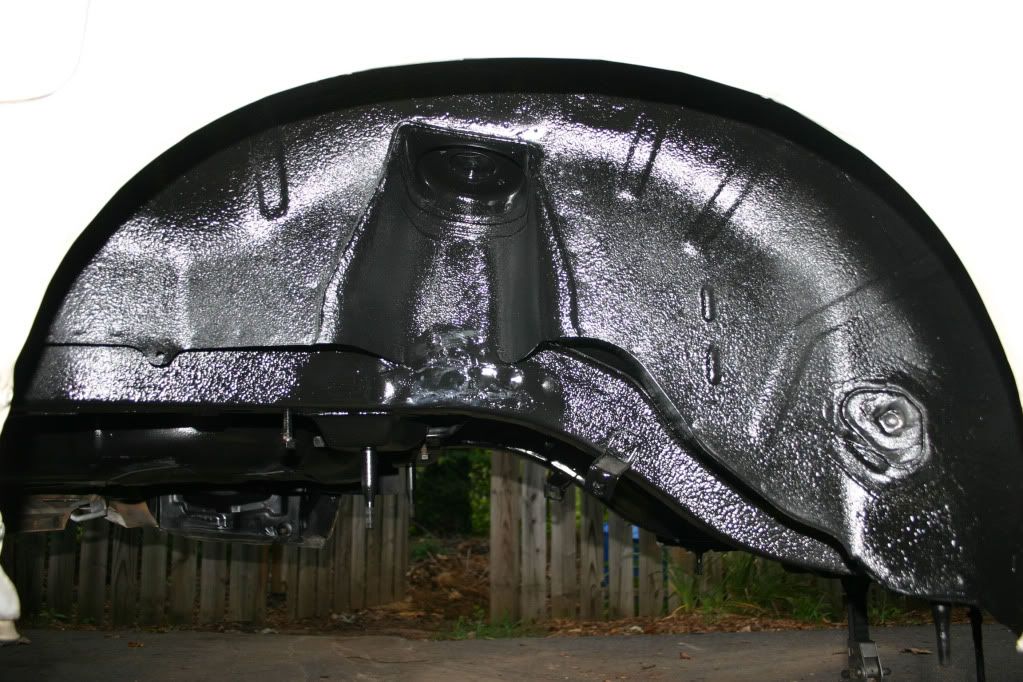
I pressure washed the areas after applying a degreaser, then sanded with 220 grit, and finally washed with the 90%+ isopropyl alcohol. I used the alcohol but there are some paint prep liquids you can also use. Just poured it onto a shop rag and scrubbed then wiped residue with a clean shop towel. The alcohol will take some of the paint off, dry then paint. Not too difficult just time consuming.
s13drifter88 wrote:sweet job bro... do work! lemme kno how those circuit sports arms work out. im thinkin of ordering them for mine after my KSport Pro coilovers come in. Keep up the good work, peace.
Sure thing man. Should have the rear reassembled by end of weekend.
-------------------------------------------------------------------------------------------
The car wont be running for a while since Apexi is having issues with the New Hand Commander :frown: . Ordered it in mid April and still havent received it. Here is the response from NenGun regarding the delay.

"Hi Matt,

Thank you for your order with Apexi, unfortunately we haven't received in supply the Apexi Power FC and New Hand Controller by the end of June as notified earlier by our Apexi distributor. For some, you have waited a long time, several months in fact and others have just recently ordered. You have received delay notifications and new updates and unfortunately we have not been able to meet these deadlines. We sincerely apologize for these hassles, as I'm sure all of you are desperately wanting your part.

We are also desperately wanting these parts for you. We have been in several discussions with our Apexi distributor and we are so very sorry to say there has not yet been a new confirmed date when these will be arriving in stock.

Please understand we are trying to do everything we can to get the Apexi parts! We have been made to understand that there is a problem with the new Hand Controller. Apexi are working very hard to ensure all Hand Controllers are fixed but it is taking time. Please remember this problem is world wide, so every Apexi order has been delayed.

We ask that you please continue to be patient as Apexi resolve the issue. As always, we will keep you updated as to when your part may arrive. "

User avatar
xiaphin
Posts: 256
Joined: Sat Nov 17, 2007 3:46 pm
Car: 10' Genesis Sedan 71' Datsun 510 90' S13 Fastback SR

Post

Good thing I have 5 Z32 wheels cause I forgot that they were directional :facepalm: Only got 4 of them sand blasted so I'm gonna do the 5th one myself. Luckily there are 2 of each, counterclockwise and clockwise wheels, the extra rim is perfect BUT the one I have to use has bad curb rash. :bs: Gonna try to fill edges with JB weld or equivalent and sand flush before I paint them.

Got valvecover back from Powdercoat. Color is Sepia Brown. Chose it over chocolate brown, grey brown and their so called UPS brown which was too purple. Wont match the UPS Brown wheels and intercooler but closest match to high temp brown used on engine brackets and accessories. Take a pic of it on engine later today or tom.

Image

Image

Mungface78
Posts: 23
Joined: Sat Sep 05, 2009 5:48 am
Car: 1990 s13 hatch
Location: 321 Florida

Post

Sweet build!

User avatar
xiaphin
Posts: 256
Joined: Sat Nov 17, 2007 3:46 pm
Car: 10' Genesis Sedan 71' Datsun 510 90' S13 Fastback SR

Post

Would have gotten both sides done but ran out of light. White dots on nuts/bolts are the ones that have been torqued to spec. Need one tension rod front bolt since someone took a cut off wheel to it or Cujo got a hold of it. Took lock washers off of tension rod since it has an elastic stop nut on bottom. Have to adjust inner/outer tie rod ends to get rack centered and straight.

Image

Image

Image

Image

Image
Mungface78 wrote:Sweet build!
Thanks it's starting to look like a car again :)

User avatar
Drakelee
Posts: 413
Joined: Thu Nov 27, 2008 3:19 pm
Car: 1992 Nissan 240sx RB20det
1986 Mazda RX7:for sale
1997 Ford Ranger:PitTruck<3
Contact:

Post

looking amazing im about to do all the same stuff. what would you say you had the most trouble with? or do you have any major advice? i have a hydro press so im not to worried about the bushings.

User avatar
xiaphin
Posts: 256
Joined: Sat Nov 17, 2007 3:46 pm
Car: 10' Genesis Sedan 71' Datsun 510 90' S13 Fastback SR

Post

Drakelee wrote:looking amazing im about to do all the same stuff. what would you say you had the most trouble with? or do you have any major advice? i have a hydro press so im not to worried about the bushings.
Since you have a press then that will make the bushing install a breeze. Most ppl don't have the right tools and have to improvise making this and ball joints difficult. Haven't had much trouble with anything yet but I'll say the most time consuming and aggravating thing would have to be killing all the rust and prepping for paint. Pressure washing all the old dirt, grease, and oil from the undercarriage, wire brushing, cleaning, sanding etc. Other than that nothing comes to mind.

-----------------------------------------------------------

Finished the passenger front and found bolt for the tension rod in my bolt bin, correct size, length, and taper. Gotta love having a Nissan bolt bin. Got all of the rear arms installed both sides, next comes the Z32 drum ebrake, hubs, axles and diff.

Image

Image

Image

Image

User avatar
JDM Sil4ty
Posts: 193
Joined: Fri Sep 04, 2009 4:00 pm
Car: Sil4ty

Post

great build man .. im liking it so far ..

User avatar
barefoot mat
Posts: 221
Joined: Mon Aug 03, 2009 4:06 pm
Car: twin cam s13 fastback

Post

this is like everything i want to do to my s13.

very nice.

User avatar
Drakelee
Posts: 413
Joined: Thu Nov 27, 2008 3:19 pm
Car: 1992 Nissan 240sx RB20det
1986 Mazda RX7:for sale
1997 Ford Ranger:PitTruck<3
Contact:

Post

Yeah I figured thats what was gonna kill me, all the cleaning. I want my car to be spotless so I just gotta put the effort forward. thanks for the imput!
xiaphin wrote:
Drakelee wrote:looking amazing im about to do all the same stuff. what would you say you had the most trouble with? or do you have any major advice? i have a hydro press so im not to worried about the bushings.
Since you have a press then that will make the bushing install a breeze. Most ppl don't have the right tools and have to improvise making this and ball joints difficult. Haven't had much trouble with anything yet but I'll say the most time consuming and aggravating thing would have to be killing all the rust and prepping for paint. Pressure washing all the old dirt, grease, and oil from the undercarriage, wire brushing, cleaning, sanding etc. Other than that nothing comes to mind.

-----------------------------------------------------------

Finished the passenger front and found bolt for the tension rod in my bolt bin, correct size, length, and taper. Gotta love having a Nissan bolt bin. Got all of the rear arms installed both sides, next comes the Z32 drum ebrake, hubs, axles and diff.

Image

Image

Image

Image

User avatar
s13_chris
Posts: 965
Joined: Sat Jun 09, 2007 6:45 pm
Car: 90 240sx Hatch

Post

Looking good!! Yah I have to replace my rack and pinion and I figure if I'm pulling the front subframe might as well pull the rear. And now I'm gonna copy your undercarriage cleanup. Looks good. Loving the build man. 2 more good fires and I'll have my parts ordered!! Looking at $3400 for the meat and potatoes and probably another $600 for loose ends and smaller stuff. Can't waaaiit

User avatar
0110-M-P
Posts: 22
Joined: Fri Feb 27, 2004 1:03 pm
Car: '93 RX-7, '92 NSX, '83 RX-7

Post

Looking great man, can't wait to see it in person next time I'm in town. I love the backyard valve spring compressor. Also, if you ever need bushings pressed in again, come down to Raleigh and use my press one weekend...we'll have a few beers and knock it out.

And by the way...it's awesome that my nephew and T04R are your avatar...just awesome.

User avatar
xiaphin
Posts: 256
Joined: Sat Nov 17, 2007 3:46 pm
Car: 10' Genesis Sedan 71' Datsun 510 90' S13 Fastback SR

Post

Tried installing the hub and drum e-brake while on the car, bad idea. The anchor pin for the drum e-brake is a b*itch to install. After using a cutoff wheel to remove the nut from the bolt connecting the RUCA to the rear spindle, somehow the nylon lock nut stripped a thread and got stuck. I bent the bolt trying to remove the nut, it was not cross threaded so don't go there, and its a grade 8 bolt not some low grade BS. Luckily other side came right off.

Once off the car I knocked the anchor pin out with a brass hammer, slightly greased the anchor pin bore after a light sanding to remove some 20+ year corrosion. Lined everything up and used an impact gun, cycling between the 4 hub bolts and the anchor pin nut. Had to jam a wrench in between the side of anchor pin to prevent it from rotating while hitting it with the impact gun. Z32 FSM wants this bad boy torqued from 159-224 ft. lbs. which is slightly more than the wheel bearing nut, 152-203. Seems a bit overkill to me but the FSM is the FSM. Gonna be fun getting a torque wrench on this on the car.

Image

Image

Image

User avatar
xiaphin
Posts: 256
Joined: Sat Nov 17, 2007 3:46 pm
Car: 10' Genesis Sedan 71' Datsun 510 90' S13 Fastback SR

Post

So after learning that Apexi was having problems with the new hand commander and wouldn't ship FC by itself or with the old hand commander I put my order from NenGun on hold and called up FR Sport hoping to get lucky. FR Sport had some of the last Defi BF Imperial gauges left in the world I believe. Originally ordered the FC back at beginning of April. Anyways once again I did and FR Sport had one in stock. Sure enough today I get an e-mail from Nengun saying the new units would be in around the 20th. Hah what are the odds. Oh well least I'll finally have it beginning next week. :)
0110-M-P wrote:And by the way...it's awesome that my nephew and T04R are your avatar...just awesome.
didnt know u had an account on here. all your knowledge and only 20 posts? i bet thats not the case over at my350z.com. and yeah i stole your photo cause it is awesome

User avatar
0110-M-P
Posts: 22
Joined: Fri Feb 27, 2004 1:03 pm
Car: '93 RX-7, '92 NSX, '83 RX-7

Post

I actually have 2 accounts over here (0110-M-P and 002-M-P with 178 posts). When I was doing my RB26 I forgot I had an account so I created a new one...then while researching CA18's I just tried my original one and it worked...I'm currently trying to get them merged.

User avatar
xiaphin
Posts: 256
Joined: Sat Nov 17, 2007 3:46 pm
Car: 10' Genesis Sedan 71' Datsun 510 90' S13 Fastback SR

Post

Decided to turn the bushings down in the lathe instead of grinding them. Pic of all 4 is after adding a chamfer. Installed slide flange with new cir-clip, cleaned cover, installed with new gasket, installed diff and J30 axles onto car.

Image

Image

Image

Image

Image

Image

Image

User avatar
xiaphin
Posts: 256
Joined: Sat Nov 17, 2007 3:46 pm
Car: 10' Genesis Sedan 71' Datsun 510 90' S13 Fastback SR

Post

PowerFC and Hand Commander is here. Also received my harness extender from Auto Sport Wiring, sure gonna make splicing into my harness a breeze. Took interior to the trim shop. No real progress been lazy last couple days.

Image

Image

Image


Return to “240sx General Discussion”