Upgrading my TT...running journal (Updated!)

The Nissan 300ZX (Z32) general community discussion forum
User avatar
DCaff300ZX
Posts: 4202
Joined: Sun Jun 14, 2009 8:18 am
Car: .
1993 CRP TT- Modified
Location: Tacoma, Washington

Post

Thanks guys!
I agree they look a bit darker than I expected as it's the "stock" gunmetal color I've used under the hood, just it seems that on a larger piece it looks darker. The clearcoat does make it pop more, but I did expect a little more silver to it to start with- they look a lot like the cowls to me at this point if without the brown tint...but the darker bronze color does stands out on the hubcaps so the shade difference is there.
It also is the color I would use for the diffusor and splitter whenever I can ever make one Chris, although I am still wanting to come up with something that will work well with the spoiler, I have some black metallic wheel paint I may look at on a sample so I may consider that also because it's closer to the cf color.
And I definitely understand your situation Anton, I normally have little time open these days as well and really wanted to take advantage of my vacation. Didn't get as far as I wanted, but we do the best we can, eh? :gotme


User avatar
DCaff300ZX
Posts: 4202
Joined: Sun Jun 14, 2009 8:18 am
Car: .
1993 CRP TT- Modified
Location: Tacoma, Washington

Post

So- quick poll now that there is some time.
I had planned to use a matte clearcoat on the wheels, which would look about as they do in the pics if with some extra pop to the color...what do you think?
Matte?
Semigloss?
Gloss?
Chime in! :bigthumb:

User avatar
NolimitZ32
Posts: 7042
Joined: Fri Jun 27, 2008 9:07 am
Car: 91 AG2 2+0 TTMT swap/E39 BMW 540i6/E53 4.6is Dinan S3
Location: Houston, TX

Post

I say gloss, I like shiny wheels.

User avatar
DCaff300ZX
Posts: 4202
Joined: Sun Jun 14, 2009 8:18 am
Car: .
1993 CRP TT- Modified
Location: Tacoma, Washington

Post

I have to agree with your thinking, as I was also thinking that with the darker shade the wheels seem to have taken on (the brake calipers aren't as dark, are more like the under hood items) that gloss is the way to go. There's a Japanese fellow I know who has a really nice Lexus with some black metallic TE37's on it that are glossy, and look quite awesome so I think that's going to be my choice. My original thinking was that the silver side of the gunmetal paint might need muting with a matte finish, and now I think the near-matte look they have now doesn't look quite right.
I stopped by to see her tonight after a graduation ceremony, and the repairs to the flaws I had seemed to have dried out well even if one wheel is a little dry and may need a scuff, but the rest are in great shape and ready for heavy clean/light scuff/degrease/clearcoat tomorrow...as well as my replacement hubcap is here and ready to join his new buddies.
Or old buddies perhaps, as amazingly and I perhaps predicted, the hubcap came from a seller in University Place, Washington from about a mile from where my Z is, and maybe two from where the accident occurred. Go figure. I'd damn near bet I just bought back my missing hubcap.
Also a problem is the upcoming US Open golf tournament at Chambers Bay GC, about a solid 6-iron from my parent's house where my Z is...getting into that area that week will be impossible and not something I will remotely attempt, even with my resident pass. Hell, I already got to see Mickelson practicing last weekend and I played the course myself a couple of years ago when it was built so I figure that's enough for me...but the bottom line is that I get the weekend off from the Z whether I want to or not, maybe even two depending upon how the whole fiasco goes given our worst-in-the-nation road system, and remote isolated location of the course.
Anyway, more when I get some clearcoat on the wheels!

enolja
Posts: 34
Joined: Fri May 22, 2015 4:44 am
Car: 1990 300ZX 2+0 NA

Post

I'm different maybe, I usually think that colors that are supposed to be shiny end up looking pretty cool as matte, and vice versa.

For instance, high gloss green or blue to me looks awesome, but I love matte gold and silver.

User avatar
DCaff300ZX
Posts: 4202
Joined: Sun Jun 14, 2009 8:18 am
Car: .
1993 CRP TT- Modified
Location: Tacoma, Washington

Post

I agree that matte and gloss can work both ways, but to me when you have two similar colors (in this case dark red and gunmetal) having one gloss and the other matte doesn't work so well, it looks a bit muddy to me.
So with the graduation party today, not much time for play so I just got the two rears done and back on and the car on the ground.
The wheels look good shinier, but the silver end of the gunmetal never popped and I think I know why...my scuffing each layer. I didn't scuff the calipers and parts after paint and they are shinier and more silver, the wheels less silver so it appears the silver flake stayed on the surface and was scuffed away. But they also didn't go super glossy which I like.
Image
Image
Image
Image
Image
Crappy cell phone cam isn't doing so well these days, guess that's on the list to replace as well.
More when I get it all done and washed up for some pics.

User avatar
DCaff300ZX
Posts: 4202
Joined: Sun Jun 14, 2009 8:18 am
Car: .
1993 CRP TT- Modified
Location: Tacoma, Washington

Post

So I braved the pre-Open traffic, and got the wheels done today! The fronts came out better as I scuffed less, and shinier for whatever reason so I recoated the clear on the rears and they are now pretty close.
I washed her up and got everything tightened and re-checked, hit the key and nothing...had to recharge the battery after a month sitting.
Things went well after a quick charge but she needed gas, so I went back to the house and rechecked everything one last time, and went for a fill up and back with no issues as by then the paint on the rotors had gone, and braking was good if a little stiff. That got better after a few more miles and so I decided to park the Honda and drive the Z for the Open week!
Here's final pics:
Image
Image
Image
Image
Image
I just like the sun effects
Image
More when I get the trim and mirror painted.

Quick opinion poll for anyone feeling that way: CRP or trim color for the mirrors?
I like the CRP, but dark like the cowls and window trim might look good also...???

User avatar
DCaff300ZX
Posts: 4202
Joined: Sun Jun 14, 2009 8:18 am
Car: .
1993 CRP TT- Modified
Location: Tacoma, Washington

Post

So a small update as my new IACV came in, and I found a little time for the DS window trims and mirror.
Here's a shot before that work in the sun, a better look at the final wheel look.
Image

I went with the brushed bronze color with the VHT matte wheel clearcoat for the mirror as well as the trim, and also painted the separator panel on the door which was scratched and rubbed and I also did the upper window trim on the DS.
Image
Image
Image

The PS is next!
Image
Image

Of COURSE, the new IACV needed to be "fit" to the car...
Image
Image

This is how they all should come, eh?
Image

More when I get back to her.

User avatar
DCaff300ZX
Posts: 4202
Joined: Sun Jun 14, 2009 8:18 am
Car: .
1993 CRP TT- Modified
Location: Tacoma, Washington

Post

UPDATE-
So the CSF radiator arrived last week and the IACV was ready and waiting, time to get to work. I REALLY want to drive her and also have everything working correctly!
I got started Friday but forgot my camera, so here's an update for Friday first, then today.
I got the rad out and IACV in, and a few other small things done before calling it quits after 8 hours.
Image
Image
Most of my ZSpec fasteners and finishers now installed
Image
Image
Intake hardpipes now finished most of the way down, rad hardpipes got scuffed and a clearcoat shot of VHT.
Image
Image
I decided to modify the horrible PCV tube removing the bracket for the balance tube and shaving it some...it installs SOOOO much easier now.
Image
So today as I got started, a few small details more while she was open up front. The CAS got shot the dark bronze color, and some ZSpec bling.
Image
Image
So Saturday the rad was dried for 24+ hours as well as the shroud.
Image
The shroud fastened properly on the top with ZSpec SS fender fasteners...
Image
But I had to use a flanged nut to catch the very edge of the bottom of the rad because it surprisingly had no provisions nor size for bottom holes and mount points.
Image
It also had no provisions for the ultra-important coolant hose holder, so I mocked it up and drilled a hole and was able to get it where it was needed.
Image
Image
And finally, ready to install!
Image
Took just a little massaging but it went right in easier than the original, and fit nearly perfectly. The shroud just doesn't quite meet the same but it is well hidden by my rubber strip on top and the unpictured stock air guide that took some massaging to get installed on the narrower top rail. I also had to set aside the crappy new Nissan radiator cap I bought and use my old one, because the new one was so sharp it wouldn't work smoothly and would get jammed closed and was scraping off PCV each time you used it.
Image
Image
Image
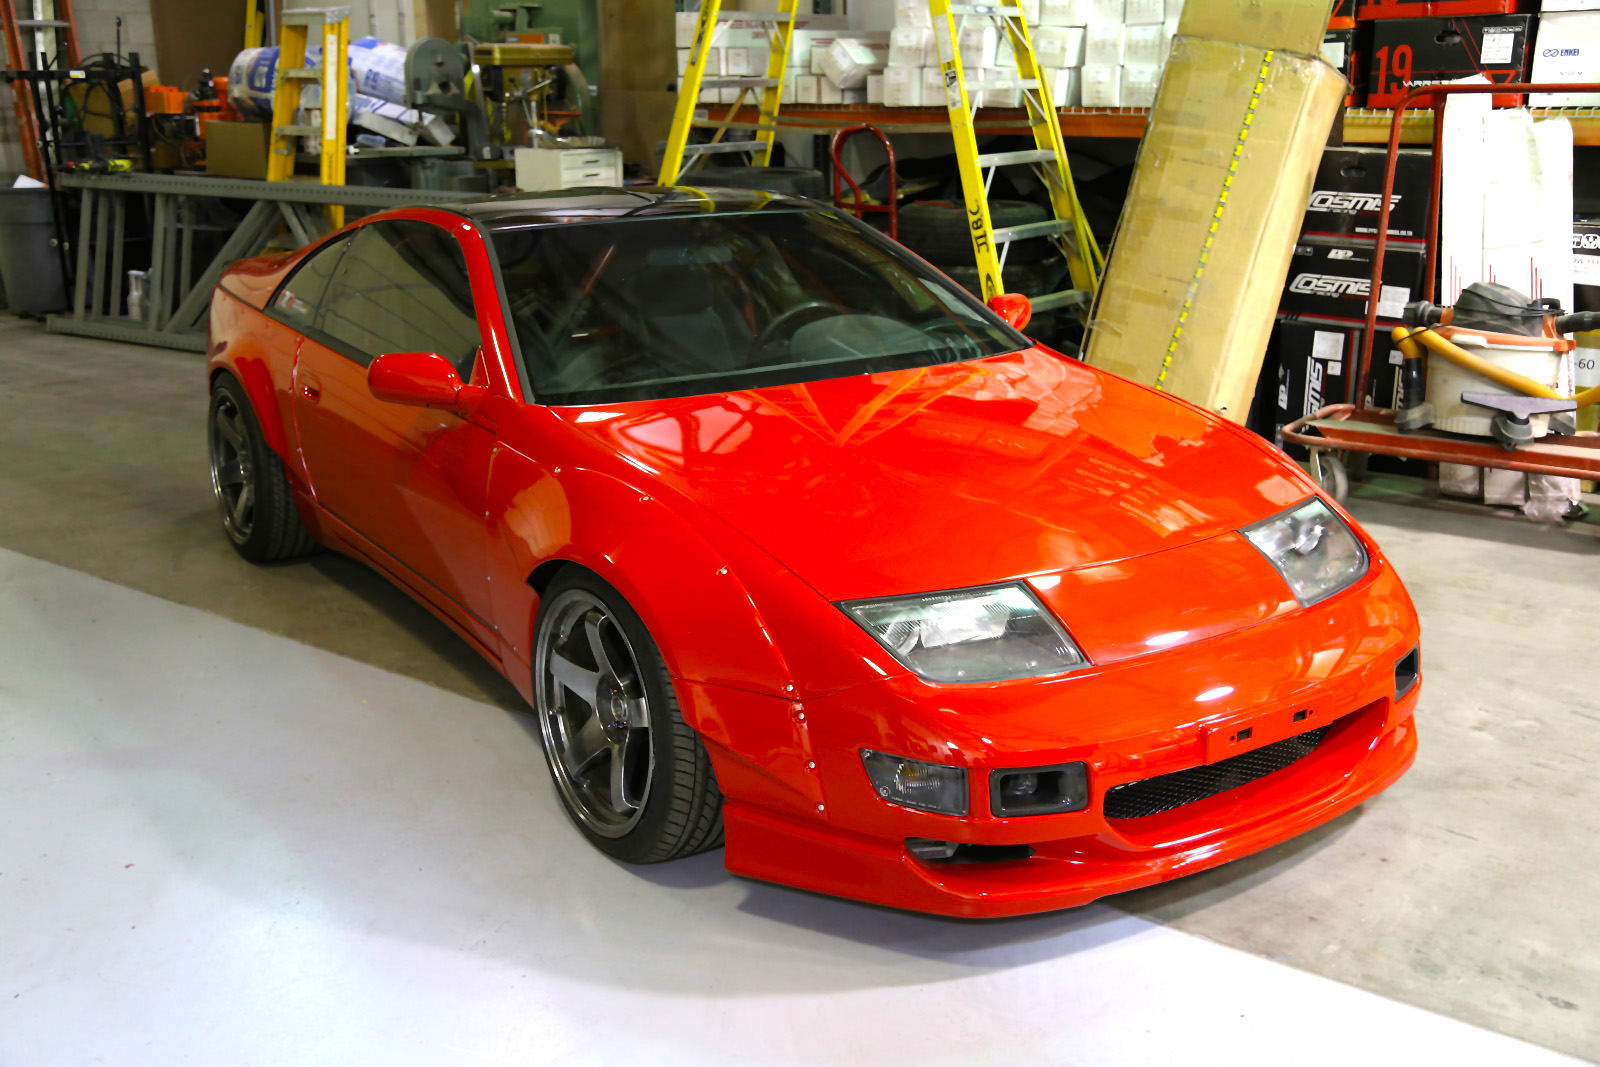
And the final pic before I went driving!
Image
She was a little spastic for a bit but settled down fairly well, idle was good and no IACV crap and I ran the heater high the whole way. Got home and cooled her down while cleaning up, filled about 2 more pints and she was happy as possible right now I think. Drove home well, so she's ready for a few days driving to work or more and then back to Doug for (hopefully) final tune tweaking.
The Jspec is also now on it's way so all of my body parts are in the works, except the rear 1/4 panel. I also have contacted my body guy Charlie and we are set to have her in his hands this late summer or fall, probably September, and he can handle getting a useable 1/4 panel. He feels he can repair the rest which is awesome news. My hope is to have her 90+% done by the start of next year, with final details and tuning/tweaking hopefully the only things left other than enjoying her!
So this may be it for awhile unless as I hope I get some access to her during body repairs, if not even being able to get my hands dirty a little and learn about the whole body panel replacement process.

User avatar
DCaff300ZX
Posts: 4202
Joined: Sun Jun 14, 2009 8:18 am
Car: .
1993 CRP TT- Modified
Location: Tacoma, Washington

Post

SMALL UPDATE-
So last month I had to replace the radiator and IACV, then Z back in to Doug for some tuning, and then a new fuel pump and more tuning and some conversation about everything.

I got her back yesterday and drove around quite a bit today, she's really purring now and nearly completely satisfactory to me mechanically.
I also learned a few things regarding my ECU management, mostly that I do have a standalone setup and NOT a piggyback, but that it does not have some of the sensors that more expensive standalone's do and therefore is why I had the idle issues and a few other differences than most standalone setups.
Doug has smoothed everything out for the most part, and a trip through emissions will tell that tale fully- I'm hopeful that I now have a VERY cool sounding and powerful Z that is completely street and emissions legal in ALL ways and all times, unlike many/most others!

So now I am ready to send it in for it's final repair, the body work. As a recap I have purchased a replacement jspec, and also a twinZ diffusor and Powertrix cf spoiler that will get added during the repairs for best integration. I also have purchased a cf air guide setup to finish off the front end once those repairs are done, with only a splitter left to make or buy to finish my look completely.

More to come as the body work begins!

User avatar
zswap0429
Posts: 398
Joined: Sat Dec 15, 2012 7:39 pm
Car: 1990 Nissan 300zx N/A (sold)
1990 Nissan 300zx Twin Turbo. (sold)
1993 Nissan 300zx N/A Convertible (sold)
1991 Nissan 300zx N/A (Project)
2009 Nissan Altima 3.5 SE 6spd.
Location: Newnan, Ga

Post

So its been a while since ive been on here... but the first thing i see is you copying my wheel choice. lol

Nah yours look a lot better then mine did

User avatar
DCaff300ZX
Posts: 4202
Joined: Sun Jun 14, 2009 8:18 am
Car: .
1993 CRP TT- Modified
Location: Tacoma, Washington

Post

Hey, welcome back!
Yeah, had to do the wheels because after the accident they were pretty thrashed with both clearcoat mostly gone and a little damage. All cosmetic stuff however that disappeared with some filler before paint, and they look brand new fresh for WAAAAAYY less than new wheels.
So what have you been up to?

User avatar
DCaff300ZX
Posts: 4202
Joined: Sun Jun 14, 2009 8:18 am
Car: .
1993 CRP TT- Modified
Location: Tacoma, Washington

Post

SMALL UPDATE-
So recently Charlie my body guy and I spoke and he will be ready for my Z in December or January, perfect for me to take care of a couple of needs before then.

The biggest one was replacing my mileage-laden Honda, which has gotten me through the loss of the Z as daily driver but now needs service $ spent, or this:
Image
I went in today and holy fawk this baby is as new-perfect as I've seen or driven, and so I got a purchase order and after the credit union decides the value and final price set as in the past, I will be picking her up on Friday. It was the only one with the color combo I wanted in the state so I had to drive a bit to get it, but it was also a Hotrod place so there was entertainment there as well! Yeah, I always find myself in old-school-type places given my needs and requirements...;>
This should get me 5-10 years of good use, depending on the mileage load of my commute if I can shorten it some as I also plan to do, my second highest priority.

So more when the Z goes in for body, I also have a new PTU harness and the recirc hoses to replace while in there and Powertrix cf air guides to install as well as 10mm front wheel spacers and longer studs to finish it all off...just waiting for her to be propped up and split open for body so my work will be a lot easier.

User avatar
DCaff300ZX
Posts: 4202
Joined: Sun Jun 14, 2009 8:18 am
Car: .
1993 CRP TT- Modified
Location: Tacoma, Washington

Post

So I think I finally got Photobucket to work right again, here's some pics of the G
Image

Image

Image

And my mother found a pic of my first car I spent my own money on
Image
LOVE the old sidepipes in front of the rear wheels, the HUGE meats, and the even huger hood scoop... :naughty:

grantb70
Posts: 11
Joined: Wed Aug 05, 2015 9:15 am
Car: 1990 300zx

Post

I'm just in love with your Z <3 <3

User avatar
DCaff300ZX
Posts: 4202
Joined: Sun Jun 14, 2009 8:18 am
Car: .
1993 CRP TT- Modified
Location: Tacoma, Washington

Post

grantb70 wrote:I'm just in love with your Z <3 <3
Thanks dude!
I can't wait until I get everything done, she should be something special I think.

So now with a whole new Nissan to fawn over, today I spent the afternoon fixing the front plate that was mis-installed and fell off, plus looked into the gas door which the release catch is stuck and couldn't be fixed immediately...need to do some research there as I could not find the release in the cabin anywhere either- although it will open now without it, just won't stay shut and locked.
Mostly I spent time with pulling the G's wheels and painting the rusty calipers and rotor hubs.
Here's the problem...
Image

...and the solution, black engine enamel with matte clear wheel paint not used on the wheels.
Painted...
Image

...and clearcoat...
Image

...and done, on to the rear.
Image

Rears with paint...
Image

...and done, on to the passenger side which went the same.
Image
The hubcaps were not playing nice and will be finished tomorrow, or repainted if they stayed not up to snuff.
More as I find time, as the Z still needs the PTU harness and air guides and front wheel spacers done, and I need to get the G fuel door release and latch figured out.

User avatar
raremotive
Posts: 3581
Joined: Sun Oct 07, 2007 8:54 pm
Car: 04 Infiniti G35
Location: Stuck in the middle.

Post

Would love to help you figure out how to release your fuel door.

MIne is simplistic.. just press on the door and it opens. :chuckle:

User avatar
DCaff300ZX
Posts: 4202
Joined: Sun Jun 14, 2009 8:18 am
Car: .
1993 CRP TT- Modified
Location: Tacoma, Washington

Post

For z.leinbach, some pics of the NA rad, aux fan, and shroud.

Image

Image


Image

Image

Sure hurts to look at all the corrosion under the hood, and the squirrel or bird nest... :facepalm:
I have the week off upcoming, and intend to get some work done on the TTZ so stay tuned for some updates!

User avatar
DCaff300ZX
Posts: 4202
Joined: Sun Jun 14, 2009 8:18 am
Car: .
1993 CRP TT- Modified
Location: Tacoma, Washington

Post

raremotive wrote:Would love to help you figure out how to release your fuel door.

MIne is simplistic.. just press on the door and it opens. :chuckle:
True, but the catch on mine would not stay "out" enough to re-engage the door when reclosed and I assumed a release somewhere...not so as you indicate, the mechanism just needed lube and a massage... :confused: :facepalm: :ohno:

So, any news with your G?
My life went haywire for 8 months and so nothing at all done on my end except survive...hope you've done better!

User avatar
DCaff300ZX
Posts: 4202
Joined: Sun Jun 14, 2009 8:18 am
Car: .
1993 CRP TT- Modified
Location: Tacoma, Washington

Post

RECENT UPDATE-
So with some vacation time I made a point that the Z would get back into the act installing the many small items I have bought but yet to do, even if I have nothing to spend on her beyond project support.
First up is to FINALLY replace the PTU harness I've had for a year+, and while in there will do the ultra-nasty recirc hose job Doug wouldn't do (and, I didn't want to pay to have done) and while in there...well you know me.
So, here we go!

The beginning...dual intakes out...nice new lighting, eh? I installed a nice flourescent directly over the "Z bay" so no more dark pics!
Image

Gutted, and messy!
Image

The ds target, WAAAAAAAAYYY back there and SO much space to work!
Image

Ps even worse with A/C and oil cooler mess.
Image

How they come out, little chunkage.
Image

Cleaned up, and with some new paint...my super high heat header paint combo I used on the valve covers was all I could do in the CRP shade, happy to see it's a decent color match to the body paint even though it mostly won't be seen.
Image

Ready for reassembly, all paint details done and lower hoses and recircs back in...
Image

...then front hoses and fan in...
Image

PTU hard installed lower ds...
Image

...and my camera dies!
Turns out it's needing a reboot but also has a dead battery so I was done with pics today, I'll get the rest of the pics made and posted tomorrow, where I will begin the paint repairs I began on the DS but never began on the PS.

After the camera died I finished the install up to the bumper cover, then started her up.
BEST DAY EVER!
Now with the new PTU harness no more quick idle drop and rich fumes, she idles at 1250-ish rpm until warming and a slow drop to 700, and warm...and she now revs freely, and no popping/missing when dropping rpm when cold!
That's been an issue since about 4 months after buying her until this day (HATES being cold unlike the NA and often ran like crap until hot) and yeah, all because of the infamous green crud/corrosion/electrical connector BS I harp on, even though there was none present this time...the harness obviously has an issue made worse previously by corrosion.
So I am REALLY happy with my day, and can't wait to see how that translates on the road tomorrow!

User avatar
DCaff300ZX
Posts: 4202
Joined: Sun Jun 14, 2009 8:18 am
Car: .
1993 CRP TT- Modified
Location: Tacoma, Washington

Post

Today it rained so no drive possible, so I just took pics and called it a day...well, got started replacing the bumper but realized I need to clean up the smic ducts to my satisfaction first...tomorrow and beyond's project it seems.

Ready for the bumper.
Image

Image

budget300zx
Posts: 199
Joined: Thu May 29, 2014 9:11 pm
Car: 90 300zx NA

Post

DCaff300ZX wrote:For z.leinbach, some pics of the NA rad, aux fan, and shroud.


Image


Image

Image

Sure hurts to look at all the corrosion under the hood, and the squirrel or bird nest... :facepalm:
I have the week off upcoming, and intend to get some work done on the TTZ so stay tuned for some updates!

What exactly was done to make the upper radiator mounts fit with that finish washer? also if you got it that way can you take a side out and take some pics?

User avatar
DCaff300ZX
Posts: 4202
Joined: Sun Jun 14, 2009 8:18 am
Car: .
1993 CRP TT- Modified
Location: Tacoma, Washington

Post

I used a couple of old bad rubber boots from something that happened to fit (not sure from what- they have the same style as the aux fan and ps reservoir rubber fittings, but are larger) onto the studs on top of the rad and through the stock mounts, using a screw down into the stud for final hold with the washer. It actually is a better idea than OEM, IMO...more solid.
And I don't own it anymore so no pics, sorry- zleinbach came by the other day and bought it!

User avatar
DCaff300ZX
Posts: 4202
Joined: Sun Jun 14, 2009 8:18 am
Car: .
1993 CRP TT- Modified
Location: Tacoma, Washington

Post

UPDATE-
More TT Love...two days of sun and 75+, time to paint the ps to match the ds.

Image

Image

Image

Final coat before clear, which I'll have on in about a half hour. Poor NA watching longingly...

Image

I'll add the clear and unmasked shots later tonight!

OK, here we go...done and final drying.

Image

Image

Image

Image

Unfortunately, I was a little too quick trying to take off the small piece covering the rubber at the post and got these blemishes...

Image

...and so left the mirror tip and other small tape pieces on for when they are completely dry. Not sure if I can get the rubber center piece to cover the loosened paint near the window bottom, and may just live with the lower trim marks or try massaging them out of the clearcoat.

Anyway, I have the Powertrix air guides and a ZSpec polished fuel filter, mount, and hardware to install plus maybe if I can find the time, the front wheel studs and spacers left....more tomorrow!

SUNDAY-
So I was only able to get the air guides on and a few other minor changes with the ZSpec fasteners and washers I have accumulated including my long-overdue license plate kits. However no fuel filter, as with my custom setup the fuel pump relay did not stop the fuel pump operation so I will have to query Doug as to how to relieve fuel pressure to replace the fuel filter.
Here's how she stands today after a nice cruise around town!

Image

Image

After checking the cooling system and finding it a bit low and refilling, she ran at 81-83 degrees celsius even with the air guides so I guess that disputes the 5-7 degrees cooler claim...but to which I am happy as I need the 83!

More to come as time allows...I am driven to get her finished up now that she's running 99% perfect. Body will obviously not be soon, but WILL get done.

z.Leinbach
Posts: 504
Joined: Thu Aug 06, 2015 10:08 pm
Car: 1990 Nissan 300ZX NA T-top
Location: Kennewick, Wa
Contact:

Post

I used my hardware that was off my car. so I have the extra hardware for the rad.

User avatar
DCaff300ZX
Posts: 4202
Joined: Sun Jun 14, 2009 8:18 am
Car: .
1993 CRP TT- Modified
Location: Tacoma, Washington

Post

z.Leinbach wrote:I used my hardware that was off my car. so I have the extra hardware for the rad.
Cool, glad that worked out since you had the same style rad and mount. Hope it's working right!

User avatar
raremotive
Posts: 3581
Joined: Sun Oct 07, 2007 8:54 pm
Car: 04 Infiniti G35
Location: Stuck in the middle.

Post

DCaff300ZX wrote:I am driven to get her finished up now that she's running 99% perfect. Body will obviously not be soon, but WILL get done.
I smell wide body. :naughty:

Nice progress so far. =D

User avatar
DCaff300ZX
Posts: 4202
Joined: Sun Jun 14, 2009 8:18 am
Car: .
1993 CRP TT- Modified
Location: Tacoma, Washington

Post

raremotive wrote:
DCaff300ZX wrote:I am driven to get her finished up now that she's running 99% perfect. Body will obviously not be soon, but WILL get done.
I smell wide body. :naughty:

Nice progress so far. =D
Thanks, and great to hear from you!

And how in the HELL did you know that??? :gotme
I actually have been thinking lately about a steel widebody after seeing one done on youtube (Danny Gibson car)...just not nearly so extreme, I was thinking more like a stealth widebody with a more pumped rear panel action like the front fenders for more tires, but not much showing at the sideskirts ("bigger hips") and also to use the Powertrix skirts I have unless steel can be easily done (read: cheap).
Oh, and side exit exhaust in front of the rear tires which would ease the skirt transition, rear center gas filler with steel patched OEM filler area, and also lose the antenna. All can be done with the stuff I have for the car now, just obviously raises the bar on the job quite a bit although done easily enough with the car all stripped down anyway.

Whenever I have that kind of money to throw at the car, I will talk to Charlie about his thoughts on that all as I'm sure he has the skill, and it would save the NA...quite honestly the biggest reason I am continuing to think about it all, but it HAS to be all steel. :dblthumb:

User avatar
raremotive
Posts: 3581
Joined: Sun Oct 07, 2007 8:54 pm
Car: 04 Infiniti G35
Location: Stuck in the middle.

Post

Well, lets say I didn't know. But looking at your extent of your damage. I knew it wasn't going to be easy to get back to original. If it was up to me I would end up slapping a wide boy over-flares on. Which forces you to have a wider track, which helps with cornering and reducing roll at the cost of larger scrub radius (basically driver feedback from the steering wheel, increases) and higher force components acting on the bearing but nothing concerning.

Steel you say eh. I was actually thinking of FRP, which would make you lighter than 1/3 of what steel would be. Besides your bumpers are made from a plastic anyways. I actually had this kit in mind when I was thinking wide body:
https://conceptzperformance.com/blog/z ... tallation/

They used self-taping screws. Which is ok. But, like they said in the article, I would use nutserts (but I would dab the black epoxy on the hole, before crimping the nutsert in to seal it.)

I myself don't mind the bolt on look of the kit especially if it's color matched to the car.

Image

User avatar
DCaff300ZX
Posts: 4202
Joined: Sun Jun 14, 2009 8:18 am
Car: .
1993 CRP TT- Modified
Location: Tacoma, Washington

Post

Well, I have a steel fender on there now and it would be steel later, so that's all good with me as weight isn't a concern to me, strength and safety is. I don't and won't be racing this car so won't get any real value out of losing weight, and definitely would be worried about safety driving on our crappy roads around here with the even-worse drivers out there.
There's a youtube video called "How to make widebody quarterpanels" that uses a method more like what I'd want, basically stretching an OEM skin over the old skin (or not) and needing far fewer custom touches and which would also be far stealthier looking IMO.
I started to assess the car above, but after a long paragraph will keep it to myself after all and just say that everything on this car except the jspec is about as far from my style and taste as possible. OK, I'll add that the rocks flying off the tires with this car would really, really make me unhappy. I don't like "hating" on things so I'll leave it at that, each style has it's merits and each person has their own tastes which is a good thing.
So really not even an option with steel body panels vs anything else, it's real or not at all for me...guess that's just my old school coming out.


Return to “300ZX (Z32) General”