Painting a 240sx
-
5280VertDET
- Posts: 32
- Joined: Tue Aug 20, 2013 3:11 pm
- Car: 1993 240SX Vert SR/Auto
-
project213
- Posts: 142
- Joined: Sun May 16, 2010 9:32 pm
- Car: 1990 s13 hatchback, s13 sr20det, s15 6sp transmission.
- Location: Pinellas County FL.
Re: Painting a 240sx
Cant wait too see this all finished! Loveing that front lip.
Major props on opting to do it yourself. Theres not enough people that are willing too do things themselves, the right way.
Major props on opting to do it yourself. Theres not enough people that are willing too do things themselves, the right way.
-
blkvrtswp

- Posts: 509
- Joined: Mon May 30, 2011 6:45 pm
- Car: 93 240SX Convertible
SR20DET FP 20G Turbo - Location: Poughkeepsie, NY
Re: Painting a 240sx
Lots of progress, still running behind though.
Who knew there were so many brackets inside the bumpers? Wire brushed, cleaned & painted all the bumper & lip brackets with Rustoleum black.


Finally managed to drill out & tap the spoiler bolts that snapped off. The white trunk needed work on two corners and where the spoiler was attached. Here is where I made a mistake. I used air tool sanding wheel that was way too aggressive and it put a bunch of scratches in the metal. I filled them with body filler - lesson learned. I am pretty happy with my body filler 'sculpting' work on the corners - not too shabby for the first time.


One thing on the whole spoiler that I am dealing with now - the respray over the OEM/original paint is peeling off all on the underside but the top is fine. You can see it it the tap pic above. I have scraped it all off the bottom very successfully, but I have some small spots where it is still peeling up on the edges. Trying to determine what to do - I am worried that if I miss a loose area it will come up, ruining the new paint. I would really prefer to not have to take whole spoiler down to plastic.
Door dings, quarter panel dings, a spot where I dropped a tool by the antenna (ouch), hood defects, taking the lettering off the rear finisher. Another mistake: Removing the glue/trim tape for the front fender extensions & the damn black stripe on the bumpers. Goo Gone barely helped, there must be a chemical pros use because I had to go down to metal/plastic after I scraped up the paint removing the goop.


All defects fixed, sanded & scuffed and ready for etching / high build / sealing primer in various spots. I sanded so much last weekend I made 3 of my fingers ooze blood!
This week I'm fixing a small bubble in one fiberglass side skirt, hanging plastic for my DIY paint booth, and painting primer ASAP.
One question for the pros - I have a 'regular' reducer because I was planning to paint in 65-75 degrees. I am now wondering if I should trade this in for the other reducer that is for under 65 degrees? Thanks for any help!
So bottom line is that this is taking at least 3 times the hours I expected ha ha ha! But I am still under $1000 even with all the tools and extras so I am still happy.
-
blkvrtswp
- Posts: 509
- Joined: Mon May 30, 2011 6:45 pm
- Car: 93 240SX Convertible
SR20DET FP 20G Turbo - Location: Poughkeepsie, NY
Re: Painting a 240sx
More progress last weekend.
I setup my DIY paint booth. I used a carport frame, .7 mil plastic sheeting from WalMart (ten 10x10 sheets in a roll for $7, I used 2 rolls), 1 roll Duct Tape and 2 rolls clear packing tape to seal the seams & edges. The most expensive things were a 2nd 20" box fan ($20) and 20x20 filters. I grabbed the cheap "Green" filters for the exhaust (10 filters for $12) plus 2 higher quality ones ($10). Total cost = $65. It was hours of work but the total cost is excellent!


I fixed up a few final defects on the front bumper & side skirt.


And I sprayed etching primer on all the bare metal spots.


I'm happy to finally be painting. Next weekend I will be using the spray guns. Getting closer to the end!
-
pepesilvia

- Posts: 584
- Joined: Tue Feb 21, 2012 8:15 pm
- Car: 96 S14
- Location: New Jersey :(
Re: Painting a 240sx
so much tedious work. how do you find the patience? lmao
-
blkvrtswp
- Posts: 509
- Joined: Mon May 30, 2011 6:45 pm
- Car: 93 240SX Convertible
SR20DET FP 20G Turbo - Location: Poughkeepsie, NY
Re: Painting a 240sx
That is so funny - I am not known for my patience. However, stubbornness and plenty of free time will get me through.pepesilvia wrote:so much tedious work. how do you find the patience? lmao
I called the job 'fun-tedious' to a friend last week.
Experienced paint guys I have a question:
I used body filler then 400 then 800 grit then sprayed etching primer. Filled areas are smooth to touch but I can still see the texture of the bondo at a certain angles of the light. Is this normal? I am wondering if this texture that is not felt will be covered by the sealing primer or if I need to use some high-build primer first?
Any advice appreciated.
-
blkvrtswp
- Posts: 509
- Joined: Mon May 30, 2011 6:45 pm
- Car: 93 240SX Convertible
SR20DET FP 20G Turbo - Location: Poughkeepsie, NY
Re: Painting a 240sx
Paint shop guy told me today that you can't use etching primer over body filler. Not sure how I made that mental mistake, but I sanded off the etching primer from all the bondo spots and recovered it with high build primer. Now I can't see the bondo texture at all.

-
blkvrtswp
- Posts: 509
- Joined: Mon May 30, 2011 6:45 pm
- Car: 93 240SX Convertible
SR20DET FP 20G Turbo - Location: Poughkeepsie, NY
Re: Painting a 240sx
A few pics from this weekend, more later. Quarter panels and windshield frame with high build primer scuffed and ready for the next step.


Re: Painting a 240sx
good job so far! very interested in seeing how this turns out. i kind of wish i took the time to do my paintjob myself.
-
blkvrtswp
- Posts: 509
- Joined: Mon May 30, 2011 6:45 pm
- Car: 93 240SX Convertible
SR20DET FP 20G Turbo - Location: Poughkeepsie, NY
Re: Painting a 240sx
Big Update!
For practice and gun setup, I sprayed a single stage metallic Meteor Gray on a fender and front bumper for my daily Hyundai. I read after I bought it that you can't sand metallics and it is not recommended for amateurs. Oh well, it was only about $40 from TCI Global's The Restoration Shop. I picked up an $8 paint gun stand from HF, so I had something to hold it when filling the paint cup. Also a $6 painters coverall from Wal-Mart.


My first coat was too thick, spraying metallic dark gray on black primer made it hard to see the paint go on. Plus I was fiddling with the volume and shape controls on the gun. Note the hanging cardboard used as target practice. So I got orange peel right away, but no sanding metallic so I just sprayed a second lighter coat on after the flash time for the 1st coat passed. It gave me the practice I needed in using the gun and mixing the paint, using the respirator etc. I had the parts up high off the floor on plastic shelves that worked great as stands. A dolly underneath, and even the doors rolled around easily.
Surprisingly, the single stage metallic came out really excellent, aside from the orange peel. It's even, shiny and smooth, no drips or runs, the metallic particles are very evenly distributed. I marked this as a win - except the color was so dark I can't use them on my light gray daily. Hello craigslist....


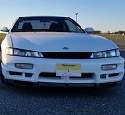
I painted the 240SX front bumper & SOHC lip years ago with a rattle can and clear coat, but it was too humid and it cracked and orange peeled badly. I sanded a lot of that off, then hit them with high-build surfacer primer from a spray can, sanded with 400 then 800, hit 'em again in a few spots. Then red 3M scuff pad and it's ready for sealer primer.
The color-matched sealing primer went on great using the Harbor Freight gun. Again no splattering, drips or runs, very even coverage. There was a lot of paint dust in the booth, fan filters and on the floor. After 2 coats of sealer primer I hit everything with a gray 3M scuff pad for good measure. This is not technically required - sealer primer is a "no sand" primer if desired, unlike surfacer primer which must be sanded before covering.


So at this point, I mixed up some base coat and sprayed it on the hood and doors. 2 medium coats, 20 minutes flash time between coats. The large surface area hood was difficult to cover - I kept seeing stripes of missed areas. But it eventually covered nicely, and the doors covered great. 1 hour flash / drying time and I went in for an inspection. I saw a lot more trash, dust and crap in the finish than in the primer, but it was acceptable. The darker final Indigo color was looking great!


One of the doors had a small area of roughness, but it was minor so I sprayed base coat on another batch - the fenders and rear center garnish. Once you spray base coat, you have 24 hours to cover with clear coat or you have to scuff the BC and respray it.

The rough patch on the door was showing up all over the rear garnish and fenders - really badly. Turns out it was a combination of being too cold, too heavy of a coat, and not long enough time between coats for the solvents to flash off. 'Lifting' 'scaling', 'wrinkling' - the technical term is "solvent under substrate". OK, so common, not from something coming up form under the primer - all I had to do was sand it off, respray the BC and then spray the CC.


But it is too cold, and the booth is filthy. I had purchased 1 quart of colored sealer primer and I actually used almost 3 quarts. This is 2 medium light coats of primer, of course I had an extra trunk and the body kit parts but it still was 3x more than the paint guys expected. The HF gun wastes paint like crazy according to the paint store guy, and I can see it all over the booth and in the fan filters. This was causing the extra trash in the base coat. I needed to replace the booth plastic before spraying anymore.
So I decided to wrap it up for the winter and I will get back to the base coat / clear coat / color sanding / buffing in the spring! Questions, comments, suggestions all welcome. PS the floor cleaned up nicely with a pressure washer.


For practice and gun setup, I sprayed a single stage metallic Meteor Gray on a fender and front bumper for my daily Hyundai. I read after I bought it that you can't sand metallics and it is not recommended for amateurs. Oh well, it was only about $40 from TCI Global's The Restoration Shop. I picked up an $8 paint gun stand from HF, so I had something to hold it when filling the paint cup. Also a $6 painters coverall from Wal-Mart.


My first coat was too thick, spraying metallic dark gray on black primer made it hard to see the paint go on. Plus I was fiddling with the volume and shape controls on the gun. Note the hanging cardboard used as target practice. So I got orange peel right away, but no sanding metallic so I just sprayed a second lighter coat on after the flash time for the 1st coat passed. It gave me the practice I needed in using the gun and mixing the paint, using the respirator etc. I had the parts up high off the floor on plastic shelves that worked great as stands. A dolly underneath, and even the doors rolled around easily.
Surprisingly, the single stage metallic came out really excellent, aside from the orange peel. It's even, shiny and smooth, no drips or runs, the metallic particles are very evenly distributed. I marked this as a win - except the color was so dark I can't use them on my light gray daily. Hello craigslist....


I painted the 240SX front bumper & SOHC lip years ago with a rattle can and clear coat, but it was too humid and it cracked and orange peeled badly. I sanded a lot of that off, then hit them with high-build surfacer primer from a spray can, sanded with 400 then 800, hit 'em again in a few spots. Then red 3M scuff pad and it's ready for sealer primer.
The color-matched sealing primer went on great using the Harbor Freight gun. Again no splattering, drips or runs, very even coverage. There was a lot of paint dust in the booth, fan filters and on the floor. After 2 coats of sealer primer I hit everything with a gray 3M scuff pad for good measure. This is not technically required - sealer primer is a "no sand" primer if desired, unlike surfacer primer which must be sanded before covering.


So at this point, I mixed up some base coat and sprayed it on the hood and doors. 2 medium coats, 20 minutes flash time between coats. The large surface area hood was difficult to cover - I kept seeing stripes of missed areas. But it eventually covered nicely, and the doors covered great. 1 hour flash / drying time and I went in for an inspection. I saw a lot more trash, dust and crap in the finish than in the primer, but it was acceptable. The darker final Indigo color was looking great!


One of the doors had a small area of roughness, but it was minor so I sprayed base coat on another batch - the fenders and rear center garnish. Once you spray base coat, you have 24 hours to cover with clear coat or you have to scuff the BC and respray it.

The rough patch on the door was showing up all over the rear garnish and fenders - really badly. Turns out it was a combination of being too cold, too heavy of a coat, and not long enough time between coats for the solvents to flash off. 'Lifting' 'scaling', 'wrinkling' - the technical term is "solvent under substrate". OK, so common, not from something coming up form under the primer - all I had to do was sand it off, respray the BC and then spray the CC.


But it is too cold, and the booth is filthy. I had purchased 1 quart of colored sealer primer and I actually used almost 3 quarts. This is 2 medium light coats of primer, of course I had an extra trunk and the body kit parts but it still was 3x more than the paint guys expected. The HF gun wastes paint like crazy according to the paint store guy, and I can see it all over the booth and in the fan filters. This was causing the extra trash in the base coat. I needed to replace the booth plastic before spraying anymore.
So I decided to wrap it up for the winter and I will get back to the base coat / clear coat / color sanding / buffing in the spring! Questions, comments, suggestions all welcome. PS the floor cleaned up nicely with a pressure washer.


-
pepesilvia
- Posts: 584
- Joined: Tue Feb 21, 2012 8:15 pm
- Car: 96 S14
- Location: New Jersey :(
Re: Painting a 240sx
DAMN, I really like that color! Too bad its too cold for you to finish up. But I can't wait to see this thread active again as soon as spring rolls around!
-
blkvrtswp
- Posts: 509
- Joined: Mon May 30, 2011 6:45 pm
- Car: 93 240SX Convertible
SR20DET FP 20G Turbo - Location: Poughkeepsie, NY
Re: Painting a 240sx
A few thing I forgot to mention:
- Cleaning the paint gun sucks. I was getting better at it but it still takes a lot of time. My goal was to only clean it once a day, so I was not planning on switching from BC to CC in the same day.
- At the end when it was around 60 degrees I started to see water vapor from the compressor when using the blow gun. Nothing in the paint though, I did change the little filter once and emptied the oil/water separator. As long as the temp is around 70+ it will be fine.
- Wasted money: $18 HF small rectangle electric sander (useless, literally did nothing to the OEM finish). Perhaps useful for something else but not this project.
- I did not use a guide coat on my body filler repairs. They were all round-ish dings, but I could have done better with another round of sanding the filler, guide coat, reapplying filler and final sanding, to verify super flat. I can still see the repairs faintly thru the primer, but probably no one else will notice.
-
blkvrtswp
- Posts: 509
- Joined: Mon May 30, 2011 6:45 pm
- Car: 93 240SX Convertible
SR20DET FP 20G Turbo - Location: Poughkeepsie, NY
Re: Painting a 240sx
All stacked up and stored away for warmer temps. Since I will have plenty of time now, I decided to redo 2 body filler spots where I can still see imperfections. One on the drivers fender that is tough due to the curve, and the other by the antenna where I can still see a ridge.


-
blkvrtswp
- Posts: 509
- Joined: Mon May 30, 2011 6:45 pm
- Car: 93 240SX Convertible
SR20DET FP 20G Turbo - Location: Poughkeepsie, NY
Re: Painting a 240sx
Hello? Is anybody out there? 
I'm almost done with BC / CC - only the hood, front bumper & chassis remain! Should be done this weekend - then reassembly starts, then color sand / clearcoat polish on some areas. I'll post pictures and detail how I made just about every popular mistake (temp, air press, flash time, butterfingers...) over the next week or so.
Some teaser pics below (sorry about the blue tarp...) I have to get some well-lit pics of the final clearcoat. I have some small defects (trash / possibly from moisture) but overall I'm very pleased with the results.


Re: Painting a 240sx
damn, looks good! looking forward to the final result.
-
blkvrtswp
- Posts: 509
- Joined: Mon May 30, 2011 6:45 pm
- Car: 93 240SX Convertible
SR20DET FP 20G Turbo - Location: Poughkeepsie, NY
Re: Painting a 240sx
I got the hood and front bumper done this weekend to my satisfaction - finally. Since they are such high visibility parts on the car, I was really stubborn and refused to accept any screw-ups.
Pictures in posts above show the wrinkles from the solvent pop from too cold painting temps / not enough flash time between coats. That was in the 2nd base coat. So I sanded the affected hood area down until I could not feel anything, but I went thru the BC and primer, so I re-primered about 1/3 of the hood. On to BC, 2 coats no problem. Now clearcoat - oops, I cleaned the paint gun top lid and did not get it dry - a dozen or so drops of solvent right on the 1st clear coat.
So I stopped, let it dry, and then sanded off all the clear coat ultimately going back down to primer in several areas. Re-primer, 2 coats base, 3 coats clear. FINALLY satisfied. There is some orange peel, but I have it on everything from very mild to moderate and will be doing clearcoat sanding and polishing to knock it down. The only bad thing is there are way too many layers of paint on this hood.
I also had a user-error on the front bumper - I forgot to turn the compressor circuit breaker on! By the time I got to the bumper I had 10 psi and the paint just splatted out in blobs. Back to the wetsanding to remove the BC, re-primer, 2 coats BC, 3 coats CC and it's looking good.
Here are some pictures, I tried to get some reflective angles but I need to try a camera with macro setting. I finally got the paint gun cleaning quicker and easier by using a nice beer bucket and can to hold the dirty Lacquer Thinner solvent.


I ran out of the tinted blue primer (again) so I did not paint the chassis yet. I almost used some OMNI 2K sealer primer I have, but since the rest of the parts all had blue primer I did not want to risk any color difference and decided to order and wait.
Next up is trying some black Plasti-Dip with Glossifier on the door trim, window trim, top well trim and other parts pictured.


-
blkvrtswp
- Posts: 509
- Joined: Mon May 30, 2011 6:45 pm
- Car: 93 240SX Convertible
SR20DET FP 20G Turbo - Location: Poughkeepsie, NY
Re: Painting a 240sx
Well, I had to move in August, so the painting job progress has been slow.
Plasti-Dip looks great - we'll see how long it lasts. No glossifier on the cowl, shrouds or wipers. Pics of well trim came out crappy.
Before (scuffed)


After


Next up: Chassis redo, taping
Plasti-Dip looks great - we'll see how long it lasts. No glossifier on the cowl, shrouds or wipers. Pics of well trim came out crappy.
Before (scuffed)


After


Next up: Chassis redo, taping
-
blkvrtswp
- Posts: 509
- Joined: Mon May 30, 2011 6:45 pm
- Car: 93 240SX Convertible
SR20DET FP 20G Turbo - Location: Poughkeepsie, NY
Re: Painting a 240sx
So when I stored the car outside under a porch for the winter, the primer I used was not a sealer primer. I got rust coming up thru the primer everywhere there was bare metal. Live and learn.... and do it over.


Ommmmm...... Zen thoughts...... <kill kill die flaming destruction> NO......Ommmm.......

Wire wheel, no more rust, new body putty, high build primer in a can, scuff with red 3M pad.


Taping (tedious!), blue sealer primer.


So far looking good! Next set of pics: Base coat / clear coat on chassis.


Ommmmm...... Zen thoughts...... <kill kill die flaming destruction> NO......Ommmm.......

Wire wheel, no more rust, new body putty, high build primer in a can, scuff with red 3M pad.


Taping (tedious!), blue sealer primer.


So far looking good! Next set of pics: Base coat / clear coat on chassis.
-
blkvrtswp
- Posts: 509
- Joined: Mon May 30, 2011 6:45 pm
- Car: 93 240SX Convertible
SR20DET FP 20G Turbo - Location: Poughkeepsie, NY
Re: Painting a 240sx
Well I ran into a problem on the chassis clear coat. The Harbor Freight paint gun blew some seal and the CC did not go on right. It did not atomize and simply blobbed on there. Coupled with the extreme overuse of paint vs other guns, I cannot recommend them. I would borrow or find a used $300 gun if I had to do it over.


I tried to sand the CC off but there is barely any on there and I hit BC very quickly.

So I am taking the chassis to a local guy who will carefully sand off the CC and then redo the BC /CC. Disappointing, but I just can't face redoing the sanding, taping and BC / CC again.
At least I will have the toughest part of the job close to perfect from a pro. Plus I am going to have the windshield replaced at the same time (it's very pitted) so I don't have to half-a** the areas around the windshield.
Updates in 2-3 weeks when it gets back.
Re: Painting a 240sx
I like the blue, looks awesome. Always wanted to paint mine blue. I repainted my car about 4 years ago for 250 (single stage white) when a shop told me 1500 for stock color outside only no jams etc. came out decent. Could've used a wet sand and buffing but I was impatient. Last year it started to chip by the rear DS window. it was my 1st time painting other than rattle cans but worth the $250 lesson. I'm back to having mismatched fenders lol, so it'll be going down again. Next time I'll know a little more than last. Good job hope it works out for you
-
blkvrtswp
- Posts: 509
- Joined: Mon May 30, 2011 6:45 pm
- Car: 93 240SX Convertible
SR20DET FP 20G Turbo - Location: Poughkeepsie, NY
Re: Painting a 240sx
I feel I have learned a lot, so it was worth the time. Took me longer than 2 years though - but that speaks more to my lazy work schedule than anything else. Aside from the expert help on the chassis, I would have had it all done for $1200 including all tools and supplies, booth etc. Even with all the extra paint the gun blew thru.
I will probably try it again someday, God help me! I did ok this time, so next time with a good gun I should do even better. I am going to CC sand and polish - I hope to get rid of most of the minor orange peel. Some parts are almost peel free, and I don't think the slight peel on side skirts and lower bumpers is even worth sanding.
I can still see some defects thru the BC CC, but I am not worried about them as this is not a show car.
-
blkvrtswp
- Posts: 509
- Joined: Mon May 30, 2011 6:45 pm
- Car: 93 240SX Convertible
SR20DET FP 20G Turbo - Location: Poughkeepsie, NY
Re: Painting a 240sx
Off to the pro for a new windshield / trim & to fix my fvckup on the clear coat. $1000 - $1500. Sucks.

Twiddling my thumbs for 8 WEEKS NOW cause the painter couldn't even pick it up until 2 weeks ago. Now I have to reassemble in a 20 degree unheated garage when it comes back next week. Not really thrilled about the way this project has turned out re: time and money..... no one to blame but myself.


Twiddling my thumbs for 8 WEEKS NOW cause the painter couldn't even pick it up until 2 weeks ago. Now I have to reassemble in a 20 degree unheated garage when it comes back next week. Not really thrilled about the way this project has turned out re: time and money..... no one to blame but myself.
-
pepesilvia
- Posts: 584
- Joined: Tue Feb 21, 2012 8:15 pm
- Car: 96 S14
- Location: New Jersey :(
Re: Painting a 240sx
The perks of living in the northeast haha. If i had a nickel for every "reassemble in a cold unheated garage".... I'm sorry you ran into problems though. I understand the frustration from wasting time and money on DIY. But at least you gave it a shot and you learned a lot! i learned a bunch from just reading your thread. Hope you can get this thing back together before next summer so you can show off that blue!
-
blkvrtswp
- Posts: 509
- Joined: Mon May 30, 2011 6:45 pm
- Car: 93 240SX Convertible
SR20DET FP 20G Turbo - Location: Poughkeepsie, NY
Re: Painting a 240sx
Thanks, man - frustration over for now. Still no car but I have seen the painters final work on the car in front of me and it was very nice, metallic green something on an Altima whole rear end wiped out.
So what do you do when you can't work on your car? Buy stuff for your car!
I was going to use a Coverlay ABS dash molded cover I had already bought to hide the single crack just above my instrument cluster, but then I found this Italian leather stitched dash cover from an eBay seller in England.
$230 shipped, delivered in 8 days, the quality looks very good. I also bought a center console cover $100 shipped - I've always wanted to do something to the console plain faded black areas!
Both available in LHD, just buy it now, then message the seller, Topgaiters http://www.ebay.com/usr/topgaiters?_trk ... 2749.l2754. They replied immediately thru ebay messaging and confirmed again after the sale they were for LHD. Just look at their eBay rating: 230,000 sales 100% satisfaction. (They should pay me....)
I'll probably also get the matching A-pillar cover and seat belt receiver covers.


I also got these mirrors on eBay for $35 shipped, just to try out. They actually look good, although I am considering the Ferrari-style ones too for $50 (I would smoke the clear lenses). Oh yeah, and what I am calling an "Obnoxious Light" - 120 watt Cree LED driving light bar. Gonna strap it on the intercooler just for fun - it's obnoxiously bright....


-
blkvrtswp
- Posts: 509
- Joined: Mon May 30, 2011 6:45 pm
- Car: 93 240SX Convertible
SR20DET FP 20G Turbo - Location: Poughkeepsie, NY
Re: Painting a 240sx
Oh almost forgot - this MOMO steering wheel too. Interior will be kicking a55!


-
blkvrtswp
- Posts: 509
- Joined: Mon May 30, 2011 6:45 pm
- Car: 93 240SX Convertible
SR20DET FP 20G Turbo - Location: Poughkeepsie, NY
Re: Painting a 240sx
Got the car back Saturday - finally! Very happy with the new windshield and trim - looks great! $320 for the window installed including new rubber seal and trim. $900 for the clear coat mess sanding and repainting.
Also I am surprised that my painting is not too far off from the pro - especially in the areas I had what I considered 'little to no' orange peel. I was being very tough on my work..... comparing it mentally to a show quality job.
So far I have the rear bumper, garnish, taillights, rear side markers and gas filler door back on - woo hoo! I'm heating the garage very nicely with a new Kerosene heater.
More progress over the next few weeks - I have the whole week of Christmas off to work on it.


-
blkvrtswp
- Posts: 509
- Joined: Mon May 30, 2011 6:45 pm
- Car: 93 240SX Convertible
SR20DET FP 20G Turbo - Location: Poughkeepsie, NY
Re: Painting a 240sx
Lot's of work getting done. Reassembled the hood window washer nozzles, front trim and some bumpers, hinges and put it on the car. The fenders are still loose pending door install and alignment.


The top of the windshield is done, big rubber weatherstrip seal back in it's pinch-in retainers, all trim plasti-dipped and secured. Working on the rear view mirror with reading lights and the dome light tomorrow. More pics coming soon.


The top of the windshield is done, big rubber weatherstrip seal back in it's pinch-in retainers, all trim plasti-dipped and secured. Working on the rear view mirror with reading lights and the dome light tomorrow. More pics coming soon.


-
GoodzKouki
- Posts: 78
- Joined: Tue Jul 22, 2014 3:02 pm
- Car: 1993 240sx SE KA-T T3T4: RIP
1996 240sx SE KA-T T3T4: SOLD
1990 240sx SE RB25 GT30: SOLD
1998 240sx SE LS1 - Location: South Jersey
Re: Painting a 240sx
Looks like it's coming together very nicely. Your car looks amazing, so fresh and clean . Good luck finishing her up.
-
PapaSmurf2k3

- Site Admin
- Posts: 18997
- Joined: Thu Nov 21, 2002 3:20 pm
- Car: 2017 Corvette, 2018 Focus ST, 1993 240sx truck KA Turbo.
- Location: Merrimack, NH
Re: Painting a 240sx
Looking good!
I was contemplating painting one of my 240s. Seems like a s*** of work!
I was contemplating painting one of my 240s. Seems like a s*** of work!
-
blkvrtswp
- Posts: 509
- Joined: Mon May 30, 2011 6:45 pm
- Car: 93 240SX Convertible
SR20DET FP 20G Turbo - Location: Poughkeepsie, NY
Re: Painting a 240sx
Thanks guys. If I could go back in time, I would have used a better gun and probably not removed the doors, hood, trunk & fenders and just painted them on the car. I bet it would have gone much quicker.
Now working on the new cloth top & tinted rear window, then door / sideskirts / front bumper install and window & fender alignment. Hoping to be roadworthy in January!


Now working on the new cloth top & tinted rear window, then door / sideskirts / front bumper install and window & fender alignment. Hoping to be roadworthy in January!

