CoryDangah's ugo40 drift thready

General discussion forum about the 240sx, and a great place to introduce yourself to the board!
User avatar
poshatch
Posts: 853
Joined: Thu Oct 15, 2009 7:44 am
Car: p.o.s. 1990 240sx hatch

Post

Update: 08-17-2010

ok so i started off my day by going and trying for the like 5th time to get my car smoged and they said the timing was too low so they sent me on my way (on a side note im pretty much over trying to get this thing smogged...you all know what i need PM ME IF YOU HAVE THE SOLUTION!)

i get 1 block away from the smog place stop at a stop sign, go to turn left...the car dosnt want to turn..

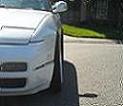
im like aaahhhhhh f***! luckily there was a parking lot directly in front of me so i drove in there. got out. looked to find that the shank on my project silvia outer tie rod had broke...lucky for me it happened when i was going slow and comming to a stop, if this had to happen it happened pretty gracefully

anyway. im soooooo over this shank bullcrap this is the SECOND shank that broke

f*** PROJECT SILIVA!!!

anyway

i decided that im going to make my own shank so that it can put the tie rod sitting more in a proper place

here is a start of what im going to do....you can see the broken one and how short it is in relation to what i will be using still in the brainstorming stage...i cant use the temp jank bolt i used today to get home

Image

here is the mock up of the hydro brake that i created and hopefully it will be in soon working fine..any suggestions on how to get the e brake handle out the easiest way?

Image

here is my t25 that ive had for a long long time that im going to rebuild got the exhaust side off but having trouble with the turbines on the shaft...work that out later

Image

anyway there it is...since i cant pass smog here is a list of stuff to come

hanger being welded on and the victories on the car
obx headers with the egr block off
un-restricted cold air intake system
hydro e brake hardlines install


stephen240hatch
Posts: 1
Joined: Sun Aug 22, 2010 8:53 am
Car: 89 s13 hatch

Post

good job quuer

User avatar
poshatch
Posts: 853
Joined: Thu Oct 15, 2009 7:44 am
Car: p.o.s. 1990 240sx hatch

Post

been a long long time,

here is a small update cause i havnt done much at all

bozo's on

Image

Image

what they used to look like

Image

what they look like now

Image

Image

User avatar
poshatch
Posts: 853
Joined: Thu Oct 15, 2009 7:44 am
Car: p.o.s. 1990 240sx hatch

Post

and just in case your curious, this is pretty much what i did

Image

Image

Image

although i didn't angle the arm more straight since i don't have a stock stopper i'm also shortening my stopper so that i get more angle that way

plus a few extra things not on there

User avatar
poshatch
Posts: 853
Joined: Thu Oct 15, 2009 7:44 am
Car: p.o.s. 1990 240sx hatch

Post

done

Image

turbos i have, the left is a garrett t25 a/r .80/60 i beieve, and the right is a aireresearch (american garrett) i dont know the exact size i think its simmilar to a t28 though, a/r .60/.48

Image

probably going to run the garrett at around 8-10psi probably getting about 200-220 to the wheels

User avatar
RustspecS13
Posts: 928
Joined: Sat Sep 08, 2007 5:30 pm
Car: '74 260z and '88 300zx turbo

Post

You should have angled the tie rod arms more straight like the pic. It changes your ackerman angle and improves it for drifting.

I reduced mine quite a bit but I think I'm going to make another pair of them to try out a different set of angles.

How did you weld yours? If you didn't take a few precautions welding will fatigue the metal and it will eventually fail.

Props for attempting it your self though.

~Alex

User avatar
poshatch
Posts: 853
Joined: Thu Oct 15, 2009 7:44 am
Car: p.o.s. 1990 240sx hatch

Post

i think i know what your talking about, i reduced it a little bit but i was afraid of the overall impact of the set up since im not too familiar with what everything does 100% even though i understand most of it i aired on the side of caution

ackerman angle is suppose to be slight toe out when at full lock to keep the car more balanced i think?, i didnt know if changing the angle too much would affect this to a point that i wouldnt like, so i decided that i wouldnt straighten it out too much, new ones if i make any will be a whole new experiment

its going to be way way better than stock that's for sure, they are so messed up stock and im running a larger shank too that isnt tapered, i think the techno toy tuning cars do that at least thats where i got the idea from, both mine and my friends shanks broke right at the threads were not making that mistake again.

im pretty confident in these things. the welds were done with a Lincoln stick welder, we took our time with the welds, cleaning well, inspecting after every pass, adjusting heat for proper penetration without melting the material away

the welds are sound, i dont predict these knuckles having much stress on them or put alot on the shank with the adjustments, if they get as much angle as they should, i shouldnt be hitting full lock all that often (i already got a lot lot of angle on the set up before i modded the knuckles)

but these are my preliminaries, ill find anything wrong with these things pretty fast and inspect, adjust for, or replace with corrected ones

thanks for lookin at the thread its an old dead thread nobody pays much attention too haha hopefully be getting more support when the car is going to events again

User avatar
J14cm7
Posts: 611
Joined: Fri Dec 04, 2009 10:36 pm
Car: 95 240sx S14 SR20det
Location: Cincinnati, OH

Post

+1 for trying it yourself although i gotta say im a little nervous for the end result. Nice build though

User avatar
nevertheless
Posts: 1378
Joined: Tue Jan 22, 2008 11:12 am
Car: 1993 240sx hatch
1995 Nissan D21
Location: Omaha, Nebraska
Contact:

Post

I like the boso pipes lol

User avatar
poshatch
Posts: 853
Joined: Thu Oct 15, 2009 7:44 am
Car: p.o.s. 1990 240sx hatch

Post

J14cm7 wrote:+1 for trying it yourself although i gotta say im a little nervous for the end result. Nice build though

thank you for the concern, im always open to critisizm about anything i do so if you have a suggestion or an idea im willing to hear it

im not too concerned though...

as far as i know the only stress exerted on that arm of the kuckle is from the shank of the tie rod and hitting the steering stopper

i corrected the arm so i didnt put as much stress on the shank which usually breaks the shank first, and it should be sitting ok, and the welds i am confident in, i didnt do them, my friend did and although not certified, has countless hours of experience on the welder, much more than me, and it looks and feels solid, but if it never makes contact wiht the stoppers i dont think there will be much force exerted on them, these should produce alot of angle from what ive seen

i coppied the design-ish from drift tengoku vol. 1 so check that ancient thing out

however, ill just have to wait and see, this is a track only car, so if it does decide to f*** up ill be there with emt's and what not should the worst happen

User avatar
poshatch
Posts: 853
Joined: Thu Oct 15, 2009 7:44 am
Car: p.o.s. 1990 240sx hatch

Post

uuuuuuhhhhhhh!!

Image

User avatar
poshatch
Posts: 853
Joined: Thu Oct 15, 2009 7:44 am
Car: p.o.s. 1990 240sx hatch

Post

01-06-2011

picked up a super hurt bumper for 5 bucks so i can complete the kit

Image

the stopper for the new knuckles, the rack maxed out before the tie rod would stop at the FLCA and would pivot out messing up my ackerman steering for the lead wheel so i fabbed these to fix it. The new stoppers stop the "jump" that i had before and HATED, so no more getting stuck at full lock

p.s. if anybody wants to know its 2.5 turns lock to lock (i believe thats the stock ratio) i dont know how much angle but im going to guess around 45*??

Image

the corrected knuckle and the corrected outer tie rod set up with the spacer and solid shank

Image

the front supsension painted and on

Image

continuing painting the back because of the welds

Image
Image

working on a hydro e brake set up, this one is a little different now because i had to change the placement of it so ill post the final product soon

Image

finally the lead wheel with corrected stopper

Image
Image
Image

User avatar
poshatch
Posts: 853
Joined: Thu Oct 15, 2009 7:44 am
Car: p.o.s. 1990 240sx hatch

Post

01-23-2011

Image
Image
Image
Image

User avatar
poshatch
Posts: 853
Joined: Thu Oct 15, 2009 7:44 am
Car: p.o.s. 1990 240sx hatch

Post

small update

Image

User avatar
poshatch
Posts: 853
Joined: Thu Oct 15, 2009 7:44 am
Car: p.o.s. 1990 240sx hatch

Post

UPDATE

after so long of neglecting this thread i decided that it would be easier to just move the updates here:

corydangah.wordpress.com

so if your interested in this click the link ^^^^^^^^^


Return to “240sx General Discussion”