Cbus240's Restoration/Build Thread 56k

-
S13_RB25
- Posts: 556
- Joined: Thu Jan 14, 2010 5:20 am
- Car: A 240 but no RB yet!
- Location: Burlington, NJ
Re: Cbus240's Restoration/Build Thread 56k
Man i love this thread. Hopefully after im done with college i can do something like this... Props to you bro!!!

Re: Cbus240's Restoration/Build Thread 56k
Yea dude Im actually just about done. I just purchased a gt2871 turbo for $800!!! and Deatschwerks 810cc injectors. This week I'm picking up a set of cams from Touge Factory although Im not sure which ones just yet. At first I was going for the Tomei PonCams 256 duration but I've been leaning into the 264s now. Still in need of a z32 maf and Enthalphy tune will come hopefully this week also.
Sorry for threadjack, well sort of. I have my own sorry a** build thread but apparently on ones likes it lol. I actually have a favor to ask of you. There are a few lose connectors in my bay/harness and around the fuse block that I can't figure out where they go. Is it possible you can enlighten me if I send you some pics of them. I mean since your engine is out it should be a whole lot easier...
Im liking the rebuild. Wait did you have a 28 series turbo all along and didn't know about it?

Re: Cbus240's Restoration/Build Thread 56k
nothing too exciting but still counts, this showed up at my door on Friday

CXRacing intercooler piping kit, complete with silicone couplers, t-bolt clamps, and hardware.


Pretty decent quality, and fitment seemed close when I mocked up the piping to my intercooler (still mounted in car) I didn't take pics though. After fitting the kit I realized upon ordering I should have told them my intercooler inlet/outlet flanges were 2.75" Instead I have reducing couplers that come with the kit (if you don't specify anything different) that are made for 3" inlet/outlet. No biggy though, found a vendor on ebay and should be able to get the right couplings for under $12. Other than that I'm pretty happy with the kit, next step is to get the Tial bov flange welded to the cold pipe.
Side Note:
I dropped the head and other related parts off at Performance Theory back on Feb 25, and was told to expect a quote for the work I'm having done in an email by the following Monday(the 28th). Waited all last week (giving them benefit of the doubt as they are a busy shop, and truthfully wasn't expecting to get a quote that fast anyway) with no emailed quote. Called them after work on Friday and Nate (the owner) answered the phone, immediately remembered who I was, and said that his wife might of sent the quote to the wrong email, and that he would promptly send it to me by the end of the day...awesome! Well needless to say I have yet to recieve a quote...I'm a little bugged by this and it worries me to some degree, considering if they're this nonchalant about not sending me a damn quote just so I can APPROVE the work to be done, who knows how much care they will put into doing things properly and maybe they'll just put me on the back burner when they do start working on it. Regardless I will be making a visit to the shop after work tomorrow to see what's up...might be coming back with my head just so I can do things myself
hell yes my dude, sounds like she's gonna be a beast! lmk how you like the setup when you get everything together and running, def would like to know what kind of numbers you will put down...haha yeah I feel ya man, I've said the same thing, it's like you spend an ungodly amount of time typing and posting detailed pics up, and then like only FOUR people post on your thread! lol it's all good though since I'm using my thread just so I can document my progress with my car versus using it as a help/question thread...but anyway yeah dude no problem! send me the pics of said plugs, and I will do my best to tell you where they go. you can PM on here (I don't get on often though) or it might be best if you shoot me an email at [email protected] mean I'm not really sure where things are supposed to go either, lol but I can atleast tell ya where they go in my car! and yeaaahI had a 28 series the whole time, but I was set on goin with the t28R anyway...oh well
CXRacing intercooler piping kit, complete with silicone couplers, t-bolt clamps, and hardware.
Pretty decent quality, and fitment seemed close when I mocked up the piping to my intercooler (still mounted in car) I didn't take pics though. After fitting the kit I realized upon ordering I should have told them my intercooler inlet/outlet flanges were 2.75" Instead I have reducing couplers that come with the kit (if you don't specify anything different) that are made for 3" inlet/outlet. No biggy though, found a vendor on ebay and should be able to get the right couplings for under $12. Other than that I'm pretty happy with the kit, next step is to get the Tial bov flange welded to the cold pipe.
Side Note:
I dropped the head and other related parts off at Performance Theory back on Feb 25, and was told to expect a quote for the work I'm having done in an email by the following Monday(the 28th). Waited all last week (giving them benefit of the doubt as they are a busy shop, and truthfully wasn't expecting to get a quote that fast anyway) with no emailed quote. Called them after work on Friday and Nate (the owner) answered the phone, immediately remembered who I was, and said that his wife might of sent the quote to the wrong email, and that he would promptly send it to me by the end of the day...awesome! Well needless to say I have yet to recieve a quote...I'm a little bugged by this and it worries me to some degree, considering if they're this nonchalant about not sending me a damn quote just so I can APPROVE the work to be done, who knows how much care they will put into doing things properly and maybe they'll just put me on the back burner when they do start working on it. Regardless I will be making a visit to the shop after work tomorrow to see what's up...might be coming back with my head just so I can do things myself
gmac708 wrote:Lookin good. Keep up the good work.
MICRoS13 wrote:Man I love this restoration build. Keep it up bro !
as always thanks for the props guys, bahah looks like there's a lotta "love" goin on in this thread!S13_RB25 wrote:Man i love this thread. Hopefully after im done with college i can do something like this... Props to you bro!!!
tEknoS13 wrote:Yea dude Im actually just about done. I just purchased a gt2871 turbo for $800!!! and Deatschwerks 810cc injectors. This week I'm picking up a set of cams from Touge Factory although Im not sure which ones just yet. At first I was going for the Tomei PonCams 256 duration but I've been leaning into the 264s now. Still in need of a z32 maf and Enthalphy tune will come hopefully this week also.
Sorry for threadjack, well sort of. I have my own sorry a** build thread but apparently on ones likes it lol. I actually have a favor to ask of you. There are a few lose connectors in my bay/harness and around the fuse block that I can't figure out where they go. Is it possible you can enlighten me if I send you some pics of them. I mean since your engine is out it should be a whole lot easier...
Im liking the rebuild. Wait did you have a 28 series turbo all along and didn't know about it?
hell yes my dude, sounds like she's gonna be a beast! lmk how you like the setup when you get everything together and running, def would like to know what kind of numbers you will put down...haha yeah I feel ya man, I've said the same thing, it's like you spend an ungodly amount of time typing and posting detailed pics up, and then like only FOUR people post on your thread! lol it's all good though since I'm using my thread just so I can document my progress with my car versus using it as a help/question thread...but anyway yeah dude no problem! send me the pics of said plugs, and I will do my best to tell you where they go. you can PM on here (I don't get on often though) or it might be best if you shoot me an email at [email protected] mean I'm not really sure where things are supposed to go either, lol but I can atleast tell ya where they go in my car! and yeaaahI had a 28 series the whole time, but I was set on goin with the t28R anyway...oh well
Re: Cbus240's Restoration/Build Thread 56k
Thanks, and yea if I can put down anywhere near 400whp (which doubt it will hit) I will be one happy camper lol. Hopefully at least 350-400 at 18psi at the wheels.
Posting and typing detailed pics about the cars suck. I stopped posting progress of the car since before I took it to get painted. Now its too late to post, too much has been done and NO pics taken. Complete body work, paint, FULL Type X body kit, kouki tails, engine assembly, z32 brake set up, 5 lug convertion, suspension install, etc. Also I dont have an actual camera, too cheap and rather blow money on the car itself. HA! I will borrow a camera from my friend so I can take some good pics of the connectors. Thanks for lending me a hand with this. I will most likely email you.
Posting and typing detailed pics about the cars suck. I stopped posting progress of the car since before I took it to get painted. Now its too late to post, too much has been done and NO pics taken. Complete body work, paint, FULL Type X body kit, kouki tails, engine assembly, z32 brake set up, 5 lug convertion, suspension install, etc. Also I dont have an actual camera, too cheap and rather blow money on the car itself. HA! I will borrow a camera from my friend so I can take some good pics of the connectors. Thanks for lending me a hand with this. I will most likely email you.
-
SketchyRollin564

- Posts: 3907
- Joined: Sat Mar 24, 2007 4:06 pm
- Car: SR hatchback in the werks
Re: Cbus240's Build Thread
Dude this build is f*** sweet. This is exactly how i would do mine if i had the resources and cash flow to do this kind of work and restoration. Im getting those same FLCA's with the brand new ball joints and bushings
i had a question about this antenna though
i had a question about this antenna though
i bought the exact same antenna for my car, with the intent of putting it on (obviously), but the size for the threading is completely different, so i wanted to ask... how the hell did you get that on? and functioning?Cbus240 wrote: Lastly, after a posting I saw on here, I picked up an Agency Power shorty antenna to replace my huge rubber S2k one.
AP Shorty antenna


Re: Cbus240's Restoration/Build Thread 56k
Like the build. Consider shortening the middle hanger on that exhaust. The resonator hangs pretty low!

Re: Cbus240's Restoration/Build Thread 56k
This build is fantastic! Love what you did with the rear end, mine will be coming out in the fall hopefully to do the same.
As far as organizing goes (i know your past this point) go and pick up one of those fisherman's tackle box from walmart. They work really well for organizing all kinds of parts, especially if the have the movable walls.
Keep up the good work, glad to see someone is actually restoring and not just modding a 240. Kudos
Also very interested in the antenna, looking to buy one.
Re: Cbus240's Restoration/Build Thread 56k
wow amazing build,  now if i could only find the subscribe button
Last edited by FlipCoupe on Sun Mar 13, 2011 7:43 pm, edited 1 time in total.
-
PyR0NiAk

- Posts: 3851
- Joined: Sun Mar 01, 2009 4:29 pm
- Car: S13 SR W/ T2 GT3071R .86AR, JWT S4 Cams, 810cc Injectors,Z32 MAF, JWT tuned ECU 87mm 9:1 Compression CP pistons, Manley Rods
- Location: Ohio
- Contact:
Re: Cbus240's Restoration/Build Thread 56k
Click reply (full editor) then at the bottom, check the box that says "Notify me when a reply is posted"
Re: Cbus240's Restoration/Build Thread 56k
off topic: thanks for telling us how to subscribe, ive been trying to figure it out for awhile now. wow. lol thanks.
Anyway...
What are your plans for colors? Sticking with the same or changing it up?
Anyway...
What are your plans for colors? Sticking with the same or changing it up?
Re: Cbus240's Restoration/Build Thread 56k
MOAR parts!and some forgotten pics
In my last update I forgot to put up a few pics of the block once I cleaned/degreased/tapped it it the previous weekend, so here ya go.
front

drivers

el passengero

A couple weeks ago (the 25th of Feb I think) I placed an order of a few parts from FRSport. They had to wait on a part from Nissan, so I didn't end up gettin the stuff until last Friday. Here dey be:
ARP Head Studs

mine say to torque to 80ft-lbs, I've heard it varies depending on when they were made

s15 compressor outlet pipe, needed for reclock

various hardware for the head/manifold reassembly: ex manifold nut/yoke, turbo outlet studs/nuts, valvecover stud

Tomei Expreme Outlet Pipe, comes with everything you need! need this since I went with the Tomei manifold...

very nice piece

outlet side

insanely good welds

and last but not least:
Circuit Sports oil filter relocation kit!


sweet shot of hoses

put together


In my last update I forgot to put up a few pics of the block once I cleaned/degreased/tapped it it the previous weekend, so here ya go.
front
drivers
el passengero
A couple weeks ago (the 25th of Feb I think) I placed an order of a few parts from FRSport. They had to wait on a part from Nissan, so I didn't end up gettin the stuff until last Friday. Here dey be:
ARP Head Studs
mine say to torque to 80ft-lbs, I've heard it varies depending on when they were made
s15 compressor outlet pipe, needed for reclock
various hardware for the head/manifold reassembly: ex manifold nut/yoke, turbo outlet studs/nuts, valvecover stud
Tomei Expreme Outlet Pipe, comes with everything you need! need this since I went with the Tomei manifold...
very nice piece
outlet side
insanely good welds
and last but not least:
Circuit Sports oil filter relocation kit!
sweet shot of hoses
put together
Thanks for the props dude! Ok, so the thing with my car was that the previous owner had already retrofitted a Honda s2000 antenna to the roof of my car. I didn't like it b/c it was awfully big for a roof antenna, and I saw that the AP one was smaller and said it was a direct replacement for the s2K one. I'm not sure if you are trying to use it with the stock antenna or not since you didn't say, but if you ARE using it on an S2K one, the install was pretty plug n' play for me. That small threaded rod that comes with the AP antenna was the EXACT same size as the S2K on and it threaded in just fine in the place of the stud on the old antenna. I tightened it by hand with a small allen (can't remember what size) then screwed the antenna over it. Donezo. As far as reception goes, I don't have any problems with it expect for one radio station here in Columbus, for some reason there's a lot of static (but that station always comes in weird in every car I drive here). Also, when parked in a garage, my reception isn't very good with the AP antenna, as you will hear that kind of static noise until you pull out. If youre trying to use it on the stock antenna, you might have to change the mounting base to the S2K style as it might be a different thread pitch. Hope this helps man...I'm not much of a stereo/electronic guru as I'd like to beSketchyRollin564 wrote:Dude this build is f**king sweet. This is exactly how i would do mine if i had the resources and cash flow to do this kind of work and restoration. Im getting those same FLCA's with the brand new ball joints and bushings
i had a question about this antenna though
i bought the exact same antenna for my car, with the intent of putting it on (obviously), but the size for the threading is completely different, so i wanted to ask... how the hell did you get that on? and functioning?
once again thanks for the comments and feedback! I def am looking to pick up some kind of plastic organizer like the one you mentioned above, life would be better with one! and as far as colors go, were you talking about my car or the engine bay!? haha regardless, def not painting the car anytime soon, I'm redoing the bay in semi-gloss black, and probably laying a nice anodized red on the valvecover to make it pop and still stay true to its redtop roots...that's about it, as far as paint and my car go...for awhile! lolSpeckid4 wrote:This build is fantastic! Love what you did with the rear end, mine will be coming out in the fall hopefully to do the same.
As far as organizing goes (i know your past this point) go and pick up one of those fisherman's tackle box from walmart. They work really well for organizing all kinds of parts, especially if the have the movable walls.
Keep up the good work, glad to see someone is actually restoring and not just modding a 240. Kudos
Also very interested in the antenna, looking to buy one.
Re: Cbus240's Restoration/Build Thread 56k
Quick Update!
Wooow, this thread is so far behind it's not even funny. Things have been crazy recently (turned 21 WOOT WOOT!!) sooo the past month I've been partying and going out a wee bit too much!! I've been working on the SR here and there and made a lot of progress, but I'm out of school now, and I def want to kick things into high gear! My goal is to have the motor and bay ready to be reunited by the end of this month (if that makes sense)
Soo, rather than write my usual novel, I will just give you guys a quick rundown of a few things that come to my head and throw in some pics:
-had to wait almost two months to get my head back from Performance Theory, but they did do an awesome job!
-timing chain/ front oil cover/ water pump installed
-ordered a lot of micellaneous parts recently, pics will come over time
-still need to order a: clutch/flywheel, 1 piece driveshaft, and new z32 MC just to name a few things
-started to work on cleaning/prepping engine bay for motor install
-installed DIF solid steering bushing
-torqued the head down to block this past weekend, then installed the rest of the valvetrain
-next things for motor will be to install intake and exhaust manifold, then plumb up the turbo
ON TO THE PICS!
here's the BC valve springs, I wanted to upgrade from stock for if/when I go aftermarket cams down the road


timing chain installed

here's a pic of the old crank sprocket (it was kinda worn) and then the new one installed

new

front timing cover/oil pump and s14 waterpump installed

At some point I took the intake manifold back to my house and disassembled it for new gaskets and to clean out all the built up carbon/gunk inside the collector and upper intake. Here's a few random shots showing from when I was tearing it apart, you can kind of see the buildup in the pics (it was bad, took almost 2 cans of carb cleaner to get everything lookin freshhh)
apart

collector

upper intake

iacv carbon buildup

I forgot to get a good shot of after I had everything all cleaned up, but you can see in this pic from when I was replacing the throttle body gasket how clean things were

Soo as I stated earlier, I went and picked up my head from Performance Theory about 3 weeks ago. Long story short, after the head had been there for exactly 1 month from the time I dropped it off, I went over to drop off the BC valvesprings since I had just gotten them in from FRSport. Needless to say, when I walked in the back of the shop, my head was still on the same cart they set it on when I dropped it off and had been UNTOUCHED! I was livid. The owner Nate was not in at the time, so I went home, wrote a pretty awesome email and lit a nice fire under his a**. Bottom line is he was sincerely apologetic, promised to make it right, and said he would have it stripped down and at their machinists shop the next day! Two weeks later I get the call that my head is done and ready for pickup, SWEET! Regardless of the lack of communciation, I'm happy with the results, and would bring my business back to them in the future.
-decked, tanked, valve job, new stem seals, and upgraded BC valvesprings:


so fresh, so clean!!


at the advice of Nate, I took a wire brush and some brake cleaner and cleaned all the built up carbon off the pistons:

NOTE^ In the above pic you can see I had the ARP studs installed into the block already, but I could NOT get the headgasket and/or head on with them in the block!!! They need to be installed after you put the head on the block, just a fyi!!
OEM composite headgasket, with RTV around the problematic front cover area for peace of mind

IMPORTANT When it comes to head studs, it seems as if there is debate on proper install techniques: whether you put the moly lube on both ends of the studs, how tight do you put the studs in the block, and also is a retorque of the studs necessary. Well, I know a noob like myself was thinking these questions, so I shot ARP an email asking them what to do. So, here's some tips from Alan over at ARP for those of you using their studs!!
1 & 2) Lube the block threads with a light coating of clean engine oil,
screw the studs into the block all the way and then back them out
1/16~1/8 of a turn, loose is good. Do not torque the stud into the
block. Using the ARP Lube, lube both sides of the washer, bottom of the
nut and the top threads of the stud, torque to ARP specs in 3 equal
steps.
3) The studs don't need to be re-torqued. Gaskets can collapse a
little so on a performance car it is probably a good idea to go over
them after a some running. Always re-torque on a cold engine, start in
the middle of the head, loosen one nut at a time and pull right back to
full torque, then move on to the next one.
here I am torquing things down like a BOSS

final product (stud, washer, nut)

then I gave the lifters a nice oil bath and bled them and put them into the head along with valve shims/guides

ordered a whole new set of rocker arms from Victory Nissan of Chessapeake (eBay, fast shipping, & great prices on SR stuff!!!)

closeup

installed with Redline assembly lube

set the camshafts in and got the cam gears lined up with their corresponding timing chain links


cam caps, oilers, and RAS installed


ADVICE, PLEAASE!
After bolting the cam caps down and torquing to spec using a 1/4" drive torque wrench (converted inch to ft lbs), I noticed that there was significant slack in the timing chain between the cam gears. (the chain was tight when I just had the cams laying in the head unbolted as you can see in that pic) So I installed the timing chain tensioner next. It took up a bit of the slack but it's still there. Everything matches up on the links and I did everything by the book. After coming online and doing some research, I guess SOME slack is normal since the tensioner runs off oil pressure and it cant fully extend until the motor is running. It eased my worries a bit, but I'm still iffy on the matter. PLEEEASE let me know if you have any input or experience, is this normal??
Here are a few pics of the slack for verification:


Maybe I'm just getting worried over nothing. I DO NOT have the crank pulley installed yet (it's just barely on the crank in the pics for timing reference) so when I do install it (probably tomorrow since I can't stop thinking about this damn chain!) I will then rotate the crank and see what happens and make sure everything is good with the valvetrain.
WOW so much for a "quick" update! I still have more pics to add of other things I've done (solid steering shaft bushing and also removing the fitting from my old BMC to install in the new one) and also of parts I've bought, AND recieved!
Hopefully I will remember to get back on here soon to get everything completely back up to date...until then, if anyone can ease my worries on the whole timing chain slack dealm that would be LOVELY!!
k bye.
Wooow, this thread is so far behind it's not even funny. Things have been crazy recently (turned 21 WOOT WOOT!!) sooo the past month I've been partying and going out a wee bit too much!! I've been working on the SR here and there and made a lot of progress, but I'm out of school now, and I def want to kick things into high gear! My goal is to have the motor and bay ready to be reunited by the end of this month (if that makes sense)
Soo, rather than write my usual novel, I will just give you guys a quick rundown of a few things that come to my head and throw in some pics:
-had to wait almost two months to get my head back from Performance Theory, but they did do an awesome job!
-timing chain/ front oil cover/ water pump installed
-ordered a lot of micellaneous parts recently, pics will come over time
-still need to order a: clutch/flywheel, 1 piece driveshaft, and new z32 MC just to name a few things
-started to work on cleaning/prepping engine bay for motor install
-installed DIF solid steering bushing
-torqued the head down to block this past weekend, then installed the rest of the valvetrain
-next things for motor will be to install intake and exhaust manifold, then plumb up the turbo
ON TO THE PICS!
here's the BC valve springs, I wanted to upgrade from stock for if/when I go aftermarket cams down the road
timing chain installed
here's a pic of the old crank sprocket (it was kinda worn) and then the new one installed
new
front timing cover/oil pump and s14 waterpump installed
At some point I took the intake manifold back to my house and disassembled it for new gaskets and to clean out all the built up carbon/gunk inside the collector and upper intake. Here's a few random shots showing from when I was tearing it apart, you can kind of see the buildup in the pics (it was bad, took almost 2 cans of carb cleaner to get everything lookin freshhh)
apart
collector
upper intake
iacv carbon buildup
I forgot to get a good shot of after I had everything all cleaned up, but you can see in this pic from when I was replacing the throttle body gasket how clean things were
Soo as I stated earlier, I went and picked up my head from Performance Theory about 3 weeks ago. Long story short, after the head had been there for exactly 1 month from the time I dropped it off, I went over to drop off the BC valvesprings since I had just gotten them in from FRSport. Needless to say, when I walked in the back of the shop, my head was still on the same cart they set it on when I dropped it off and had been UNTOUCHED! I was livid. The owner Nate was not in at the time, so I went home, wrote a pretty awesome email and lit a nice fire under his a**. Bottom line is he was sincerely apologetic, promised to make it right, and said he would have it stripped down and at their machinists shop the next day! Two weeks later I get the call that my head is done and ready for pickup, SWEET! Regardless of the lack of communciation, I'm happy with the results, and would bring my business back to them in the future.
-decked, tanked, valve job, new stem seals, and upgraded BC valvesprings:
so fresh, so clean!!
at the advice of Nate, I took a wire brush and some brake cleaner and cleaned all the built up carbon off the pistons:
NOTE^ In the above pic you can see I had the ARP studs installed into the block already, but I could NOT get the headgasket and/or head on with them in the block!!! They need to be installed after you put the head on the block, just a fyi!!
OEM composite headgasket, with RTV around the problematic front cover area for peace of mind
IMPORTANT When it comes to head studs, it seems as if there is debate on proper install techniques: whether you put the moly lube on both ends of the studs, how tight do you put the studs in the block, and also is a retorque of the studs necessary. Well, I know a noob like myself was thinking these questions, so I shot ARP an email asking them what to do. So, here's some tips from Alan over at ARP for those of you using their studs!!
1 & 2) Lube the block threads with a light coating of clean engine oil,
screw the studs into the block all the way and then back them out
1/16~1/8 of a turn, loose is good. Do not torque the stud into the
block. Using the ARP Lube, lube both sides of the washer, bottom of the
nut and the top threads of the stud, torque to ARP specs in 3 equal
steps.
3) The studs don't need to be re-torqued. Gaskets can collapse a
little so on a performance car it is probably a good idea to go over
them after a some running. Always re-torque on a cold engine, start in
the middle of the head, loosen one nut at a time and pull right back to
full torque, then move on to the next one.
here I am torquing things down like a BOSS
final product (stud, washer, nut)
then I gave the lifters a nice oil bath and bled them and put them into the head along with valve shims/guides
ordered a whole new set of rocker arms from Victory Nissan of Chessapeake (eBay, fast shipping, & great prices on SR stuff!!!)
closeup
installed with Redline assembly lube
set the camshafts in and got the cam gears lined up with their corresponding timing chain links
cam caps, oilers, and RAS installed
ADVICE, PLEAASE!
After bolting the cam caps down and torquing to spec using a 1/4" drive torque wrench (converted inch to ft lbs), I noticed that there was significant slack in the timing chain between the cam gears. (the chain was tight when I just had the cams laying in the head unbolted as you can see in that pic) So I installed the timing chain tensioner next. It took up a bit of the slack but it's still there. Everything matches up on the links and I did everything by the book. After coming online and doing some research, I guess SOME slack is normal since the tensioner runs off oil pressure and it cant fully extend until the motor is running. It eased my worries a bit, but I'm still iffy on the matter. PLEEEASE let me know if you have any input or experience, is this normal??
Here are a few pics of the slack for verification:
Maybe I'm just getting worried over nothing. I DO NOT have the crank pulley installed yet (it's just barely on the crank in the pics for timing reference) so when I do install it (probably tomorrow since I can't stop thinking about this damn chain!) I will then rotate the crank and see what happens and make sure everything is good with the valvetrain.
WOW so much for a "quick" update! I still have more pics to add of other things I've done (solid steering shaft bushing and also removing the fitting from my old BMC to install in the new one) and also of parts I've bought, AND recieved!
Hopefully I will remember to get back on here soon to get everything completely back up to date...until then, if anyone can ease my worries on the whole timing chain slack dealm that would be LOVELY!!
k bye.
-
Conrad 2NR
- Posts: 21
- Joined: Mon Nov 23, 2009 4:47 am
- Car: 1991 180SX
- Location: Trinidad
- Contact:
Re: Cbus240's Restoration/Build Thread 56k
*subscribed*
Last edited by Conrad 2NR on Fri Dec 09, 2011 6:26 am, edited 1 time in total.
-
RustspecS13

- Posts: 928
- Joined: Sat Sep 08, 2007 5:30 pm
- Car: '74 260z and '88 300zx turbo
Re: Cbus240's Restoration/Build Thread 56k
I wouldn't be to worried about it, that's a long timing chain and its main tension comes from oil pressure. Then again, I'm no SR expert (nor fan :P) so take it for what its worth....
Edit- I hope you have bought or are going to buy nistune soon! That motor was begging for it the one time I drove it, and its surely begging for it now! Hello reliable 300Whp!
~Alex
Edit- I hope you have bought or are going to buy nistune soon! That motor was begging for it the one time I drove it, and its surely begging for it now! Hello reliable 300Whp!
~Alex
Re: Cbus240's Restoration/Build Thread 56k
You should be fine dude. I just did mine a few weeks ago and had the same dilemma. Make sure the little hook from the tensioner has been released and the rest is up to the oil pressure to handle...
SR looking fresh man. So how did you like installing that steering bushing?
BTW: I forgot to take those pics of connectors a had asked you about..
SR looking fresh man. So how did you like installing that steering bushing?
BTW: I forgot to take those pics of connectors a had asked you about..
Re: Cbus240's Restoration/Build Thread 56k
EPIC MASSIVE UPDATE!!! MOTOR IS IN CAR AS OF 6-4-2011!!
Wow...just, wow. All I can say is for about the past 3 weeks I've put countless hours into this car. I seriously felt like all I would do is go to work for 8 hours, come home, eat, then work on the 240 or SR in some way shape or form for 6 hours after, then do it all over again the next day...and the next . Oh yeah, and as far as my social life...LOLZ!!! Well all the work has paid off so far, and I'm the closest I've ever been to getting my car ready roll again. The summer is here, the big local meets have started, and my car is still in pieces and I'm dying to get her back together. I guess I stressed myself these past couple weeks to make the final push to get the motor back together and actually IN the car as a motivator to finish the final leg of the build.
Alright, so first let me get you up to speed on some of the other things I've been working on besides the SR itself. This brings us to the part I like to call
SIDE JOBS:
1. solid aluminum steering shaft bushing install
shaft removed from car

trying to keep the plastic bushings in order on new piece

I didnt realize I needed to press the brass collars into the new bushing, so I took the shaft home to finish the job

*My thoughts on the install of the shaft bushing is that it was pretty simple and straight forward. Now of course I had the motor out of my car and was able to get into the bay and easily access the shaft, so without that I can see this job being a total PITA. I also had to loosen/lower the front subframe a little bit to remove the shaft (along with coupler) from the rack&pinion assembly. Other than that it was out with the old, in with the new, then bolt her back in. I'm very curious as to how much of a difference it will make. I can tell you I can already feel a difference in the "firmness" of the steering assembly just from turning the wheel back and forth in the car as it sits now, so we'll see!!
2. Remove fitting from old leaky Z32 BMC to reuse in new, and avoid having to use two adapters to make brake lines work. I used a dremel, obviously destroyed the old BMC in the process...but it leaked brake fluid all over my firewall and inside my frame rail unsuspectingly, so it deserved it!
destroyed...NO SACRIFICE, NO VICTORY!!!

and the lil nugget of a reward! should press in the new MC nicely and make for a factory looking install

3. Transmission. Totally degreased/painted. Installed new rear seal, shifter gasket, fork dust boot, and shifter collar. Bought a SPL clutch fork pivot ball to replace the weak factory one. Also bought an ACT clutch kit which came with a new throwout bearing, so that was replaced too.
SPL vs OEM pivot ball

cleaned/degreased sensors, fork/hardware, and vent hose

Nissan recommends molybdenum disulphide grease for clutch components. My ACT kit came with this stuff called Ceramlub, a 100% percent ceramic lube that is good to like 2800 degrees farenheit. Well problem is, the little pack that came with the kit wasn't nearly enough to pack the carrier for the T/O bearing, along with the other pieces you have to grease for the clutch. SO after a little research, I found something with the same properties as the Ceramlub made by Permatex. It's a synthetic based brake caliper lube with ceramic in it. It is also good for 2800 degrees farenheit, waterproof, and is good for metal to metal sliding and contact point. You can also pick it up at the counter of your favorite parts store such as Advanced.
here is said stuff. it's purple, woooo!

packed carrier w/ grease per FSM (pounded out and pressed the new T/O bearing at my company's shop, so no pics of that)

put red threadlocker on the new pivot ball, greased other components per FSM, and here it is all together

new dust boot/cover

and here's the transmission is all dolled up

4. Wiring. Now I didn't take pics of all the work I did cleaning up, re-looming, and re-wrapping the mess of wiring in the bay, but I guarantee you it is 100% cleaner looking than it was before. Not perfect and tucked like I would want it to be, but I doubt I'm ever going to take my car to that level at this point. I did use about 5 rolls of Scotch Super 33 electrical tape, just a fun fact! haha here's a pic of some of the crap I took out

5. Engine bay clean, prep and paint. By far the most daunting of these tasks, and I had a few long nights at the storage unit to get things up to par. Let me just say I am SO happy with the results I got, I mean keep in mind I'm doing paint work with spray bomb, in a storage unit, out in the elements, with no electricity or lights for that matter. On to the good stuff.
after degrease and light sanding, ha you can see where I was testing primer on the passenger wheel well, and different shades of black on the driver's side


taped off and ready


primer on finally around midnight on 5-29-11

the next day, also sprayed some undercoating on the front frame rail areas

finally color, wooo!! ended up going with Duplicolor Engine Enamel "Low Gloss Black"


finished bay, with renewed wiring (out of the way for motor install)

Ok, so now you guys should be up to date with everything besides the motor. Let's start part 2 of the post sha'll we??
I left off my last post worried about the timing chain slop. This is no longer an issue. I hand cranked the engine multiple times to see if everything would line up to TDC (and it did) but in doing so just rotating it allowed the tensioner to pick up some tension on the chain. That, plus oil pressure on start up should keep things nice and tight! Ok so let me bring you up to speed on the SRARRRRGH!!!
NISMO thermostat

comparison of parts store SR equivalent and the NISMO

installed

back of motor looking dirtyyyy

degreased

FUN FACT! HOW TO REMOVE YOU PILOT BUSHING THE CLEAN AND EASY WAY!!!
1. Take newspaper, and soak it in water...or let your puppy dog pee on it!

2. Shred paper into pieces and then wad it up and stuff it inside the hole and behind the pilot bushing

3. Find a deepwell socket the fits closely inside the diameter of your bushing and invert an exstension into it

4. Hammer the socket, and in turn keep adding paper to the hole, using hydraulic force to remove your bushing!

old vs. new ACT

new rear main seal along with new pilot bushing pressed in

s14 strainer installed

windage tray/baffle installed

brand new OEM oil pan from Nissan of Chessapeake!

s15 multilayer exhaust manifold gasket (came with Tomei manifold)

Tomei manifold bolted on, just threw the turbo/lines on because I HAD to see what it looked like lolz


coolant line AN fitting hits the wastegate actuator rod, will need to be shaved down

oh look! an order from Summit Racing oh my!! fittings to make turbo lines work, DEI Reflect-A-Gold for BMC heat shield, DEI Titanium heat wrap for manifold, and SS lock ties for wrap

final mock up of turbo and lines

DEI Titanium wrap on, has a carbon fiber look to it, saweet!! you also don't have to soak the wrap in water, but it was still a PTIA to put on haha

finally got things bolted down

at some point I put the NISMO engine mounts on, intake manifold (which I have to take off again to get all the coolant lines on) new dipstick guide, and Tomei elbow (wrapped of course) and plumbed up the drain for the T28R
sex.

side shot

drain

turbo closeup


peep the homemade engine lifting point, courtesy of my popskis!

gotta get that power to the ground somehow! ACT Street/Strip clutch kit and Streetlight Flywheel

6lbs lighter than stock

full face clutch disc (you can see that Ceramlub stuff I was talking about)

pressure plate, 362ft lbs of clamping force

flywheel bolted up

disc and pressure plate in all their glory


gettin it onnn

pressure plate torqued down

transmission on, everything rigged up and ready for its big voyage!


up she goes

ready for transport

I was so stoked just to see this image infront of me haha

halfway to victory


GREAT SUCCESS!!!
SR officially back in its home on 6-4-2011


sets a little higher with the NISMO mounts

YEEESSS! SO glad it's finally back in guys. Such a huge weight lifted off my shoulders now!! I just place one of my final last round of orders of parts last night (loottts of cool stuff coming in soon) and my goal now is to spend the next couple weeks getting everything back together, and then get the 240 towed to my house the weekend of the 4th of July to start her up!! I am definitely going to keep this thing updated more regularly now, tired of doing these huge updates, HA!
Wow...just, wow. All I can say is for about the past 3 weeks I've put countless hours into this car. I seriously felt like all I would do is go to work for 8 hours, come home, eat, then work on the 240 or SR in some way shape or form for 6 hours after, then do it all over again the next day...and the next
Alright, so first let me get you up to speed on some of the other things I've been working on besides the SR itself. This brings us to the part I like to call
SIDE JOBS:
1. solid aluminum steering shaft bushing install
shaft removed from car
trying to keep the plastic bushings in order on new piece
I didnt realize I needed to press the brass collars into the new bushing, so I took the shaft home to finish the job
*My thoughts on the install of the shaft bushing is that it was pretty simple and straight forward. Now of course I had the motor out of my car and was able to get into the bay and easily access the shaft, so without that I can see this job being a total PITA. I also had to loosen/lower the front subframe a little bit to remove the shaft (along with coupler) from the rack&pinion assembly. Other than that it was out with the old, in with the new, then bolt her back in. I'm very curious as to how much of a difference it will make. I can tell you I can already feel a difference in the "firmness" of the steering assembly just from turning the wheel back and forth in the car as it sits now, so we'll see!!
2. Remove fitting from old leaky Z32 BMC to reuse in new, and avoid having to use two adapters to make brake lines work. I used a dremel, obviously destroyed the old BMC in the process...but it leaked brake fluid all over my firewall and inside my frame rail unsuspectingly, so it deserved it!
destroyed...NO SACRIFICE, NO VICTORY!!!
and the lil nugget of a reward! should press in the new MC nicely and make for a factory looking install
3. Transmission. Totally degreased/painted. Installed new rear seal, shifter gasket, fork dust boot, and shifter collar. Bought a SPL clutch fork pivot ball to replace the weak factory one. Also bought an ACT clutch kit which came with a new throwout bearing, so that was replaced too.
SPL vs OEM pivot ball
cleaned/degreased sensors, fork/hardware, and vent hose
Nissan recommends molybdenum disulphide grease for clutch components. My ACT kit came with this stuff called Ceramlub, a 100% percent ceramic lube that is good to like 2800 degrees farenheit. Well problem is, the little pack that came with the kit wasn't nearly enough to pack the carrier for the T/O bearing, along with the other pieces you have to grease for the clutch. SO after a little research, I found something with the same properties as the Ceramlub made by Permatex. It's a synthetic based brake caliper lube with ceramic in it. It is also good for 2800 degrees farenheit, waterproof, and is good for metal to metal sliding and contact point. You can also pick it up at the counter of your favorite parts store such as Advanced.
here is said stuff. it's purple, woooo!
packed carrier w/ grease per FSM (pounded out and pressed the new T/O bearing at my company's shop, so no pics of that)
put red threadlocker on the new pivot ball, greased other components per FSM, and here it is all together
new dust boot/cover
and here's the transmission is all dolled up
4. Wiring. Now I didn't take pics of all the work I did cleaning up, re-looming, and re-wrapping the mess of wiring in the bay, but I guarantee you it is 100% cleaner looking than it was before. Not perfect and tucked like I would want it to be, but I doubt I'm ever going to take my car to that level at this point. I did use about 5 rolls of Scotch Super 33 electrical tape, just a fun fact! haha here's a pic of some of the crap I took out
5. Engine bay clean, prep and paint. By far the most daunting of these tasks, and I had a few long nights at the storage unit to get things up to par. Let me just say I am SO happy with the results I got, I mean keep in mind I'm doing paint work with spray bomb, in a storage unit, out in the elements, with no electricity or lights for that matter. On to the good stuff.
after degrease and light sanding, ha you can see where I was testing primer on the passenger wheel well, and different shades of black on the driver's side
taped off and ready
primer on finally around midnight on 5-29-11
the next day, also sprayed some undercoating on the front frame rail areas
finally color, wooo!! ended up going with Duplicolor Engine Enamel "Low Gloss Black"
finished bay, with renewed wiring (out of the way for motor install)
Ok, so now you guys should be up to date with everything besides the motor. Let's start part 2 of the post sha'll we??
I left off my last post worried about the timing chain slop. This is no longer an issue. I hand cranked the engine multiple times to see if everything would line up to TDC (and it did) but in doing so just rotating it allowed the tensioner to pick up some tension on the chain. That, plus oil pressure on start up should keep things nice and tight! Ok so let me bring you up to speed on the SRARRRRGH!!!
NISMO thermostat
comparison of parts store SR equivalent and the NISMO
installed
back of motor looking dirtyyyy
degreased
FUN FACT! HOW TO REMOVE YOU PILOT BUSHING THE CLEAN AND EASY WAY!!!
1. Take newspaper, and soak it in water...or let your puppy dog pee on it!
2. Shred paper into pieces and then wad it up and stuff it inside the hole and behind the pilot bushing
3. Find a deepwell socket the fits closely inside the diameter of your bushing and invert an exstension into it
4. Hammer the socket, and in turn keep adding paper to the hole, using hydraulic force to remove your bushing!
old vs. new ACT
new rear main seal along with new pilot bushing pressed in
s14 strainer installed
windage tray/baffle installed
brand new OEM oil pan from Nissan of Chessapeake!
s15 multilayer exhaust manifold gasket (came with Tomei manifold)
Tomei manifold bolted on, just threw the turbo/lines on because I HAD to see what it looked like lolz
coolant line AN fitting hits the wastegate actuator rod, will need to be shaved down
oh look! an order from Summit Racing oh my!! fittings to make turbo lines work, DEI Reflect-A-Gold for BMC heat shield, DEI Titanium heat wrap for manifold, and SS lock ties for wrap
final mock up of turbo and lines
DEI Titanium wrap on, has a carbon fiber look to it, saweet!! you also don't have to soak the wrap in water, but it was still a PTIA to put on haha
finally got things bolted down
at some point I put the NISMO engine mounts on, intake manifold (which I have to take off again to get all the coolant lines on) new dipstick guide, and Tomei elbow (wrapped of course) and plumbed up the drain for the T28R
sex.
side shot
drain
turbo closeup
peep the homemade engine lifting point, courtesy of my popskis!
gotta get that power to the ground somehow! ACT Street/Strip clutch kit and Streetlight Flywheel
6lbs lighter than stock
full face clutch disc (you can see that Ceramlub stuff I was talking about)
pressure plate, 362ft lbs of clamping force
flywheel bolted up
disc and pressure plate in all their glory
gettin it onnn
pressure plate torqued down
transmission on, everything rigged up and ready for its big voyage!
up she goes
ready for transport
I was so stoked just to see this image infront of me haha
halfway to victory
GREAT SUCCESS!!!
SR officially back in its home on 6-4-2011
sets a little higher with the NISMO mounts
YEEESSS! SO glad it's finally back in guys. Such a huge weight lifted off my shoulders now!! I just place one of my final last round of orders of parts last night (loottts of cool stuff coming in soon) and my goal now is to spend the next couple weeks getting everything back together, and then get the 240 towed to my house the weekend of the 4th of July to start her up!! I am definitely going to keep this thing updated more regularly now, tired of doing these huge updates, HA!
Nistune, SCHMISTUNE!!! FACTORY ECU IS FOR WINNERS!! haha ok jk, but I hear you man it's gonna come in due time!!RustspecS13 wrote:I wouldn't be to worried about it, that's a long timing chain and its main tension comes from oil pressure. Then again, I'm no SR expert (nor fan :P) so take it for what its worth....
Edit- I hope you have bought or are going to buy nistune soon! That motor was begging for it the one time I drove it, and its surely begging for it now! Hello reliable 300Whp!
~Alex
ok good to know man, everything actually worked out good so it seems...and as far as the bushing as I'm sure you're gonna read, I didn't think it was bad at all! It was a PITA to press those brass bushing into the new aluminum piece, but other than that it went well. I'm really hoping it tightens up that steering though, that rubber bushing had ridiculous amount of slop! And no biggy on the pics, I figured you did hahatEknoS13 wrote:You should be fine dude. I just did mine a few weeks ago and had the same dilemma. Make sure the little hook from the tensioner has been released and the rest is up to the oil pressure to handle...
SR looking fresh man. So how did you like installing that steering bushing?
BTW: I forgot to take those pics of connectors a had asked you about..
Last edited by Cbus240 on Thu Jun 09, 2011 8:41 pm, edited 1 time in total.
Re: Cbus240's Restoration/Build Thread 56k
Wow, great job yet again. So glad you are putting all your time and effort in the right places. I'm sure your itching to drive it everyday, but by the looks of it, it will be well worth the wait. I wish I was closer too my car so I could work on it, I hope that your storage unit is not to far from your house. lol
-
splintercell

- Posts: 1764
- Joined: Sat Mar 19, 2005 1:28 pm
- Car: 1989 Nissan 240sx HB CA18DET
1991 Nissan Silvia Q's SR20DE ITB's - Location: Virginia
- Contact:
Re: Cbus240's Restoration/Build Thread 56k
good god...WOW! what a great job you have done...keep it up
-
cjmirabal1

- Posts: 475
- Joined: Tue Aug 17, 2010 10:36 pm
- Car: Past: 90' S13 fastback
CA18DET powered
Current: 90' S13 fastback
Vh45de powered - Location: Tampa, Florida
Re: Cbus240's Restoration/Build Thread 56k
awsome build!!
-
mastakilla08

- Posts: 130
- Joined: Wed Sep 16, 2009 9:00 am
- Car: 1992 hatch, 1989 piggy coupe, 1991 coupe silv.
Re: Cbus240's Restoration/Build Thread 56k
-
SkyS13Walker

- Posts: 76
- Joined: Tue May 31, 2011 9:30 pm
- Car: 1990 240sx Hatch-back
- Location: New York
Re: Cbus240's Restoration/Build Thread 56k
Sick build your making me doin my build right the first time........keep this bad b**** on a leash... she running wild
-
S13AL

- Posts: 444
- Joined: Sun May 03, 2009 4:31 pm
- Car: 1991 240sx hatch with blacktop s13 sr20det, HKS Hipermax III suspension, HKS Sport exhaust, Blitz downpipe, S15 Sylvia HLSD, 300zx/J30 5 lug and brakes, and mesh wheels
- Location: Kirkland, Wa
Re: Cbus240's Restoration/Build Thread 56k
Correct me if I'm wrong, but isn't the purpose of heat wrap on a turbocharged vehicle to keep the exhaust gasses hot before the turbine housing? If you wrap the pipe coming out of the turbine, wouldn't insulating heat there cause more back-pressure? I was just wondering if that's true and if there might be another reason why you wrapped that pipe.
-
240TKE128

- Posts: 230
- Joined: Fri Feb 06, 2009 9:05 am
- Car: 1990 240sx HB
2011 subaru outback 2.5i limited - Location: Asheville, NC
- Contact:
Re: Cbus240's Restoration/Build Thread 56k
Looking good cant wait to see the rest.
-
nightsauce
- Posts: 1074
- Joined: Thu Jun 19, 2008 3:06 am
- Car: 1991 Nissan 240SX S13 hatch RIP
1992 Nissan 240S S13 hatch :D - Location: Newark, NJ
Re: Cbus240's Restoration/Build Thread 56k
looking awesome!! suscribed 
-
OutToWinPAHC

- Posts: 8810
- Joined: Thu May 31, 2007 12:19 pm
- Car: 2015 Chevy Silverado
Nissan Skyline R33 GTS-t
Nissan Skyline R32 GTR
Nissan RB20 E46 RHD
2015 Harley Vrod Muscle
1990 Nissan Patrol - Location: PA
- Contact:
Re: Cbus240's Restoration/Build Thread 56k
I like the attention to detail and the no need to rush attitude. I wish more would follow this mentality.
-
splintercell
- Posts: 1764
- Joined: Sat Mar 19, 2005 1:28 pm
- Car: 1989 Nissan 240sx HB CA18DET
1991 Nissan Silvia Q's SR20DE ITB's - Location: Virginia
- Contact:
Re: Cbus240's Restoration/Build Thread 56k
damn straight!OutToWinPAHC wrote:I like the attention to detail and the no need to rush attitude. I wish more would follow this mentality.
-
RustspecS13
- Posts: 928
- Joined: Sat Sep 08, 2007 5:30 pm
- Car: '74 260z and '88 300zx turbo
Re: Cbus240's Restoration/Build Thread 56k

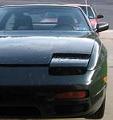
Crappy cell pic of us at the local car meet. Its nice to see it finished, at this level of detail and finally out and about!
~Alex
-
AfroSamurai240
- Posts: 1
- Joined: Fri Jul 01, 2011 3:39 pm
- Car: 1991 240sx Hatch: D.I.Y Project
1998 Nissan Maxima GLE: People Mover
2007 BMW E90 335i: DD
Re: Cbus240's Restoration/Build Thread 56k
So so awesome. Gets me excited to start my 240sx hatch project next week! 