2009 240Z build
Re: (evildky)
When I put them in, I didn't have to flip them and they didn't bottom.
The Z31T CV's have to be flipped though.
The Z31T CV's have to be flipped though.

Re: (evildky)
I have about 1" before spring bottoms out. I checked at all travel points.evildky wrote:you put int the cv's as removed!? you didn't flip the tulip? they shafts ahve to be bottoming out int he cups
I can still flip them. I do not remember reading about flipping Please explain...
-
KeeperoftheDead

- Posts: 69
- Joined: Wed Aug 02, 2006 6:11 pm
- Car: 95 s14 stock
- Contact:
Re: (evildky)
Fixed.evildky wrote:Did you put the CV shafts back in, in the same direction as you removed them? The shafts have to be bottoming out in the cups. If not then the tulips need to be flipped over.
-
evildky
- Posts: 14225
- Joined: Sat Jan 31, 2004 9:23 pm
- Car: 71 Datsun 240ZT
87 Nissan 300ZX N/A-T
06 Nissan 350Z GT
Toyota Tundra TRD RW - Location: Louisville, KY
- Contact:
lol, sorry I just assumed you used Z31 cv's the s130 shafts are shorter and a better fit
for those watchign at home, to use the z31 shaft (which is what I run) you hae to take the cv shaft apart at the outboard side, and remove the inner race and flip it over ont he shaft, this shortens the length of the shaft by about 1" allowing it to fit the S30 chassis without binding
the S130 is a tripod style cv and can't be flipped
my concern is if the S130 shafts will hold up to that RB power, they were breaking on a lot of L28ET drag cars is why I went Z31
Re: (evildky)
Usually the hold up a little better in the lighter S30's mostly due to the fact they're compressed just past the wear pattern they achieved on the S130, basically giving them a new(er) wear surface to beat themselves against. Enough pressure in one spot for a tripod and they begin to develop cracks in their less beefy housing.
Update
I got the rear sway bar this week. Suspension Techniques Kit for 70-73 240Z P/N 51075. Sorry kids, can't keep it green. Had to paint it.
Rattle-can for now, I will get it powder coated later. Added the Teflon tape to keep the squeaks down.
Pretty simple install, bolted up to the Arizona Z stuff without any trouble.
The kit came with brackets to replace the stock rear mounts and the poly bushings would mount up to these. I ended up not needing them. If anybody wants them...drop me a PM.
Nice kit and everything fit without any problems.
Now for the rear brakes.
Modern Motorsports 240SX brake adapters.
I purchased 93 240SX from local Advanced Auto for $110 plus $30 core. Also needed E-brake brackets.P/N 44196-35F00 (L/H) and P/N 44195-35F00 (R/H) for $22.52 each from local Nissan.
As you can see from picture here, the E-brake brackets need some modification to adapt to smaller E-brake cable. I needed to cut parts from my old brackets.
Cut...
Weld...
Paint
Bolt on brakes and adapters...
The e-brake cable need to have clevis pins and a little adapter installed to hook up to brake. The MM kit includes these. I also swapped the cables from left to right due to the extra cable length. Taking the cable from the left side and hooking it up to the right side used up the extra length I now had. It just made everything fit a little nicer, otherwise the e-brake cable was sort of hanging down.
Modern Motorsport has a cool little brake hose adapter kit that bolts direct up here...The R/H bracket on the frame gets removed and the ridged line is replaced with the SS hose.
The hose on the left side gets hooked up to the bracket on frame, but that bracket and the e-brake brackets were a little too close for comfort. They were almost touching when the strut was compressed.
So...drill new hole closer to frame...
Trim off old hole...
Much better...
Back on the ground.
Gord
-
KeeperoftheDead
- Posts: 69
- Joined: Wed Aug 02, 2006 6:11 pm
- Car: 95 s14 stock
- Contact:
Re: Update (gmac708)
word word
-
carps13guy
- Posts: 291
- Joined: Sat Jun 14, 2008 7:07 pm
- Car: 91 coupe ka
Re: Update (gmac708)
lookin good mang. those aluminum susp. pieces look tough, im keeping a close eye on this thread because once again, you are essentially building one of my dream cars. its gonna be hard to keep up w/all the custom fab & cleanness of yours though. good work
-
hbpignosePA
- Posts: 3481
- Joined: Fri Dec 01, 2006 6:07 pm
- Car: 90 240sx hatch (Jackstand Queen)
78 Datsun 280Z (RIP)
89 Toyota Cressida (Sold)
86 Nissan 200SX hatch (sold)
83 Nissan 280ZX turbo (parts car)
90 Volvo 240 (sold)
80 Toyota Cressida MX32 (new daily) - Location: Amish Country Pa
Re: (evildky)
probably one of the most legit builds ive seen on a z

Re: (noobdrftr)
well saidnoobdrftr wrote:awesome...just pure awesome
Re: (HoosierSX)
Really really nice build-- I am super jealous. A lot of good parts going on to this thing... and done right. I wish I had the time for a build like this. Not to mention the skills. Your Z> my Z


Re: FN-QR (Dittoz7)
This build is just pure awesomeness!! Great job on all the detail you have done to this car! Keep up the good work!
Update
Update, sorry it took so long...I started to work on the front end. The radiator and FMIC for now. I purchased a double pass radiator. That means the water passes through core twice. Once, from right to left on bottom, and then left to right on top. I picked it up 24" from Arts racemart. Very nice looking and hope it works. http://www.randysracemart.com/prcdopara.html .
I used a floor jack to test out the height.
Also put the hood on and checked for clearance. Stuck my camera up and took a few pictures.
You might notice that I have cardboard on cooling fins. Keeps fins looking new during fabrication.
So I set the height and bent up some aluminum angles. Marked and placed them where I want them welded.
I thought I would give Defined Autoworks of Pataskala a try for my welding needs. I checked out their shop and talked to Logan, he said no problem and they did a nice job. So I got my rad back and just needed to trim and mount it.
I'm using grommets in bulkhead for rubber mounting.
Nice fit, everything looks good.
Now on to the FMIC
I purchased 24X12X4 intercooler on e-bay. X02 racing. Good price
I bent aluminum brackets and bolted to bottom of FMIC. The top is going to need some brackets made up. I ended up running out of time....
That's it for now... I'll pick up some sheet aluminum this week, and the tubing and couplings should be delivered as well.Gord
-
bigred240sx
- Posts: 426
- Joined: Sat Feb 24, 2007 6:32 pm
- Car: 91 240sx fb w/ super hicas(wrecked)
1976 280z
2009 frontier - Location: the woodlands, texas
Re: Update (gmac708)
looking good. cant wait for the finished product.
Re: Update (bigred240sx)
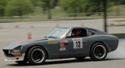
You need a side pic of the car I want to see the ride height and whatnot lol, PLEASSEEE!
-
hbpignosePA
- Posts: 3481
- Joined: Fri Dec 01, 2006 6:07 pm
- Car: 90 240sx hatch (Jackstand Queen)
78 Datsun 280Z (RIP)
89 Toyota Cressida (Sold)
86 Nissan 200SX hatch (sold)
83 Nissan 280ZX turbo (parts car)
90 Volvo 240 (sold)
80 Toyota Cressida MX32 (new daily) - Location: Amish Country Pa

Re: Update (hbpignosePA)
Hmmm, is it just me or are you gonna have some issues with hood clearance with the top coupling on that radiator? Either way, still wholeheartedly approve.
EDIT: I'm dumb, that's where the radiator cap goes.
Modified by musashin at 11:13 AM 9/28/2009
EDIT: I'm dumb, that's where the radiator cap goes.
Modified by musashin at 11:13 AM 9/28/2009
-
carps13guy
- Posts: 291
- Joined: Sat Jun 14, 2008 7:07 pm
- Car: 91 coupe ka
Re: Update (gmac708)
damn, i cant stop thinking about how much of a beast that thing is gonna b once roadworthy. good stuff, im always stoked to see updates from your build!
Re: Update (carps13guy)
If you dont mind me asking--- whats your profession? I barely have enough time for my build and its nowhere near as comprehensive as yours.
-Eric
-Eric
Re: Update (streeteg)
idahos13 wrote:You need a side pic of the car I want to see the ride height and whatnot lol, PLEASSEEE!
Back on page 5, I had a picture of the car lowered as far as I could. The fenders were sitting on the tires. I need to get the ZG flares installed so I can set ride height. Maybe I'll do that next. I should get another picture posted.
streeteg wrote:If you don't mind me asking--- whats your profession? I barely have enough time for my build and its nowhere near as comprehensive as yours.
-Eric
I am an aircraft mechanic and work about 60 hours a week. I usually spend one day a weekend playing in the garage, sometimes two. As far as having enough time, I have the added benefit of free, child slave-labor I keep them on top of cutting the lawn and cleaning up the yard. They help me out in the garage too. That gives me some extra time.
-
spooled240

- Posts: 6487
- Joined: Sat Jan 20, 2007 8:45 pm
- Car: kouki s14
Re: Update (gmac708)
s*** i know how that goes...paint the house or get my a** cracked: I pick option 1gmac708 wrote: I have the added benefit of free, child slave-labor
Update
I worked on the FMIC today. The 24X12X4 is pretty big. I needed to squish everything between the two brackets that support the hood hinges and the headlights. This meant I needed to weld the 3" 90 degree adapters on the ends of the intercooler. This will shorten everything up and it should fit...I hope.
I cut the old flanges off with saw and dressed them up square and smooth with a grinding wheel.
Mounted everything up and measured a bunch to see how much of the 90 degree I needed to remove. About 3/4" would do it.
Ran over to Defined Autoworks and Peter welded them up for me.
Next...I made some room on the fwd bulkhead. I gave up trying to get everything to feed through the existing holes. I elected to remove everything, and will build some new plates later. That way I should be able to mount oil cooler and intake as well.
Here is before...
After... you get the idea
Now I have all sorts of room.
Tomorrow we get to fab up the piping That's it for todayGord
-
carps13guy
- Posts: 291
- Joined: Sat Jun 14, 2008 7:07 pm
- Car: 91 coupe ka
Re: Update (gmac708)
coming along nicely man.
-
KeeperoftheDead
- Posts: 69
- Joined: Wed Aug 02, 2006 6:11 pm
- Car: 95 s14 stock
- Contact:
Re: Update (carps13guy)
Looking forward to tomorrow!!
Update
OK...Today we got started on the FMIC piping. It's real easy to do.
First, I use a band saw. Yes it helps. Nice straight cuts. Second, never use green or brown masking tape to hold the piping together before you weld. Something in that tape contaminates the surface and it drives the welders crazy.
Hot pipe is 3 1/4" reduced down to 3" to FMIC. Have vibrant 3" 90 degree and 3" straight pipe to work with.I just cut and trim as needed.
Need a little straight piece here...
Here I use a cheep Harbor Freight bead roller to put bead on end of pipe.
trim off excess
Should hold...
Last part over here...
Have it coming over the fender, up high, then back down to the FMIC. I need the space down below for the intake.
Now we have to go from 3" outlet to 3 1/2" pipe, the to 4" intake manifold. I am using the 3 1/2" vibrant 90 degree and straight pipe.
Hard turn inboard and down.
Then back up towards the intake
Funky non-skid mat to protect the finish on the pipe. Keeps the scratches down.
That's it for this side
I am going to take over and get welded this week. Everything came out pretty smooth.
I need to start thinking about where to mount the BOV.
Cam and Alex wanted to swap out shocks on the 240SX and things went down hill from there, guess I'll get back to the Z next weekend...
Gord