This is my first write up so please bare with me. This write up is for the front brakes "didn't have enough money fo rthe rear set" will do another write up when I get the rears. I'm sure every 240sx owner has considered upgrading their brakes to the much popular z32 and q45 brakes. Another option are the brakes from the 1993-1997 Infiniti J30. The J30 and Q45 rotors share the same part number and the J30 calipers are just slightly smaller than the Q45's. First off here is a list of tools and items I used.
J30 brake calipers, brackets, and rotors.http://i72.photobucket.c10mm, 12mm, 14mm, 19mm, and 5/8 wrenches12'' channel locks21mm socket with socket wrench or breaker bar(3) 1/2" x 1" bolts with nuts 1/2'' metal drill bit drill with 1/2" chuckBottle of brake fluid "very easy to forget" Bottle of brake parts cleaner Bottle of rust treatmentOil pan or something to catch brake fluidWD40
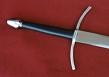
Pic of the J30 rotors and calipers
Check out the s13 calipers on the left and the J30's on the right. HUGE difference.
First off of course jack up the car on whatever side you wanted to do first "I chose the passenger side". Use the 21mm socket and remove the wheel.
Here a pic of the stock s13 brake setup.
Make sure your brake fluid is full. Now use the 12m wrench and remove the banjo bolt from the back of the caliper. Brake fluid will spill out so use something to catch it. The fluid will continue to spill out at a slow pace so check on it throughout the install.
Now using the 19mm wrench remove the 2 bolts "top and bottom" from the back of the caliper bracket. Remove the whole brake assembly and rotor.
With everything removed you come across the splashguard. The J30 rotors are too big for the splashguards. You can either remove the whole thing by taking off the hub, or take a hammer to it. I opted to use a set of metal cutting shears and cut off the 90 degree lip on the splashguard. After that just use your hands and bend the thing inwards towards the engine bay. I'm paranoid about rust so I sprayed the cut edges with some rust treatment.
pic of the splash guard after cutting it
Next are the rotors. The problem is that the s13 rotors are 4 lug and the J30's are 5 lug. Those of you who are not able or uncomfortable redrilling the holes can take it to a machine shop "should only take a day". I decided to do it myself. Take the 2 rotors and place them on top of each other "5 lug on bottom".
The rotors are hub-centric so the center hole will line up. Now just rotate the rotor"4 lug" until one set of the stud holes line up and the 3 others have a solid surface to drill through. Take 1 of the 1/2'' x 1" bolts and bolt the 2 rotors together through the hole thats lined up. Using my finger run it around the lip of the center hole and make sure that they are flush.
Pick a hole to start at and spray some wd40 on it "it'll help the drilling process". Using the drill and the 1/2" metal bit drill through the J30 rotor using the top hole as a guide. To help stabilize the the rotors and make sure they didn't move I stood on top of them while drilling. After the drilling the hole wipe away the metal flakes and use another 1/2" bolt and tighten it down. Check to make sure the rotors are still flush and repeat this process until all the holes are drilled.
The end of the stud by the hub is slightly bigger than the threaded part. If you look on the inside of the s13 rotor that the holes are stepped in "tappered or seated or whatever you call it". I actualy had a 35/64 bit and used it to to step down the new holes a little bit. You can also just use the 1/2" bit or dremel and reem it out a bit too. Then spray hole with some rust treatment "remember I'm paranoid". Then go test fit. If it doesn't fit like it should in any way time for the machine shop. If it does bolt the rotor on using 2 lug nuts and spin it. If it grinds againest the splashguard then just take off the rotor and bend the splashguard in some more.
Now look at your j30 calipers and you'll noticed on the top of them they have marks on them "L and R". Obviously L is the driver's side and R is the passenger side. Use the according caliper to whatever side your working on.
Mount the j30 assembly on the car using the 19mm bolts. And reinstall the brake line using the 12mm banjo bolt "don't forget the washers" to the new caliper. Now using the 14mm wrench remove the lower caliper bolt.
Loosen the bleeder valve swing the caliper up and using the channel locks and squeeze the pistons down as far as they go "watch out for the brake fluid shooting out". Install the new brake pads, swing the caliper back down, retighten the bleeder valve, and reinstall the lower caliper bolt.
pic of the bleeder valve
Now get a friend, family member, whoever to help you bleed the brakes. Now the remove the 2 lug nuts holding the rotor flush. Here's a pic of the new setup. Notice that since this is the passenger side that the caliper says R on it. If for some reason it doesnt say anything on it the bleeder valve should be on top.
Put the tire back on and repeat the process on the other side. To break in the new brake pads I did about 30 or so 30 mph stops "your gonna feel brake fade" with intervals between each stop.
Sorry if the write up was sorta long. Just wanted to to be as detailed as can be for those who need it to be. Hope everyone liked the write up. Any comments welcomed good or bad. Anyways now go enjoy your new j30 brakes!
Modified by anumeric at 5:39 AM 5/4/2006
Write up for J30 brake upgrade.
Re: Write up for J30 brake upgrade. (anumeric)
Damn. You drilled your brakes in your front yard with a handrill? That's pretty ballsy. You aren't haveing any vibration issues? From what I have heard, you should be visiting a machine shop.
-
anumeric

- Posts: 763
- Joined: Sun Mar 07, 2004 2:58 am
- Car: 1989 RS13, 1986 AE86 GT-S, 1948 2-Wheel Rickshaw.
- Contact:
Re: Write up for J30 brake upgrade. (naed240sx)
Yeah I was feeling kinda ballsy. If I messed up or had issues after install I was just gonna pick up some new cross drilled or slotted rotors and get a machine shop to do it. Im not feeling any issues with vibirations at all so far. They feel pretty good. Plus those 1/2 bolts I used to hold the rotors together were the exact size of the stud holes they worked like a champ.
Re: Write up for J30 brake upgrade. (anumeric)
Hahah sweet. Well whatever works. Good job. Everybody should be very cautious if using that method though.anumeric wrote:Yeah I was feeling kinda ballsy. If I messed up or had issues after install I was just gonna pick up some new cross drilled or slotted rotors and get a machine shop to do it. Im not feeling any issues with vibirations at all so far. They feel pretty good. Plus those 1/2 bolts I used to hold the rotors together worked like a champ.
-
anumeric
- Posts: 763
- Joined: Sun Mar 07, 2004 2:58 am
- Car: 1989 RS13, 1986 AE86 GT-S, 1948 2-Wheel Rickshaw.
- Contact:
Re: Write up for J30 brake upgrade. (naed240sx)
t
Thanks and yes I agree be very cautious if you use the hand drill method. If you have any doubts get a machine shop to do it. Unless your like me and planning on buying new rotors if you mess up.naed240sx wrote:Hahah sweet. Well whatever works. Good job. Everybody should be very cautious if using that method though.
-
anumeric
- Posts: 763
- Joined: Sun Mar 07, 2004 2:58 am
- Car: 1989 RS13, 1986 AE86 GT-S, 1948 2-Wheel Rickshaw.
- Contact:
Re: (SeVa-S13)
Yeah I was gonna use my drill press but the rotors didn't fit on it. lol But you know me I like to try to do everything myself. "well at least once until I mess up" lol. But thanks dood.SeVa-S13 wrote:Myyyy nigga. That was better than I was expecting. You didn't tell me you drilled your own rotors though, lol! Pretty smart way of going about it though.
Modified by anumeric at 5:26 AM 5/1/2006
Re: (anumeric)
hell yeah. this is the story of my life.anumeric wrote:Yeah I was gonna use my drill press but the rotors idn't fit on it. lol But you know me I like to try to do everything myself. "well at least once until I mess up" lol. But thanks dood.
-
Sockington
- Posts: 191
- Joined: Sun May 15, 2005 9:41 pm
Re: title
So, are the mounting brackets even different? Also, could you use the stock rotors or do the pads over-hang over the lip of the rotor?
-
Kenrik
- Posts: 5736
- Joined: Wed Apr 27, 2005 10:01 am
- Car: Nissan 240SX Coupe
Infiniti G35 Coupe
Nissan Versa Hatch
Re: (anumeric)
ahahahha This is the very reason my track car is on it's third engine...anumeric wrote:
Yeah I was gonna use my drill press but the rotors didn't fit on it. lol But you know me I like to try to do everything myself. "well at least once until I mess up" lol. But thanks dood.
Modified by anumeric at 5:26 AM 5/1/2006
-
RB20DETodd
- Posts: 3763
- Joined: Thu Apr 07, 2005 10:30 pm
- Car: 92 Nissan S13 coupe SE RB20DET
Re: Write up for J30 brake upgrade. (naed240sx)
LOL, i used a drill press for my z upgrade along with a 20 dollar drill bit, i even thought of cross drilling them myself toonaed240sx wrote:Damn. You drilled your brakes in your front yard with a handrill? That's pretty ballsy. You aren't haveing any vibration issues? From what I have heard, you should be visiting a machine shop.
Re: Write up for J30 brake upgrade. (anumeric)
will the brakes clear stock 15 alloys?
-
anumeric
- Posts: 763
- Joined: Sun Mar 07, 2004 2:58 am
- Car: 1989 RS13, 1986 AE86 GT-S, 1948 2-Wheel Rickshaw.
- Contact:
Re: title (Sockington)
The brackets are different, the mounting points for the calipers are wider. And you pretty much nailed it with the rotors beign too small.Sockington wrote:So, are the mounting brackets even different? Also, could you use the stock rotors or do the pads over-hang over the lip of the rotor?
Yes they will. I'm running them with my stock 15" teardrops. .speed-s13 wrote:will the brakes clear stock 15 alloys?
LOL yeah the thought of cross drilling them did pop into my head during the install.RB20DETodd wrote:LOL, i used a drill press for my z upgrade along with a 20 dollar drill bit, i even thought of cross drilling them myself too
-
forksquared
- Posts: 1308
- Joined: Fri Aug 05, 2005 5:09 pm
- Car: 91 Nissan 240SX coupe
98 Subaru Forester S (New DD)
Re: (SeVa-S13)
are these the same style as s13 brakes just bigger or are they like the z32 and are 2 piston ?
-
b0rdin4life
- Posts: 179
- Joined: Tue Mar 14, 2006 9:54 am
- Car: 95 240sx
Re: Write up for J30 brake upgrade. (anumeric)
Would I take the same steps to do this upgrade on my S14 SE besides drilling the rotors since I already have 5 lug hubs? Thanks.
-
RB20DETodd
- Posts: 3763
- Joined: Thu Apr 07, 2005 10:30 pm
- Car: 92 Nissan S13 coupe SE RB20DET
Re: (SeVa-S13)
I just need a templateSeVa-S13 wrote:Never run crossdrilled rotors on the street, much less ones you did yourself.
-
eds13

- Posts: 5487
- Joined: Mon Nov 01, 2004 9:27 am
- Car: 89 240sx Hatch, 07 Armada LE, 91 Skyline GTR
- Location: Central VA
Re: (SeVa-S13)
good write-up!
-
starkos14

- Posts: 1304
- Joined: Sun Feb 20, 2005 3:12 pm
- Car: s14 R33*, 99 gs300(2jz-gte soon)
- Contact:
Re: (SeVa-S13)
TRUE but try stopping with extremely hot brakes.... then your screwed. i was messing around one night whomping through the gears, made some turns, then straight away with one driveway til an onramp.. shot to 90mph and some1 pulled out in front of me... my brakes were soo hot i almost couldnt slow down in time....scary moment and immediately bought the crossdrilled and slotted rotors the next day. now they really help with heat!!! reccomended!!SeVa-S13 wrote:Even with a template, it'll only hurt your stopping distance.
-
starkos14
- Posts: 1304
- Joined: Sun Feb 20, 2005 3:12 pm
- Car: s14 R33*, 99 gs300(2jz-gte soon)
- Contact:
Re: (SeVa-S13)
no not from that one stop.... i was going through the gears and making turns(slowing down for each of course)... by the time i hit the straight way, the turns made them pretty hot... then when i hit the brakes because of the car.... in like 2 seconds they were overheated ...and the car was about 150 feet in front of me at the time... so it wasnt terrible until i felt as if i wasnt going to stop... i felt like i didnt have to write my life story of my night... i thought people would pick up that i use my brakes before turns
oh and for the record. i picked up the brembo cd&s rotors for the front
oh and for the record. i picked up the brembo cd&s rotors for the front

more than likely its because the rotors have better heat capacity
cross drills are for looks
and slots arent for fade
you didnt change the pads, that would be where youd eliminate fade
so that leaves the rotors, and only the rotors...that or youre imagining it, which as crazy as it sounds is a very real possibility, similar to the "butt dyno" when putting on stuff that adds 5 or 6 hp
Re: title (anumeric)
So how did you adjust to fit the new calipers on? Did I miss something here?anumeric wrote:
The brackets are different, the mounting points for the calipers are wider. And you pretty much nailed it with the rotors beign too small.

Re: title (Ajax)
I think he misunderstood or something. I'm pretty sure S13/S14/J30/Q45/Z32/R32 and evern some Maximas have interchangeable calipers, as in they'll all bolt up to eachother's mounting brackets.Ajax wrote:
So how did you adjust to fit the new calipers on? Did I miss something here?