The 240 turbo truck gets a turbo change

General discussion forum about the 240sx, and a great place to introduce yourself to the board!
User avatar
PapaSmurf2k3
Site Admin
Posts: 23998
Joined: Thu Nov 21, 2002 3:20 pm
Car: 2017 Corvette, 2018 Focus ST, 1993 240sx truck KA Turbo.
Location: Merrimack, NH

Post

So my 240 KA-T truck sometimes smokes a bit just after startup. I was hoping it was the turbo leaking some seals and not valves or anything.
The turbo is a custom kit built by me like 16 years ago or something... its been around a while. It utilizes subaru turbos and flanges, because those were cheap and plentiful at the time. Its a top-mount system that puts the exhaust uncomfortably close to the brake master cylinder.
Turbo brake lines.JPG
I used to run a reverse wastegate actuator (mounted to the downpipe) and custom wastegate bracket, but gave that up eventually and just cut a hole in my hood to clear the actuator in its traditional mounting position. I blew a couple of those higher-class turbos a while back and decided to say screw it and get a china-charger off Amazon for $188 shipped. Its a td05 variant and fit the car very well (previous turbos were td06 and didn't spool til later... not what you want in a truck).
Anyway, it was pretty awesome until one day I was backing out of my shop and caught the exhaust flange on the edge of my driveway (like a curb), which stopped the car completely... that's a lot of energy going through the exhaust system.
It ended up bending some things which then lead to some exhaust leaks at just about every joint (downpipe to turbo, turbo to manifold, manifold to head), which I fixed to some extent but never completely.
On top of that, the wastegate for the turbo finally gave up the goose so I had to adopt another one to this turbo, which lead to some other issues (wastegate stuck open after full throttle events, etc). Needless to say, it was time for a change.

I have a GT2860RS from my miata which will be small for this engine, but for what I use it for (truck stuff), the low end power will be welcome. A friend turned me on to the Tomei Expreme manifold and other turbo system components that utilizes T2 turbos and other hardware from SR20s... so I can bolt it up to a KA, use my miata turbo, and use SR20 downpipes and stuff to guarantee fitment. As a bonus, its a bottom-mount setup that gets the turbo and heat away from the brakes. The downside is I'll need all new coolant lines, oil line, downpipe, and have to change up my hot side intercooler piping.
Image
Image

So, first step was pull the intake tube and filter off. Saw some oil schmutz in there which is either from an over-oiled filter or turbo seals leaking. I don't have the PCV routing back to the intake on this vehicle, so its not oil from that.
Turbo oil.JPG
Next, pulled the coolant lines and oil supply line. The drain line was a pain to get off and I ended up busting a knuckle when I was under the car doing pull-ups to get it off :mad:
After that, popped the wastegate actuator arm off the waste gate and pulled the center section and compressor housing
via the V-band to the turbine housing to gain more access to manifold bolts and downpipe nuts(sidebar - I love V-bands).
Manifold and housing.JPG
Make believe that's still mounted to the engine :rotfl
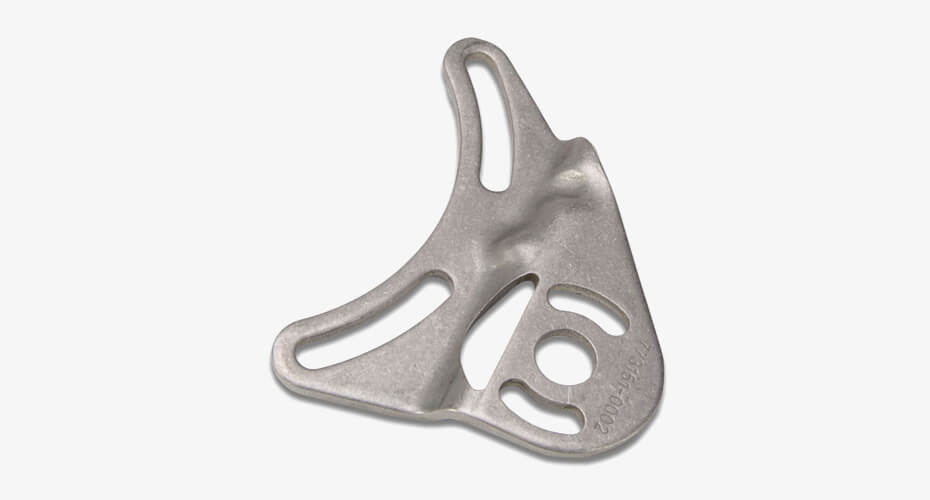
You can see where the manifold is cracked where the turbo mounts to it.
Anyway, the downpipe bolts were easily accessible from the top at this point and they came right off.
Downpipe gasket.JPG
There's your leak right there...
From there its a straight shot to remove the rest... its just kinda heavy when you have a sore back haha.
Pulled turbo system.JPG
Still need to pull the O2 sensor out of the turbine outlet. Somehow my socket doesn't fit it... but I know I put it in there somehow in the past :gotme
Anyway, that's all for now. I already have the new manifold wrapped and turbo mounted with Tomei Expreme turbine outlet. It'll go in tomorrow and I'll cut my exhaust system to accept the ISR downpipe. I'll need to weld a flange to my piping too.


User avatar
AZhitman
Administrator
Posts: 71061
Joined: Mon Apr 29, 2002 2:04 am
Car: 58 L210, 63 Bluebird RHD, 64 NL320, 65 SPL310, 66 411 RHD, 67 WRL411, 68 510 SR20, 75 280Z RB25, 77 620 SR20, 79 B310, 90 S13, 92 SE-R, 92 Silvia Qs, 98 S14.
Location: Surprise, Arizona
Contact:

Post

LOVE it!

User avatar
PapaSmurf2k3
Site Admin
Posts: 23998
Joined: Thu Nov 21, 2002 3:20 pm
Car: 2017 Corvette, 2018 Focus ST, 1993 240sx truck KA Turbo.
Location: Merrimack, NH

Post

Alright so where we left off, almost everything was out of the engine bay.
KA engine bay exhaust side.JPG
That downpipe is welded to the exhaust down below, so I needed to cut it out to make room for the new stuff.
Sawzall downpipe.jpg
The trusty Ryobi with a fresh harbor freight blade got it done haha. Only grabbed the pipe once and smashed my hand against the car :bigthumb:
Not the greatest downpipe, but its what I was able to make with what I had back in the day. Remember, this system was all custom.
So anyway, next up was the order of pulling the coolant lines from the old turbo. This was the beginning of an unfortunate sequence of events. They were pretty darn stuck in there. I ended up having to put the impact on them.
clamped turbo.JPG
I got them off and put all my chips on the table to see what I'm dealing with.
Coolant line options.JPG
Ended up just re-using the ones I had (the non gold/yellow ones) which worked well, but then realized my compressor housing was clocked 180ish from where it needed to be :(
The outlet pipe would be heading directly into the engine block.
Original coolant line placement.JPG
Incorrectly clocked turbo.JPG
I then had to remove everything I did, clocked the damn thing, and then modified a few things to get the lines to fit. They came out fairly side-by-side and would be hidden below the turbo. "NIFTY!" I thought. I was still in the mindset that I was dealing with a top mounted turbo, and real estate below the turbo was essentially infinite. This was incorrect.
I went to place it on the exhaust manifold studs for mockup purposes, but couldn't get it to be in the correct spot... the coolant lines were hitting the damn engine mount!
Tomei Expreme KA manifold and turbo.JPG
Coolant lines hitting motor mount.JPG
So its staying there for the night. I'm sure I'll have to cut some of the lines and re-weld them so they take a different angle.

Sidebar - I went to remove the O2 sensor from the old turbine outlet pipe and ended up rounding the flange. Not sure why they can't make the freaking hex a bit bigger on these things... there's not much engagement to be had. I hit it with PB blaster without good results, then moved on to torch/heat... still couldn't get it out.
rounded O2.JPG
So, there's 50 bucks to the local autozone for a replacement.
Not a great day. Having some warm peanut butter chocolate chip cookies and Guinness now.

User avatar
PapaSmurf2k3
Site Admin
Posts: 23998
Joined: Thu Nov 21, 2002 3:20 pm
Car: 2017 Corvette, 2018 Focus ST, 1993 240sx truck KA Turbo.
Location: Merrimack, NH

Post

After typing that up and looking at the pictures and thinking about it a bit... I STILL might have to clock the compressor housing a bit... its awfully close to the motor mount too.

User avatar
WDRacing
Moderator
Posts: 23925
Joined: Mon Nov 25, 2002 2:00 am
Car: 95 240SX, 99 BMW 540i, 01 Chevy Express, 14 Ford Escape
Location: MFFO
Contact:

Post

I think the 2860 is the perfect size for the truck. Glad she's getting some love.

User avatar
NukeKS14
Posts: 310
Joined: Wed Apr 10, 2019 2:50 pm
Car: 1995 240SX SE - KA24DE-T
AC Cobra Mk IV Rep.
2020 Civic Si

Post

Looking great! should be a marked improvement in response (especially with that leak taken care of). Can you swap to a different style mount?

Something like this?
https://www.phase2motortrend.com/produc ... 240-hc.htm

I'm running those and, while NVH is up, they're pretty stout and I'm very happy with them. It'd gain you at least a little clearance on one of the lines. That internal wastegate is killing you on re-clocking it too. Sometimes I wish I went bottom mount... but I don't think we can win with the exhaust, steering, brakes and everything all on that side of the engine bay. At least your BMC is safe now!

User avatar
PapaSmurf2k3
Site Admin
Posts: 23998
Joined: Thu Nov 21, 2002 3:20 pm
Car: 2017 Corvette, 2018 Focus ST, 1993 240sx truck KA Turbo.
Location: Merrimack, NH

Post

I have Nismo mounts in there now and am very happy with them. I had some stiffer ones before and they were shaking me to death.

Also, I agree on that internal gating comment. Unfortunately there's no option on this manifold for an external wastegate :/

User avatar
NukeKS14
Posts: 310
Joined: Wed Apr 10, 2019 2:50 pm
Car: 1995 240SX SE - KA24DE-T
AC Cobra Mk IV Rep.
2020 Civic Si

Post

Nonsense. Go the Aussie route; wastegate welded on to the turbine housing. Here's one w/ a Tial 44mm mount;


Image
Image

Here ya go

I think with a compact turbosmart like my 45mm unit, you could clear everything down there.

User avatar
PapaSmurf2k3
Site Admin
Posts: 23998
Joined: Thu Nov 21, 2002 3:20 pm
Car: 2017 Corvette, 2018 Focus ST, 1993 240sx truck KA Turbo.
Location: Merrimack, NH

Post

Holy moly those are awesome. I never knew they existed. Definitely keeping that in mind if this doesn't work out :)
Thanks for sharing! This is why forums are great.

User avatar
PapaSmurf2k3
Site Admin
Posts: 23998
Joined: Thu Nov 21, 2002 3:20 pm
Car: 2017 Corvette, 2018 Focus ST, 1993 240sx truck KA Turbo.
Location: Merrimack, NH

Post

Alright so this is where we left off:
240sx truck Dec 7 2020.JPG
Car in the air, manifold not fitting because the coolant lines were wrong and hitting the engine mount, and a lot of unknowns.
After sleeping on it, I decided the plan of attack should be to remove the coolant lines completely from the turbo and just mock it up to see what I'm dealing with and what my options are.
But first... a little side-activity.
I didn't have a great day at work and felt like taking some aggression out on that damn O2 sensor. I want to get it out of the turbine outlet so I can hopefully sell/trade it in the future.
I went back to the torch and put some vise grips and a HUGE pipe on the end to get some leverage. I ended up having to beef up the mounts of my vise to my work bench :eek:
My torch is kindof messing up and I'm not getting the heat out of it, so the vise grips just continued to round the hex.
I found a big axle nut leftover from a wheel bearing job I did on my Honda and decided to weld it to the O2 sensor. :mike
The shank on the O2 sensor is actually stainless, so I can't weld to that. The axle nut slipped over the shank, but my 36mm socket isn't deep and hits the back of the sensor, so I had to cut the shank away.
Chopped O2 sensor.JPG
For anyone that's curious, this is what the inside of an O2 sensor looks like:
Sectioned O2 sensor.JPG
Now, the next process is to clean the surfaces and lay some hot, nasty, un-pretty, snot-looking welds between the nut and the sensor, but not on the turbine outlet. Then, when that slut is still cherry red, hit it hard with the impact gun.
Nut-welded O2 sensor.JPG
I let it drop to the floor, called it a b****, and gave it the finger.

User avatar
PapaSmurf2k3
Site Admin
Posts: 23998
Joined: Thu Nov 21, 2002 3:20 pm
Car: 2017 Corvette, 2018 Focus ST, 1993 240sx truck KA Turbo.
Location: Merrimack, NH

Post

Alright so now that the fun is over, back to work. I pulled the assembly back out and removed the coolant lines.
I threw it back in the engine bay and loosely secured it to the head with 3 nuts. The good news is it fits.
Tomei Expreme KA24DE mocked up.JPG
The bad news is that compressor outlet comes REALLY close to that engine mount. I MIGHT be able to squeak the coupler in there, but realistically I should either clock the compressor more, or grind down the mount :(
Compressor to engine mount clearance.JPG
Kinda makes me wish I re-considered this bottom-mount thing. Its a different animal.
But then, the fitment of this turbine outlet around the steering shaft (and not pictured - the engine) is spot on :bigthumb:
Turbine outlet to steering shaft clearance.JPG
It also leaves loads of room around the strut tower. I had previously relocated my power steering reservoir and had some funky hose routing going on. Guess I can simplify all that at some point.
Definitely going to have to do some work with the charge piping to make it reach, but that was expected.
View from strut tower.JPG
That's enough up top. I went down below to see how the ISR downpipe would mock up to the back of the turbine outlet. I'm actually pretty impressed with this piece. It has a pretty good look and feel to it considering how cheap it was. Its hanging a tiny bit low, but probably because its only secured at one end and the nuts are only finger tight.
Downpipe fitment.JPG
On the downside, I'm going to have to get creative with the exhaust that is currently there if I want to keep my flex section (which I do).
Also observing from the bottom, that oil return line coming out of the turbo is just too damn long for a bottom mount. There's not much distance (height-wise) from the bottom of the turbo back to the pan. I plan on cutting and welding it at an angle to shoot it back towards the fitting in the pan. I also might have to replace the straight fitting on the pan with an angled one. We'll see.
Oil drain line.JPG

User avatar
NukeKS14
Posts: 310
Joined: Wed Apr 10, 2019 2:50 pm
Car: 1995 240SX SE - KA24DE-T
AC Cobra Mk IV Rep.
2020 Civic Si

Post

Nice progress. That is tight in there. You'll get it sorted though.

User avatar
PapaSmurf2k3
Site Admin
Posts: 23998
Joined: Thu Nov 21, 2002 3:20 pm
Car: 2017 Corvette, 2018 Focus ST, 1993 240sx truck KA Turbo.
Location: Merrimack, NH

Post

Update time.
The past few days have mostly been researching and ordering stuff. I discovered I'm probably not the only one with this waste gate actuator placement problem, and as such, Garrett makes an expensive a** bracket to help alleviate the issue. Part number 773151-0002 in case anyone is wondering.
Garrett_Performance_Accessories.jpg
Image
It was just what the doctor ordered and allowed me to really dial in my clocking and alignment, which I consider primary. Oil lines secondary, coolant lines tertiary.
Adjustable wastegate actuator bracket.JPG
Now we have a (mostly) full assembly:
Tomei Expreme turbo and manifold assembly.JPG
Having now clocked the turbo, I needed to re-install everything to get a better idea of oil and coolant lines.
Tomei Expreme KA24DE manifold with clocked turbo.JPG
I'm pretty pleased with the fitment.
I "massaged" one of the bolts sticking out of the engine mount in case I need to route coolant through there, and it looks like that's going to have to be the case with the lines I'm working with. I'll still have to cut and weld at least one of them, and maybe sacrifice another to get the proper length :eek:
Also, I miiiight have to disconnect the wastegate actuator again and clock the center section just so I can secure the oil feed line. I don't think I can sneak the bolt in there with the turbo mounted to the manifold as is. Its pretty tight up top.
Tomei Expreme KA24DE manifold with clocked turbo 2.JPG
Coupler easily clears the strut tower.
Not pictured- the math said there was no way my current exhaust setup was going to work, so I ordered a new shorter flex pipe, reducer, and flange. The reducer claimed it was mild steel, but showed up stainless, so I'll have to source another replacement. A new O2 bung will be welded into the flex pipe section as well, and a fresh wideband will be installed. My current one is many years old and sometimes gives me the "HTR" (heater) constant-on error on the gauge.

User avatar
WDRacing
Moderator
Posts: 23925
Joined: Mon Nov 25, 2002 2:00 am
Car: 95 240SX, 99 BMW 540i, 01 Chevy Express, 14 Ford Escape
Location: MFFO
Contact:

Post

That's a sweet bracket.

User avatar
PapaSmurf2k3
Site Admin
Posts: 23998
Joined: Thu Nov 21, 2002 3:20 pm
Car: 2017 Corvette, 2018 Focus ST, 1993 240sx truck KA Turbo.
Location: Merrimack, NH

Post

Its 2020. Everything should be slotted by now.

User avatar
PapaSmurf2k3
Site Admin
Posts: 23998
Joined: Thu Nov 21, 2002 3:20 pm
Car: 2017 Corvette, 2018 Focus ST, 1993 240sx truck KA Turbo.
Location: Merrimack, NH

Post

Had some side projects tonight. Did tires and some other work on the girlfriend's car. She's got a lower control arm that does the hula when shifting into drive. Bushing totally gone. Reminds me of the G20 of death.
nicofest-phoenix-the-g20-of-death-t238364.html
Anyway, finished that up and made some kickass buffalo chicken tortellini.
Buff chix tortelini.JPG
So after that I went out and decided to mark up where the coolant and oil lines need to go. While I was under the car, I noticed the turbo was resting/in contact with the motor mount. This turbo really isn't even that big, so I'm not sure how other people get around this... but I know how I get around it:
Motor mount grind.JPG
I didn't get any before pictures because my phone was super dead, but whatever. I pulled the turbo and mani after everything was measured and marked, then ground down a section of the motor mount.
After that, I committed the cardinal sin, and I don't even care.
...I clocked the center section of the turbo so the oil feed and return are not 12 and 6 o clock. By my math, I could either do that, or put an immediate bend in the return fitting so the line could be routed around the motor mount and back to the oil pan bung. Clocking it also gives me more space for mounting the supply line on the top of the turbo.

Next up is making 1 more coolant line to have it exit near where I marked on the compressor housing, then I THINK its ready to go back in the car for the last time. I'm going to try to find an oil-resistant 5/8 line with a right angle bend in it for the return bung on the pan, otherwise I'm going to have to rig up a right angle fitting on the line somewhere, and that's going to suck.

User avatar
NukeKS14
Posts: 310
Joined: Wed Apr 10, 2019 2:50 pm
Car: 1995 240SX SE - KA24DE-T
AC Cobra Mk IV Rep.
2020 Civic Si

Post

Turbo challenges are real on the KA s chassis combo. You'll get it.

https://www.ebay.com/i/392716799083?chn ... 48QAvD_BwE

That's what came on mine and it seems to work pretty well so far. No leaks (knock on wood) i'd definitely get some rtv involved in the parry

User avatar
PapaSmurf2k3
Site Admin
Posts: 23998
Joined: Thu Nov 21, 2002 3:20 pm
Car: 2017 Corvette, 2018 Focus ST, 1993 240sx truck KA Turbo.
Location: Merrimack, NH

Post

Yeah I'd rather not drop the pan at this time, but it is an option if I can't get something to work reliably.

User avatar
PapaSmurf2k3
Site Admin
Posts: 23998
Joined: Thu Nov 21, 2002 3:20 pm
Car: 2017 Corvette, 2018 Focus ST, 1993 240sx truck KA Turbo.
Location: Merrimack, NH

Post

Smaller update. Work is slow going partially because we're in a cold snap and it kinda sucks to be out there, and partially because a lot of time is being spent ordering the little things that are going to get this car back on the road.
I found an oil return line that I *hope* is going to work. Its part number PSH0142 and its a low pressure power steering return line for a BMW.
Power steering return line.jpg
It actually has 2 90 degree bends in it, so I think I'll be able to snake it around the motor mount and then up to the return fitting on the turbo. If the center section isn't correct, I'll just cut off one side and keep 1 90 degree bend.

After clocking the turbo, I went to check oil line fitting clearance to see if I should install the line outside of the car, or if it would be accessible in the car. Unfortunately at this point I realized the fittings for my old turbo (M10 banjo bolt) are not the same as the new one (7/16-24), and the fittings I was using for it on my Miata were not banjo bolts, and there's not enough room for anything else. SOOOO I got to order one of those too.

Moving on to something within my control, I started on the return line. I cut a spare one up to lengthen a section that needed to be lengthened. Welded it up, and bubble tested it with some pressurized air. The first weld went great. No bubbles. The 2nd had to be repaired like 3 times :(
Oh well, better to do it now than find out later it leaks.
Coolant line welding.JPG
I've got 1 more cut/bend to put in it, and then its done. I called it a night cos I was freezing my nuggs off at this point, and I knew I'd be waiting for hardware to come in before I could re-install the assembly anyway.
Only other thing I can work on in the meantime is the center section of the exhaust to join the downpipe to the BRM cat back.

User avatar
float_6969
Moderator
Posts: 19853
Joined: Mon Aug 26, 2002 1:55 pm
Car: CA18DET swapped 1995 Nissan 240sx (too many mods to list)
2015 SV Leaf w/QC & Bose (daily)
Location: Topeka, Kansas
Contact:

Post

Subbing! That Tomei mani looks like a really good piece!

User avatar
PapaSmurf2k3
Site Admin
Posts: 23998
Joined: Thu Nov 21, 2002 3:20 pm
Car: 2017 Corvette, 2018 Focus ST, 1993 240sx truck KA Turbo.
Location: Merrimack, NH

Post

Hey, some parts came in!
My new banjo bolt setup was first to go on. The old fittings came off the supply line easily enough, but I did end up having to clock the center section of the turbo so I could get the new one on. When I went to clock it back, I couldn't get it quite as far, as the banjo fitting ended up hitting one of the turbine housing bolts. I had to un-clock, tighten that 1 bolt down like 1/2 way, clock it back, and tighten the rest of them. Didn't get any pics... sorry.

Everywhere I looked at the PSH0142 oil line didn't have any measurements on it, so in case you're wondering in the future, here you go:
PSH0142 measurements 1.JPG
Note then end isn't exactly 90 degrees, but its close enough.
PSH0142 measurements 2.jpg
Unfortunately, I made a big assumption that this BMW power steering return line would be 5/8" ID...
PSH0142 ID vs old hose.jpg
Its really only ~11.25mm, or 7/16ish in size. I didn't want to wait on another line to come in (or really do the shopping for it) so I just ended up using a stepper bit on the end to punch the hole out a bit. It fit on my barb for the oil pan no problem. The fitting on the turbo actually seemed even bigger. I had a left over fitting end (bulb end?) from my sacrificed coolant line, so I ended up welding that onto my existing oil return hardware for better hose fitment once I cut it to length. It also allowed me to put every-so-slightly-more angle in the drain for better routing.
I'm pretty pleased with the fitment. The anti-abrasion sleeve is a welcome addition, as its likely to rub against the engine mount from time to time.
PSH0142 on KA24DET.JPG
Note to self (and anyone that may search this in the future), a smaller 5/8 line with a 90+ degree bend is the Edelmann 80576.

While I had the welder out for the oil return, I went ahead and finished my bends and routing for one of the coolant lines.
Flux Core Welding.JPG
^Only a little worried about the cardboard everywhere that could catch on fire.
GT2860RS coolant and oil lines.JPG
Everything mounted, ready for a test fitment. The line on the right side didn't quite get to where I marked my turbo for a line exit, but I figured I'd check it in the car anyway. It didn't fit, so I had to pull it all back out again and remove it for future modification. I also noticed that damn heat shield bolt/stud/nut/whatever on the left side engine mount was screwing me yet again on the other coolant line. I busted out the cut-off wheel and removed it from this world. Its crazy how tight every thing is down here and the things you need to do to get fitment. I have to keep that coolant line loose just so it will move during installation. Its only in the correct spot once the manifold is on the studs and "home".
Speaking of "home", if you recall, I ground down the motor mount bracket a bit to make room for the turbo. Turns out, it still needs to go more. Pretty unbelievable.
Tomei Expreme GT2860RS KA24DE clearance.JPG
So it all needs to come out again for fitting that last coolant line and grinding the engine mount bracket. But then I should be ready for hooking up the soft coolant lines, oil supply line, drain line, down pipe, O2 sensor, and finally engine start/test.
I still need to figure out how to hook up the intercooler piping, which is really nowhere near where it needs to be for this setup.

User avatar
NukeKS14
Posts: 310
Joined: Wed Apr 10, 2019 2:50 pm
Car: 1995 240SX SE - KA24DE-T
AC Cobra Mk IV Rep.
2020 Civic Si

Post

At the expense of dropping your motor down about 3/4", the Xcessive KA motor mounts would resolve some of the clearance issue on your driver's side.

Picture of mine when I got them a few months ago. Definitely solved my top mount issue with hood clearance. Well made.

Image

User avatar
PapaSmurf2k3
Site Admin
Posts: 23998
Joined: Thu Nov 21, 2002 3:20 pm
Car: 2017 Corvette, 2018 Focus ST, 1993 240sx truck KA Turbo.
Location: Merrimack, NH

Post

Oh nice. That's nifty. Another product I didn't know existed haha.
I just ground the s*** out of mine. Got my last coolant line modified and its ready to go back in the car, I just haven't done it yet because family is visiting for the holidays.

User avatar
PapaSmurf2k3
Site Admin
Posts: 23998
Joined: Thu Nov 21, 2002 3:20 pm
Car: 2017 Corvette, 2018 Focus ST, 1993 240sx truck KA Turbo.
Location: Merrimack, NH

Post

Speaking of nifty products, I ended up using a Pittsburgh Tool "square drive socket cap", or as I like to call it "square drive to hex adaptor" tonight in a tight spot to get my coolant line tightened up. If anyone is wondering, its Pittsburgh part number 67011. $3.99 for the set from Harbor Freight, or $14.00 from the thieves at Amazon. I really wish all sockets had a hex-backing to them like spark plug sockets have.
Socket with adapter.jpg
Because everything is SO tight down there, the actual process of installation is important, and I actually have to leave my coolant lines loose during installation to allow for some bump and flex while everything is getting oriented. Because of that, I need to go in and tighten them up after the manifold is secured to the head. The coolant line on the block side is particularly tight with my shallow socket (which, admittedly could be even more shallow). So I used the socket cap mabobber to get a flex head ratchet wrench on there to tighten it up.
Socket setup for coolant lines.JPG
Before tightening it all down, I verified my latest round of motor mount grinding was sufficient. Looks good to me.
Ground Motor Mount.jpg
After confirming that, and the correct placement of my coolant and oil supply line (finally), I put all the manifold nuts on and cut the oil return line to length and mounted it.
Finished oil line on turbo.JPG
Hopefully that's the end of that drama.
Side note- Tomei ships their "Titanium" exhaust wrap with their manifold and claims its perfectly safe to touch without gloves on and such. Normally I'd say they are probably correct, but after handling it so much, its resulted in some minor fraying and then the familiar fiberglass style itch after handling it, so be careful.
Tomorrow I should be able to cut some new coolant soft lines to hook up to the engine, install the O2 sensor, and test fire this thing and burn off all the fingerprints I left all over it :)

User avatar
Lobo240sx
Posts: 779
Joined: Wed Dec 01, 2010 7:39 am
Car: 1991 Nissan 240sx Coupe SR2.35DET Redtop Build
Location: Austin, Texas USA

Post

Hey there nice build. Did you cut the hatch or did you buy it that way? Seems like a similar car may have been floating around for some time now.

One of my buddy's chopped his hatch then it went North west somewhere. I may have been in your car lol. ;)

User avatar
PapaSmurf2k3
Site Admin
Posts: 23998
Joined: Thu Nov 21, 2002 3:20 pm
Car: 2017 Corvette, 2018 Focus ST, 1993 240sx truck KA Turbo.
Location: Merrimack, NH

Post

Lobo240sx wrote:
Tue Dec 29, 2020 2:11 pm
Hey there nice build. Did you cut the hatch or did you buy it that way? Seems like a similar car may have been floating around for some time now.

One of my buddy's chopped his hatch then it went North west somewhere. I may have been in your car lol. ;)
I bought this car as a running but non driving stock 240. I drove it back to Mississippi from Florida with blown struts and a very sketchy clutch & brakes :chuckle:
I had another 240 at the time, so this one was scheduled to be a truck from the beginning. I pulled the hatch and cut the C-pillars back in 2014 or so, put in a roll bar and steel sub structure for chassis rigidity, then a composite deck for the bed. Not many people have been in this vehicle after the truck transformation. Maybe a dozen or so.

User avatar
PapaSmurf2k3
Site Admin
Posts: 23998
Joined: Thu Nov 21, 2002 3:20 pm
Car: 2017 Corvette, 2018 Focus ST, 1993 240sx truck KA Turbo.
Location: Merrimack, NH

Post

Ground control to Major Tom,
Commencing countdown engines on
Check ignition and may God's love be with you!

I got the soft lines cut and hooked up, old exhaust mid section removed, downpipe and narrowband O2 installed.
I ordered a downpipe gasket with the ISR downpipe because it was unclear if it came with one or not. It showed up with a nut and bolt pack, along with the 2 gaskets as part of the kit. The 2 additional gaskets I ordered (also ISR brand) also came in. Curiously, the gaskets were different. The one that came in the bolt pack had some stickers on it so I tried to use the stand-alone one I ordered first. Unfortunately the bolt/stud holes on that one were undersized (defect?), but the one with the stickers on it were correct... so I peeled the stickers off and used it. Nothing is ever straightforward haha.
Speaking of nothing being straightforward, I removed the wideband O2 from the mid section and checked it against the new sensor I ordered. Unfortunately it looks like the incorrect part was in the correctly labeled box. Bosch 17014 is the older style with larger plug, and 17025 is the smaller style, which I'm pretty sure I got.
O2 sensor mismatch.jpg
No matter... I didn't need it to start the car and let it get to operating temp anyway... its just for my interior gauge.
Manifold smoke.JPG
I got the temps up til a good manifold smoke was rolling (burning off the new) just so I could check for leaks. So far so good! Also, no blue smoke out the tailpipe! :dblthumb:

There's still the matter of the intake filter, which is waiting on a coupler I ordered on the 9th and still hasn't been delivered (thanks USPS!), and the charge piping. I just need a 2" 45 degree coupler and I think I can make the rest work.

User avatar
float_6969
Moderator
Posts: 19853
Joined: Mon Aug 26, 2002 1:55 pm
Car: CA18DET swapped 1995 Nissan 240sx (too many mods to list)
2015 SV Leaf w/QC & Bose (daily)
Location: Topeka, Kansas
Contact:

Post

It's alive!!!

User avatar
PapaSmurf2k3
Site Admin
Posts: 23998
Joined: Thu Nov 21, 2002 3:20 pm
Car: 2017 Corvette, 2018 Focus ST, 1993 240sx truck KA Turbo.
Location: Merrimack, NH

Post

Alright, so I went back to Advance after the O2 mishap and they didn't believe me the wrong part was in the box, but they were cool and ordered another one for early AM delivery anyway. They were amazed when they pulled a different O2 sensor out of the new box with the same part number heh. Score one for me.
I ordered more couplers and a new exhaust flange instead of trying to re-purpose my old one. The flange should be here tomorrow so I figured I'd go and get the new flex pipe finished up on the downpipe side.
For some reason I thought this would be easy and straightforward... except it literally was not straight, or forward (?). Anyway, The downpipe and the catback aren't directly in line, so I had to cut a wedge in the flex pipe section for angle adjustment.
Exhaust angle mod.JPG
Cutting flex pipe is kindof a b****. You don't really want to clamp too hard on the flex section, and the parts fore and aft of it aren't long enough to clamp on the same side you cut on. Originally I had the other side clamped, but was getting too much wobble and movement during my cuts. I eventually just threw a welding glove around it and gently but firmly clamped on the flex section. Came out really good.
Cut flex pipe.jpg
I brought it back under the car and mocked it up with the new downpipe side flange (marked with the downpipe flange for alignment purposes).
Flex pipe mock up.JPG
Not bad for completely eyeballing it. No further adjustments needed. So much for measure twice and cut once hehe.
I marked the pipe on the flange for alignment purposes, unbolted the flange, brought it all over to the vise/welder, and put 3 tacks on the outside. I re-installed it in the car to make sure I didn't do any bonehead stuff (it happens) and everything was still good. I marked up where I need to put the O2 bung and removed the assembly again.
I didn't grab any pics, but I then cleaned the surfaces and welded the pipe 360 degrees around the inside. After that I located my O2 bung and drilled a bigass hole in the pipe I just welded up haha. Unfortunately its not big enough (I don't have a 1" drill apparently), so I'm going to turn down the O2 bung on the lathe a little at work tomorrow.
Once that's done and welded in, I need to cut the other side of the pipe to size and install my 3" to 2.5" reducer, weld it on, and then weld the new flange on.
Its cold again, and I guess my slip resistant shoes aren't well insulated because my feet were stupid frozen after only a few hours in the shop. I came in and warmed them in the oven while drinking hot chocolate from Jesda's Christmas present.
Hot Chocolate.JPG
Couplers are supposed to be in Thursday, but we'll see. USPS hasn't been kind to me.

User avatar
Jesda
Posts: 39664
Joined: Mon May 05, 2003 1:50 pm
Location: STL, DTW
Contact:

Post

Just here for the pasta thx


Return to “240sx General Discussion”