
I have typed this in the Google search at least a 100 times and the only thing I have seen is the cheap looking eBay alteza knock offs. So, enough looking I am going to do this myself. I have 200 Bright White LEDS, an Extra set of Tails from the U-Pull-It, I am ready to do this!
First things First: Extra set of taillights. (why have just one when you can have two)
Now time to cook the lights, literally, throw those things in the oven at about 200 Degrees and wait 10 minuets. Once warm take a screw driver and start removing the lenses from the assemblies from the outside in. Sorry I don't have any pictures of this step yet.
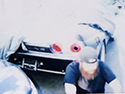
Once done you have this Elmo was helping in this step.
Once apart I took a few LEDS and shined them at the lenses to get a feel of how it would look. I hated it. The lenses are not set up for LED in any way, but that is okay, nothing a little Sand paper cant fix. I took 80 grit Green sandpaper to the inside of the lenses to get the molded divots off. It will take some work, but it is turning out real nice. I will polish them after sanding them down with 200, 400, 600 1000wet. Divots
Sanded Divots
Once done the lenses will be tinted Red and completely see through.
I like simple, so I think What I will do is use the clear diffusers to hold the LEDS into place by Drilling or Laser Cutting the LED pattern into them, These are the clear diffusers:
This is the first pattern I have Started for the Lights, any suggestions in this area are welcome, with a picture of course.
That is all I have for now, more to come once the LEDS show up.
Modified by YR240 at 12:09 PM 9/8/2009
S14 LED Taillight Conversion
-
AIRFORCEONE
- Posts: 151
- Joined: Wed Feb 14, 2007 9:50 am
- Car: 95 240sx
Re: S14 LED Taillight Conversion (YR240)
This is great, I was about to start my own led tail light project. Except I see you're doing circles, whereas I'm going to have connected proto boards with rows of leds. Just a quick suggestion, make sure your leds are around or above 15000mcd to provide sufficient lighting even in daytime. Keep this thread updated because I am interested in what you will do!
Re: S14 LED Taillight Conversion (AIRFORCEONE)
Can't wait to see some finished pictures to see how these turn out
Re: S14 LED Taillight Conversion (goldfish)
^ you do realize that mcd rating means nothing basically and its just for marketing. What you want to look for is amperage and luminous output to give you an idea of how bright an led will be.
-
duece.four.oh.sx

- Posts: 357
- Joined: Thu Aug 10, 2006 8:10 pm
- Car: 1965 chevy corvair turbo
Re: S14 LED Taillight Conversion (Redevil)
this is going to be interesting no doubt about that.......
-
SketchyRollin564

- Posts: 3907
- Joined: Sat Mar 24, 2007 4:06 pm
- Car: SR hatchback in the werks
Re: S14 LED Taillight Conversion (duece.four.oh.sx)
thats badass! ive been waiting for sombody to do this on an s14
only thing is i woulda done rows instead of a circle, i dont think the circle will look right on that tail light design
only thing is i woulda done rows instead of a circle, i dont think the circle will look right on that tail light design
-
MAXIMUS Nismo

- Posts: 1535
- Joined: Tue Aug 20, 2002 7:23 am
- Car: 95 240sx SE
- Contact:
This is awsome. I've seen other people with LED tails and I've been planning to do one myself. Issue is, I cannot find any spare tails for cheap around here.
I've been browsing a few conversion websites and reading up on the process.
Make sure to take tons of pics. This WILL become a great sticky/tutorial when you are done.
btw, I'm subscribing to this.
I've been browsing a few conversion websites and reading up on the process.
Make sure to take tons of pics. This WILL become a great sticky/tutorial when you are done.
btw, I'm subscribing to this.

-
DrifterXRPS13

- Posts: 12391
- Joined: Fri Sep 19, 2003 4:14 am
- Car: 1993 Acura Integra LS, 1998 Nissan 240SX SE 5sp. KA-T,2004 Honda CBR 600RR, 2005 Suzuki GSX-R 600, 2013 Harley Davidson Iron 883, 2014 BMW S1000RR
- Location: Vernon Hills, IL
- Contact:
-
numbnuts240

- Posts: 32380
- Joined: Sat Jul 01, 2006 4:17 pm
- Car: 1999 Ford Exploder 4-door 5spd
1974 Datsun Fairlady-Z 250GT
2011 Ford Focus
2010 Mazda 3 - Location: TJ
Re: (DrifterXRPS13)
actually, they came with the car. i don't know if that makes it better or worse
-
numbnuts240
- Posts: 32380
- Joined: Sat Jul 01, 2006 4:17 pm
- Car: 1999 Ford Exploder 4-door 5spd
1974 Datsun Fairlady-Z 250GT
2011 Ford Focus
2010 Mazda 3 - Location: TJ
Re: FN-QR (Dittoz7)
ever wonder why that only happens when i'm in the car?
-
DrifterXRPS13
- Posts: 12391
- Joined: Fri Sep 19, 2003 4:14 am
- Car: 1993 Acura Integra LS, 1998 Nissan 240SX SE 5sp. KA-T,2004 Honda CBR 600RR, 2005 Suzuki GSX-R 600, 2013 Harley Davidson Iron 883, 2014 BMW S1000RR
- Location: Vernon Hills, IL
- Contact:
-
DrifterXRPS13
- Posts: 12391
- Joined: Fri Sep 19, 2003 4:14 am
- Car: 1993 Acura Integra LS, 1998 Nissan 240SX SE 5sp. KA-T,2004 Honda CBR 600RR, 2005 Suzuki GSX-R 600, 2013 Harley Davidson Iron 883, 2014 BMW S1000RR
- Location: Vernon Hills, IL
- Contact:
Re: S14 LED Taillight Conversion (YR240)
I have 15000 MCD 40Deg White LEDs that will be going in the small holes and 10mm 120000MCD 40Deg Bright White LEDS that are going in the bigger holes.
By the way, 120000 MCD 40DEG = 45.7 Lumens15000MCD 40deg = 5.7 Lumens
There will be atleast 50 5.7 Lumen Bulbs and 15 46lumen bulbs in each section of the tails. If its not bright enough, I have some Cree superflux to supplement with.
Here is a Layout of the Lights, Red= Running Lights Yellow= Brakes
Re: S14 LED Taillight Conversion (YR240)
looks like you`re going balls out with this!
gotta give you credit. i hope it looks good and clean. ill be waiting for finished product pictures
gotta give you credit. i hope it looks good and clean. ill be waiting for finished product pictures

Re: S14 LED Taillight Conversion (YR240)
The problem with white LED's shining through a red lens is that it will look pink.YR240 wrote:I have 15000 MCD 40Deg White LEDs that will be going in the small holes and 10mm 120000MCD 40Deg Bright White LEDS that are going in the bigger holes.
Re: S14 LED Taillight Conversion (Dammitboy)
I have tried Red, Blue, Ultraviolet, Yellow and White and am happiest with white. Red does not show up very well, something about the attenuation of the Red lenses and bulbs, the rest of the colors excluding Ultraviolet are extremely dim coming trough. Ultraviolet is by far the brightest, and pinkest of the choices. I didn't notice much pink with the white lights, the original incandescent bulb emits soft white, which could be considered 30:70 Yellow:White at 32 Lumens running/ 800Lumens breaking.
Re: S14 LED Taillight Conversion (YR240)
Most oem lighting now uses an LED called Lumileds Superflux.
Try Red/Orange superflux LED's. Much brighter then plain red superflux.
Modified by Dammitboy at 12:54 PM 3/6/2009
Try Red/Orange superflux LED's. Much brighter then plain red superflux.
Modified by Dammitboy at 12:54 PM 3/6/2009
Re: S14 LED Taillight Conversion (YR240)
Trust us. You will want to use the Lumileds Red/Orange. I've tried all different kinds too but in the end I only use those. Both Dammitboy and I have done LED conversions and we know what we're talking about. I can't speak for Dammitboy but I know that my tail lights using the Lumileds are definitely brighter than the stock bulbs. Of course this is your project and if you just prefer the color and brightness of the LEDs you have now go for it. I just don't want you to end up wasting as much money as I did trying all of the different types of LEDs before finally getting the Lumileds.
-
C3Sierra_S2000
- Posts: 315
- Joined: Fri Sep 22, 2006 6:31 pm
- Car: 1997 240SX SE LS swapped
- Contact:
Re: S14 LED Taillight Conversion (Dammitboy)
Why use seperate LEDs for brake and run? Why not fill it with the larger brighter LEDs and run them at half voltage for run lights and full voltage for brakes and turn. I have this exact same setup on my Harley and it works great. The modules to do this are already built and are fairly cheap.
-
AIRFORCEONE
- Posts: 151
- Joined: Wed Feb 14, 2007 9:50 am
- Car: 95 240sx
Re: S14 LED Taillight Conversion (Dammitboy)
Yeah superflux are much nicer than regular leds but they are also more expensive. You have to remember we are 240 ownersDammitboy wrote:Most oem lighting now uses an LED called Lumileds Superflux.
Try Red/Orange superflux LED's. Much brighter then plain red superflux.
Modified by Dammitboy at 12:54 PM 3/6/2009
Re: S14 LED Taillight Conversion (YR240)
Okay, I laser Cut just a piece of ABS plastic to see what it would look like and installed three very low powered LEDS.
Lights on
Does anyone want to post up some ideas for Light Patters other than straight lines? I may just use it.
Lights on
Does anyone want to post up some ideas for Light Patters other than straight lines? I may just use it.
-
AIRFORCEONE
- Posts: 151
- Joined: Wed Feb 14, 2007 9:50 am
- Car: 95 240sx
Re: S14 LED Taillight Conversion (YR240)
perhaps maybe diagonal lines? similar to this:
You'd have to space them out far enough to get the diagonal look instead of maybe the line look if they are too close together.
You'd have to space them out far enough to get the diagonal look instead of maybe the line look if they are too close together.
Re: S14 LED Taillight Conversion (YR240)
dude hella yea. ive been waiting for this forever. you are truly and inspiration. thanks.
now finish it.
now finish it.

Re: S14 LED Taillight Conversion (Joshkl)
is there not an easier way to do this?other than buying the ebay one
-
Xdisaster240sX
- Posts: 3989
- Joined: Wed Oct 25, 2006 6:57 pm
- Car: S13 Hatch, R32 GTS4
- Location: Baltimore
Re: S14 LED Taillight Conversion (slammednismo3)
^ WOW...Slammed, you really need to make your sig ALOT smaller. Holy s***!
Re: S14 LED Taillight Conversion (YR240)
Sorry I have been taking so long, Work, training, excuse #3, excuse #4...etc, has kept me busy, but I finally managed to get the lenses polished and the final layout of the lights. Hopefully in the next 3 weeks or so I will have time to wire the lights up. I switched from the basic LEDs to some nice bright Highflux Lumileds that are red/orange and Amber ones for the turn signals. Thanks for the suggestion.
Blurry, Thank you cellphone. Nice and shiny. I still have some edge clean up to do.
Led Reflector and arrangement
Suggestion if you ever attempt to polish the bumpies off a lenses, don't push to hard, you will crack them like I did. Its not to bad but if I was a perfectionist I would be mad. This is the first attempt, next time.