Project S13bay

General discussion forum about the 240sx, and a great place to introduce yourself to the board!
red24d
Posts: 47
Joined: Mon Aug 02, 2010 2:48 pm
Car: 1990 240sx Hatch
Daily: 2006 Nissan Titan
Location: Watkinsville, GA

Post

As promised, more pictures. I picked up a couple more pieces for the body this weekend. The first piece was a dirty, but good back hatch with full glass, and the inner fender well piece I need to replace the rusted one. I will attempt to start the welding myself, but if that fails then I'll pay someone to do it. I'm also considering buying the tools for the build on ebay to stress that this project is 100% ebay products. I bought a valve spring compressor kit on ebay yesterday for when I start the tear down and build of the future engine selection. Here's a picture of it:

Image

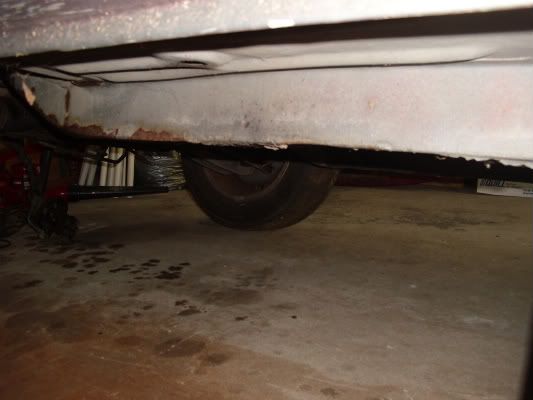
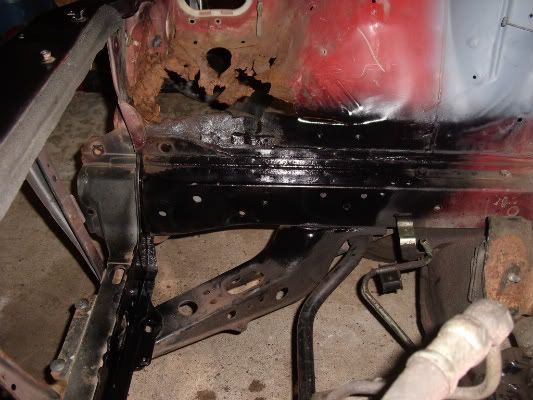
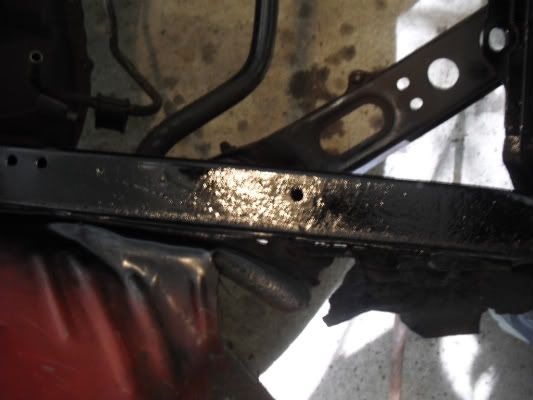
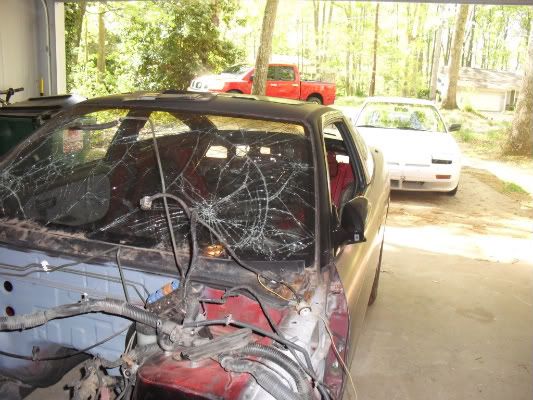
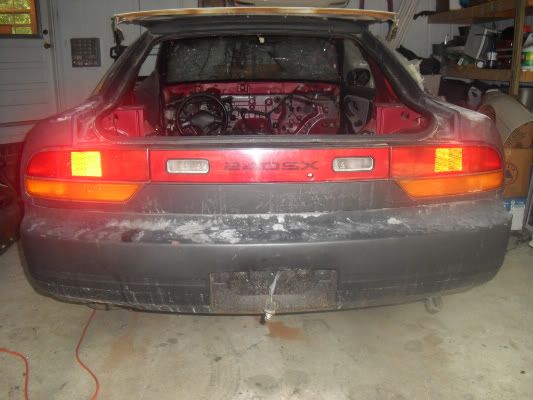
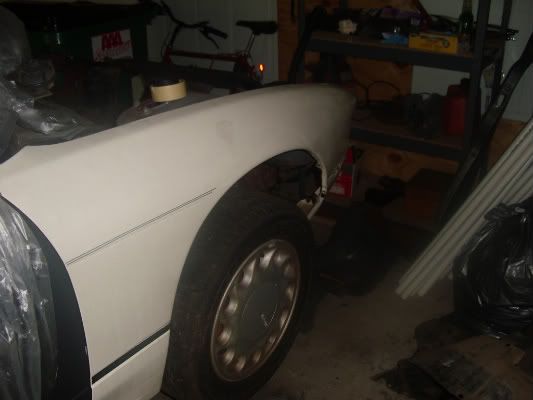
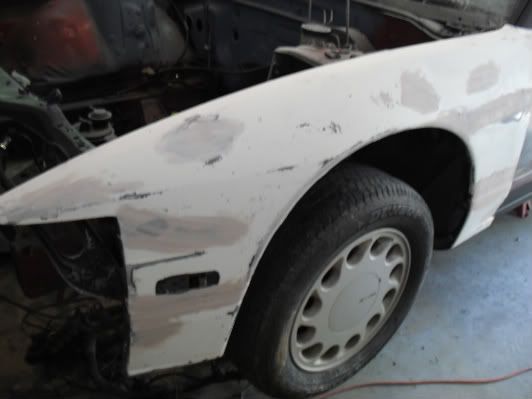
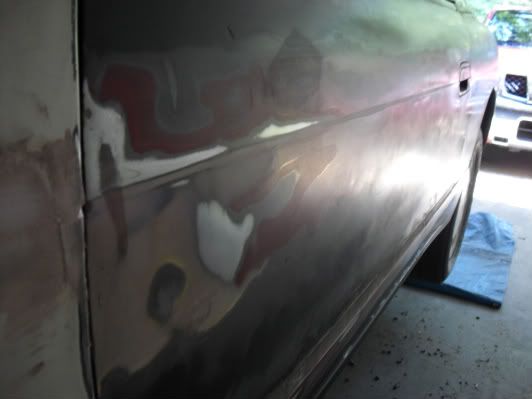
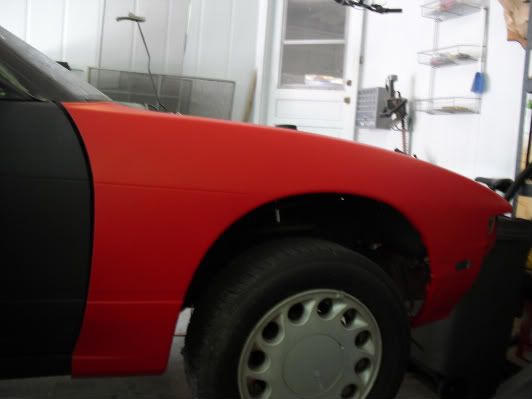
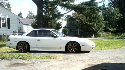
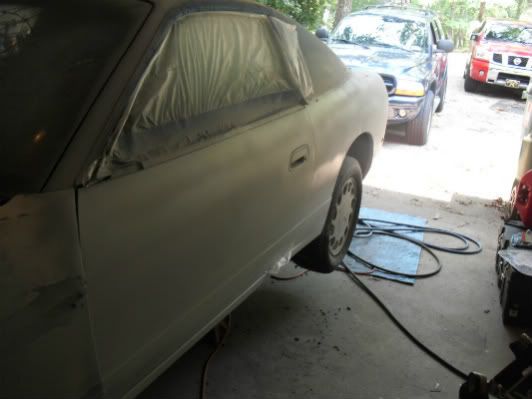
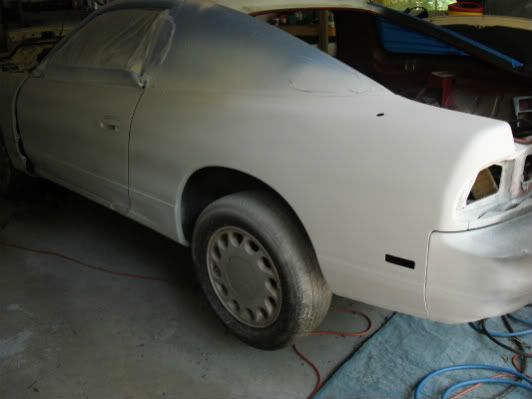
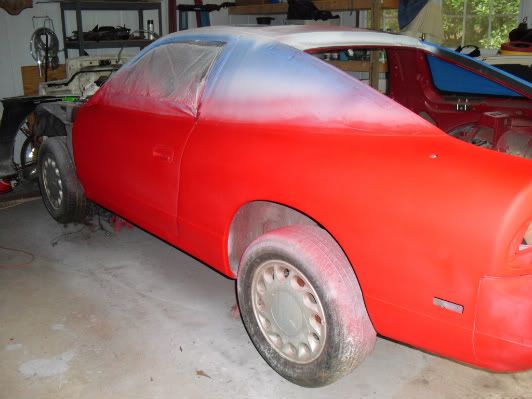
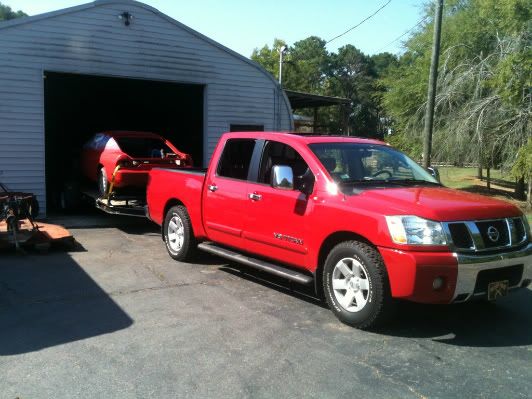
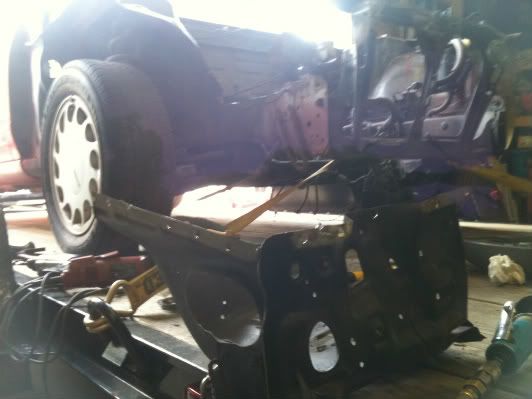
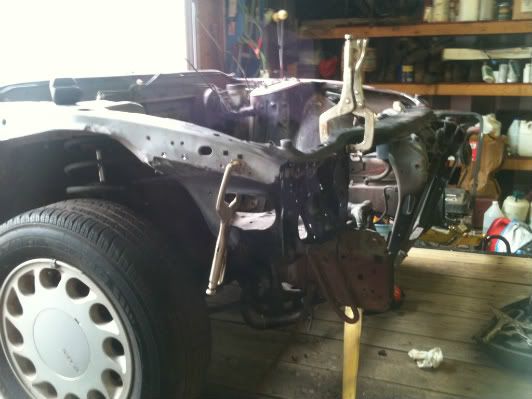
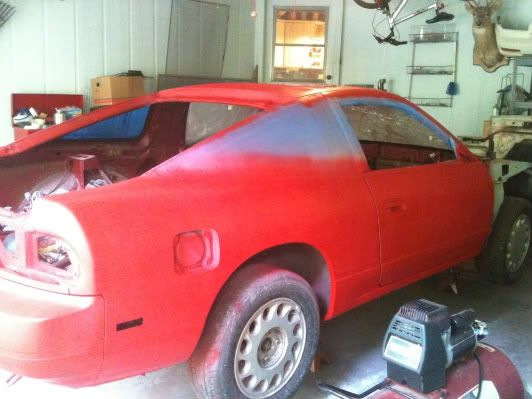
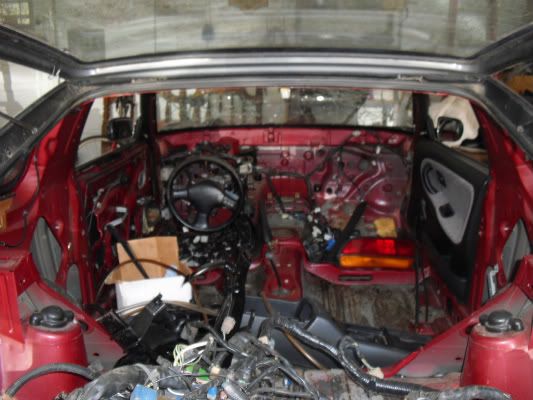
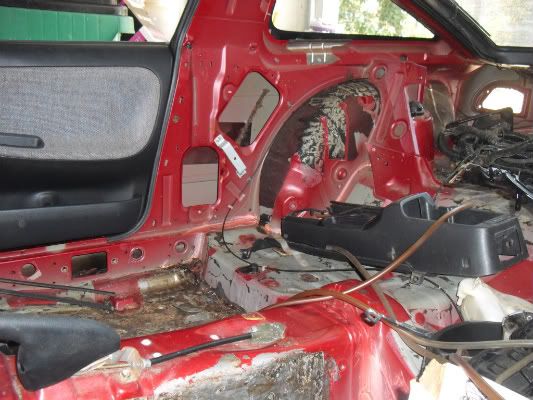
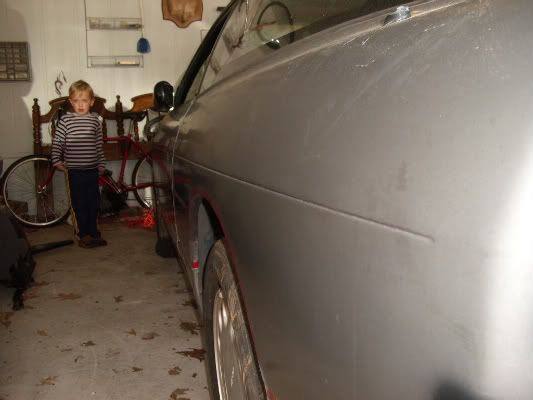
And for the more recent pics. I took quite a few but with a better camera. If I need to resize them for the forum by all means please let me know.

Image
Image
Image
Image
Image
Image
Image
Image
Image
Image
Image
Image
Image
Image
Image
Image

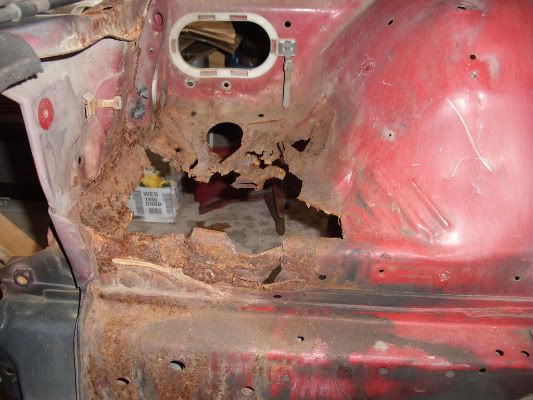
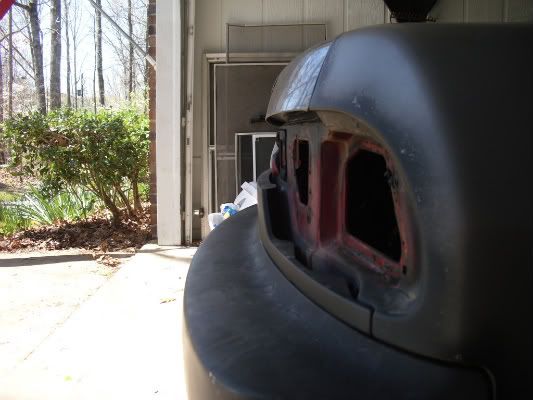
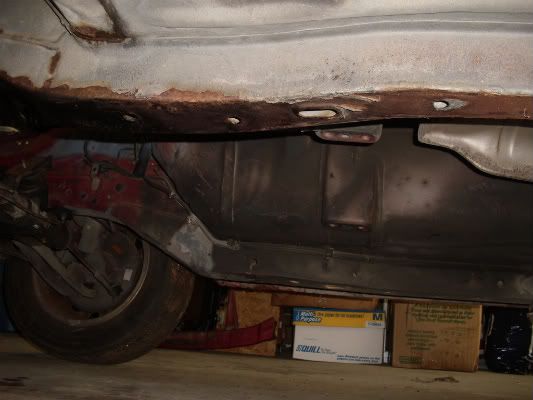
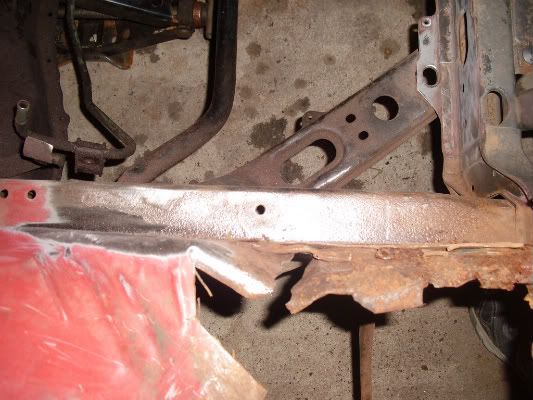
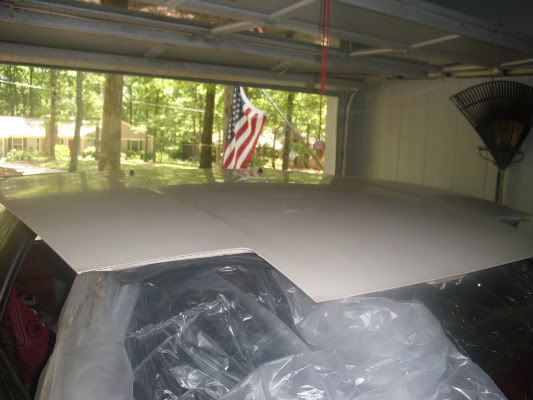
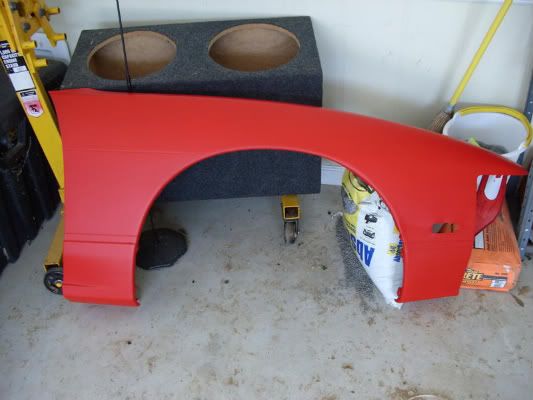
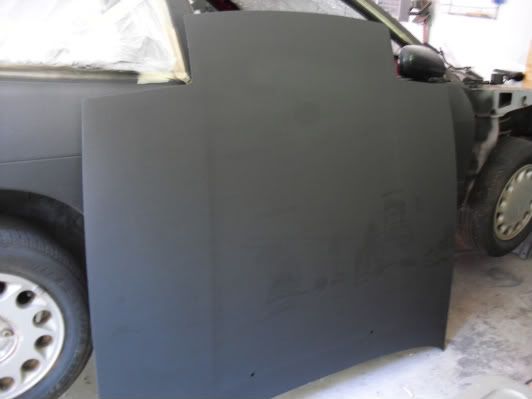
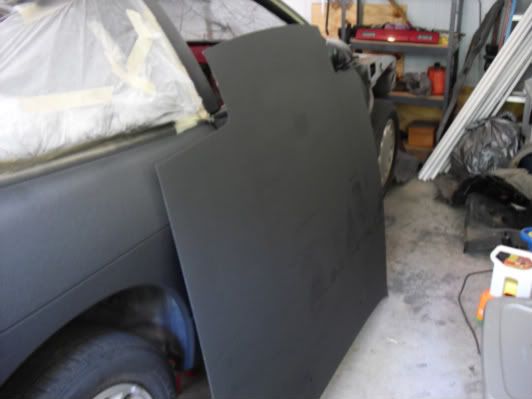
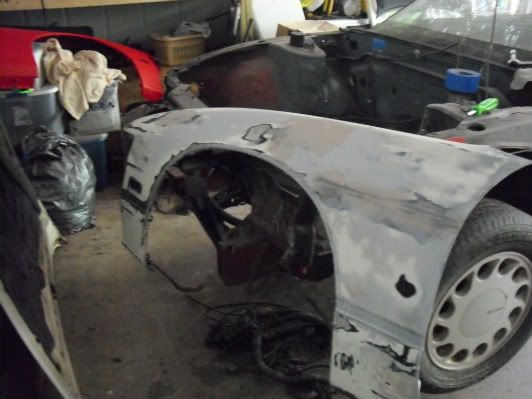
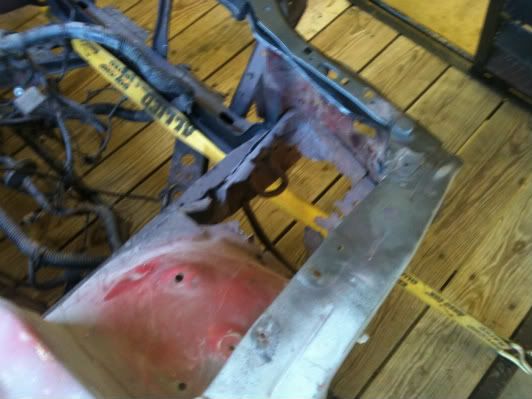
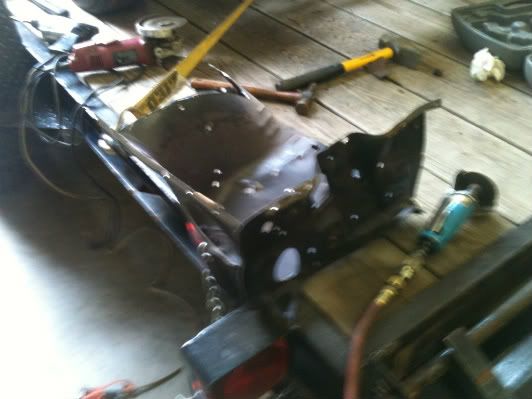
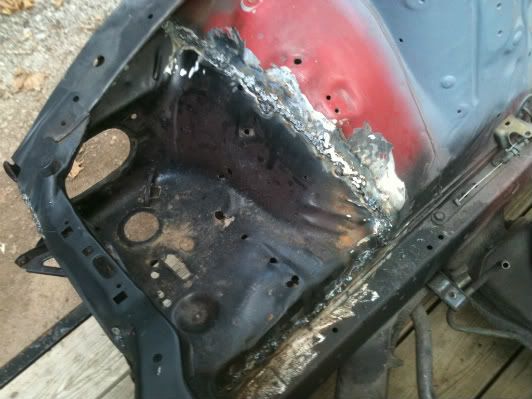
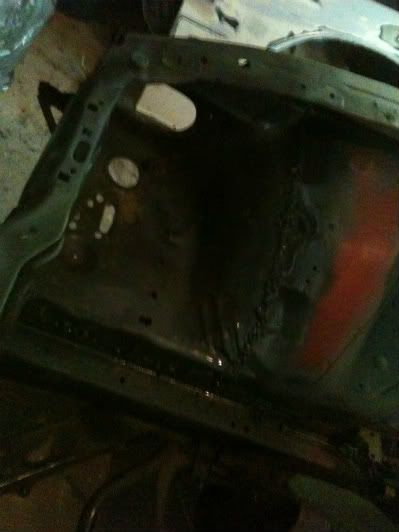
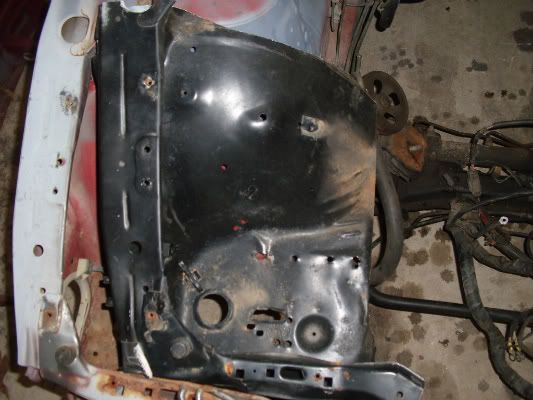
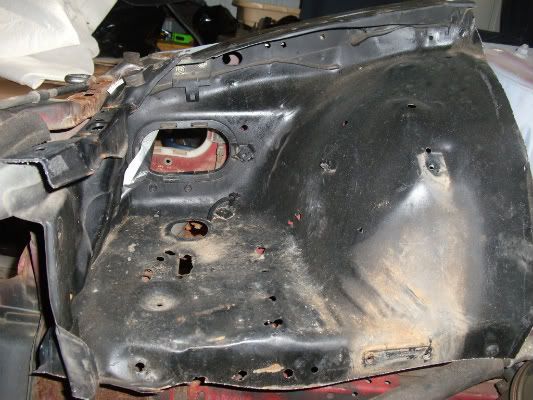
And the replacement part for the inner fender:
Image
Image


User avatar
moulton712
Posts: 762
Joined: Sun Sep 09, 2007 8:43 pm
Car: coupe, hatch, both s13s

Post

most of my parts were sourced through ebay. even my motor. but then again i built half the crap in my car too

red24d
Posts: 47
Joined: Mon Aug 02, 2010 2:48 pm
Car: 1990 240sx Hatch
Daily: 2006 Nissan Titan
Location: Watkinsville, GA

Post

Yeah? You should write up a review that I can link to from my blog for anyone curious about parts you may have used or currently use. If ya get a chance, email it to me at [email protected], and I'll post it up giving you all the credit. JLMK

User avatar
breadbox
Posts: 8549
Joined: Tue Oct 17, 2006 4:09 pm
Car: 89 Nissan 240SX
89 Koop
84 720 4x4KC
Location: Va Bch

Post

If you have a small welder, fixing those few spots of rust should be easy. If I were you I'd just strip the rest of the car and start fixing rust and getting the Chassis primed and painted.

red24d
Posts: 47
Joined: Mon Aug 02, 2010 2:48 pm
Car: 1990 240sx Hatch
Daily: 2006 Nissan Titan
Location: Watkinsville, GA

Post

I'm actually looking into that. I've read some stories about people taking some shi* pipe, glue and measuring them together and laying out plastic around the whole thing, creating a small paint booth. I was thinking prevention, at the minimum was a good idea, to keep the rust from accumulating any further. I may go on ebay later this week and pick up a small electric hand held sander as well to make the process a bit quicker. If you have any suggestions on a certain models of that tool available there, please let me know. After all, this build is suppose to be user assisted! Thanks guy!

User avatar
breadbox
Posts: 8549
Joined: Tue Oct 17, 2006 4:09 pm
Car: 89 Nissan 240SX
89 Koop
84 720 4x4KC
Location: Va Bch

Post

I like my wire wheel on things like this. to get it down to bare metal in the bay.

red24d
Posts: 47
Joined: Mon Aug 02, 2010 2:48 pm
Car: 1990 240sx Hatch
Daily: 2006 Nissan Titan
Location: Watkinsville, GA

Post

breadbox wrote:I like my wire wheel on things like this. to get it down to bare metal in the bay.
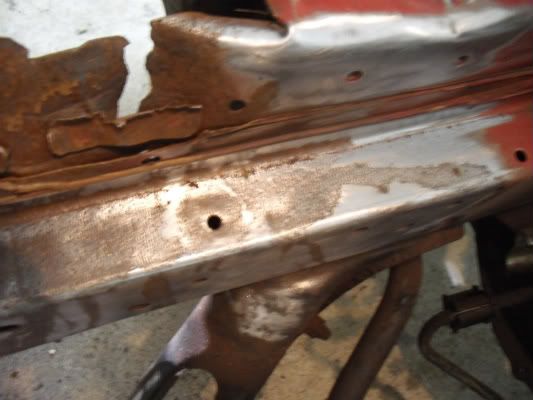
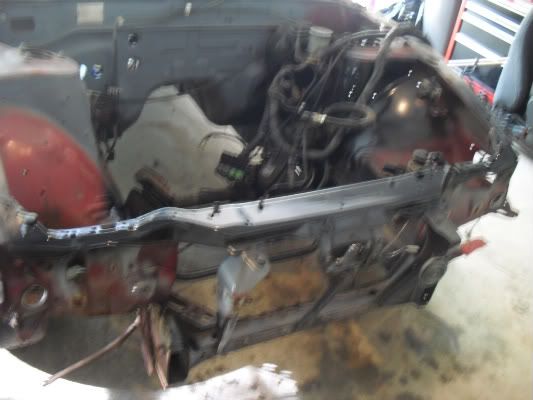
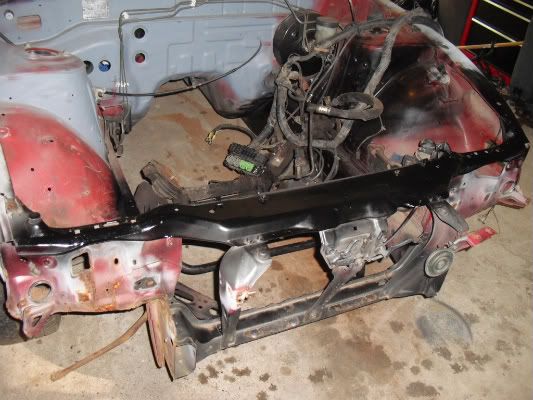
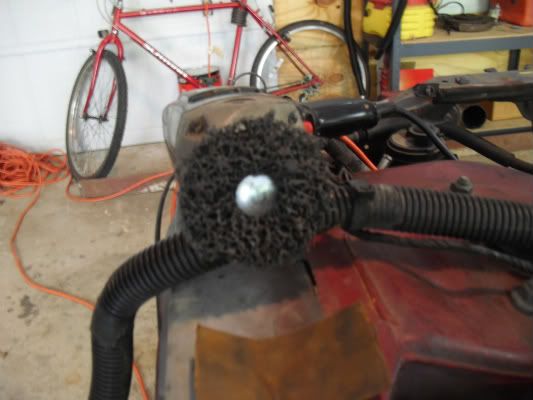
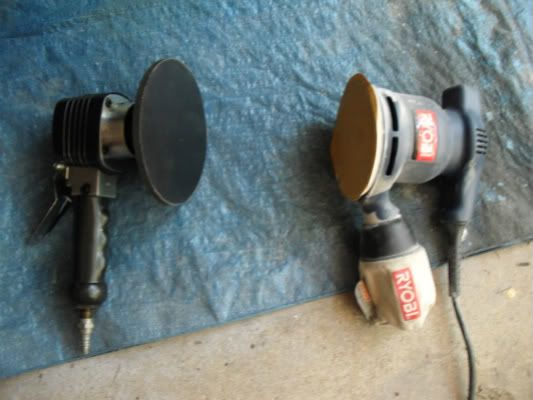
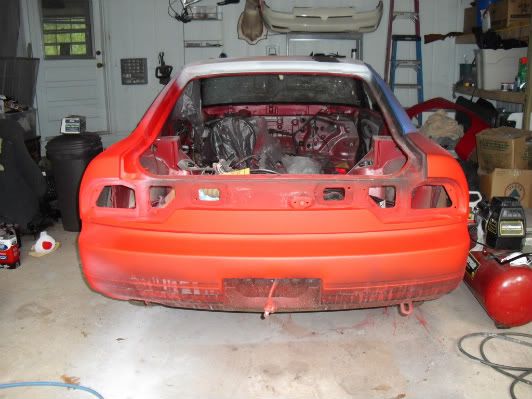
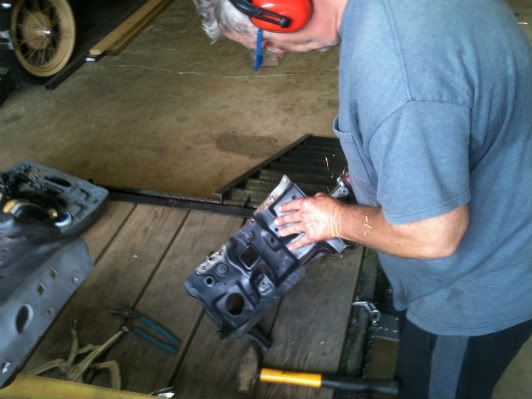
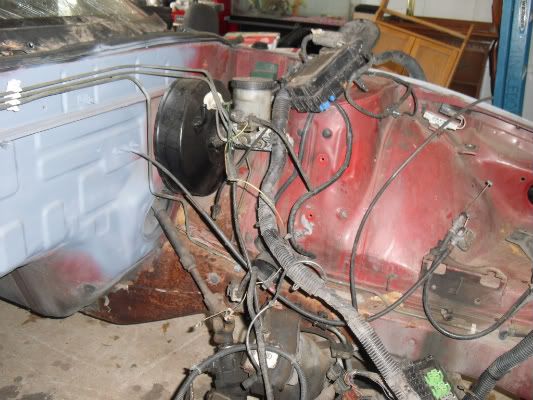
I like that idea. I've been looking at dual action sanders but then again that's for the bigger pieces and won't really work well for those hard to reach spots. I've posted yet again on the blog, polls for the first votes are in. Engine platform will be a KA24DE, suspension bushings have been decided on as well. See the blog for more on that.

Also went out and bought some PVC pipe at Lowe's the other day and a large roll of plastic to use as a make shift paint booth. spent hours and hours cleaning my brothers garage to make room for it as well. I haven't set it up just yet, but when I do I'll post up the pics of that as well. Also went out and got some 220 and 400 grit sand paper and some spray can primer to start working on the rust spots, just as suggested here before. Check out the new posting for any other details. I'll keep ya all posted!

User avatar
xX RB Xx
Posts: 3719
Joined: Wed Jun 20, 2007 3:15 pm
Car: SE3P, FC3S, FC3C.
Location: Japan

Post

:inout:

red24d
Posts: 47
Joined: Mon Aug 02, 2010 2:48 pm
Car: 1990 240sx Hatch
Daily: 2006 Nissan Titan
Location: Watkinsville, GA

Post

Blog is updated at s13bay.blogspot.com. And if you don't want to go there, here is a summary. I started doing some sanding on my days off and snapped some pictures of it as I went along. I thought I got a fair amount of the surface rust taken care of until I lifted the car to prime the under portion of the frame and caught a glimpse of what was waiting for more attention. I've decided to take some good advice from suggestions here and make a purchase for a soft wire brush connection to my drill, it will definitely save me some time, and a sore shoulder. Updated pictures follow:

Image
Image
Image
Image
Image
Image
Image
Image
Image
Image

red24d
Posts: 47
Joined: Mon Aug 02, 2010 2:48 pm
Car: 1990 240sx Hatch
Daily: 2006 Nissan Titan
Location: Watkinsville, GA

Post

Updated the blog at s13bay.blogspot.com again. I have purchased a rust and paint removal wheel to attach to my drill. Hopefully this will do the trick and help the success of getting that rust off and making improvements on preventing more. I also did a bit of research on rust removal to see what kind of speedy ways to get it done would be, of course, my biggest factor was doing less manual labor, but what the hell right? I researched and learned electrolysis and how that would work. I was pleased at how little work it would take, until I realized I needed a very BIG bath for the chassis, and that would require a lot more money that I would be very hesitant to spend on something I would likely use only once. So, that idea too a back seat, but is still a likely idea for sub-frames, smaller moving components, and what not. Then I looked into products like the one I am now stuck on. Safest Rust Removal. The website shows quite a bit of change in the item being worked on, uses a much smaller bath to catch run off and recirculate it through the shower by way of a sump pump that could be bought pretty cheap, and best of all, the most I have to do is move the hose to the next treated area! YAY! If the rust removal (or sanding) wheel doesn't give me the speed and quality effect that I'm looking for, I may just buy this stuff.

red24d
Posts: 47
Joined: Mon Aug 02, 2010 2:48 pm
Car: 1990 240sx Hatch
Daily: 2006 Nissan Titan
Location: Watkinsville, GA

Post

Updated the blog again, see above or first post for site. Here's what's going on. So I decided to let me sleep schedule get out of whack and headed over to work on the car again today. I took that new $5 drill attachment with me to decide if it will make a big enough difference in both the amount of time to get work done, and the ease of the work. Thank goodness the drill had a locking function on the trigger, because the amount of force to get that thing held down would have made the job that much more irritating. I decided to work on the highly rusted battery tray area and frame rail under it for two reasons. I wanted to see if the section there had any ability to be salvaged, and I wanted to clear off the rust and paint from the areas that would need to be clean for welding if it could not be salvaged. I was more than pleased with the results, and very pleased with the ease and speed that it got done. Here's some pictures of the work.

Image
Image
Image
Image
Image
Image
Image
Image
Image
Image
Image
Image

And for good measure, wanted to capture my truck and my brothers coupe in the background..lol!

Image

As you can see in the pictures, the pitting from the rust was very extensive, but I believe that now that it is all cleaned up and primed, it still has quite a bit of stability and strength to be good to go. You can also see I did some work on the core support/radiator housing. It cleaned up real nice and looks good as well. I don't know if any of these pictures or previous pictures show it well enough or not, but I ended up using a sledge hammer on the forward facing portion of the headlight area of the core support. It came out looking good, but the rust is still so extensive coming off the battery tray area into the forward facing spot, that I believe I will have to cut it out and use my spare part. You can also see the amount of wear that the wheel took while doing just this small area. Looks like I will be in need of more of them in the future as I will be using this technique to do all the prepping for paint both inside and out. I hope to get over there again in the morning after work, and if so, more pictures will follow.

red24d
Posts: 47
Joined: Mon Aug 02, 2010 2:48 pm
Car: 1990 240sx Hatch
Daily: 2006 Nissan Titan
Location: Watkinsville, GA

Post

I figured since the only new pictures of the work were all Iphone pics since I kept forgetting my camera, I'd just put them here and not the blog. I got a few chances to go back and get some more work done. I ended up sanding down the majority of the driver side frame that was rusted and primed that up. I also decided to sand down the body to see if anything else had previous bondo kind of material on it that shops would use to repair accident damage. Nothing found over the entire body, no weld lines, no bondo. After that I ended up smoothing out the body panels and primed those as well. I'm looking at getting another donor car for the engine and transmission but also a new hatch if possible but not needed so I didn't touch the hatch at all since it has small dents above the rear brake light. Next on my list is to complete the passenger side frame rust and prime that down as well, then have my new inner fender part welded on and sand and prime the whole engine bay after dropping the subframes. I'll give it about two weeks or so before I get that done, then move on to the Energy Suspension subframe bushing install.

Image
Image
Image
Image
Image
Image
Image
Image
Image
Image
Image
Image
Image
Image

red24d
Posts: 47
Joined: Mon Aug 02, 2010 2:48 pm
Car: 1990 240sx Hatch
Daily: 2006 Nissan Titan
Location: Watkinsville, GA

Post

Blog updated with a more detailed idea of progress, see s13bay.blogspot.com if you wish to read more. I try to save you all here from having to read too friggin much since I know personally that the pictures matter most! LOL!

Bought a 1990 hatch with a badly blown head gasket. I ended up swapping the hatch I got earlier with the hatch from this car since the other one had a good bit of dents from what I believe to be where someone stood on it and broke the third brake light. I also scored another set of good tail lights, both headlights and mounting brackets with working motors for them, a front bumper, both fenders, and a nearly new brake master cylinder. The brake booster looked brand new too, but I didn't have the patience to take the dash items out of the way to get to it. I went ahead and snapped some shots of what I have.

You'll notice that the car is now fully primed. The past couple of weeks I had been sanding and checking all body panels for any prior damage, i.e. any body filler anywhere. I was pleased to find NONE whatsoever. I laid down a single layer of primer to protect the metal and moved on. Still waiting for a good time to get that front fender section welded in, I don't have a car hauler trailer and they are costing too much to rent here and there to scrap all these cars I've been getting, so I'm hoping somewhere down the line I can borrow one to get it over to my friends place to weld it on. On to what you really want, here are pictures of my new pieces.

Image
Image
Image
Image
Image
Image
Image

More to follow soon as I complete the frame rust sanding, then onto the welding and simple body work on fenders and the hood.

User avatar
krash
Posts: 4836
Joined: Mon Apr 11, 2005 10:43 am
Car: 1993 Nissan 240sx Convertible
Location: Memphis, TN
Contact:

Post

body work sounds good. I was thinking you'd buy some ebay body parts though

red24d
Posts: 47
Joined: Mon Aug 02, 2010 2:48 pm
Car: 1990 240sx Hatch
Daily: 2006 Nissan Titan
Location: Watkinsville, GA

Post

I'm still debating on that and the tool issue. At first the idea was to buy only "performance" parts from ebay, but once I told my helpers (my brothers that is) about the idea with the tools, the suggested every purchase should be from ebay. The only thing that scares me for that is availability of items since I am working with a rather bare shell, when I come up needing something, I don't really want to put anything (or everything depending on the situation) on hold waiting for someone to post a part that I need to continue, like the issue I am currently having with the KADE, I haven't seen one listed other than salvage yards wanting far more than a good used engine is worth for quite some time. Still, I'm kinda weighing the option.

User avatar
breadbox
Posts: 8549
Joined: Tue Oct 17, 2006 4:09 pm
Car: 89 Nissan 240SX
89 Koop
84 720 4x4KC
Location: Va Bch

Post

I mean I don't car that the hatch or parts car didn't come from ebay. Some people are missing the point. This is a pretty in depth thread with a side goal of testing ebay products. Keep up the good work. I'd be more interested in more common upgrades, like now that you have two s13's you could compare oil relocation kits on both cars just comparing them, obviously trying not to get almost identical items at the same price but different ranges.

red24d
Posts: 47
Joined: Mon Aug 02, 2010 2:48 pm
Car: 1990 240sx Hatch
Daily: 2006 Nissan Titan
Location: Watkinsville, GA

Post

Over the past few days I have been spending a lot of time on the bodywork. The fenders and the hood I recently got all had small dents and scratches, so I went ahead and started with some Bondo. A friend of mine helped out with the sanding of the hood since he had access to a electric sander (highly useful by the way). With the sanding, Bondo and primer applied to the top side of the hood, that job only took about 2 hours, whereas sanding by hand has been taking forever. As suggested by my brother I started to fill the lines of the doors and fenders with Bondo too to create a more seamless appearance and I must admit, I like the appearance of the top line so far since I have nearly completed the entire driver side. However, the wide gap line at the bottom portion that wraps the entire car may not turn out as good as I would like, but I'll see when I get there.

Image

I have also been tossing around the idea of painting the car myself. I ended up going to Harbor Freight to price some guns and what not and came across some useful tools for the current work I'm doing. I ended up getting a metal mixer plate for the Bondo, some metal spreader blades (because the plastic ones take too friggin long to clean), a respirator mask for the painting and a can of paint that I have been very curious about. The paint is part of Dupli-Color's Paint Shop Finish line. This product has been reviewed on many automotive TV shows and has been spoken of highly. It is a lacquer based paint that comes pre-mixed, and is shown as a painting "step" type procedure. The can of primer is marked as step 1, the can of paint color step 2, the can of clear is step 3 or 4 depending on if you use the "metallic" clear first. With all the videos that I have seen and the thought of being a newbie wanting to try my hand at something new, I thought why not.

Image

project213
Posts: 142
Joined: Sun May 16, 2010 9:32 pm
Car: 1990 s13 hatchback, s13 sr20det, s15 6sp transmission.
Location: Pinellas County FL.

Post

judging by that red fender looks to me like you did pretty good, the matte red kinda looks sick lol but i cant wait to see a finish product. Maybe ill go about painting my car the same way if it worx well for you. Good luck with this build man i cant wait to see how this worx

red24d
Posts: 47
Joined: Mon Aug 02, 2010 2:48 pm
Car: 1990 240sx Hatch
Daily: 2006 Nissan Titan
Location: Watkinsville, GA

Post

As promised, here are some more recent pictures. I've added some of the tools and such that I am currently working with as well. In case anyone wants to know how they work and why I chose them, I will be adding more to the blog later this evening reviewing that. So, here are the pics from this week.

Image
Image
Image
Image
Image
Image
Image
Image
Image
Image

User avatar
240life
Posts: 1313
Joined: Mon Sep 24, 2007 6:02 am
Car: 1993 Nissan 240SX S13 Coupe SR20DET blacktop
Location: ME
Contact:

Post

Im going to let you know now before you spray your whole car with that Craptastic product....DON'T! Gas bubbles the clear, even a mild chemical like "goof offf" used to remove sap from tree's will cause it to blister...this was after the paint and clear had been on for a year. :nono:

red24d
Posts: 47
Joined: Mon Aug 02, 2010 2:48 pm
Car: 1990 240sx Hatch
Daily: 2006 Nissan Titan
Location: Watkinsville, GA

Post

I appreciate your help on that. I'm actually about to update the blog. After reading numerous forum posts and watching plenty of videos of how to create paint booths, complete body work, and such, I found that the paint booth I originally wanted to go with would run a VERY high risk of becoming volatile and explosive if it was not vented properly. Not to mention a new EPA law enacted as of January this year forbids releasing paint solvents of any kind be it from cleaning paint parts or air dust particles. I've decided after much thought, that the safest way for me to get paint on this car would be to hire someone with an EPA approved paint booth. It may cost me more, but it will be better in the long run. I've decided that I will do all the body repairs, sanding prep work that I can, to make the paint shop workload smaller so the cost is more beneficial. Thanks again for the heads up.

Cgeigert
Posts: 225
Joined: Sun Oct 08, 2006 7:43 am
Car: 1989 Nissan 240sx

Post

Good idea but about 5 years too late. Ebay sucks huge balls nowadays, 99% junk. Ebay drove all the good sellers away, plus the JDM craze is dying down so not that many importers like there used to be.

90desilvia
Posts: 17
Joined: Wed Sep 01, 2010 4:41 pm
Car: 90 nissan 240sx

Post

so what happened lol

90desilvia
Posts: 17
Joined: Wed Sep 01, 2010 4:41 pm
Car: 90 nissan 240sx

Post

try using rust bullet for the rust it sounds like an amazing product. I havnt used it but I hear great things.....has any one here ever used it. it dehydrates the rust and gurantees 10 years of rust free where applied

red24d
Posts: 47
Joined: Mon Aug 02, 2010 2:48 pm
Car: 1990 240sx Hatch
Daily: 2006 Nissan Titan
Location: Watkinsville, GA

Post

This will be two posts since I had forgot to update the last time I was able to get some work done!

7-9-11
I wasn't able to get as much done today as I had hoped. I spent a great deal of my time with the driver side body work until I was happy with what the results were. I did a very serious amount of sanding and body filler work to the passenger side but ended my day after priming the driver side and masking the rear windows. I'm, still on a limb about the fenders I scored off of a previous donor car, they can be repaired, but I am having serious thoughts about fiber-glassing the fenders and possibly even the outside door shell down the road. Not too sure. I'll edit the post shortly, and add a couple pictures I took of the driver side primed with the top line filled in, I think it turned out great.

Image
Image

7-15-11
So, yesterday I ended up getting a few hours with the car. I sanded down the passenger side and added more body filler to the line and that should be about all I need in the way of body filler outside of the fenders. I did get some sanding done on the driver side fender and also added more body filler to it, i would say maybe another two rounds of building up the body filler and it should be right at perfect. Most of my time however, was spent wet sanding the primer on the driver side prepping for the base coat. It took me nearly two hours of wet sanding with 800 grit sandpaper to get the smooth finish i was looking for. I still had that red paint from the tester fender, so I decided to go ahead and lay down the base coat. I was very surprised at how well the base coat went on, and I was able to coat the entire side three times with less than one quart of the red. I had some left over so I cleaned up the back trim piece under the tail lights and sprayed it as well. I over sprayed onto the back bumper but I really don't care since I will be removing it to sand down imperfections and repair small scratches and what not. I took a couple of pictures as well to note the progress. If you are anything like me, then the pictures is what you are looking for anyway! HAHA! So, here they are:

Image
Image
Image
Image

User avatar
breadbox
Posts: 8549
Joined: Tue Oct 17, 2006 4:09 pm
Car: 89 Nissan 240SX
89 Koop
84 720 4x4KC
Location: Va Bch

Post

nice. looking good.

red24d
Posts: 47
Joined: Mon Aug 02, 2010 2:48 pm
Car: 1990 240sx Hatch
Daily: 2006 Nissan Titan
Location: Watkinsville, GA

Post

So Thursday was a long day day for me. After dropping one of my kids off at school I got started on some wet sanding on the passenger side. I wasn't all too happy with how it turned out afterwards, so I think painting may be better left alone for now, or at least until I got the entire sub frame dropped and cleaned up all around outside and in. I gave a good friend of mine a call and he agreed to let me borrow his trailer and help me out with welding the new fender piece in. My awesome brother (Thanks Dave!) woke up to help me load her on the trailer and I had to snap a shot of that since I had yet to get a picture of my Nissan truck towing my Nissan toy.

Image

Then I took a shot of it after I backed it into my friends shop that we built.

Image

We started off gauging how we would like to tackle the project, and after a few minutes at looking at the rust damaged spots:

Image

And what I had cut from a previous donor car:

Image

We decided on popping the OEM welds around the fender and donor piece and welding those cut parts in. Here's a shot from that donor piece cut down, as well as the fender piece(less) part we cut off the car. Forgive the fuzziness, all I had for the photo taking was my phone:

Image

Image

Image


Then we prepped by placing clamps where needed to hold in place for the welds:

Image

Image

I didn't catch any of the welding process since we were both heavily involved in maintaining the position of the piece and keeping any flames out. We decided that since these pieces were rather thin metal we wanted to build up the welds real good and then grind them down later on when I started to prep the engine bay for paint. I am very pleased with how well the welding went and turned out. It's not too pretty right now, but after hitting it with the grinder then priming and painting the engine bay, she will look near flawless. When I got the car back to my brother's house I went ahead and hit all exposed metal and welds with a quick shot of rust inhibitor from a spray can since I don't have time just yet to grind her down. It actually seems like it didn't take long to do all this but it was very meticulous work and actually took us right around seven hours to get it right and squared. Also, I'm adding pictures of the passenger side as well as the roof that I painted. Still waiting to drop the back bumper, so don't mind the over spray on it since it's not a full on attempt to paint it just yet. Enjoy.

Image

Image

Image

Image

red24d
Posts: 47
Joined: Mon Aug 02, 2010 2:48 pm
Car: 1990 240sx Hatch
Daily: 2006 Nissan Titan
Location: Watkinsville, GA

Post

I have just decided that every aspect of the project needs to be reviewed. I bought some tech DVD's from 240sxtechdvds.org to get a better view of what we read in the forums with snap shots from time to time. In fact I just reviewed that site, the purchasing process, and the ease of use for those DVD's in the new post on the blog today before coming back to this thread to update and reply. It just seemed to me that if I considered them for my project, then someone, at some point may as well, so it's always best to put down in a clear manner what the experience was like and I hope to be able to do that more and more as the project progresses.

Now, as for the update. I wrote a lengthy review at the blog which I will tell you again what it is because I know that when threads get this long, people browse the pictures and then read the most recent posting (I'm guilty too!) http://s13bay.blogspot.com/. I won't go nearly in depth here as I did there, but I will tell you all that have never dealt with the rear sub-frame bushings before, you are in for quite a treat. It is such a slow and meticulous job and boredom will find you within the first hour. I did get a fair amount done though. I got the sub-frame dropped, dragged it out from under the car on the tires, and got to it. It was much lighter than expected since there is no differential on the car. Here are a few pics of what I did and used.

Image
Image
Image

scotttak
Posts: 738
Joined: Wed Mar 17, 2004 12:30 pm
Car: 2018 Camaro ZL1
Contact:

Post

my car has a lotta ebay parts on it lol. ebay turbo, turbo manifold, coilovers, and tuned ecu (retuned by me though). turbos been good for over 3 years now, had to replace the manifold once (with another ssac special), coilovers been good for around 2 years though i wouldn't necessarily recommend them (godspeeds). the ecu had a crap tune on it so i had to learn how to tune and buy a chip burner. which i guess is a good thing (this is all on a 91 coupe ka24det). i basically bought the top mount turbo kit that they used to have on ebay for 800 bucks. my setup is ghetto but its held up through the years so far. i only run 9 psi and i havent tracked my car yet. i would say im lucky that nothing vital has broken yet but i made sure i did my research before i installed anything. i also made sure i had a proper setup for important things such as fueling. that i didnt skimp on.

long story short, ebay can save you money but you gotta make sure you do your research first especially with the cheap parts. but i guess you're not going with the cheap cheap parts like me lol. just my .02


Return to “240sx General Discussion”