*** Project LOWFATZ Updates and Pics ****

The Nissan 300ZX (Z32) general community discussion forum
Milo (San Antonio)
Posts: 854
Joined: Tue Apr 03, 2007 9:43 am
Car: Project LOWFATZ (weight reduced slicktop TT)

Post

OMG, it seems like forever since I have gotten on NICO and everything has changed....sort of. But glad to be back on the site after some time. Anyways, Here is everything from beginning to currently with the project. Warning....it's a lot. Anyways....enjoy.


**********************************************************************************************************************************************


Bought the car with the intentions of stripping it down as far as I could go all the while staying street. The Z's plan was to become the lightest 300ZX that I could put together for weekend track usage.

Here is the original pics of the car bought out of Galveston, Texas.
Image

Image

Image

Image

Image

So after getting the Z back to San Antonio, I drove it around for a while before fully hatching my plan of total tear down. Then.....we started the fun.

All the interior went first. Then on to sound deadening removal.
Image

Tools of the trade. Dry ice, chisel and a hammer.
Image

Coming....
Image

Coming....
Image

Getting there.
Image

Finally done with that. Now onto gutting the engine out and a few other things.
Image

We get the NA motor out to prep the engine bay for deletion of all the following throughout the car - AC condensor, AC plumbing, all emission systems, power antenna, rear wiper, rear water tank, heater core and tubing, stereo and all speakers, non needed interior and begin to cut out all the brackets in the engine bay we will not need any longer.

For example, bye bye battery box tray.
Image

We opted to run thru panels for the battery terminals to both mount our lightweight battery inside and also to be able to move weight out from the front and more towards the rear over the wheels for better weight distribution which will lead to traction....hopefully.
Image


Milo (San Antonio)
Posts: 854
Joined: Tue Apr 03, 2007 9:43 am
Car: Project LOWFATZ (weight reduced slicktop TT)

Post

So from here I plan to simplify the engine bay, deleting as many brackets as I can and plugging holes for systems that are either simplified down/relocated/deleted entirely. All the while prepping for paint.

Image

Image

Sorry for the bad pics, crappy camera.
Image

Finally it is stripped down and I am laying paint. Low Gloss Black from Hot Hues. Easy paint to work with and very forgiving.
Image

The area around the tray we cut out with the new terminals.
Image

Overall shots.
Image

Image

User avatar
simmode1
Posts: 7918
Joined: Fri Aug 17, 2007 4:51 pm
Car: Red '95 S14
Location: Euless, TX
Contact:

Post

Oh god yes. Decluttered engine FTW... :popcorn:
Last edited by simmode1 on Tue Feb 08, 2011 3:43 pm, edited 1 time in total.

Milo (San Antonio)
Posts: 854
Joined: Tue Apr 03, 2007 9:43 am
Car: Project LOWFATZ (weight reduced slicktop TT)

Post

Now that I had finished up with the engine bay deletes I wanted to get started on the structure foam before I shipped the car out for paint and body work.

I ordered the foam from Fomo (yes, they bought out ITW Foamseal for those that know something about this product) via Grainger. Grainger now stocks the foam and is a great choice to add to any Z32 for a little bit of extra rigidity at almost no weight additions to the vehicle.

Here are some of the prep and mid way shots.
Image

Here is another in the process shot. The foam has a good expansion rate of nearly 3 times it's spray rate so it rises up quickly. Not fun stuff to get in your hair, so protection is HIGHLY recommended. I'll put together a HOW-TO post on this later on.
Image

Finished product.
Image

Don't mind the pink lines, those are just the seam welding line layouts that I had in mind.
Image

And our quest for weight savings ventures on.

We got so crazy with saving weight we began to play with different parts from different year Z's to shave even more weight.

Here we took the cross bar (under dash) and weighed the two to see how much we actually saved by going to a NA 2+2 coupe bar.
Image

Here you the difference in pounds....not ounces!!! We did this with a lot of parts on the car, throughout the whole build.
Image

An odyssey battery will now be our work horse for the kick on duties from now on. It's lighweight and packs a punch. It also has a lightweight tray that also came with it. Picked this up from Summit Racing for a good price. Plan to lighten up that try by punching holes through it and dimply dying it. Crazy....maybe....but we gotta go there.
Image

Stock mirros are power and way too heavy. The plan was Craft Square but damn those mirrors are expensive. Ordered a set of Bomex mirrors, should be here soon. Lightweight and should shave us a few pounds over the stock mirrors and their heavy metallic bases.
Image

Here you see how heavy these truly are.
Image

We opted to kill the hood latch, hardware, cable, connections and even cut the bracket out under the dash to shave as much weight as possible. Aerocatch hood pins will be our hood unlock/lock system. We shaved nearly 10lbs collectively here.
Image

As we went through the entire car, I sent some of the brackets that I opted to keep off to powdercoat to pretty them up a bit. These were about all the only brackets that we will have left when everything is said and done other than a few others. These brackets tend to rust and I had a minute to send em off....came out good.
Image

At this point Charles Parks from Powertrix stepped in and offered up a Carbon Fiber Hatch that he'd been sitting on. Charles makes a lot of trick parts and is a track enthusiasts to boot so he knows what it takes to make speed. I received the hatch in a piano sized box and quickly opened up to find this amazing part.
Image

Fit was pretty damn good considering it's a race only part. Props again to Cparks for stepping up on helping me shed even more poundage.
Image

Now that we had all of our panels in, it was time to detrim and prep to send it off to body work. By prepping a lot of the car, I saved a lot of change myself.
Image

The body was good but in no way perfect. I wanted the body stream lined and free of all the dents and dings from years of abuse. If you look closely, you can see a lot of circled damage area. I also opted to delete both lines and things as I may try to fashion a custom side skirt/rear bumper air guide later to help stream line aerodynamics.

Image

Image

Image

Image

From here I shipped the car off to paint to have it started on. Little did I know I would primarily be the one doing all the body work anyways. Anyhow, there it went.

Image

Milo (San Antonio)
Posts: 854
Joined: Tue Apr 03, 2007 9:43 am
Car: Project LOWFATZ (weight reduced slicktop TT)

Post

At this time ZCON in San Antonio was about 6 months away. Luis and myself, along with all the local San Antonio club guys were going out of our minds setting up ZCON and getting all the details loaded down as well as all the other BS that I don't even want to mention. Needless to say it was crazy. I turn the car in and it just sat at the paint shop till I got around to getting over there and putting in some of the wrench time to it.

I get around to making it out to the shop just after ZCON finished up.
Image

Image

Image

Image

After much labor and many many hours prepping, blocking, re-blocking and long blocking the body we get an extremely straight body. It came out cleaner than I thought it would.
Image

Image

Image

Image

From here, it was time for the last of the body panels to be fit and prepped onto the body.

Charles Parks at Powertrix again came through for me and hooked me up with a stock Kuruma fiberglass wing to aid in some down force. I installed it onto the CF hatch he supplied me earlier in the year. Took some massage but all in all a good fit.
Image

From this point we got a lot of our body panels straight and the car for the most part was layed out how I wanted it now it was time to start the last of the tear down to get ready for ..... THE ROLLCAGE.

From here I pulled off the doors to pull the glass assemblies. Everything from glass, scissor lift, motors wiring was all taken out to both shave weight and get the doors prepped for the NASCAR bars that were going to part of the custom cage we were going to have installed soon.

This for the record....sucked. I had black tar all over me by the end of the day. The wiring was complicated and stupid. I had never taken a door apart and it seemed to go on for hours.

Here is when we started. Just removed the trim and hadn't even started really.
Image

Getting there.
Image

Getting there.
Image

Getting there.
Image

Yahtzee!!!! Finally get the door back in with everything removed. But we will go deeper into this and take it a step further later. But good enough to get out to rollcage for now.
Image

From here I called for the help of my fellow Z brother, Aidenverse (Isaac) who was nice enough to come over and help me on one lazy sunday afternoon.
Image

A shot I like from that day. My new slicktop on the left, Aidenverse on the right.
Image

Okay, back to the story.

So we start to break out a windshield. We prep by pulling out what little interior is loosely installed in the Z still.
Image

Working the trim with a heat gun.
Image

Clean up after removal. Safety first kids.
Image

We get treated with a suprise. New racing seat shows up. I quickly put it to good use.
Image

The Kirkey Road Race seat weighs in at around 15lbs and is sturdy and comfortable. Not to mention lightweight. An amazing buy for the money. Picked it up from Jegs at a steal.
Image

Us mocking it up....sort of.
Image

Image

From here Andris Laivins Race Cars (the same gentleman who built all the cages for the SPL race cars) was nice enough to come down and pickup my Z to take back to Austin for the rollcage work to be done. We opted for NASCAR bars, a high hoop, gussets on the A pillars (for cool points) and to have the cage tied in to as many spots in the car as possible to help aid in body rigidity. Let's see what we get.....

Milo (San Antonio)
Posts: 854
Joined: Tue Apr 03, 2007 9:43 am
Car: Project LOWFATZ (weight reduced slicktop TT)

Post

In a 3 month period my mother passes away and I get a whole lot of things change in my life from moving into a new home, handling insurance settlements for my mother's estate, I had a real estate deal change on me when I was trying to buy a house, making sure I had enough money to cover the expensive rollcage and then trying to scrape some cash together for getting started on the 300HP motor with Mitch over at EPR Racing. Mitch was cool with putting off the motor since he was moving into a new location to further his business.

Eventually, Andris Laivins gets the cage all settled up and done to perfection. And this is what I get.

Kirkey seat mounted and note the A pillar gussets. I don't know how a simple piece of scrape metal welded in between the rollcage and body could be soo cool looking.
Image

Note the span out of the NASCAR bars in the back. Very well done. BTW, that's my pops in the background.
Image

Another shot of the NASCAR bars.
Image

Image

Image

Note the gutted doors now. This was the reasoning to why we gutted the doors originally. Lexan will replace this door glass in the future. The handle will be on a smooth little cable system in the future (got the idea from Steve Millen's GTR, after riding in it with him at ZCON09). Simple and sexy...you'll see.

We kept the stock side beam as this car will be "DRIVEN" to track events and I figure I could care less about 20lbs added to car if I can walk away from a crash. So, tough....keeping them. Sorry.
Image

Note the way the bar hugs the hinge pillar of the door opening. Very good attention to detail. The mark of a good cage maker.
Image

Another far away shot.
Image

Before the rollcage I estimated that we cut nearly 900lbs out of the Z before glass removal. After the cage, which I figure added close to 130lbs easy (rough guess), we are still looking good. I am currently in the process of prepping the interior for paint and all the while cutting out the last of the brackets that won't be needed.

Lexan will replace our quarter glass windows as well as the drivers doors to save a few pounds. I will also try to institute a clear NACA duct to the drivers quarter to draw fresh oxygen into the cockpit for the driver in case of either fire or smoke filling the cabin. (old pic, but just for reference.)
Image

From here I have just been up to prepping the doors and hatch for the interior paint which will be a simple Rustoleum Dark Gray that I can just touch up later if it gets scratched (which happens).

The rollcage is a raw metal right now so I had to opt to order a special Zinc Chromate Aviation Bond Primer that had to be shipped so I am waiting on that. But that didn't stop me from knocking out the doors.

This particular version of Rustoleum is great. I normally never use a spray can for painting, as I always mix my own paint but this stuff (when prepped right) goes on so damn well. I highly recommend it for these uses.
Image

I shot the interior of the door first. Came out amazing. Note the finish. Impressive for a single shot paint.
Image

Image

From here, I finished off the rest of the door.
Image

Image

Milo (San Antonio)
Posts: 854
Joined: Tue Apr 03, 2007 9:43 am
Car: Project LOWFATZ (weight reduced slicktop TT)

Post

Spent the day cutting out the last of the brackets in the car that I no longer needed in an attempt to shave more weight and clean up the interior. I ended up cutting out all the non essential brackets in the rear and cleaning up a lot of that area. Also, I began swiss cheesing/dimple dying the rear sections to save a little weight as well there.

Here's the starting point.
Image

I started labeling all the connections on the main body harness and began to remove it as well. I plan to simplify this harness as well to shave some weight here as well.
Image

The entire body harness removed and layed out how it goes in the vehicle for reference. I suggest labeling all the connections as you remove it from the car so you keep your sanity later when installing.
Image
Image

From here I began to cut out all the brackets, studs, welded in clips and clasps as well as anything else that we wouldn't need in the future.
Image

This may not seem like a lot of brackets and stuff but it is. This small amount of metal etc, weighed in at 2lbs and 6 ounces. We had 3 of these piles. Total we cut out another 8lbs and 2 ounces for the day. This is even over all the deletes we did over 6 months ago. This goes to show that you can always still find ways to shave a little more here and there. But I think this was about the furthest we could without cutting section of sheet metal out completely, which has crossed my mind. Rear trunk....I'm looking at you.
Image

From here we began to swiss cheese a couple of panels while also being followed by a dimple die to give strength to the hole we just made in a perfectly good piece of metal. This process is very popular in cup car series race cars that are looking to shave any and every ounce possible.
Image

After that, I spent the rest of the day prepping the Powertrix Carbon Fiber hatch for paint on the underside to match out interior paint that is soon to come.

Before paint and prep.
Image

After scuffing, prep and final prep and paint.
Image

I was also cleaning out the extra parts bin and remembered that I had all my glass and assemblies from the doors. I wanted everyone to see what taken out of the doors. Keep in mind this does not even include the door catch system, wiring and gunk in those doors. Like i said in recent posts the doors were by far the worst part of this entire build for me.
Image

Lastly, recieved a package from Japan today that I've been expecting.

The stock mirrors come in at 7lbs and some changes as a full assembly (see previous posts) so I wanted to find a substitute that both lightweight, functional and cool looking. I had been looking for these Bomex mirrors for an infinity and finally found a set. Had them shipped from Japan as I finally found a set.
Image

While being aero dynamic and function they are above all else. SSSSuper light weight. Both mirrors came in at 5.5 ounces which is ridiculously light weight, even lighter than the CF mirrors that I thought about picking up. I was very happy to pick them up and happy to shave nearly 7lbs by dropping the stock ones over these.
Image

Next update will be all the interior prep for the rollcage, some sand blasting work we need to do to clean up all the hinges/assemblies to get ready for paint and lastly the rollcage and interior painted

Milo (San Antonio)
Posts: 854
Joined: Tue Apr 03, 2007 9:43 am
Car: Project LOWFATZ (weight reduced slicktop TT)

Post

Spent today cutting what last bit of weight I could out of the chassis while prepping for paint. This took a lot of time today but gave me an opportunity to really simplify the interior as I pushed on with prep. Since I am stuck waiting for my aviation primer to come in, I decided to take the whole day and dedicate it to being innovative to cut the last of the last pieces out of the car.


Examples like this bracket. It mounts up an interior body panel to the car. We will obviously never run interior in this Z again so we trimmed it. Believe it or not, I managed to cut another 4lbs out of the car just using this thought process throughout the car today.
Image

Image


This is a bracket in the center of the car behind the armrest up high. Normally there would be a bracket here that would allow us to run a harness through it to the fuel pump and then onto the ABS system (located behind the passenger seat). Eventually I plan to simplify the ABS with a brake bias system after talking to Kuah at SPL and figure out how he did it for the SPL track car. For now we will simplify and ziptie it to the rollcage or fab a bracket to get us through paint/cure and the car up and running.
Image


Previously I mentioned that I cut out all the brackets in the rear. This is a better pic to demonstrate how it should look in the end. This is the final look before paint. Notice I started to paint the panel interiors, as it makes it easier to pass over the simplest face panels first on passes with the paint.
Image


Some how during the prep, I took a good cut to the hand. Just a reminder out there to wear protection at all times.
Image


Here is a shot of the cavity with some paint on it. The entire interior will be this color. This dark grey made sense as it's easy to refinish later. White gets way to dirty quickly. Black would have us baking in the summer days. And the regular gray was just to simple. This color looks great when done right.
Image


I finally wanted to clean up that whole area under and around the ABS to prep and paint it today as it's the biggest pain in the a** to paint around later. I didn't want to mask around it later and it look like crap so I simply lifted it and painted it now. Later we will mask inside the body lines to cover our old paint and new blend lines (an old body shop trick).
Image


With the unit raised as a whole I finally had some time to get the last bit of sound deadener out of there and clean up that whole area really well. I noticed a lot of track Z32 that still kept the ABS system never get in there fully. I wanted to take the time to get this done right.
Image

Image


Working a little more at that sound deadener. After I got the sound deadener out with a chisel and a heat gun. I still needed to clean it up. Some paint thinner and a red rag work amazingly great to clean up the tar residue. Saturate the goo leftover and run over it, slowly it goes away.
Image

Final prep and paint done. Same area.
Image

Here it is done. We will give it a 48hour cure time before we get near it for anything but looks good. I am really happy with the way it came out.
Image


From here, I wanted to really take some time and simplify as much as I could under the dash. Even though it will all be covered by stock dash (which we will need to alter to fit of course), I wanted to take the time to cut out all the useless brackets that I missed here as well.
Image

I know it doesn't seem like we cut anything out but we did. Cut studs and smoothed them out, cut brackets under the dash that were no longer going to support anything and found a small amount of deadener mat hiding in the corner. For the record, an 80grit flap wheel does wonders on working down studs. I also took the time to clean up the floors with thinner to get the last of that sound deadening leftover goo off. The floors look amazing. Too bad they will probably be the first victim of an eventual need for a respray once we put some usage on this car.
Image

Image

After some cutting, elbow grease and love.
Image

Image

Image


This is everything that we took out of the car today. Basically, it's the last of anything we are going to cut out of the vehicle. This was the last of the weight that I could see cutting out of the vehicle from here on. I wanted to keep going but I think I am just going too overboard at this point. I'll see if I can find a few more opportunities to shave a few more pounds here and there for you guys. But we are getting scarce at this point.
Image


Hopefully tomorrow, I will have the interior fully DA'd, sanded and scuffed. Some of the local Z guys will hopefully come through tomorrow to lend a hand as my shoulder if on fire at this point. More pics to come though. Nite

Milo (San Antonio)
Posts: 854
Joined: Tue Apr 03, 2007 9:43 am
Car: Project LOWFATZ (weight reduced slicktop TT)

Post

Since my shoulders are pretty much blown out now I did what I could to prep all the little holes around the interior to lay some paint in them.
Image

From here I didn't want to throw the towel on a full weekend without doing a bit more, so I turned my attention to mod-ing the dash and door panels. The dash and door panels will be modified to fit and eventually covered in alcantara (a form of nova-suede) along with the arm rest. These will be the only panels left in the entire car when it all said and done.

My first attempt at installing the dash prior to hacking it up. Not gonna work.
Image

Image


The stock dash before cutting it up.
Image


I start by trimming off the panels that no longer will mount up to the body or stock under dash bar.
Image


After about 6 more test fits and alterations we finally got it to fit like a charm. I still utilizes 7 connecting bolts out of the original 11. Not bad. Fits like a glove. Also this really doesn't count as a weight reduction because everything we cut off the dash only came in at a mere 2 ounces. :)
Image

Image

Image

Image


From this point I took the time to trim up the original stock door panels to basically just have glorified arm rests. Due to Texas sun the interior of a car on the track can get over 120 degrees. I can't see myself resting my precious arms on a hot bar or even a hot black pad so we opted to keep these. At a collective .5 of a pound with hardware, I think I can spare it.
Image

I am pretty much done for this weekend. I have no feeling in my arms any more and I am running on now sleep but for the most part she is almost nearly ready for paint. Next time should be primer on the rollcage and maybe paint. Till next update.

User avatar
TYL3R hez
Posts: 216
Joined: Wed Oct 06, 2010 7:08 pm
Car: 93 z32 2+2
92 z32 twin turbo drift car
90 z32 2+2
^^*All gone but not forgotten*
03 Is300 5-speed
Location: Lincolnton, Nc

Post

I am loving every second of this thread!
keep it coming dude!
:D

Milo (San Antonio)
Posts: 854
Joined: Tue Apr 03, 2007 9:43 am
Car: Project LOWFATZ (weight reduced slicktop TT)

Post

Spent the whole weekend in Myrtle Beach/Pawley's Island in South Carolina with the family so I didn't have a lot of time on the car the last two weekends but had a little time to get on it.

Spent the day prepping the bars for primer. This involved sanding down all the rust converter sprayed on the bars some time back. Isaac (Aidenverse) was nice enough to come over yet again to help me with this part of the project. We hit it all with 150 grit.

Me prepping the bars and area under the roof for the bar primer.
Image

And yes, I wear a respirator for all of this. Safety first.
Image


The bars sanded all down and pretty. Isaac is in the car sanding down more of the roof.
Image

As for the primer we used. It's called Zinc Chromate and it's the BEST adhering primer for raw metal. The only note I want to stress is the safety needed here. We used a full, no joke, respirator for this operation. The primer lays on as an ugly green which makes no difference as we will lay our Rustoleum paint over it later once we do one last scuff pad session on the interior before final paint.

Here are a few pics of the Zinc Chromate Primer layed down.
Image

The primer on the A pillar gussets.
Image

Yes, I know there is spots missing on the bars on the underside. This makes no difference as we really just need it on the top to give the paint something to grab and prevent runs when laying down the paint later on.
Image

Image

Image

Milo (San Antonio)
Posts: 854
Joined: Tue Apr 03, 2007 9:43 am
Car: Project LOWFATZ (weight reduced slicktop TT)

Post

So had a free Saturday again finally. Called over Isaac (Aidenverse) yet again, but this time Mike Delashmutt (aka, motormutt) to help with the last bit of prep before we finally shot it today.


This required a lot of prep. Basically it went.....scuff...air blast the chassis.....vacuum.....scuff....air blast the chassis....vacuum some more...scuff yet again....air blast....vacuum.... now hit it the entire interior with a surface prep.....wipe off the surface prep.....one last vacuum.... and begin masking everything off for paint...then finally paint.


We start the day off with a scuffing since we already hit all the interior with all the sanding compound grits that we wanted. I want to say we finished off everything in a 320 grit before the red scuff pad were applied. I also spend an entire night grinding down all the sharp/rough edges that could catch someone's pretty little flesh when running over any part of the interior. Anywho, here we go.


Mike D scuffing it all down.
Image


We start getting into more of the long other prep involved here.
Image


Image


Image


Image


Image


I plan on cutting out the rear floor to basically make a box section in the floor for a fuel swirl pot, maybe a fuel chiller and few other items so I'll cut out the floor at a later date. But, being a perfectionist I still had to option out to prep it all even though I am just going to come in here later and either plasma cut or disc cut out a lot of this spare tire area.


Originally it was all covered in undercoating, which proved to be shoulder destroying to clean with sandpaper. So, we used out brains and used wax/grease remover with a few used red scuff pads and the stuff just fell off. After a few revolutions with this process, we came out with this. Reference the old pics to see how truly nasty it was on here.


About halfway through cleaning.
Image


Finished.
Image


We start wiping down the rest of the car to prep for final paint.
Image


And now finally.....we lay the paint. We went through 9 cans total taking out time and doing it all right. I recommend hitting all the tough corners that are going to be hard to get later, first. This allows you time for those spots to dry and get ready for full paint lay on later. I like to start high up first on an interior and work my way out. This way I can lay inside the car shooting upwards and then get out to not paint myself into a corner (aka, stopping point). If you are doing a project like this, take the time to plan out the route you will use for paint. By just attacking it and not playing with the paint on other items first, you will not get the chance to see how thick/thin the paint can be. With this particular paint, I recommend a distance of a 12-18 inches while moving slow and steady when allowed. After everything....this is what we got.


Outside to cure.
Image


Image


Image


Image


Image


Image


So, there you go. Interior is now complete. Now to give it a few more days to self cure and I'll install some interior back into it. From here, I'll need to do a few more things like install front windshield glass and reinstall the door/hatch as well before sending it off to get the outside paint layed onto it. Still up in the air on a color. I'll have to think of something soon though.


For now, I am beat and going to bed. Night.

Milo (San Antonio)
Posts: 854
Joined: Tue Apr 03, 2007 9:43 am
Car: Project LOWFATZ (weight reduced slicktop TT)

Post

Spent most of weekend up in Austin visiting some friends but had a little time Sunday to put some time into the Z. Mostly today was details, lite assembly and test fits before moving to other stages of finishing up the interior.

Got around to painting all the hinges and plates that I previously sand blasted.
Image

All these things need to go in today or at least get a test fit as well as both doors and the Powertrix CF hatch.
Image

Here is the interior as I began the assembly.
Image

It doesn't look like much happened but most of the prep and PITA was getting the harness to run smoothly where I needed it to go. Later on, when funds are available, I'll try to have the body harness simplified for just running the essentials with a Painless wiring harness.
Image

Moving on to fitting the dash and few other things.
Image

Reassembly of the door's seals, hinges, catch and brackets.
Image

Test fitting the door trim panels after chopping them up. Later the dash, door trim pieces and center consoles will just get a wrap in the same material. Thinking Alcantara to keep it simple and clean.
Image

A mocked up idea of the interior trim panels that I will use in the dash and center consoles.
Image

Image

Lastly threw on the Powertrix CF hatch to finish off the day.
Image

Lots more detail work to do and still needed some items to come in to finish up a lot of it.

Rollbar padding, Roll bar mating, the other Kirkey racing seat and accessories as well as a bunch of other small details. Still need to order some lexan so I can cut both the quarter glass and driver glass.

*sigh*

Milo (San Antonio)
Posts: 854
Joined: Tue Apr 03, 2007 9:43 am
Car: Project LOWFATZ (weight reduced slicktop TT)

Post

Got a few things in and decided to add in a few late hours to the car.

Had ordered these TRS from England a while back and they finally came in. These will be a weight savings replacement as opposed to the stock ones.

Just one of the stock brackets on the scale with the hardware.
Image


This is the new TRS strap. Note the weight.
Image


Installed.
Image


This was the bar I had intentions on installing. It's a copy of the Do-Luck Rear Ladder Bar. I originally had it to add rigidity to the rear but later I plan on welding in a bar from cross member to crossmember to give the same result. So away it went. I'll probably throw it on the daily or something.
Image


I received this ARC induction box from another member a while back. I love this air intake and was on the hunt for it for a while. This will hopefully find a place into my project or my other one.
Image

Needs some cleaning. :)
Image


After marveling over the induction box I picked up, I went onto detail work for the night.

From here I spent a lot of the night figuring out how the very few trim pieces were going to make their way back into the project. Originally this trim piece ran the length of the door edging. Since we run bars so close to the B-pillar I opted to keep edge guard while modifying them to fit. It's small mock up work like this that make for a good final product.
Image

Had a lot of small holes that needed to be plugged. Decided to put in some rivets for a cleaner look. Will use grommets to plug the holes where the Autopower rollbar was fit to.
Image

At the moment I am still struggling with figuring out how I will make a door handle release to the door. The stock handle will still perform all the normal duties from the outside...locking and opening the door from the outside. But inside I will have to run a cable to something to make it work. I had an opportunity to sit in Steve Millen's GTR and noticed that he ran a similar setup without using a stock handle but a cable system. He said, and I quote, "it was easy. Not hard at all to do yourself." So with that nod from one of the Gods of Speed, I will attempt to copy it from memory.

Here is the stock latching system...simplified to the basics of course.
Image


This a closer look at the system. The blue rod handle fits to the outside door handle. The green rod handle is the one that we will need to loop to. The loop will need to run inside the door and come out somewhere mid interior door panel, so that I can pull it easily in case of a quick needed exit.
Image


Lastly, I threw in the new Kirkey seat in for some mock up to get a few things figured out. I am sure I will be taking this seat in and out a few times to make sure I get it right.
Image

Parting shot.
Image

Milo (San Antonio)
Posts: 854
Joined: Tue Apr 03, 2007 9:43 am
Car: Project LOWFATZ (weight reduced slicktop TT)

Post

Didn't have a whole lot of time to put into the track car this weekend. Helping a friend finish up his project and another finish up his home project...throw in a night out and going to see Jackass (3D) and that is a pissed away weekend. :(


Anywho, I had to put in a little time. Got a few things in so I installed them.


New rollbar padding came in. Picked these up from Racer Parts Wholesale. These are 45.1 SFI spec padding that are recommended by NHRA and SCCA as they are supposed to provide maximum energy absorption and won't melt under fire. These will be the larger padding that we will use in the areas that will most likely see my head crushing into them in the event of a flip, so we used them in a few key spots.
Image


Up top. More padding will be installed later but a little thinner to allow me to see more out the rear view mirror. The new SFI approved padding is taking on the absorption duties on the big stuff. May throw another one of the SFI approved ones on that long length wise one as well.
Image


Had to shave a little off of the outside to make them fit perfectly with the door. What could I do. *shrug*
Image


Also added in a helmet hook in the rear for later. It attaches to the bar rather simply and would keep my helmet from lying on the ground of the car at track days. Plus, it's kind of cool in my book so that justified the purchase. Wanted one and it was lightweight so what the hell.
Image


Felt like working on the center console a bit, so I mocked up a piece of CF with a aluminum reinforced back to give it some abuse-a-bility. Unsure of what we will do in this area, if anything but thought it came out okay. I like the rivet look so this what ya get. Going to plate off the mirror switch hole as well. Had to spend a bit of time throwing a compound buff on CF but think it came out okay all in all. After all, it's a track car so it doesn't need to be completely dead on immaculate...just functional...and cool never hurt.
Image


Going to bed now. Thanks for looking

Milo (San Antonio)
Posts: 854
Joined: Tue Apr 03, 2007 9:43 am
Car: Project LOWFATZ (weight reduced slicktop TT)

Post

Okay, so I've been trying and trying to figure out some of the more pain in the a** things to knock out.

1) Slimming down the harness for all the things that I have now deleted.

2) Installing some sort of door handle system to open and lock the doors manually. As well as come up with a handle to be able to close the doors also.

3) Learning where to get lexan and how I am going to make it mount to the car.

4) Making a release cable for the trunk of either just use aerocatch hood pins for the hatch and then have to make custom mounts.

5) Start working on the aerodynamics.

*********************************************************

I didn't have a whole of time this weekend to dedicate to the track car but still got around to putting in some time.

Picked this loop up from a Porsche site to be able to close the doors. I managed to take a license plate fastner and make it all work perfectly with almost no modification. Threw a little bling bling on there to make it look cool.
Image


Image


From here it was on to the handle situation. I couldn't find a way to mount a handle and utilize the stock door panel that I cut up recently to make fit...so the panel got ditched. I like this better only because I can now get to the handle at a very easy, no effort reach. So when it comes to burning to death and staying alive, I'll take the first one. I ended up wanting to mount the handle high to make for an easy reach and also to be able to run the cables through a small valley that built into the door. This will make it damn perfect to run release cables into at a later date as well as keeping them away from damage in case of a serious side impact.

Okay, so I took the handle and needed to drill another hole into it to make it a 2 bolt mounting point handle. This actually turned out to be very simple and easy to do. I highly recommend doing the same thing for anyone else out there. Just dumb luck to have worked out so damn clean. And yes, I know the handle is ugly but I will use another clean one. This one was simply for fabrication purposes.
Image

In the rear of the handle, I had to smooth it all down for a clean mating surface to the door.
Image

There were no holes here, so I drilled and then tapped a standard 10mm bolt pattern into it so that later I can mount another two "blingy" bolts into it after I get my upcoming set from VIP.
Image


Image


Image


Here it is all together. Easy to grab handle to close the door. And another easy to grab handle to pop the door open. Worked out great so far. All we need now is to figure out a clean cable release system and I am golden on this.
Image


After I knocked out the handles, I needed to cut out the rear floor area for two reasons. Soon I will be putting in a custom box section for a few things. And, I also plan on running a full lower rear diffuser that will suck up into the floor area, so this all had to go.
Image

Later we will clean this all up and actually cut even more out of it.
Image


From underside.
Image


Say bye-bye.
Image


I had a little time to put toward the body harness which is still proving to be a pain in the butt. This is all the extras cut out of the harness - wiper wires, defrost wires, 3rd brake lights wires, dome light wires, bose system rear speaker wires and rear washer bottle wires. This is the 3rd cut out of the harness, this all came in at 3.2lbs of wire and crud. So I figured we are maybe at around 10lbs cut out of the harness so far.
Image

Milo (San Antonio)
Posts: 854
Joined: Tue Apr 03, 2007 9:43 am
Car: Project LOWFATZ (weight reduced slicktop TT)

Post

Finally had a chance to finish up a few things.


Got around to finishing up the center console piece with the CF plugs. Came out okay.
Image


Also made a few of these around the car to cover up a lot of the holes I had that could easily find a bolt or screw falling into.
Image


Finally got in my other SFI approved rollbar padding from RPW. This padding is much smaller than the originaly padding, which is both lighter and allows me to see more out of the rear view mirror/front windshield areas where space is a premium.
Image


This is the completed roof padding. Finally knocked it all out.
Image


Got a few new things that came in for the project, like this hood vent. This will be added to the hood for some much needed cooling.
Image


Also, got these new power mirrors in a few days ago from Japan. Don't know what they are but they are both power and almost seems like a rubber finish. Very well made. These will go on the daily but just wanted to see them mounted.
Image

Image


Finally, I got around to knocking out the doors. I ended up just deciding to use the original door handles and maybe I'll touch them up later but what the hell, afterall....it's a track car, so can't all be super nice.


Anyways, This was a lot harder than it looked. Took forever to make it all simple, clean and effortlessly user friendly.


I used a 3/32 high grade cable to attach from the locking release to the handle. The tensile strength on this stuff is something like 300lbs so this is probably overkill but what the heck.
Image


I then used a plastic roller to act as my pulled system/adustable cable tensioner. This was crucial to the simple design. Took me a while to get it all figured out. But I highly recommend this if someone is going the same direction with the door.
Image


The door had a stock slide adjuster hole originally in this spot. I simple made this my plastic roller point to be able to use the adjustability of it to add or reduce cable tension simply by moving the piece up or down. From here the cable simple ran through the door. A great way to keep the cable out of harms way.
Image


And here it is attached. Works like a charm. Now I just have to figure out a locking mechanism that is simple and we are all good.
Image

Milo (San Antonio)
Posts: 854
Joined: Tue Apr 03, 2007 9:43 am
Car: Project LOWFATZ (weight reduced slicktop TT)

Post

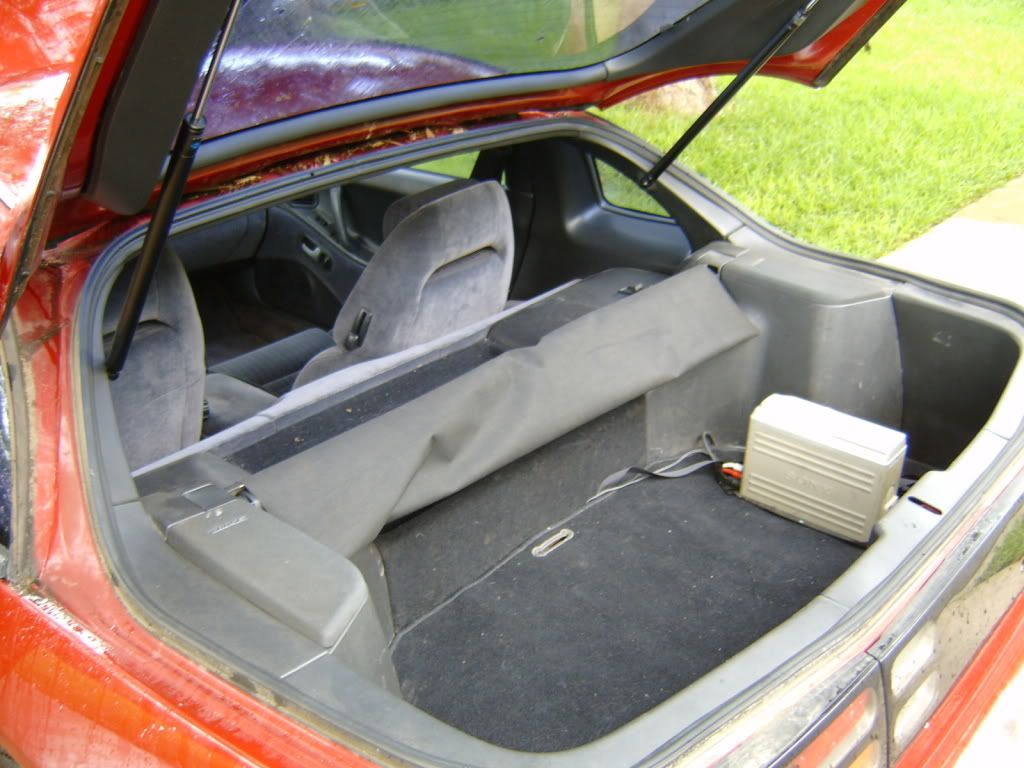
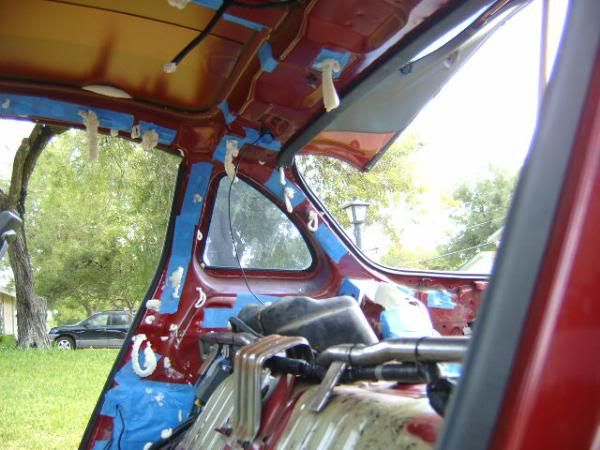
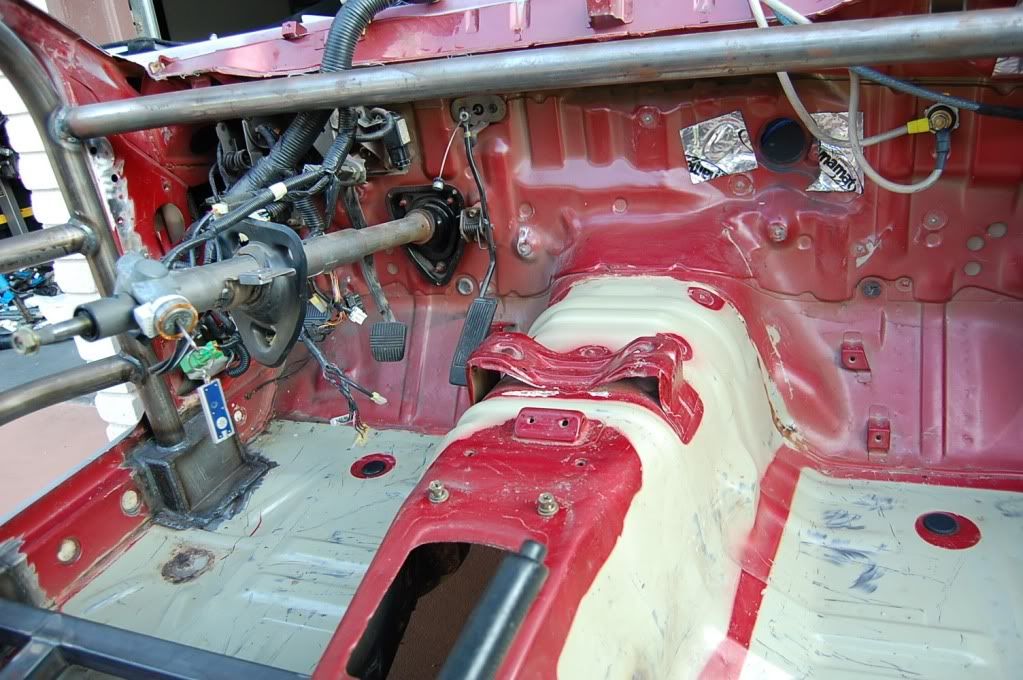
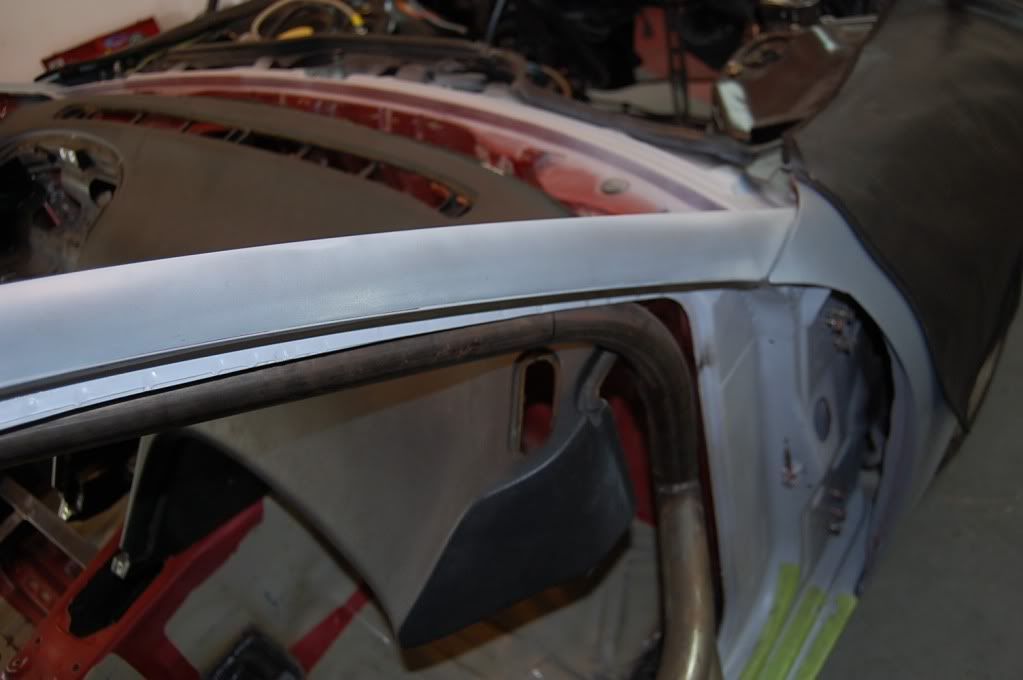
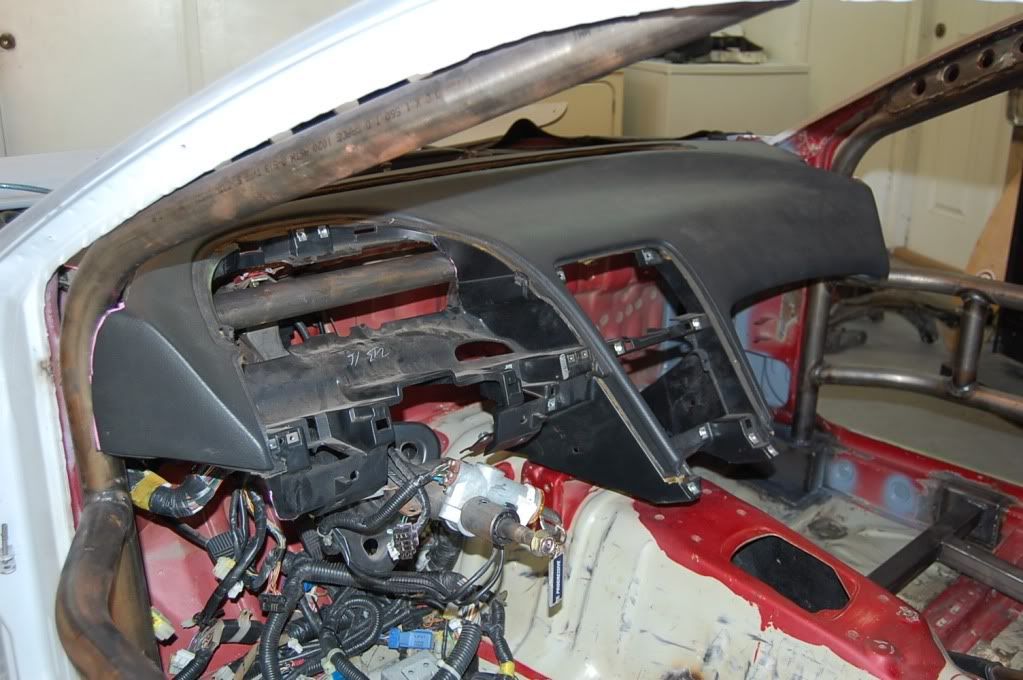
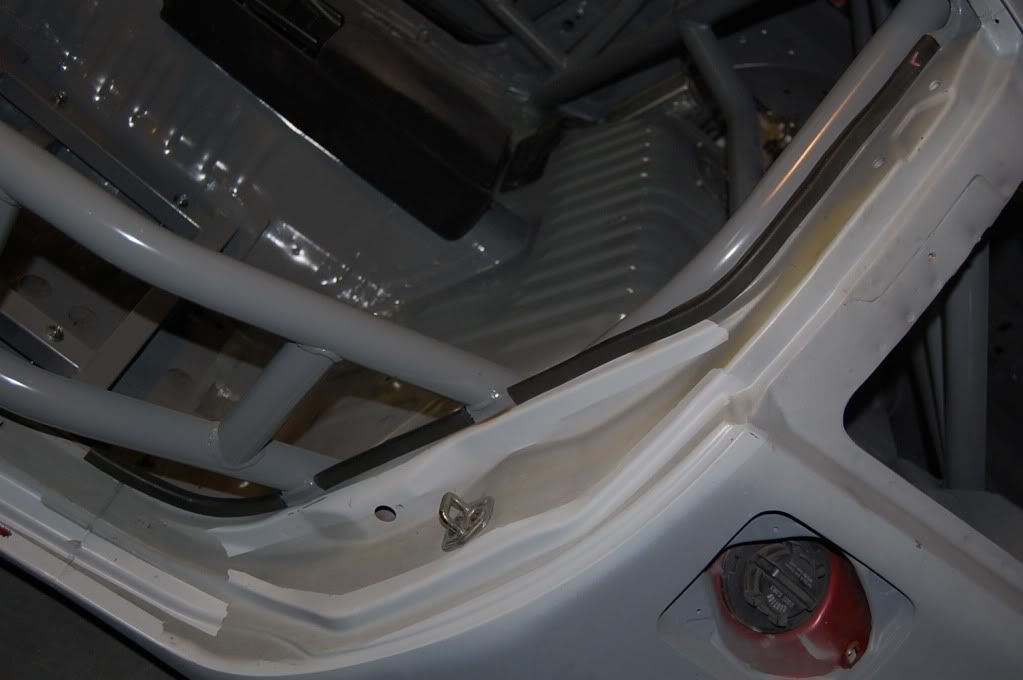
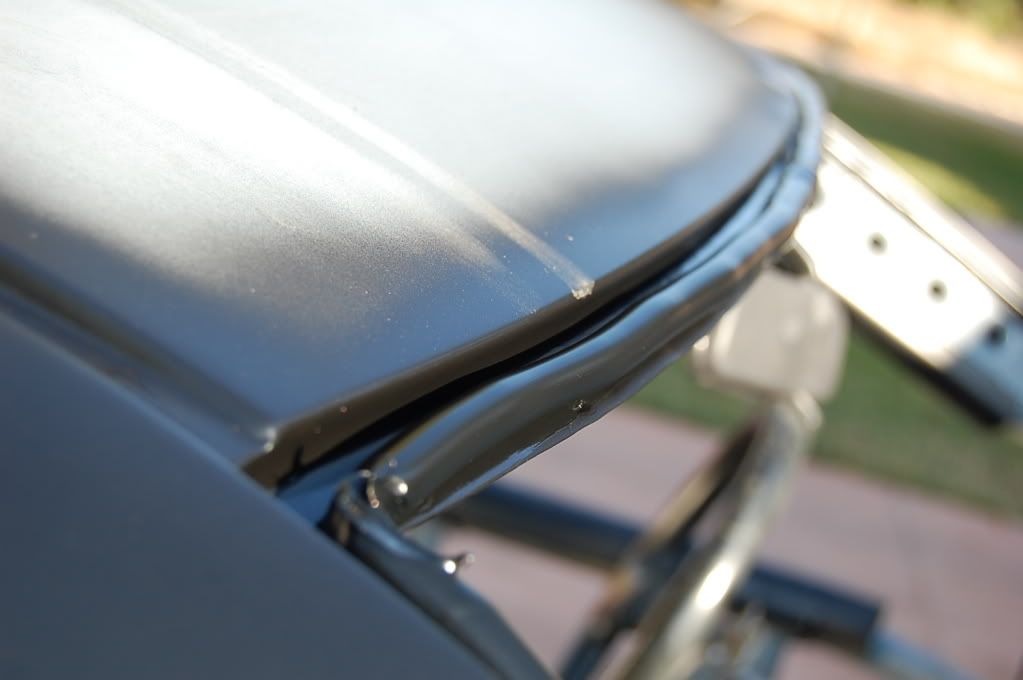
So, tonight I spent a lot of time figuring out the next step for the Lexan windows. The plan is to run all Lexan all around except for the front windshield to be able to squeek by on legality.

Tonight I ended up mocking and fabricating a set of quarter glass windows and got some ideas for what I will do for the door glass and rear glass. Here you go.

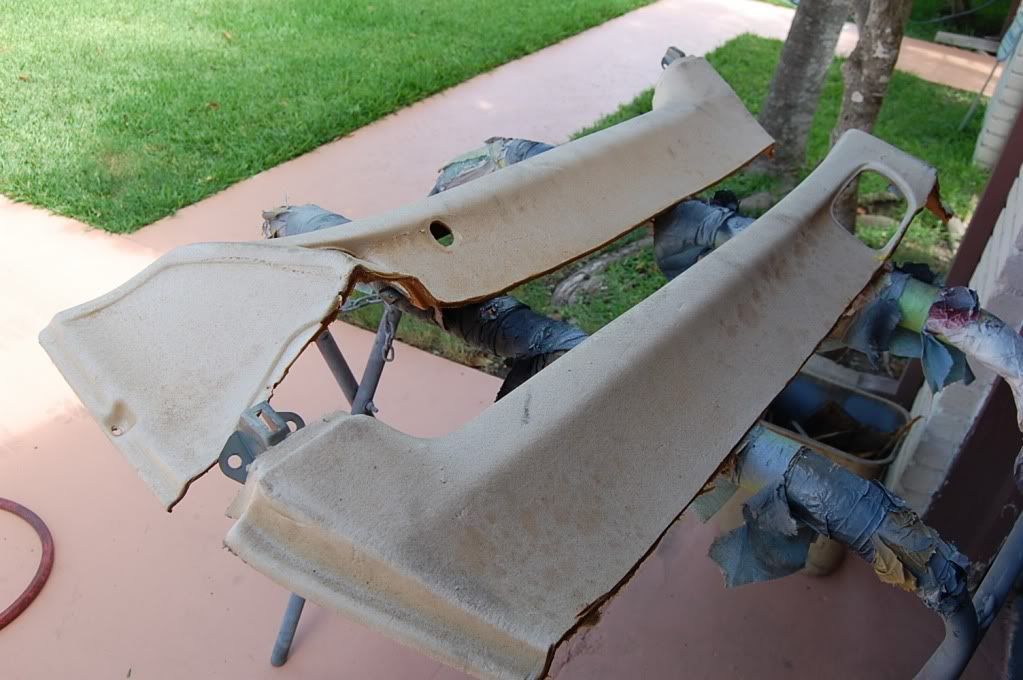
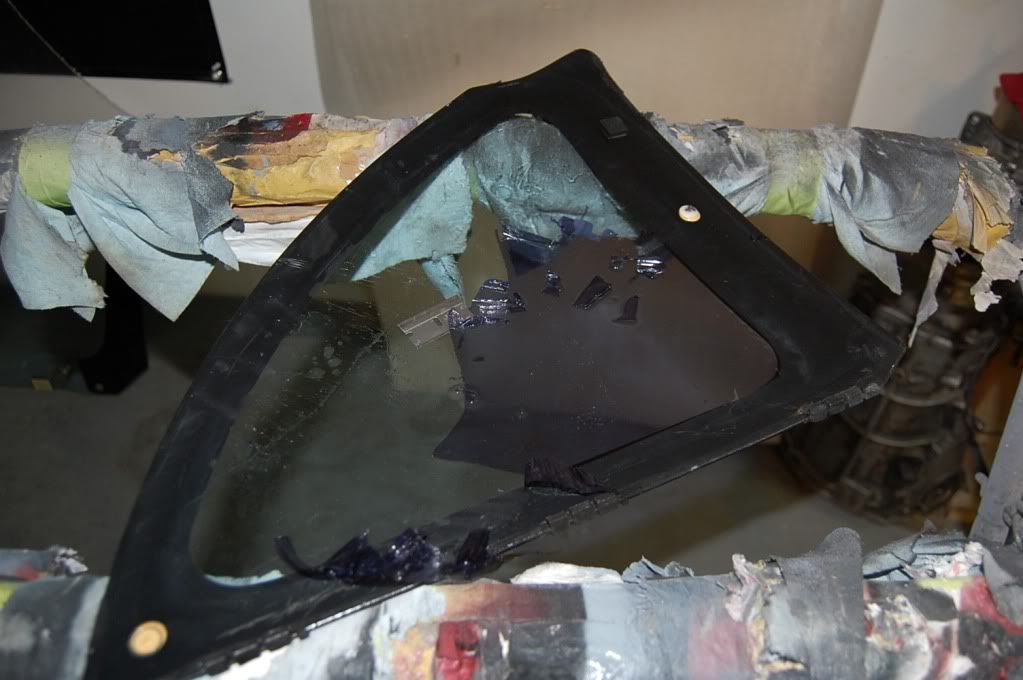
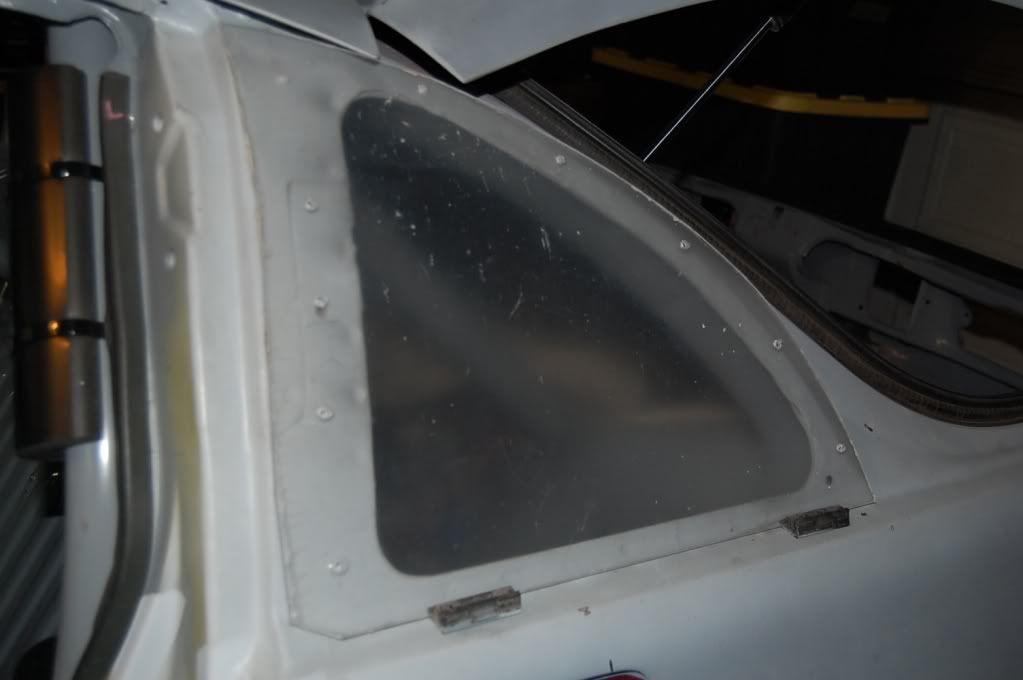
This is what I was starting with. I originally had the quarter glass windows but still wanted to use the moldings to get a stock look. I simply hate the way a piece of lexan is just drilled and riveted into the body. Doesn't look clean at all. So, I opted to strip away the quarter glass parts I didn't need.

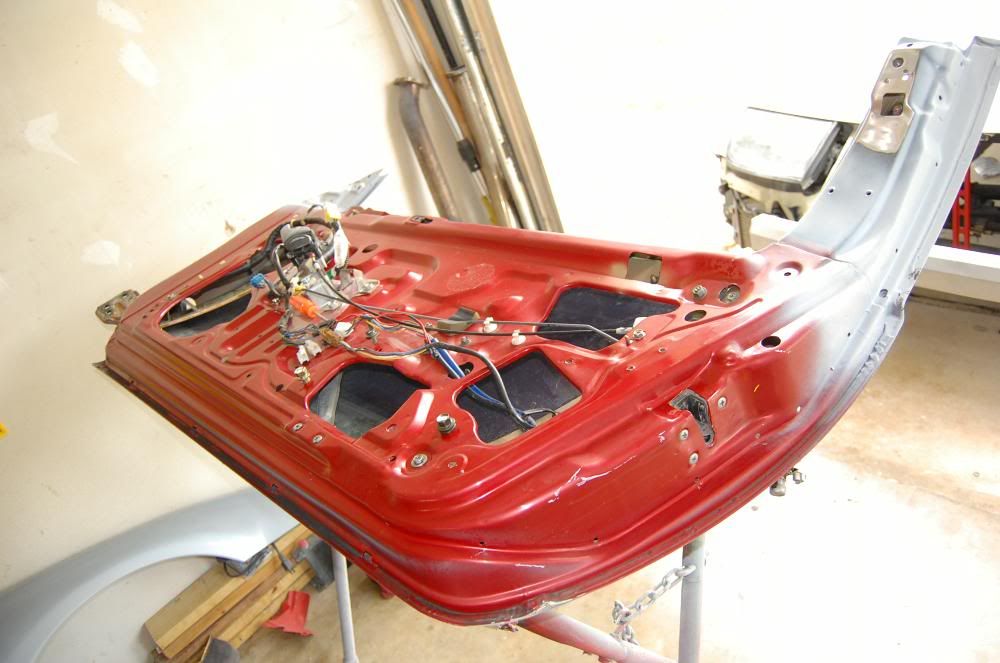
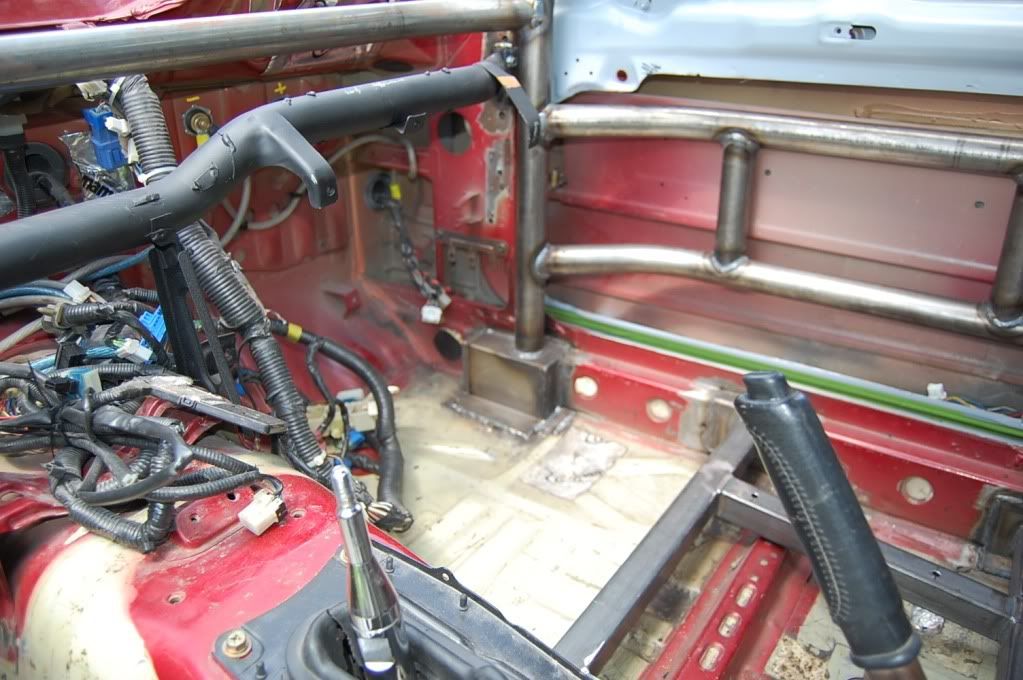
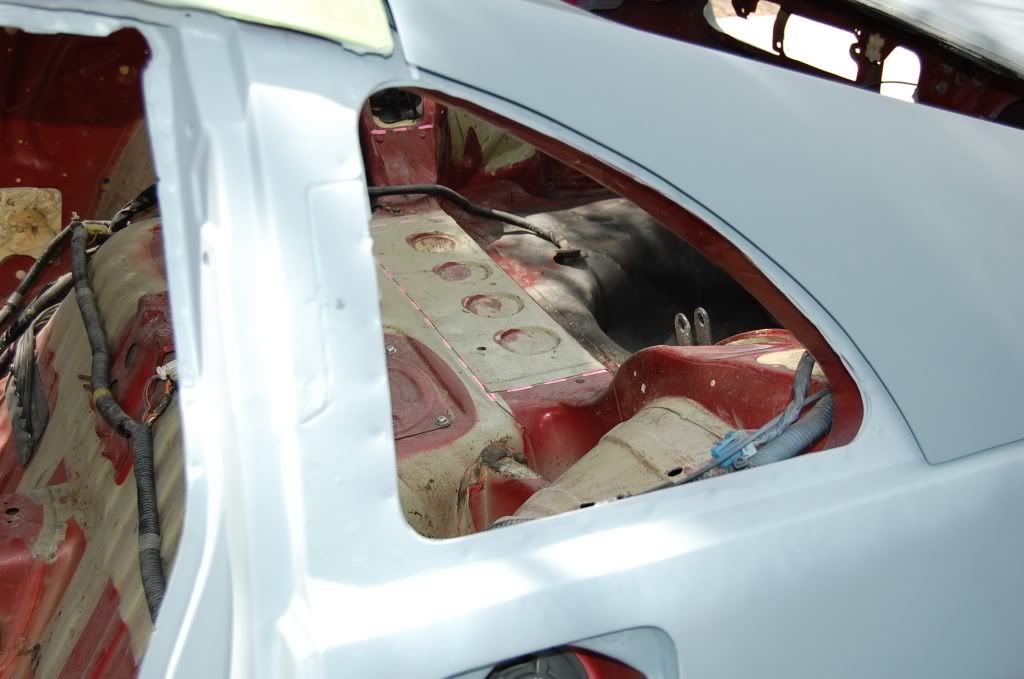
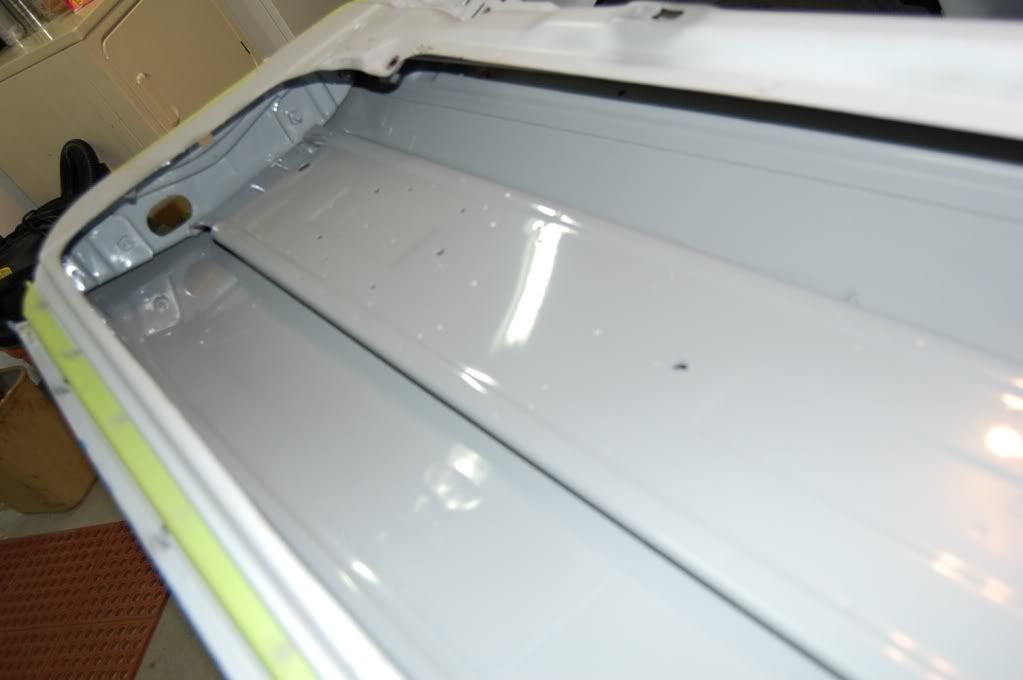
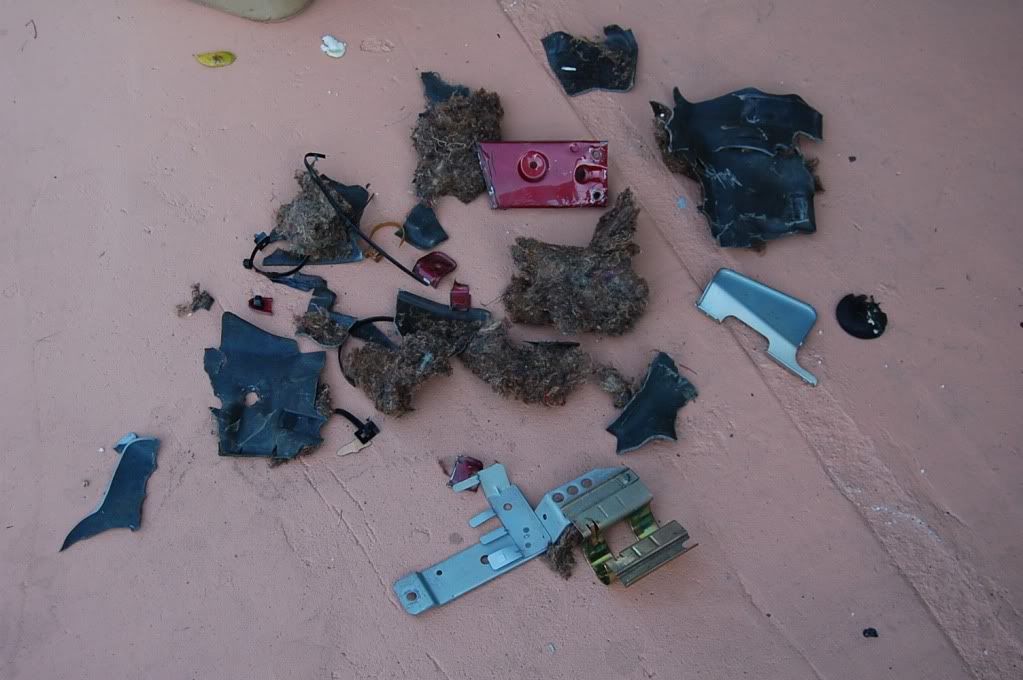
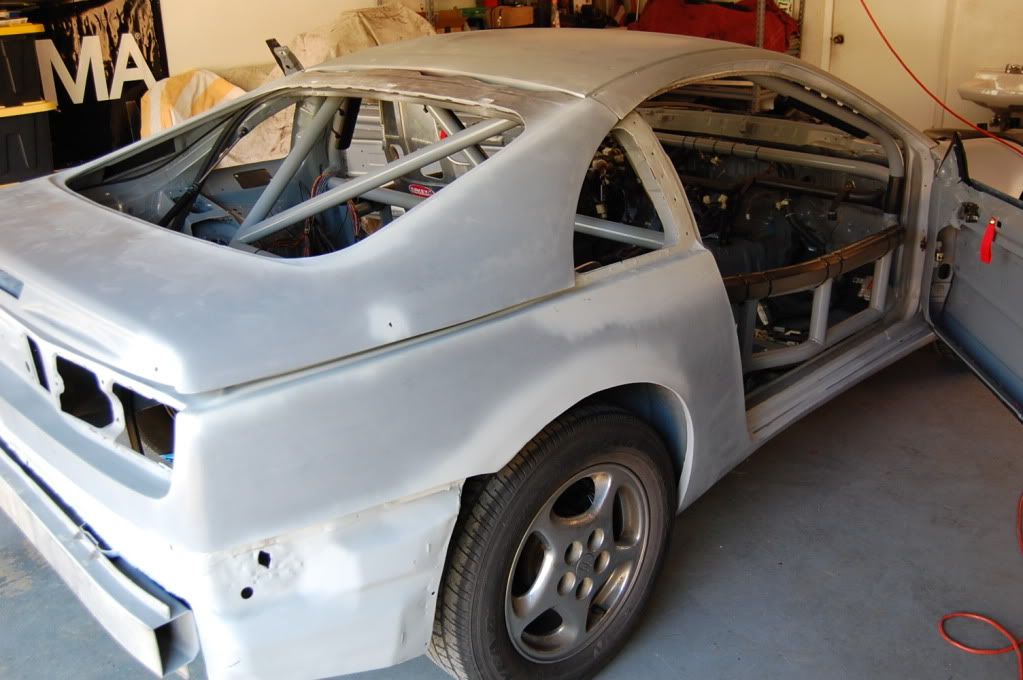
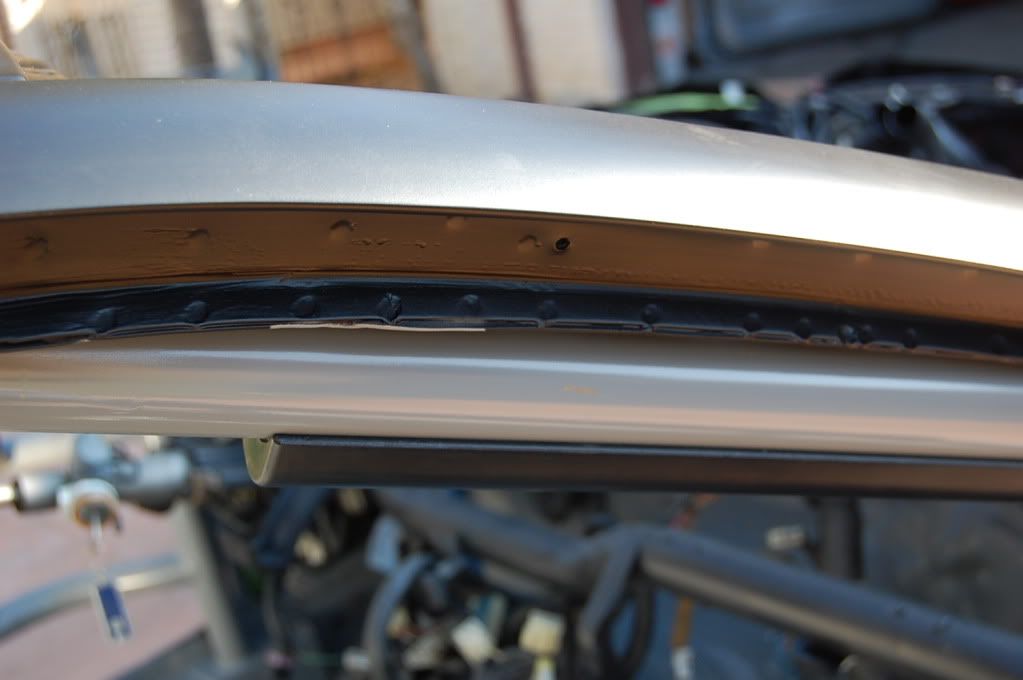
Anyways, this is our starting point. Obviously, everything is stripped off the quarter. Glues, adhesives, paints.....the whole enchilada...no hidden sins...to get us to here to this point, a clean mounting surface.
Image


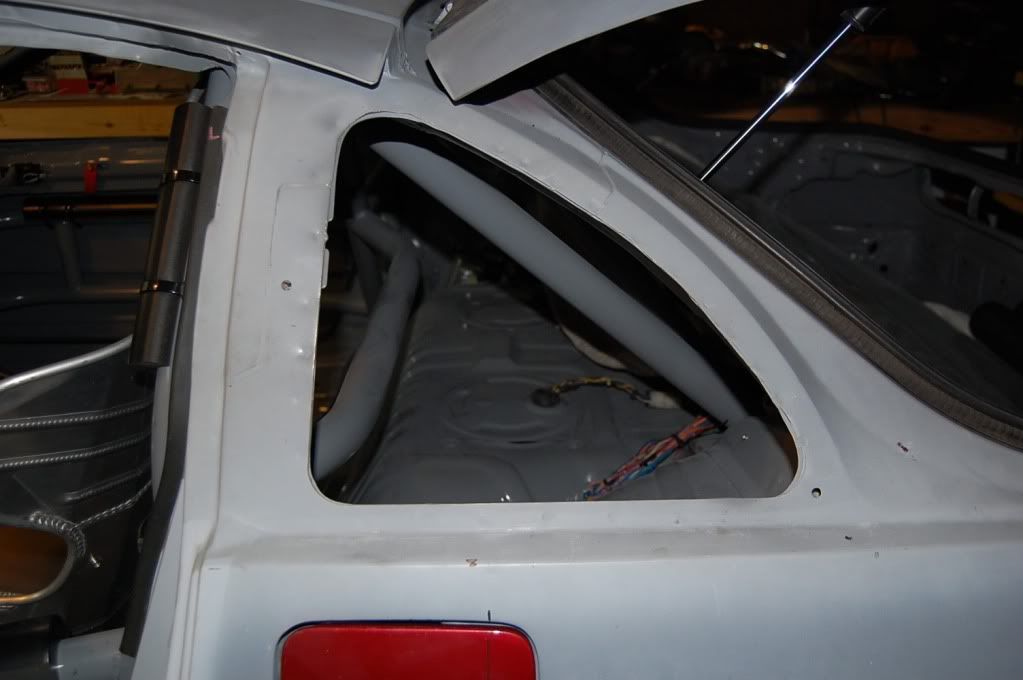
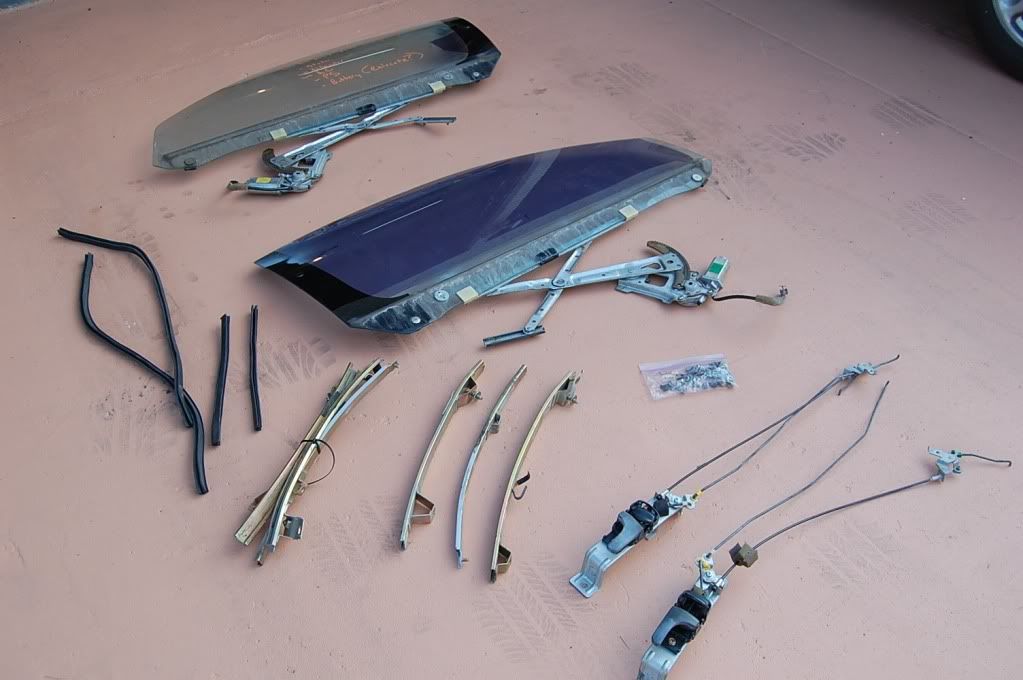
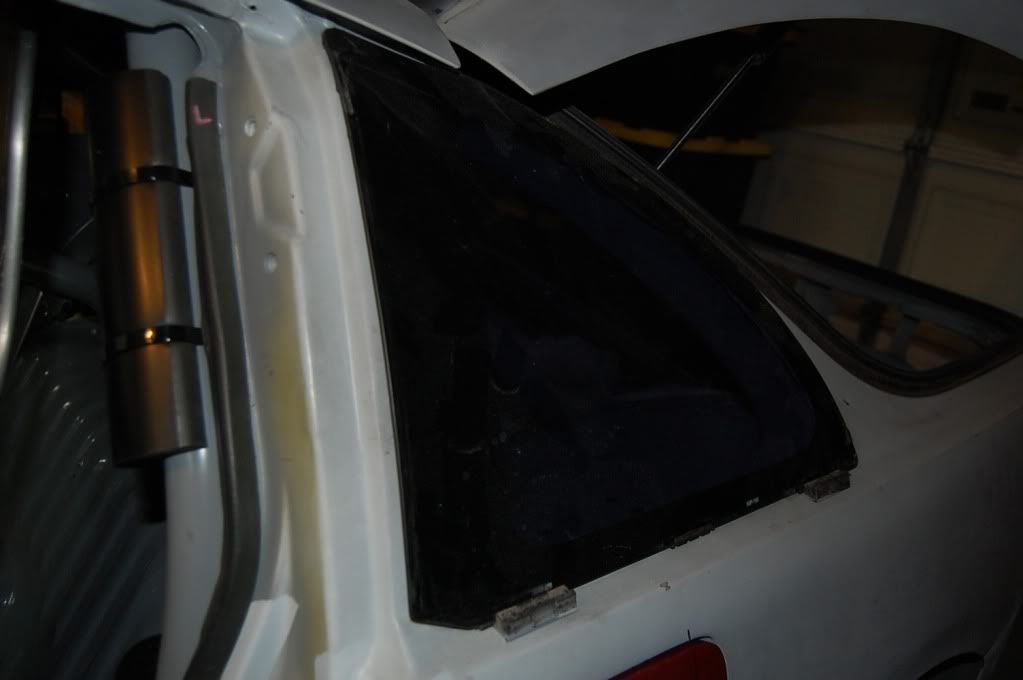
From here I took the original glass and removed it from the body using a simple glass removal kit from Harbor Freight (around $15 for the kit) some time back. I then took the glass and removed all the moldings, permanently attached tabs and adhesives. All I wanted was the stock glass to start from the ground up for a mold. Even the tint needed to go as I need to make a template also of the glass black out area, so that I can make my lexan piece look exactly like this one.
Image


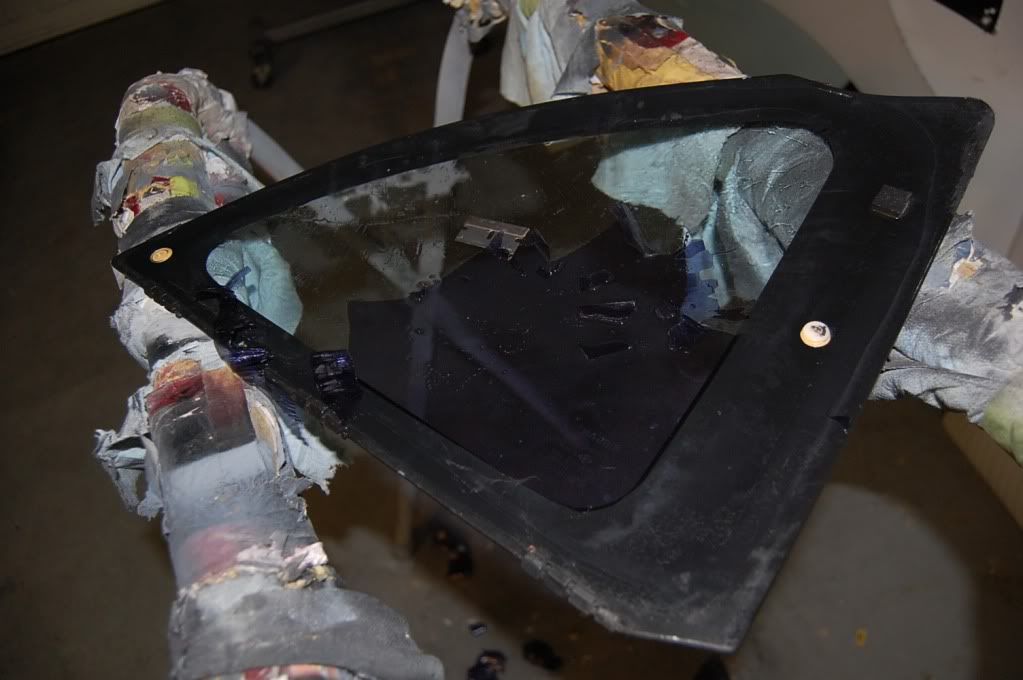
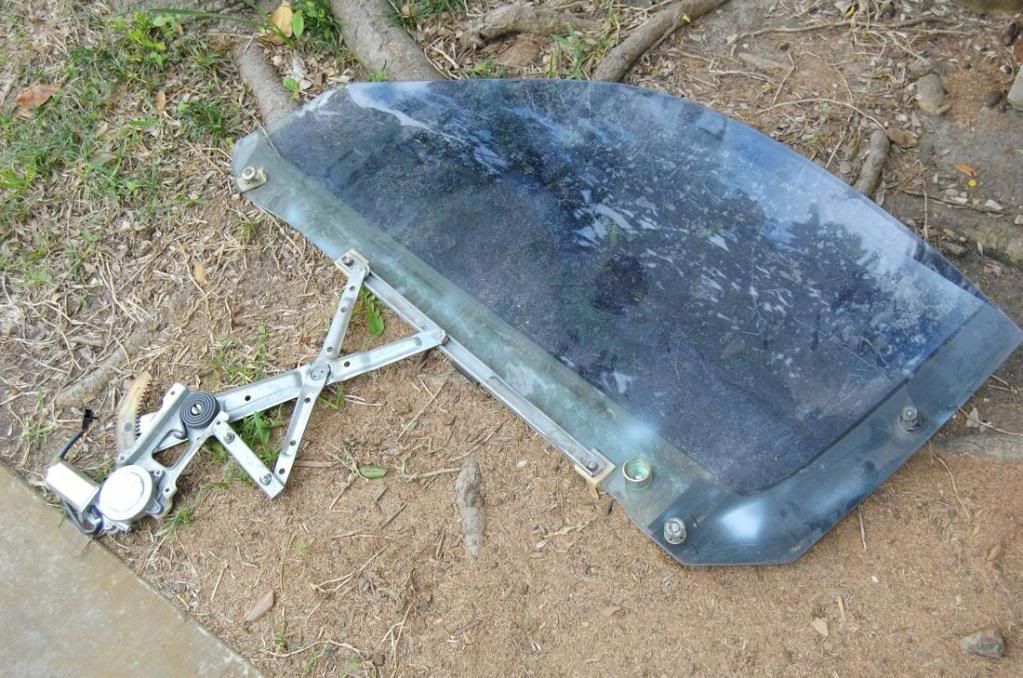
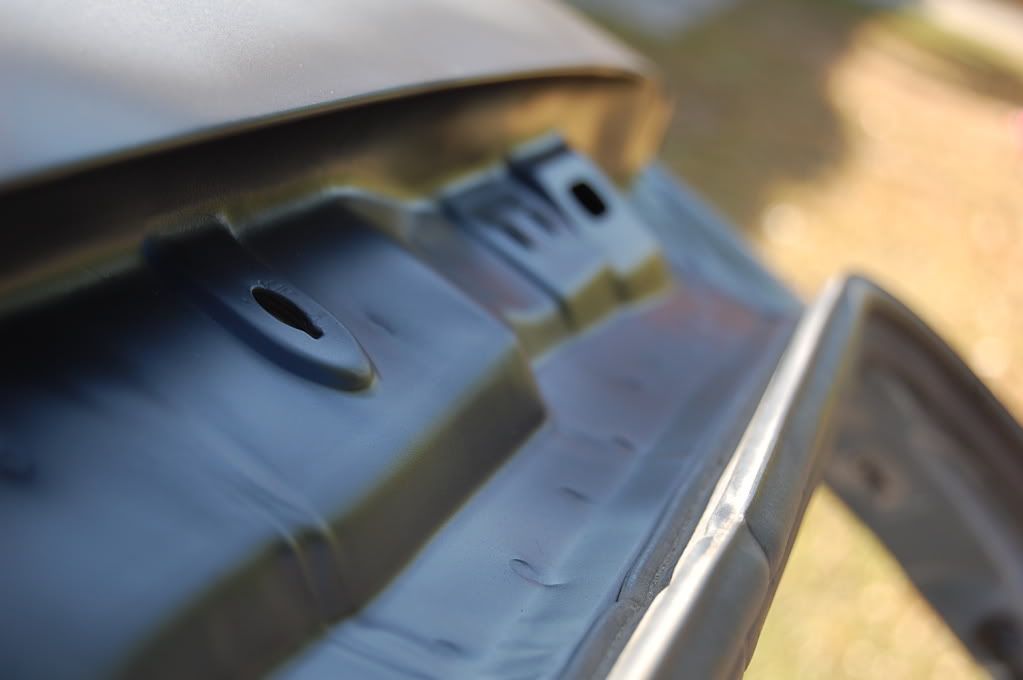
This is what I want. Just the glass....finally.
Image


Here is a basic mock up of what I want, using the original glass.
Image


Now that I have my glass out. I make a simple template.
Image


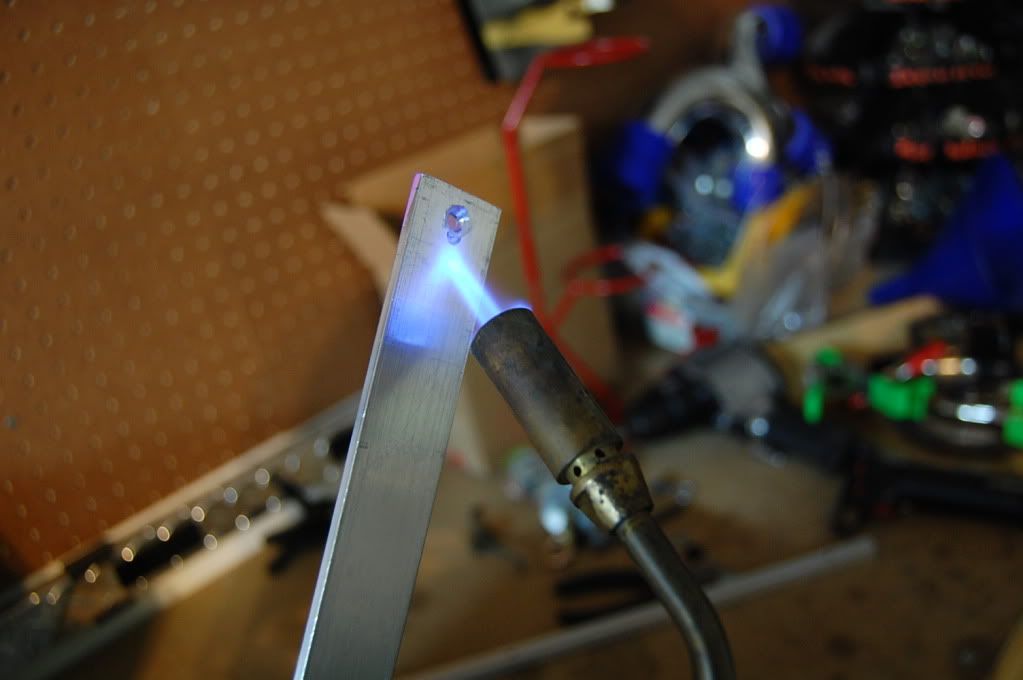
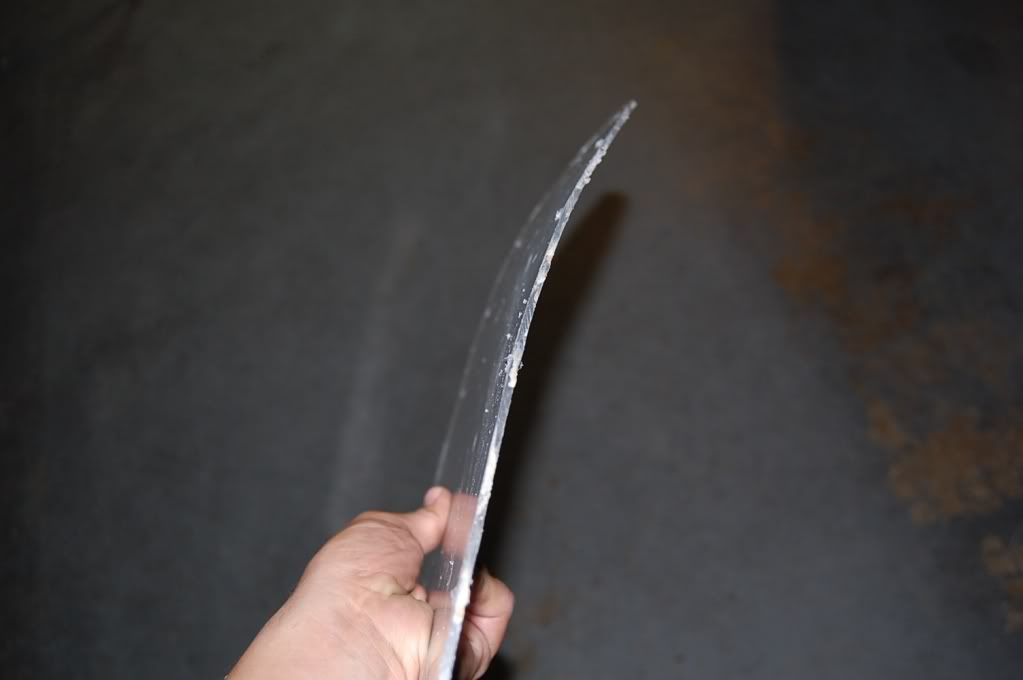
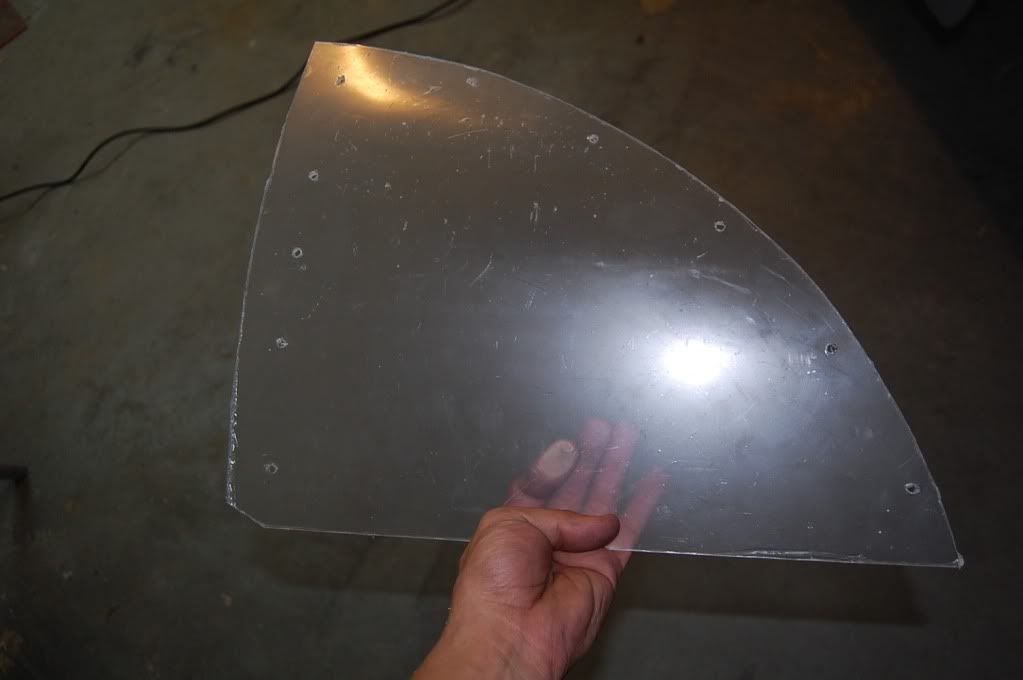
From here I took a piece of lexan that was the exact same width as the glass and cut out my piece using the above template. I used the exact same glass so that I could use the original quarter glass clips. These are important as they will allow me to simply clip in the rubber door moldings ( the same ones that everyone replaces all the time) that go over the glass. But the hardest part was forming, with a heat gun and by hand, the lexan to the same form as the oem glass. Here is the piece formed, this took about an hour for each quarter to mimic.
Image


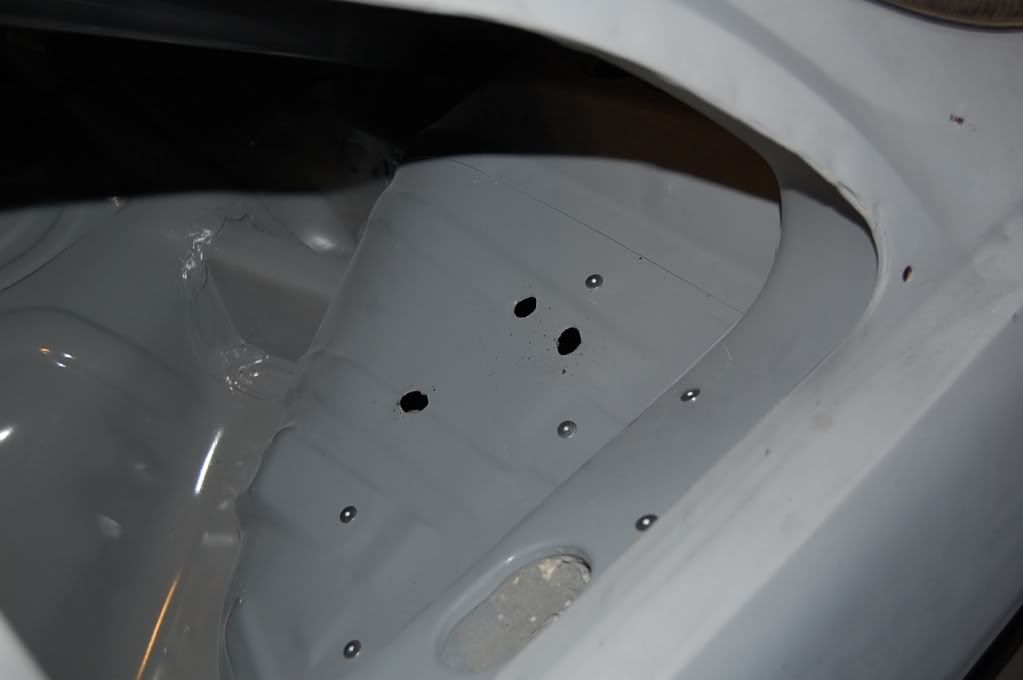
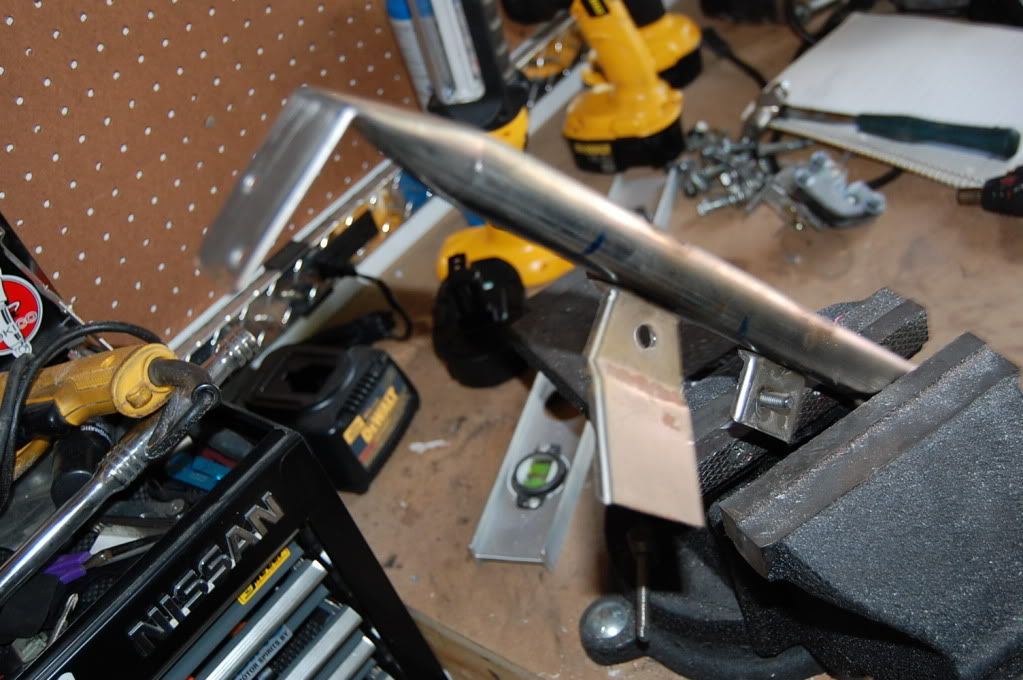
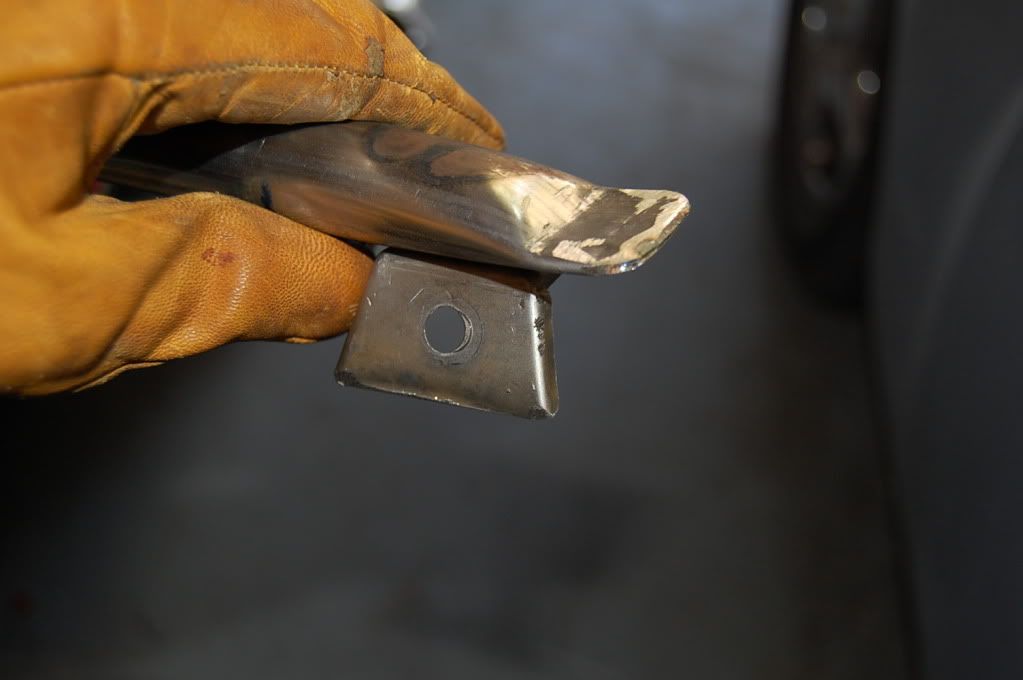
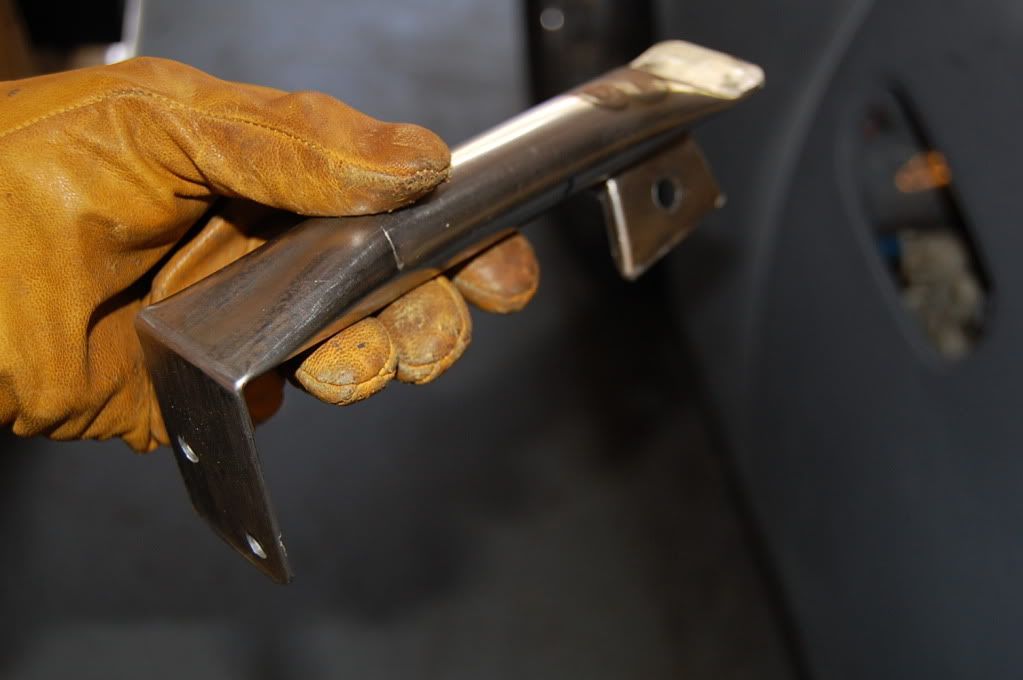
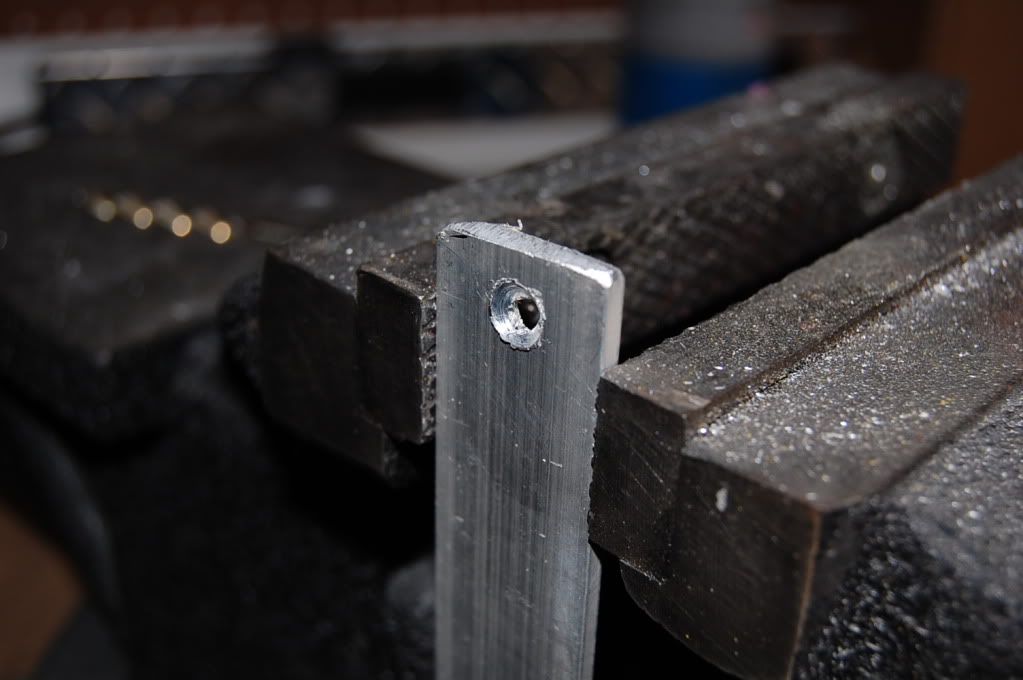
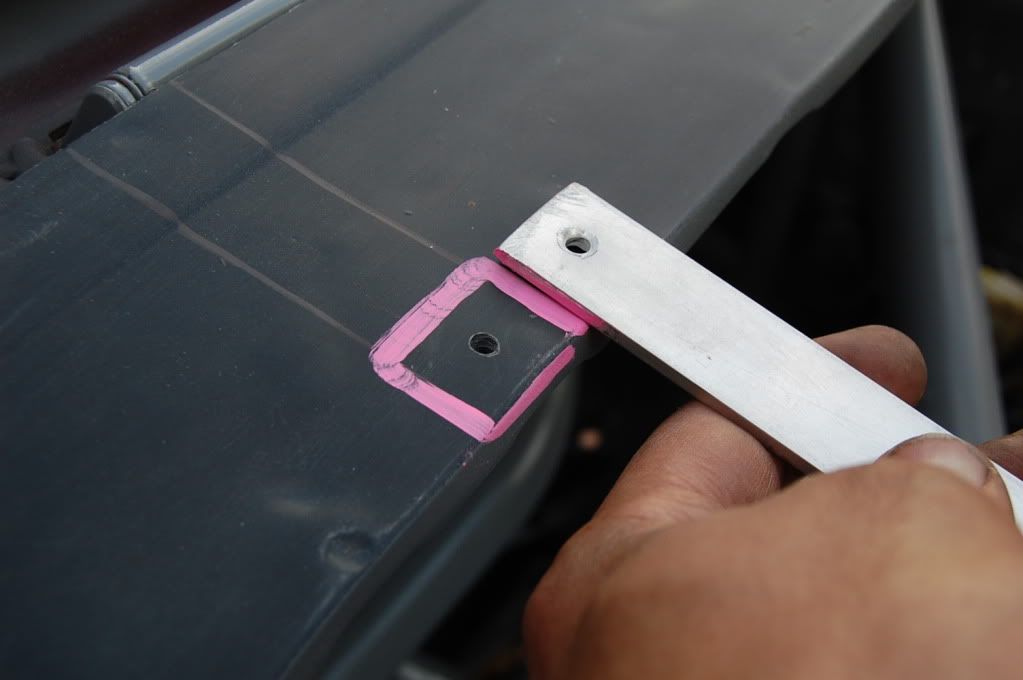
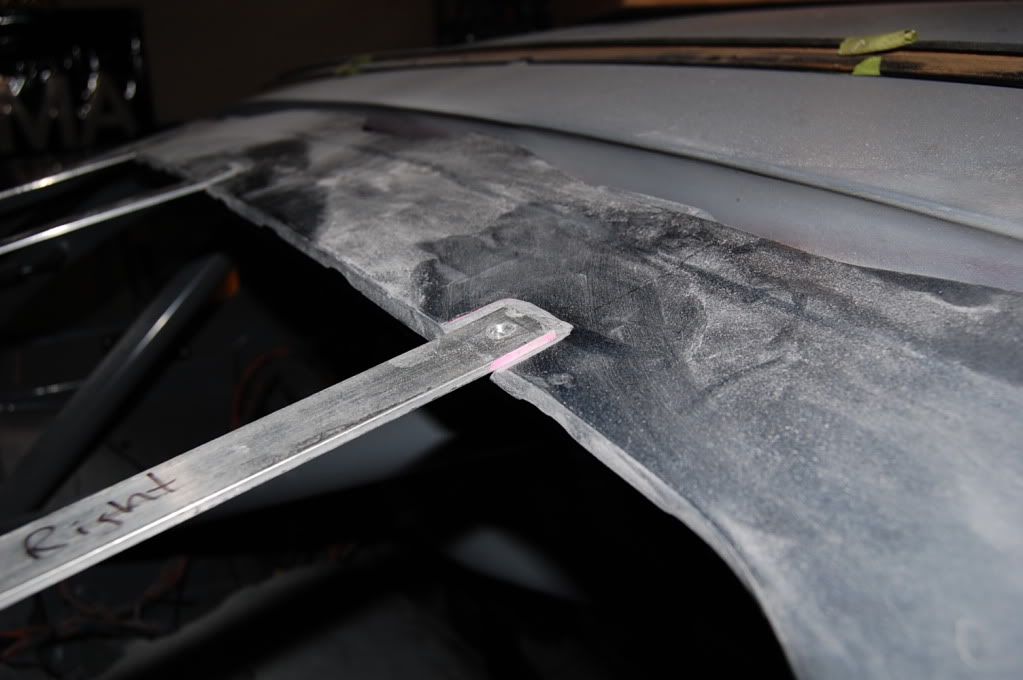
From here I layed out my holes according to how the lexan will stress the most and of course taking the look into account as well. Gotta look cool too.
Image


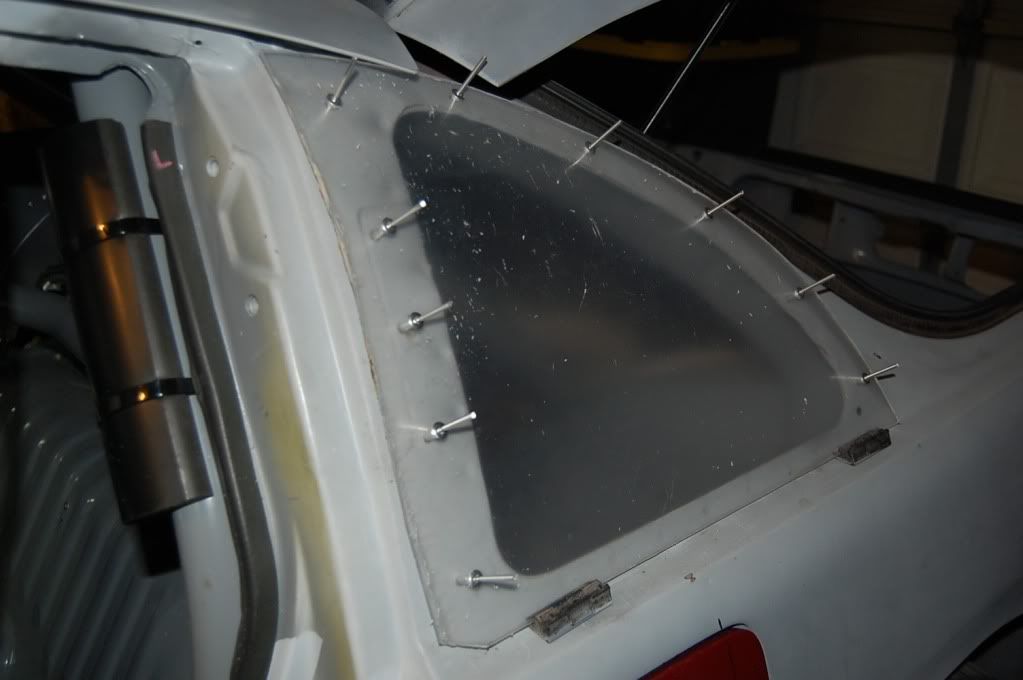
After that, I simply added my drill points to the quarter via marker. Punched the sheet metal and drilled the holes to accept rivets later on.
Image


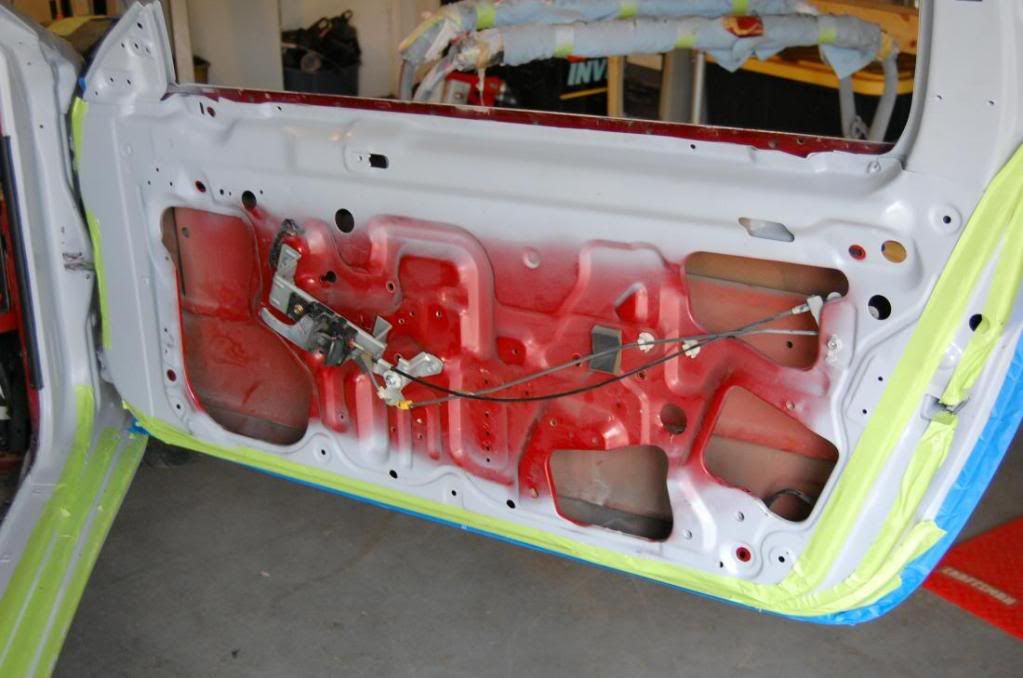
And here is mock up. Still have to paint the jambs with the car color later, buff and paint the quarter glass, install my lexan NACA ducts into them, lay down bonding adhesive and lastly install them. It will be a while till you see these in. But at least all the hard work is done. And.. YES I know it's rough but I plan on clean up the edges before install and also remember that moldings WILL be going back onto this lexan.
Image


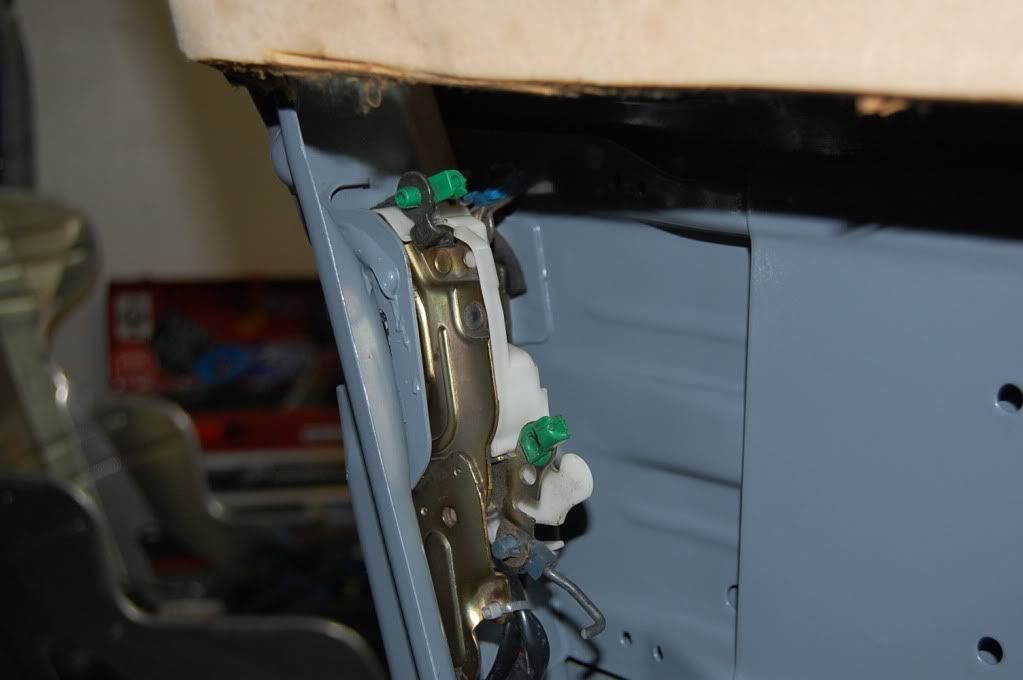
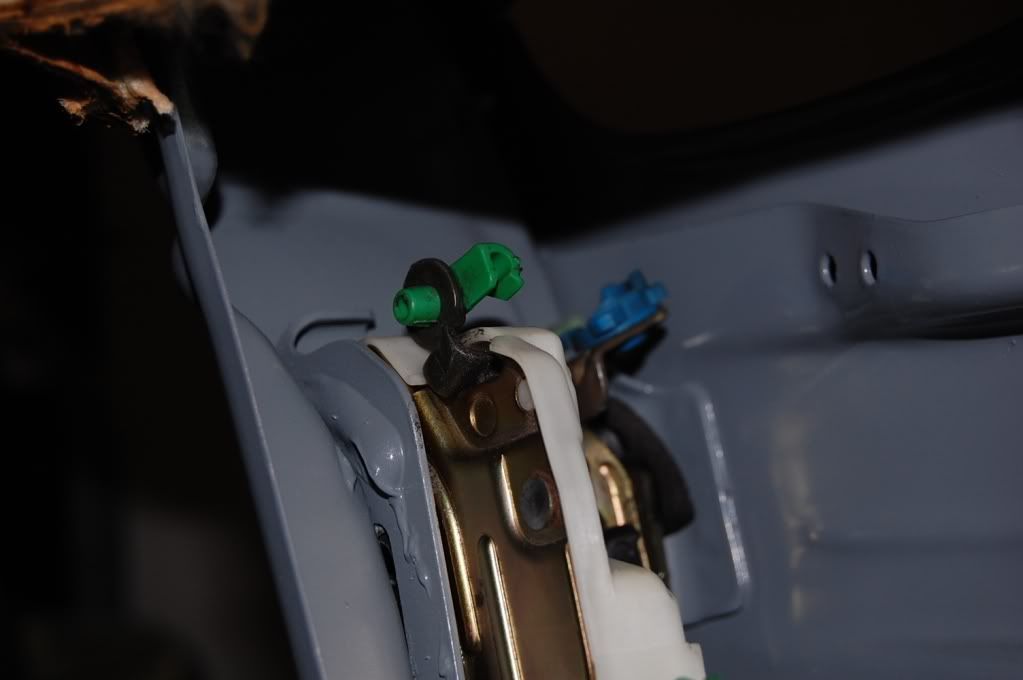
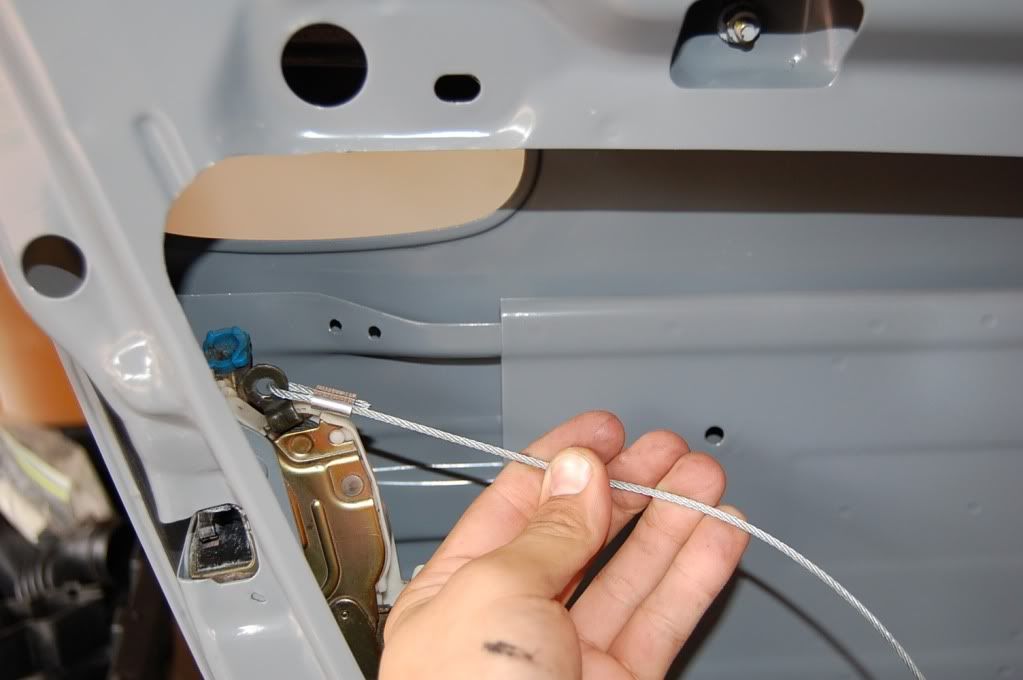
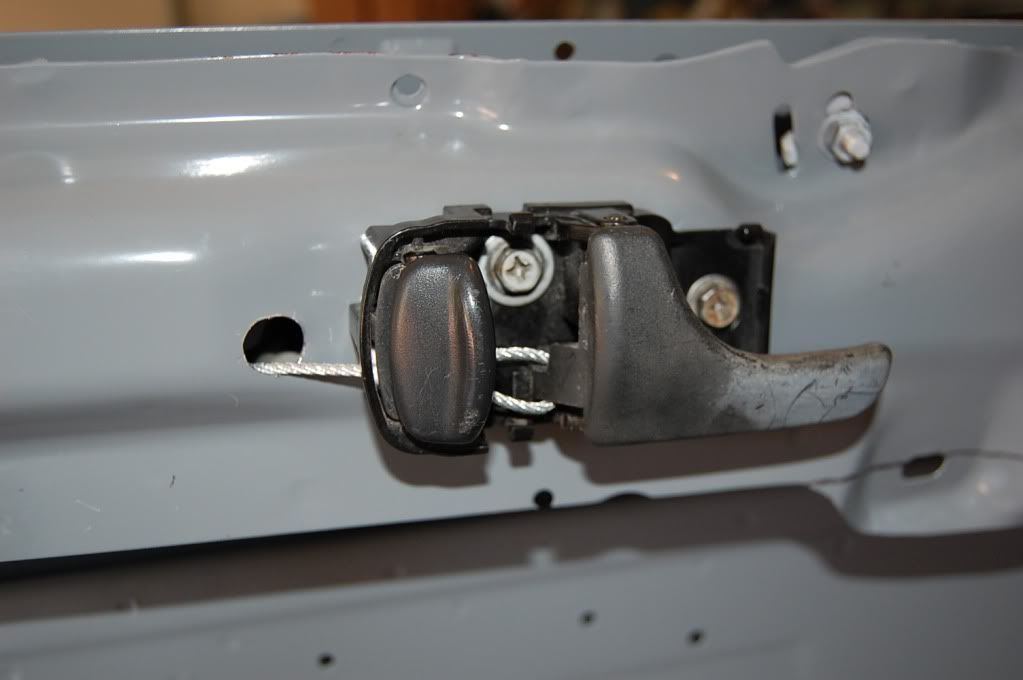
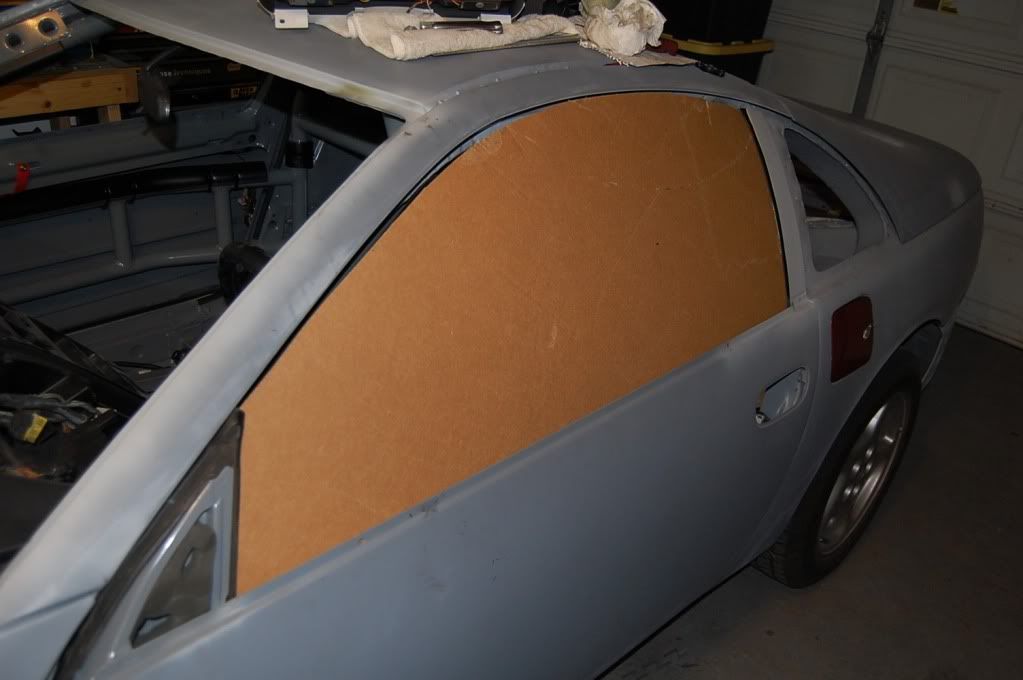
So with that done, I moved onto the door glass. The problem I am running into with the door glass is mounting. I no longer run an interior track which is the whole support for our door, so I have to come up with either a bracket or reinvent the track to allow the glass to stay stationary. I may just make a lip that will run the length of the glass on the high part to give it some rigidity. But who knows, still working it out in my head.

I also have a plan run a sliding door on the window as well, but have to figure out how to do that too. This glass will be a pain. But anyway, this is all I really got to on the doors.

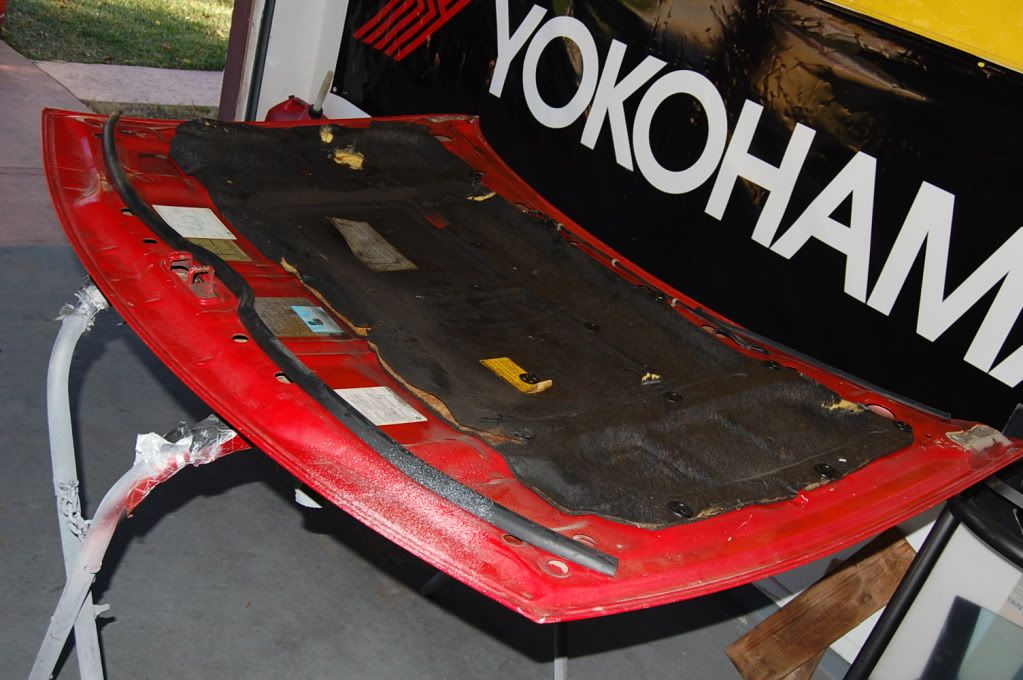
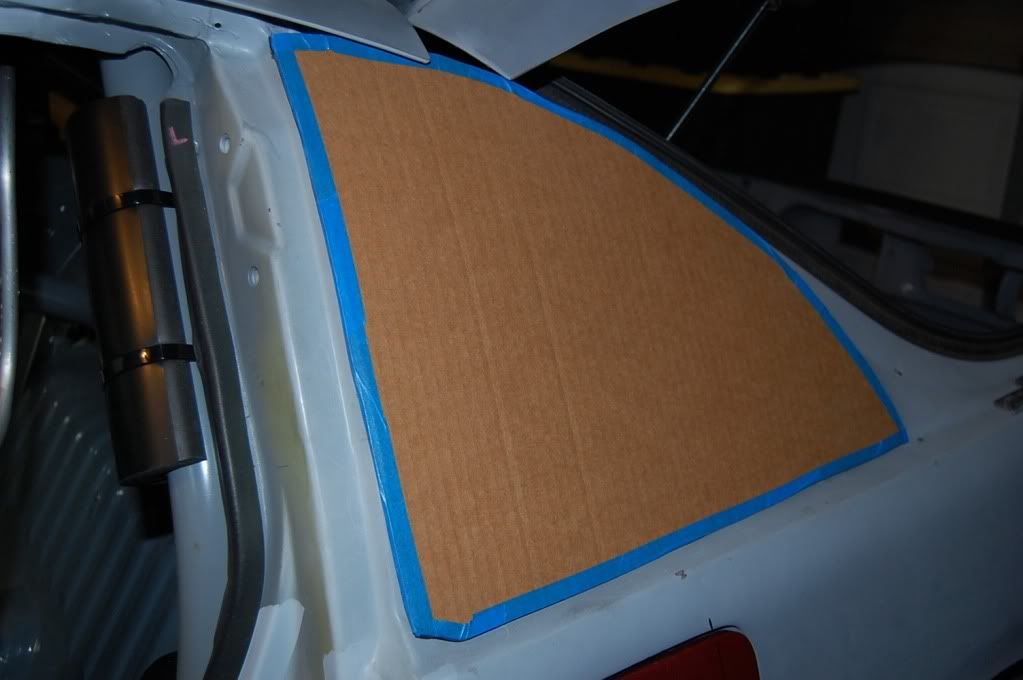
Took the original glass and simply removed everything to get a nice template.
Image

Here is the cardboard template. Not the stock moldings are staying place to still allow water to drain in the same stock way the car did originally. For the record, that cardboard is packaging from a Toyota bumper that I snagged from the office. Boooooo.......hissssssssssssssss..............
Image


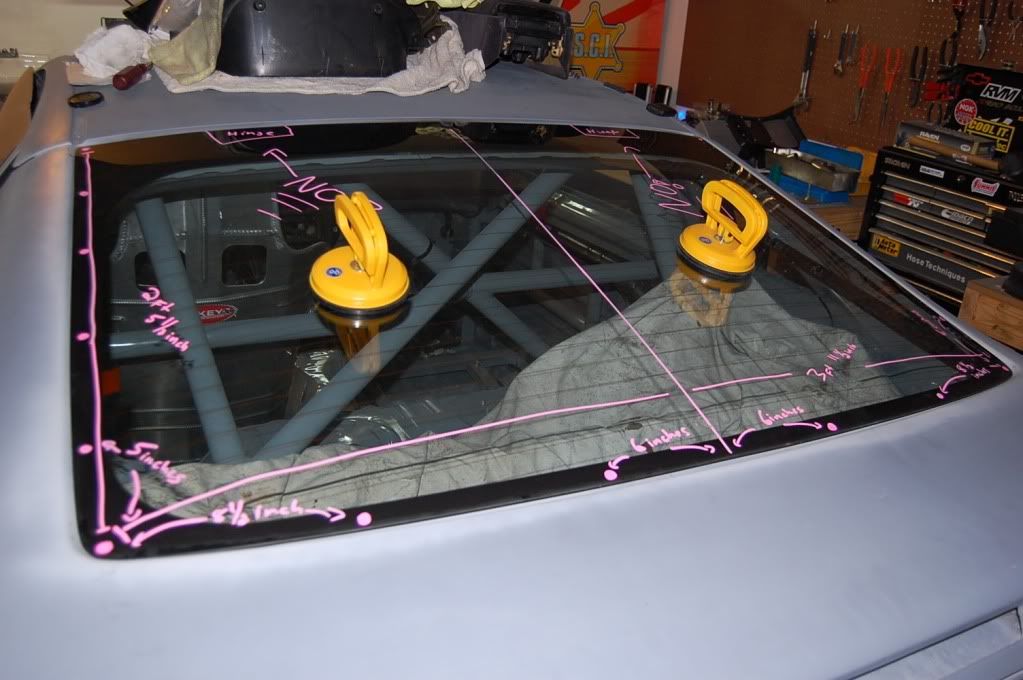
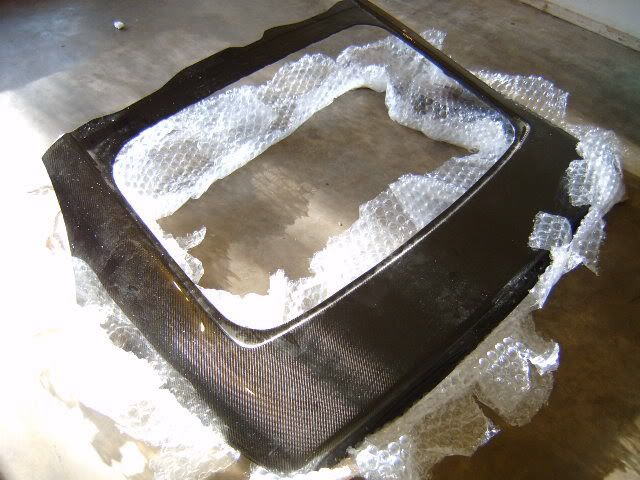
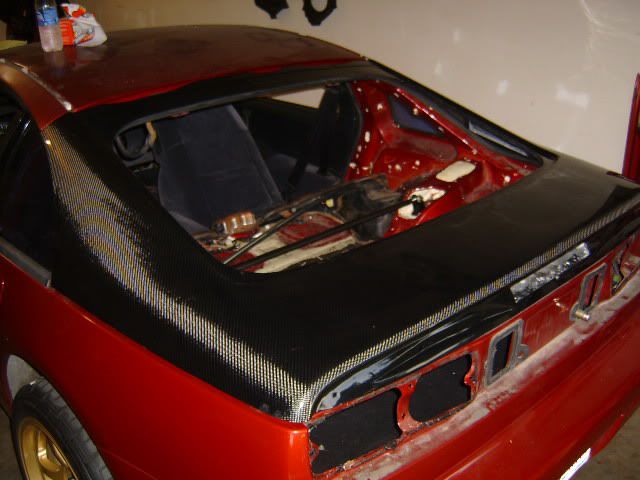
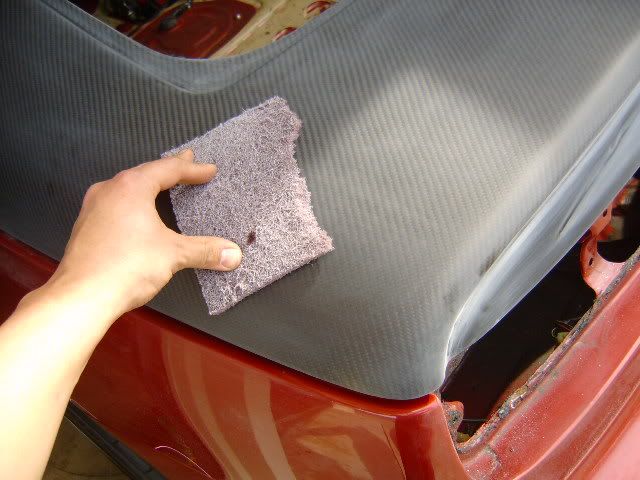
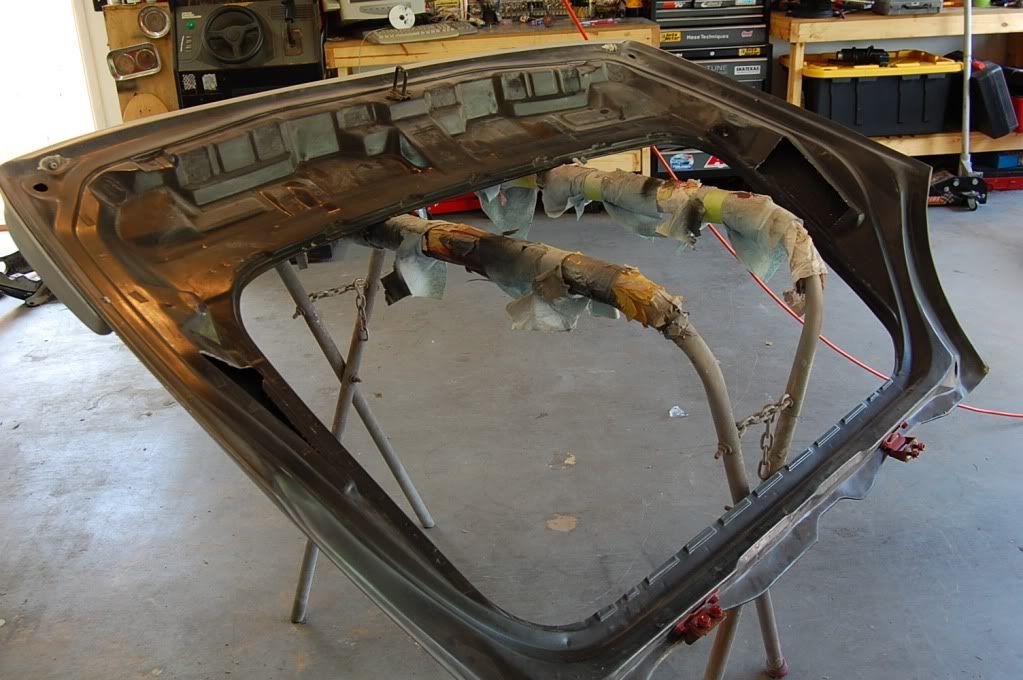
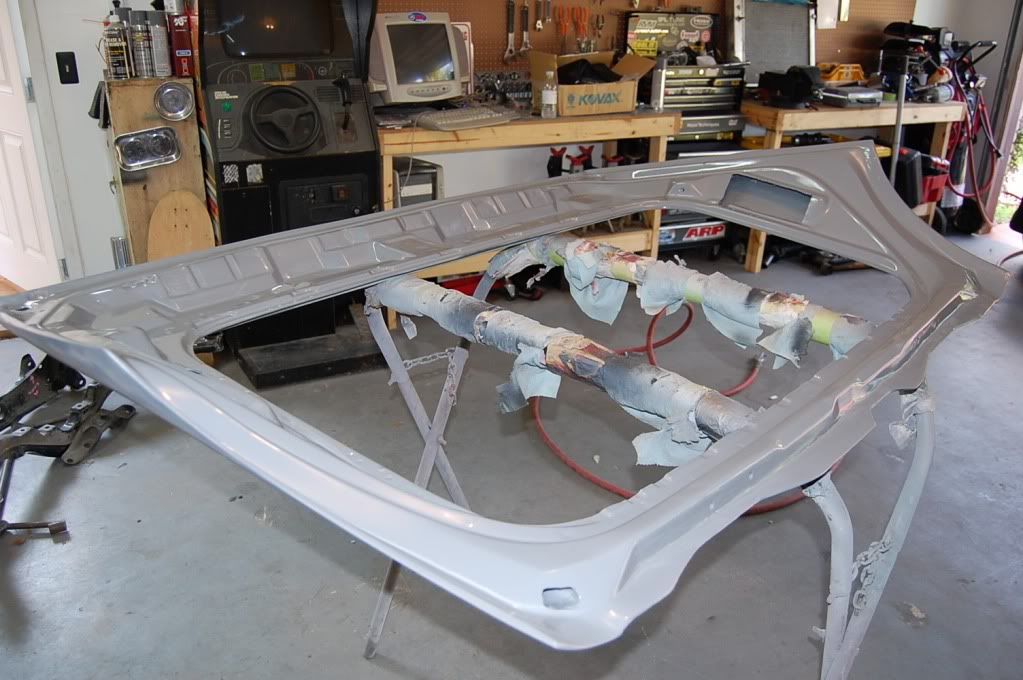
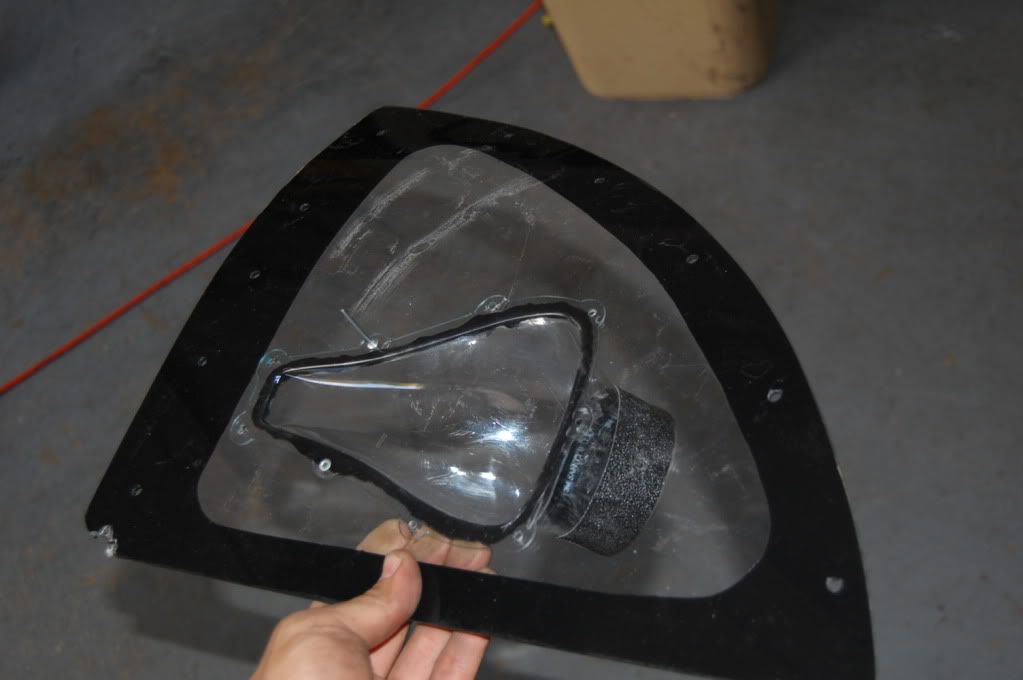
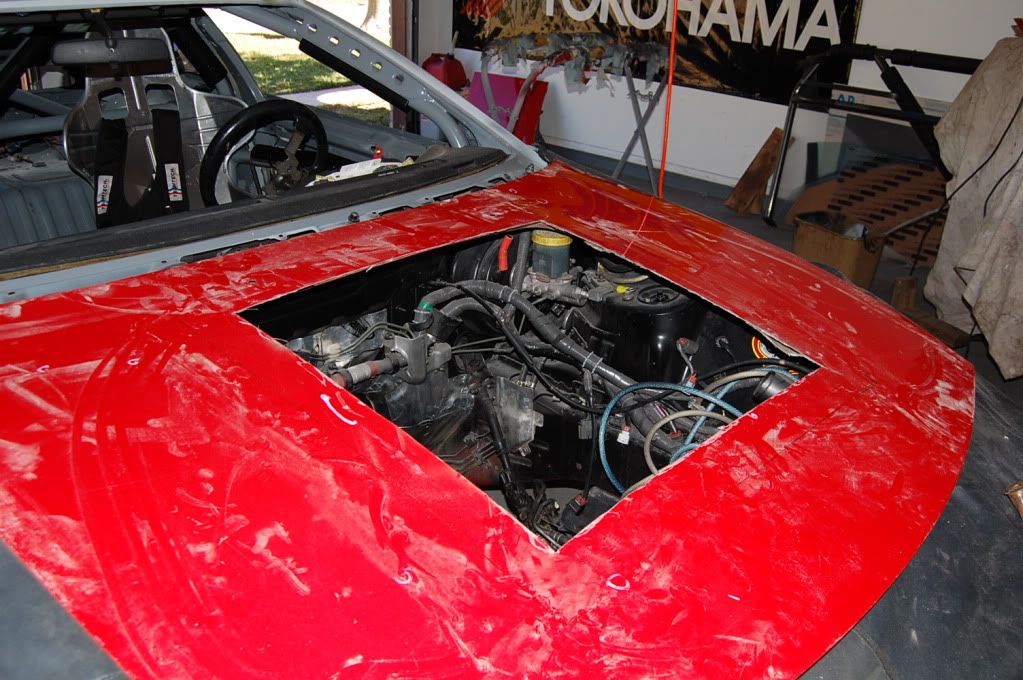
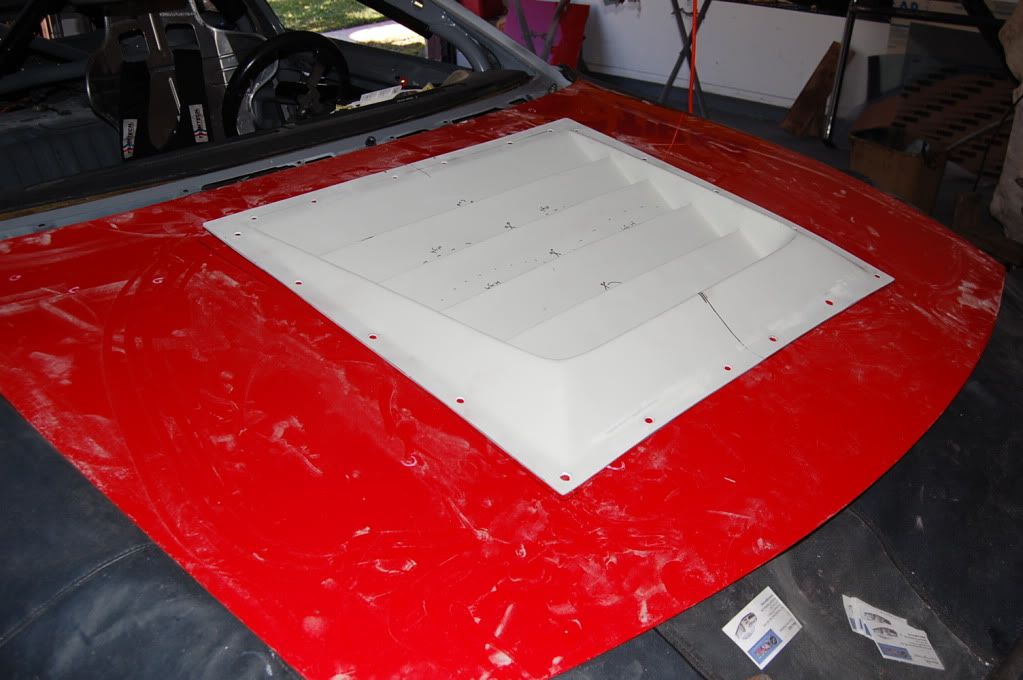
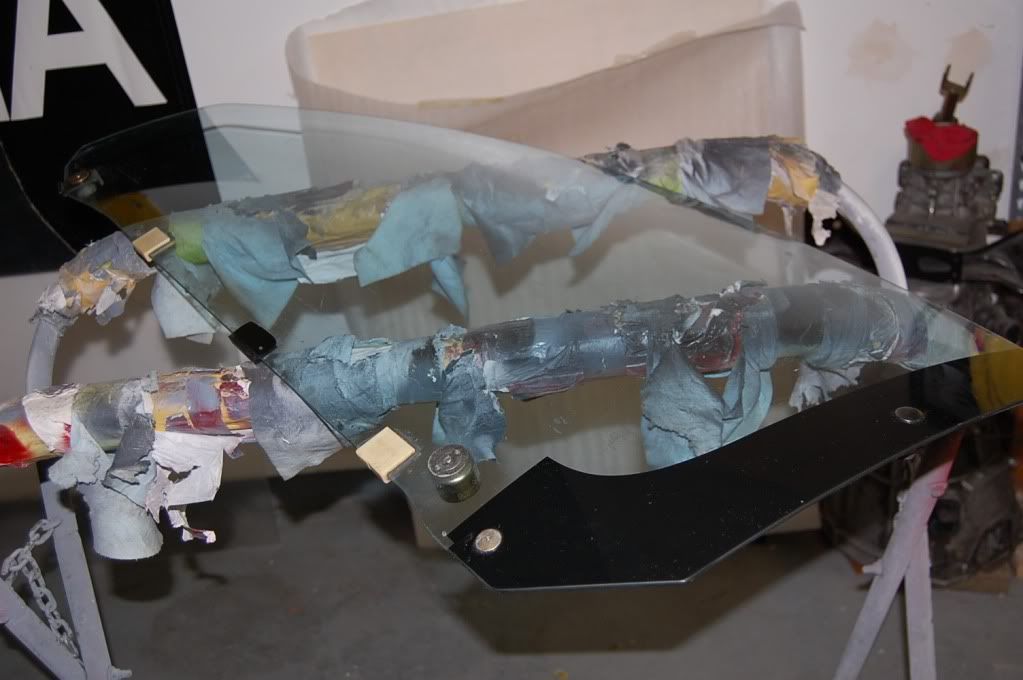
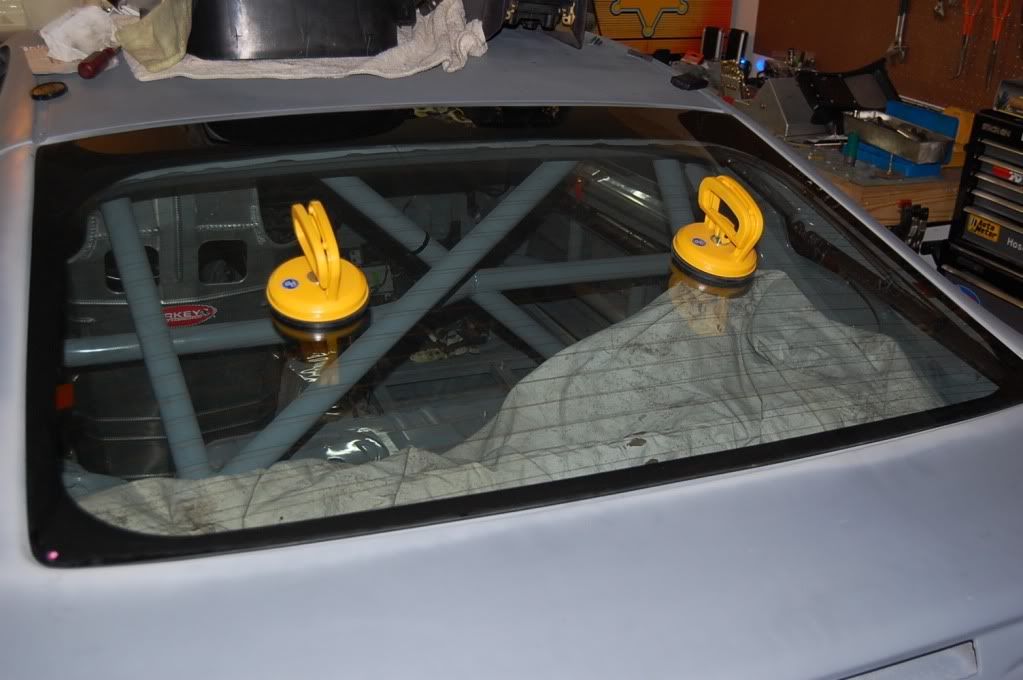
Lastly, I worked on my layout for the rear glass on the Powertrix Carbon Fiber rear hatch. This is a bit tricky but nothing near as bad as the door glass will be. I will have to use a thick lexan so that I won't have to use a bracing in the middle of the glass, that will simply impeed my vision. So forming it, although minimal in angle, will still prove to be a pain. But hey, gotta make it look cool.

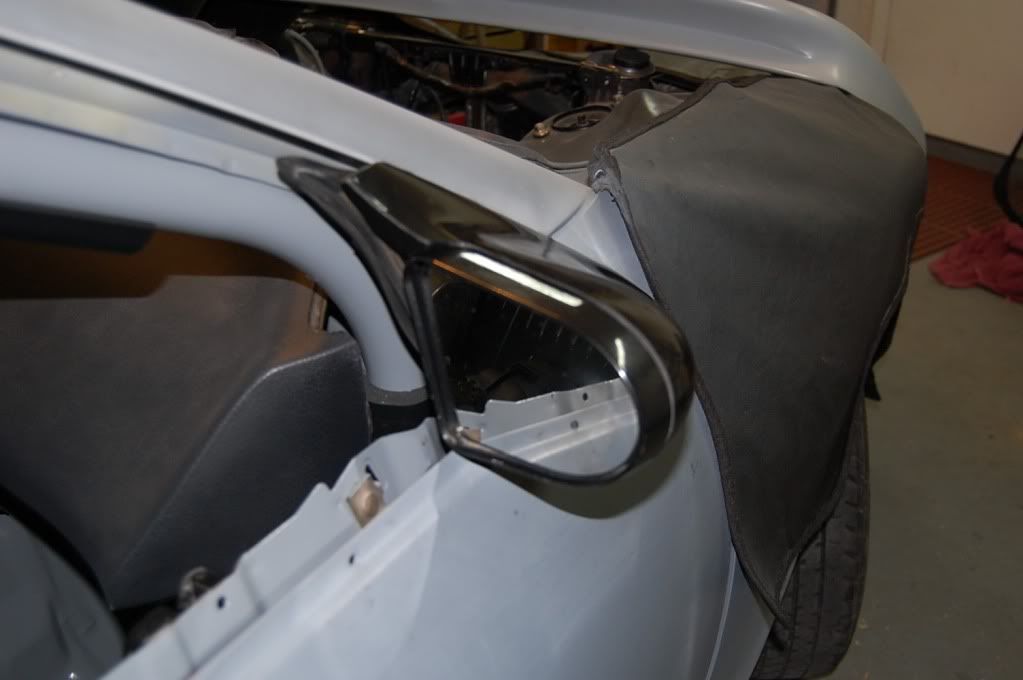
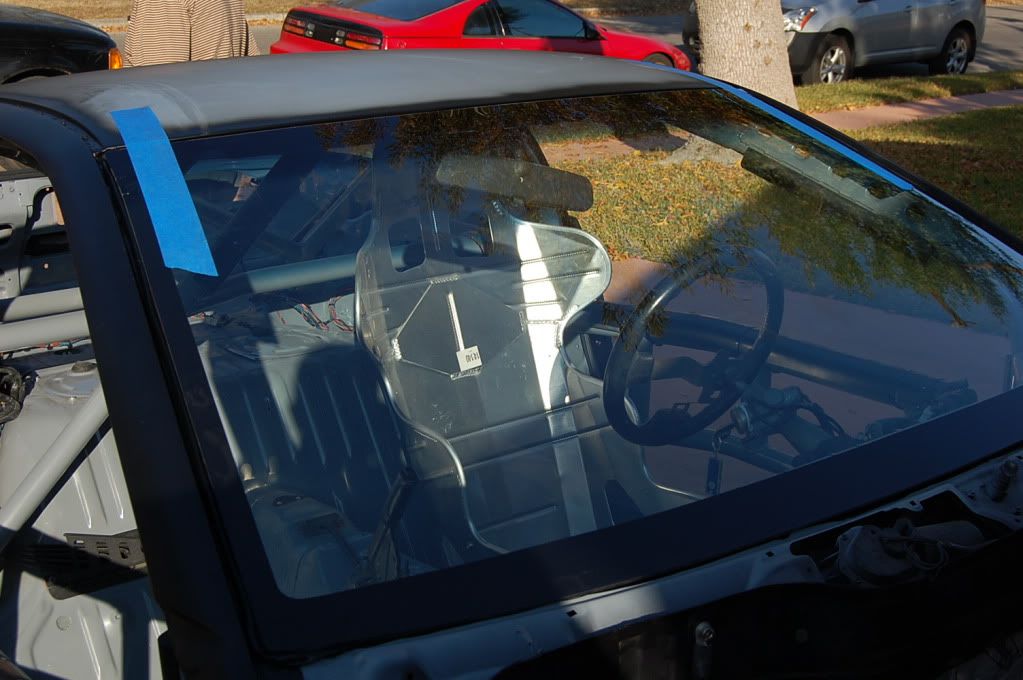
Here is the OEM glass in place. From here I will build a layout of my holes in the lexan that is coming in shortly.
Image

From here it's a lot of measuring and game planning. *sigh*.....this took a while to get all those holes layed out perfectly.
Image

Milo (San Antonio)
Posts: 854
Joined: Tue Apr 03, 2007 9:43 am
Car: Project LOWFATZ (weight reduced slicktop TT)

Post

Some tears and some triumph....but not much. Either way, getting closer.

The ABS actuator still needed a bracket for now, until later I figure out how to kill it out. In the mean time I had to fabricate a bracket to hold it into place. Originally we got rid of all 3 bracket beams that hold all the rear interior panels into place. These were no longer needed as we've gotten rid of 80% of the interior and brackets that hold them into place for a cleaner look and to shave some weight.

So, i simply took the old bracket and cut it accordingly.
Image


After cutting and using a press on the end to make it look like a stock piece would.
Image

Image


I ordered a reman steering rack and came in "okay" but was kind of pissed. When I opened it up a boot was already split. I had a set of new oem boots and installed them after the photo but still....for a brand new reman piece, that is kind of crappy. I am not telling who the reman rack was from but still, that sucks. PS- It was NOT Z1 before you all start going into your Hang-Em-High Mode.
Image

Image


Installed the TeamTech 6 point harness Eye Bolts as well. This was more of a pain than I thought it would be. Took a while to get the spaces down and in the correct and proper way you are supposed to according so SASCA regulations. TeamTech makes an amazing harness, i picked this one up from Sean "The Stig" Farrah from one of his track car. I'll need to get it update as it's expired but it will work for a while until the Z sees competition and the need for date validation becomes an issue for the belts.
Image


Spent a full day working on forming the rear back window Lexan and still need to probably throw another 3-4 hours at it.

This is before I started forming it. Straight as a board, this is how sometimes these are installed on track cars and they look like garbage without an angle formed into them.
Image

These will be the inner aluminum bar bracing for the rear back window. Later we will need to form them up a hair to accomodate the angle in the Lexan we still have to make. I will most likely hole punch these as well to shave off a few ounces and add some strength to them, but they are pretty stout for aluminum thin bar.
Image

Drilled and recessed to allow the lexan to sit flush on top of it for a good seal.
Image

Later we will have to cut/smooth out a section of the Powertrix CF hatch to flush these in.
Image


And now for the tears. When I was adding in the clear NACA ducts to the drivers side quarter window it cracked. It sucked. I was pissed and chunked it across the garage. The crack on the bottom is from my 100mph pitch into the garage wall, the crack was from the rivet exzerting too much force on the lexan and cracked it.
Image


But, I have a plan......I am going to one up this design with a CF NACA Duct, step up the thickness by .10 on the lexan I'll use for just this side and lastly install a set of small SS nut and bolt combo for the duct to fastened in. I was SOOOOO freaking pissed that it broke but I figure with failure comes the opportunity to make a better product. We shall see.

Anyways, that's it for now.

Milo (San Antonio)
Posts: 854
Joined: Tue Apr 03, 2007 9:43 am
Car: Project LOWFATZ (weight reduced slicktop TT)

Post

Had a bit of time between all the chaos of the Xmas holidays to put some time into the project.

Needed to cut and bevel in a section for the back window support braces. Used a dremel and a variation of bits to get there.
Image


I needed to form the alumimum to the original contours of the glass. So I used the orig glass as a template and began forming. I initially heated the aluminum bar to spread out the molecules which makes for a smoother easier bend, a good trick, especially when working with aluminum.
Image


After a little bit of work. Came out pretty flush. I still will punch holes in the aluminum bar to shave off a few ounces before final install of course.
Image


I picked up a so-so condition stock aluminum hood to start the mock-up process for the hood vent.
Image


After a lot of measurment and eyeballing, cut the hole out.
Image


I remember Kuah stating how much of a pain this way, and now I know why. The flat vent does not fit well with the slope of the hood. Positioning is dead on. But I will have to head gun and cut stress sections into the fiberglass vent before reinforcing it. It's not bad but the goal is flush.
Image


**********************************************************


And I got started on painting the jams on the track car with the new color... Dupont Hothues Hot Rod Black. I ended up wanting to do the jams myself as shops never ever do it the way I want. So.....I did it myself.

Here is a quick time lapse.
Dis-assembly.
Image


Sanding, scoth padding and surface prep.
Image


Masking off.
Image


Jams shot.
Image


Removed masking.
Image


Here are a few random shots of how I masked the car off.
Image

Image


And some shots of the color on the car. Again, it's a professional flat black from Dupont. A pint with a kit will get you around $175-$200. I still plan to shoot the whole car which will probably be another $700 in materials most likely. The color itself is a true flat black and looks good, rattle can doesn't even touch it.

Image

Image


And with the jams painted up, I started install on a few things. Had a new front windshield installed into the Z to keep it street legal.
Image

New glass installed.
Image

LIBRILZ
Posts: 1491
Joined: Sun Mar 04, 2007 3:17 pm
Car: 1990 Nissan 300zx
2007 M45 Sport

Post

Nice work man, I was wondeering how this car had been coming along. Looking good, only thing I see right now being kinda iffy is the seat is made out of metal. Thats gonna get pretty hot in the summer heat don't you think?

DanDrath
Posts: 1393
Joined: Sun May 10, 2009 8:19 am
Car: 1990 Nissan 300ZX 2+2 TT
Location: Long Island, New York
Contact:

Post

sick build more updates! =]

User avatar
DCaff300ZX
Posts: 4202
Joined: Sun Jun 14, 2009 8:18 am
Car: .
1993 CRP TT- Modified
Location: Tacoma, Washington

Post

WOW.
This will be fun to watch!

Milo (San Antonio)
Posts: 854
Joined: Tue Apr 03, 2007 9:43 am
Car: Project LOWFATZ (weight reduced slicktop TT)

Post

LIBRILZ wrote:Nice work man, I was wondeering how this car had been coming along. Looking good, only thing I see right now being kinda iffy is the seat is made out of metal. Thats gonna get pretty hot in the summer heat don't you think?
They make a cover for the seats, similar to most other solid bucket seats. It is actually masterfully foam padded formed to contours of a common body. Once that insert is in, you are not going anywhere. Very nice but a bit pricy. They are not in right now as I don't want to tear them up with the constant installing/removing the seats for mocking.

User avatar
raremotive
Posts: 3581
Joined: Sun Oct 07, 2007 8:54 pm
Car: 04 Infiniti G35
Location: Stuck in the middle.

Post

You left a lot a weight in the doors. :ohno:

Image
Image

You have side impact for your rollcage, no need for those heavy bars in the door ;)

Milo (San Antonio)
Posts: 854
Joined: Tue Apr 03, 2007 9:43 am
Car: Project LOWFATZ (weight reduced slicktop TT)

Post

Yup, I understand that. But considering the car will go door to door, it's one extra step of additional safety. Trust me, I know that I can gut the door. If I was going to do that, I would simply get rid of the doors and go with some FRP doors from Escort Racing as I know one of the techs and a distributor for them is a good friend. So, I had that option but did not go that route for the addition of safety.

Personally, the extra 15 or so pounds per door is worth it to me as I have to examine vehicle impacts for a living and have experience with wrecked tracked cars. To me, it's worth it. That's also why I chose to add structure foam for additional structural integrity as well.

Anybody can come and chop up a car, but considering the car will have myself and most likely a passenger on most days, I wanted safety for them mostly. Also, ocassionaly I will hand over the keys to a few buddies that are pro drivers for shake down runs so I did not want their safety to be in question with a new car they are running down issues with.

To me...not worth the danger level. Also, another reason why we went OEM front glass.

Sometimes, you have to measure these things this way.

User avatar
Ace2cool
Posts: 11650
Joined: Sun Apr 20, 2008 5:21 pm
Car: 1991 Nissan 300ZX TT
1966 Datsun Fairlady 1600
2005 Suzuki GSX-R 600
1974 Honda CB550 Four
2009 Ford F150 Lariat
Location: Murfreesboro, TN

Post

Glad to see the build updates up, Milo! Always loved seeing this, and honestly can't wait to see how it does on the track! TBH, I wanna see how it behaves as a street car too...... Keep the updates rolling, brother!

User avatar
simmode1
Posts: 7918
Joined: Fri Aug 17, 2007 4:51 pm
Car: Red '95 S14
Location: Euless, TX
Contact:

Post

:iconeek The most official build I have ever seen. So legit.

Milo (San Antonio)
Posts: 854
Joined: Tue Apr 03, 2007 9:43 am
Car: Project LOWFATZ (weight reduced slicktop TT)

Post

Yeah, as a street car I can only promise one thing...that it will probably make for the most uncomfortable ride ever.

No AC. Stiff suspension. No way to roll down windows. No sound deadening. Have to crawl over a bar just to get in the seat. No radio.

Oh....it's gonna suck. But I will still love it.

User avatar
Z32 TwinZ
Posts: 2132
Joined: Sun Feb 10, 2008 3:51 pm
Car: 1991 300zx TT
Location: Houston, Texas

Post

Damn very nice progress.. :bigthumb: Im about to start a 240z race build myself.. ive got a lot of work coming my way!


Return to “300ZX (Z32) General”