*update*
I just got my oil check valve thingy under the oil filter housing in the mail. I hope it is the right one Z1 motorsports pulled through for me! I talked to chuck over there and he figured a vg30 and ka24 and ca18 were same for rb20 as they are for the later! He measured one up for me over the phone .504 ish diameter .840 ish length! Matched up so hopefully back in business ill verify this as im going to attempt to pull the one out of my spare block with less damage.
Body work is yet to be addressed still sitting outside shop hasn't been touched.....due date was MARCH 20TH....
I left multiple voicemails trying to get some kind of update not a peep. Pretty upset about that deal im giving it till the end of the month.
Bottom end is done arp headstuds installed slapped the head on.
Bolted in my camshafts and the intake cam binds a bit(hard to turn).......
caps all same spot and direction no idea whats up with that.
cyl. head was warped only .0015 in one spot never seen anything less that .004 bind so im kinda confused
Inspected for scouring nothing......cleaned tightened and looked for shiny spots nothing....
I might try my spare engine camshaft or break out the plastiguage.
Not shur how to set up to straight edge the cam journals as I think I need an arbor...?
Anyways its getting there guys sorry no pics yet been stupid busy with job change.
LEXCROB rb20 build
-
lexcrob
- Posts: 527
- Joined: Mon Sep 22, 2008 7:38 pm
- Car: I get a different ride faster than I could update this.
- Location: Clarksville, TN
Re: LEXCROB rb20 build
I read that post back to my self went out in garage and looked at it for a while. The intake cam caps all facing opposite way of exhaust the front one you cannot put on backwards due to the camseal flange FACING THE OTHER WAY......
I put them all on the wrong direction swapped em around GOOD TO GO! What a friken relief ive been straight up having nightmares of my engine just burning up all week. Seriously been in a horrible mood stressed out to the max about that.
LESSON LEARNED! rb20det cam caps lettering all face same direction exhaust and intake. Not flip flopped like if you stood on opposite side of engine!
Just painting and polishing accessories at this point trying to fit and finish this one for once.!!!
Re: LEXCROB rb20 build
Yeah, here's a quick rule of thumb.
Whichever way the front most cam cap lettering points is the same direction all the others behind them go. The exhaust and intake front cam caps can only go one way. So however the lettering is facing on them is how you place all the others. Kind of fool proof if you can remember that.
Whichever way the front most cam cap lettering points is the same direction all the others behind them go. The exhaust and intake front cam caps can only go one way. So however the lettering is facing on them is how you place all the others. Kind of fool proof if you can remember that.
-
lexcrob
- Posts: 527
- Joined: Mon Sep 22, 2008 7:38 pm
- Car: I get a different ride faster than I could update this.
- Location: Clarksville, TN
Re: LEXCROB rb20 build
Happy 4th of July guys finally got some time to load up some timeline pics.
My buddy made me take this and send it to my SR loving buddy.

All machined up and ready to go together!

Cleaned one last time with soapy water WD40'd the inside and rattled up the outside.

ARP hardware!!! First time ive ever used them pretty excited!!!

The much debated Supertech's that im proudly running! .40" over maybe a bit more grunt on the low end.

The rev to the moon-- LIFE INSURANCE THAT COST ME QUITE A BIT OF MONEY SAID AND DONE. rb20 crank to big for machine shop had to get sent to industrial machine shop..... $$$

-
lexcrob
- Posts: 527
- Joined: Mon Sep 22, 2008 7:38 pm
- Car: I get a different ride faster than I could update this.
- Location: Clarksville, TN
Re: LEXCROB rb20 build
Setting ring end gap. Didn't have to do much but I wanted it all perfect! Opened them up a bit so I can really push her if I ever get enough $ for a bigger turbo/fuel sys. upgrade.

Plastiguage with the beer gut!

Buddy Brad putting in that work lappin valves mostly just to make shur all is straight and seals.

Kinda lost the camera for a while got too excited slamming it all together and needed to focus after drinking all that beer.
Here is the rotating assy. bolted it and block getting the ARP head studs.

Pretty much done now just finishing up the accessories and all that stuff.
Ivan did a hell of a job on my valve covers since im too lazy to put that kind of time in to that.

WHORE IT OUT SHOT!

Sorry took so long guys but enjoy! This has been my slowest build EVER. The body is STILL at the shop just got started on it. So hopefully it will be done by the end of the month and I can stick this guy in there and get her running! Then turn it up tweak it and run the living hell out of it till winter.
-
lexcrob
- Posts: 527
- Joined: Mon Sep 22, 2008 7:38 pm
- Car: I get a different ride faster than I could update this.
- Location: Clarksville, TN
Re: LEXCROB rb20 build
RAW BROKERAGE just came out with a billet wheel upgraded stock turbo....... 1000$ sounds like a steal compared to the 1700 hypergears were running!
I think im gonna have to get one!!!!!!!!!!!!
I think im gonna have to get one!!!!!!!!!!!!
-
Yellow4g63
- Posts: 3718
- Joined: Mon Jan 20, 2003 6:07 pm
- Car: 95 Nissan RB20 240SX RB20
91 Nissan NX2000 VE power
95 Nissan 240SX Stock - Contact:
Re: LEXCROB rb20 build
why not get a precision 5555 turbo? prob 700ish and its billet wheel. Just weld a external gate to your stock manifold and call it a day.
-
lexcrob
- Posts: 527
- Joined: Mon Sep 22, 2008 7:38 pm
- Car: I get a different ride faster than I could update this.
- Location: Clarksville, TN
Re: LEXCROB rb20 build
Maybe....
I suppose since its intent is to just run the 1/8 mile as fast as possible I should lean towards the biggest turbo I can fit...
Hopefully it will be in the car running by the end of Aug.
I suppose since its intent is to just run the 1/8 mile as fast as possible I should lean towards the biggest turbo I can fit...
Hopefully it will be in the car running by the end of Aug.
-
Yellow4g63
- Posts: 3718
- Joined: Mon Jan 20, 2003 6:07 pm
- Car: 95 Nissan RB20 240SX RB20
91 Nissan NX2000 VE power
95 Nissan 240SX Stock - Contact:
Re: LEXCROB rb20 build
I have the old SC61 on my RB20. Its laggy but I also have 270 cams on mine. Party starts @ 5k all the way to 8k and power isn't falling off. I need to rev it higher but can't/scared too. The 5555 is smaller but should respond faster than the 6262b but need more boost to make the number.

Re: LEXCROB rb20 build
i tuned a 25 with that hybrid upgrade turbo that pure turbo makes and i wasnt much impressed tbh.
-
lexcrob
- Posts: 527
- Joined: Mon Sep 22, 2008 7:38 pm
- Car: I get a different ride faster than I could update this.
- Location: Clarksville, TN
Re: LEXCROB rb20 build
My eyes are bigger than my wallet for now anyways. I wish I could blow every penny like I did when I was under the parents roof.
The stock turbo and clutch will have to be reused till I go back into it. Planning too AFTER this winter so I don't wrench out in the cold like I somehow always end up. I want her break in and get some other stuff taken care of. I may get a Carl tune once up and running an turn it up just tiny bit. I believe that should satisfy for a bit!
The car just when into the paint shop yesterday...........
I'm so over the timeline on the paint but excited I hope he pulls through for me!
Ill put the biggest snail on the side of her you guys think it can handle!
Last edited by lexcrob on Fri Jul 19, 2013 4:52 pm, edited 1 time in total.
-
breadbox

- Posts: 8549
- Joined: Tue Oct 17, 2006 4:09 pm
- Car: 89 Nissan 240SX
89 Koop
84 720 4x4KC - Location: Va Bch
Re: LEXCROB rb20 build
the block looks so good gold. Keep it up.
-
lexcrob
- Posts: 527
- Joined: Mon Sep 22, 2008 7:38 pm
- Car: I get a different ride faster than I could update this.
- Location: Clarksville, TN
Re: LEXCROB rb20 build
Some other things ill be addressing very soon when I get the car back.
REAR END:
OBX diff. ? Ive read some good things.....some mixed reviews. Seems you need to upgrade the springs in it give it a couple measurements. Then your in good shape.
I originally was going to go with a USDM s14 LSD orange sticker but I guess you never know if its got service life left and its not "rebuildable".
Maybe a JDM diff is a better option as I figured a "tighter" rear end may help my 1/8 mile times. I heard the early 89-90 sileighty lsd is like 4.55? compared to USDM S14 4.11..... Hard to find good info on that stuff.
SUBFRAME BUSHINGS/RIDEHEIGHT/PINION ANGLE.....
Ive ridden in a s14 with solid subframe bushings and a Kazz 2 way and it juttered and clunked a bit. Maybe something was loose? Maybe the energy suspension replacements are a Better route.
(On that note Sikky offers "taller bushings to offset a lowered car to help with "angles" Maybe these are a good route?)
Im more thinking ahead about breaking axles and pinion angle........
Its on Eibach lowering springs no plans for coilovers or anything.
I might get into different spring rates cause again I only care about drag. That stuff is kinda mumbo jumbo too me....
Still waiting on the painter......
Re: LEXCROB rb20 build
i use a Helical S15 diff and 4.63's id recommend it
PS.. i got the same ring file !
PS.. i got the same ring file !
-
lexcrob
- Posts: 527
- Joined: Mon Sep 22, 2008 7:38 pm
- Car: I get a different ride faster than I could update this.
- Location: Clarksville, TN
Re: LEXCROB rb20 build
Finally go the car back from the painter 6 months later. Its half sanded down half finished bondo all over it not even close to being done. The guy was never going to finish and I lost out on the deposit 600 bucks and my brand new 200$ greddy gracer lip.
I decided its just going to have to be one ugly duck at this point and am pushing to get the motor in.
She is completely assembled transmission bolted up ready to drop in except for a few set backs.
1 The alternator bracket does not line up with hole its about 1/4 inch to low. I believe you hog out the bracket to make it work but its not an ideal solution as it doesnt allow you to use the whole adjustment. Maybe ill fab my own bracket up ?
2 The power steering pump bracket is completely different. I accidentally parted ways with the one it was running so again ill have to come up with something there. ideas? Links? (s14 stock p/s pump and bracket to fit onto rb)
Both mckinnley mount kit mounts were garbage dry rotted and broken. So I went to auto parts and grabbed up a dog bone engine mount that im going to hack into two. I think they will work well if not better than my original plan of hockey pucks.
Lastly I was given a 06 subaru wrx fuel pump that should work temporarily to keep up with the thirsty rb. 180lph?
-
lexcrob
- Posts: 527
- Joined: Mon Sep 22, 2008 7:38 pm
- Car: I get a different ride faster than I could update this.
- Location: Clarksville, TN
Re: LEXCROB rb20 build
This is how I got the car back from its 6 month paint job.

I watched a couple you tube videos and decided I can paint the thing myself. Bought some duplicolor paintshop paint and clear lacquer. Ran down to harbor freight for the infamous purple wonder gun. Started at 7pm slammed on some bondo, sanded it all down, washed it, sprayed it....... At 4 am this morning we finished and what a learning experience it was to say the least. Either way we got it done and in 36 hours wet sand and buff. Fingers crossed the moisture from last night outside didnt screw me up too bad as its very matte and cloudy in some spots.


I watched a couple you tube videos and decided I can paint the thing myself. Bought some duplicolor paintshop paint and clear lacquer. Ran down to harbor freight for the infamous purple wonder gun. Started at 7pm slammed on some bondo, sanded it all down, washed it, sprayed it....... At 4 am this morning we finished and what a learning experience it was to say the least. Either way we got it done and in 36 hours wet sand and buff. Fingers crossed the moisture from last night outside didnt screw me up too bad as its very matte and cloudy in some spots.

-
lexcrob
- Posts: 527
- Joined: Mon Sep 22, 2008 7:38 pm
- Car: I get a different ride faster than I could update this.
- Location: Clarksville, TN
Re: LEXCROB rb20 build

Just about ready to put the motor back in her. Dont mind the timing cover drank a bit too much whoop a$$ and grabbed a can of black paint.
Hope you guys get a kick off my super duper paint skills!
-
lexcrob
- Posts: 527
- Joined: Mon Sep 22, 2008 7:38 pm
- Car: I get a different ride faster than I could update this.
- Location: Clarksville, TN
Re: LEXCROB rb20 build
Weird question but I need to know rb20det dip stick length. (so I can make a custom one mine disappeared)
Specifically the length to the min and max ranges from the seat.
Another problem is I got to looking at my harness and its pretty much toast I don't even know how it ran an engine. I contacted wiring specialities for one of their stand alone harness's and 4wks minimum turn around.
So anyone have a stand alone harness or even a nicer harness. Ill buy it I was ready to spend the 500$. I just need to beat the cold here!!!
-
lexcrob
- Posts: 527
- Joined: Mon Sep 22, 2008 7:38 pm
- Car: I get a different ride faster than I could update this.
- Location: Clarksville, TN
Re: LEXCROB rb20 build
*update*
Most of the moonlight paint job buffed out good enough for racecar! We painted the front bumper sideskirts and rearend the other day with the experience from before. Needless to say we got it down for shur!
Yes I slammed a lowes special front lip on the front. Never got the brand new greddy one back from body shop. It would have looked wack without something up there running supermade sides.
Enjoy!

-
lexcrob
- Posts: 527
- Joined: Mon Sep 22, 2008 7:38 pm
- Car: I get a different ride faster than I could update this.
- Location: Clarksville, TN
Re: LEXCROB rb20 build
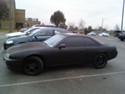
This should look a little cleaner! 


-
breadbox
- Posts: 8549
- Joined: Tue Oct 17, 2006 4:09 pm
- Car: 89 Nissan 240SX
89 Koop
84 720 4x4KC - Location: Va Bch
Re: LEXCROB rb20 build
do you still need someone to measure that dip stick? I can try to compare it to my ka one and see if its even close.
-
lexcrob
- Posts: 527
- Joined: Mon Sep 22, 2008 7:38 pm
- Car: I get a different ride faster than I could update this.
- Location: Clarksville, TN
Re: LEXCROB rb20 build
Yes!
Ive got alternator and powersteering mounting stuff worked out.
Only thing left is the wiring and dip stick.
Ive got alternator and powersteering mounting stuff worked out.
Only thing left is the wiring and dip stick.
-
breadbox
- Posts: 8549
- Joined: Tue Oct 17, 2006 4:09 pm
- Car: 89 Nissan 240SX
89 Koop
84 720 4x4KC - Location: Va Bch
Re: LEXCROB rb20 build

The dip sticks seem overall pretty close, I got the KA dipstick out of a 90 kae 240sx block.
The oil capacity readings are different. the rb20 dip stick has a greater capacity, perhaps.
The overall length from the bottom of the rubber stopper is 17 7/8ths or 18" fully seated.
the over filled bump is at 15 3/4" so possibly close to 16" fully seated.
the middle of the fillline is 16 3/4" or 17" fully seated.
-
lexcrob
- Posts: 527
- Joined: Mon Sep 22, 2008 7:38 pm
- Car: I get a different ride faster than I could update this.
- Location: Clarksville, TN
Re: LEXCROB rb20 build
What a boss.
That is perfect thank you very much.
Planning on putting engine in tomorrow night.
That is perfect thank you very much.
Planning on putting engine in tomorrow night.
-
breadbox
- Posts: 8549
- Joined: Tue Oct 17, 2006 4:09 pm
- Car: 89 Nissan 240SX
89 Koop
84 720 4x4KC - Location: Va Bch
Re: LEXCROB rb20 build
The KA looks longer because the the dip stick pull tab is a bit longer, but a ka stick would fit but once again the oil levels are different. Was hard to get a good pic.
RB < >KA


RB < >KA


-
lexcrob
- Posts: 527
- Joined: Mon Sep 22, 2008 7:38 pm
- Car: I get a different ride faster than I could update this.
- Location: Clarksville, TN
Re: LEXCROB rb20 build
This is my plan for the wiring I believe it will do the trick.
WIRING RB20DET ECU/HARNESS STANDALONE
(no chassis harness patching)
(no wipers, cluster communication, eccs)
Just make it run simple and easy.
Add fuel pump and starter signal up running.
On the wiring I contacted wiringspecialties and found no current availability on rb20det harness's. So I talked to their awesome tech support guys and this is what ive got. (Thank you very much Yuri !)
Constant power pin: 58
Switched power pin: 49,59,109,46
Ground pin: 107,108,116,10,20,30,50,60
Wire up fuel pump separate.
I'm going to just fuse / toggle switch the power wires and BOOM it should run!
Trying to replicate a stand alone harness that's bare bones so other stuff doesn't present problems.
This should help others that are fighting wiring trying to just make rb20 run.
It will also be nice where I could pop it into any other chassis without wiring again!
-
lexcrob
- Posts: 527
- Joined: Mon Sep 22, 2008 7:38 pm
- Car: I get a different ride faster than I could update this.
- Location: Clarksville, TN
Re: LEXCROB rb20 build
Started on car about 6 Friday night 18 straight hours later first start up! Runs flawlessly except for the water pump pissing out the weep hole......
The only part bolted to the engine that I reused because I planned to put a new belt and tensioners on. Ill make some calls Monday hopefully I can find a 20 pump and not get a 25 pump again.
The only part bolted to the engine that I reused because I planned to put a new belt and tensioners on. Ill make some calls Monday hopefully I can find a 20 pump and not get a 25 pump again.
-
Yellow4g63
- Posts: 3718
- Joined: Mon Jan 20, 2003 6:07 pm
- Car: 95 Nissan RB20 240SX RB20
91 Nissan NX2000 VE power
95 Nissan 240SX Stock - Contact:
Re: LEXCROB rb20 build
part number 21010-21U26 it's a RB26 pump that fits RB20-RB26. The dealer I got mine from had it listed on EBAY but since they were in Socal I just went to pick it up. It was $80 with tax picked up. The Normal 26 pump or 25 pump won't work because the 10mm bolt hole won't line up and the pump will start to piss out of that part unless you drill a new hole in the pump for the bolt to go in.
-
lexcrob
- Posts: 527
- Joined: Mon Sep 22, 2008 7:38 pm
- Car: I get a different ride faster than I could update this.
- Location: Clarksville, TN
Re: LEXCROB rb20 build
Your right on top of it yellow".
This guy shut it down!
rb25-water-pump-on-rb20-pictures-t226242.html
Never thought of jb weld and redrill id say it work as long as you prepped right and allowed to cure properly. I've even seen the stuff used in intake manifold ports over on hot rod forums and ls1 guys blocking off throttle body stuff.
Pump is ordered found one on ebay 80$ picture was right (one little 10mm hole no slot). Ordered a ZAP ebay radiator for 109$ buddy had good luck with one figured it werk. Should all be here by the end of the week.
.....huff
In the mean time im working on getting a mig welder so I can just start making my own stuff!!!!!!!!!!!!SO STOKED!!!!!!!
Anyone have any thoughts on a millermatic 252? I got a line on a used one.
Maybe too much for car stuff up too 1/2inch ....waste money?....
I eventually want to be able to weld ANYTHING you would put on a car.
tubeframe front end, cage, intercooler stuff, exhaust, eventually spool gun for aluminum etc.....
Maybe a tig is better for my goals?
Im a Subaru Hyundai dealership tech I dont have much metal work experience to say the least.
I have harbor freighter flux wire that tries too join metal but I used a millermatic 180 other day OMFG BOSS I went from garbage too good enough for me!