IM BACK!
-
homeslicej2

- Posts: 5446
- Joined: Mon Jan 15, 2007 5:46 pm
- Car: 1990 Nissan 240SX S13 SR'd hatch
-
Nismo400R33GTR

- Posts: 133
- Joined: Tue Jun 20, 2006 3:18 pm
- Car: 1991 240sx HB s13.5
Re: (homeslicej2)
Compressor Specs:-60 trim HI performance compressor wheel-0.42AR compressor housing- Flow Rate 35lb/min
Turbine Specifications:-68 trim turbine wheel-0.48 A/R. turbine housing
CHRA Specifications:-360 degree thrust bearing standard.-Oil cooled&lubricated center section.
INTERNALLY WASTEGATED!!!!
if you know how to read a compression map this will answer your question
Turbine Specifications:-68 trim turbine wheel-0.48 A/R. turbine housing
CHRA Specifications:-360 degree thrust bearing standard.-Oil cooled&lubricated center section.
INTERNALLY WASTEGATED!!!!
if you know how to read a compression map this will answer your question
-
StandardProspect
- Posts: 1181
- Joined: Thu Feb 14, 2008 4:41 pm
- Car: '93 Nissan 240SX
'98 Infiniti Q45
Re: (Nismo400R33GTR)
nice dude. I saw that hatch on craigslist, the price was kind of high cause doesent it have a bad motor? anyway, good luck with your project.
-
Nismo400R33GTR
- Posts: 133
- Joined: Tue Jun 20, 2006 3:18 pm
- Car: 1991 240sx HB s13.5
Re: (StandardProspect)
actually change of plans again, found on in greenbay for 500, on my way to look at it now, i'll take pictures for ya guys
-
Nismo400R33GTR
- Posts: 133
- Joined: Tue Jun 20, 2006 3:18 pm
- Car: 1991 240sx HB s13.5
Re: (Nismo400R33GTR)
ok here we go, keep in mind this car is $500 bucks, and it runs...ish lol i will tell you right now the car is WAY better then 500 bucks, NO rust in the wheel wells, NO rust on the rockers, little rust under the spoiler, there was a fire under the hood, as soon as i got there i noticed that the fire was right smack dap in the center front by the fan, what started it? no idea.. does it really matter? uh..no, the sr20 wont care, as long as i clean the bed for it to sleep in im sure it wont care.
ok 1st picture.as you can see it was burned up pretty good, but still not as bad as i thought.
as you can see the interior was fave stars nice, no holes in the carpet, all seats intact, very nice!
not bad huh?
ok 1st picture.as you can see it was burned up pretty good, but still not as bad as i thought.
as you can see the interior was fave stars nice, no holes in the carpet, all seats intact, very nice!
not bad huh?
-
Nismo400R33GTR
- Posts: 133
- Joined: Tue Jun 20, 2006 3:18 pm
- Car: 1991 240sx HB s13.5
Re: (Nismo400R33GTR)
well today when i was working on the mold for the s15 rear quarters, someone needed to use the oven and must of thought nothing of my mold, well now it's all warped to s*** and the foam melted to the blocking! so for now im going to just install the 50mm wide rears im getting off a friend for 200 bucks. kinda crappy but oh well. im in no rush to finish this project, i want this one to last years.
-
Anime_TuneR

- Posts: 203
- Joined: Wed May 13, 2009 1:36 pm
- Car: 2006 Mitsubishi Lancer Evolution IX
SOLD---1998 Nissan 240SX SE (S14.5)
Re: (Nismo400R33GTR)
Congratulations!
Mine comes out in a couple of days hopefully, they had to take some more time on other cars than expected before they get to mine.
I wouldn't mind 50MM rear panels on mine, for sure though when I get wider wheels on my S14.
-
Nismo400R33GTR
- Posts: 133
- Joined: Tue Jun 20, 2006 3:18 pm
- Car: 1991 240sx HB s13.5
Re: (Anime_TuneR)
just adding some of the pics i posted in a write up (sorta using this post as a before and after thred for my self)
Tools needed:9-13 mm sockets and wrenches with extensions.Pliers for the hose clamps.flat head and Philips screw drivers.some duct tape.a band aid. 90% of you will bust open your knuckle, i did!
ok here we go.
first thing you do is show the motor just how much you hate it!
ok for real now. first thing i like to do is remove the hood, it allows you way more space to work and helps with lighting. removing the hood is as easy as simply removing the front bolts from each side first with a socket wrench, then remove the bottom 2 bolts from passenger and driver side. the last bolt you will want to hold the back of the hood with your free hand to avoid the hood slamming into the windshield and cracking it
as you can see my motor bay had a fire in it and like most motor bays it's dirty! simply grab an air hose and blow the crap out so you can see what your doing
there now it's a bit less nasty to work around in.
WARNING!!!! DISCONNECT THE BATTERY!!!!! this is important! any time your under the hood working on this kinda thing, safety first!!!!!!!! no need getting knocked on your butt...
ok i like to start from the front and work my way back on these pulls, first removing the intake to get at stuff we need under it. there are just a couple of these screws to remove from the above the radiator....
then start disconnecting sensors attached to the filter housing...
there are many of these hose clamps in the motor so for you noobs, to remove them simply place a wrench or pliers over the taps, push them together and slide the clamp down the hose.
disconnect the hose after the clamp is off...
now all these hoses and wires are exposed for us to work with under the intake. so simply follow the wires and hoses and disconnect them from what they are attached to...
now this is not needed on all swaps but my radiator was busted so it needed to go, (plus an new one with the sr20 should be done anyways), so as you can see in the picture if you disconnect the hose shove a rag in the hose and tape it with duct tape so you don't spill fluid all over the place, i only had masking tape so i made do... you should do this to all hoses you pull the contain fluid.
popping the radiator is simple there's only 4 of these bolts, two on top and two half way down, a hose on top a return hose on bottom and a breather on the bottom, disconnect and POP! out she comes.
as you can see, we now have a nice clean area where we can work in and around without headaches.
ok now what i like to do is start at the END of the harness and work my way to the fire wall. the last connections are behind this black box..
so simply pop the clips off like so..
the way to remove these Nissan clips is to place a screw driver on the taps and push inwards, they will spring off!.
the way a harness is ran is, the end is at the driver side strut tower, start is by the passenger side strut tower runs kinda clockwise if you will...
keep following the harness all the way around the block, disconnecting all the injectors as you go, you'll follow the chain of disconnects to the back of the fire wall where you'll notice the wires tucked behind your lines, there's only 3 clamps holding those back there so just pop em free and pull the now completely disconnected harness threw those lines and out by the fire wall, for now leave it connected to the ECU, we will cover that later. (in the picture this is an optional pull, as im replacing everything, im pulling all the pumps and accessory's.
now that you have the harness free we can start on the hardware!!!
.......next I'll go over removing the motor and trany from the drive shaft and pulling that bad boy OUT!!!
to be continued.
Modified by Nismo400R33GTR at 3:52 AM 7/29/2009
-
Anime_TuneR
- Posts: 203
- Joined: Wed May 13, 2009 1:36 pm
- Car: 2006 Mitsubishi Lancer Evolution IX
SOLD---1998 Nissan 240SX SE (S14.5)
Re: (Nismo400R33GTR)
hey bro
I finally got my car running.
I'll post pics of the car soon hopefully.
I'll let you know
I finally got my car running.
I'll post pics of the car soon hopefully.
I'll let you know
-
Nismo400R33GTR
- Posts: 133
- Joined: Tue Jun 20, 2006 3:18 pm
- Car: 1991 240sx HB s13.5
Re: (Anime_TuneR)
good deal man!so as an update these are the things i bought today!!!!!
sr20det $1700
walbro fuel pump $89.00
upgrade fuel filter $12.95 lol
JDM's Front mount intercooler with black aluminuim piping and type s bov $180
Xtune boost gauge $24.00
Xtune air/fuel gauge $28.00
SR20DET 3" DOWN PIPE DOWNPIPE $60.00
MiragePower performance sr20 radiator $127.00
grand total...$2221.82 not bad
Modified by Nismo400R33GTR at 3:46 AM 8/5/2009
Modified by Nismo400R33GTR at 3:54 AM 8/5/2009
-
Nismo400R33GTR
- Posts: 133
- Joined: Tue Jun 20, 2006 3:18 pm
- Car: 1991 240sx HB s13.5
some body work
well since i had some free time today at the shop there was some dents in the door that were annoing me! so i pulled 2 dents on the front fender side of the door and a crazy deep one under the door handle, also found some rust developing under the window seal under the paint, so cut, ground, glassed and bondo filled em up, only an hour of work, but one less thing i have to do later lol
-
turbocarslut

- Posts: 243
- Joined: Mon Oct 14, 2002 2:46 pm
- Car: 1989 Nissan 240sx (hatch)
2011 BMW 535xi
Re: some body work (Nismo400R33GTR)
subscribing to thread.
-
Nismo400R33GTR
- Posts: 133
- Joined: Tue Jun 20, 2006 3:18 pm
- Car: 1991 240sx HB s13.5
-
Ramonesfreak2010

- Posts: 472
- Joined: Wed Jul 02, 2008 4:46 pm
- Car: 1993 240sx Hatch
Re: some body work (Nismo400R33GTR)
Where did you buy your SR20? It looks pretty clean. Any other pics of it?
-
Nismo400R33GTR
- Posts: 133
- Joined: Tue Jun 20, 2006 3:18 pm
- Car: 1991 240sx HB s13.5
-
Nismo400R33GTR
- Posts: 133
- Joined: Tue Jun 20, 2006 3:18 pm
- Car: 1991 240sx HB s13.5
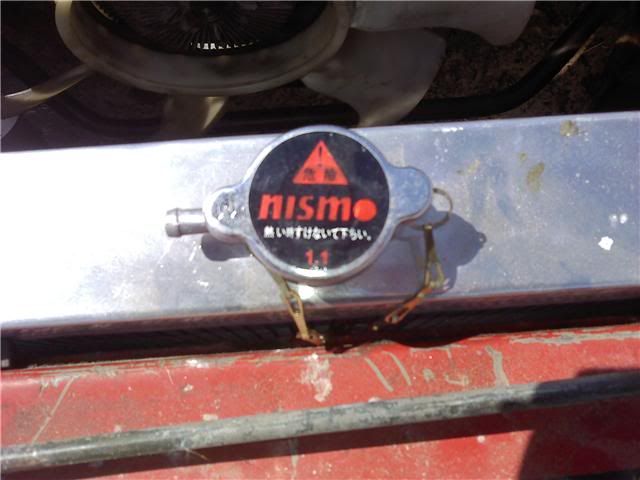
Some more work done!!!
ok well i have not been on in while for an update so here we go.motor came in one day early...yay
so as you can see i was like...wow look at the ugly valve cover.....lucky me i hapen to be a painter so guess what i did? took the cover off, degreased it and sand blasted her down!!!!!
here she is in fluid resistant epoxy primer.
not that you can realy tell but i mixed up a special color of fire engine red and imron 5000 silver effect.
after the paint dryed for 72 hours i took it over to the table mill and took 1 thousandths of an inch off the letters.
then i took a half inch plate of aircraft aluminum routered the bottom radious down to match the stock plastic center cap, drilled the holes and counter sunk them as well, de-bured the edges, hit it with 1500 grit buffed with mothers mag polish...walah! new center cap (the plastic stock one was broken)
and here she is sitting on the motor all ready to rock this weekend.
P.S. the back two mounting screws for the center cap are at work getting measured to replace them with chrome studs..
Re: Some more work done!!! (Nismo400R33GTR)
put that baby in so that you can make that sr20 install write up you promised
-
Nismo400R33GTR
- Posts: 133
- Joined: Tue Jun 20, 2006 3:18 pm
- Car: 1991 240sx HB s13.5
Re: Some more work done!!! (24j0hn)
no props on the valve cover!!! wtf
-
Nismo400R33GTR
- Posts: 133
- Joined: Tue Jun 20, 2006 3:18 pm
- Car: 1991 240sx HB s13.5
back to work
been a while since my last post but money got a bit tough loosing my job and all...however im back working again, and making way more money so it's back to the beast! im towing the car to my house so i can start working on it every night after work, this way i can just drive it back to shop when i need to...
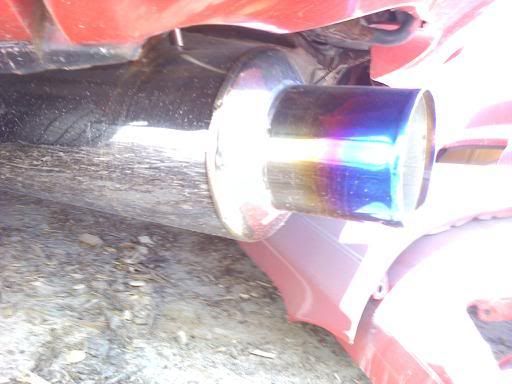
as an update *will take pictures this weekend i promise* the motor is in and the wiring is done, sorry i didnt make the sr20 install guide like i said i would but i had one night to get it in, didnt have to stop and take pictures...apart from the motor in the automatic to manual pedals still needs to be done and i am picking up my drive shaft friday. new radiator is in along with the 3 inch hks exhaust turbo back. and some other little stuff. i still have like 7 boxes of toys to put on this monster so lets get back at it!!!!!!!!!
as an update *will take pictures this weekend i promise* the motor is in and the wiring is done, sorry i didnt make the sr20 install guide like i said i would but i had one night to get it in, didnt have to stop and take pictures...apart from the motor in the automatic to manual pedals still needs to be done and i am picking up my drive shaft friday. new radiator is in along with the 3 inch hks exhaust turbo back. and some other little stuff. i still have like 7 boxes of toys to put on this monster so lets get back at it!!!!!!!!!
-
Anime_TuneR
- Posts: 203
- Joined: Wed May 13, 2009 1:36 pm
- Car: 2006 Mitsubishi Lancer Evolution IX
SOLD---1998 Nissan 240SX SE (S14.5)
Re: back to work (Nismo400R33GTR)
I'll be waiting for pix
-
Nismo400R33GTR
- Posts: 133
- Joined: Tue Jun 20, 2006 3:18 pm
- Car: 1991 240sx HB s13.5
Re: back to work (Anime_TuneR)
hows your beast doing anime?
-
Nismo400R33GTR
- Posts: 133
- Joined: Tue Jun 20, 2006 3:18 pm
- Car: 1991 240sx HB s13.5
Re: IM BACK!
ok so heres some pictures i took today when i stopped by my car and dropped off my drive shaft, clutch and break pedals.
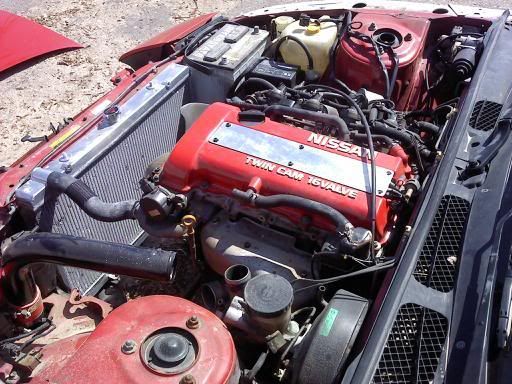
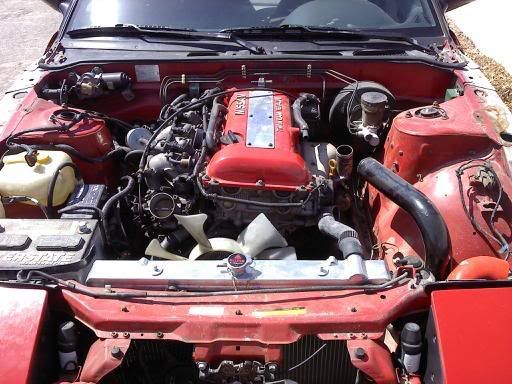
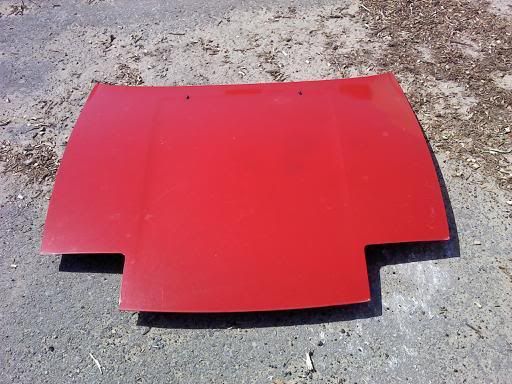
and here is a hood someone can have if they want it
god do i have alot of work to do lol..oh well
and here is a hood someone can have if they want it
god do i have alot of work to do lol..oh well
-
Anime_TuneR
- Posts: 203
- Joined: Wed May 13, 2009 1:36 pm
- Car: 2006 Mitsubishi Lancer Evolution IX
SOLD---1998 Nissan 240SX SE (S14.5)
Re: back to work (Anime_TuneR)
Nismo400R33GTR wrote:hows your beast doing anime?
Not bad so far actually, haha! Need to update my sig picture too when I get the chance. From the view of my current sig pix, I have a S15 OEM front bumper, Aerocatch lockable hood pins, and running 17 IN bronze 5 Zigen FNROC1 in the rear.
In progress in getting done:
Get S15 core support
Install my 8000k HID's
Sand and black primer my fenders and sideskirts
Bolt my stock exhaust system (been running LOUD, now getting sick of the open catback)
Install inner and outer tie rods
Alignment
then install the 17 5 Zigens in front
-
Nismo400R33GTR
- Posts: 133
- Joined: Tue Jun 20, 2006 3:18 pm
- Car: 1991 240sx HB s13.5
Re: IM BACK!
extremedimensions.com has the cor supports now dude. and there cheep. word of advice on the fenders is get someone to spray some acuglow highbuild primer, the stuff is dirt cheap from sherwin williams and it has zinc chromate in it (anti rust agent) plus you can block sand highbuild way easer then regular primer and the end result will be 75 percent less orange peal..just throwing that out there and how about some pics?
-
Anime_TuneR
- Posts: 203
- Joined: Wed May 13, 2009 1:36 pm
- Car: 2006 Mitsubishi Lancer Evolution IX
SOLD---1998 Nissan 240SX SE (S14.5)
Re: IM BACK!
I'll probably make a thread update on my car the next couple of weeks with lots of pics. I'll let you know when its up. haha!
-
Nismo400R33GTR
- Posts: 133
- Joined: Tue Jun 20, 2006 3:18 pm
- Car: 1991 240sx HB s13.5
Re: IM BACK!
kk