FILvert - the stock appearing SR-swap

The Internet's ONLY forum for 240sx convertible information and the official home of the 240sx Convertible Club of America!
User avatar
DeXteR
Posts: 2702
Joined: Sun Sep 25, 2005 9:01 pm
Car: 14 Titan Pro4X
05 Xterra OR
92 300ZX Slicktop
94 Sentra RS Rally Car
Location: Beulah, MI
Contact:

Post

First, I'll just apologize.

I'm sorry.

Take it for what it's worth. I've been absent from this sub-forum for a very long time. I've been working on other projects and doing cool stuff. [Ok, so it's not all cool. Twelve-hour swing shifts aren't very cool, and I do a lot of those...] Some of you who are facebook friends get to see the things I do when I'm not on the intrawebnets. I really just don't have the time to be involved with the forums like I did back in the day.

Also, the title is terrible. I couldn't really think of anything more creative.

Lastly, this thread is probably going to suck.

I'm sorry.


This is my Father-In-Law's convertible (FILvert). Here's a thread about it. If you don't want to go look, here's a picture from when he first got it:
Image

He's loved that car and kept it very stock. The only thing the car has ever had done to it is a front upper strut tower bar, a replacement head unit, and a set of 17x7 962's I handed down to him. Being an old-timer he has always been hesitant to change anything because he had in his head that it might be worth a lot of money some day if it were all original. It might be, but that's no fun.

A few years back I built an S14 with an S14 SR20DET. When my father-in-law went for a ride in it, he got bit by the bug. "Wow, this car is really fast. Can you make my car fast like this?" Funny he should ask that because I'd been secretly plotting to do an SR swap in his car for a long time. I joked with my wife about doing a fully forged engine with a built valvetrain with a decently sized turbo under a stock manifold. The idea was to keep it very stock looking and just leave the boost turned way down so it was just a peppy street car when her dad would drive it around. Then if we ever wanted to borrow it, crank the boost up and go have a riot.

I all ready had an oil-starved S13 SR that came out of my S14 when I bought it. I was made aware of a deal on another S13 SR engine from a local drifter guy that I scooped up. I figured between the two of them, I could put together a pretty sweet engine to one day put in my father-in-law's convertible - you know, just some winter while it's in storage in my shop. He wouldn't even notice the third pedal.

It turned out that my father-in-law was kind of serious about doing the engine swap in his car. We sat down and talked about it and decided to do a bone-stock SR swap. He wanted it to maintain all the creature comforts of his convertible like cruise control and air conditioning with factory reliability while making more power. He even wanted to keep the automatic transmission, but I drew the line there. I did not want to try to source and install an automatic SR transmission. Besides, no one likes a slushbox except drag racers and lazy people.

Summer 2014, I started seriously gathering parts and preparing for doing a full-blown SR swap on his car. I was planning on starting the swap last fall, but my plans fell apart quickly. Between personal issues and another brutal Michigan winter, I wasn't able to start the project until just a few weeks ago.

I took some time off of work during the fourth week of March to dive into the convertible as well as doing some upgrades on my S14. If all had gone according to plan, this car would all ready be done and on the road. However, in typical fashion, that plan was quickly ruined. You'll see as this thread unfolds. I'll be back to post progress pictures and stories as time allows.


User avatar
biggie
Moderator
Posts: 10330
Joined: Wed Jul 24, 2002 2:31 am
Car: '16 Q70L/'14 Q60S Vert/'19 Armada/'09 FX35
Location: Clemmons, NC

Post

Look forward to updates. Miss my Vert way too much.

User avatar
DeXteR
Posts: 2702
Joined: Sun Sep 25, 2005 9:01 pm
Car: 14 Titan Pro4X
05 Xterra OR
92 300ZX Slicktop
94 Sentra RS Rally Car
Location: Beulah, MI
Contact:

Post

After sitting in the back of the lab all winter under a car cover, it was finally time to dive in.
Image
Image
Image

As any experienced swapper knows, the interior also needs to get tore up.
Image
Image

Need to remove the automatic brake pedal to facilitate the 5-speed swap which means disconnecting the brake booster. If you're any good, you don't even need to to disconnect the lines.
Image

My father-in-law had the engine bay detailed once a long time ago. They only did what was visible which left a grimy mess in the engine bay underneath. I always do a thorough cleaning after pulling an engine. Engine degreaser and Simple Green go a long way to tidy it up. I cut the hole for the clutch master cylinder before doing any clean up.
Image

With the chassis tear down completed, it was time to start prepping the engine. It was not long after taking this picture that things really started to go downhill.
Image

User avatar
DeXteR
Posts: 2702
Joined: Sun Sep 25, 2005 9:01 pm
Car: 14 Titan Pro4X
05 Xterra OR
92 300ZX Slicktop
94 Sentra RS Rally Car
Location: Beulah, MI
Contact:

Post

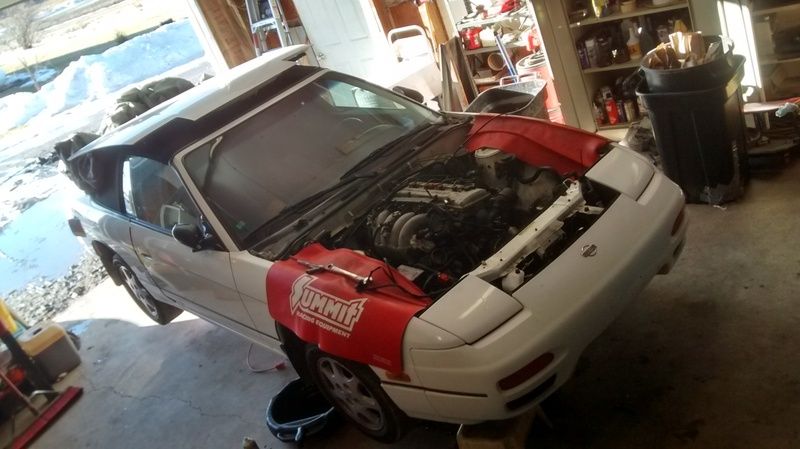
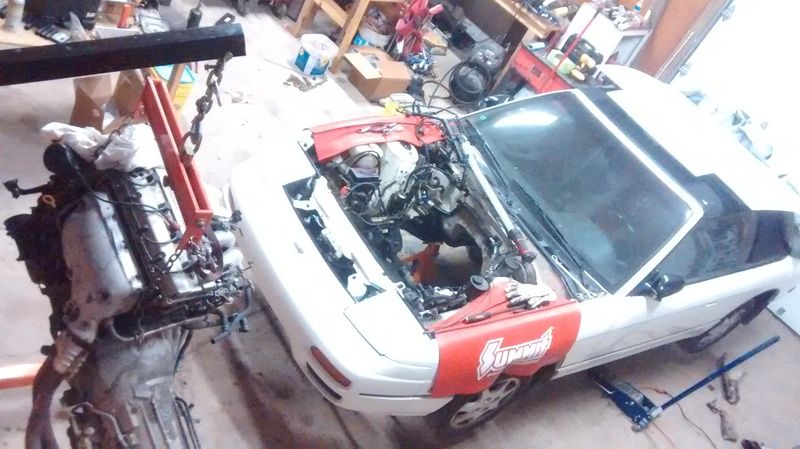
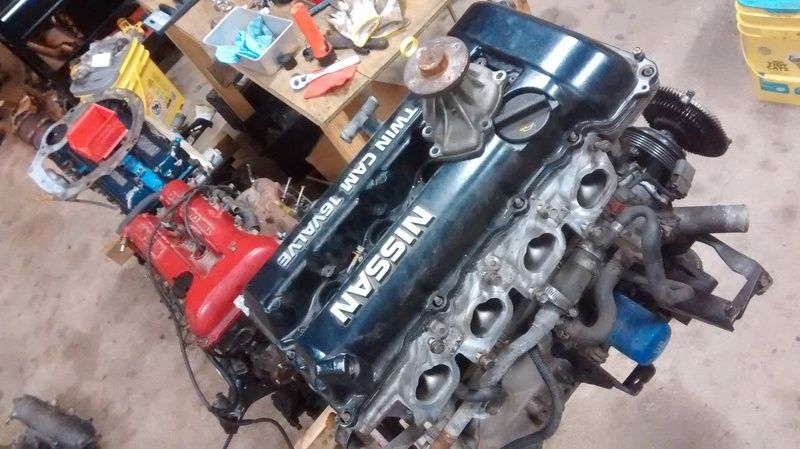
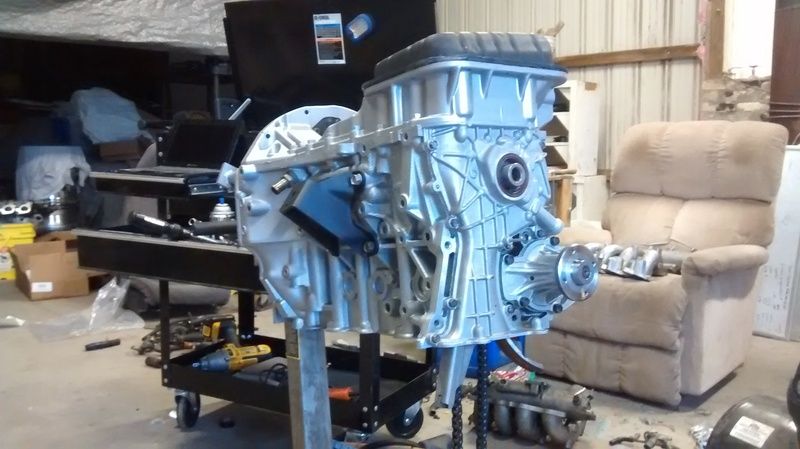
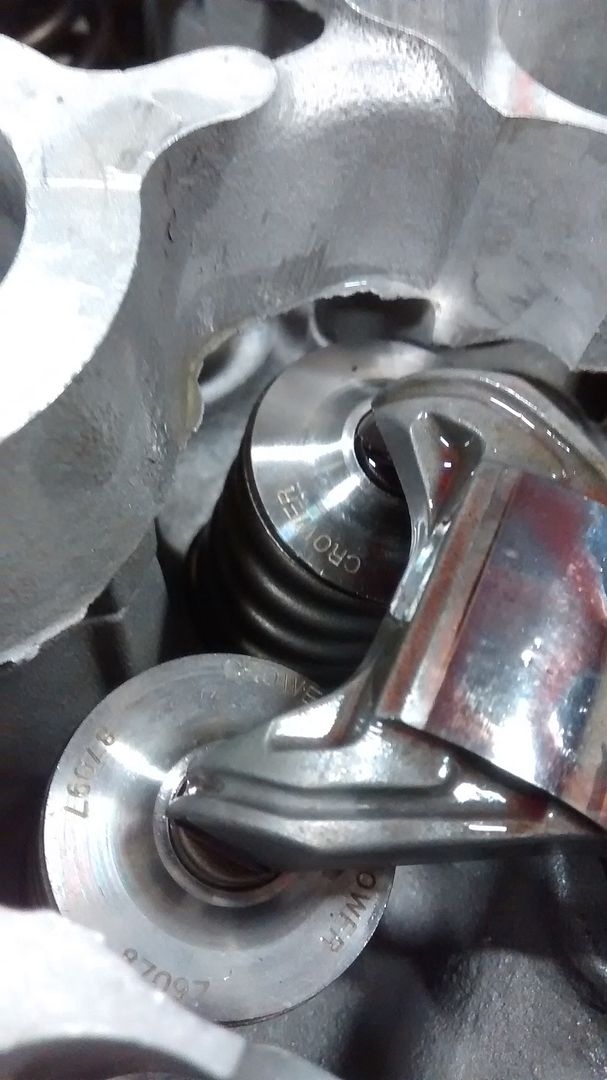
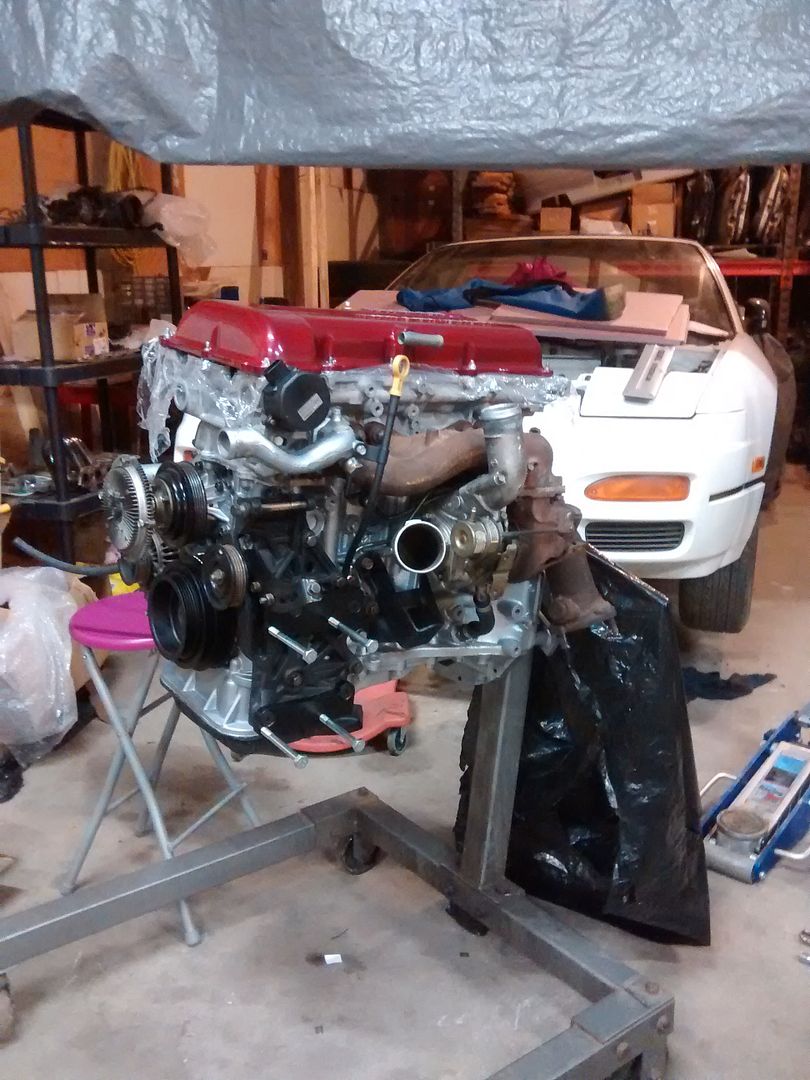
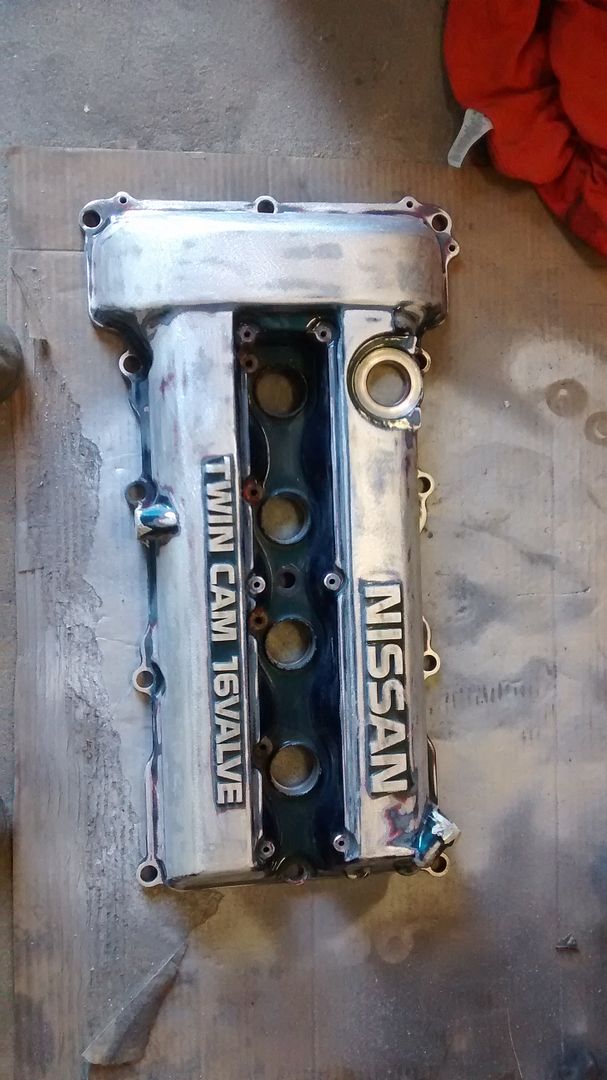
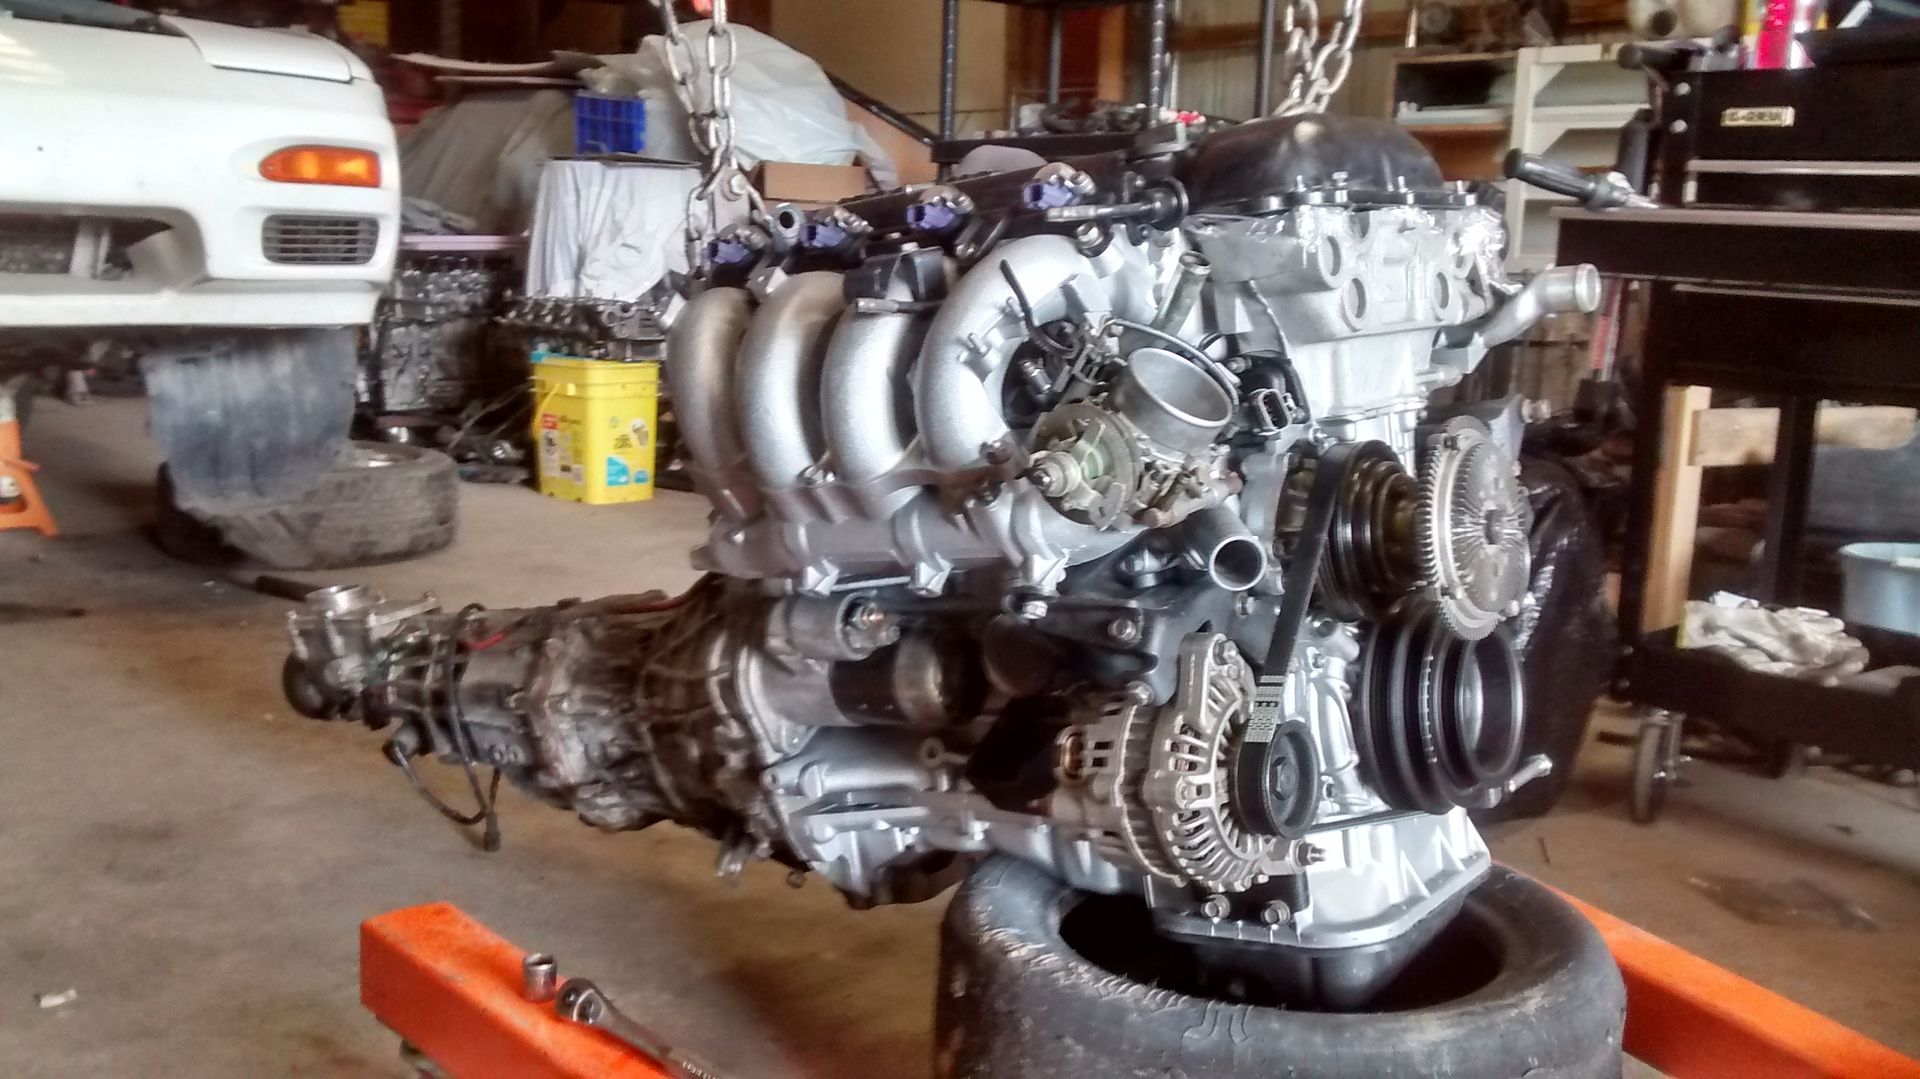
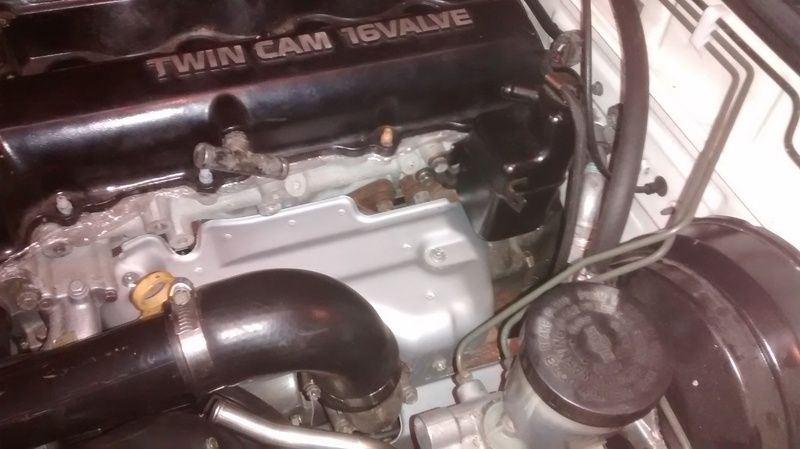
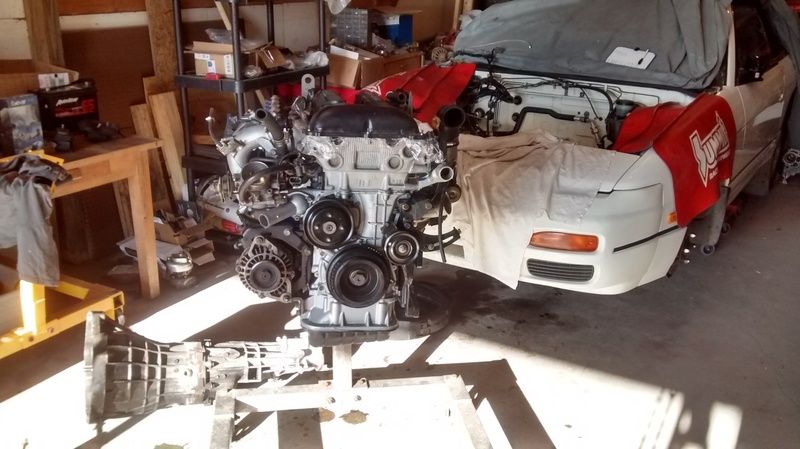
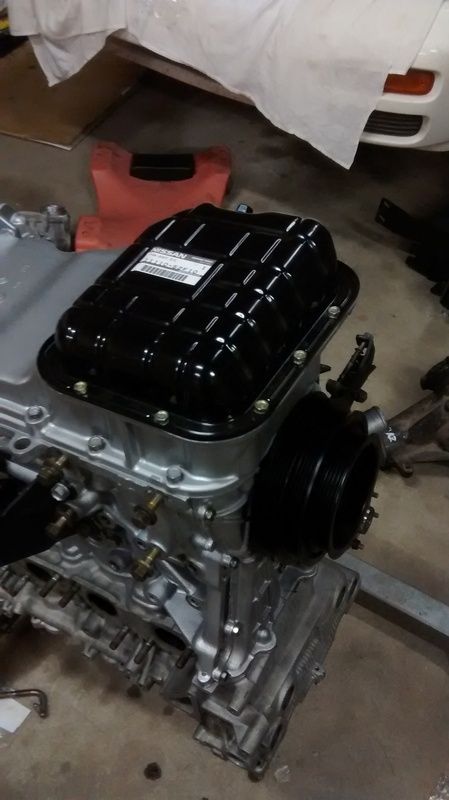
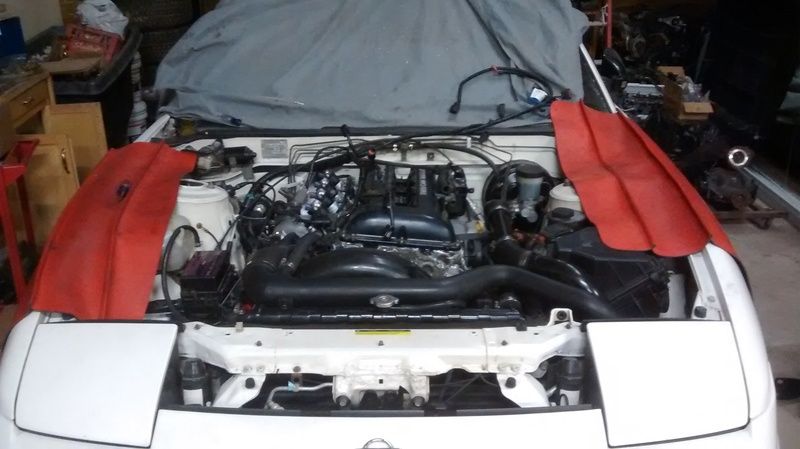
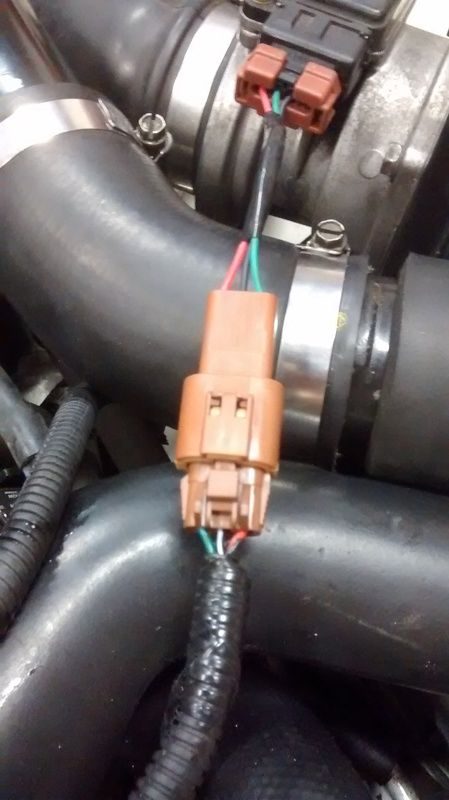
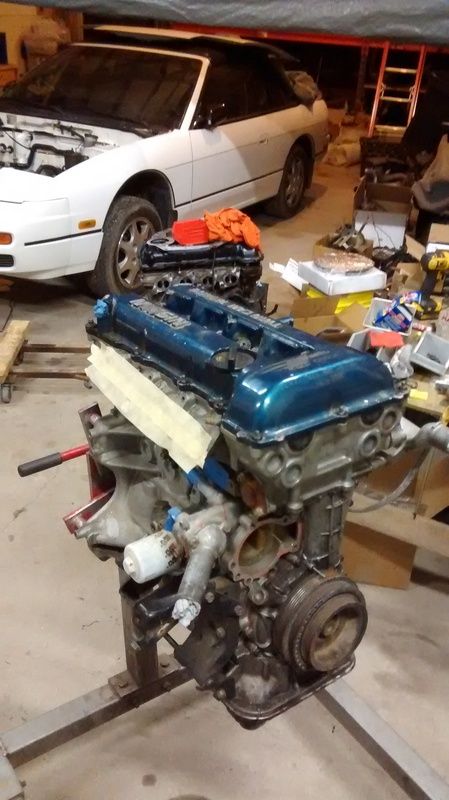
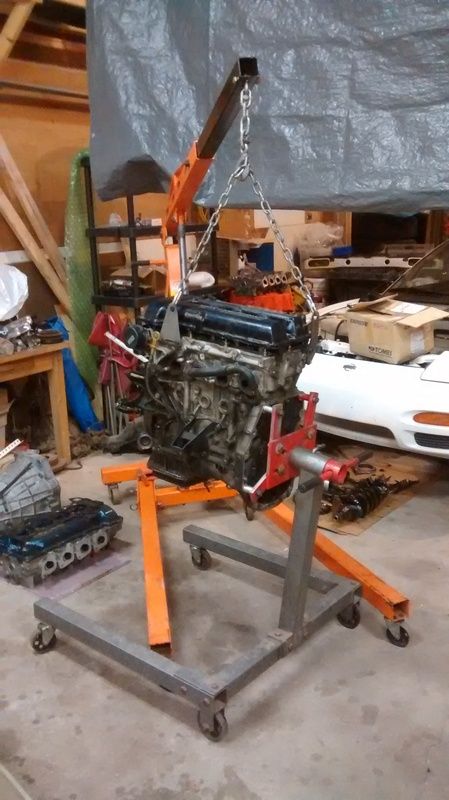
If you look closely at the last picture in my previous post, you should see three S13 SR20's. The one on the stand with the black cover is supposed to be a good running engine. I got it from a local-ish drifter who was having idle issues and smoking issues. He said the smoke was from the turbo and the idle issues were ignition/fuel. It's got ARP head studs, Crower springs and retainers, and a metal head gasket. When we pulled it out of his car, we discovered two of the injectors had broken connectors - we suspected this was causing the idle issues. This is the engine that I'm planning on dropping into the vert.

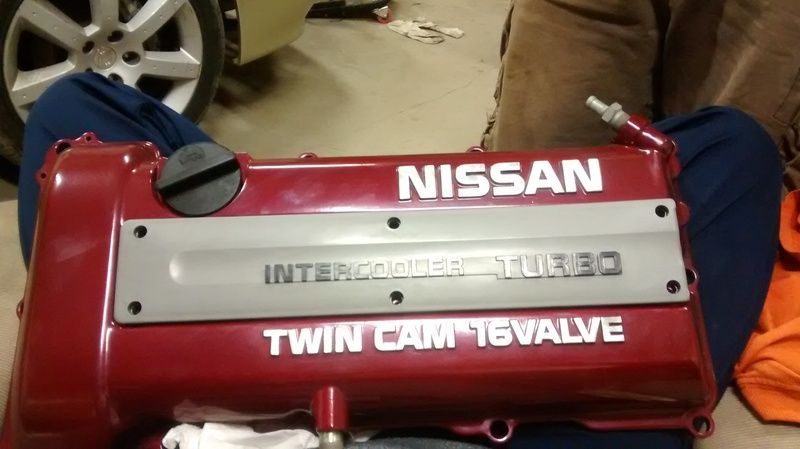
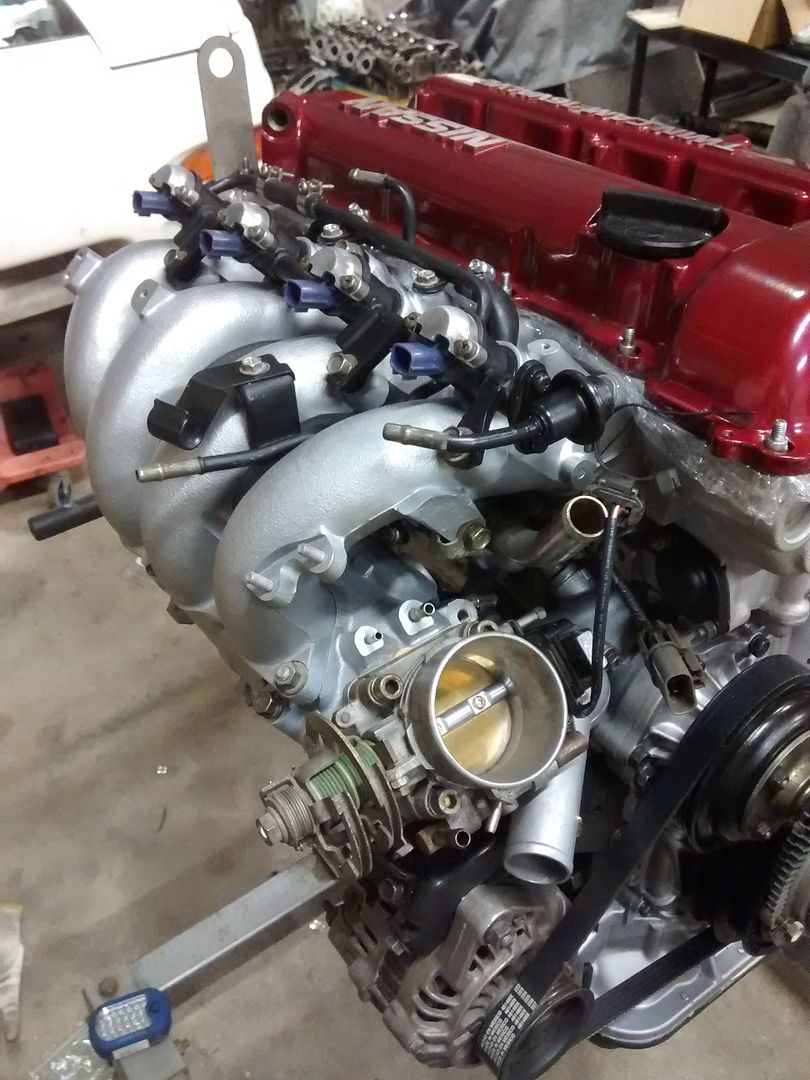
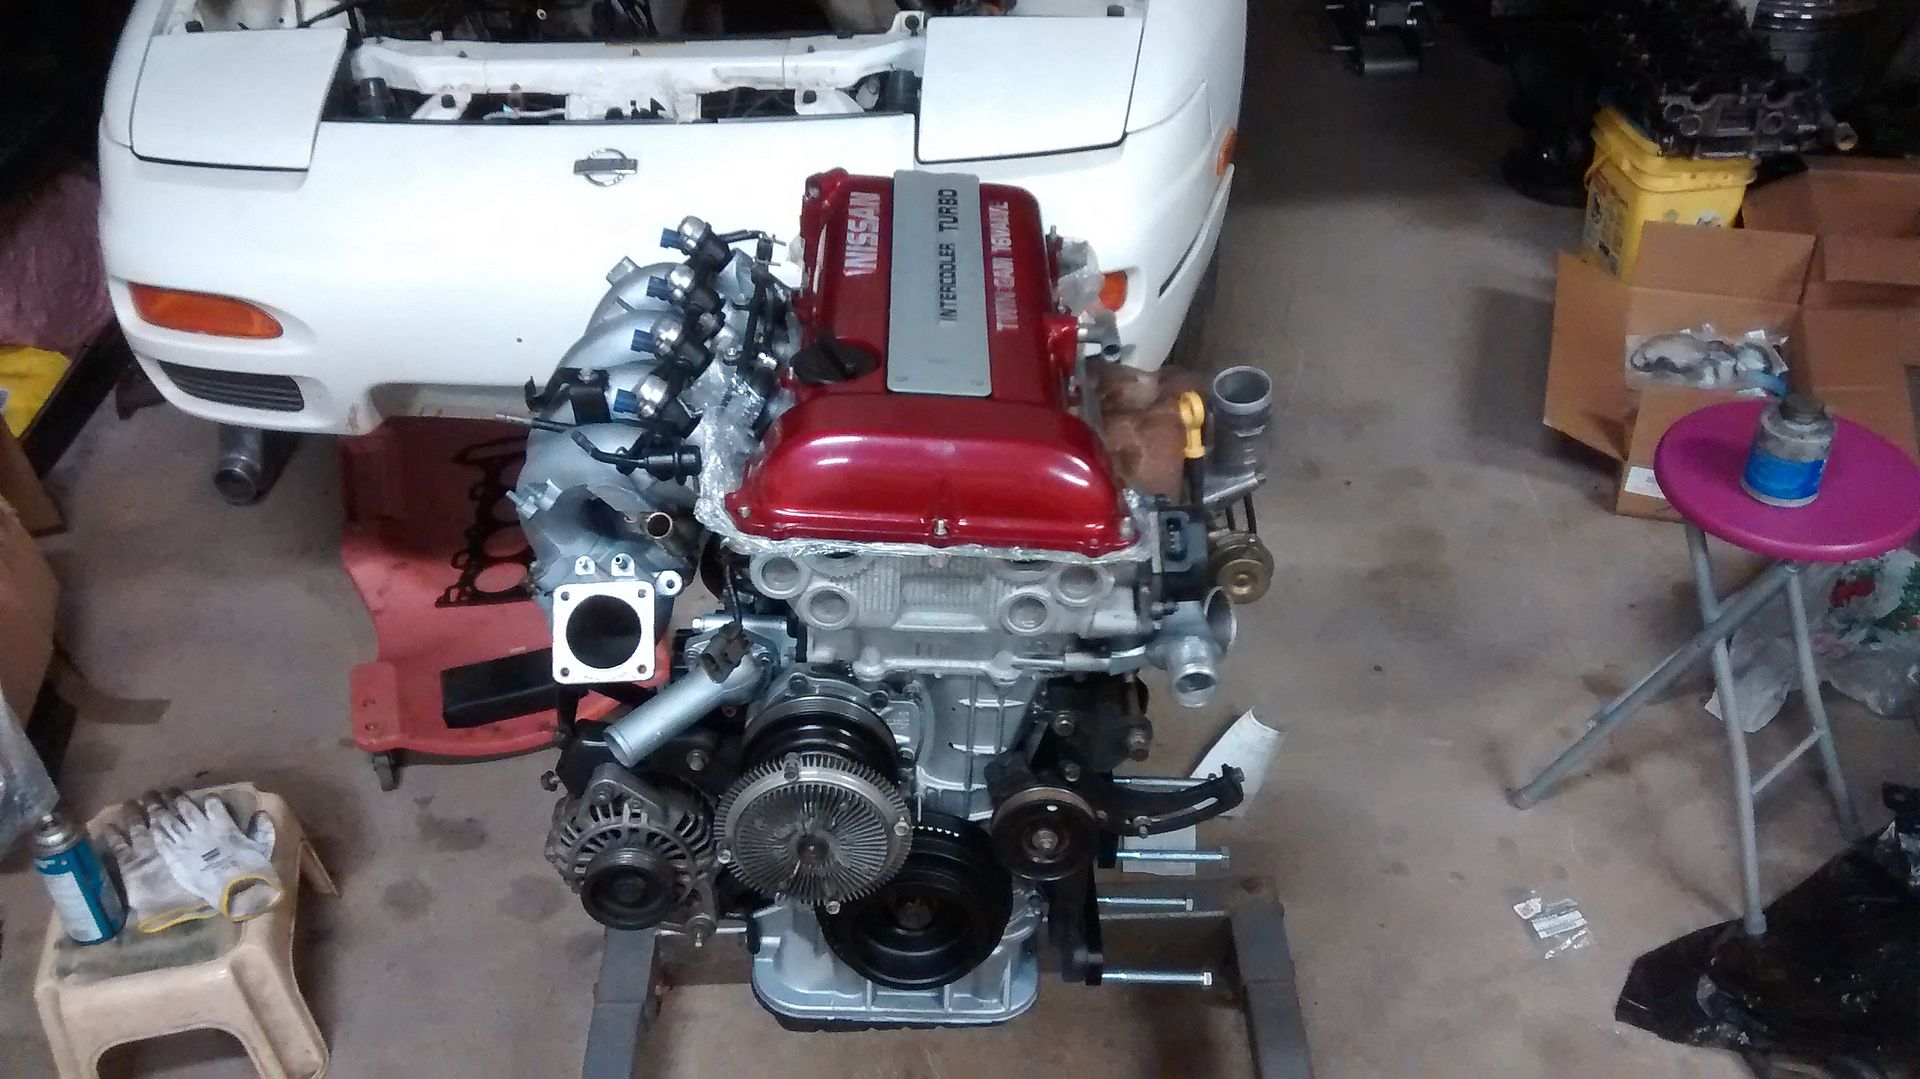
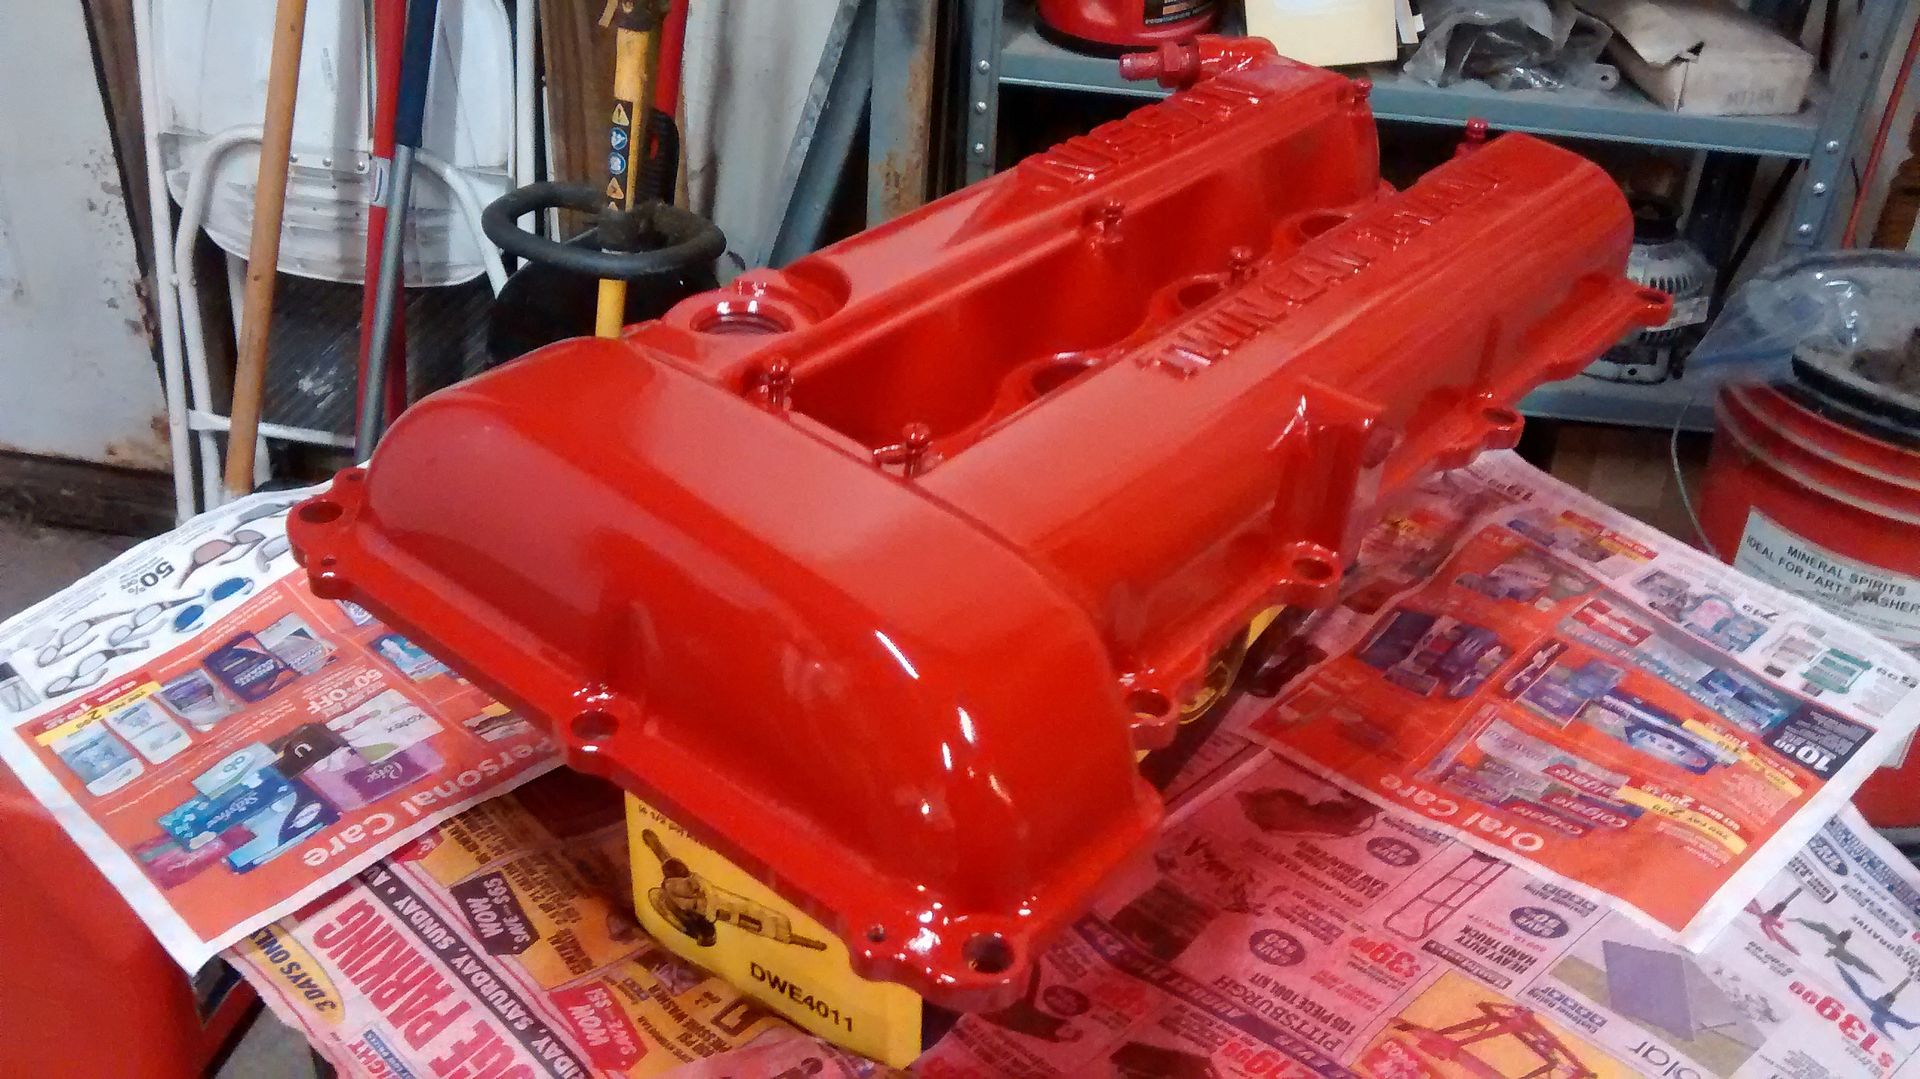
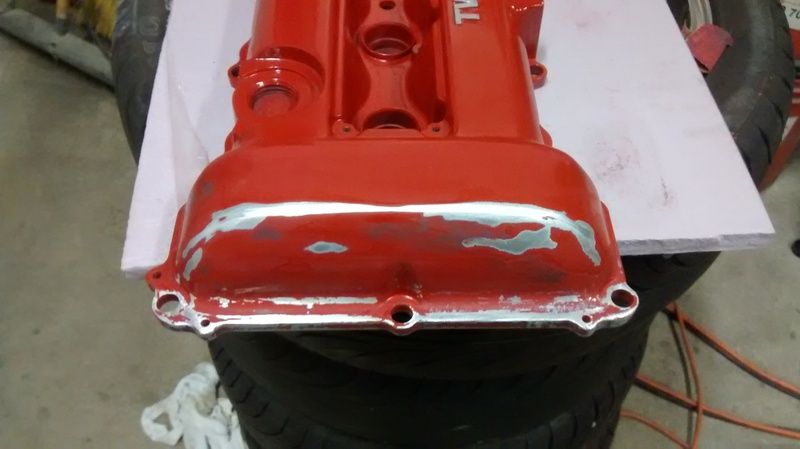
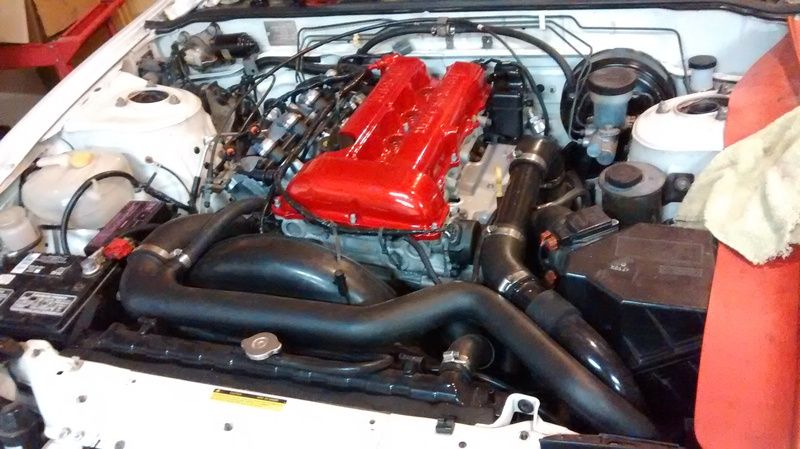
The second SR with the red cover is what was originally in my gold S14 when I bought it. This engine was oil starved. The previous owner had some podunk quick lube place do an oil change on his S14 with an S13 SR swap and they put the wrong oil filter on it. Hard to believe, right? It backed off the engine and the rest is history. It is a completely stock engine and the plan was to scavenge parts from this engine for the engine going into the vert.

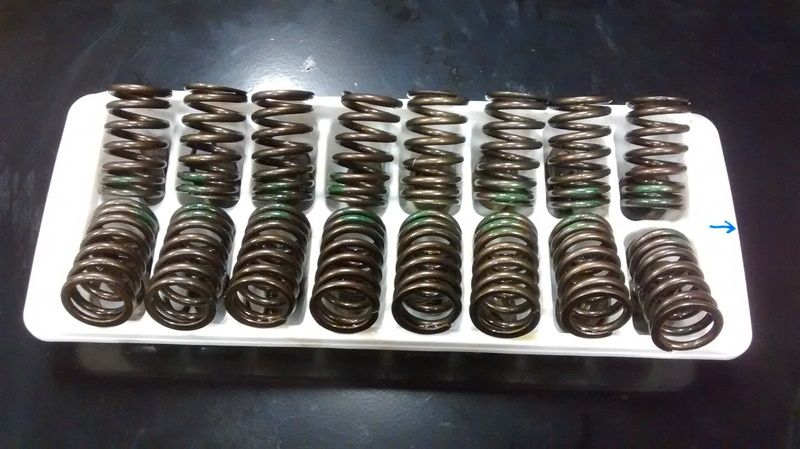
Finally, the third SR in the very back has a blue-green cover. I picked this one up from another local-ish drifter. That engine had forged internals, a knife-edged crank, big cams, BC springs, ARPs, and a metal gasket. The previous owner thought he blew a piston due to lean conditions under boost. It was all ready 87mm, so saving the block would require more money and effort than either he or I would be interested in investing into it. I figured I'd use the parts from this engine to build myself a race engine for my S14.

You're probably wondering why you should care about all that. It will be evident as this post unfolds.


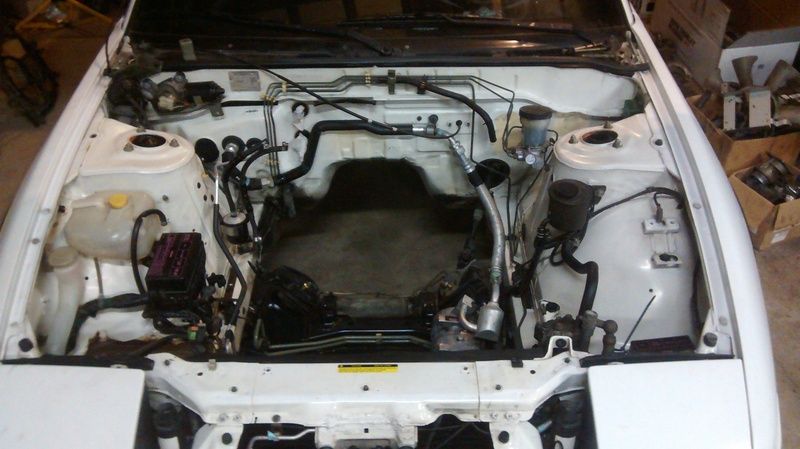
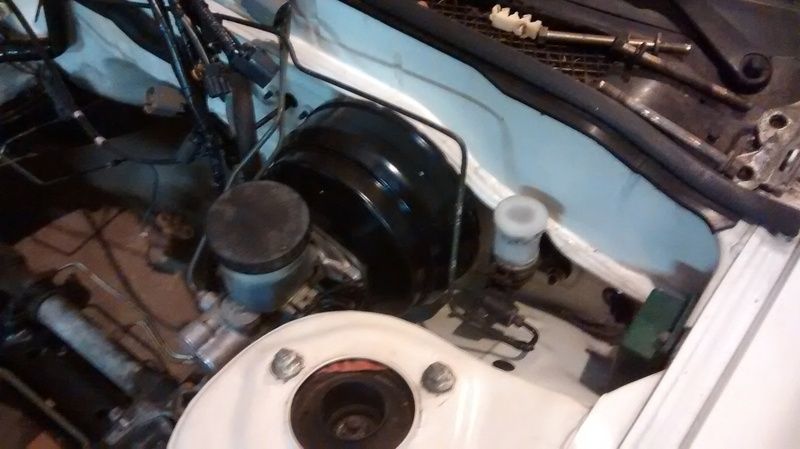
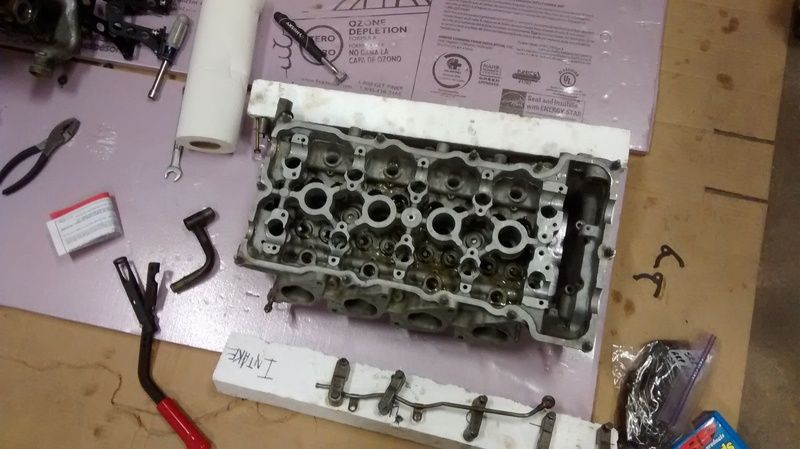
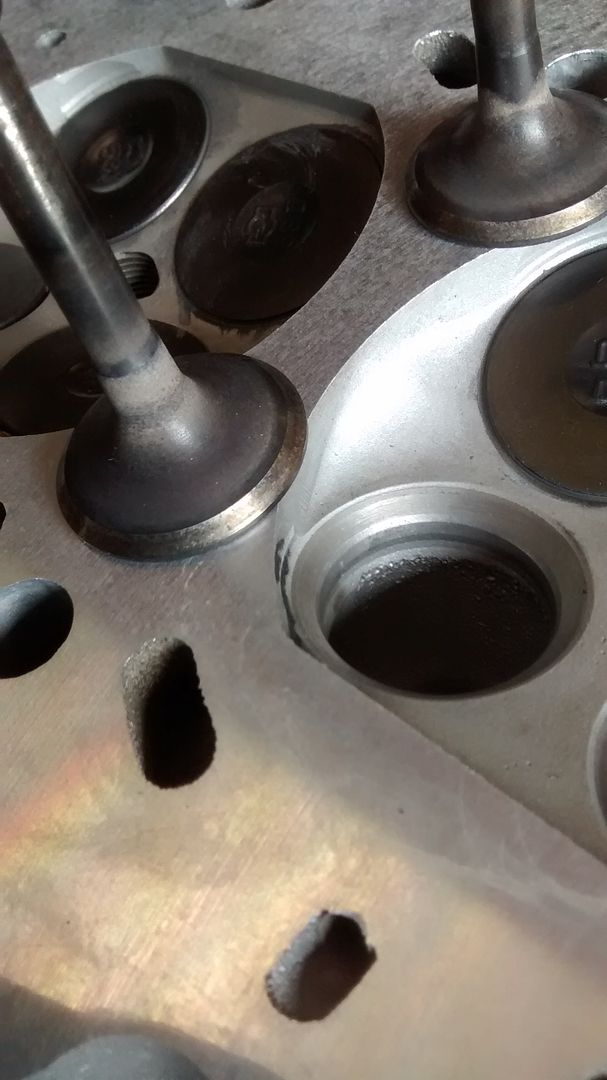
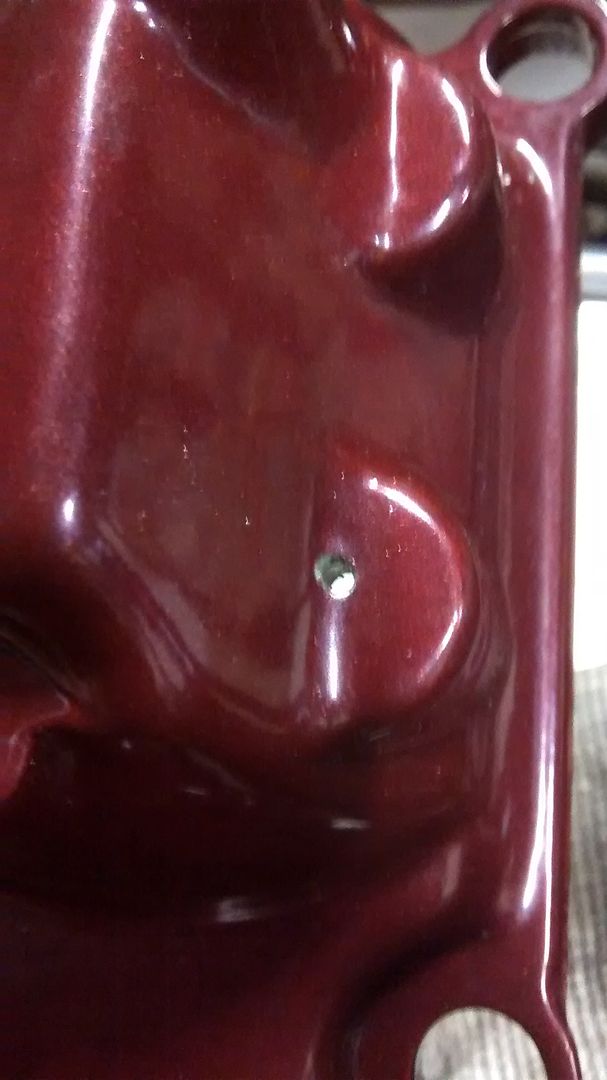
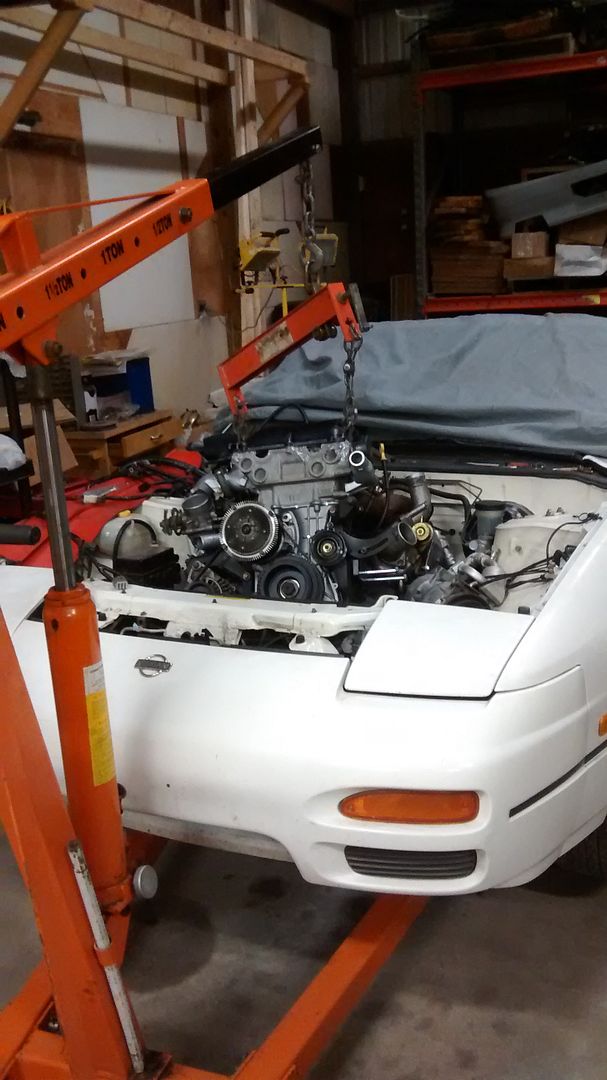
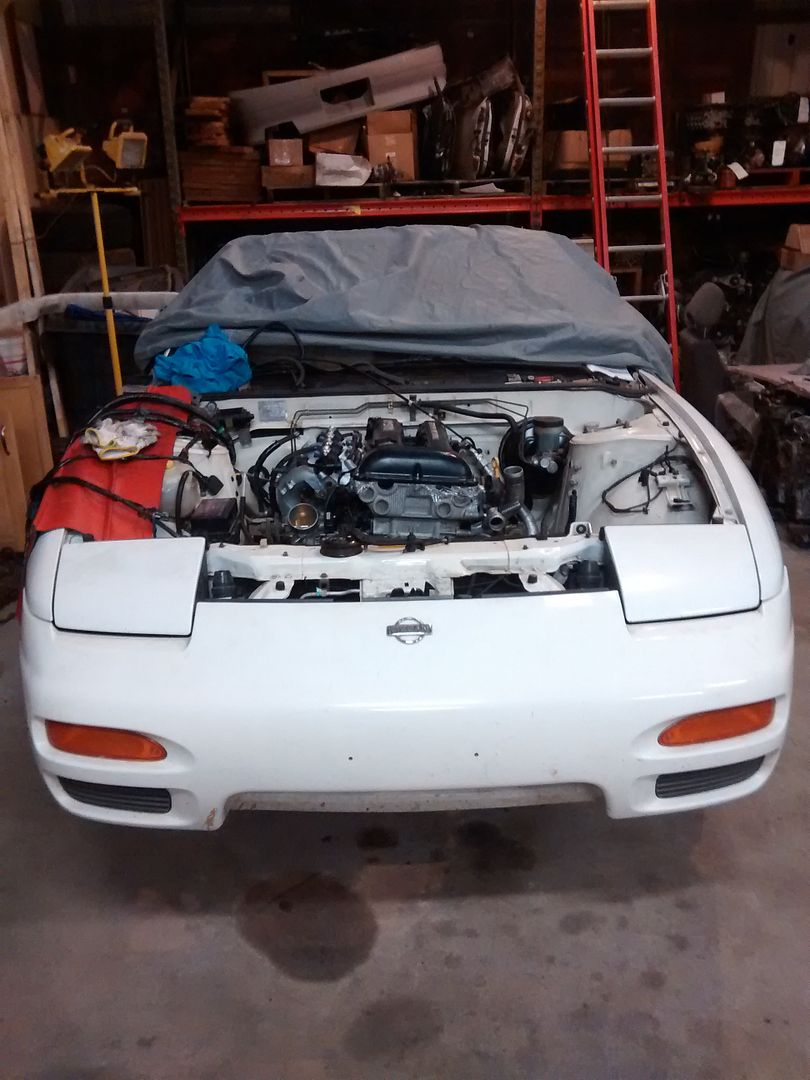
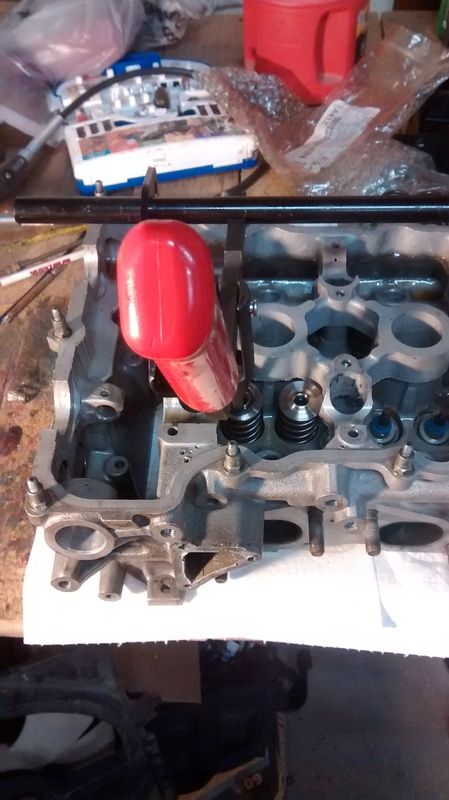
Now that the car is practically ready for the engine to go in, I started prepping the SR. At some point, I decided to peek down the ports to see how the valves looked. I'm certainly glad I did because the last valve on the exhaust side was wet. This usually means a leaking valve stem seal. This was either the cause of the smoking or contributing to it. Either way, I was going to have to do valve stem seals. For some reason, I decided I would just take the head off and have it done at my local machine shop. When I lifted the head, I wasn't really excited about what I was seeing.
Image

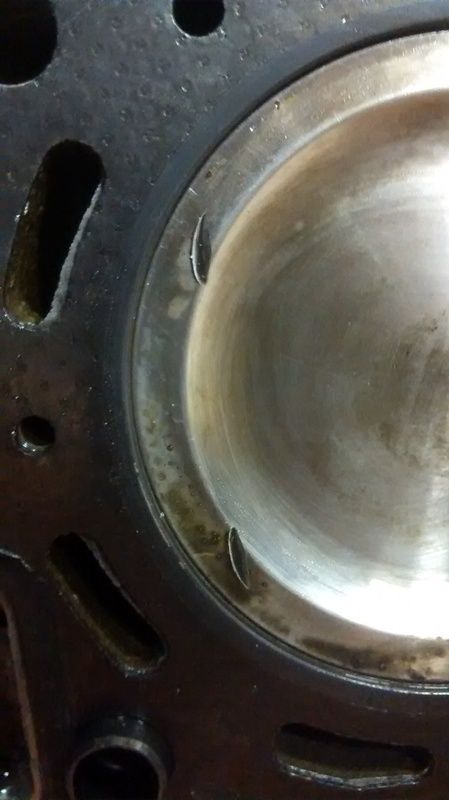
The further I got into this thing, the more issues turned up. The mating surface on the head was rough. The headgasket had been copper sprayed. Who does that with a metal headgasket? Probably someone cutting corners because they didn't want to do a proper resurface. When I tried to pull the HG off, it wouldn't come up. At some point, someone had cut the bottom layer of the gasket at the front cover - most likely for replacing the cover with the head still on. Well, they sandwiched the edges between the cover and the block, so now I've got to get further into this thing. It wasn't until after I had pulled the oil pans and front cover until I noticed some scouring in the #1 cylinder. Then after turning the crank, the #3 cylinder too.
Image
Image

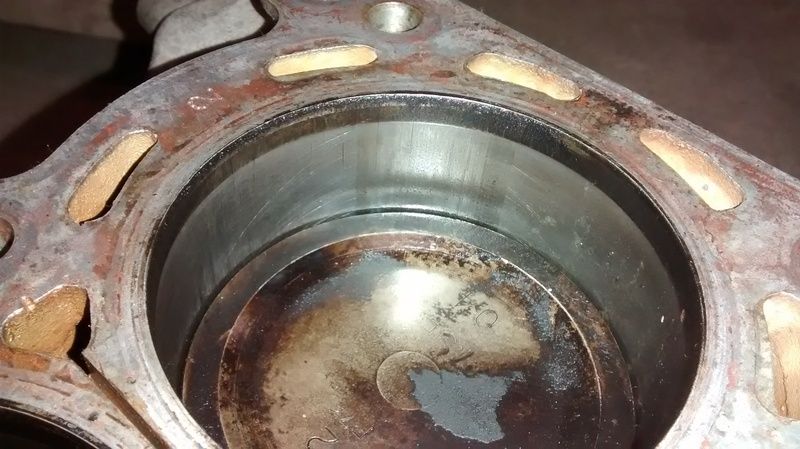
So we're not using this engine... Time to find another block, I guess. I have an extra S14 block in the shop... I pulled it out and gave it a look over. I discovered some melted piston on cylinder #2. I took it to the machine shop to see if they could clean it up and maybe use this one. They hit it with some muriatic acid and a bearing scraper. No dice - that one needs an over bore. So I need to find another block again. Maybe... Let's check the forged engine first.
Image

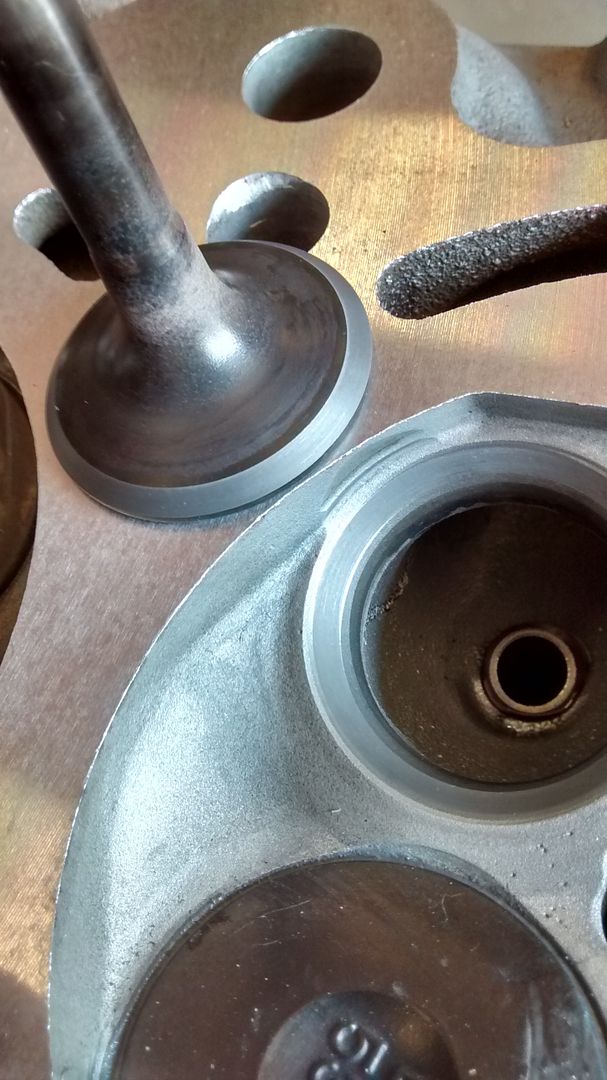
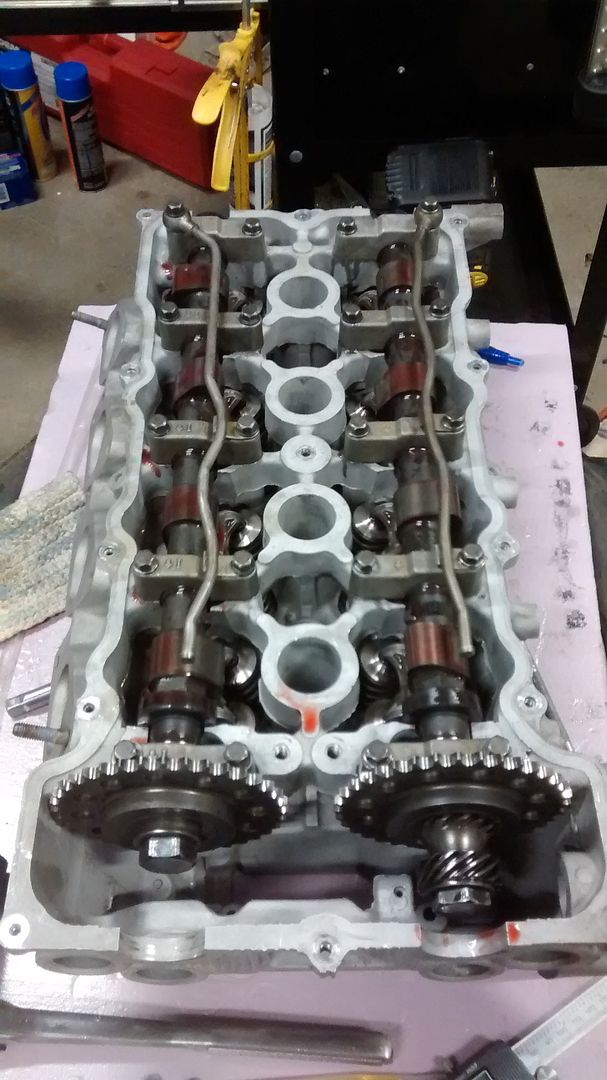
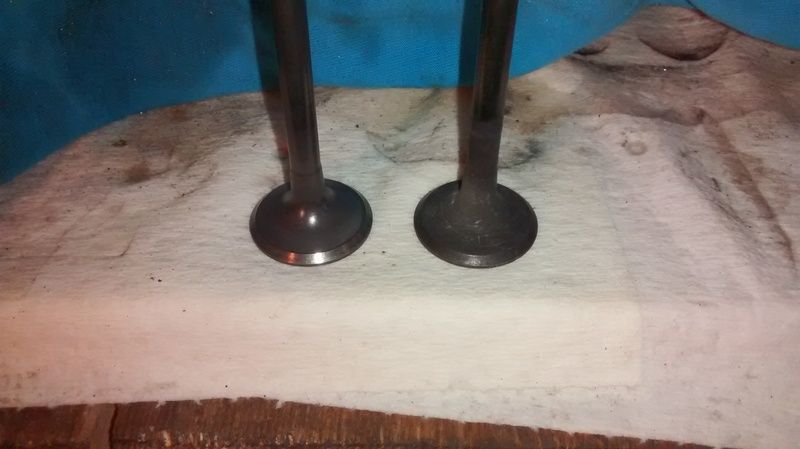
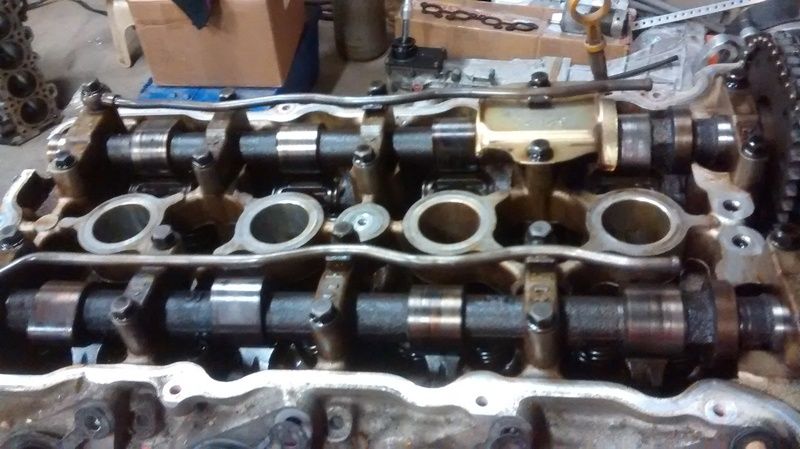
Everything in this engine was super clean. It must not have had very many miles on it since the last build. The cams are Brian Crower. I ran the numbers on them to discover they're 272 cams for an S14 SR. This car must have had terrible idle because the S14 intake cam is some 20 degrees different than the S13 cams because of the VCT. These are way more aggressive than I'd want to run in my S14 though. I peered down the ports of this one to discover four bad valve stem seals also - that explains the smoke in this one too.

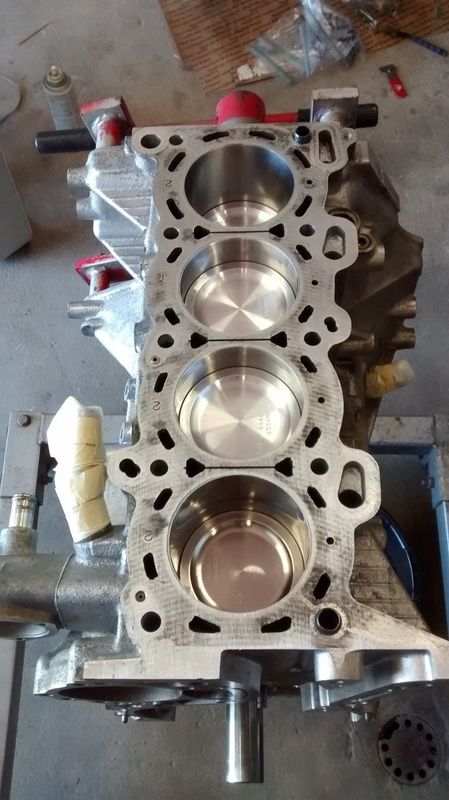
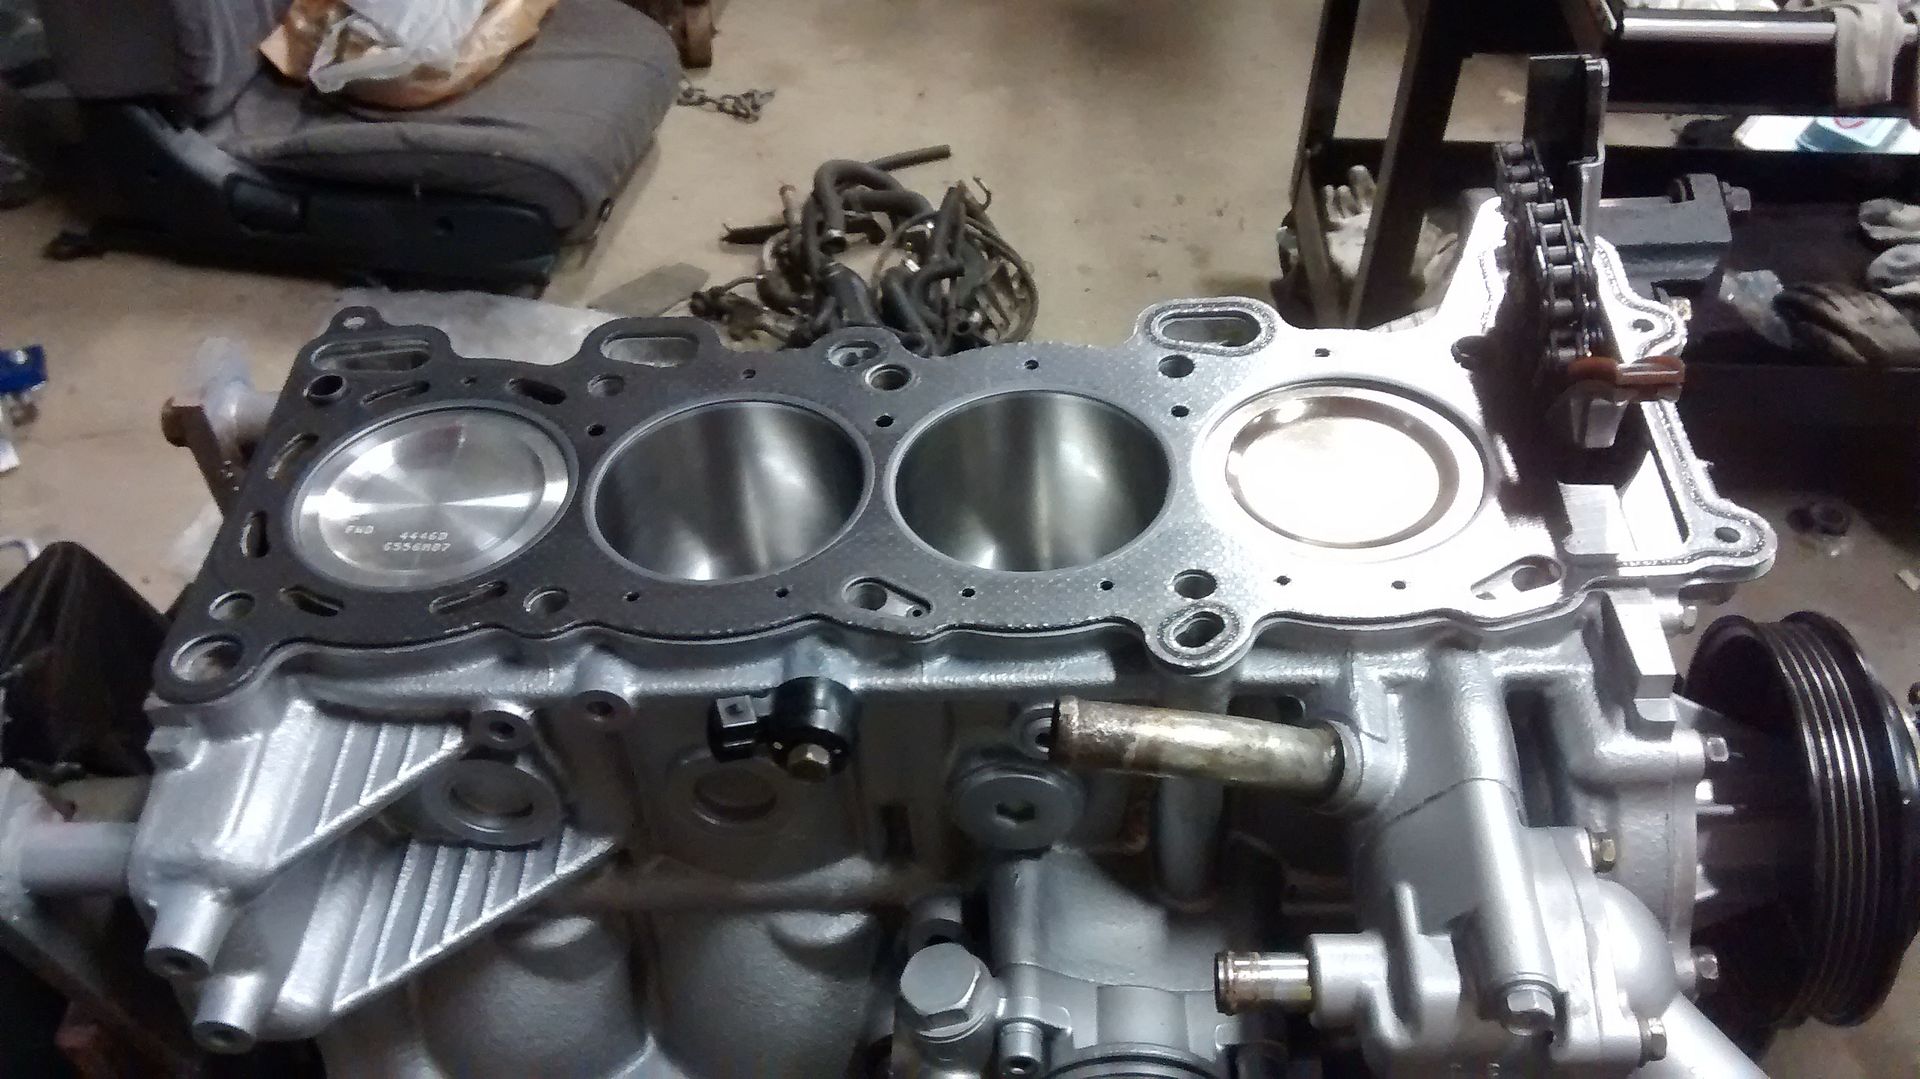
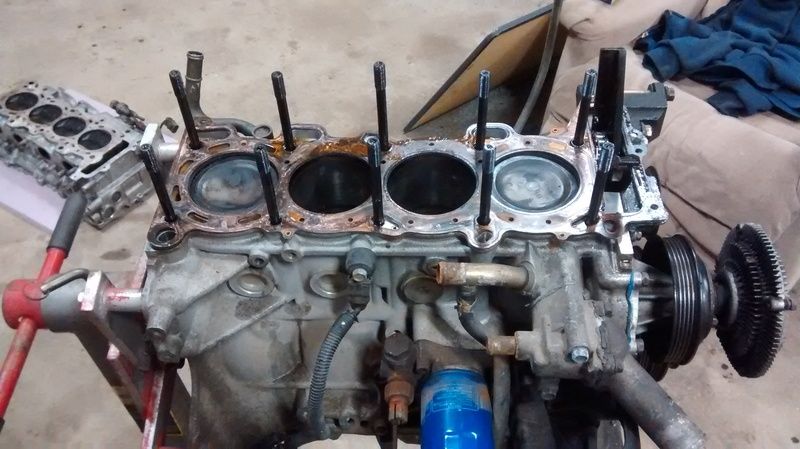
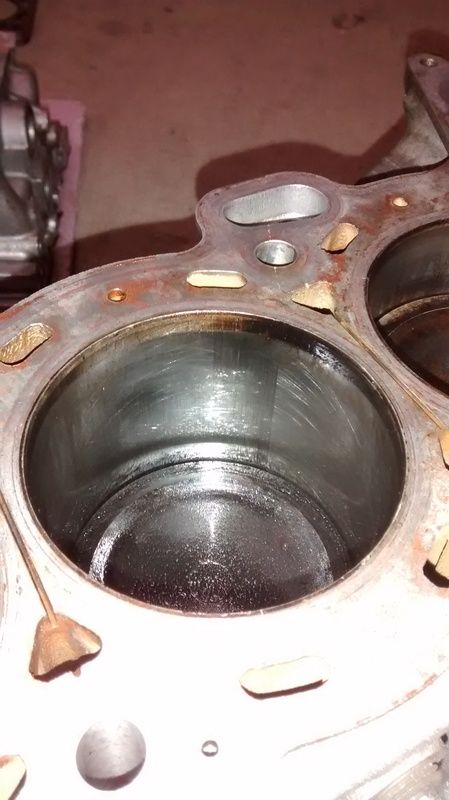
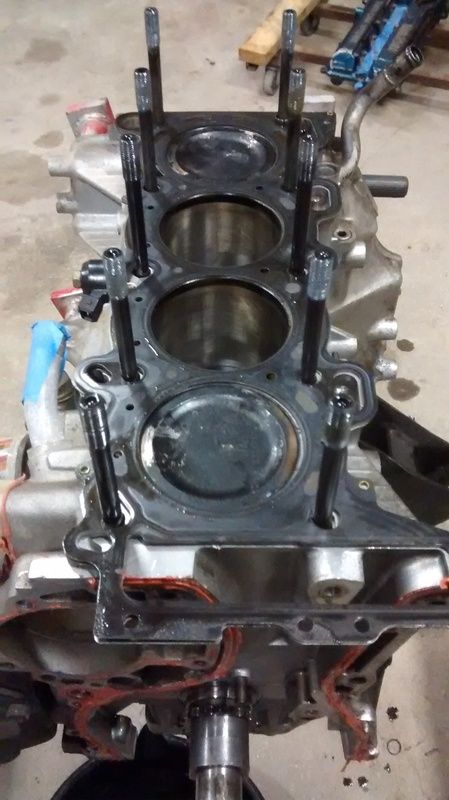
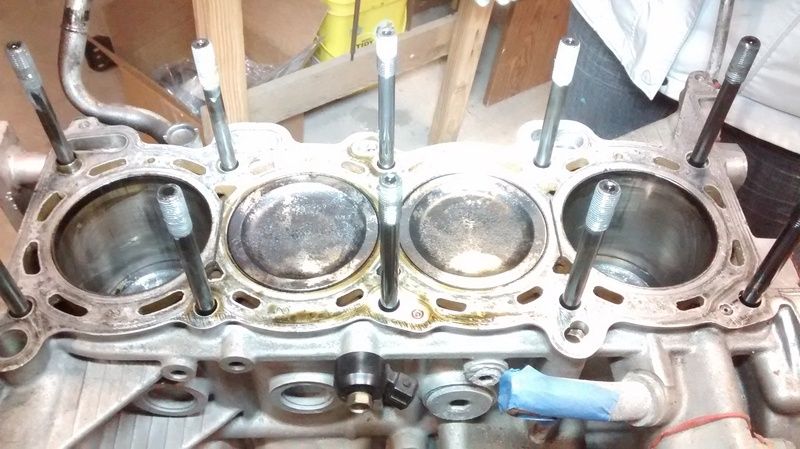
After I lifted the head and inspected the pistons, I didn't see any evidence of detonation. The cylinder walls looked pretty good too. There was some wear, but I hoped it might clean up and seal with a hone and some fresh rings. The head surface looked really good too.
Image
Image
Image
Image

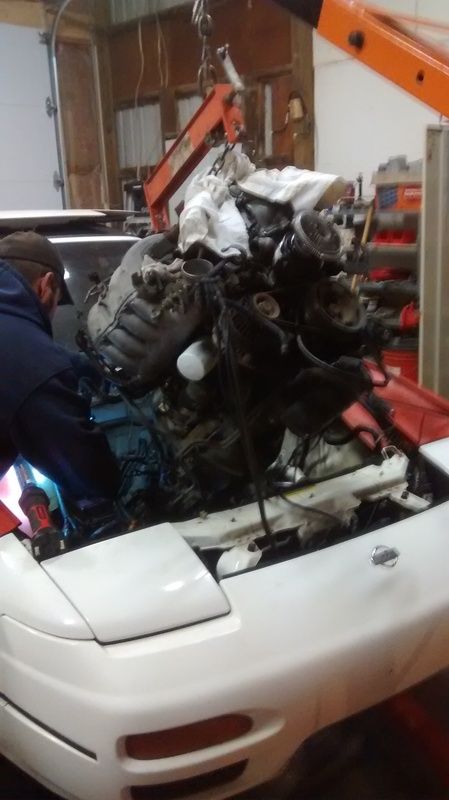
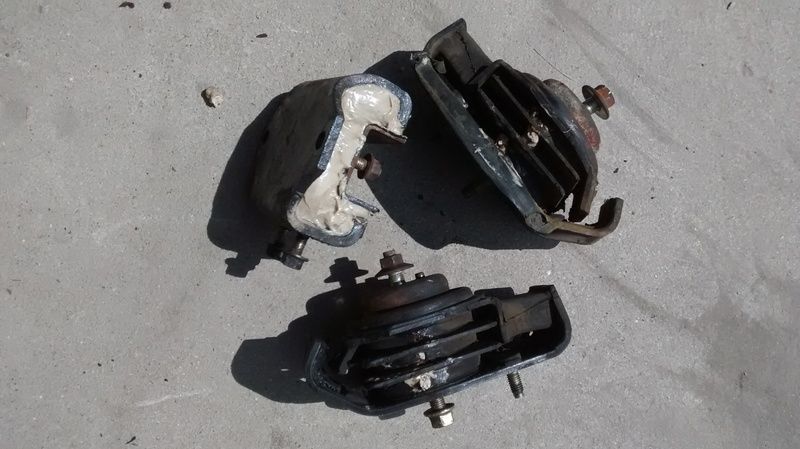
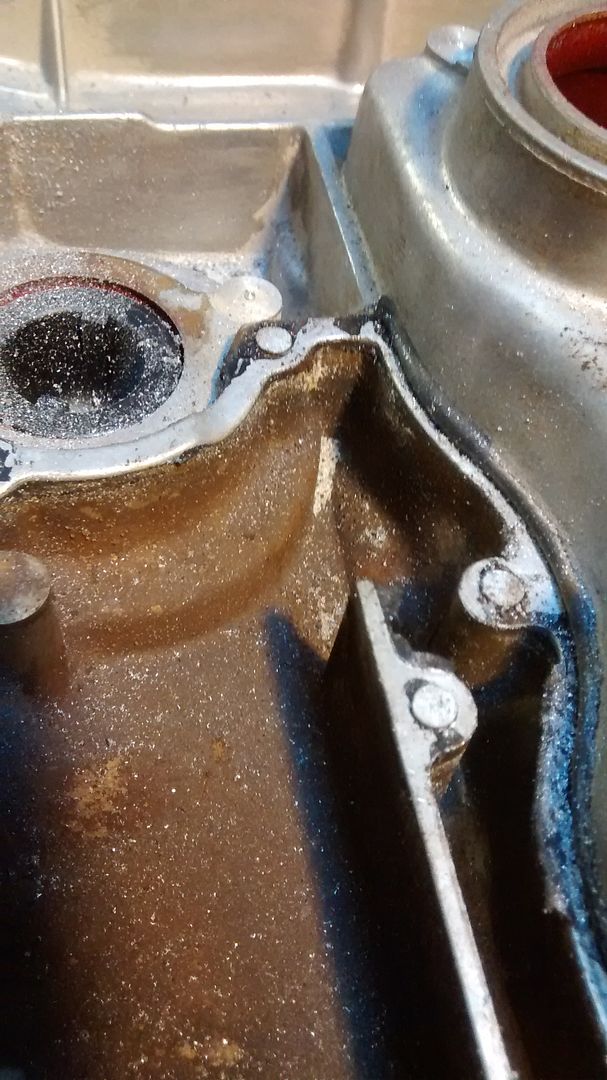
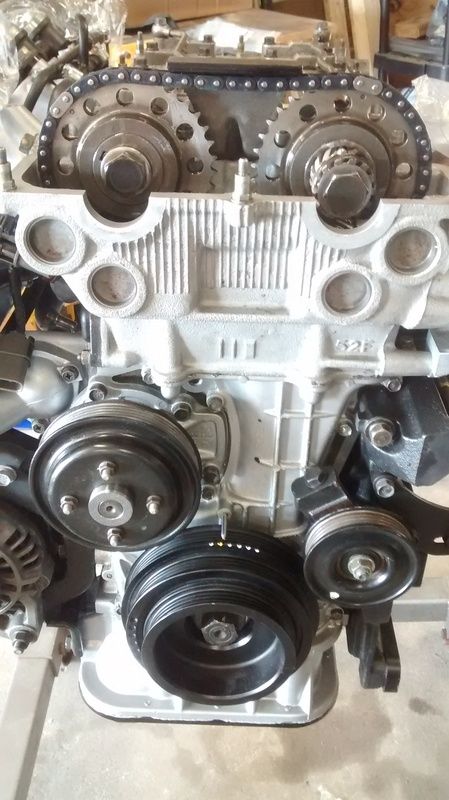
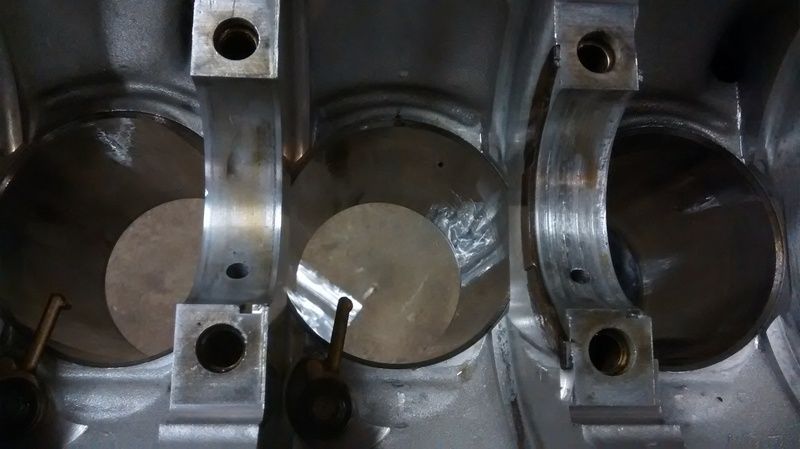
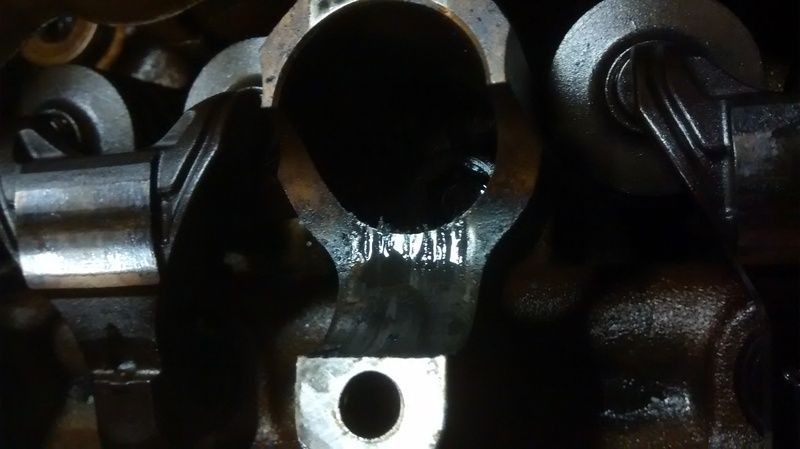
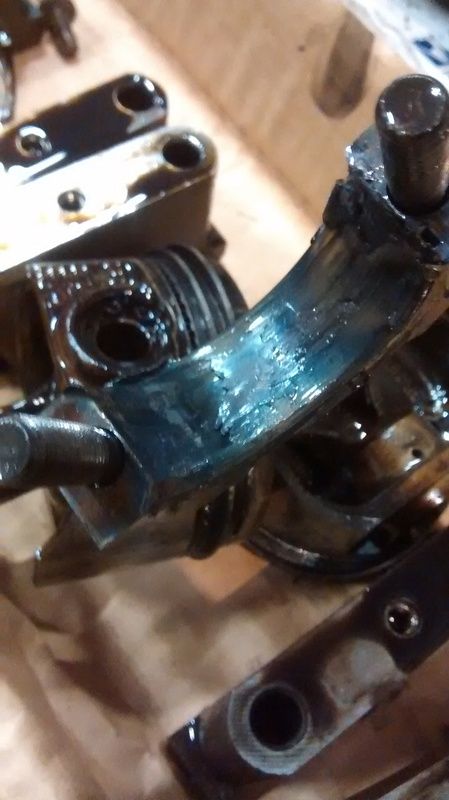
After I pulled the oil pans and front cover, I flipped it over to find what was really wrong with this engine.
Image

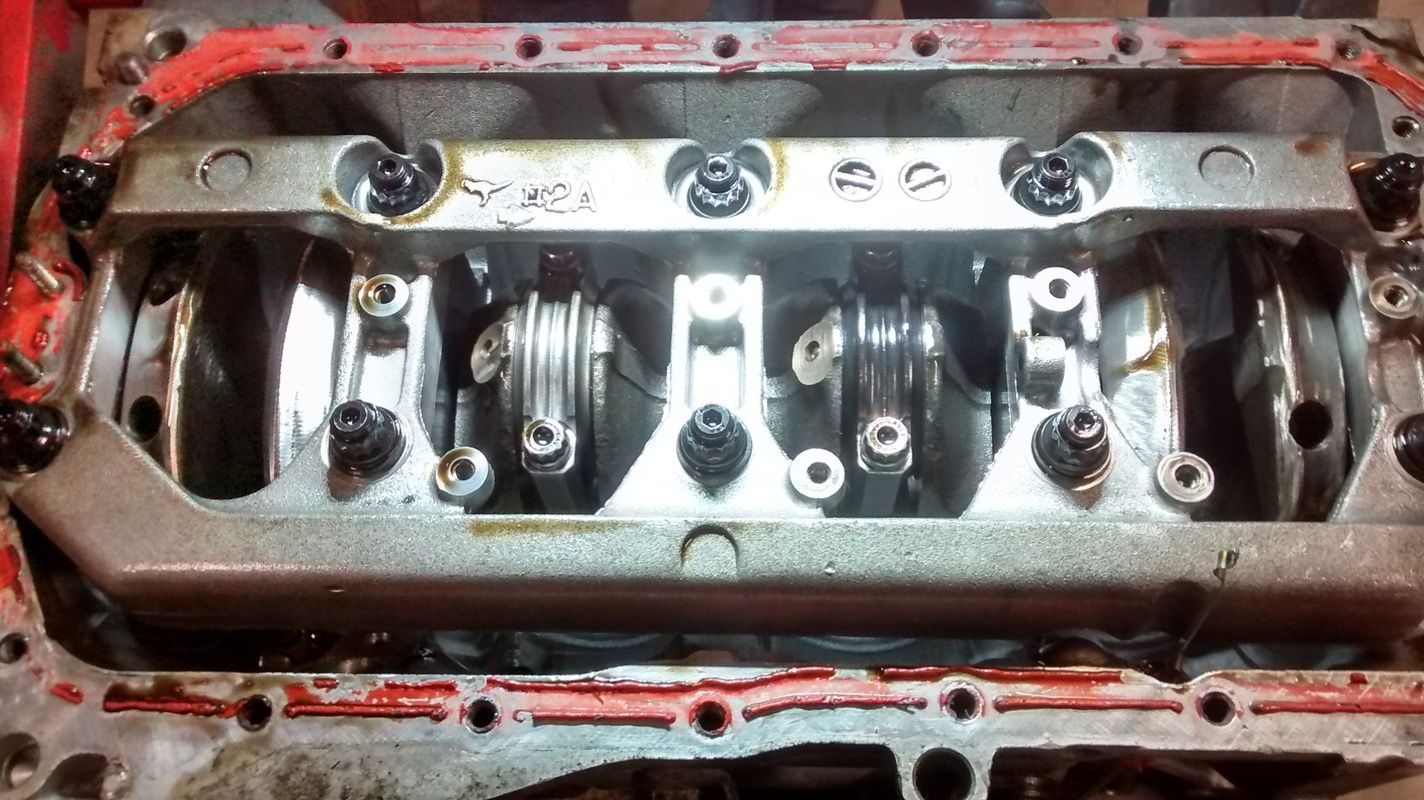
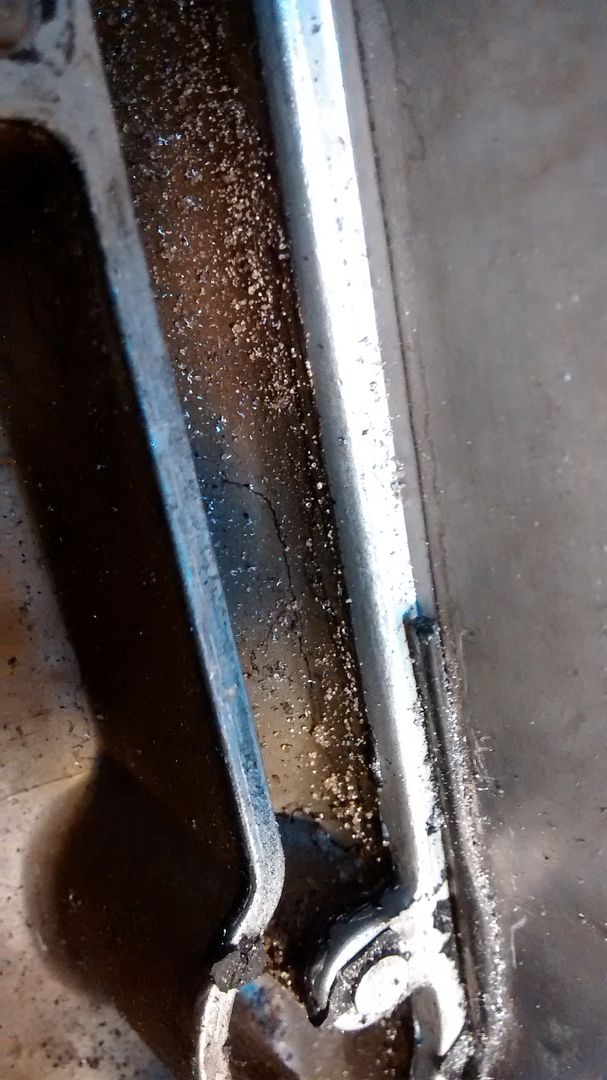
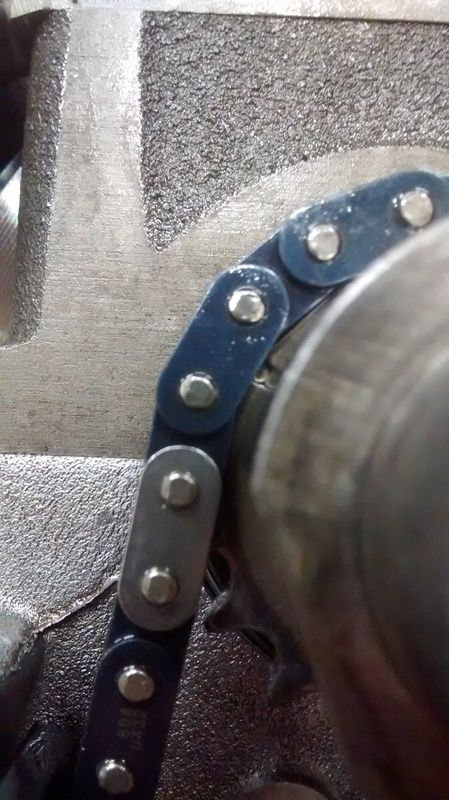
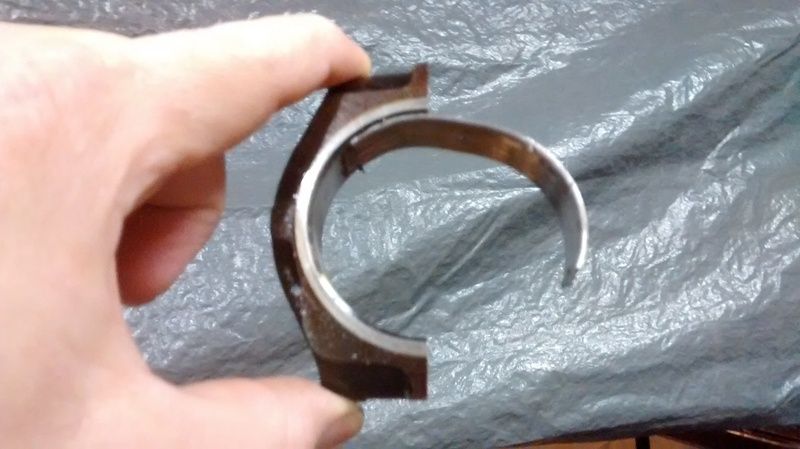
Can you see it? The #2 connecting rod cap is black. It had a spun bearing.
Image
Image

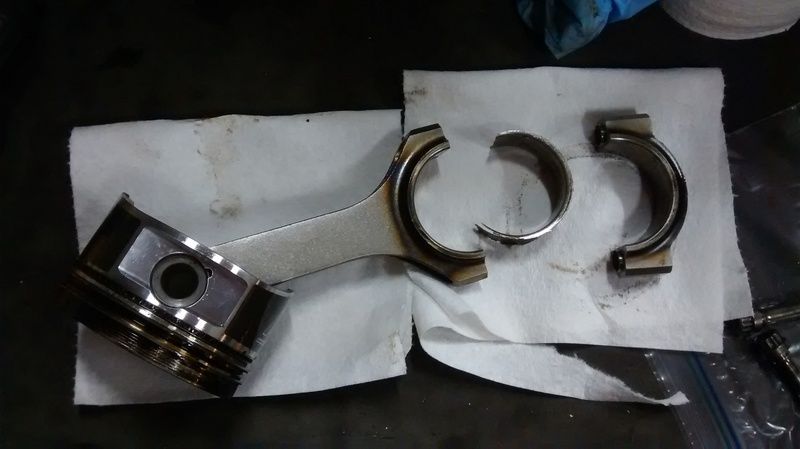
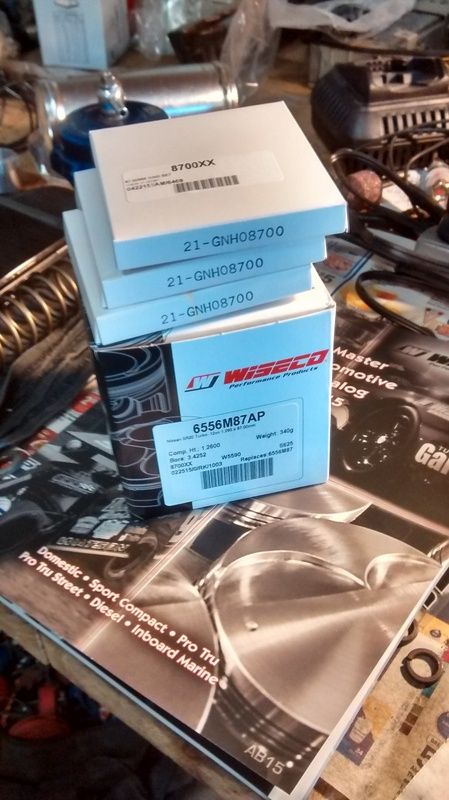
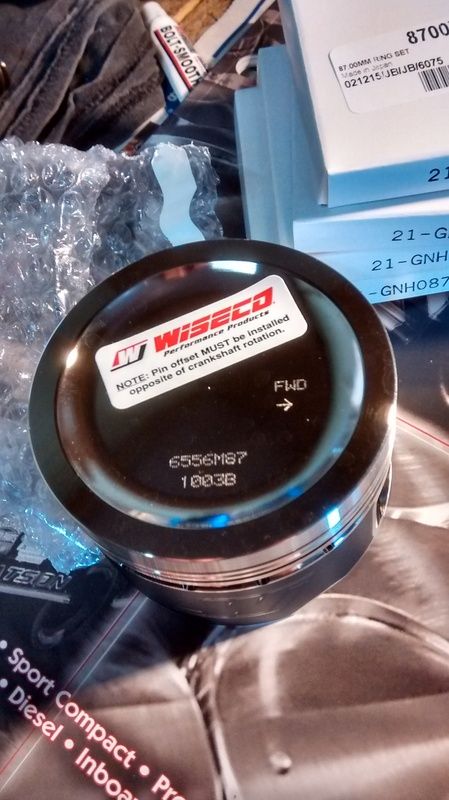
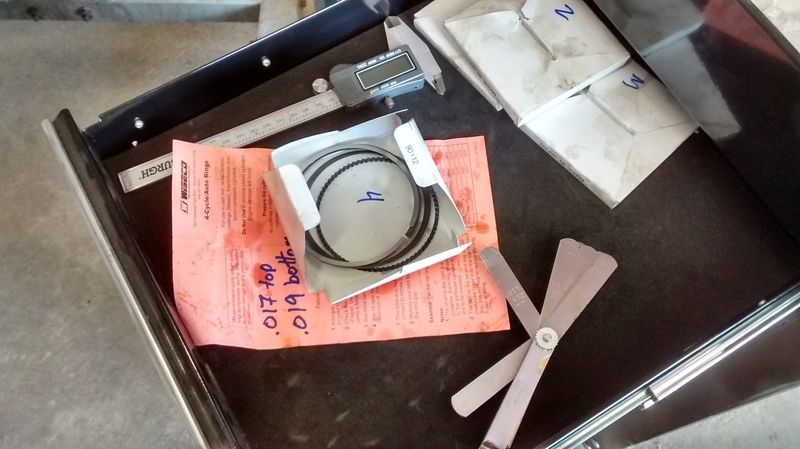
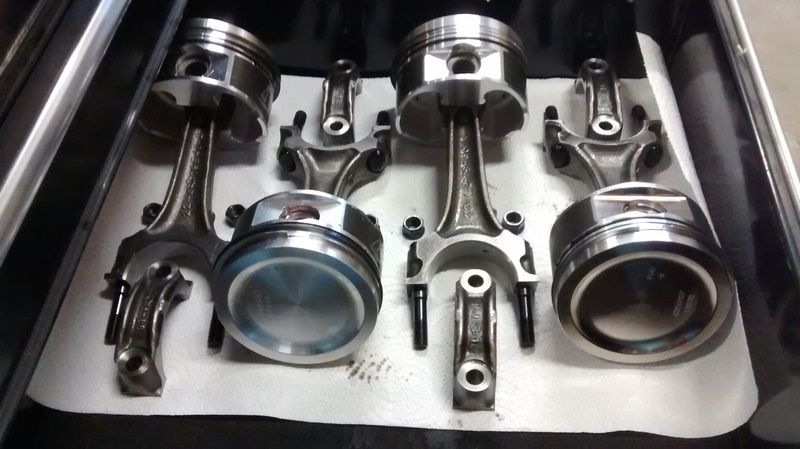
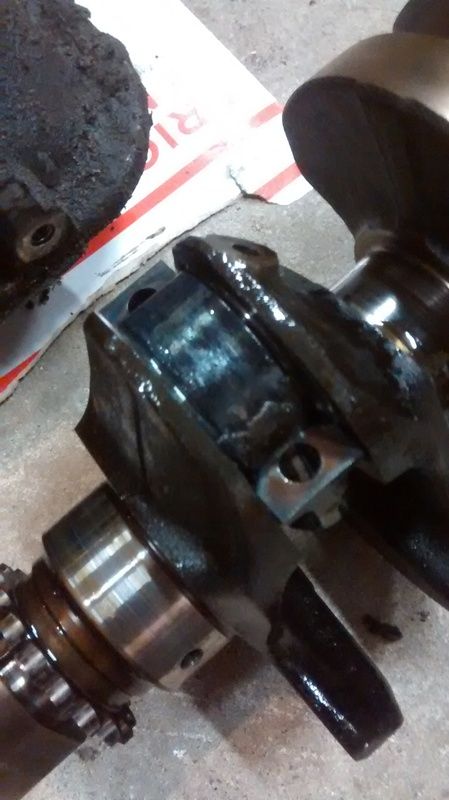
Also, that's not a knife-edged crank. So I loaded up the block and internals and took them to the machine shop to discuss a new plan. The professionals told me that even with a hone and new rings,this was probably going to smoke a bit because it just won't seal. The #2 piston was junk as was that connecting rod and the crankshaft. So much for that plan. We decided to get the rods and pistons weighed so I could order replacement parts. I needed to call Wiseco and see what kind of specs they had on clyinder wall clearance in hopes that maybe we could find some wiggle room.

Turns out, there isn't enough wiggle room. They can get me a weight-matched replacement, but they're clearances are built in and you're just supposed to punch the blocks to the given bore size. You can take 0.001" - 0.004" out for boosted and racing applications, but we agreed that this wasn't going to be a good idea for this mostly street-driven car. So the block came back home.

Now that I'm looking at machine work, I might as well tear that first block down the rest of the way and take it in since it's still an 86mm block. We can put the Wiseco pistons in that block with some stock rods and that would make a pretty good street setup. Back on the engine stand it went. However, it continued to follow the trend of the deeper I got, the worse it became. This engine spun rod bearing #3. I also discovered after I pulled the crank that it had spun main bearing #3 also. The rest of the bearings had taken a significant beating in this engine too.
Image
Image
Image
Image

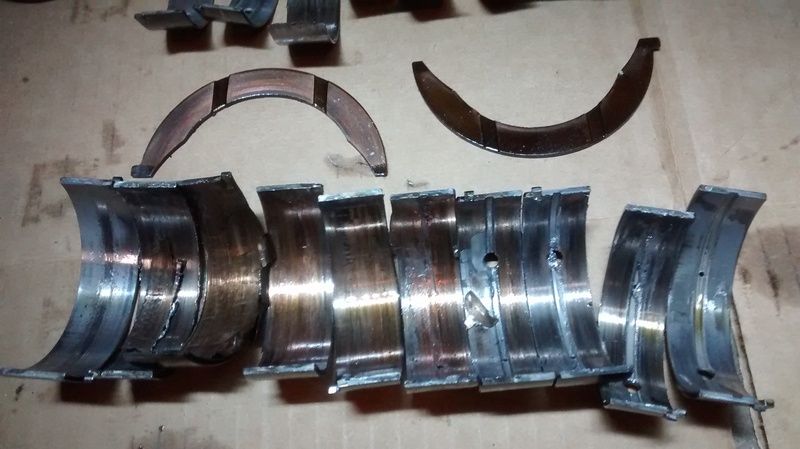
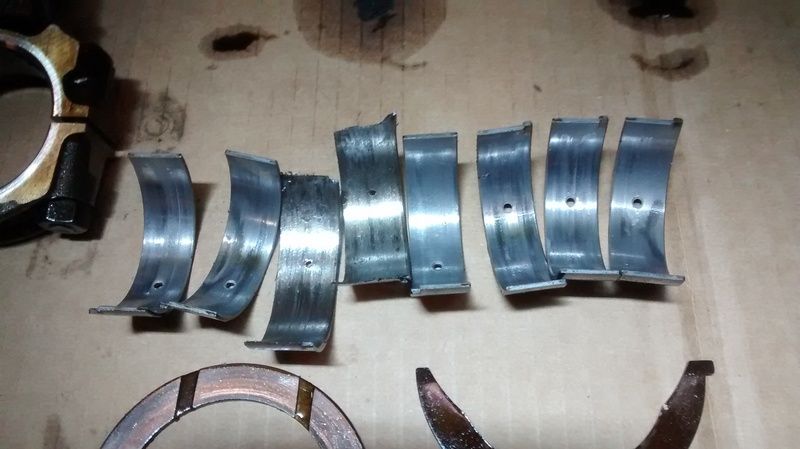
At this point, it's looking like I'll need to add an align bore to this block as well as the cylinder re-bores. I've got another junk crank on my hands too. Now I'm figuring the oil-starved engine might not be any worse than this one. Hopefully the third time is the charm.
Image

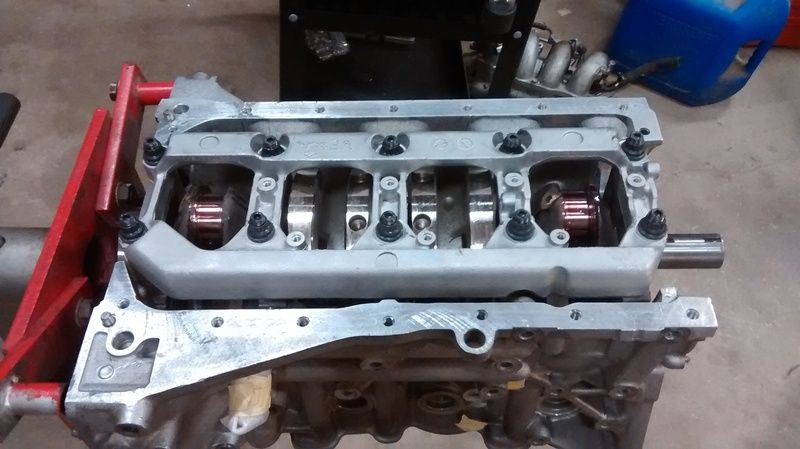
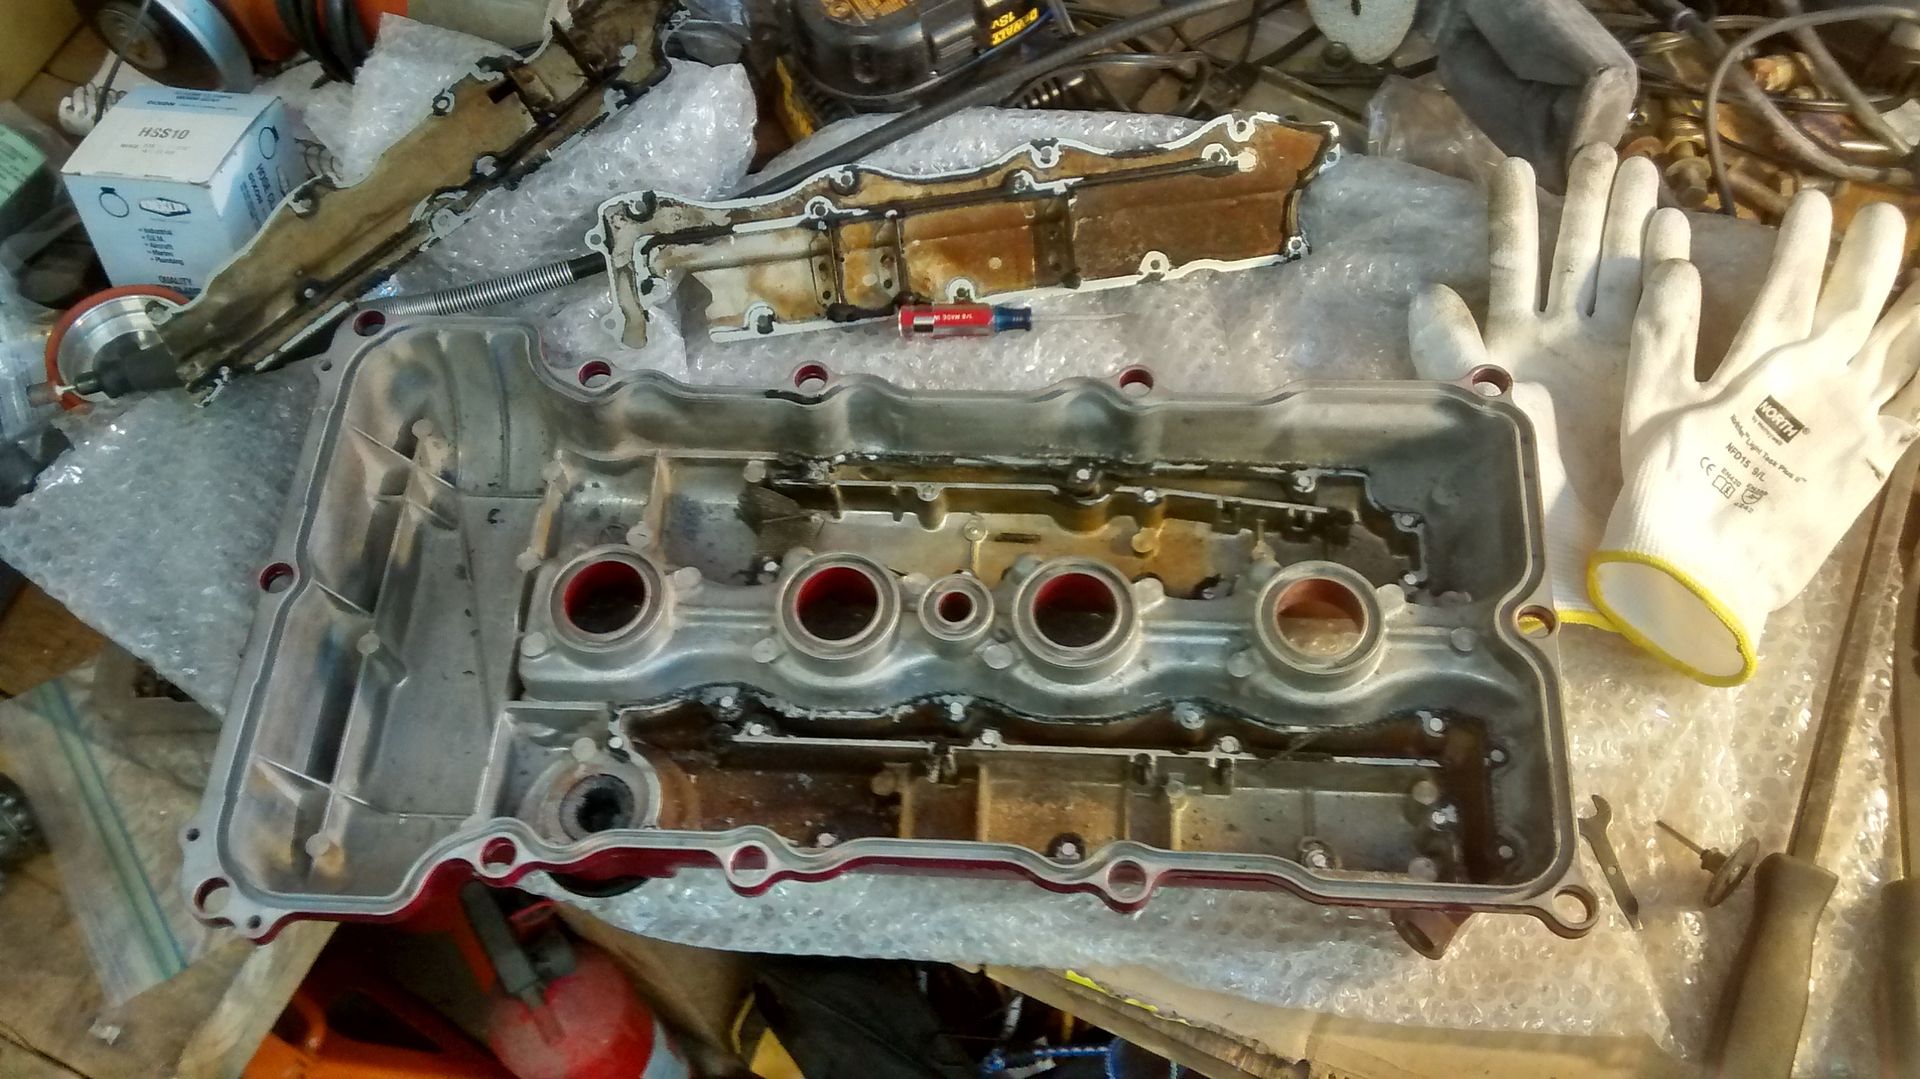
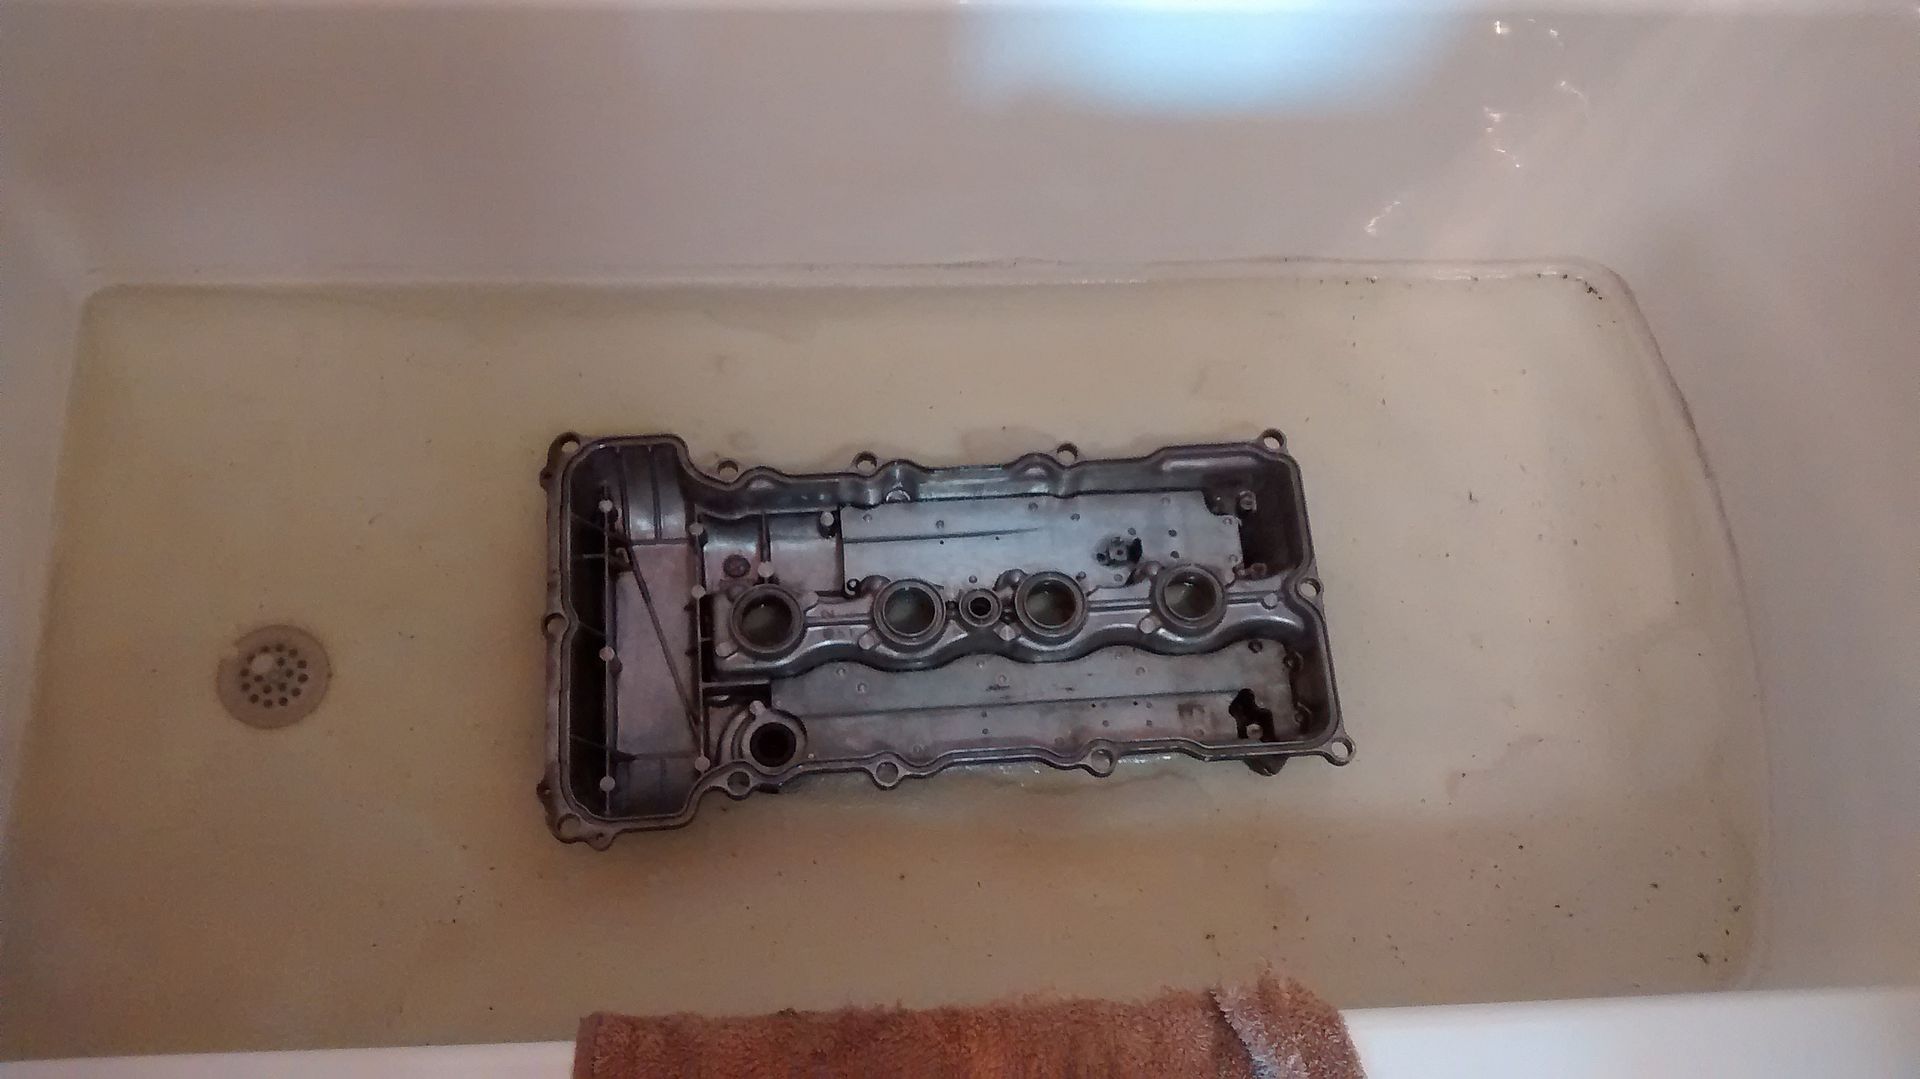
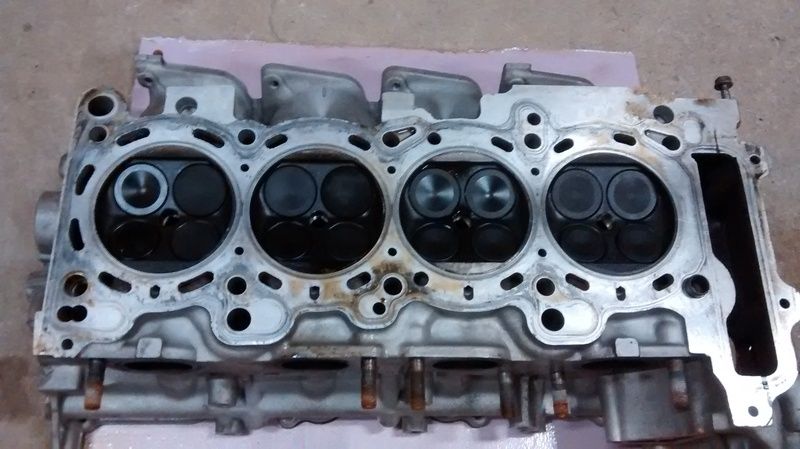
After pulling the cover off, it was apparent that this head would be junk. The cams were pretty much fried and the journals weren't much better.
Image
Image
Image

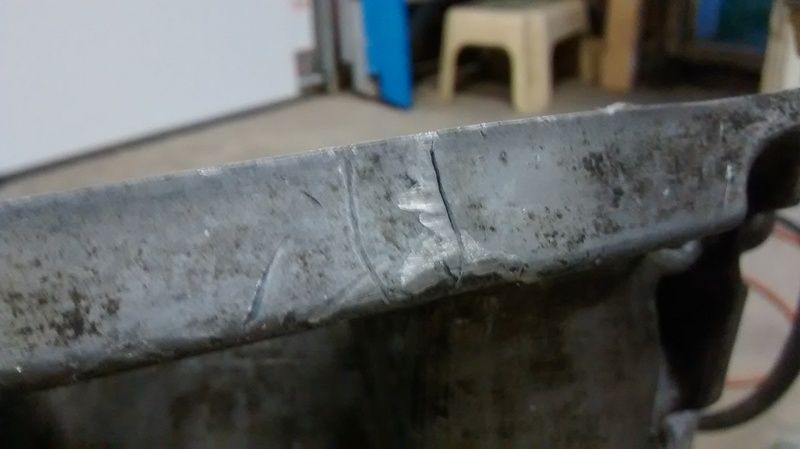
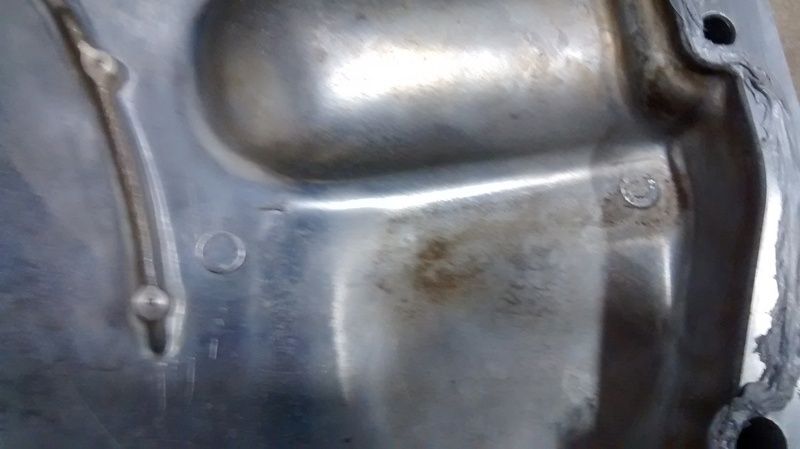
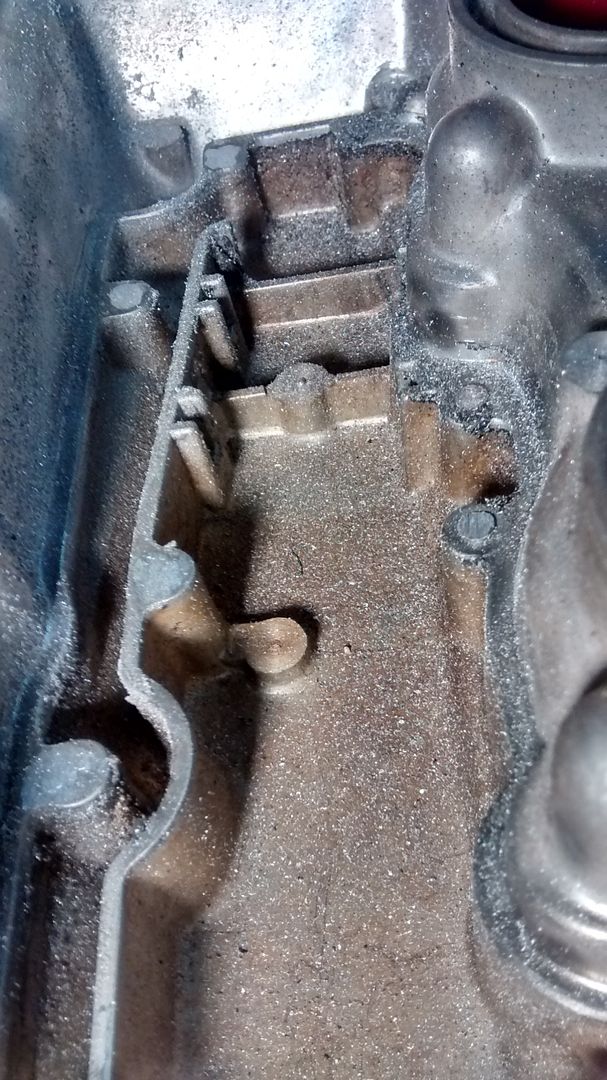
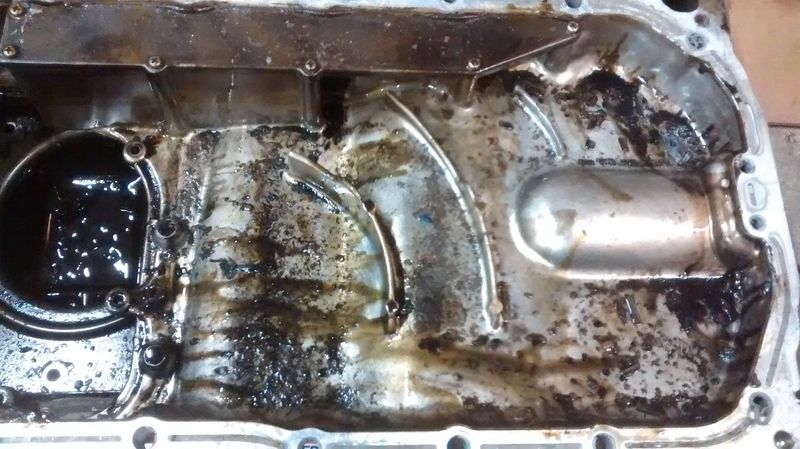
I was never able to get this engine to crank by hand, so I knew it was going to be seized up somewhere. The upper portion of the oil pan looked like a battle field. There were gooey, sparkly clumps everywhere. At least with this type of failure, the oil pump is all ready empty by the time the bearings disintegrate, so this stuff doesn't have a chance to circulate.
Image

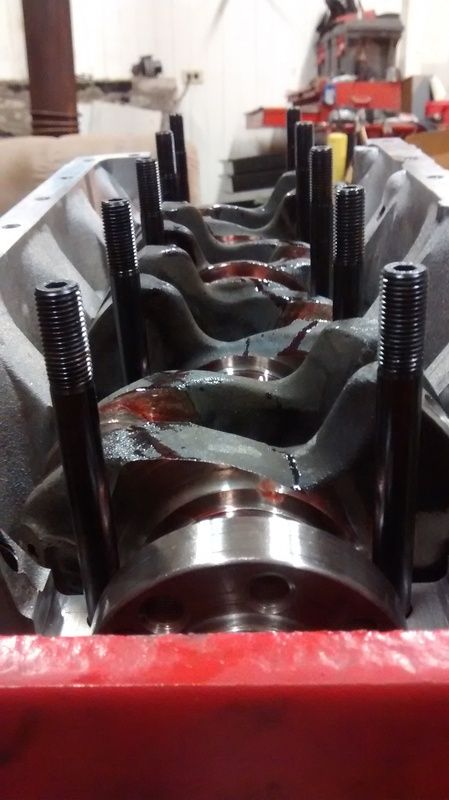
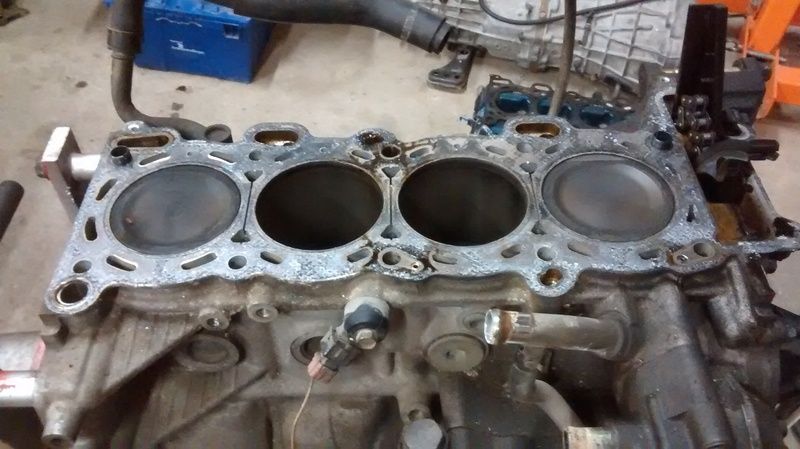
In order to get the rotating assembly out of the block, I had to pound the pistons out from the bottom with my 3lb hammer and a pry-bar against the under-side of the piston. Cylinder #2 and #4 came out easily, but #1 and #3 fought back. The rod caps on #1 and #3 also never came off the crank journals. However, at that point, the crank came out of the block easily.
Image
Image

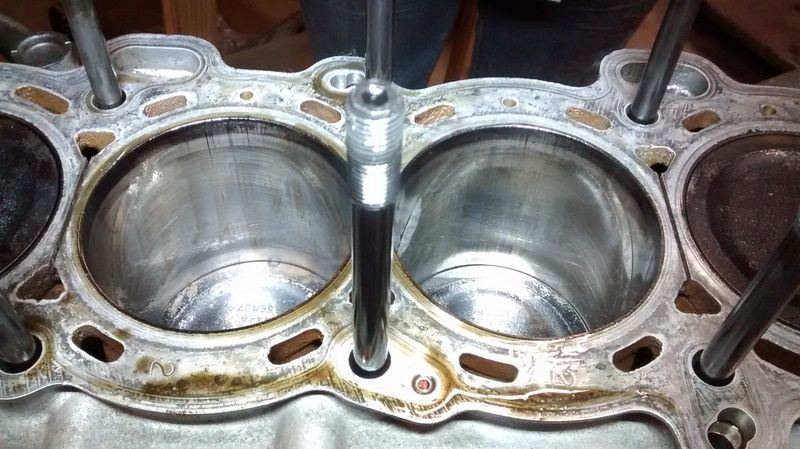
With the internals out of the block, it really didn't look that bad. All of the carnage took place between the crank and rods. The cylinders are scoured, but the main journals look good. I also had a good crank, rods, and pistons that I acquired a while back that I loaded into my car with these two blocks and headed off to the machine shop again. I left the oil starved block there with the bin of internals.

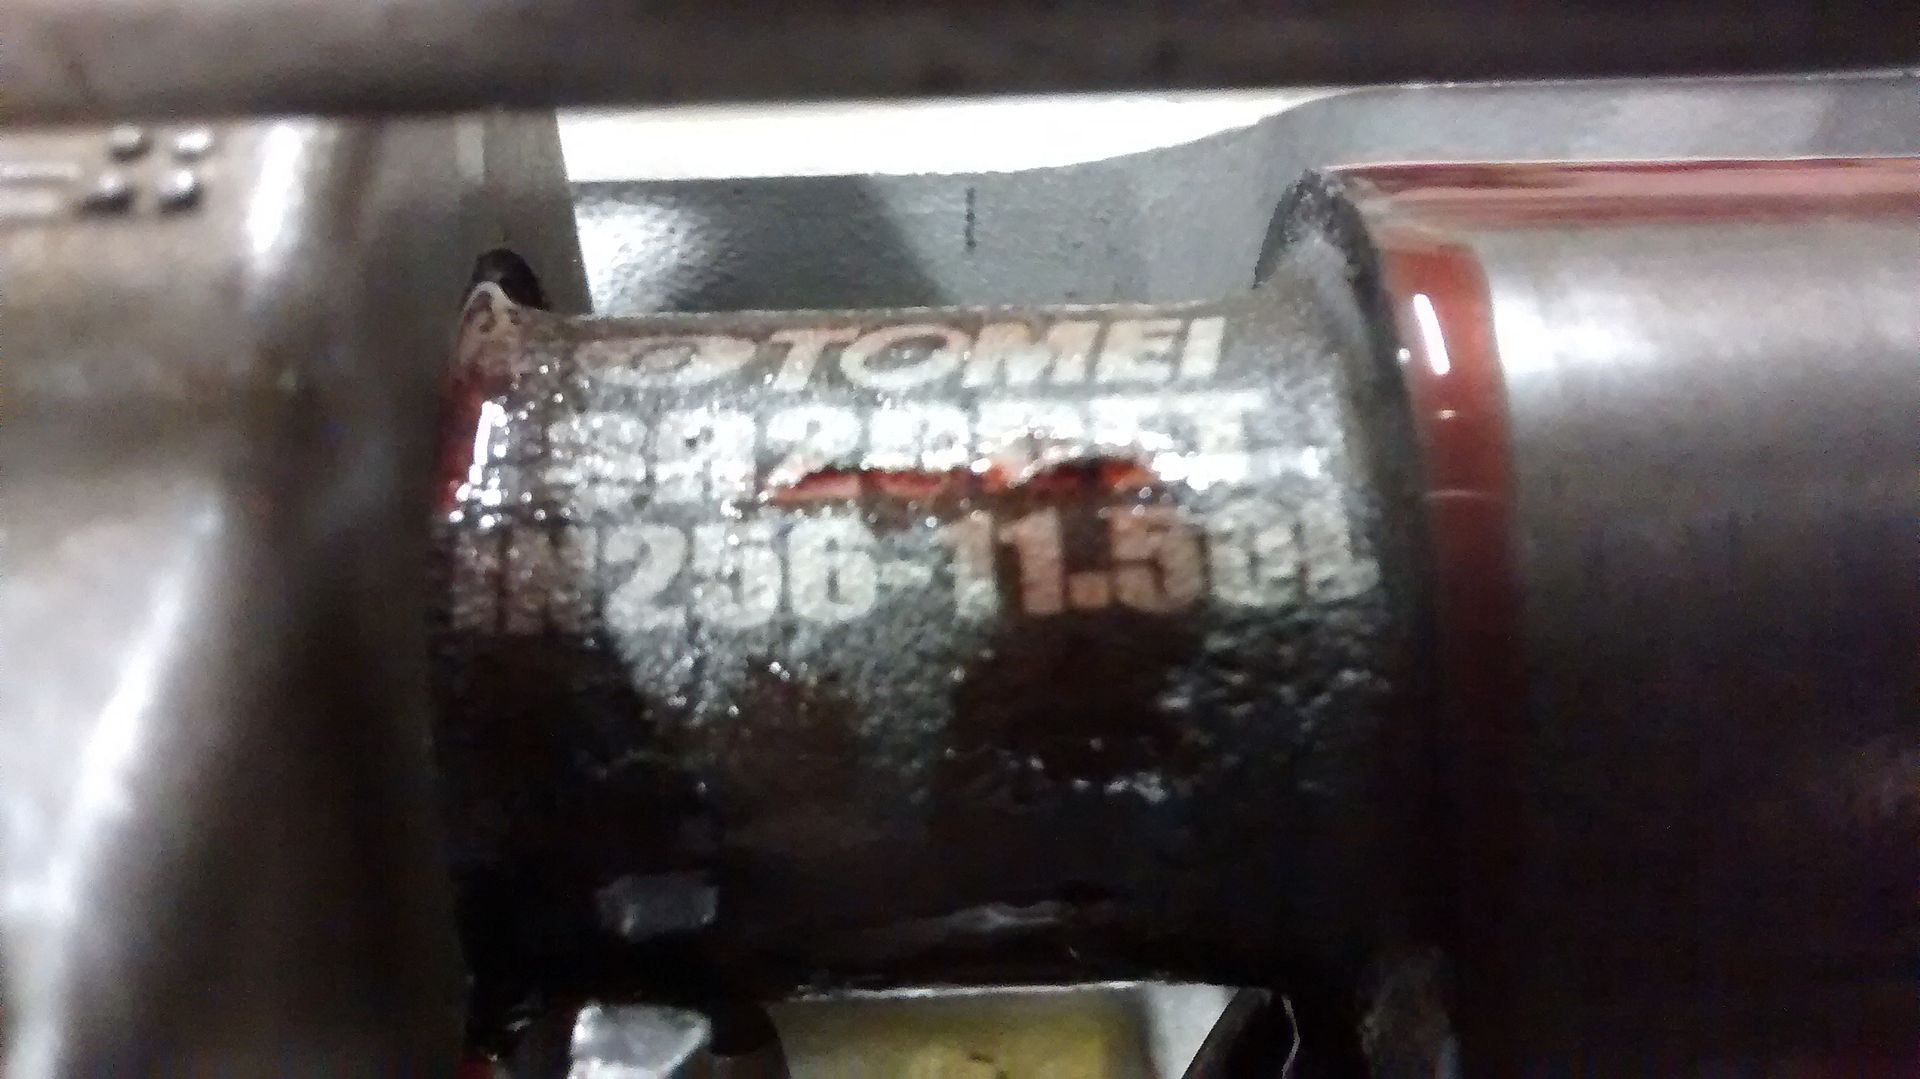
Moving forward, the plan is to order a replacement piston and a new set of rings and punch the oil-starved block out to 87mm. The Wiseco pistons will get pinned to a set of stock connecting rods which will be align bored with ARP rod bolts. This rotating assembly will get fully balanced. The mains will get align honed with ARP main studs. Finally the block will get decked for an OEM "felt" gasket. I'll be using the head from engine #2 that had the blue-green cover. I need to tear it down and replace the seals and put it back together with the BC hardware. I'll be installing a set of Tomei 256 Poncams and clamp it back on the block with more ARP hardware. Now it's just a matter of time - and money.

User avatar
blkvrtswp
Posts: 509
Joined: Mon May 30, 2011 6:45 pm
Car: 93 240SX Convertible
SR20DET FP 20G Turbo
Location: Poughkeepsie, NY

Post

Yikes - you are due for some good luck!

User avatar
AZhitman
Administrator
Posts: 71063
Joined: Mon Apr 29, 2002 2:04 am
Car: 58 L210, 63 Bluebird RHD, 64 NL320, 65 SPL310, 66 411 RHD, 67 WRL411, 68 510 SR20, 75 280Z RB25, 77 620 SR20, 79 B310, 90 S13, 92 SE-R, 92 Silvia Qs, 98 S14.
Location: Surprise, Arizona
Contact:

Post

DeX, you are a patient (and skilled) man, my friend.

Just wanted to let you know I'm stoked to see you posting again - I learn a ton from reading your stuff. :)

User avatar
DeXteR
Posts: 2702
Joined: Sun Sep 25, 2005 9:01 pm
Car: 14 Titan Pro4X
05 Xterra OR
92 300ZX Slicktop
94 Sentra RS Rally Car
Location: Beulah, MI
Contact:

Post

AZhitman wrote:DeX, you are a patient (and skilled) man, my friend.
Says the guy who painstakingly refinished all the bolts and fasteners on his KAT project...

Thanks, Greg.

So the chassis prep wasn't entirely complete. The holes were cut for the clutch and everything was clean, but there was still some work to be done. Michelle (my awesome wife who sometimes helps me work on cars and stuff) helped me get the manual pedals installed from the outside while I was folded under the steering column.
Image
Image

Then it was time to wire the pedals. Yes, wire the pedals. This isn't some drifter driveway conversion. In order to make sure this car will be factory functional, I'm taking the time to ensure the inhibitor and ASCD cancel switches are properly integrated with the clutch pedal. [ASCD stands for automatic speed control device - Nissan's fancy terminology for cruise control] I snagged the switches from some other pedals, but I had to source the pigtails from a couple buddies who bought the car I scavenged most of the 5-speed components from for this project. They happen to be doing a drifter driveway project. [If you guys ever read this, no offense]. Anyway, the switches are the same in appearance and function - they're both normally open until depressed. This might get confusing, but try to keep up and reference the pictures.

First to address the ASCD circuitry and try to keep it simple. In an automatic, there is an ASCD cancel switch on the brake pedal which is also a normally open switch that is closed when the brake pedal is not depressed. Since we want the ASCD to shut off when the clutch is depressed too the easiest way is to just wire the clutch switch inline with the brake switch. This will open the ASCD circuit when either pedal is depressed, which is exactly what we want.
Clutch pedal not depressed:
Image
Clutch switch in series with the brake switch:
Image

In almost all the wire-ups for doing the 5-speed conversion we're told to just jumper the two wires coming from the 2-pin plug under the engine bay fuse box. That's the part of the automatic transmission inhibitor switch that closes the starting circuit when it's in park or neutral. In order to make sure the car won't start unless the clutch is depressed, I wired the rear clutch switch to that connector from the auto trans. Now when the clutch is pushed down, the switch at the back will be closed and complete the circuit that will allow the starter to engage.
Clutch pedal pushed down:
Image
In the car, not depressed:
Image

To keep the new clutch inhibitor wiring looking clean, I ran the wires with the dash harness, over the HVAV, and under the engine harness grommet. From there it will get taped and loomed to match the rest of the harness. If the engine harness ever needs to come out in the future, the wires will need to be cut under the dash and a connector will be added. I really should do that now before the dash goes in.
Here's the connector under the relay box in the engine bay:
The connector location:
Image

Well, since the engine harness needed to be installed before finishing the clutch switch wiring, we fed that through the hole and installed the SR20 ECU. Again, to maintain factory functionality and fitment, I put the ECU brackets from the KA ECU on the SR ECU and bolted it back in the original location.
Image
Image

In case you're curious, I got the harness from Wiring Specialties. I did all the wiring myself on my S14 SR20 and it was quite the endeavor. Since I'm going for a factory look, I figured I might as well get a basic WS harness and save myself the trouble. It was totally worth the cost because I didn't have to mess with it and everything from the wires to the connectors is brand new. The newness alone is worth letting them handle the harness.

More updates to come when time allows. Thanks for following along.

User avatar
blkvrtswp
Posts: 509
Joined: Mon May 30, 2011 6:45 pm
Car: 93 240SX Convertible
SR20DET FP 20G Turbo
Location: Poughkeepsie, NY

Post

Please post more - very interesting!

User avatar
DeXteR
Posts: 2702
Joined: Sun Sep 25, 2005 9:01 pm
Car: 14 Titan Pro4X
05 Xterra OR
92 300ZX Slicktop
94 Sentra RS Rally Car
Location: Beulah, MI
Contact:

Post

Yet another bottom end is currently at the machine shop. Had to retrieve a block I had given to a friend because both the machinist and I missed the spun main in the block until after it was cleaned. Just waiting for that one to go through its paces now. Race season is a terrible time to get work done. Ran in to more issues with the cylinder head too, so picking one up this week hopefully.

Spent the last month getting the rally car ready and raced it last weekend. I'm CoDriving an MK2 Golf now with my friend, Bill. You can find Tri City Evolution Rally Team on Facebook if you're interested. Should be getting back to this project shortly I hope.

User avatar
DeXteR
Posts: 2702
Joined: Sun Sep 25, 2005 9:01 pm
Car: 14 Titan Pro4X
05 Xterra OR
92 300ZX Slicktop
94 Sentra RS Rally Car
Location: Beulah, MI
Contact:

Post

I've heard from a reliable source that the block and bottom end are finished and that I should expect a call this afternoon telling me to come get my junk and pay for services. That being the case, I should get this brought up to speed.

One of the little side projects I did while waiting for the machine work was modifying the gauge cluster. Ever since short shifting my S14 at the drag strip last year, I've wanted to swap a JDM tach into my car. Call it ricey, call it attention to detail, call it a waste of time and money; but I wanted it done. I still haven't gotten around to that yet, but I did have a JDM S13 cluster sitting around too. I figured, I might as well put the SR20 tach in the cluster for this car as well. I think it's an appropriate thing to do.
Removed the JDM tach:
Image

...and swapped:
Image

Somewhere along the way, I ordered the new piston and ring kit:
Image
Image

I also had the valve cover powder coated to look like a stock red top. Well, it turned out darker than I would have liked, but it's good enough.
Image

You might notice that's a new OEM spark plug cover. Also adding to the collection of parts for the rebuild are new OEM water pump, new OEM crank pulley, some stainless valve cover hardware, Tennessee Clutch and Supply clutch kit, and various other bits and pieces.
Image
Image

Here's another side story. My father-in-law has been wanting to get his seats reupholstered for a while. I've always told him it would be a waste to invest any time or money into the original seats because they're junk. For the amount of money it would cost to rework them, I could find a better set of seats that would be more comfortable and be in great shape. I finally found something...
Image

It's funny how things work out sometimes... The JDM cluster I scavenged the tach from came to me with a bunch of RHD components when I bought my wife's Silvert way back in the day. Last fall, I sold all of the stuff except the cluster to a guy downstate that I met on the Michigan S-Chassis page on facebook. A few months later, he decided the money he had wrapped up in a set of 180sx seats could better serve him in another capacity. I quickly jumped at the opportunity and reminded him about the deal I cut him on the RHD parts. I think they'll make an excellent addition to this project. I just need to take these rear seats and the vert rear seats in to a local upholstery shop and get them to make it work.

A while back, I received one of the most crucial components for maintaining the factory appearance for this project - an OEM airbox. It's actually for an S14 and it came all the way from England. It hasn't been out of the box yet, but I should pull that and the side mount intercooler kit out to go over them and do some test fitting before the engine goes in. I need to clean them up and snap some pictures so they can be included in the next update. Most likely, engine assembly will be well under way then as well.

Again, thanks for following along.

User avatar
DeXteR
Posts: 2702
Joined: Sun Sep 25, 2005 9:01 pm
Car: 14 Titan Pro4X
05 Xterra OR
92 300ZX Slicktop
94 Sentra RS Rally Car
Location: Beulah, MI
Contact:

Post

Engine assembly is well under way!

Did I mention that I picked up ANOTHER cylinder head too? The head that I was going to use needed new guides on one side. The wrong guides were ordered because most generic US suppliers only carry USDM parts - RWD (non USDM) SR uses different sizes for the exhaust and intake where the FWD (all USDM) uses the same size on both sides. This is the trouble when dealing with a machine shop that is unfamiliar with what you're doing. At any rate, I decided that after the cost and time associated with sending the wrong guides back, buying new ones, and paying for installation, I was better off finding another head.

I purchased a head from downstate that was supposedly recently rebuilt and ready to go; After a more thorough inspection, I wasn't so sure. So I tore it down and took it to the machine shop to get cleaned and decked.
Image
Image

I'm still waiting for it to come back from the shop. I'm glad I tore this down too because one of the spring seats was MIA. Also, I have now used two different methods for disassembling the cylinder heads: the magnetic whacker tool and the bolt-on lever press. The lever press (as can be seen in the previous picture) is my preferred method. They can be had on eBay for less than $50. Totally worth it. It will make assembly much easier as well. The magnetic whacker is great for quick disassembling for scrapping or junkyarding or other means where you just want to knock stuff out and be quick; but the lever press provides much more precision and control.

Anyway, on to the next road block. I purchased ACL Race Bearings through a friend that runs a shop downstate. He said his distributor had the bearings in stock and the price was good. Well, they ended up being Pulsar GTIR bearings. These are "upgrades" through other shops, but their use requires modifications to the rotating assembly. So I had to send them back and order the correct set from Mazworx because they had everything in stock and could get them to me in two days. If you want something done right...

In the mean time, there were other projects to tackle such as customizing the engine mounts, fitting the rings, pinning the pistons on the rods, and cleaning and painting things.

Holes were drilled in the factory mounts to drain whatever nasty fluid was inside them. Solvents were injected in an attempt to clean them out. Finally, they were injected with urethane from the hardware store. These are better than the Nismo mounts at a fraction of the price.
Image

File-fitting the rings did not take long once I got the hang of it. I practiced on the old rings and was humored to discover that the builder of the previously forged block did not fit the rings at all. There was nearly zero end gap on the rings that I checked.
Image

Once the rings were fitted, it was time to bring the pieces together and await their installation.
Image

Once the correct bearings arrived, it was time to clean the block and crank. Cleaning the block is as easy as rolling it outside and hosing it out. Make sure all the plugs are out and that all of the passages are thoroughly rinsed and cleaned. I used my gun cleaning kit and swabbed the oil galleries.
Image

The crankshaft was a pain. I went through three cans of brake parts cleaner getting those oil passages clean. I was unable to figure out a way to easily remove the plugs in the crank that would allow me a straight shot through the passages. I just stood the crank on end, plugged a couple holes with my fingers, and blasted the solvent in. Flip, blow them out with compressed air, and repeat until clean.

If I were a little smarter, I would have removed the main studs and measured them. I did not. More on that later. At this point, I dropped the crank in and torqued it down.
Image
Image

Then I dropped the rods and pistons in and clamped them to the crankshaft.
Image

As assembly progressed, I discovered that I had a serious issue with the upper oil pan - it was not sitting flush on the bottom of the block. I unbolted it, checked the holes and the dowels and put it back together. Then I broke it.
Image

About measuring those studs...
Image

Long story short, all of these main studs are the same length. This means that this is a FWD set. Back in the day, RWD guys discovered that the upper oil pan did not clear the studs, so they needed to either order shorter studs or modify the pan and/or studs to fit. ARP eventually created another kit that was RWD specific and included three shorter studs to use on the front left side. I kind of knew this from the installation instructions I had printed from ARP, but it didn't really register in my mind. After I broke one oil pan I discovered that the pan from the forged block was also cracked because that guy didn't fit it either. I don't recall seeing a huge gap when I tore that engine apart, so that was kind of weird. I cleaned up a third pan and ground out clearances for the studs until it fit properly. I ended up removing about 0.12" out of about 0.25" of pan thickness.

As it sits right now, the full rotating assembly is inside the block and torqued down. The new OEM water pump and new OEM oil pump and cover assembly are fastened. The rest of the short block accessories can start getting bolted on.
Image

The head should come back today and assembly can begin with that too. It shouldn't be long now before it all comes together and gets put back in the car.

User avatar
DeXteR
Posts: 2702
Joined: Sun Sep 25, 2005 9:01 pm
Car: 14 Titan Pro4X
05 Xterra OR
92 300ZX Slicktop
94 Sentra RS Rally Car
Location: Beulah, MI
Contact:

Post

I know it's been quite a while since my last update. I apologize, but I've been pretty busy with work, working on the car, family vacations, seeing friends, tending to the garden, and other summer activities. I really was hoping to have this car totally back together in time for my in-laws to be able to drive it down to Tennessee for our vacation. We got back earlier this week and the car did not make the trip. My car didn't make the trip either, but that's another story for another thread.

We were able to knock out a lot more work on it before we departed. While the cylinder head was gone, I chucked the valves up in my drill, equipped my bench grinder with a brass wire wheel, and cleaned all the valves. Meanwhile, the rest of the valvetrain got a mineral spirit bath in the parts washer. After the head came back and got it's own bath, I lapped all the valves by hand. Here's a couple pictures so you can get an idea of what it looked like before and after.
Freshly decked and checked from the machinist:
Image
Before lapping:
Image
After lapping:
Image

Once all the valves were lapped and cleaned again, it was time to do preliminary test fittings. I had a base made out of a deconstructed hydraulic lash adjuster. I could attach my dial indicator to this to measure valve stem heights. Well, it turned out to not be capable of providing repeatable, consistent results. I tried a couple different ways to mount the dial and then be able to move between valves, but nothing was good enough. Since one of the engines I tore down earlier had solid lifters, I just used the feeler gauge method to check the gap on each side of the rocker arm under the cam lobe. It's not a precision method, but it's consistent. Fortunately, I only needed to swap out shims and guides a few times as this method requires the cams to be installed and torqued down.
Brian Crower springs and retainers:
Image
Tomei PonCams:
Image
Fully Assembled and ready to rock:
Image

With the head sorted out, it was time to put it on. So I pulled out the stock head gasket and plopped it on for the sake of seeing it on there.
Image

Since I'm using ARP head studs, I went ahead and put those in first because that's what you do on a 4G63 - except there's no timing guides to feed through the head on a 4G63. That was a fun struggle. Out came the head studs and on went the head. Then out came the cams again - another duh moment because you can't access the head studs with the cams in there. Then I fought the cams several more times as I got the timing chain installed and the gears torqued down. I eventually got it all figured out once my brain caught up with my hands. Hopefully this will go a lot smoother next time.

With the head finally sorted and everything torqued down, it was finally time to dress the long block with manifolds. The intake manifold went on with one of those thermo-plastic gaskets that help reduce heat transfer. I installed one on my S14 and it made a HUGE difference in manifold temperatures. Back in the spring I sent out a couple sets of injectors to Witch Hunter Performance. When they came back, I put together this flow-matched set of stock injectors. The fuel rail followed the same plan as the block and head as this was the third or fourth fuel rail I tried because the rest of them were bent. Seriously, how do you do that? Anyway, fresh spacers, seals, hoses and clamps were installed also.
Image

That's a KA throttle body at the end of the plenum. For some reason, I thought I was going to be able to splice parts together from the SR and KA throttle bodies, but I ended up using the whole KA unit with the KA TPS. So here's an odd thought: The Wiring Specialties harness is supposed to maintain functionality of the cruise control but it's wired for an SR throttle body. I'm pretty sure the only way to maintain cruise on an SR swapped 240 is by using the KA throttle body. There are two different TPS plugs on this harness because apparently there are different TPS plugs for auto and manual SR's. Fortunately, the pins in the auto plug are the same as the ones that were in the KA harness; so I just had to unpin that connector, repin the KA connector, and remove the manual SR connector. Now that's good to go.

Then I switched my focus to the hot side and brought the exhaust manifold, turbo, and turbine outlet together with fresh OEM gaskets and a new waste gate flapper clip. It's so inexpensive and easy to replace with the turbo out of the car that I figured it was silly not to replace it. The whole assembly was hung on the engine and then I started refitting OEM oil and coolant lines. One of the other little tricks that I'm employing is using an S14 water neck which will greatly simplify the coolant lines for the turbo. I had accumulated a few sets of lines from the various engines, so it was just a matter of finding the lines that fit the closest, test fitting, bending, test fitting again, bending some more, until finally all the hard lines were bolted up. If the turbo ever gets upgraded and the engine doesn't come out of the car for it, these lines will be gone. It was hard enough massaging them in to place with the engine out of the car.
Image
Image

Yes, that's a stock T25 that I got from a friend who upgraded. Yup, all that engine is going to be choked by this tiny turbo. It's all right for now, since all of the support outside the engine is for a stock setup. Some day... For now though, stock turbo.
Image

It was around this time that we discovered that the valve cover I had powder coated a while ago had a bunch of sand in it. I specifically told the guy to mask it well so I wouldn't have sand in it. He apparently didn't understand English because it was like he didn't even try. It started when my wife cleaned the valve cover and sand started pouring out. I determined there was no salvaging it without cutting out the baffles. Oh the agony.
Image
I'll save you all the sandy valve cover pictures and just share a couple.
Image
Image
Image

Now I've got another unexpected side project - valve cover reclamation. My wife and I split this project up. She started cleaning and stripping one of the other valve covers to paint it. I was going to grind down all the rivet things, drill and tap them, and fasten the baffles with some cap screws. Michelle ended up using our bathtub to clean car parts after taking a cue from a late friend who had a bathroom designated for parts washing.
Image
Image

I was making good progress. I got the baffles cleaned up and all the silicone off. I ground all the rivet things flush and started drilling new holes to tap.
Image
Then I drilled right through it in the back.
Image
At that point, I gave up on saving the powder coated cover and decided to paint the one Michelle was working on. I just picked up a couple cans of paint to try to replicated the factory cover. More on that as I progress.

This is probably a good time to take a break anyway. I've got more photos and updates, but it'll have to wait for the next post.

User avatar
DeXteR
Posts: 2702
Joined: Sun Sep 25, 2005 9:01 pm
Car: 14 Titan Pro4X
05 Xterra OR
92 300ZX Slicktop
94 Sentra RS Rally Car
Location: Beulah, MI
Contact:

Post

A couple small details I would like to have added to my previous post, but didn't recall in time to edit:
I replaced all the hoses under the intake manifold with new pieces from NAPA. Even though I had picked up heater core hoses from FRSPort for an SR swap, I'm going to try to send those back. One of the reasons I used the S14 water neck was to eliminate the coolant hoses behind the cylinder head. I've got the turbo and heater hoses configured in such a way that I just need to use a couple S-hoses to connect to the heater core and there is no longer a mess of tubes and hoses behind the head. There are several threads on the net about doing this. It's easy and I don't know why anyone would want to do it the other way. Also, in the future when I upgrade the turbo and lines, I won't have to fight with a goofy coolant return adapter fitting or threading the hose behind the cylinder head.

Secondly, I'm using a Z31 NTK oxygen sensor. I wasn't able to find a turbine outlet that would fit the fat sensors, so this was a cheap alternative to buying the SR sensor. However, the Z31 connector is different. I don't know if I ordered the right sensor or not, but the pins are the same. Once again, I just harvested the connector for the stock SR 02 and repinned it to the Z31 sensor.

Once we had attached the ancillaries to the engine, it was time to dismount it from the stand and hang it on the hoist - it was quite the milestone. A freshly resurfaced flywheel was fastened with a little Loctite, then a new clutch kit from Tennessee Clutch and Supply followed. I've been running their setups on my S14 for the last few years and even though my first clutch failed in a catastrophic way, they stood behind their product and handle the situation very well. Customer service goes a long way with me and they'll continue to get my business.
Image

With that out of the way, it was time to prep one of the transmissions I had laying around. The exterior and bell housings were cleaned; but since this part will only ever be seen by me after it's installed, we weren't as thorough as we had been with the engine. Preparations included a new rear seal, new lever housing gasket, new lever bushing, new lever boot, new pivot and washer (slightly shimmed for resurfacing), a new throw out bearing, and thorough cleaning of the rest of the parts. Then the transmission was mated to the long block with a new bolt kit.
Image
Image

It was about this time that Michelle got motivated to start putting the interior back together. We ended up having to swap the seat belt receivers out because the ones on the 180sx seats would not accept the vert's belts. This would have saved me from unpinning the connectors had I not all ready done it. Another lesson learned the hard way. The dash is all back together too with the cluster featuring the 9krpm tach - not that it'll ever get there with the T25. Again, just a small detail that most will never notice.
Image
Image
Image

Before we dropped the engine in, I wanted to get the side mount intercooler fitted while I had the extra room. I pulled the fender liner to find some weird black box... I don't think I've ever seen one of these before.
Image

It's just a useless resonator. Once it was out, I made quick work of cutting out the template that Nissan was kind enough to leave there for me. I started with the sawzall, worked it down more with my Dremel, and finished it off with carbide burs to keep everything tidy. Before we got too far, we cleaned up all the pieces of the two kits I had acquired for this project. I picked up an OEM side mount intercooler with OEM piping from a 180sx through Elite JDM a while back. I also purchased an OEM intake and piping kit for an S14 200sx from Drift Bitz on eBay UK.
Image

After a quick spray of white paint to cover the bare edges, the SMIC was installed.
Image
Image

Now the moment we've all been waiting for...
Image
Get in there!
Image

Michelle made a comment along the lines of, "That was easy." To which I replied, "Yeah? Well, we've done this a few times. We kind of know what we're doing by now."

Now begins all of the custom fitting - you know, the fun parts that take lots of time. I started out by bolting the A/C compressor to Cody Ace's brackets on the SR A/C bracket. I ruined the SR idler pulley trying to remove the bearing. Since I didn't have another SR idler at my disposal, I tried using a KA idler and it seems to fit just fine.
Image

Notice how the purge valve is right in line with the compressor inlet? When Cody Ace saw that picture on my facebook, he said, "Oh, you've got one of the weird ones. Those are fun. Start bending." It took a lot of persuasion, but it eventually yielded. Then it was time to figure out the intake setup. When all was said and done, my recipe ended up being the stock 240sx lower air box, the S14 200sx upper air box, and what I think is an S13 SR or R32 GTS-t intake tube (I had it laying around with an RB turbo). I was really hoping I'd be able o use the whole S14 air box and incorporate the snorkel, but the lower S14 box doesn't fit very well.
Image

The power steering pump then became the next road block. I ended up using the stock KA pump with an SR pulley and an SR low pressure inlet elbow because it's angled to better clear the intake piping.
Image

On to the radiator setup. I picked up an S15 radiator from a friend who upgraded. It is a big copper Koyo with A/C fan and shroud. Much like an S14 upgrade, some modifications are necessary to get this radiator to fit. The lower mount bushings need to be trimmed and the upper mounts need to be relocated. I haven't gotten around to doing the upper mounts yet because I want to see how everything is going to fit once the intercooler piping is installed.
Image

The shroud is not installed yet because the little surge tank thing for the A/C interferes. More bending of A/C lines was needed. I took the bracket off of that surge tank, trimmed it, turned it upside down and drilled a new mounting hole. It should fit now, just haven't finished cleaning it up yet. Also need to get some rust converting paint to spray the battery box.

This is pretty much how it sits right now. I hurt my back on vacation, so I haven't been out to the lab to work on the car lately. It's getting close. I really want to get this thing running and broken in so my in-laws can enjoy what little bit of summer is left.

In closing, if you want to be updated more frequently with how this is progressing, you can follow me on Instagram. @dexters_autolab is my handle. It's not just this project, but all my automotive related things. I promise there's no babies or puppies or cats or food - just car stuff.

User avatar
DeXteR
Posts: 2702
Joined: Sun Sep 25, 2005 9:01 pm
Car: 14 Titan Pro4X
05 Xterra OR
92 300ZX Slicktop
94 Sentra RS Rally Car
Location: Beulah, MI
Contact:

Post

Time for another biannual update on this project.

It still doesn't run.

Now that I've gotten that out of the way, let's get to some progress...

One of the topics we left off on was the battery tray. As anyone who's worked on S13s much can attest, this is a problem area. Although my father-in-law's car is a pretty clean specimen, it was not immune. I've seen much worse. The following picture is after I cleaned up the area with wire brushes and my Dremel.
Image

Then I used a VHT rust converter product. I can't remember if I bought it from Amazon or Advance Auto Parts, but it seemed to work pretty well. It's supposed to use chemistry stuff... Anyway, after masking off the surrounding area, I sprayed a few coats on the battery tray. The product comes out clear and as it reacts with the rust it turns black. If there isn't any rust, it remains clear. The two-fold benefits are that you can see where it's working and you don't have to be super concerned if you get it somewhere else. I let it dry for a couple days and then primed and painted the area with cheap rattle-can paint. The final result was a tremendous improvement
Image

With the engine and transmission in the car, I was able to connect the front of the car to the back of the car. I used the manual driveshaft that was in my wife's convertible (the Silvert won't be needing it ever again anyway). I hate those factory driveshafts, but it was here and didn't cost anything. I'd like to upgrade to a one-piece steel unit in the future.

I also connected the convertible's original catback to an OEM S15 downpipe with an eBay test pipe. One of the nice things about the eBay pipes is that they have brackets for the catalytic converter heat shield. Since I had two of those shields laying around, I went ahead and installed one to help keep the test pipe inconspicuous while maintaining a factory appearance.

Image

After that, I decided to start routing the engine harness. It went pretty smoothly, although some of the lower harness seems awfully tight. I can't complain though as the Wiring Specialties harness looks great and saved me a LOT of hassle.
Image

That's going to be it for this update. I have a lot more done, but I just realized after uploading and looking at the pictures that I need to take some more pictures next time I'm in the lab. Hopefully it will be some time soon.

Fastazz240
Posts: 189
Joined: Sun Apr 25, 2010 10:40 am
Car: 1995 240 SX, 93 Vert, 95 Hardbody 4X4

Post

Looking great man keep up the good work love the clean swaps

User avatar
DeXteR
Posts: 2702
Joined: Sun Sep 25, 2005 9:01 pm
Car: 14 Titan Pro4X
05 Xterra OR
92 300ZX Slicktop
94 Sentra RS Rally Car
Location: Beulah, MI
Contact:

Post

UPDATES:

No spoiler alerts here. I'm just going to pick up where I left off. Actually this post is mostly just going to be filling in the remaining details on final assembly. If you follow me on thefacebook.com or InstaGram, you're always up to date. For those that still prefer the good ol' fashioned forums, you get the whole story with all the little details that the instant gratification does not afford.

Since I'm using an S15 radiator and shroud, the brackets on the intercooler pipe going to the throttle body don't line up anymore. I tried my best to shave the bracket off and dusted it with matte paint to make it less obvious that I hacked it up.
Image

I was FINALLY able to track down a good S13 SR exhaust manifold heat shield courtesy of Elite JDM. I cleaned it up, painted it, and installed it. I was also fortunate to stumble across a factory catch-can from someone on one of those other Z/Silvia forums. I promptly scooped that up and bolted it on too.
Image

Back to the valve cover. If you recall the fiasco with powder coating, I ended up deciding to just paint one myself. I thought it was looking really good.
Image

Then I sanded down the letters and clear coated it. Then the paint wrinkled... So I sanded it back down...
Image

Then I primed it. It wrinkled again...
Image

At that point, I was at the end of my ropes with the stupid thing. I called my old powder coat guy and made the 35-mile journey to drop it off. I knew I could trust him to not fill my valve cover with sand, but it's such a hassle to drop thins off and pick them up. Oddly, there was still some issues in the front of the valvecover where I was having the wrinkle issues. The powder coat fish-eyed a bit in the base coat. Since it was a three stage coat, it got buried and it's not really noticeable unless you're looking for it. Whatever - I didn't have to mess with it anymore.
Image

As you can see in the above picture, I had finished installing the rest of the pipes, hoses, and tubes. The to-do list was getting whittled away. We tossed the battery in, dumped some oil on the valvetrain and into the engine, and we were ready to get it primed. This was a big milestone.
Image
That's a video. Clicking on it should take you to photobucket where it can be played. I wish I could get it to just embed in my post, but I'm not that smart.

Now that the engine is primed, it's ready to fire. I finished the valve cover by polishing the letters and topping it off with a brand new coil cover.
Image

That's enough for now. I'll try to get another update added really soon. I don't want to leave you hanging too long.

Thanks for stopping by.

User avatar
DeXteR
Posts: 2702
Joined: Sun Sep 25, 2005 9:01 pm
Car: 14 Titan Pro4X
05 Xterra OR
92 300ZX Slicktop
94 Sentra RS Rally Car
Location: Beulah, MI
Contact:

Post

With everything bolted down, it was finally time to fire it up for the first time...
Image

That sounds terrible...

I wasn't sure what I was hearing. I fired it up again and let it build pressure for a while and got a little better, but there was still something wrong. It was late and I left it to tinker with next time.

Well, the first thing I noticed the next time I went out was oil under the engine... Great... It's leaking all ready? Fortunately, I spotted it quickly and it was obvious.
Image

There was a tiny crack in the side of the oil pain. I swapped it out with another one I had laying around. It's a lot easier to do with the engine out of the car.

My first thoughts after running the car were that I might have had a collapsed lifter. I tore the head down and re-bled all the hydraulic lash adjusters. That didn't do anything, so I tried another set of lifters after cleaning and bleeding them.
Image

Still nothing... Maybe something else was wrong. I decided to run the engine without the valve cover on. [I'm not sure if the sound is going to work on this or not]
Image

That made a mess and proved to be an waste of time. You see, I noticed some "wobble" in the cam which lead me to re-measure all the cam journals which showed nothing. Then I noticed the casting marks... It turns out, when they're rotating, it looks like the cam is wobbling between caps.

It was around this time it started to dawn on me, that I might have screwed something up and I had better look inside the combustion chamber. I borrowed a borescope from a friend and it revealed what I feared - valves made contact with the pistons. I was dumbfounded. How could the valves hit the pistons when the timing is on? I checked it at least 10 times...

Then I had my facepalm moment - at some point in looking at the timing chain my mind was looking at the timing marks on the cam sprockets instead of looking at the dowels on the cams. So when the crank was at zero, the timing marks were at 10 and 12. The dowels are what needed to be at 10 and 12... Several times, I lined up the timing marks with the timing links to ensure everything was properly lined up. My issue had to be at the crank - which was even more puzzling.

I pulled out an extra block and mocked up the bottom of the timing chain setup. I couldn't figure out how it was possible to lose the alignment on the crank sprocket once the front cover is in place because there's a rigid guide that prevents the chain from falling off the sprocket.

Out the engine came...
Image

This is when my new slogan became: do it wrong, do it twice.

Off with it's head to reveal the damage:
Image

When I finally got to the front cover removed, my hypotheseis was confirmed.
Image

It was time to start the rebuild all over again. On the bright side, at least I knew what was wrong. To this day though, I'm not sure how it happened. I must have put it on wrong. It's the only logical explanation - no matter how hard it is to admit.

User avatar
DeXteR
Posts: 2702
Joined: Sun Sep 25, 2005 9:01 pm
Car: 14 Titan Pro4X
05 Xterra OR
92 300ZX Slicktop
94 Sentra RS Rally Car
Location: Beulah, MI
Contact:

Post

Do it wrong, do it twice... On the bright side, I guess it gave me an opportunity to address a few of the issues that I wasn't completely satisfied with. With the engine out of the car again, I might as well...

However, the first order of business was to determine if the valves or guides had been damaged. As it was only the exhaust side that made contact, I didn't bother doing a full tear-down on the cylinder head.
Image

I rolled the stem of each exhaust valve on a parallel block as they came out of the head. They all looked straight; but since the edges were nicked, I decided it would be best to clean up another set of valves to use. Last time I cleaned a set of valves, I never bothered to get any pictures, so here's what it looks like with a valve chucked up in the drill against the wire wheel. The following picture is a pair of valves demonstrating after and before the procedure.
Image
Image

I did a visual inspection of the guides and then performed a "feel test" with the valves. Everything looked and felt good. I re-lapped the exhaust valves, reassembled the head, re-shimmed the rocker arms, and it was ready to bolt on again. You know, because do it wrong, do it twice...

I needed to clean up the pistons and remove any sharp edges created by the valves smashing into them. The edges could become hot spots under heavy load and cause pre-detonation. I removed the connecting rods from the crank to make that job easier. I de-burred the pistons with my Dremel using some small grinding stones and polishing compounds.

Being that deep into the bottom end, I decided to address the main studs. Remember that debacle? I ordered the three short studs from ARP in order to make the kit correct for RWD. I mainly (no pun intended) did this because I did not like the reliefs that I had to cut into the upper oil pan, so I sourced another one of those as well. To top it off, I bought a new OEM oil pan because I was tired of dealing with rusty, bashed in, used pans.
Image

Then I flipped it back over and bolted the head on. The whole time I was reassembling, I quadruple checked everything and had my wife double check things behind me as well. This time, everything actually lined up properly - for real, look:
Image

When I drained the oil to remove the engine, I was reminded how much I HATED the location of the factory oil filter. It makes such a mess when it's removed and it's difficult for me to get my hands in there. In order to eliminate that hassle from my life, I purchased an oil filter relocation kit from Parts Shop Max. I don't prefer the twist-on adapters, but this is just a street car and PSM kit is a great value.
Image

Deja vu... The engine went back into the car again.
Image

I tucked the filter relocation bracket into the frame rail just under the firewall and plumbed it with left-over fittings and hose I had from doing the oil cooler setup on my S14. I think this turned out well and will certainly save me a lot of grief when doing future oil changes.
Image

So, that was a lot of extra work from a small, but costly mistake. I learned my lesson. Let's move on.

User avatar
DeXteR
Posts: 2702
Joined: Sun Sep 25, 2005 9:01 pm
Car: 14 Titan Pro4X
05 Xterra OR
92 300ZX Slicktop
94 Sentra RS Rally Car
Location: Beulah, MI
Contact:

Post

I'm going to try this again now that it appears NICO is playing nice with the internet again.

One of the sub-projects within this endeavor was the clutch system. The clutch hardline as well as the slave and master cylinders came from the same aborted S13 hatch that I scavenged the other 5-speed parts from. The first time we attempted to fill and use the system, it leaked badly from the fitting at the master, and the slave didn't work. We spent a lot of time fiddling with trying to salvage the parts. Once I found out how cheap replacement cylinders were, I regretted the time wasted and just bought new ones. I also sourced a braided soft line to finish it off. After trimming both ends and some careful massaging, everything went together smoothly and operates flawlessly.
Image
Image

While I was under there, I snapped a picture of the OEM S15 downpipe I was able to snag to help maintain that factory look and sound.
Image

Sweet! Right? Probably not so much... This is nice stuff to have in maintaining the "all original" theme, but it's not very exciting - I know.

Anyway, we started it up again and it sounded MUCH better this time. I have a video somewhere, but I haven't loaded it - you'll get over it soon. The first time we started it before the re-rebuild, we had some pretty serious issues with maintaining idle. Sure, a part of the issue was the mechanical timing. I also was using my consult cable and ECUTalk to look at various parameters throughout initial startups. I had a MAF code that wouldn't clear, so I swapped MAFs without any change.

Fast-forward to after the re-rebuild and the idle issues remained. I had asked my buddy Zach to send me his MAF and ECU for troubleshooting since most of the stuff I had was unproven. I know his car ran before we tore it apart. So once again, we swapped MAFs and still had the code. I plugged in Zach's ECU, and still had crappy idle and the code persisted. I started busted out the FSM and started probing with the multimeter and getting some unexpected results.
Image

Well, look at that... Do you see it? The wires don't match up. I sent a message to Wiring Specialties and they confirmed that the wires had been crossed. They immediately dispatched a replacement MAF harness, but I just went ahead and re-pinned the connector myself. When we started it up again after that adjustment, it ran like a champ.

Well, maybe not a champion, but at least it was in the game again. It ran good enough to get it to move under its own power for the first time in well over a year.
Image

It still wasn't perfect, but it had old gas and I hadn't adjusted the timing. Regardless, we wanted to get some miles put on the new engine right away, so we took it up to the gas station and filled it up with 93.
Image

Then we drove it over to my father-in-law to show him that it was alive once again. You should have seen the look on his face when we pulled into his driveway...


Return to “240SX Convertible Forum”