I finally pulled the trigger on some taillights. http://cgi.ebay.com/ebaymotors...71875
I thought I remembered these things being closer to $200 for a set. $135 shipped is pretty good I think.
I also bought a 1 ton hoist from harbor freight this week. I won't need it for my 'vert build. But it's awful nice to have around. I just couldn't pass it up for $99.00
I would have started working on my 'vert body stuff already, but it's just been uncomfortable outside. The last two weeks we've been stuck in the high 40's and low 50's with lots of wind. Plus on top of that, i've been working on a Nissan Quest that my boss and I acquired to donate to christian missionary that we're friends with. That thing is done now, so i'll be able to focus on my car now.
Eikon's exterior build thread.
-
Eikon

- Posts: 6928
- Joined: Sat Apr 24, 2004 3:20 am
- Car: 71 240z, 93 Supra TT
- Location: Lake Orion, MI
- Contact:
Re: (Eikon)
Bad news about this fall.
As much of a hypocrite as it makes me, I have to admit that I can't go to NOPI Nationals this year. Turns out I've got a family obligation in Wash. DC that same weekend.
SUCKY!!!
As much of a hypocrite as it makes me, I have to admit that I can't go to NOPI Nationals this year. Turns out I've got a family obligation in Wash. DC that same weekend.
SUCKY!!!
-
cmkelly

- Posts: 788
- Joined: Mon Jun 26, 2006 4:09 pm
- Car: 1992 Nissan 240SX Vert
2006 Acura TL
2001 Nissan Pathfinder LE
1996 Toyota 4Runner 4x4
Re: (Eikon)
Great price on the tail lights. I can't remember if I paid $135 before or after shipping. As others have mentioned on my install thread get the red bulbs to completely eliminate the "pink bulb" effect.Good luck!
-
DeXteR
- Posts: 2702
- Joined: Sun Sep 25, 2005 9:01 pm
- Car: '14 Nissan Titan Pro4X
'05 Nissan Xterra OR
'92 Nissan 300ZX Slicktop
'94 Nissan Sentra RS Rally Car - Location: Beulah, MI
- Contact:
Re: (cmkelly)
Indeed, good deal on the tail lights!
Hoists are good for more than just engines! Get a harness for your kid and string him up when he's misbehaving.
The weather has been pretty nasty - not real good for bodywork, but over on this side of the puddle, we've been hard at work...
Yeah, this fall isn't looking good for me either. Maybe we should organize a "wish I could have gone to Nopi" event.
-
Eikon
- Posts: 6928
- Joined: Sat Apr 24, 2004 3:20 am
- Car: 71 240z, 93 Supra TT
- Location: Lake Orion, MI
- Contact:
Re: (DeXteR)
Chicago in July or August?DeXteR wrote:
Yeah, this fall isn't looking good for me either. Maybe we should organize a "wish I could have gone to Nopi" event.
-
Eikon
- Posts: 6928
- Joined: Sat Apr 24, 2004 3:20 am
- Car: 71 240z, 93 Supra TT
- Location: Lake Orion, MI
- Contact:
Re: (Eikon)
Found some time this afternoon to get some more work done.
I pulled the ASC doors off the 'vert. Had to remove the door panels, pull off all the brackets and handles, seatbelts mechanisms, etc... Removed the wiring harness from the door.
Then pulled the pins and then unbolted the door from the car.
I had some rust in the joint underneath the door latches. So we (my buddy Chad) ground it off with a die grinder. The rust was from the door latch and not on the chassis, so that was nice. Still sanded it all down and primered it. I'm going to pick up some silicone for that joint to replace what the factory put on there.
My new taillights arrived. Wow do they look nice compared to the stock ones.
I've also got a big hunk of iron hanging out behind the 'vert.
-
S15nS13vert

- Posts: 600
- Joined: Mon May 28, 2007 3:02 am
- Car: 95 240sx with a s15 engine 6speed transmission, 94 S13.4 SKYLINE VERT and a 08 Lexus RX350
- Contact:
Re: (Eikon)
are you gonna use that hunk of iron????, btw your vert is gonna look hot, and i tought doing the s13 jdm front end was easy
-
Eikon
- Posts: 6928
- Joined: Sat Apr 24, 2004 3:20 am
- Car: 71 240z, 93 Supra TT
- Location: Lake Orion, MI
- Contact:
Re: (S15nS13vert)
That hunk of iron is a LQ4, which is a 6.0L iron block version of the LS1 engine. It's going on an engine stand for a rebuild over the winter. Then it'll hopefully find a new home in my 95 240sx that I have stashed in a buddies garage. Probably not until the end of next summer, perhaps the following.. we'll see.
The jdm front is pretty easy if you just want to pop it on there.
I am doing the front end, a body kit, coupe door swap, and a full paint job with all the body work required to make it nice... All in one shot! So that's why this thread is long and a lot of work.
The jdm front is pretty easy if you just want to pop it on there.
I am doing the front end, a body kit, coupe door swap, and a full paint job with all the body work required to make it nice... All in one shot! So that's why this thread is long and a lot of work.
-
DeXteR
- Posts: 2702
- Joined: Sun Sep 25, 2005 9:01 pm
- Car: '14 Nissan Titan Pro4X
'05 Nissan Xterra OR
'92 Nissan 300ZX Slicktop
'94 Nissan Sentra RS Rally Car - Location: Beulah, MI
- Contact:
Re: (Eikon)
Pushrods FTL.Eikon wrote:I've also got a big hunk of iron hanging out behind the 'vert.
HEAVY engine FTL.
Cheap, reliable NA power FTW.
Nice progress though.
-
Eikon
- Posts: 6928
- Joined: Sat Apr 24, 2004 3:20 am
- Car: 71 240z, 93 Supra TT
- Location: Lake Orion, MI
- Contact:
Re: (DeXteR)
yes for the most part, I agree with you. I prefer high revving, smaller displacement, high tech engines. But I paid next to nothing for this motor, and it will serve me very well in my next project.DeXteR wrote:
Pushrods FTL.
HEAVY engine FTL.
Cheap, reliable NA power FTW.
Nice progress though.
This motor will make 550whp with just heads and a cam in carburated form. (Just over $2k invested).
A full rebuild with forged internals will yeild well over 1000 hp when boosted. The iron block and it's extra weight quickly becomes an advantage rather than a detriment over the aluminum blocks.
-
krash
- Posts: 4836
- Joined: Mon Apr 11, 2005 10:43 am
- Car: 1993 Nissan 240sx Convertible
- Location: Memphis, TN
- Contact:
Re: (Eikon)
does that motor have anything to do with your s14???? heheheh..... My sister just got an 88 camaro man... makin me a bit jealous... I NEED VERT INSPIRATION!!dude those tail lights look sick too, are you going to smoke them?
Re: (krash14)
looks good man. see u got your intake mani finally too. (haven't checkied the vert forum in a while)
-
Eikon
- Posts: 6928
- Joined: Sat Apr 24, 2004 3:20 am
- Car: 71 240z, 93 Supra TT
- Location: Lake Orion, MI
- Contact:
Re: (sttp01)
We put the new coupe doors on today and set up the rear bumper. The bumper is just sitting on there with no screws or bolts or anything and It'll need a bit of work. Don't mind all the crap on the car.
Here's the passenger side door.
Here's the driver side door. I need new weather stripping as the piece that was on there was pretty banged up! Anybody know how much that costs? I'll call the dealership tomorrow.. Most likely will have to watch for a used one online.
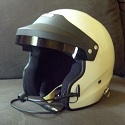
Here's my boy driving his car with his helmet on.
Here's the passenger side door.
Here's the driver side door. I need new weather stripping as the piece that was on there was pretty banged up! Anybody know how much that costs? I'll call the dealership tomorrow.. Most likely will have to watch for a used one online.
Here's my boy driving his car with his helmet on.
-
Eikon
- Posts: 6928
- Joined: Sat Apr 24, 2004 3:20 am
- Car: 71 240z, 93 Supra TT
- Location: Lake Orion, MI
- Contact:
Re: (Eikon)
I've got a couple questions about the door swap if anyone can help.
The convertible has a pointy pin that apparently goes into a hole in the 'vert door. The coupe doors don't have a hole there and they don't close with those pins still in place. There is no wiring to the pins at all. Any idea what they are for? Just a tighter fit? From what I can see you have to either drill holes in the coupe doors for the pins or just remove the pins. I removed the pins.
The wiring is certainly different between the 'vert door and the coupe door. The power windows module clip is the same, and a coupe others look similar. There aren't any seat belts in the coupe doors, so a couple of the 'vert harness wires will be useless. What is the black box on the driver door? It's only on the driver side door. I don't have any wiring that goes to that thing?
Anybody do the coupe doors conversion that can give me some good tips on the wiring? I'll work my way through it eventually, but any tips that can save me some time would sure be appreciated!
Thanks gang.
-
Eikon
- Posts: 6928
- Joined: Sat Apr 24, 2004 3:20 am
- Car: 71 240z, 93 Supra TT
- Location: Lake Orion, MI
- Contact:
Re: (240_ESEX)
I finally got this issue sorted out.. or at least it seems. I took the core support to a friends house and had him fire up the plamsa cutter. Those things are cool as hell!!!240_ESEX wrote:Well based off of your messurements, sounds like you're gonna have to hack it up. I know if it were me i'd try cutting the support over the bumper, that way if you need to for whatever reason you can sell the bumper whole rather than cut up. I was looking at the pics carefully and this is just from my experience with my conversion, but when I put it together the area's in red where the cut outs are lined up to each other.
The reason the cut outs should line up is so when you put the turn signals in, the backings go into the support cutouts, otherwise if it didn't have those holes there, they wouldn't sink in all the way.
A few other things to keep in mind in doing your swap is I had to cut these nubs off the support
And lastly and perhaps more importantly, is how much of a gap is there between your IC and support? The reason is cause the Silvia front is shorter than the Chuki front. One more thing I had to do was drill new holes on the side of the support to mount it properly to the new front. It's about a 1.5"-2" difference in length. This is where the factory Chuki bolts go inThis is how I cut the support to allow it to go in further for the Silvia front.
The red circle is pretty straight forward, just make a new hole for the bolt to go through, and I just extended the cut outs on the ends so it slid in more.
If your support is butted up against the IC, then you might have to toss the support, or get one of those homemades, like madcow posted
Here's what the modified core support looks like.
We basically wound up cutting it in half. I started with small cuts and kept test fitting, but it took a lot to get it to fit inside the vertex front bumper.
I know that the strength of the unit is now diminished. But it's better than nothing, and really, my greatest desire for keeping it was to have it support the bumper so that it fits tighter against the headlights on the top.
I have not bolted it on the car yet, so I'm not sure if that will take more modification or not.
I'll test that tomorrow.
Next step is to get the fenders back on and start working with the hammers and dollies and bondo and stuff. Good times!
-
DeXteR
- Posts: 2702
- Joined: Sun Sep 25, 2005 9:01 pm
- Car: '14 Nissan Titan Pro4X
'05 Nissan Xterra OR
'92 Nissan 300ZX Slicktop
'94 Nissan Sentra RS Rally Car - Location: Beulah, MI
- Contact:
Re: (Eikon)
I have no idea what these were for. Mine functions fine without them.Eikon wrote:The convertible has a pointy pin that apparently goes into a hole in the 'vert door.
Quote »The wiring is certainly different between the 'vert door and the coupe door. [/quote]Unfortunately I do not remember what the differences were nor do I remember what I did to wire mine up. I think it was so intuitive that I just did it and it worked... I'm pretty sure it was just matching up colors and leaving the extras dangle.
Quote »What is the black box on the driver door? [/quote]Pics?
-
Eikon
- Posts: 6928
- Joined: Sat Apr 24, 2004 3:20 am
- Car: 71 240z, 93 Supra TT
- Location: Lake Orion, MI
- Contact:
Re: (DeXteR)
Here is the door on the inside. The black box I'm confused about is on the left side of the door between those two silver metal strips.
Here's a picture of the wiring. Not very close... but you can kind of see things.
The doors I got still have the wiring inside them. So I'm going to back that wiring out today. I can tell that they have power mirrors which adds a few wires. They also appear to have had some sort of alarm system which added a couple wires. They also might have had a separate tweeter speaker. But it's that black box that is what's confusing me.
Here's the pin that I removed.
Here's the inside of the door where that pin hits.. note the scratches that I have to paint now.
Re: (Eikon)
I believe that black box is the power amp for the power windows. Removing it will disable your windows.

Re: (vsiev)
^^^ Actually, on the vert, it's behind the rear seats.
Eikon, that is the power amp module for coupes & fastbacks, so technically, you don't need it for the vert since your module is located behind the rear seats.
You could, however, save it as a spare in case yours goes out (I actually had to do that with mine, came in handy).
Eikon, that is the power amp module for coupes & fastbacks, so technically, you don't need it for the vert since your module is located behind the rear seats.
You could, however, save it as a spare in case yours goes out (I actually had to do that with mine, came in handy).
-
Eikon
- Posts: 6928
- Joined: Sat Apr 24, 2004 3:20 am
- Car: 71 240z, 93 Supra TT
- Location: Lake Orion, MI
- Contact:
Re: (brokeAs240sx)
Thank you!!!brokeAs240sx wrote:^^^ Actually, on the vert, it's behind the rear seats.
Eikon, that is the power amp module for coupes & fastbacks, so technically, you don't need it for the vert since your module is located behind the rear seats.
You could, however, save it as a spare in case yours goes out (I actually had to do that with mine, came in handy).
I got the doors wired up better. I used some zipties to cinch the wire harness up close to the doors.
I put together my new engine hoist.
We did some body work on the driver side fender and got it to line up pretty well.
I got a quote for a new top weather stripping for the driver door.. $156.00 NOT!!! I pulled the one off the old vert door and it fits perfectly.
Put the car up on jack stands as well.
We'll be working on the passenger fender on thursday. After that we'll install the front bumper and attach the rear bumper and side skirts.
Then comes the bondo!
Can't wait for paint!
-
S13xCrazy

- Posts: 2642
- Joined: Sun Oct 08, 2006 2:54 pm
- Car: 1993 240sx Vert, 1993 BMW 325i, 1993 Honda CBR F2, 1998 Infiniti Q45,
Re: (Eikon)
I do believe the pins that you spoke of on the door are to 'line up' the door better when you open/close it. It just keeps the door in line incase for whatever reason there is a little flex in the chassis.
I modified my coupe doors to keep them My old man comes in handy once and a while!
Looking good tho!
I modified my coupe doors to keep them My old man comes in handy once and a while!
Looking good tho!
-
DeXteR
- Posts: 2702
- Joined: Sun Sep 25, 2005 9:01 pm
- Car: '14 Nissan Titan Pro4X
'05 Nissan Xterra OR
'92 Nissan 300ZX Slicktop
'94 Nissan Sentra RS Rally Car - Location: Beulah, MI
- Contact:
Re: (Eikon)
Getting close... Can you smell the fumes yet?Eikon wrote:Then comes the bondo!
Can't wait for paint!
Re: (S13xCrazy)
It also pushes out the door a little bit for your convenience if you lift the door handle. I kinda like the mechanism. When you adjust the striker bar, you must adjust this bullet looking pin too. That's very cool that you modified your coupe door to keep the pin. +1S13xCrazy wrote:I do believe the pins that you spoke of on the door are to 'line up' the door better when you open/close it. It just keeps the door in line incase for whatever reason there is a little flex in the chassis.
I modified my coupe doors to keep them My old man comes in handy once and a while!
Looking good tho!
-
Eikon
- Posts: 6928
- Joined: Sat Apr 24, 2004 3:20 am
- Car: 71 240z, 93 Supra TT
- Location: Lake Orion, MI
- Contact:
Re: (94_240sx)
We test fit the side skirt and front bumper today. I slapped the lights in (no screws) just to get a look at what the finished product should be.
Here it is from the back side. You can see in this picture how much work we've already done to the front fender... and how much more work it's going to take.
Look how tight the front bumper and intercooler line up.
Here it is from the back side. You can see in this picture how much work we've already done to the front fender... and how much more work it's going to take.
Look how tight the front bumper and intercooler line up.
-
Z Style
- Posts: 427
- Joined: Wed Jan 19, 2005 3:38 pm
- Car: 93 240sx Roadster
01 Pathfinder Overland
97 F350 Powerstroke
88 RX-7 SR20DET Swapped
14 Star Bolt
Re: (Eikon)
Looking good.
-
Eikon
- Posts: 6928
- Joined: Sat Apr 24, 2004 3:20 am
- Car: 71 240z, 93 Supra TT
- Location: Lake Orion, MI
- Contact:
Re: (Z Style)
Well the past month has been very slow going, and very non-photogenic work.
I've been learning body work. I have a friend helping me who went to school for this stuff, so he is incredibly helpful. I can only assume he knows what he's doing since I surely don't. So far, it seems like we're making good progress and doing things the right way.
Here's the process for anyone who is interested in what I've learned... If not, just skip to the pictures, or further down the thread.
First off, the fenders I got with my silvia conversion were in really rough shape. So it took a lot of time with a hammer and dolly to get them as close to straight as possible. I actually resorted to just using my hands to bend and message a lot of it. I wish I had real tools for this stuff (like and english wheel), but I wouldn't know how to use those things anyhow.
One good tip I learned was that if you are going to be off a bit with the shape, you're better off being too low than you are too high. The reason is that you can use bondo to build it up.. but you can't do anything to make it lower.. So while you're hammering and shaping.. beware of high spots.
Before spreading Bondo, you should sand the panel down to bare metal or at least primer level. If you are too lazy for that, at least use some 120 grit sandpaper and scuff the finish up as much as possible so that the bondo has something to adhere to.
So we used a regular Bondo brand body filler for the big areas - the ones with deep dents and major problems.
Make sure you use a perfectly flat spreader to spread the bondo. I made the mistake a few times of not cleaning the blade very well. So the old crusty bondo leaves grooves in the new spread bondo. That makes it really hard to sand off properly because you have those deep grooves. Not a good thing!
Here's a picture of the bad fender with all the bondo on it. I had to apply two to three different times and sand it off again to get it right. It's still probably pretty dicey. But it's hard to tell at this point. So we're going to primer it up and then take another look at it to see if it needs more attention.
So we used the Bondo that is gray for the big areas.
For smaller dents (very shallow little ones), we used a different type of filler. It's a glaze for small issues. Basically what I did was wash the surface so that it was clean and shines. Then I took some 80 grit sandpaper and rubbed it in a X pattern across any areas that look like dents. Of course whenever using sandpaper I always use a sanding block so that it's a perfectly flat surface (see little red blocks in the previous picture). Anyhow after running a flat sandpaper across the surface you can see the depressions better because they will not have the scratches across them. If it's on a big area, sand it off completely down to metal so that the bondo will stick to it. If it's a small area, I think it's ok to scuff it up really good with sandpaper.
After sanding I apply the glaze bondo. I make sure to keep it as flat as possible, with a clean blade, and cover an area larger than just the depression. This bottle says it takes 25 minutes to dry, but I've found that it's at least twice that time.
After it's dry, I sand it off nice and smooth with 400 grit paper. The thing I don't like about this stuff is that it's hard to use your hands to feel if it's flat or not. With regular bondo, it feels just like dusty metal on your hands. You really can't tell if your on metal or bondo.. it all feels consistent, so you can really use your hands to tell if it feels flat or not. With this glaze however, it has a different texture, so it catches your fingers a bit. So it's hard to tell if it's really flat or not.
So I got a really cheap primer from the store and shot it on the top of the red sanded glaze.
So this is how the car stands now... Lots of funny spots of primer. The white primer is the bad spots that were deeper. The gray is the smaller dings that I used the glaze over.
The red dust is the sanding from the glaze.
Thanks for staying tuned thus far!
Here's the next steps (as I understand them).
#1.. let the primer dry and then feel the surface to see if it's flat or not. If not, apply more glaze and sand and repeat. This could take another week or two depending on my free time.
#2.. Rig up a do-it-yourself spray booth. We're going to screw in some hooks into the ceiling, then get some plastic or tarps from harbor frieght and tie them to strings and then hang them from the garage ceiling. The idea is to restrict a space around the car that will stay cleaner and hopefully the air will be less dusty than the rest of the garage. It won't be professional, but hopefully better than nothing.
#3.. Clean the hell out of the garage. To prevent crap in the air from getting into the "spray booth" and onto the fresh paint, it's wise to remove as much as possible from the rest of the garage. That means emptying and cleaning the garage. That will take a full day I'm afriad.
edit* #3A i guess.. I forgot to mention TAPING it up. You've got to tape it really good. Not like when painting a wall in the house. We're not using a brush, so it'll be airborne, and overspreay can go anywhere.. interior, windsheild, etc...
#4.. Start painting. Primer first! We'll load up the spray gun and put on a coat of primer. Then get a good look at the car and decide if it's ready to paint a base coat, or if it needs more bondo, sanding, etc..
#5.. Wet sand the whole car. Again check to see if there are any areas that need attention before applying paint.
#6.. base coat. Black is beautiful. I can't remember if we wetsand the base or not?
#7.. clear coat #1. let it dry.
#8.. clear coat #2. let it dry.
#9.. wet sand the hell out of it with super fine (like 1200 or higher grit) paper.
#10.. clear coat #3. let it dry.
might be done then.. we'll see. I might do another one or two clears depending on how much I have left and how nice it's turning out.
It's a long way from done.. but getting there.
-
Eikon
- Posts: 6928
- Joined: Sat Apr 24, 2004 3:20 am
- Car: 71 240z, 93 Supra TT
- Location: Lake Orion, MI
- Contact:
Re: (Eikon)
I have a couple questions for anyone keeping up with this thread.
1.) What do you use to repair a body kit? The kit is in pretty decent shape overall, but has a couple cracks and some scratches and some other cancerous spots. I've got a tub of "fiberglass strand bondo" that I thought might work. But I'm not sure. Any ideas or advice??? Do I apply stuff just like bondo and sand it? Or is there another method? My buddy said he's never done a body kit (only stock metal panels), so he's not too sure either.
2.) When to paint body kit? Do I paint it off the car, then install? Do I prime it off the car, then install, then color and clear? Do I do primer and base coat, then install, then clear? I'm just not sure what's best here? I'm leaning toward fully attaching the kit and painting it entirely on the car.
3.) Any tips for attaching the body kit? There are already some holes drilled in it, so I know the prior owner used screws. I'll use the same in the areas that are already drilled. Should I use some high end two sided tape for the rest of the surface area? Any good ideas?
Here's some pics of the bad spots.
Thanks everyone!
-
S15nS13vert
- Posts: 600
- Joined: Mon May 28, 2007 3:02 am
- Car: 95 240sx with a s15 engine 6speed transmission, 94 S13.4 SKYLINE VERT and a 08 Lexus RX350
- Contact:
Re: (Eikon)
Eikon you car is going to look awsome when it is done.now, i work in a auto body shop, now, i been working in the body shop business for 14 yrs since i and by no mean i am a know it all, but when applyin prime always use the good primer, never the auto discount stores, reasons when you painting that car, it bubbles up and paint come apart, try to find out if there is a BASF, PPG, DUPONT, GLAZZERET..ETC store near by, so you can purchase the paint materials, always try to go with 1 paint brand, it is the safest way to go, now you fiberglass body kit, they have a fiberglass repair kit on the same stores and it comes in a tube mixed with the cat hair and sloution, and you will need hardener, just like Icky did to my 1/4 PANELS, he used fibergalss repair kit to attatch the new 1/4s to my metal body, cuz if you use bondo , it will crack in a yr and it will look like DO DOif you need more info holla @ ur boi
-
Eikon
- Posts: 6928
- Joined: Sat Apr 24, 2004 3:20 am
- Car: 71 240z, 93 Supra TT
- Location: Lake Orion, MI
- Contact:
Re: (S15nS13vert)
thanks dude..
The cheap spray primer was only so that i could get a constant feel and color so that I can more easily find high and low spots. I'll sand it down again prior to shooting a professional primer.
I've got two quarts of Western Automotive Finishes gray primer and a gallon of TCI urethane reducer. I got the stuff at Car Quest. I know it's not PPG quality, but it should be high enough quality. I'll be using a Limco base color for my Nissan Black paint. Car Quest actually has a Nissan OEM clear that they sell. They paint expert there recommended it. He said it works really nice in concert with the Limco base.
I thought about going with the high end paint stuff. But this car will not be a trophy winner show car, so I don't see the any reason to spend $600 to $800+ on just the paint. I think i'll get a very very nice finish with some extra wetsanding.
-
S15nS13vert
- Posts: 600
- Joined: Mon May 28, 2007 3:02 am
- Car: 95 240sx with a s15 engine 6speed transmission, 94 S13.4 SKYLINE VERT and a 08 Lexus RX350
- Contact:
Re: (Eikon)
not a thropy winner???don't say that Eikon, i love your car, and the fact you r car is a vert, gotta represent , now if you going to do it yourself and never had experience, check this out, paint your car white, reasons , you don't see the imperfections, with other color, uhmmm, just ask God to help you first, when you are done priming and tape it all nice , and i hope you do your R&Is,( remove all trims, and install when car is done, it is a body shop lingo) tape it up, and make sure u clean your car with pre-cleaner, everything has to be clean, wash the area you are going to be paint at meaning location, spray booth paint, remember when everything is clean the job come out nice, 1. apply sealer (if you have some)2. let it dry for 30 minutes (you don't have a heated spray booth)3.use 1000 grid sand paper to get the dirts off the car, make sure, do it easily 4.apply base 2 coats (or until you cover the car with the desire color)5.let it sit for 45 minutes, for it to dry6.sand imperfections with 1500 grid or 20007. more coat of base8. let it dry 30 -45 minutes make sure it is not wet or else your will run ur base9.apply clear coat, first coat semi wet10. wait 20-35 minutes (you have no heated paint booth11.apply a nice heavy coat of clear, and make sure it is not dry if so , apply another coat to the desire area (no waiting time, DON'T RUN IT)
panit everythin off the car is will come out better, but if you need to put bumpers on the car, so you don't scratch them
panit everythin off the car is will come out better, but if you need to put bumpers on the car, so you don't scratch them