Any EX35 Owners who DIY?
-
jamesstock

- Posts: 169
- Joined: Sat Mar 06, 2010 6:42 pm
- Car: 2010 Liquid Platinum/Stone Journey
Diamond Cut IR Tint
Re: Any EX35 Owners who DIY?
When I change the oil in the EX, I always take off the undercarriage engine shield with the use of an electrical screwdriver. It doesn't take that long (probably 3 min tops). But I like to have a view of the entire lower bay so spot any leaks, hoses conditions etc. Putting back the shield is also very easy.
-
EXceptional

- Posts: 1222
- Joined: Sun Apr 06, 2008 7:54 pm
- Car: 2008 Aspen Pearl EX35 Freakin Loaded!
Re: Any EX35 Owners who DIY?
Has anybody taken Pictures of this yet?
What kind of tool is needed to take the under-tray off?
What kind of tool is needed to take the under-tray off?
-
XIS

- Posts: 865
- Joined: Wed Aug 24, 2011 11:00 am
- Car: 08 Infiniti EX35 RWD
17 Infiniti QX30 Sport - Location: The Desert
Re: Any EX35 Owners who DIY?
you dont need to take off the whole tray... just 4 10mm bolts and then fold the tray towards the front (bends at the seam). I use a bungie cord and attach it to the grill to hold it back. Sorry - forgot to take pictures in December when I changed it last... 
-
EXceptional
- Posts: 1222
- Joined: Sun Apr 06, 2008 7:54 pm
- Car: 2008 Aspen Pearl EX35 Freakin Loaded!
Re: Any EX35 Owners who DIY?
Is there enough room to fold the Tray over, if the car is up on Ramps?
How much room is needed to fold it over?
What size wrench is needed for the Drain-plug? Is it really a 14mm Wrench?
How much room is needed to fold it over?
What size wrench is needed for the Drain-plug? Is it really a 14mm Wrench?
-
XIS
- Posts: 865
- Joined: Wed Aug 24, 2011 11:00 am
- Car: 08 Infiniti EX35 RWD
17 Infiniti QX30 Sport - Location: The Desert
Re: Any EX35 Owners who DIY?
If I remember correctly, it was a 14mm. There should be enough room to fold it over on ramps. I just barely jacked up one side enough to slide under on my back and could easily fold it over.
The drain plug and the oil filter are right next to each other. It is one of the easier vehicles to change the oil on (easy access and clean draining)...much different than my wife's RX330. That is a mess - the filter is at the front and you DO need to remove the entire plastic undercover... there is an oil catcher thingy because when you remove the filter, you WILL spill the oil on the side of the engine - and then there is a separate 2nd opening on a different undercover for the oil plug. Big pain in the arse. The EX is so so much easier and cleaner.
The drain plug and the oil filter are right next to each other. It is one of the easier vehicles to change the oil on (easy access and clean draining)...much different than my wife's RX330. That is a mess - the filter is at the front and you DO need to remove the entire plastic undercover... there is an oil catcher thingy because when you remove the filter, you WILL spill the oil on the side of the engine - and then there is a separate 2nd opening on a different undercover for the oil plug. Big pain in the arse. The EX is so so much easier and cleaner.
-
EXceptional
- Posts: 1222
- Joined: Sun Apr 06, 2008 7:54 pm
- Car: 2008 Aspen Pearl EX35 Freakin Loaded!
Re: Any EX35 Owners who DIY?
Thanks... I'm going to tackle this today.
-
EXceptional
- Posts: 1222
- Joined: Sun Apr 06, 2008 7:54 pm
- Car: 2008 Aspen Pearl EX35 Freakin Loaded!
Re: Any EX35 Owners who DIY?
I doing my Oil change today. I ran it up some Ramps... and this gave me lots of room to work under there.
I noticed some wetness around where the little Hatch is, so I decided to remove all the 10mm Bolts and drop the whole Plastic-tray, just to see what the reason for it is.
It was full of Rocks and Dirt... and little pools of Oil.
I noticed there is a Cross-member thats pretty close to where the Plug is... and I wasn't sure if any drips from my Oil change were going to make their way over to it and then get caught up to drip on the Garage-floor later... so I cut up a long white Styrofoam-tray from some Chicken we bought at COSTCO earlier in the day.
The Styrofoam-tray was perfect to control how far the pour went into my Oil catch-pan, once I took the Plug out. It also was easy to install. I wedged it in between the Block/Oil-pan and the Cross-member.
The Oil Filter was easy to remove. Not much to write about it.
I wasn't impressed with the old Crush-washer that was on the Plug. However I don't think it was the reason for the wetness around the Hatch.
I'm convinced the Wetness happened because the Mechanic didn't remove anything to drain the Oil last time... and any Oil that didn't come out properly got caught by the Tray. I watched him doing it... he simply jammed an old chunk of cardboard into the little Hatch-hole and let the dirty oil fly out.
Since my warranty expired, I felt it was time to do my own Oil-changes from here on out. No more Grease-monkeys doing my Oil-changes on the EX35
I'm going to clean up the Tray and re-install it... and keep an eye on it. The Engine block seems to be clean, dry and free of any Oil leaks.
I like to let the Oil drip for several hours. I figure why not let out as much of the old Oil as I can. I've let the Oil drip out for as long as 24 Hours in past DIY Oil-changes. I think in the Dealerships, there is still Oil dripping out while they are re-installing the Plug.
I have a heated Garage with lots of space and light.
While I'm waiting for Oil to drain... I found this Post from August 2009 that says I shouldn't have run my Car up the Ramps the way I did...
-
EXceptional
- Posts: 1222
- Joined: Sun Apr 06, 2008 7:54 pm
- Car: 2008 Aspen Pearl EX35 Freakin Loaded!
Re: Any EX35 Owners who DIY?
Mark Booth wrote:I change the oil in my EX35 and find it quite an easy process. Here are a few "tips" that might help others with the oil change...
First off... The oil sump on the EX35 runs perpendicular to the motor. Meaning, the sump runs east/west while the motor and transmission run north/south. Also, the sump is located near the very front of the engine (completely hidden under the bottom pan). Because of the location of the sump, the EX35 must be level when you drain the oil (or be slightly pointed downhill -- nose slightly lower than the tail). This means you can't drive the EX35's front wheels up onto ramps on level ground to drain the oil. The rear of the engine could end up being lower than sump and, thus, you might not drain all of the old oil.
Frankly, the EX35 sits off the ground enough that it is possible to squeeze under the car enough to change the oil without jacking it up. But I prefer more room to maneuver so here's my procedure:
1) I back the EX35 into my garage. I then pull forward just to the point that I can open the driver's front door without hitting the side of the garage opening. This positions the front wheels in the driveway and the rear wheels in the garage. I then place my ramps (Rhino Ramps) in front of the front wheels and then drive the EX35 up onto the ramps. The result is my EX35 is positioned so the rear wheels are just at the spot where the slopped driveway meets the level garage floor and the front wheels are on the ramps. Since my driveway slopes downhill away from my garage, the top of the ramps are just a tad bit lower than the level spot where the rear wheels are positioned. The EX35 is then almost level, with a very slight tilt downhill at the nose. PERFECT for changing the oil. And, thanks to the ramps AND the downhill slope of the driveway, I have PLENTY of room to get under the front of the car. In fact, there's almost too much room because the used oil has a bit of distance to free-fall.
2) I open the hood and remove the oil filler cap.
3) Move to under the car and use a 10mm socket on my battery-powered electric drill/driver motor to remove the bolts around the circumference of the bottom splash pan. (NOTE: The four bolts along the BACK of the splash pan are slightly different than the rest of the bolts around the circumference... be careful to put those four back in the right spot when reinstalling the pan.) At this point, the splash pan is still held in place by three push-pin type of fasteners across the center of the pan. Using a slot screwdriver, gently pry out the center pin of the left and right push-pin fasteners and pull the fasteners from their holes. Now you'll have a splash pan that is perfectly balanced in place by a single push-pin fastener. Gently remove the middle push-pin fastener and remove the splash pan from under the car.
NOTE: With a battery drill/screwdriver, removal of the splash pan takes less than 2 minutes! It's a piece of cake!! And Infiniti's use of the push-pin fasteners across the middle makes it VERY easy to remove and reinstall the pan! Excellent!
4) The rest is standard procedure... Place a oil drain pan under the sump (the east/west black pan with the bolt in the end of it that faces the front passenger-side wheel), remove the drain plug bolt, and drain the oil. You'll see the oil filter is VERY easy to access. On the RWD models, it's directly above the oil drain plug. A mere few inches above! Very convenient! You don't even have to move the oil drain pan to catch the oil draining from the oil filter. (Be careful, the oil has a tendency to spray out of the filter bottom fairly quickly as you loosen the filter.) If you have an AWD model, the oil filter isn't the same side as the drain plug. Rather, it is on the front of the engine pointing toward the radiator. But it is still located nice and close to the bottom of the engine near the sump. Once all the oil is drained, clean up the area around the filter with a shop rag, including carefully wiping the surface where the oil filter mounts. Lubricate the O-ring on the new filter with some fresh oil (yes, this step is VERY important as it prevents the O-ring from binding and possibly breaking when installing the filter) and screw the new filter in place. Tighten it HAND TIGHT. Meaning, as tight as you can get it with your bare hand as long as it is at least 3/4 of a turn from the spot the filter O-ring first contacts the base but not more than 1 full turn. Reinstall the drain plug bolt, being sure the copper drain plug washer is in good shape (I replace my drain plug washer with every 2nd or 3rd oil change). Tighten to the torque specification indicated in the owner's manual (I forget what that spec is so be sure to look it up!). Then, move topside to put in the new oil. The oil capacity of my 2008 EX35 Journey is 5-1/8 US quarts. So, I start off by putting in about 4.75 quarts, reinstall the oil filler cap, and start the engine and let it idle for 2-3 minutes. While it is idling, I check for leaks around the oil filter and drain plug (be careful under the car when the motor is running!!!!!!!). Then I shut off the motor and move back under the car to reinstall the splash pan....
5) Position the splash pan in place under the car and reinstall the very center push-pin fastener! VOILA! A perfectly balanced pan that you don't have to hold up while you are trying to install the bolts and other push-pin fasteners! VERY clever design by Infiniti!! I set my battery drill/driver to the screw drive position and set the torque clutch so just driving right up until the driver clutch skips is a couple of foot pounds to hold them in place. I've never had one fall out and, again, you can reinstall the pan in mere minutes.
6) After checking that everything is out from under the car, I carefully back the EX35 off of the ramps into the garage so all four wheels are on a level surface. After the EX35 has sat with the motor off for about 5-10 minutes, I pull the oil dipstick, wipe clean, reinsert and check the oil level. With every change so far, I've had to add the last of that 5th quart of oil (making 5 quarts total). This brings the level on the dipstick up to just a little bit below the hole in the dipstick below the full mark. I could put in another eighth of a quart but I never bother to. The car doesn't burn enough oil between 3,000 mile changes to even register the difference on the dipstick.
The long description above might make it seem like the oil change on the EX35 is difficult. It isn't! In fact, I've owned MANY cars that were far far more difficult. Don't let that splash pan removal slow you down! It is incredibly easy and quick to remove the splash pan with a battery-operated drill/driver! And, best of all, once the splash pan is removed, the drain plug and filter are "right there", conveniently located for easy removal!
Lastly, I use regular dino oil in all of my cars! I experimented with synthetic oil (Mobile 1) in a couple of my cars and they both started having minor oil seeps around the gaskets once I'd been running synthetic for awhile. Switching back to dinosaur oil eliminated the seeps. And, if you change every 3,000 miles, the dino oil offers PLENTY of protection.
Mark
P.S. My thanks to my friend Tom for the recommendation on placing the ramps in the driveway so the car will remain level.
-
dreamingat30fps
- Posts: 35
- Joined: Fri May 11, 2012 4:03 pm
- Car: 2008 EX35 Journey
Re: Any EX35 Owners who DIY?
I wish all cars were like my BMW with the oil filter at the top in the engine bay. Soooooooo easy to change the oil. Of course an oil change on that one will run me like $120+ were as the EX is like $30 at the DEALER!
-
EXceptional
- Posts: 1222
- Joined: Sun Apr 06, 2008 7:54 pm
- Car: 2008 Aspen Pearl EX35 Freakin Loaded!
Re: Any EX35 Owners who DIY?
I call bull-s*** on this.Mark Booth wrote:The oil sump on the EX35 runs perpendicular to the motor. Meaning, the sump runs east/west while the motor and transmission run north/south. Also, the sump is located near the very front of the engine (completely hidden under the bottom pan). Because of the location of the sump, the EX35 must be level when you drain the oil (or be slightly pointed downhill -- nose slightly lower than the tail). This means you can't drive the EX35's front wheels up onto ramps on level ground to drain the oil. The rear of the engine could end up being lower than sump and, thus, you might not drain all of the old oil.
I ran my EX35 up some Ramps nose first so the front Bumper was the highest point off the floor... and after removing the Engine-tray, I noticed the Drain-plug is at the rear of the lowest part of the Sump.
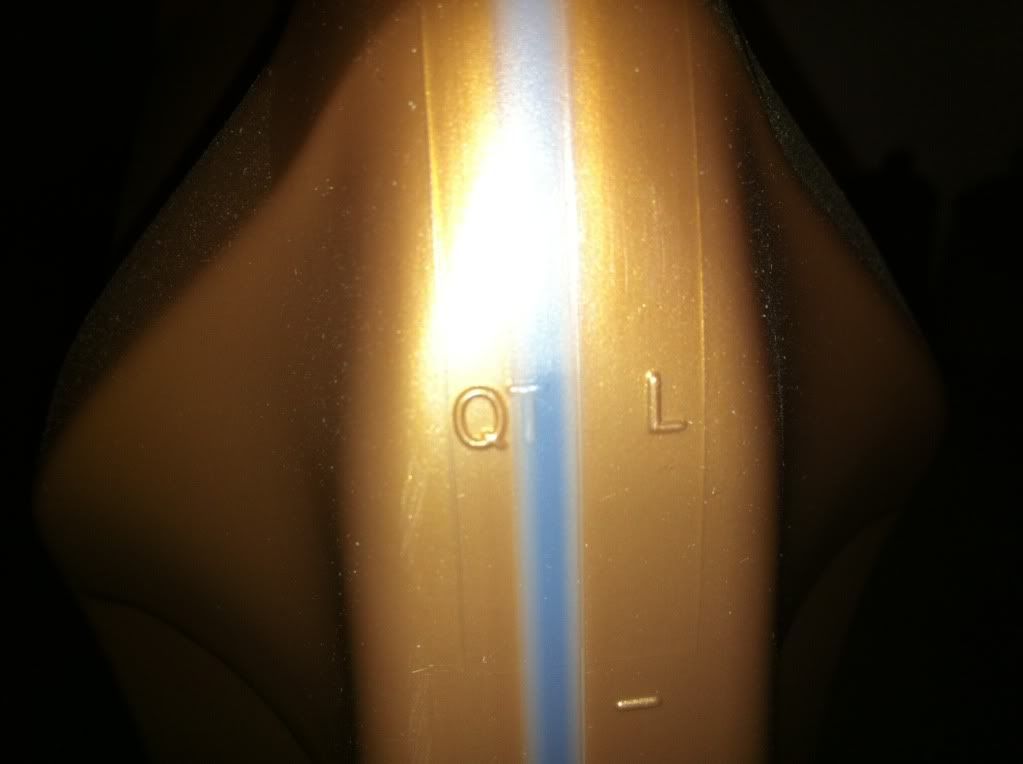
Once I pulled the plug, after eight hours of dripping, I drained out more than 5 Litres of dirty Oil. How do I know it was 5 Litres?
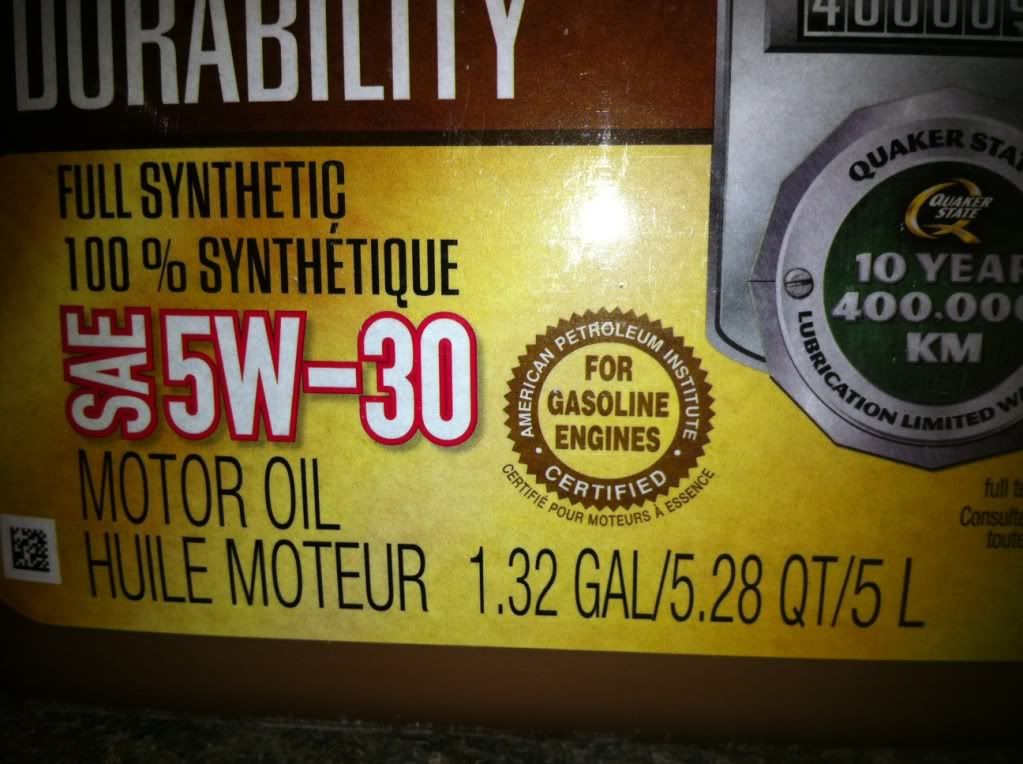
I poured the dirty Oil back into the Jug and the level reached the point of where the new Oil once was when I bought it. The Jug was labelled 5 Liters or 5.28 Quarts.
This along with what was left in the Oil Filter and what little might have burnt up in the engine over 7500 Kilometers (yes, I was overdue) (we recently drove to Las Vegas and back) I think I dumped out the entire quantity and probably left no Oil behind.
-
CDNicecube
- Posts: 233
- Joined: Fri Oct 15, 2010 6:58 pm
- Car: 2010 EX35 Journey+Tech+Navi
- Location: Kanata Ontario
Re: Any EX35 Owners who DIY?
XIS, EXceptional, what oil brand did you use? Mobil 1? I have just did a oil change with Mobil 1 and the engine seems so much smoother. I think the dealership used some bulk dino oil in the past (not scientific but just a feeling that the engine revs better)...
So using ramps and driving up the ramps work well to get all of the oil out of the sump?
So using ramps and driving up the ramps work well to get all of the oil out of the sump?
-
EXceptional
- Posts: 1222
- Joined: Sun Apr 06, 2008 7:54 pm
- Car: 2008 Aspen Pearl EX35 Freakin Loaded!
Re: Any EX35 Owners who DIY?
It seems to run smoother, but it might be because of the satisfaction I got from doing the oil change.
This is what I used for Oil... it cost me $29.99 a Jug.
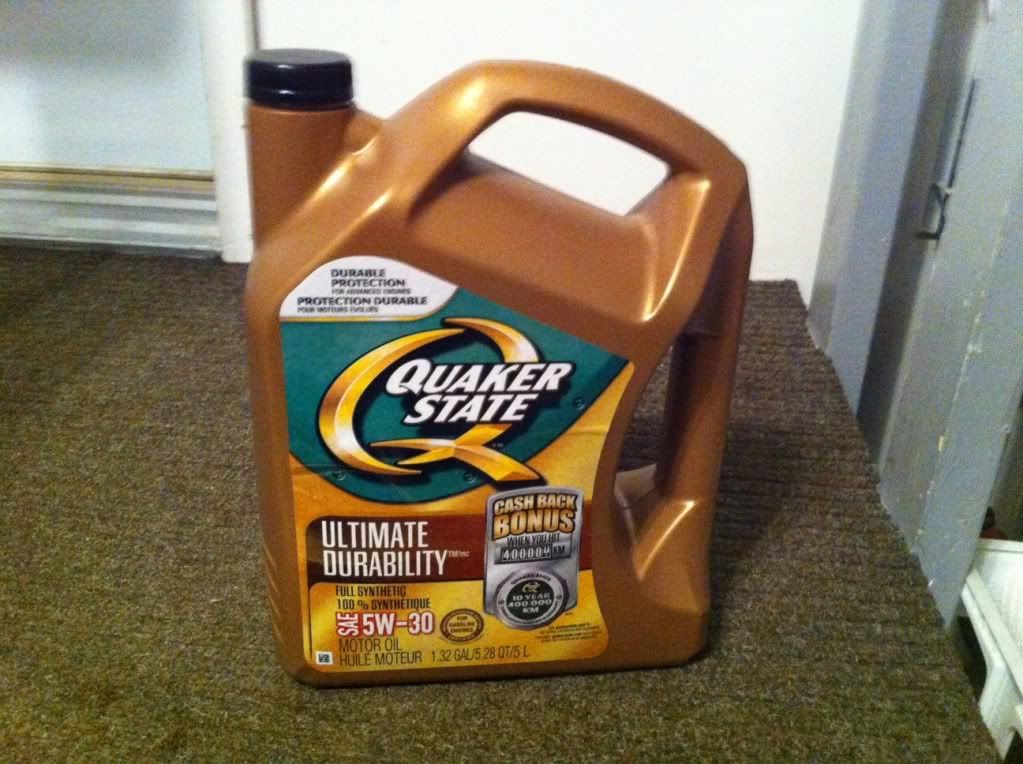
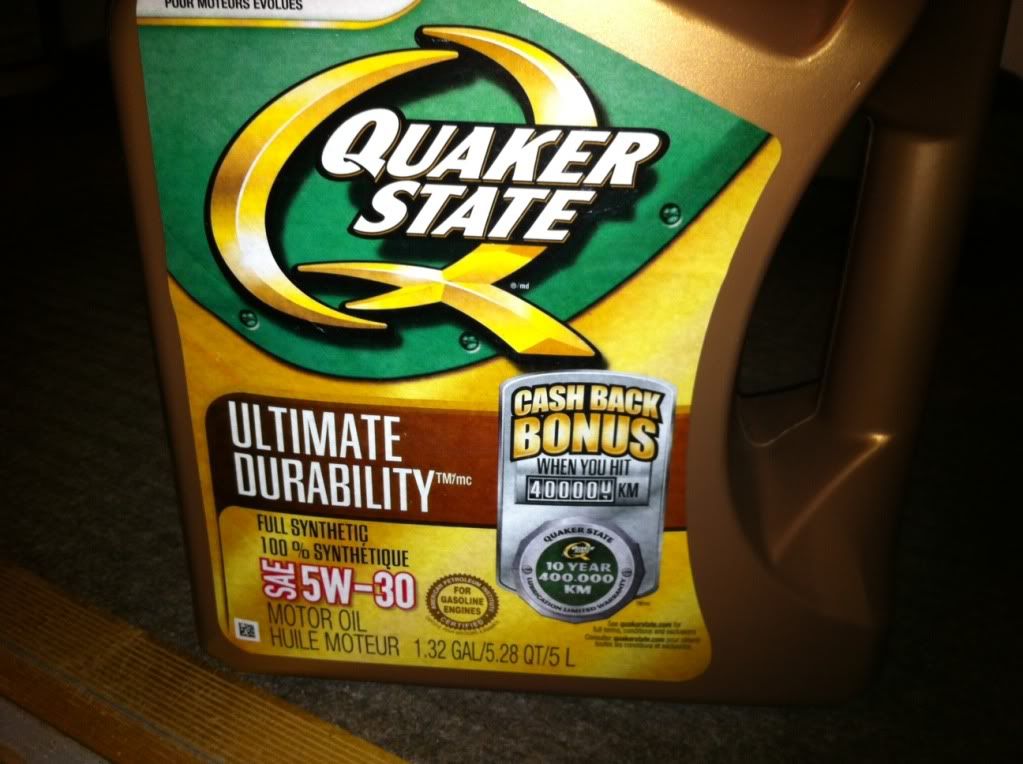
Top mark of the Jug, almost what I poured in...
This is what I used for Oil... it cost me $29.99 a Jug.
Top mark of the Jug, almost what I poured in...
-
XIS
- Posts: 865
- Joined: Wed Aug 24, 2011 11:00 am
- Car: 08 Infiniti EX35 RWD
17 Infiniti QX30 Sport - Location: The Desert
Re: Any EX35 Owners who DIY?
Just changed my rear differential fluid yesterday afternoon. I don't know why I was so intimidated by it in the past??
As it turned out, my son's CRV with 176K was making some noise back there. The CRV forum suggested that fluid be changed with their new preferred fluid and it solved the problem just like that. It was SO easy, that I decided to tackle the EX the next day.
I didn't even jack it up. Crawled under there and loosened the fill plug. (You need a 10mm Hex Bit). Then I loosened the drain plug. Slid the oil pan underneath the diff case (tight fit). finished unscrewing the drain plug by hand. The plug was COVERED in gunk - think stinky almost burned-looking with a good amount of metal dust. I cleaned off the plug and stuck it back in while it was still draining and got more metal shavings. I cleaned it off again and repeated a few more times. Tightened her up, removed the oil pan and attached the pump to the Castrol 75W/90 synthetic. It took just under 2qts and much less time and effort than an oil change. Now that I saw all the crap on the plug and see how easy and quick it was, I will probably do this every 24K miles. (I am currently at 49K)
Re: Any EX35 Owners who DIY?
Nice. Thanks for sharing the details. I'm a bit surprised that you took on this job, as I recall you don't like dealing with disposal of the fluid.XIS wrote:Just changed my rear differential fluid yesterday afternoon. I don't know why I was so intimidated by it in the past??
As it turned out, my son's CRV with 176K was making some noise back there. The CRV forum suggested that fluid be changed with their new preferred fluid and it solved the problem just like that. It was SO easy, that I decided to tackle the EX the next day.
I didn't even jack it up. Crawled under there and loosened the fill plug. (You need a 10mm Hex Bit). Then I loosened the drain plug. Slid the oil pan underneath the diff case (tight fit). finished unscrewing the drain plug by hand. The plug was COVERED in gunk - think stinky almost burned-looking with a good amount of metal dust. I cleaned off the plug and stuck it back in while it was still draining and got more metal shavings. I cleaned it off again and repeated a few more times. Tightened her up, removed the oil pan and attached the pump to the Castrol 75W/90 synthetic. It took just under 2qts and much less time and effort than an oil change. Now that I saw all the crap on the plug and see how easy and quick it was, I will probably do this every 24K miles. (I am currently at 49K)
I haven't had the chance to change out the differential fluid yet, but it's nice to hear that it's a straightforward job. Since I'm strapped for time, I'm actually contemplating having the dealer change my differential and/or transfer case fluid. They charge $57 and $67 respectively for each job, which I don't think is too outrageous. What I thought was funny was that they charge $68 for the engine air filter replacement
-
XIS
- Posts: 865
- Joined: Wed Aug 24, 2011 11:00 am
- Car: 08 Infiniti EX35 RWD
17 Infiniti QX30 Sport - Location: The Desert
Re: Any EX35 Owners who DIY?
I finally broke down and got one of those 15qt drain pan/container thingys and take the oil back in for recycling now. That diff fluid was / is some of the stinkiest oil I have ever encountered. Even just the stuff on the rags that I threw in the garbage inside my garage totally stunk up the place. Gagging nasty smell. I need to go dump that oil off at Autozone ASAP.
Just fyi - the Castrol synthetic was about $12/qt. I heard good things about Royal Purple but it was about $24/qt and I thought the castrol syntec would be much better than what it had.
Just fyi - the Castrol synthetic was about $12/qt. I heard good things about Royal Purple but it was about $24/qt and I thought the castrol syntec would be much better than what it had.
Re: Any EX35 Owners who DIY?
My EX has just passed the 61K mileage mark, I had a chance last weekend to do a little maintenance. I drained and filled the both the transmission and transfer case fluids. I also took some photos. When I get the chance, I'll put up a few posts about them. I'm not sure if I should put them here, or make new threads about them though.

Re: Any EX35 Owners who DIY?
That is great! I am looking forward to see those pictures. I know where the front differential bolts are from reading online, but transmission and transfer case i could not find online. This will save me time once i open the cover underneath.NJGuy wrote:My EX has just passed the 61K mileage mark, I had a chance last weekend to do a little maintenance. I drained and filled the both the transmission and transfer case fluids. I also took some photos. When I get the chance, I'll put up a few posts about them. I'm not sure if I should put them here, or make new threads about them though.
I will soon be draining and filling both differential fluid, transfer case and transmission.
Dealer wants $450 plus tax on these services. BTW, did you use oem fluids for differential? transmission and Transfer case the same fluid? Do you have to buy new crush washers for all bolts?
For differential i am thinking of going Amzoil severe gear 75wx90, but car is under warranty until Aug. of 2016. I am sure transmission and transfer case should be OEM.
Do you guys recommend doing this services through the dealership?
I know DIY and keeping the receipt for future proof is ok, but that will take time to resolve if there is a major issue ( problems that might not even related with fluids, such as transmission sensors, engine sensors etc.) but stealership will insist incorrect fluid levels etc..etc...
Thanks!
Re: Any EX35 Owners who DIY?
I'm going to post a new thread on what I did, and it will cover your questions. However, here are my quick answers for now.AWGD8 wrote: That is great! I am looking forward to see those pictures. I know where the front differential bolts are from reading online, but transmission and transfer case i could not find online. This will save me time once i open the cover underneath.
I will soon be draining and filling both differential fluid, transfer case and transmission.
Dealer wants $450 plus tax on these services. BTW, did you use oem fluids for differential? transmission and Transfer case the same fluid? Do you have to buy new crush washers for all bolts?
For differential i am thinking of going Amzoil severe gear 75wx90, but car is under warranty until Aug. of 2016. I am sure transmission and transfer case should be OEM.
Do you guys recommend doing this services through the dealership?
I know DIY and keeping the receipt for future proof is ok, but that will take time to resolve if there is a major issue ( problems that might not even related with fluids, such as transmission sensors, engine sensors etc.) but stealership will insist incorrect fluid levels etc..etc...
Thanks!
1. transmission and transfer case were uncovered on my EX. Once you get under the car, you won't be able to miss them.
2. I did not get to the differential yet. I did not buy OEM fluids, but instead bought some of the Wally World (WalMart) Supertech brand 75W-90 semi-syn differential oil for when I do the service. The FSM specifies at the minimum 80W-90 GL5 gear oil, but makes no mention of a conventional or synthetic composition. I don't think the Wally World stuff can be any worse than a standard gear oil on the market that meets Infiniti's 80W-90 GL5 requirement.
3. I used Nissan Matic-S for the transmission, but decided to go with Valvoline Maxlife Dex/Merc for the transfer case.
4. I only bought one crush washer, which was for the transmission drain plug.
5. Its up to you if you'd like to use OEM for the transmission and transfer case. If you're under warranty, I'd at least use OEM fluid in the transmission, as it does most of the heavy lifting and probably costs much more to fix/replace than the transfer case in the event of a failure. The transfer case fluid can be debatable, as you mentioned it doesn't get worked nearly as much. It only specifies Matic-J or Matic-D, not Matic-S.
6. I don't have any money in an extended warranty, so for maintenance I'm free to do as I see fit at my own risk.
How has your dealership treated you so far? Do you think they would look for any little thing to deny a warranty claim, or do you think they'd go to bat for you when dealing with Infiniti corporate? That might give you a better feel for what you should do.
If I were in your shoes, I'd probably do some of the less important stuff, and let the dealer do the more critical items. Either that, or you can space out the services over a couple of visits, following order of the list in which you prioritized each service.
BTW, I do think you're right about the non-mechanicals of these systems that usually are the first that go bad.
Re: Any EX35 Owners who DIY?
So far my dealership service dept. is great! The only problem is they charge more than what i normally read online. Rear differential oil change cost $99.95 plus tax etc... Also, my car is 5 years old and I noticed that I had conversation with 4 different service advisers in the span of 5 years.NJGuy wrote:I'm going to post a new thread on what I did, and it will cover your questions. However, here are my quick answers for now.AWGD8 wrote: That is great! I am looking forward to see those pictures. I know where the front differential bolts are from reading online, but transmission and transfer case i could not find online. This will save me time once i open the cover underneath.
I will soon be draining and filling both differential fluid, transfer case and transmission.
Dealer wants $450 plus tax on these services. BTW, did you use oem fluids for differential? transmission and Transfer case the same fluid? Do you have to buy new crush washers for all bolts?
For differential i am thinking of going Amzoil severe gear 75wx90, but car is under warranty until Aug. of 2016. I am sure transmission and transfer case should be OEM.
Do you guys recommend doing this services through the dealership?
I know DIY and keeping the receipt for future proof is ok, but that will take time to resolve if there is a major issue ( problems that might not even related with fluids, such as transmission sensors, engine sensors etc.) but stealership will insist incorrect fluid levels etc..etc...
Thanks!
1. transmission and transfer case were uncovered on my EX. Once you get under the car, you won't be able to miss them.
2. I did not get to the differential yet. I did not buy OEM fluids, but instead bought some of the Wally World (WalMart) Supertech brand 75W-90 semi-syn differential oil for when I do the service. The FSM specifies at the minimum 80W-90 GL5 gear oil, but makes no mention of a conventional or synthetic composition. I don't think the Wally World stuff can be any worse than a standard gear oil on the market that meets Infiniti's 80W-90 GL5 requirement.
3. I used Nissan Matic-S for the transmission, but decided to go with Valvoline Maxlife Dex/Merc for the transfer case.
4. I only bought one crush washer, which was for the transmission drain plug.
5. Its up to you if you'd like to use OEM for the transmission and transfer case. If you're under warranty, I'd at least use OEM fluid in the transmission, as it does most of the heavy lifting and probably costs much more to fix/replace than the transfer case in the event of a failure. The transfer case fluid can be debatable, as you mentioned it doesn't get worked nearly as much. It only specifies Matic-J or Matic-D, not Matic-S.
6. I don't have any money in an extended warranty, so for maintenance I'm free to do as I see fit at my own risk.
How has your dealership treated you so far? Do you think they would look for any little thing to deny a warranty claim, or do you think they'd go to bat for you when dealing with Infiniti corporate? That might give you a better feel for what you should do.
If I were in your shoes, I'd probably do some of the less important stuff, and let the dealer do the more critical items. Either that, or you can space out the services over a couple of visits, following order of the list in which you prioritized each service.
BTW, I do think you're right about the non-mechanicals of these systems that usually are the first that go bad.
Re: Any EX35 Owners who DIY?
FYI, I was able to sneak in some work on my EX this past weekend. Did the front and rear diff fluid, serpentine belt, coolant change, and also a tire rotation while the car was up on the jack stands. I'll try to put up a new thread about this, along with a few pictures when I have some more free time.
-
TonyN
- Posts: 61
- Joined: Sun Aug 01, 2010 11:23 am
- Car: 2010 EX35 "The Baby Wagon"
2010 Camry SE "The Beater"
1994 Supra Turbo "The Weekend Warrior"
Re: Any EX35 Owners who DIY?
The EX is just like any other car, nuts and bolts. I have worked on all my personal cars, BMW M3, Mercedes E500 / CLK 500, Toyota Supra Turbo, Mazda Rx7, etc... I have owned over 20 cars and one thing I learned is if you can work on your economy box you can work on higher end cars, they take more work because of the way things are put together but at the end of the day it nuts and bolts, you just have to know what you are doing and the steps to take. I also have figured that some things are not worth me doing, like oil changes, I buy the oil and pay my local shop $15 bucks to change my oil and dispose of the old oil/ filter. I also just guy my brakes and pay then $80 to cut my rotors and put on the pads, if i have to change the rotors then I do it myself. It all depends on how much time I want to spend and what the shops are charging or even if I feel like doing the work myself.
For the EX35 I changed all the lights to LED myself, did the VSS bypass for the navigation/bluetooth, and normal filter maintenance but not the oil change. When it comes to my fun car the Supra Turbo, I tend to do everything myself unless I require a lift like when I had to pull the transmission.
I believe that when you get older and time becomes a premium most people tend to pay to get things done because time is more valuable, I no longer do my own oil change because for the time it takes to change the oil and then take the old oil to dispose I rather just pay someone. I my early 20s I enjoyed working on every car and motorcycle, i did everything on my Ducati myself. The funny thing is I still show people how to work on their cars but am too lazy to work on most of my own things.
-
XIS
- Posts: 865
- Joined: Wed Aug 24, 2011 11:00 am
- Car: 08 Infiniti EX35 RWD
17 Infiniti QX30 Sport - Location: The Desert
Re: Any EX35 Owners who DIY?
Interesting! I also did the LED's and video screen bypass thingy...
I did most everything when I was young and then when I moved out for college, I started taking my (Scirocco S or Integra) to local shops for misc. maint.... When my kids started to get old enough to understand cars, I started doing much more of everything here... starters, radiators, oil changes, differential fluid, manual trans fluid, brakes, etc...My son even bought me a crawler for Christmas! (I am lucky that I have several shops within a few miles that recycle oil) . I still leave the jobs like clutch replacements to someone else! (just had to do that with my son's RSX)
But one thing you are completely correct about is they are all nuts and bolts. Just the newer cars have more plastic coverings and air tubes and crap to take off and get out of the way first.
Re: Any EX35 Owners who DIY?
I agree. I started this thread because while I have some experience doing work on other cars, I was starting from zero on Infinitis. I was looking for tips, shortcuts, suggested tools, and caveats to save me a little time and a lot of frustration, and to lessen the learning curve when I chose to start doing work on my car. I kind of also wanted to share with others here anything I've learned or picked up when working on my EX if it was their first time attacking a job on theirs. In addition, this car isn't a volume seller and the activity on this forum reflects that. Not that I could really change the fact, but I at least wanted to see if I could get some helpful and meaningful discussion going on this topic and specific to this model vehicle.TonyN wrote:The EX is just like any other car, nuts and bolts. I have worked on all my personal cars, BMW M3, Mercedes E500 / CLK 500, Toyota Supra Turbo, Mazda Rx7, etc... I have owned over 20 cars and one thing I learned is if you can work on your economy box you can work on higher end cars, they take more work because of the way things are put together but at the end of the day it nuts and bolts, you just have to know what you are doing and the steps to take.
I also hardly do my own oil changes now. To begin with, they don't cost all that much more than doing it yourself, and the dealership techs usually give the car a good look over to point out any items that may need to be addressed. That's when I consider whether or not I'll take on that job, or let someone else do it.TonyN wrote:I also have figured that some things are not worth me doing, like oil changes, I buy the oil and pay my local shop $15 bucks to change my oil and dispose of the old oil/ filter.
I believe that when you get older and time becomes a premium most people tend to pay to get things done because time is more valuable, I no longer do my own oil change because for the time it takes to change the oil and then take the old oil to dispose I rather just pay someone.
It all depends on how much time I want to spend and what the shops are charging or even if I feel like doing the work myself.
I cut my teeth as a teen in the mid-90's working on Chrysler products from the late 80's (not sure why my parent's liked them so much, as I didn't). I can't say I did that much work, as I was pretty much self-taught and couldn't take on any serious work without risking disabling the car. The explosion of internet forums after the millenium helped me a little bit; more so with my motorcycles than with my cars, but I think the help available on car forums caught up fast. But nowadays it seems like we can find a how-to for almost anything out there, especially on YouTube. I don't have near the amount of experience you do working on vehicles, so I feel the need to see what a new-to-me job entails prior to taking it on.TonyN wrote:I my early 20s I enjoyed working on every car and motorcycle, i did everything on my Ducati myself.
Care to show us a couple of things with us here?TonyN wrote:The funny thing is I still show people how to work on their cars but am too lazy to work on most of my own things.
-
EXceptional
- Posts: 1222
- Joined: Sun Apr 06, 2008 7:54 pm
- Car: 2008 Aspen Pearl EX35 Freakin Loaded!
Re: Any EX35 Owners who DIY?
Did you ever create a Coolant swap thread?NJGuy wrote:FYI, I was able to sneak in some work on my EX this past weekend. Did the front and rear diff fluid, serpentine belt, coolant change, and also a tire rotation while the car was up on the jack stands. I'll try to put up a new thread about this, along with a few pictures when I have some more free time.
Re: Any EX35 Owners who DIY?
I never got around to making one. If it's something you plan on taking on soon, I'd check out these links as I think they're quite helpful.EXceptional wrote: Did you ever create a Coolant swap thread?
http://www.myg37.com/forums/d-i-y-insta ... olant.html
https://www.youtube.com/watch?v=mayYHv5vOkg
Re: Any EX35 Owners who DIY?
For you guys with the scratched steering surround here is a fix: SEM Landau Black spray paint after steel wool sanding and masking off controls spray 8-10 coats and let dry overnight for a good solid coating. Done