I made this thread because I think its helpful.
It started from this zerothread?id=202517 and I'm elaborating it to what you see now.
Credit goes to MyeeS13I used some of your photos without your permission.I hope thats cool, im doing this for eveyone's benefit
Difficulty. ***Time: 25mins - 2hours. (the first time it takes longer)You'll need: 8mm, 10mm, 12mm socketflathead,engine grease, ( for lubrication )engine cleaner ( for sludge and grime )and Lastly a SOHC 89-90 KA STARTER VERSION: HITACHI!!
________
Preface: The only parts, you'll replace are the brushes at the bottom of your SR starter, and the solenoid. Clean the rest, and your starter is good as new.
1: "Getting Started" dont open you're SR starter until you've completely disassembled your KA SOHC starter. that way you'll be familiar with all the parts. work in an open space.
2: "Disassembling The Starter" remove the two long 10mm bolts from the SR starter, and 2 from your solenoid. Spray and clean the Black housing section with the green sticker. Over time it accumulates grime that hinders your motor's spinning.
"The Starter Head" - The head should face down,because it has 4 gears that are unfastened, but they're easy to put back on. clean them with degreaser and liberally apply engine grease.
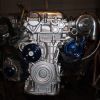
this is the KA head, that you wont be using.
3:"Replacing the Brushes" - the base of the copper core. for the eletric motor, is clamped in by brushes. when starters dont spin, its because these brushes have worn out.
EDIT:: the brushes are 4 small copper bars that press against the bottom of copper core. When you turn the key they send lots of current and spin the motor. throughout the life of the starter they burn away and shorten, until they aren't long enough. there's a spring behind them to push them outward as they shorten but eventually its not enough.
replace them to give your starter renewed factory life.their plate is attached by two small phillips screws from underneath.
4: "Assembling the Motor w/ New Brushes" - Assemble the motor first, then replace the solenoid. The main housing of the starter, wont seal up and close properly if something isnt aligned, so check everything before you tighten. I snapped a bolt by mistake this way. The starter housing should seal up nicely if everything is aligned and in place. it will take a few tries to feel this out, but once things fil, you'll know.
5. "Attaching the solenoid" slide the pin into the new solenoid's head. This pin is what ejects the gears out the starter and fires it up. when pushing the solenoid into its housing... make sure it snaps in, and lines up with the inset holes. once its on tighten quickly.
If your starter spins, and doesn't initiate the motor and flywheel its because the solenoid is dead.
This was my starter after a rebuild, you can see the new solenoid, and new bottom cap with fresh brushes. Im very pelased with it, and its nice to know your starter will last for another 6-10 years.
It just requires patience.
feel free to ask questions. or post any additional suggestions.
- Malik
Modified by Kalypso at 8:59 AM 6/23/2009
DYI -Rebuilding your SR starter.

Re: DYI -Rebuilding your SR starter. (Kalypso123)
Great Write upim paranoid about my SR starter breaking and me not being able to find one for under 400 bucks.
my only question is with step 3can you elaborate about the 3 brushes?i see those 4 gold things.. but what are the brushes?
and i vote this to be put in the technical article.
my only question is with step 3can you elaborate about the 3 brushes?i see those 4 gold things.. but what are the brushes?
and i vote this to be put in the technical article.
Re: DYI -Rebuilding your SR starter. (E7-S14)
I appended it.
Let me know if thats more clear.
- they're 4 Copper brushes, - they press against the motor core, at its bottom most point and provide current to make it spin. - over time they wear out from the live contact and friction.
Let me know if thats more clear.
- they're 4 Copper brushes, - they press against the motor core, at its bottom most point and provide current to make it spin. - over time they wear out from the live contact and friction.
-
Acuratechva

- Posts: 204
- Joined: Thu Nov 11, 2004 6:48 am
- Car: Black Kouki
Re: DYI -Rebuilding your SR starter. (Kalypso123)
Which solenoid did you use, Hitachi or Mistubishi?nissan has two diff brands avaialbe for SOHC. it shouldn't matter just curious
Re: DYI -Rebuilding your SR starter. (Acuratechva)
it was neither oddly,
I used a "worldwide" starter from advanced auto parts. it was all the had, and it fit like true love.
http://shop.advanceautoparts.c...arter
It was my suspicion that the manufacturer wouldn't matter. I think they all make their solenoids the same.
I used a "worldwide" starter from advanced auto parts. it was all the had, and it fit like true love.
http://shop.advanceautoparts.c...arter
It was my suspicion that the manufacturer wouldn't matter. I think they all make their solenoids the same.

Re: DYI -Rebuilding your SR starter. (Kalypso123)
nice write up! always heard this could be done but never seen it, now I know I could do it.
thanks
thanks
Re: DYI -Rebuilding your SR starter. (slow s13)
thanks bro, I just want to help.
know if only someone could teach me to make manifolds
know if only someone could teach me to make manifolds
-
pauliedrft
- Posts: 471
- Joined: Tue Oct 07, 2008 12:06 am
- Car: 91 240sx
Re: DYI -Rebuilding your SR starter. (Kalypso123)
Nice write up , it will be good to know . i call sticky .or something .
-
positron1

- Posts: 3609
- Joined: Mon Mar 21, 2005 12:29 am
- Car: Project: 1993 Nissan 240SX Coupe SR
Daily: 2010 Honda Civic Coupe - Location: Starkville, MS.
Re: DYI -Rebuilding your SR starter. (pauliedrft)
This will come in handy like andy, nice write-up! That starter looks like friggin' new now!
Re: DYI -Rebuilding your SR starter. (positron_)
After having two that slowly died on me. 'm grateful to have This one, it cranks hard every time.positron_ wrote:This will come in handy like andy, nice write-up! That starter looks like friggin' new now!
I also want to rebuild my A/C compressor, just for the joy of doing it. there's an article on that also.
Re: DYI -Rebuilding your SR starter. (Kalypso123)
"when starters dont spin, its because these brushes have worn out. replace them to give your starter renewed factory life.their plate is attached by two small phillips screws from underneath."
I don't understand why you have to use a SOHC KA starter, is it to swap out these copper brushes? If so, why couldn't you just replace the solenoid and brushes and have a rebuilt starter? Sorry if I'm missing something, this isn't meant to be critical, just a question. Thanks.
I don't understand why you have to use a SOHC KA starter, is it to swap out these copper brushes? If so, why couldn't you just replace the solenoid and brushes and have a rebuilt starter? Sorry if I'm missing something, this isn't meant to be critical, just a question. Thanks.
Re: DYI -Rebuilding your SR starter. (va240dude)
that exactly what happened, I replaced the brushes and the solenoid.va240dude wrote:
I don't understand why you have to use a SOHC KA starter, is it to swap out these copper brushes? If so, why couldn't you just replace the solenoid and brushes and have a rebuilt starter?
they came from the SOHC KA starter.

Re: DYI -Rebuilding your SR starter. (Kalypso123)
Here is a step by step for a similar starter;
http://www.btinternet.com/~rol...r.htm
Here is a source of the replacement starter brushes
http://www.rockauto.com/catalo...31513
with the above.. I think it is all covered
good luck
http://www.btinternet.com/~rol...r.htm
Here is a source of the replacement starter brushes
http://www.rockauto.com/catalo...31513
with the above.. I think it is all covered
good luck
Re: DYI -Rebuilding your SR starter. (PhopsonNY)
PhopsonNY wrote:Here is a step by step for a similar starter;
http://www.btinternet.com/~rol...r.htm
Here is a source of the replacement starter brushes
http://www.rockauto.com/catalo...31513
with the above.. I think it is all covered
good luck
Thanks for the links!
-
skirodeo7

- Posts: 77
- Joined: Mon Jun 11, 2007 1:25 pm
- Car: 2007 Nissan Frontier, 1991 Nissan 240sx
- Contact:
Re: (DBo)
nice write up. Used it to rebuild my starter. Not jacking, but does anyone have the torque specs for a redtop starter? I've built the whole damn engine off the s14 FSM, but I must be retarded because I can't find the starter torque specs anywhere. And all the threads on here never get answered because people just send links to the FSM, which I have dilligently looked through.
Re: (skirodeo7)
supposedly, but mine didn't fit when I tried that,DBo wrote:good diyalso you dont have to take apart the rearend of the starter you can simply just swap housing on the starter and itll work fine.
sooooo... I dont know. I'm all for keeping as many parts from the original starter as possible. especially if things don't fit convincingly.
i really don't know, I wasn't too concerned with torque specs. I was more worried about over tightening and snapping a bolt...skirodeo7 wrote:nice write up. Used it to rebuild my starter. Not jacking, but does anyone have the torque specs for a redtop starter?
but I want to say around 12-18ft/lbs
Re: (Kalypso123)
hmm weird i did prob like 4 sr starters already, 2 mine and 2 other friends, and i had no problems swappin housings.Kalypso123 wrote:
supposedly, but mine didn't fit when I tried that,
sooooo... I dont know. I'm all for keeping as many parts from the original starter as possible. especially if things don't fit convincingly.
either way good write up
-
Clawhammer

- Posts: 3027
- Joined: Fri Dec 29, 2006 10:41 am
Some info to add:
All year 240's had the same starter. So SOHC doesn't matter. What you need is a hitachi starter. Mitsubishi's won't work. The head is different, the SR starters are hitachi.
Worldclass reman's starter's for all the parts store chains. They have different names for each store: worldwide, duralast, etc. No matter what the starter will still be either a hitachi or mitsubishi, depends on what core they remanufactured and stuck their sticker to. Unless it's still got the OEM sticker on it (highly unlikely after a reman) the only way to tell the difference is to pop the head off. When I did mine I got lucky and got the right starter on the first try.
Also want to add that there is no need to rebuild it. This is simply a head swap. Pull the SR head off and put it on the KA body and vice versa. (What I did to get my 60 core charge back). :p
Re: (Clawhammer)
The benefit of rebuilding your starter is
1. You don't need to buy a KA starter if you don't already have one2. You get brushes and you clean out the grooves of the commutator3. It can be cheaper as new brushes only cost about $20.004. Less wastage... there isn't a perfectly good starter body on the landfill.
Good luck whichever way you go.
-
Clawhammer
- Posts: 3027
- Joined: Fri Dec 29, 2006 10:41 am
The benefit of swapping the head as opposed to rebuilding your starter is:
1. A remanufactured starter is less than $150, don't be a cheap ***.2. It's new so it'll last longer than the starter you rebuilt with used stuff.3. You get a lifetime warranty when you buy a reman'd starter from the parts store.4. Wastage?...you put the KA head on your SR body and bring it back to the store as a core charge...it gets fully rebuilt and someone else benefits down the line!5. It's easier and takes roughly 5 minutes to swap the heads to both starters.
Seems like #1 is the only drawback considering if you own a 240 you're probably inclined to take the cheapest way out.
-
sideslider

- Posts: 116
- Joined: Mon Jun 02, 2008 2:42 pm
- Car: nissan 240sx
Re: (sideslider)
sh*t, i dont know.
im sure s15 starters wont line up, but the s14 sr starter might work interchangeably with the s14 KA and s14 ka starter.
It all depends on the teeth and placement of the flywheel.
ask Hijacker
im sure s15 starters wont line up, but the s14 sr starter might work interchangeably with the s14 KA and s14 ka starter.
It all depends on the teeth and placement of the flywheel.
ask Hijacker
-
maj Andres

- Posts: 1030
- Joined: Thu Dec 13, 2007 2:09 pm
- Car: Zenki, '95 Model, w/ S14SR20DET
Re: (Kalypso123)
So let me get this straight.
If your SR starter is starting to take a crap on you all you need to do is...
- Get a KA starter (either SOHC or DOHC) and put the "head" of the SR on it? - But the KA starter has to be manufactured by Hitachi? (Where all SOHC starters manufactured by Hitachi?)- We're using the solenoid from the KA aren't we? - Are the plugs on the KA and SR solenoid the same?
Thanks guys.
-
Clawhammer
- Posts: 3027
- Joined: Fri Dec 29, 2006 10:41 am
Re: (Kalypso123)
Nice write up
-
maj Andres
- Posts: 1030
- Joined: Thu Dec 13, 2007 2:09 pm
- Car: Zenki, '95 Model, w/ S14SR20DET
Re: (MastaYu)
Damn, I went to my local yard and right away found the only S13 there and the starter was already off the car and sitting in the engine bay, so I snatched it up. I was looking to see if it was made by mitsubishi or hitachi, but it didn't have a plate on it. As soon as I payed for it and was on my way back to my car I saw the VERY small mitsubishi logo on the solenoid! I took it to Autozone to have it tested and when it worked fine.So I gave it a shot and attempted to put the SR starter head on this mitsubishi unit hoping to make a breakthrough on NICO, but they are incompatible . The armatures, and gears are different and the SR head is too fat or the KA body is too skinny, however you wanna look at it. And the brushes from the mitsubishi unit are too small in diameter and won't fit into the SR body (the brushes on my SR starter looked fine) So I moved on to the solenoid (think this is the problem my SR starter has) took both of them apart and they too are also incompatible. I then proceeded to clean the grooves of my armature and clean it off with some sand paper hoping this would help. NOTHING. Maybe if I had the HITACHI it would of worked out for me?
So to reiterate what Clawhammer said, Mitsubishi units will not work! Hopefully I can get a hitachi from a local autozone/napa/pepboys.
So to reiterate what Clawhammer said, Mitsubishi units will not work! Hopefully I can get a hitachi from a local autozone/napa/pepboys.