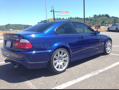
Winter 08 build: The track package

General discussion forum about the 240sx, and a great place to introduce yourself to the board!
User avatar
tmwnn
Posts: 114
Joined: Fri Feb 27, 2009 5:15 pm
Car: '93 240sx

Post

Bumnah wrote:Did I adjust the BV traction arm correctly? My first time with adjustable arms...
Hey man love the build.

I noticed no one answered this question. Im a total noob and have no one else to help me out when I have to work on my car, so everything I know has been self taught by reading on the internet. But I had to replace my tension rods last week after I snapped one on a curb and was wondering the same thing, and everything I read online said that to adjust them the length on both sides should be equal in order to allow adjustability. Seems from the pic that you have unequal length on the threads and one nut tightened against the spherical bushing (or whatever its called). One set of instructions also mentioned that the total distance of exposed threads should not exceed 1", so I adjusted it to 0.5" on each side of the rod.

Im sure someone else with more knowledge will be able to chime in, and besides I still need to adjust mine when I get it aligned...

peace, hope this was somewhat useful. Keep up the good work
Modified by tmwnn at 11:38 PM 4/25/2009


User avatar
Bumnah
Posts: 2042
Joined: Fri Apr 21, 2006 1:50 am
Car: 1992 240SX, black. Bone stock.
Contact:

Post

Thanks for answering man. Yeah, I already went back and fixed it.

User avatar
Bumnah
Posts: 2042
Joined: Fri Apr 21, 2006 1:50 am
Car: 1992 240SX, black. Bone stock.
Contact:

Post

Update time

Went in the garage after a mid day nap. Hit it up hard.

Pleased with the results.

Blinged out my sub frame brackets.

Mounted my Nismo studs.

Mounted the e-brake assembly and hubs to the z32 uprights.

Then I moved onto mounting up the suspension arms. I've been looking forward to this for a while! I took the OEM arms and laid them next to their SPL counter parts. I adjusted the SPL units until they were similar in length. I'm sure the alignment is shot to hell still. :p

Started with the lower control arms first:

Then the uprights.

Traction arms.

Upper Control arms.

Toe arms.

Rear subframe in all it's glory.

Tons more pix here.

Thanks for looking!

User avatar
supreamS14
Posts: 1046
Joined: Thu Jan 04, 2007 11:13 am
Car: 96 240sx S13-blacktop Sr20deT

Post

You are gonna have the greatest sense of accomplishment and really be able to enjoy your car when your done.

User avatar
Bumnah
Posts: 2042
Joined: Fri Apr 21, 2006 1:50 am
Car: 1992 240SX, black. Bone stock.
Contact:

Post

That's all I want at this point. Just to drive the car gain.

User avatar
SolaraOnBronze
Posts: 725
Joined: Wed Oct 08, 2008 5:04 am
Car: 1993 240sx SR20DET
Contact:

Post

Looking awesome bro, great progress! I am jealous of the subframe, that looks really clean- you can't even tell the weights were there! Keep up the good work, it should all come together quickly now!

User avatar
Bumnah
Posts: 2042
Joined: Fri Apr 21, 2006 1:50 am
Car: 1992 240SX, black. Bone stock.
Contact:

Post

Thanks man. I can't wait to drive this thing. The green has worked out better than I expected. Looks solid with the black arms.

User avatar
Bumnah
Posts: 2042
Joined: Fri Apr 21, 2006 1:50 am
Car: 1992 240SX, black. Bone stock.
Contact:

Post

Update!

Finally over the big hurdle. Rear sub frame is back in! Took me forever to get it back in!

Pix:

Fuel line bracket was rusted out. While I'm down there, might as well clean it up. Cleaned,painted, reinstalled.

Again the under carriage is super clean. Here's one of the studs after nearly 17 years. Also the worst of the rust I've found.


Differential mounted. Axles in. Bolts torqued down to spec.

My brilliant caliper holders!


The incredible Hulk, back at home

As expected, pretty much hidden behind the fuel tank.

Driver and passenger side suspension.


Hopefully tomorrow I'll install the rear sway bar, the exhaust, drive shaft and rear coil overs.

More pix here.

User avatar
White Comet
Posts: 19033
Joined: Thu Jun 15, 2006 7:22 am
Car: fc, s13 and mazda6, Sierra
Location: lancaster, pa

Post

looking really good. the underbody reminds me a lot of my own car, the worst spot of surface rust i have is in the same place.

User avatar
SolaraOnBronze
Posts: 725
Joined: Wed Oct 08, 2008 5:04 am
Car: 1993 240sx SR20DET
Contact:

Post

Looks great bumnah! The pics of those cf parts are just haunting me... you are tempting me so bad man (unless you sold them). My spray bombed hatch looks like crap... Keep it up, can't wait to see your car on the ground as well!

User avatar
mattblancarte
Posts: 1978
Joined: Sat Jun 21, 2008 4:14 pm
Car: 2005 BMW M3 Comp. Coupe

Post

Alright the green looks pretty sexy. I'm sold.

User avatar
Bumnah
Posts: 2042
Joined: Fri Apr 21, 2006 1:50 am
Car: 1992 240SX, black. Bone stock.
Contact:

Post

Thanks gents.

Someone pointed out my washers for the 4 studs on the back of the diff were pre sub frame. So I had to go back and fix that little hiccup.

I installed the brake cables. I had to re-seat one of the drum brake setups. I need to adjust both drum brake shoes.

I also mounted up the drive shaft.

Bit under the weather so I didn't do too much.

Hopefully tomorrow front and rear sway bars go in. She's almost ready to sit on all fours.

User avatar
Bumnah
Posts: 2042
Joined: Fri Apr 21, 2006 1:50 am
Car: 1992 240SX, black. Bone stock.
Contact:

Post

Update time!

A lot of the suspension is wrapped up. I'm completely burnt out on working on this car. I'm very much ready to finish this up.

My biggest concerns are the leaks I may be facing. Something is bound to leak. Hopefully it won't be too bad.

Local mechanic friends said they'd get me aligned well enough to get to the race shop for a proper corner balance and race alignment. Cost? A round of beers. Sadly the corner balancing and race alignment won't be as cheap.

Pix:

New z32 tie rod VS old tie rod.

Hammering the top of the lock pin was a bit annoying. I did the best I could. I wasn't able to use my torque wrench on the inner arms. So it went on with "tight as I can get it". With a lock ring, and lock tite. It should stay on there just fine.

Inner arm on, boot on.

Outer Tie rod shank installed.

Steering all wrapped up.

Rear coil overs on.

Rear driver side wheel well. All that's left is to align the drum e-brakes and torque the caliper bolts to spec.

Rear sway bar installed.

Front suspension. Just needs to be torqued down. Progress bar in front set to stiffest.

As always, more pix here.

j-z
Posts: 2878
Joined: Mon Dec 01, 2003 4:26 pm
Car: 95 240sx

Post

looks very nice. what tie rod ends are those, and are they height adjustable? they look like it from the pics, and you just put different sized bushings in there to drop them or raise them.

cant wait to see the finished product. im gonna do another S chassis and seeing all these build threads is making me anxious!!!! i want to do something no one has ever done before (motor wise). i dont know what chassis to go with either... ive owned all of them except s14 kouki.....

mrgreeneyes
Posts: 2229
Joined: Wed Jan 11, 2006 6:15 pm
Car: ///M5
Parted Out Built S13 Coupe

Post

so damn tasty man.... ugh....

i LOVE the details man. such legit parts, so clean, so THOUGHT OUT... not just a random pile of bolt ons...

User avatar
Bumnah
Posts: 2042
Joined: Fri Apr 21, 2006 1:50 am
Car: 1992 240SX, black. Bone stock.
Contact:

Post

The outer tie rods are SPL units. They're designed to be used with the OEM z32 inner tie rods.

User avatar
supreamS14
Posts: 1046
Joined: Thu Jan 04, 2007 11:13 am
Car: 96 240sx S13-blacktop Sr20deT

Post

I've never seen a ball joint with a grease fitting. I must know where you got it!

User avatar
Bumnah
Posts: 2042
Joined: Fri Apr 21, 2006 1:50 am
Car: 1992 240SX, black. Bone stock.
Contact:

Post

uhhhh. standard Moog balljoint. Hard not to find answers to what parts are what in this thread. I pretty much documented everything with pictures....

User avatar
mRodiek
Posts: 2153
Joined: Fri Mar 07, 2008 9:42 am
Car: Stock Hatch
Location: CHICangeles
Contact:

Post

Im pretty sure ball joints with grease fittings are relatively common..

User avatar
White Comet
Posts: 19033
Joined: Thu Jun 15, 2006 7:22 am
Car: fc, s13 and mazda6, Sierra
Location: lancaster, pa

Post

^ they are most car's come stock with grease fittings. i don't think you can find replacement bal joints for the s14 that dont come with grease fittings.

User avatar
SolaraOnBronze
Posts: 725
Joined: Wed Oct 08, 2008 5:04 am
Car: 1993 240sx SR20DET
Contact:

Post

Looking great man, can't wait to see it on the ground!

User avatar
Bumnah
Posts: 2042
Joined: Fri Apr 21, 2006 1:50 am
Car: 1992 240SX, black. Bone stock.
Contact:

Post

Thanks man. I can't wait to get this thing back on the road! It'll be so fun to drive. I'll get there soon enough. First track event is June 13th. I HAVE to have it ready a few days before that.

User avatar
Bumnah
Posts: 2042
Joined: Fri Apr 21, 2006 1:50 am
Car: 1992 240SX, black. Bone stock.
Contact:

Post

So I figured I should updates this thread.

What I did.

Stripped the transmission fill bolt. Had to fill the transmission through the shifter. It's a real pain to do with a B&M short shifter. So if you have a B&M, don't bother filling it from there. Use the fill bolt.

Mounted up the rest of the suspension. Torqued it all down.

The S14 front lca's with S13 balljoints, and s13 front knuckles work just fine.

Cleaned and mounted up the exhaust. Replaced the last rubber hanger with a Circuit Sport hanger my friend gave me.

Mounted up the gauges. Now I just have to wire them. I've already got the wires tapped from the original install of my 52mm EGT gauge. Running the wires through the firewall grommet should be the only slow part.

Sold off my carbon fiber hood and hatch for profit, and bought some Type X taillights with the money. Part of the sale of the carbon fiber was a practically brand new Eastwood fender roller.

More soon.

Pix:

See why it's a pain to fill through the shifter with a B&M?

Gauges test fitted. I really like the way they look.

How I mounted the gauges. Super glue. It's made for racing.

Same level of high tech solution for the turbo timer install.

Cleaned the exhaust. Spent some time on the tip. Mounted it up!

Tip.

Mounted.

I've wanted these since I bought the car in Feb. of 2006.

More pix here.

User avatar
nissan_star
Posts: 531
Joined: Mon Dec 10, 2007 5:18 pm
Car: 2000 maxima se and 1993 240sx vert (5sp!!!)

Post

Bumnah wrote:How I mounted the gauges. Super glue. It's made for racing.
Are you sure thats super glue and not hot glue gun glue?

User avatar
Bumnah
Posts: 2042
Joined: Fri Apr 21, 2006 1:50 am
Car: 1992 240SX, black. Bone stock.
Contact:

Post

Oh yeah yeah; hot glue. My bad. Wrong terminology.

User avatar
mattblancarte
Posts: 1978
Joined: Sat Jun 21, 2008 4:14 pm
Car: 2005 BMW M3 Comp. Coupe

Post

Polishing the exhaust is around 5-10 extra hp.

User avatar
Uberck
Posts: 1257
Joined: Sun Jun 10, 2007 4:48 am
Car: 240sx
Location: Boston, MA

Post

oh shiz that f***er is gonna be LOUD. where did you get the cat back

User avatar
SolaraOnBronze
Posts: 725
Joined: Wed Oct 08, 2008 5:04 am
Car: 1993 240sx SR20DET
Contact:

Post

looking good man... glad I could help make your tail light dreams come true, lol. Still wish I got the cf for the price you paid, that truly must have been a crack head deal! We will have to meet up again out at beaver run or something when the car is done... we can hard park and talk about how we dont like drifting

User avatar
White Comet
Posts: 19033
Joined: Thu Jun 15, 2006 7:22 am
Car: fc, s13 and mazda6, Sierra
Location: lancaster, pa

Post

good choice on getting those taillights, they make the hatch look great.

User avatar
Didderson
Posts: 2567
Joined: Sat Mar 18, 2006 4:05 pm
Car: 1990 Nissan 240SX FB
'88 Nissan Hardbody pickup
'74 Datsun Z
Location: Nor-Phillerdelph
Contact:

Post

Looking great man. I didn't have time or care yet to remove my subframe weights .

Very well thought out colors. I like it all!

Your exhaust looks like a BAWSs


Return to “240sx General Discussion”