1 can VHT Night-shades translucent BLACK lens paint

1 can Krylon Crystal Clear GLOSS

Also:
1 bottle isopropyl alcohol
2000 grit sand paper and dish detergent (any brand)
crescent wrench to remove tail lamps
painter's tape to mask trunk lenses
microfiber towels - regular towels will scratch the lenses
-----------------------------------------------------------------------------------------------
Here is the two-part video I used as a general guide. The audio is speeded up to save time. Watch the vid and then follow my tweeked version below. Play close attention to his spraying technique for best results.
PART 1: http://youtu.be/OSKA0ElKg1Q
PART 2: http://youtu.be/-8-hZP6-ZY8
I did NOT use paint thinner for cleaning - I used isopropyl alcohol instead. I did NOT mask off the turn signal area or the reverse lamp area ... BUT ...I also did NOT use as many coats as was done in the video over the turn signal area.
Here is my tweeked version to get the look I was going after:
Remove the tail lights from your car - see the FAQ "replacing / upgrading tail lights" for instructions.
After removing the tail lamps, use the 2000 grit sand paper to sand the surface of the lenses - I used a good sized serving bowl filled with water and a very small amount of dish detergent (to aid in lubrication). Splash the lens with water from the bowl and dip the sandpaper into the bowl to make sure it sands over the lens without snagging - you will need to re-dip the sand paper several times to keep it and the lens lubricated - sanding in ONE back-and-forth direction only - do NOT do circular motions. You don't need to use heavy pressure, you're just making the surface rough to help the Night-shades stick to it. After you sand, clean the lens with a clean microfiber towel (don't use paper towels) and inspect it closely - you want the entire surface to have a uniform scratchy, foggy appearance. Re-sand any areas that still have a glass-like surface and re-wipe if needed. Then clean the lens with the alcohol using a smooth soft rag - inspect again to make sure the entire lens has a smooth, clear, uniform surface (it should look like a brand new lens until the alcohol is removed - then remove the alcohol with a microfiber towel and it will return to it's foggy, scratchy surface again. Now you're ready to spray the Night Shades.
Lay the lenses facing UP and as flat as possible. You may need to safely elevate them so the edges of the lenses are NOT touching anything so you can spray the edges horizontally as in the video above. I taped off the the inner sides (the area that will be inside the body after installing) of each lens to prevent over-spray. I did one regular coating horizontally from 8 inches JUST on the edges as shown in the video, waited 5-10 minutes, then one VERY light, very fast pass with overlapping, back and forth motion over the FACE of the lens from over one foot away, waited about 5-10 minutes, then I did one reg coat at normal speed at 8 inches on the edges AND the face of the lens again with overlapping, back-and-forth techique, waited another 5-10 minutes, and did a 3rd regular coat horizontally on JUST THE EDGES from 8 inches away. This makes the outermost sides of the lens darker than the rest of the face - it gives a gradual, feathered dark-to-lighter effect as you look form the edges to the center. Don't worry about the side marker light showing through - It will show just as well as it did before you painted.
I reckon it was total of 1 1/2 coats on the face of the lens and 3 full coats around the very edges. I stopped there because the lens had a sexy black cherry look which amplified the reflections of the inner chrome fixture. If I went on with another coat on the face of the lens, I feared that look would be lost. Personally I think this should be the max coating. If you add more coats, you will begin to black-out the lens (unless that is what you are going for). In the video you can see how blacked-out his lens became after just 3 coats. I feared other motorists (not to mention the Po-Po) may have trouble seeing the brake / turn / reverse lights. You can mask over the turn signal areas and the reverse lights if you like, but it is NOT necessary as long as you don't exceed what I just described. I waited an hour before spraying the clear coat. (that will be addressed below)
I wanted to remove the trunk lenses from the car as well, but for the life of me I could not work out how to do it. I loaded my repair / service manual disc on my comp and looked at the diagrams. It appears you need to dismantle the entire center portion of the rear area of the trunk lid involving clips, bolts, and 3M tape, etc. So I decided to mask a border around the trunk pieces with painter's tape instead. Be sure the edges of the tape are secure around the edges to avoid any over spray (this isn't plasti-dip and you can't remove overspray by rubbing with your fingers). I used a felt covered squeegy to press the edges of the tape firmly around the border of the lenses to prevent any product from reaching the actual trunk lid body.

I sanded and cleaned the trunk pieces just as I did the tail lamp lenses. I sprayed the Night Shades in one very light, very quick side-to-side overlapping coat from a distance of about 1 foot, waited 5-10 minutes, then one regular coat from about 8 inches - same as the tail lamps so they would match.
I waited an hour before applying the clear coat. The clear coat is applied the same way as the Night-shades. Use back-and-forth overlapping motions from about 8 inches just as shown in the video. I waited 10 minutes between coats. I did 4 coats of clear.
I did NOT do the final step in the video - did not re-sand after the clear coat. My lenses did not have a severe orange peel surface or foggy appearance after the clear coat dried. Dunno why, but they had a clear, smooth surface after drying so I didn't bother with those last steps.
*** Examine your lenses AFTER the clear coat is completely dry - if you have a severe orange peel effect, or want a more glass-like effect, sand them VERY LIGHTLY with 2000 grit paper dipped in soapy water. DO NOT wipe with Alcohol as you did before the tinting ! Dry them with a microfiber towel (they will appear foggy and just like the first sanding you did), then apply a polishing compound, rub VERY HARD in one direction back and forth - do NOT use cricular motions. Then buff the lenses with a clean microfiber towel.
I let the tail lamps cure overnight and then re-installed them the next day. I did a light polish on all the pieces and finished with some wax and the surface became smooth as glass and very clear. Here are the results:
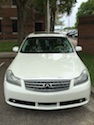
BEFORE:

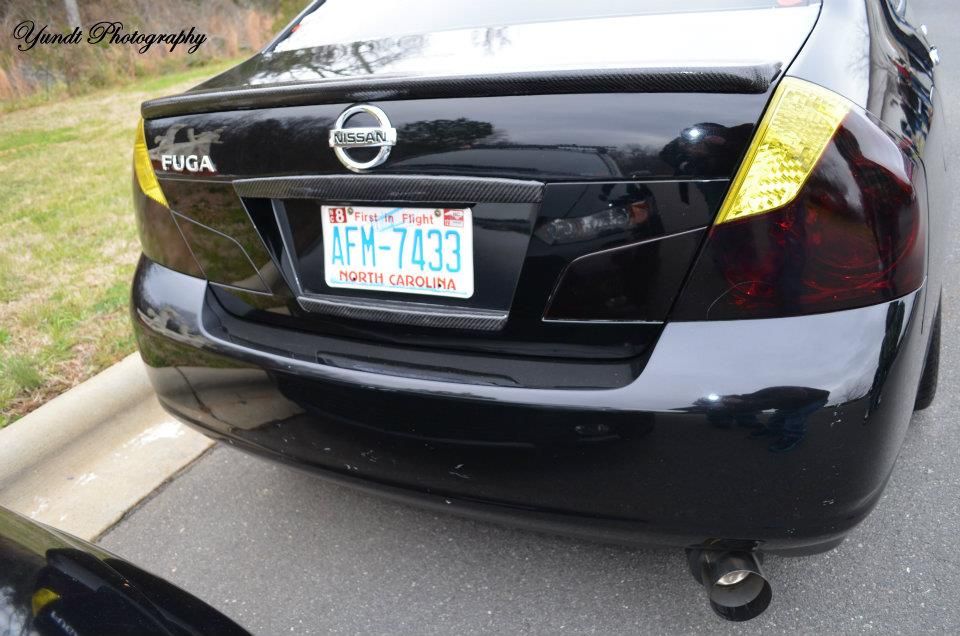
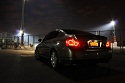
AFTER:
The first picture shows the tail light at dusk, it's even darker at full evening, but in daytime, it's got a black cherry hue and looks deeper and richer than the original tail light.

.

.

NITE:
First picture shows the side marker and the rear light - just driving lights, not brakes.
Second picture shows rear of car - again, just driving lights, not brakes

.

The turn signals light with no difference to other motorists and the parking / brake lights show just as well - the LEDs reflect against the inside of the lens making them appear multiplied with a brilliant dark cherry hue. The view in reverse cam is no different than before the night-shades.
*** If you mess up, or want to go back to your stock lenses, I recommend a product called "Goof Off" which is available at my fav shop: Home Depot. Simply spray it directly on the lenses and everything rinses away leaving the original lens in it's un-touched condition. It also comes in a non-spray and you just gently rub it on the lenses to easily remove everything. I had to re-do one tail lamp at the 3rd clear coat and start over from the very beginning. Fetucini (my g/f), ambled into the garage, looked at the lens, said: wow what a beautiful colour, and before I could say Oi!, touched the surface, leaving a girly finger print behind. That drama aside, this was a very easy project - but as with any paining, its teadious, time consuming prep.