I just completed this project and offer the following suggestions for anyone wanting to tackle it in the easiest fashion and make it easily reversible.
The information here is great but I took it a step further and refined it a bit. Here's my experience.
Suggestions:
1) Take your time. If you have a garage with A/C or a cool place, use it. Budget 4 hours for this job and that's mostly just being meticulous. I fortunately had an A/C warehouse. I have a wonderful 1994 Volvo as my backup car and it was available the entire time so there was no pressure on me. This makes a huge difference in any project, being able to step back and walk away. This can be very intimidating for someone, especially with cutting wires to something critical like A/C. However, it's straightforward and it can be done with relative ease.
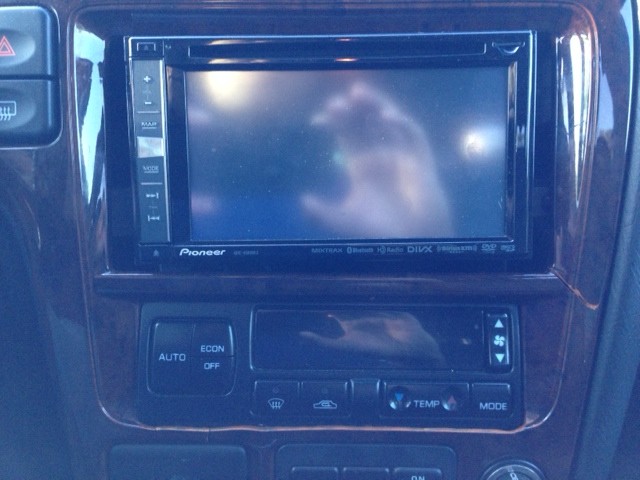
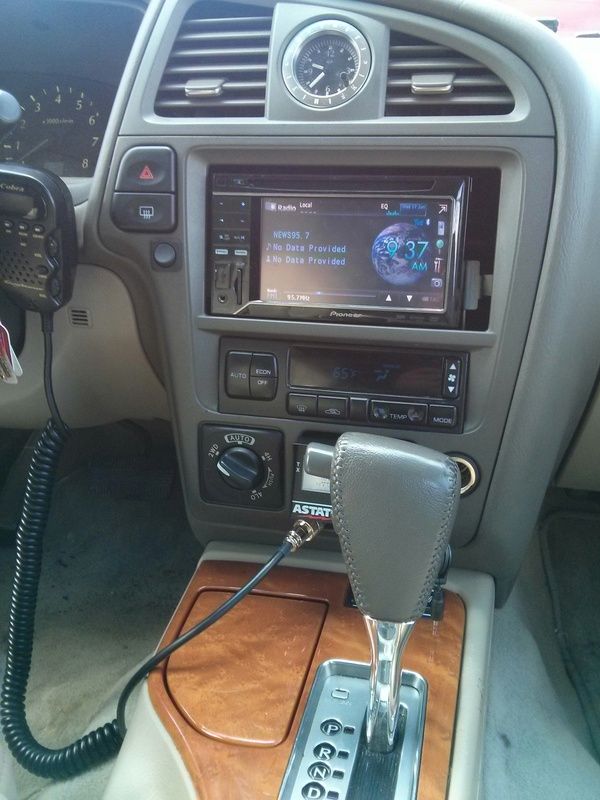
2) Buy a complete bezel with everything you need already installed. Don't piecemeal by buying one thing at a time and end up needing something. Wait for the right one. I purchased a complete bezel with climate unit, 4WD switch, lighter, everything WITH pigtails on eBay...a lot more than I needed. Junkyards that sell on eBay are your best bet for finding them with pigtails. Cutting off a nice pigtail on all of the stuff is pretty standard for a junkyard. I browsed for a month and found the perfect one with pigtails. In my deal, they even threw in the clock and upper vent that I didn't need. Read the conclusion for why this was cool.
3) Tag your wires before you cut them...on both sides. Go through the pinouts and tag your pigtail with the wire numbers. Then tag the wires coming out of the car before you cut the harness. I used a Brady IDXPERT printer and printed a wraparound wire tag for each wire on both sides. I numbered each wire right beneath the connector on both sides...on the pigtail that came with my replacement climate unit and also on the car side on the wires that were going into the Navi-climate unit box. I numbered them based upon the pinouts right here. That way, when I went to make the connections, I'm matching number to number and not monkeying around with wire colors or looking back at the connector I cut to see if I have the right wire. I did some work before I cut the wires that saved me a lot of time on the back end.

4) Think outside the box for making the connection. I didn't use use butt splices or solder...I used high quality insulated quick-disconnect connectors instead of crimping my wires directly to one another. I took my pigtail harnesses from the new climate unit and put male insulated spade connectors on each wire. Then, on the car side, I used females. Since I already had tagged my wires by number, I just had to match the numbers and snap them in. If I made a bad connection, I could pop the connector out and troubleshoot easily. I got it right on the first shot, but the point is that I had a backup plan. Use quality connectors and they will never come loose like the cheap garbage from AutoZone. I bought MOLEX brand and from Allied Electronics and crimped with an Ideal Crimpmaster (the best).

5) Strain relief is important. It takes some force to pull these wires out of those quick-connects...more than just pulling by hand. To be extra sure, to prevent any push or pull on my connections, I wrapped each wire bundle in spiral wrap from Alpha Wire (also from Allied Electronics). This keeps it all together, is easily removable, and provides peace of mind if I was somehow thinking these things would come undone. If you use high quality ones, they won't, but an ounce of prevention is worth a pound of cure. I wrap anything - soldered, crimped, quick-connects - ANY connection in either heat shrink, spiral wrap, loom, or something to eliminate any strain on the connectors. Strain relief is critical, no matter what method you're using to make the connection.

6) Use a quality ratcheting crimper if you're crimping. I cannot overstate this. Don't try this unless you're using a good crimper and you know how to crimp. A generic crimper from Wal-Mart or Auto Zone won't consistently crimp connections. Consistency is critical when you're talking about hacking into 30 wires. One bad crimp means there are probably 10 marginal crimps, etc. You can't get around this. Get a good, quality, ratcheting crimper. The connection should be better and more consistent than a soldered connection if you're using a decent ratcheting crimper with minimal skill.

Conclusion:
The project is well worth it and easy if you plan it out, tag everything, and do it right.
Whether you go my route of using quick-disconnects or actually crimp the wires together, the tagging of the wires is essential and should be done by anyone taking on this task. It helps immensely. The main reason I did it is because I work in electronics and automation and tagging wires is something I do daily. I don't mess around with wire identification. I take nothing on faith or even color of wire. I highly recommend anyone who does a lot of auto wiring to invest in a tag printer. I love them. There are dozens of ways of tagging wires, from using scotch tape and paper all the way to the fancy printer I use for work. Just tag them in whatever way you can. You'll be glad you did.
An added bonus....I made money on the conversion Before I began the project, I sold the following on eBay separately: 4WD Switch, Ashtray, Bezel with Hazard/Defrost Switch/Lighter, Clock/Vent assembly. I had paid for the project simply by selling the stuff the eBay Bezel came with that I didn't need. Now that I'm done, I'm selling the navigation unit (with broken buttons), climate box and the Bose tape-deck. That's all just icing on the cake for me.
Tools used:
Paladin Stripax Plus Wire Stripper (already owned)
Brady IDXPERT wire-tag printer (already owned)
Ideal Crimpmaster crimper (already owned)
Molex Male & Female insulated Quick disconnects (From Alliedelec.com)
2" Alpha Spiral Wrap (already had a roll laying around)
I took some photos and will post later as my iPhone has died from running the XM app for 4 hours and I have no Lightning charger on me. I put some stock footage for illustrations for now for the wire tags, spiral wrap, and connectors.
Bottom line: Plan ahead, do it, and do it right.