Sub install for 2009 G37 sedan

Discussion forum for body kits, repair, modifications, interior styling, Audio / Video and internal/external lighting.
joe603
Posts: 10166
Joined: Mon Nov 21, 2005 5:45 am
Car: 2014 Durango R/T
Location: Atlanta

Post

So after a delay from a bad stereo shop, my Rockford Fosgate Overload is installed. For those that are interested, here are some install pics/tips:

I found this shop online with some great prices: http://www.audiovideodimension.com/

They have been great to deal with...and their prices are fantastic. I purchased the RF Overload, a RF 8-ga amp wiring kit, and the PEQ remote. They even gave me 5% back on my purchase because they had a sale on RF items. Anyway, everything together was under $500!

So on with the install. First, here are some wiring diagrams that you'll need to look over to see where you need to tap:

Image
Image

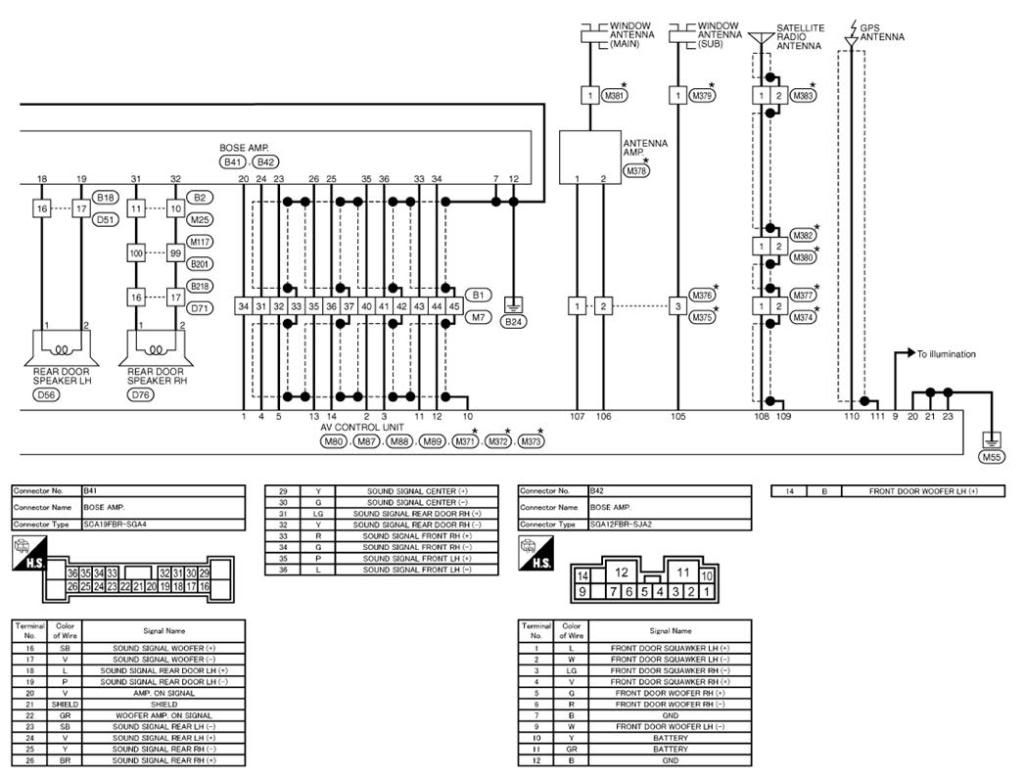
For the best possible sound, I decided to tap into the rear speakers from the head deck, before it goes into the Bose amp. The signal is called "low-level" signals. (High-level or Speaker-level is after the amp) The Overload can take either, but if you use low-level, you have to use a remote turn on. Luckily, the Bose system has a separate amp for the OEM subwoofer and it has a remote turn on for the amp!

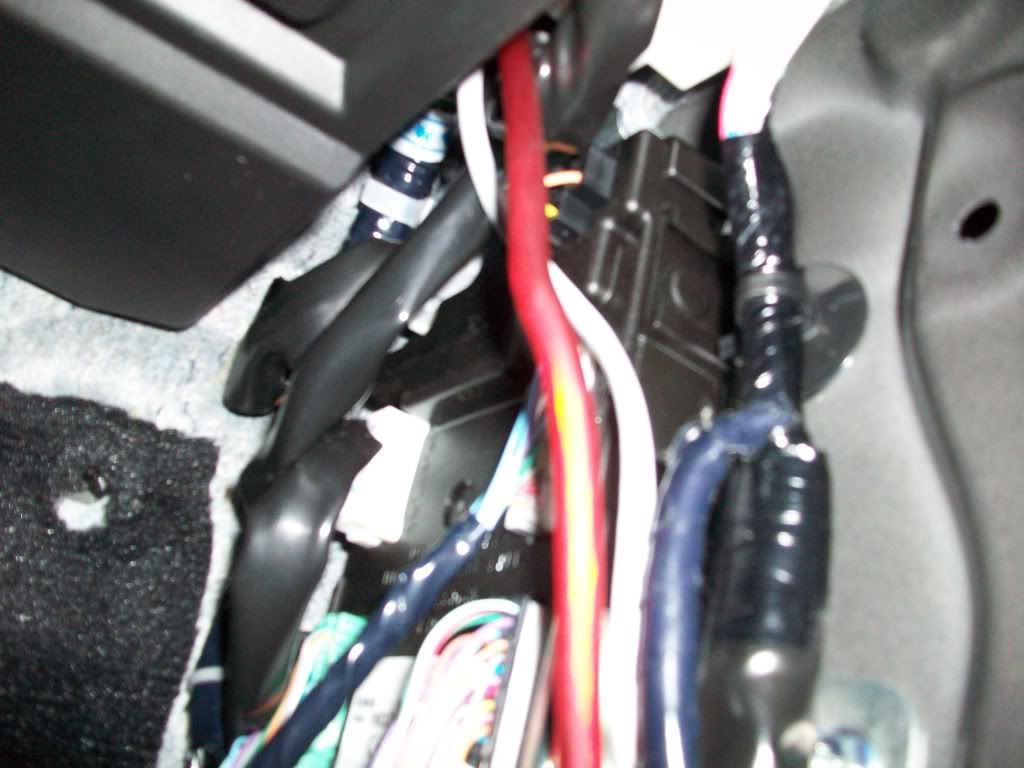
Here is a pic of where to splice into the harness. There are 2 connectors for the Bose amp, you want the larger one (B41 in the diagram).

Image

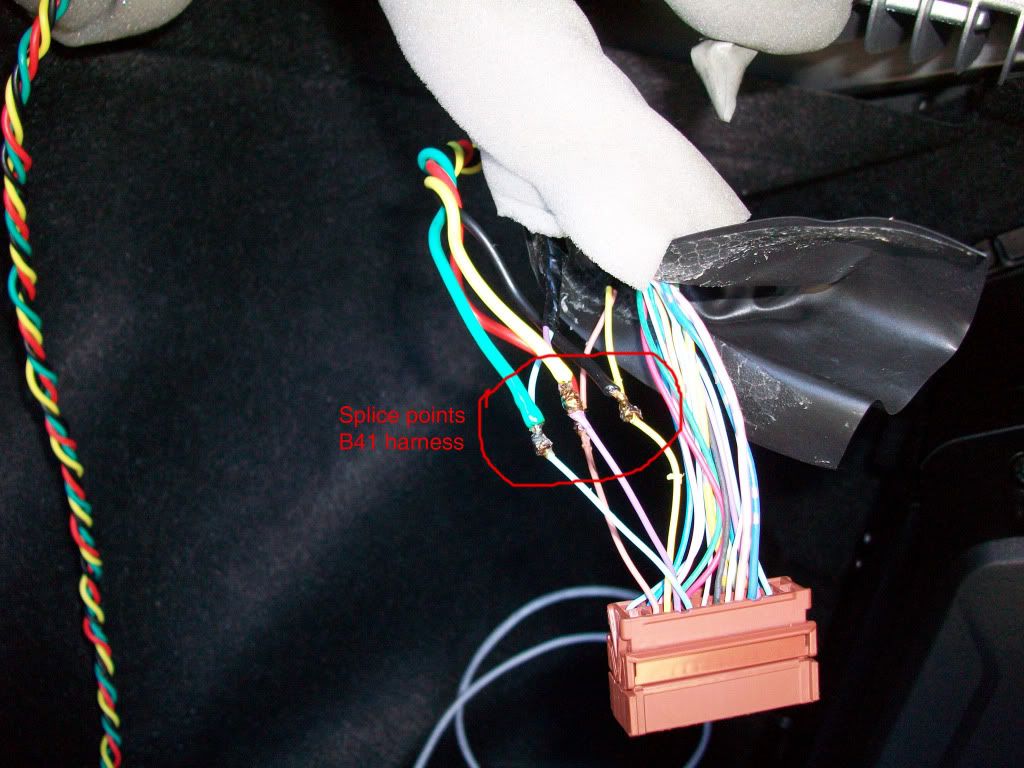
I used 23-26 going into a cut RCA cable. It's very simple, you just cut one end of a short RCA cable and solder the left/right +/- together for each side. One cable is for the tip, the other is for the sleeve. Keep the same +/- orientation for each one and you'll be fine.

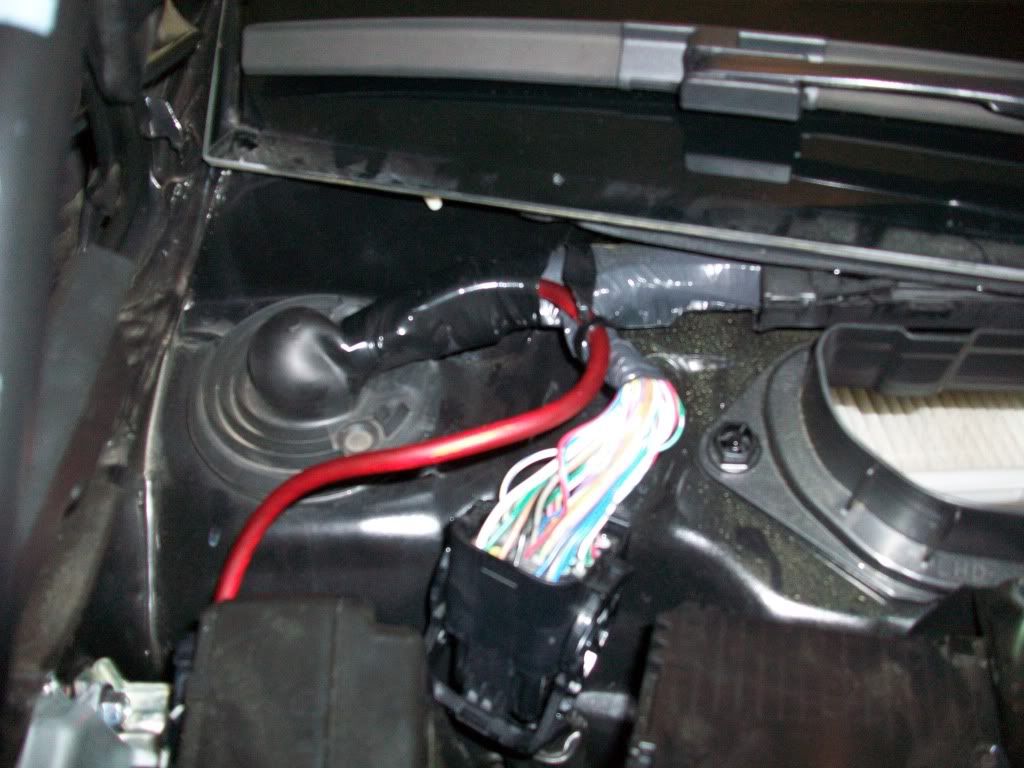
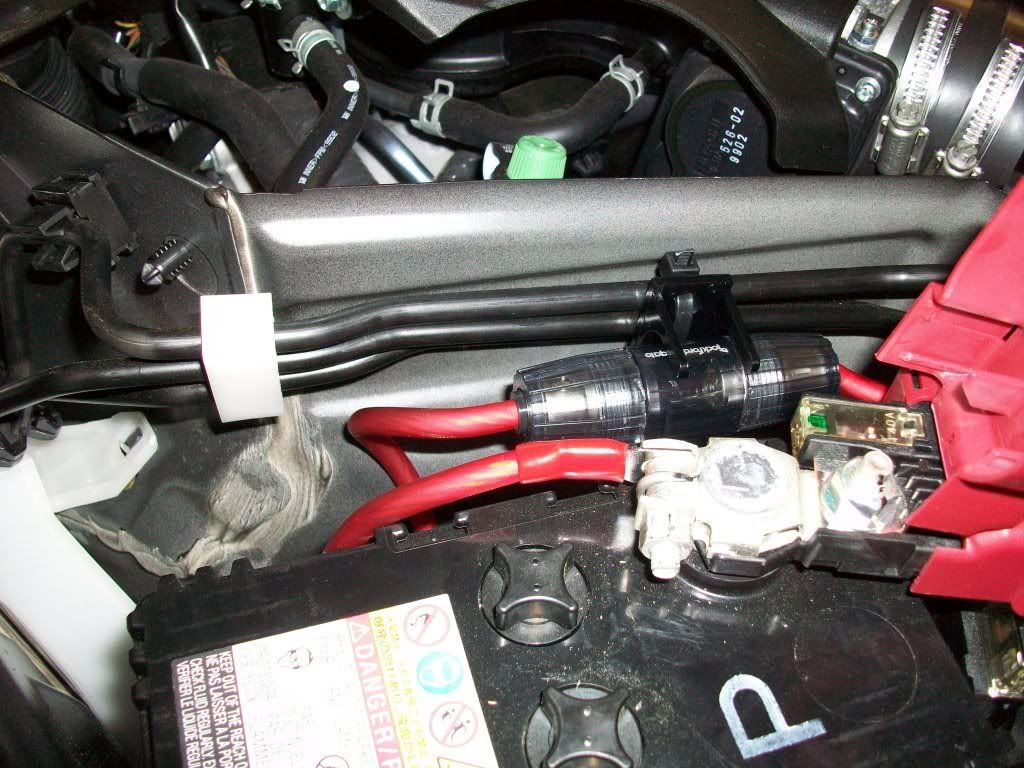
Now the power wire run...it wasn't as bad as I thought it would be. We decided to use the passenger side wiring harness behind the battery. You need to remove the plastic around the battery, including the lower windshield portion (see pic). Also, I used some electrical tape and silicon to seal up the wire.

Image

Here is how I connected to the battery:

Image

You need to remove the glove box (search for the cabin air filter replacement for that procedure). In fact, you might as well replace it while your in the area.

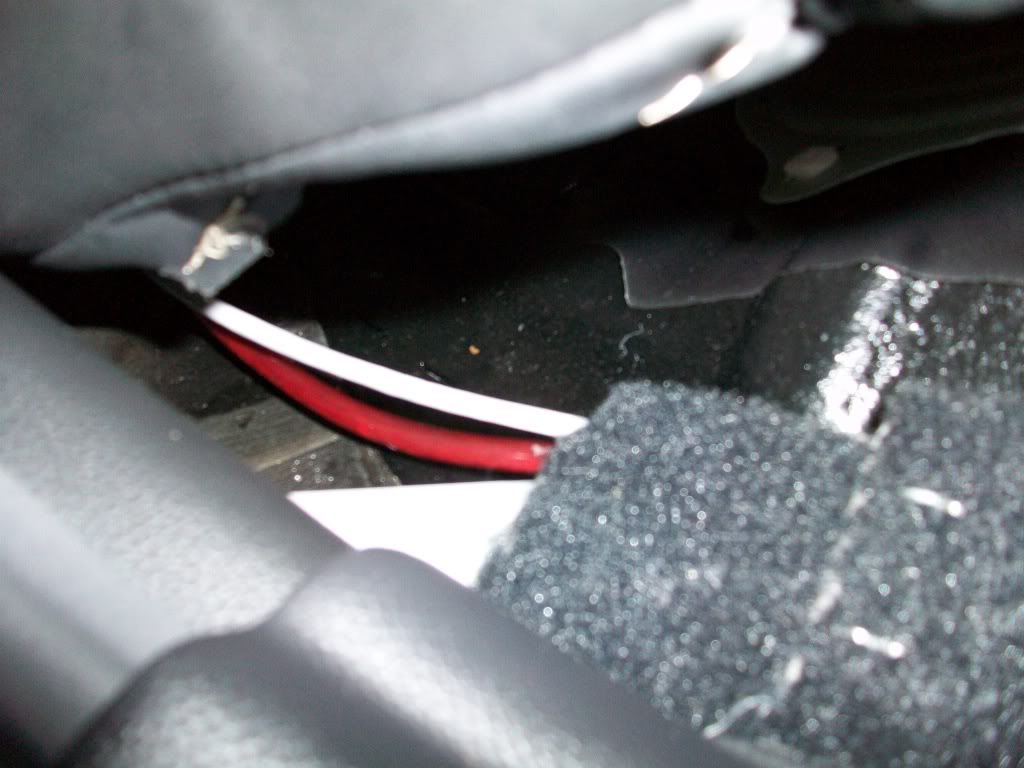
The wire will run down the side like this:

Image

And down the side of the car in the sweet OEM wire trays:

Image

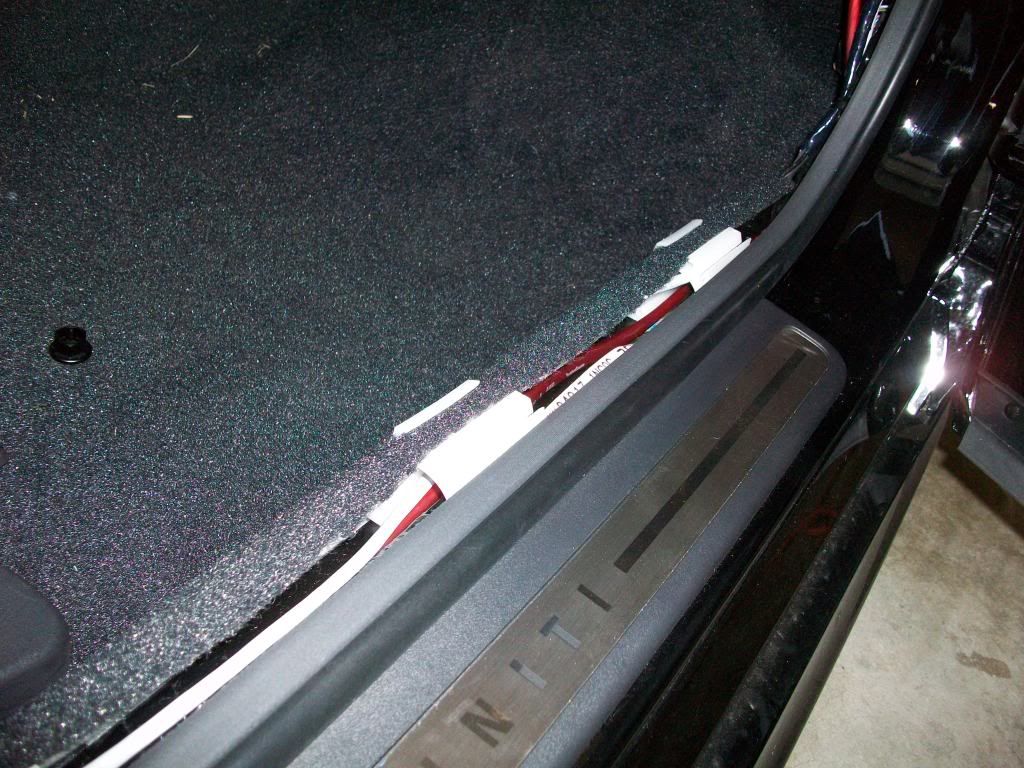
For the sedan, I used mechanical fingers to get through the center pillar between the front/rear door. Then it goes into the rear seat area, (remove the rear seat bottom to make life easier...its just 2 quick connectors) still following the car wiring track:

Image

To get into the trunk, mechanical fingers help to pull the wire through. Since the amp is on the other side, just route the wire behind the trunk cover:

Image

You'll also notice the CAT 5 cable...this is for the PEQ which I will install later. The negative wire was easy because I used a bolt for the rear seat on the drivers side. (you just need a nut that fits, which I had in my junk drawer...a home depot run may be needed)

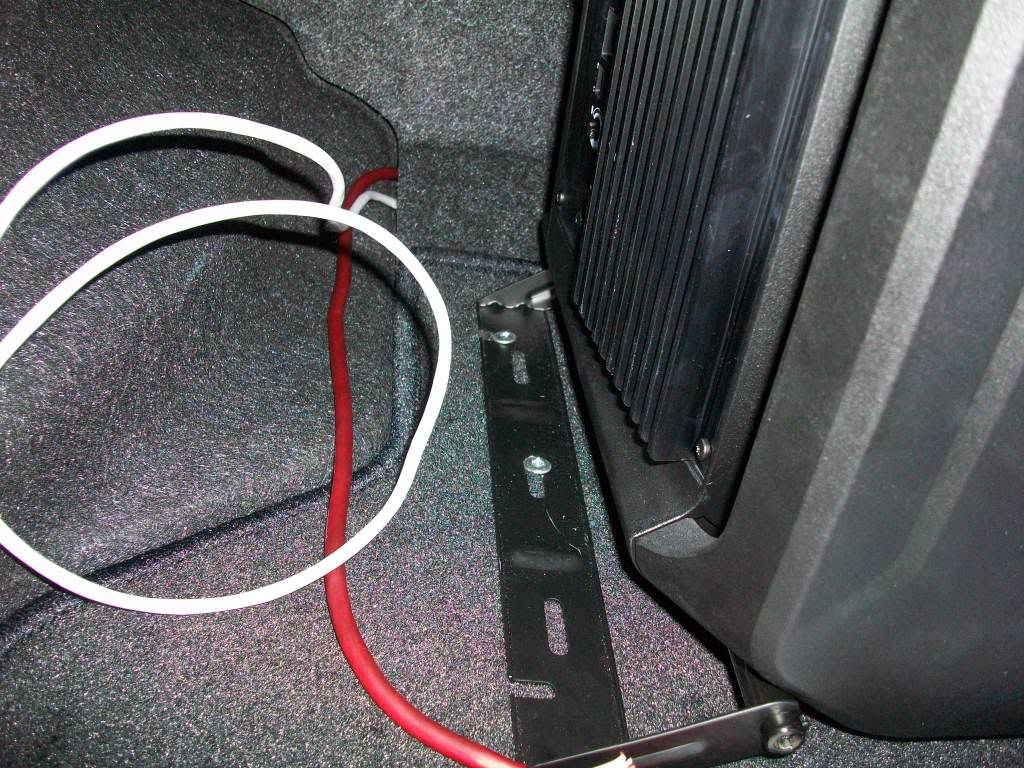
Here's the box mounted. We mounted it through the lower carpet with the underneath cut so the spare tire can be removed if needed:

Image

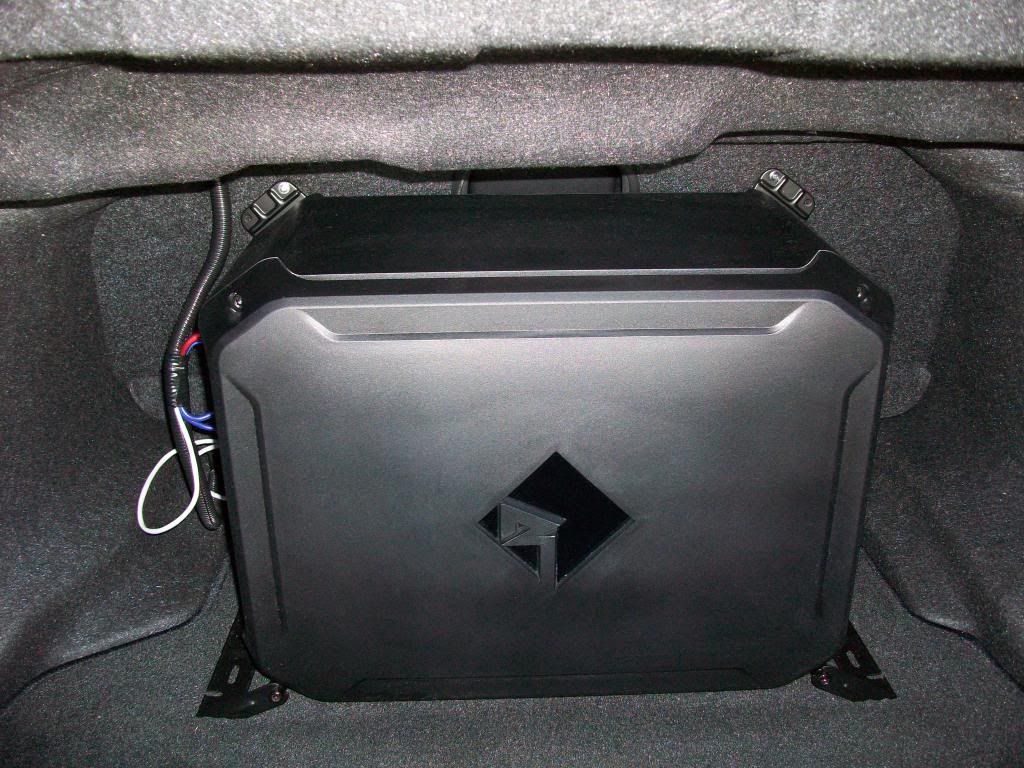
Oh, and just to let you know, there isn't anything underneath the box to get in the way of the mounting screws...but you should check to be sure. FYI, the fuel tank is underneath the rear seat. I also used the rear seat to help keep in in place.

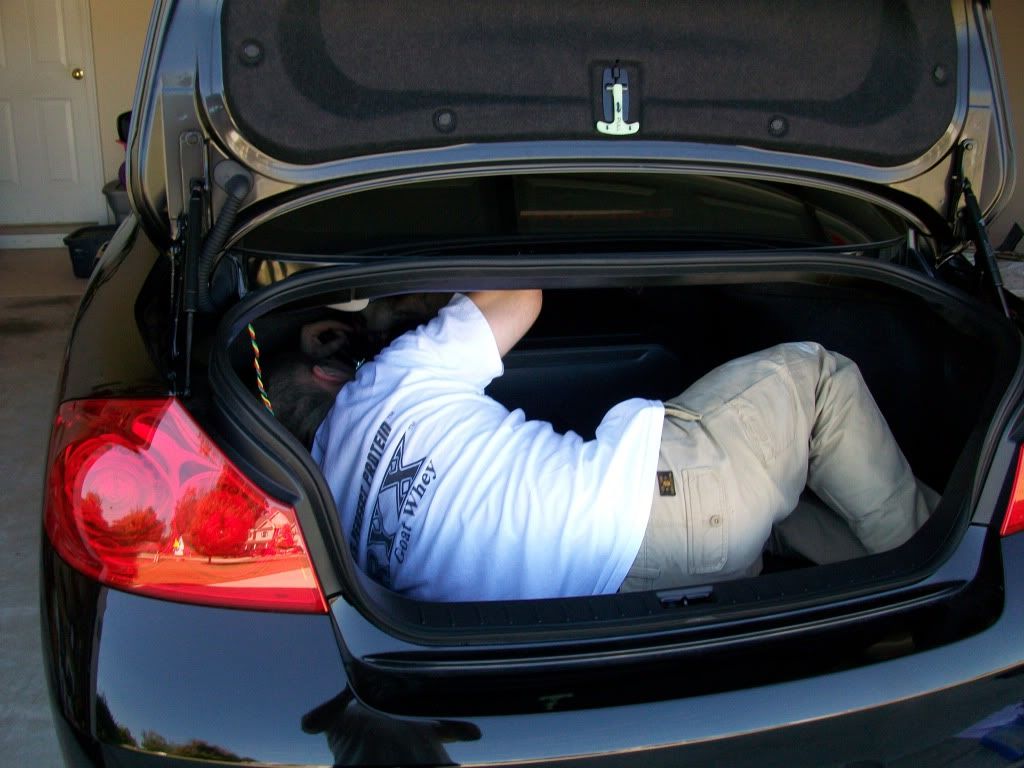
The install goes much faster with a friend...and one that fits in the trunk is a plus!!:

Image

When I install the remote gain controller, I'll post up. As for the sound...100x better than OEM! Plenty of bass to shake the rear view mirror and rattle the trunk. Dynamat needs to be installed to help with that. If you know me, then you know what I had in my last car...and this upgrade is close to that output, but for much less $$!

Let me know if you have any questions!


timmy0257
Posts: 690
Joined: Mon May 17, 2010 12:05 pm
Car: 08 Infiniti G35 Journey 5AT
-R2C Intake
-interior LEDs w/ tag lights
-SBD grounding kit
-TBW engine cover
-Eibach Pro-kit
-JL Audio


Future Mods include GT-Spec strut bar & more.
Location: Tallahassee, FL

Post

no chance I could get in my truck like that. I'm 6'6".

User avatar
LuckyLuke
Posts: 667
Joined: Wed Nov 12, 2008 1:50 pm
Car: G37s - HKS Exhaust - R2C Performance Intake
Contact:

Post

that's look heavy! :slap:

joe603
Posts: 10166
Joined: Mon Nov 21, 2005 5:45 am
Car: 2014 Durango R/T
Location: Atlanta

Post

35lbs

User avatar
audtatious
Moderator
Posts: 37008
Joined: Sun Oct 27, 2002 5:31 pm
Car: 2017 Q60 Red Sport. Gone: 2014 Q50s, 2008 G37s coupe, 2007 G35s Sedan, 2002 Maxima SE, 2000 Villager Estate (Quest), 1998 Quest, 1996 Sentra GXE
Location: Stalking You
Contact:

Post

I can get my rearview in the coupe shaking with the factory system. Can't do that in the sedan though and they are supposed to have a similar configuration. Coupe system sounds much better than the sedan and it's a reason I have not looked into "bass upgrades"....That and I'm getting too old for it ;)

Don't forget to add this to WP.

timmy0257
Posts: 690
Joined: Mon May 17, 2010 12:05 pm
Car: 08 Infiniti G35 Journey 5AT
-R2C Intake
-interior LEDs w/ tag lights
-SBD grounding kit
-TBW engine cover
-Eibach Pro-kit
-JL Audio


Future Mods include GT-Spec strut bar & more.
Location: Tallahassee, FL

Post

audtatious wrote:I can get my rearview in the coupe shaking with the factory system. Can't do that in the sedan though and they are supposed to have a similar configuration. Coupe system sounds much better than the sedan and it's a reason I have not looked into "bass upgrades"....That and I'm getting too old for it ;)

Don't forget to add this to WP.
thats probabaly due to the cabin volume. coupe is surely a bit smaller so the air moves around faster. I remember my camaro would thump with two JL w3s

User avatar
SVTCOBRA
Posts: 6052
Joined: Wed Sep 03, 2003 2:26 am
Car: 2018 Q60 AWD 2023 F150 4x4 5.0 FX4
Location: LKN NC

Post

Nice job Joe!! :dblthumb:
I think the last audio mod I did was adding a Craig Powerplay 8 track 24 watts per channel!! :mike

pippen99
Posts: 202
Joined: Thu Aug 16, 2007 12:49 pm
Car: 2010 Infiniti FX35 AWD

Post

I found just the opposite. I thought the bass in my coupes to be anemic and the loaner sedans I got when the coupes were in for service had better bass. I think the bass in my FX is better than my coupes

timmy0257
Posts: 690
Joined: Mon May 17, 2010 12:05 pm
Car: 08 Infiniti G35 Journey 5AT
-R2C Intake
-interior LEDs w/ tag lights
-SBD grounding kit
-TBW engine cover
-Eibach Pro-kit
-JL Audio


Future Mods include GT-Spec strut bar & more.
Location: Tallahassee, FL

Post

pippen99 wrote:I found just the opposite. I thought the bass in my coupes to be anemic and the loaner sedans I got when the coupes were in for service had better bass. I think the bass in my FX is better than my coupes
i think that may because of the type of subwoofers that are used. some push the perfect amount of air for the cabin volume of the vehicle they are installed in. it is definitely an engima trying to figure it out.

the FX probabaly sounds great.

User avatar
audtatious
Moderator
Posts: 37008
Joined: Sun Oct 27, 2002 5:31 pm
Car: 2017 Q60 Red Sport. Gone: 2014 Q50s, 2008 G37s coupe, 2007 G35s Sedan, 2002 Maxima SE, 2000 Villager Estate (Quest), 1998 Quest, 1996 Sentra GXE
Location: Stalking You
Contact:

Post

timmy0257 wrote:
audtatious wrote:I can get my rearview in the coupe shaking with the factory system. Can't do that in the sedan though and they are supposed to have a similar configuration. Coupe system sounds much better than the sedan and it's a reason I have not looked into "bass upgrades"....That and I'm getting too old for it ;)

Don't forget to add this to WP.
thats probabaly due to the cabin volume. coupe is surely a bit smaller so the air moves around faster. I remember my camaro would thump with two JL w3s
Boundary effects would be different for sure between sedan and coupe's rear but the front door/dash configuration is the same. Air moving faster should have nothing to do with it as sound propagates at a set rate. Now, the doors of the coupe are longer so there may be more volume for the factory sub but as I have not looked into either door I don't know for sure.

There is a difference between a G coupe and a Camaro as the later is a hatchback design. My old Probe, another hatch, bumped quite well with a single W6 and a PPI A600.

timmy0257
Posts: 690
Joined: Mon May 17, 2010 12:05 pm
Car: 08 Infiniti G35 Journey 5AT
-R2C Intake
-interior LEDs w/ tag lights
-SBD grounding kit
-TBW engine cover
-Eibach Pro-kit
-JL Audio


Future Mods include GT-Spec strut bar & more.
Location: Tallahassee, FL

Post

ahh yes you are right about the rate that sound travels. hatchbacks make for crazy bass.

User avatar
Tim30250
Posts: 259
Joined: Sun Dec 20, 2009 4:43 am
Car: 2009 G37 Journey Premium/Nav/Cargo Net!!! 2002 330Ci - Supercharged
Location: San Antonio, TX

Post

Alright, I'm gonna bring this thread back from the dead because it was very helpful, and I want to acknowledge that without reading this, I probably wouldn't have had the guts to tackle this install myself. I did everything according to the DIY except I used wires 16 and 17 for the amp signal instead of 23-26. A guy at my local stereo shop said that if you have a dedicated low frequency subwoofer signal (as any Bose equipped G37 will) it is better to use that for the amplifier inputs than a full range signal. Wires 16 and 17 (light blue and violet) are the + and - signals for the Bose sub. Splicing at these wires also made the job easier since I only had to solder 2 wire joints instead of 4.

I just have a single JL 10W0v3-4 in a sealed box with a JL 250W amp. This setup is more than adequate to deliver the deep lows that were missing from the OEM Bose system. I'm very happy I did this project, and it took me about 6 hours because I prioritized accuracy over speed. The total cost was only $350 ($100 sub, $50 enclosure, $140 amp, $60 wiring/soldering iron/wire strippers) so I saved money over a professional install and got the same stellar results!

Image

joe603
Posts: 10166
Joined: Mon Nov 21, 2005 5:45 am
Car: 2014 Durango R/T
Location: Atlanta

Post

Nice work! Glad I could help out.

I actually pulled out the sub before I sold my G37 and Installed it in my SRT8 ;)

MikeJones916
Posts: 1
Joined: Wed Jun 19, 2013 3:39 pm
Car: 2007 G35 Journey

Post

Tim30250 wrote:Alright, I'm gonna bring this thread back from the dead because it was very helpful, and I want to acknowledge that without reading this, I probably wouldn't have had the guts to tackle this install myself. I did everything according to the DIY except I used wires 16 and 17 for the amp signal instead of 23-26. A guy at my local stereo shop said that if you have a dedicated low frequency subwoofer signal (as any Bose equipped G37 will) it is better to use that for the amplifier inputs than a full range signal. Wires 16 and 17 (light blue and violet) are the + and - signals for the Bose sub. Splicing at these wires also made the job easier since I only had to solder 2 wire joints instead of 4.

I just have a single JL 10W0v3-4 in a sealed box with a JL 250W amp. This setup is more than adequate to deliver the deep lows that were missing from the OEM Bose system. I'm very happy I did this project, and it took me about 6 hours because I prioritized accuracy over speed. The total cost was only $350 ($100 sub, $50 enclosure, $140 amp, $60 wiring/soldering iron/wire strippers) so I saved money over a professional install and got the same stellar results!

Image
Hey Tim30250.

I was curious, did you use a line out converter for this install?

If so, would you happen to know if the wires you chose to run it to are the same for a 2007 G35 sedan?

I was also interested to know if you ran any amp remote turn on wire, and if so, what did you splice it into?

Thanks.

_Michael

User avatar
Tim30250
Posts: 259
Joined: Sun Dec 20, 2009 4:43 am
Car: 2009 G37 Journey Premium/Nav/Cargo Net!!! 2002 330Ci - Supercharged
Location: San Antonio, TX

Post

Joe: Thanks again, you were the key that unlocked my courage to take on this install. I appreciate you being one of the pioneers for this type of job, and glad you transferred your stuff to the next car. I'll be sure to do the same.

Michael: No LOC was needed as the signal is tapped into BEFORE the factory amplifier so it's already a low-level input for the aftermarket amp. You only need a LOC if you're feeding your aftermarket amp with an already amplified signal.

I did use a remote turn on. Even though the JL amps are supposed to automatically sense the signal and turn on by themselves, the G37 factory Bose system uses a remote turn on for the factory sub, so I just took an extra 5 minutes and tapped into it. It was the #20 wire on the B41 harness.

I wouldn't imagine there would be much difference in wiring from your '07 to my '09, but you'll want to get a diagram to confirm. You wouldn't want to do all that work and then have to redo it.


Return to “G35 and G37 Interior, Exterior and Audio”