SR20VET - Saker GT build

All over the world, Nissan products are involved in road racing, track days, time attack and autocross.
Deezal
Posts: 18
Joined: Fri May 20, 2016 4:23 am
Car: Saker GT
E60 M5

Post

Hey everybody, thought there may be one or two who could take an interest in this so here goes.

The car is a Saker GT (spaceframe kit car), in most cases they run a EJ20 but I'm more familiar with the SR platform so that is what we've opted to go with.

Specs wise the car should work out similar to the likes of a daytona prototype. Approx 950kg (2100lbs) fully laden with me in it and gas. Aiming for approx 600hp.

The car is setup with EVO 6 brembo brakes right around, I've just had a set of 2nd hand penske 8000 series shocks arrive for it. Also just ordered a rebuilt audi 01E transaxle for it and the plan is to order the remainder of the rotating assembly, studs and dry sump kit from mazworx in another month or so.

For more regular updates follow Vesuvius Racing on Facebook.

Now for some photos:

Here it is on the day we picked it up with the subaru drivetrain just sitting in place.

Image

Image

Image

Image

Image

The vents on the guards had essentially just been stuck on so one of the first jobs was trying to flare them into the body work.

Image

The rear cowling also didn't fit that well so we had to re-glass it and extend it. I have a sponsor who is going to tidy up the body and paint side of things so at this stage we're just trying to make everything fit "loosely".

Image

Image

We also extended the front splitter by 120mm and glassed in 20mm foam sandwhich for the under tray to give it some strength.

Image

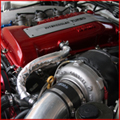
One of the next jobs was throwing the SR in to see how it was going to fit, to run a baffled sump wasn't going to work without seriously modifying the chassis and going to a dry sump will also enable us to lower the engine to get a better C.O.G. and give us more room for the cross braces coming down from the top of the fire wall.

Image

Then we set to making up the diffuser and wing mounts, the idea was to try and make it somewhat resemble the Group C cars that it is loosely based on by making it more of a "long tail" deisgn.

Image

Image

Image

Made up a bracket to mount the digital dash off the bosskit

Image

Currently this is basically how it sits, rear bodywork still needs mounts made up to attach it properly.

Image

Image

Image


The hit list for the next few weeks is to get the seat mounted up, attach jacking points to the chassis as you cant fit one under the bodywork. Finish setting up the head, mount the rear bodywork and get the Penske's bolted in.


User avatar
2_Liter_Turbo
Posts: 2980
Joined: Sat Jan 24, 2004 10:41 am
Car: _________________
'96 S14 Coupe: SR20VET
'90 R32 TH1 GTR: RB26DETT
'92 S13 Fastback: SR20DET
'11 V36 Sedan: VQ25HR
'06 GMT800 2500HD: LBZ Duramax
Location: DFW, Texas
Contact:

Post

Very nice! I'm excited to see how this goes. I've always thought about doing a kit car with an SR or even an RB down the road. What is your plan for the engine build?

Deezal
Posts: 18
Joined: Fri May 20, 2016 4:23 am
Car: Saker GT
E60 M5

Post

The engine specs at this stage are, still waiting to order a lot of it but this is the plan.

Head:

Standard P11 head
P12 cas for the ignition
SR16VE cams
Standard valves (for now)
Q45 TB

Misc:

Excessive plenum with standard runners
Custom steam pipe exhaust manifold
2000CC injectors
Cosworth head gasket
50mm GFB wastegate

Block:

Standard crank
ACL bearings
Mazworx main & head studs
New nissan oil pump
Mazworx dry sump kit
CP 9:1 pistons
Manley turbo tuff rods

It will end up with a custom fly wheel, twin plate clutch and adapter plate to mate it to the O1E transaxle.

Will be running a Link G4 ECU and most likely a GT35 equivalent holset or borgwarner turbo

User avatar
2_Liter_Turbo
Posts: 2980
Joined: Sat Jan 24, 2004 10:41 am
Car: _________________
'96 S14 Coupe: SR20VET
'90 R32 TH1 GTR: RB26DETT
'92 S13 Fastback: SR20DET
'11 V36 Sedan: VQ25HR
'06 GMT800 2500HD: LBZ Duramax
Location: DFW, Texas
Contact:

Post

Very nice! Why did you choose 2000cc injectors? Seem a little large for a 600whp goal. I have about the same goal for my SR and I just picked up 1300cc ID's for E85. Unless you want more room to grow :D Then I answer my own question, ha ha.

Deezal
Posts: 18
Joined: Fri May 20, 2016 4:23 am
Car: Saker GT
E60 M5

Post

I was going to get 1300's but I scored a set of 2nd hand 2000's that hadn't done much work quite cheap.

I'm only looking at 500-550whp (600ish at the crank) on E85, I didn't want to do anymore in a race motor that will be seeing over 8000rpm consistently. To push it any further I'd be doing billet main caps, sleeves, over-sized valves etc. Not to say that it won't get done in a few years, the money was better spent on doing the dry sump and ATI damper for now, when the car will be capable of over 2 lateral G's it was a higher priority.

Our dyno's in the southern hemisphere typically read 10% lower than they do up north, most people put it down to bragging rights.

User avatar
2_Liter_Turbo
Posts: 2980
Joined: Sat Jan 24, 2004 10:41 am
Car: _________________
'96 S14 Coupe: SR20VET
'90 R32 TH1 GTR: RB26DETT
'92 S13 Fastback: SR20DET
'11 V36 Sedan: VQ25HR
'06 GMT800 2500HD: LBZ Duramax
Location: DFW, Texas
Contact:

Post

Ahh, that makes total sense! Definitely keep us updated, it's definitely a cool build!

Deezal
Posts: 18
Joined: Fri May 20, 2016 4:23 am
Car: Saker GT
E60 M5

Post

Suspension is now bolted in but the mounting points still need some work.

Got the head shimmed last night, all within spec now to suit the VZR cams.

Started mounting the seat, hopefully have that finished this week, nothing is "off the shelf".

Also made some mounting brackets to attach the rear bodywork and welded (and painted) pipes onto the chassis to give us some jacking points as the car is too low.

This is how it sits currently.

Image

Image

Image

Image

Image

Image

User avatar
AZhitman
Administrator
Posts: 71063
Joined: Mon Apr 29, 2002 2:04 am
Car: 58 L210, 63 Bluebird RHD, 64 NL320, 65 SPL310, 66 411 RHD, 67 WRL411, 68 510 SR20, 75 280Z RB25, 77 620 SR20, 79 B310, 90 S13, 92 SE-R, 92 Silvia Qs, 98 S14.
Location: Surprise, Arizona
Contact:

Post

Very cool. Love the jacking arrangement.

My early Datsuns (specifically, the Roadster and Bluebird) have "ports" in the rocker panel where a jack insert can be placed (once you pull out the plug). Smart design, and allows 2 wheels to be lifted simultaneously.

Deezal
Posts: 18
Joined: Fri May 20, 2016 4:23 am
Car: Saker GT
E60 M5

Post

Cheers, the idea is to have a 12mm bolt through the pipe you can see with another pipe hinging off that with a "washer" welded on it an inch from the end of the pipe. You can take the dish out of the jack head and slip the pipe down in the jack head and it will stop once it hits the "washer" and that will lock it in the jack. The vertical pipe being long enough that you still effectively have the full travel of the jack otherwise it's half way through its travel to get to where you see in the photo.

User avatar
AZhitman
Administrator
Posts: 71063
Joined: Mon Apr 29, 2002 2:04 am
Car: 58 L210, 63 Bluebird RHD, 64 NL320, 65 SPL310, 66 411 RHD, 67 WRL411, 68 510 SR20, 75 280Z RB25, 77 620 SR20, 79 B310, 90 S13, 92 SE-R, 92 Silvia Qs, 98 S14.
Location: Surprise, Arizona
Contact:

Post

Perfect. Nice engineering, and the light weight of the car makes it easier to come up with a creative solution.

Carry on - Eager to follow the updates!

User avatar
Antihero
Posts: 28
Joined: Mon May 16, 2011 6:22 pm
Car: 1996 Corolla
1978 280z (2nd owner, my 3rd Z)
2013 BRZ
Location: Gilmanton, NH

Post

Absolutely fantastic build.

Deezal
Posts: 18
Joined: Fri May 20, 2016 4:23 am
Car: Saker GT
E60 M5

Post

About time for another update, been studying for my final trade exam so haven't got a lot done.

Put my order in at Mazworx, hopefully see it in a month or so.

Image

Head is shimmed and ready to go

Image

Got the chassis rails cleaned up and removed the urethane from the previous owners motor mounts.

Image

Seat is now roughly in place, haven't worked out what we're going to do for harness mounting points as of yet.

Image

Paperwork for the roll cage Homolgation has finally showed up also

Image

Trans arrived yesterday courtesy of Advanced Automotion, already got somebody lined up for sorting out the adapter plate.

Image

Image

The gear ratio's should equate to the speeds you see below assuming I go with these tyres. It should be almost on the limiter in 5th with that gearing on my local track.

Image

User avatar
2_Liter_Turbo
Posts: 2980
Joined: Sat Jan 24, 2004 10:41 am
Car: _________________
'96 S14 Coupe: SR20VET
'90 R32 TH1 GTR: RB26DETT
'92 S13 Fastback: SR20DET
'11 V36 Sedan: VQ25HR
'06 GMT800 2500HD: LBZ Duramax
Location: DFW, Texas
Contact:

Post

I may have missed it, but what transmission is that? Looking awesome so far!

Deezal
Posts: 18
Joined: Fri May 20, 2016 4:23 am
Car: Saker GT
E60 M5

Post

The transaxle is an Audi 01E out of a fwd TDI model so it has the wider first gear. It's got different ratios installed with a cryo main shaft and a wavetrac diff.

Hopefully it'll do the trick, had looked at converting a subaru trans but this should be a lot stronger, especially when it has a 10" cw&p.

User avatar
2_Liter_Turbo
Posts: 2980
Joined: Sat Jan 24, 2004 10:41 am
Car: _________________
'96 S14 Coupe: SR20VET
'90 R32 TH1 GTR: RB26DETT
'92 S13 Fastback: SR20DET
'11 V36 Sedan: VQ25HR
'06 GMT800 2500HD: LBZ Duramax
Location: DFW, Texas
Contact:

Post

Awesome! I wouldn't trust a subaru transmission anyways, ha ha.

Deezal
Posts: 18
Joined: Fri May 20, 2016 4:23 am
Car: Saker GT
E60 M5

Post

Last weekend we made a start on the adapter plate and got it bolted onto the back of the SR.

Image

Dropped it off at a local engineering firm during the week and they made up an adapter from the back of the crank to the input shaft to center it and then doweled the transmission.

Then it was time to make the flex plate fit within the adapter plate and modify the adapter to fit the standard SR20 starter motor in the factory location, we've recessed the adapter so the starter sits in nicely. The trans will need minor modification to allow for the starter motor when it pops out and engages.

Image

Image

Having that done enabled us to mark out what holes on the 01E we wanted to use and drill them to suit.

Image

So now she all bolts up nicely, just got to get it cut out with a bandsaw and countersink a couple more holes and she's as good as done.

Image


Other than that I got the degreaser and wire brush out and tidied up a few other bits and pieces

Image

Deezal
Posts: 18
Joined: Fri May 20, 2016 4:23 am
Car: Saker GT
E60 M5

Post

Adapter plate is all cut out now

Image

Also got the trans and motor bolted back up and did their first test fit in the chassis, now to start making some mounts for each of them and getting stuff to fit. The stub axles for the trans aren't far off lining up with the splines on the hubs so that's just another bonus.

Image

Image

Deezal
Posts: 18
Joined: Fri May 20, 2016 4:23 am
Car: Saker GT
E60 M5

Post

My order from Mazworx was delayed by a few weeks and only left a couple of days ago but I should have it in 10 days or so.

In the mean time I ordered a few other bits and pieces to keep me busy.

Made up some brackets to mount the intercoolers and oil cooler, still need to make some shrouds to stop the air from bleeding off around the sides and we should have some pipes here this week to start joining things up, can't finish it untill we have the manifolds in place and the turbo.

Image

Image

Image

Image

Image

Also started working out how we'll mount the harness in and what is required to modify the seat, have the chief scrutineer coming around this week to discuss that and getting a custom fuel cell made to fit in behind the drivers seat.

Image

Radiator also showed up so that's also on the to do list to make some mounting brackets for that and then some brake ducting etc.

Image

Also made some inquiries with DSS and cableshift.com in regards to getting the shifter setup and getting some axles to suit the trans and subie hubs.

User avatar
2_Liter_Turbo
Posts: 2980
Joined: Sat Jan 24, 2004 10:41 am
Car: _________________
'96 S14 Coupe: SR20VET
'90 R32 TH1 GTR: RB26DETT
'92 S13 Fastback: SR20DET
'11 V36 Sedan: VQ25HR
'06 GMT800 2500HD: LBZ Duramax
Location: DFW, Texas
Contact:

Post

I had a similar thing happen with Mazworx some years back. Awesome products, but expect a few delays, ha ha. Everything is looking great though!

Deezal
Posts: 18
Joined: Fri May 20, 2016 4:23 am
Car: Saker GT
E60 M5

Post

Thanks, the hit list keeps getting smaller. Yeah, they won't be getting a great review from me for the customer service and communication but if everything shows up and is as awesome as I'm lead to believe it should be then I really can't complain.

Deezal
Posts: 18
Joined: Fri May 20, 2016 4:23 am
Car: Saker GT
E60 M5

Post

Progress has been a bit slow lately, heaps of stuff is ordered and won't be here for a few weeks yet.

Made a start on the shrouds for the intercoolers and radiator, Radiator one still needs a little bit of modifying and then make some mounts for the radiator itself.

Image

Image

Also got the seat and mounts well on the way for mounting the harness through them, had to widen and strengthen the top a bit for piece of mind and to get the belts at the right width apart.

Shipment also showed up finally, the moment of truth was getting the inlet manifold in position and confirming my fears that it will need some modification to clear the firewall. Will shorten the plenum and the Q45 TB a little so we can get enough room to fit a 3.5" bend infront and line everything up.

Also won't be able to fit the dry sump tank where I'd originally planned but I've found a solution just unfortunately means I'll have to route the lines back and forth across the firewall.

Image

Image

Image

Image

Most recent update:

Got the seat finished, just need the mount in the floor now for the crotch belt. Door cards, internal door releases and door close straps are all done now also. Plenum and IC pipes are also welded up and I've started to give them a bit of a polish up. Dry sump tank and breather tank are also bolted up, now just need to weld some mounts onto the chassis to bolt the backing plate too and give the coolers a flush. Also got the drivers side radiator pipe bent to suit so that will run through the suspension out to the radiator.
Dad drew the flywheel up last week and I've just ordered the ecu and fuel pumps etc so that's another few things ticked off the hit list. For the sake of simplicity and fuel volume now though I think I'll have to run a traditional fuel cell in the passengers side of the car instead of trying to run a passengers seat and get a custom alloy tank made to fit behind the seats and seal that off.

Image

Image

Image

Image

Image

Image

Image

Deezal
Posts: 18
Joined: Fri May 20, 2016 4:23 am
Car: Saker GT
E60 M5

Post

Progress has been a bit slow, the old saying of two steps forward one step back definitely rings true. Turbo, BOV and FPR showed up courtesy of Rapid last week but as suspected it sits too high to fit under the chassis so now I'm looking into getting a custom "top mount" twin scroll manifold to drop the turbo down to where I'd like it. In the process of working out how much room we've got I realised the alternator doesn't fit so now I'll have to make an adapter to move the relocation bracket up 30mm to allow the alternator to clear the chassis rail.

Thanks to Anthony from Ralston Sheetmetal I've got most of the IC piping in and polished up again, obviously can't finish that untill we have the final location of the turbo.

Got the reservoirs for the shocks mounted up, fuel pump brackets have many uses. Rear view camera also showed up so got the screen mounted on the dash.

Image

Image

Image

Image

Image

Image

Image

Image

Felt like a kid at Christmas the last few days, flywheel is now finished and ready to be sent off to get balanced with the rest of the rotating assembly. G4 storm, coils, fuel pumps, surge tank, breather bottle, fuel cell, radiator pipes etc have all shown up aswell as the radiator duct and the intake cowling so I've got plenty to do for the next few weeks.

Flywheel is only 7.8kg (17lbs) which isn't bad at all given how deep it is to get the twin plate clutch to fit on the spline of the input shaft.

Image

Image

Image

Image

Image

Image

Deezal
Posts: 18
Joined: Fri May 20, 2016 4:23 am
Car: Saker GT
E60 M5

Post

Got a bit more done lately, the intake scoop on the rear cowling and the radiator vent and deflector on the front so now she should be able to breathe.

Also made a start on the exhaust manifold, will have to modify the motor mount slightly to get clearance on cylinder no#2 otherwise it should tidy up okay given how limited we are for space.

Also had the clutch and a few other parts show up as well as the slicks, the wheels should be underway courtesy of 41 degree wheels either this week or next.

Doesn't look like it'll be ready for the December meeting like I'd hoped but we'll have plenty of time to get it ready to rock for Speedfest in February.

Image'

Image

Image

Image

Image

Image

Image

Image

Image

Image

------------------------------------------------------------------------------------

Time for a pre Bathurst update. Got the manifold as good as finished, just need to plumb up the wastegate. As a result I've got the piping sorted out to go to the pod filter and will be finishing off the intercooler piping up to the turbo in the coming days.

The last of my parts have also arrived from the states, M300 custom axles to go between the subaru hubs and audi trans aswell as the cable shift setup, the mounting brackets for the trans took a little modification but got pretty good feel with the shifter now.

Also got most of the radiator piping sorted out and a custom reservoir all cut up and ready to get welded.

Wing uprights have been galved and painted and will have most of the bodywork around to Dean Howden to get tidied up in the next week or two.

Image

Image

Image

Image

Image

Deezal
Posts: 18
Joined: Fri May 20, 2016 4:23 am
Car: Saker GT
E60 M5

Post

About time for another update, I'd been holding off till I got a few other items finished but as is always the way with builds of this nature, something always slows ya down.

Huge thanks to Dean Howden for getting the first half of the car painted, now it's just a case of getting the remainder of the car finished and dropping it off in the new year to get tidied up.

Courtesy of Limitless motorsport my new precision wastegate and plazmaclamp have also showed up which enabled me to finish off the intercooler piping. We're in the midst of finishing off the exhaust manifold but given the space constraints and size of the wastegate it's taking some time to get it right.

I've also mocked up the enclosure for the fuel cell which Ralston's are fabricating for me at the moment and opted to move the surge tank and fuel pumps to the engine bay and leave the lift pump in the enclosure with the fuel cell.

Gary from Probuilt Engines has also finished setting up the bottom end for me and between Dad and I have started assembling the remainder of the motor. Hope to have it finished in the next week or so depending on what takes priority.

Another job I've started on is mocking up the switch panel for the car and mounting the ecu, saving the wiring till last as I'm dreading it a little. Got the fuel, oil and vacuum lines all planned out.

Replaced the old rubber brake lines with new braided ones and greased and assembled the hubs/wheel bearings.

Another big thanks to The Driveshaft Shop, after my custom axles showing up from the states and finding they'd stuffed up the lengths, they got another one landed in Invercargill in a couple of weeks and now everything fits a treat.

Image

Image

Image

Image

Image

Image

Image

Image

Image

Image

Image

Image

Image

Image

Image

User avatar
2_Liter_Turbo
Posts: 2980
Joined: Sat Jan 24, 2004 10:41 am
Car: _________________
'96 S14 Coupe: SR20VET
'90 R32 TH1 GTR: RB26DETT
'92 S13 Fastback: SR20DET
'11 V36 Sedan: VQ25HR
'06 GMT800 2500HD: LBZ Duramax
Location: DFW, Texas
Contact:

Post

It's looking fantastic! Great progress!

Deezal
Posts: 18
Joined: Fri May 20, 2016 4:23 am
Car: Saker GT
E60 M5

Post

Thanks, I'm pretty happy with how it's coming together.

Finally got the exhaust manifold finished off, the precision 66mm gate proved to be difficult to find space for but still a lot easier than 2 38's.
Started plumbing up the fuel and oil system, got the coils in and mounted up. Welded tags on to mount the dry sump tank and breather.
Also got the motor 90℅ together, still need a few bits and pieces to finish it off. All going well I hope to have it in the car this coming weekend and get the clutch and trans setup.
The first of the wheels showed up from 41 degrees just to check the measurements before it gets tidied up and the rest are made to suit.
Slowly getting closer.

Image

Image

Image

Image

Image

Image

-----------------------------------------------------------------------------------------------------

Found that the clutch won't fit in the trans as it hits the housing for the diff so will hopefully get the flywheel machined down 5mm during the week so everything fits like it should as we had the first clutch plate approx 5mm onto the input shaft anyway.

Decided to slap the trans on anyway and get everything in the car for the first time. Huge thanks to Anthony from Ralston sheetmetal for getting the intercooler and water piping welded up for me, only a few things left to tidy up. Then it's just a case of flushing it all out and clamping it down.
Got the fuel feed and return lines from the fuel rail done aswell so half the fuel system is plumbed up.

Dash and switch panel are now vinyl wrapped black which made a huge difference, got the boost controller mounted and tabs welded on to mount the switch panel. Just a case of painting and drilling it out to suit now. Another job done was getting the conduits in and mounted for running the wiring, vacuum lines and throttle cable through to the engine bay. Also got an extra bit of box section welded in the passenger's side to give me more fixing points for when the fuel cell goes in there next weekend hopefully.

Notched the chassis rail to get enough clearance for the alternator to fit, and modified the P10 throttle pedal to make it a floor mount so it sits nicely next to the wilwood pedal box.

Image

Image

Image

Image

Image

Image

Deezal
Posts: 18
Joined: Fri May 20, 2016 4:23 am
Car: Saker GT
E60 M5

Post

Hi everybody, long time between updates but it's not due to getting nothing done.

Weight as pictured was 880kg with 20L of gas in it.

Fuel and oil system's are finished.

Wiring is as good as done, all the essential things are finished. Except for possibly needing to reroute the cas wiring.

You'll see from the boost curve that I'm having a hard time getting it spooled, currently working through multiple theories as to why.

Going back to the cas wiring, the car wouldn't cleanly rev past about 7000rpm on the dyno. Tried rerouting the cas out the passengers window and removing it from the engine loom and it made no difference. Next test will be to try extra earths off the coils to the block. The cas itself is brand new from nissan and has a pretty good fit in the back of the cam. Getting it back from the body shop tomorrow and will get the side windows in and tidy up a few things and go from there. Long weekend for me so will try and hire the track for all 3 days. Running 16VE cams they might have too much overlap which may also be causing issues with exhaust flow in the mid range.

https://www.youtube.com/watch?v=KOCTHQ96PQo

Image

Image

Image

Image

Image

Image

Image

Image

Image

Had a few minor issues on the first shakedown run, main one being the rebuilt head I bought didn't have the frost plugs in very well. Luckily I appear to have got it shut down fast enough to avoid seriously damaging anything but it was a little too close for comfort. Lost a lot of water.

Image

Image

Deezal
Posts: 18
Joined: Fri May 20, 2016 4:23 am
Car: Saker GT
E60 M5

Post

Just occurred to me I haven't updated this in ages, for those who are interested visit http://zilvia.net/f/showthread.php?t=631187 or https://www.facebook.com/vesuviusracing/


Return to “Nissan Road Racing / Auto X Forum”