s14 Build
-
bllabong89
- Posts: 485
- Joined: Tue Sep 01, 2009 1:25 pm
- Car: 1995 s14
Re: s14 Build
So I didn't work on my car last night as I got sucked into Crackdown 2 on the 360 but I did manage to spend 50 on fiberglass materials. Today on my lunch break, I went to cycle gear to get stuff for my bike for the track this weekend and I was raped there...215 for 4 qts of oil, 4 spark plugs, an oil filter and front brake pads. I guess it will be a little bit before I spend anymore money on my car so the next few updates will most likely be me using the materials I now have... 
-
motoman399

- Posts: 2982
- Joined: Mon Oct 09, 2006 9:18 pm
- Car: 98' wrecked (RHD coming soon) 240
- Location: Eureka, Ca
- Contact:
Re: s14 Build
what bike do you have?
-
bllabong89
- Posts: 485
- Joined: Tue Sep 01, 2009 1:25 pm
- Car: 1995 s14
Re: s14 Build
I have a 2001 Honda CBR 929rr. This is my first bike so what they say about starting with a 600 is bs. I'm about 5'6" and 150 and I havent layed it down yet and I do stupid s*** on it(wheelies, speeding, twisties, stoppies,etc.). About a month after I got it, the second gear went out so everytime I would click into second, it would pop into neutral. I found out that it would cost less to buy a new motor than rebuild the transmission so I bought a 954rr engine and stuck that in. I also have a yosh pipe and vortex +9 rear sprocket.

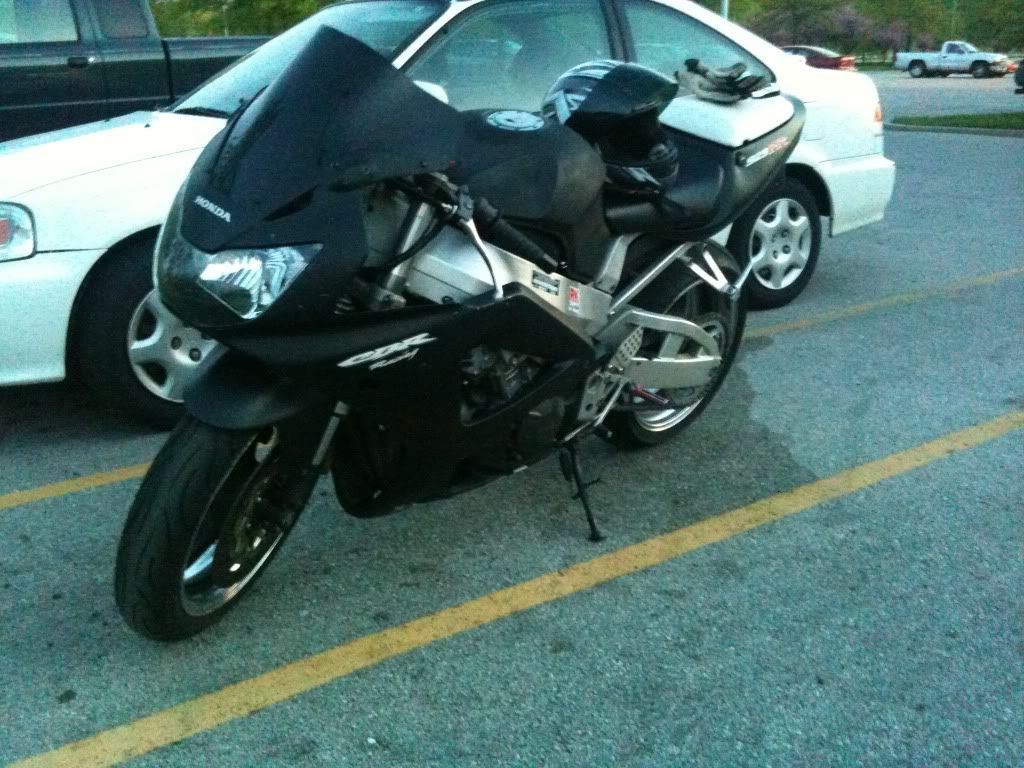

The guy that I got it from rigged it all up so I had to buy new clip ons, new fairings, and some other things. I changed the plugs, oil and clip-ons last night and they made it the most difficult thing possible to change plugs and throttle cables. There are 2 throttle cables, one opens the butterfly valves and one snaps the twist throttle back when they close. One cable was easy to put on, the other...not so easy. It took me about 1.5 hrs for one cable because they put it on the bottom where you can't see it if the valves are open or closed...fml.

Then as you can see bellow, the spark plugs aren't in a very good spot. For these, I used a 15mm socket, socket extension, dropped those in, put another small extension on, loosened them with channel locks, pulled the second extension off, pulled the socket and extension out, used a pocket driver with a magnet on it to pull the spark plug. Then dropped the new plug in, dropped the socket and extension in, put the second extension on and stuck a pocket driver in the hole on the second extension to tighten the plugs down...Sounds fun huh?

So basically I spent alot of time on simple things and I still have to adjust my forks, adjust my clip-ons, fill the oil, put the airbox, velocity stacks, and gas tank on and then put my fairings on. FFFFFFFFFFMMMMMMMMMMLLLLLLLLLLL. This could be time and money spent on my car but no, I just had to race my bike tomorrow.lol
The guy that I got it from rigged it all up so I had to buy new clip ons, new fairings, and some other things. I changed the plugs, oil and clip-ons last night and they made it the most difficult thing possible to change plugs and throttle cables. There are 2 throttle cables, one opens the butterfly valves and one snaps the twist throttle back when they close. One cable was easy to put on, the other...not so easy. It took me about 1.5 hrs for one cable because they put it on the bottom where you can't see it if the valves are open or closed...fml.
Then as you can see bellow, the spark plugs aren't in a very good spot. For these, I used a 15mm socket, socket extension, dropped those in, put another small extension on, loosened them with channel locks, pulled the second extension off, pulled the socket and extension out, used a pocket driver with a magnet on it to pull the spark plug. Then dropped the new plug in, dropped the socket and extension in, put the second extension on and stuck a pocket driver in the hole on the second extension to tighten the plugs down...Sounds fun huh?
So basically I spent alot of time on simple things and I still have to adjust my forks, adjust my clip-ons, fill the oil, put the airbox, velocity stacks, and gas tank on and then put my fairings on. FFFFFFFFFFMMMMMMMMMMLLLLLLLLLLL. This could be time and money spent on my car but no, I just had to race my bike tomorrow.lol
-
motoman399
- Posts: 2982
- Joined: Mon Oct 09, 2006 9:18 pm
- Car: 98' wrecked (RHD coming soon) 240
- Location: Eureka, Ca
- Contact:
Re: s14 Build
lol looks sweet. how much was the new engine? my friend has an old honda car with an air cooled 2 cylinder and he wants to use a big street bike honda engine. lol
i used to have an 02 r6. it was my first street bike but i have been riding since i was 4. and raced for a few years. im going to have to agree with the statement that a beginner should start with no more than a 600. and thats because MOST people arent as good as you are. and wont be as comfortable and will try a wheelie before they are ready. and 90% will go over backwards. at least thats how i see it. i have taught a bunch of people how to ride and know how people react..
good job on cleaning the bike up though. i bet it rips. was it carburated before?
-
bllabong89
- Posts: 485
- Joined: Tue Sep 01, 2009 1:25 pm
- Car: 1995 s14
Re: s14 Build
I paid 900 shipped for the new engine. Yea, my whole point on beginners is that you will most likely love to ride and if you buy a bigger bike from the start, you wont have to upgrade. The bike will only go as fast as you make it, its not gonna do it on its on, ya know. But yea, the bike has come pretty far to date but there are still more things I need to do. I am thinking of a turbo in the future if I keep it. There is a local shop that builds some of the fastest turbo'd busas in the states so its a possibility.
The bike was never carburated. The 929rr was made in 2000 and 2001 and was a fuel injected 929cc bike. I believe it was mostly the 600's around that date that were carburated if I am correct. I think most bigger bikes were fuel injected but I could be wrong.
The bike was never carburated. The 929rr was made in 2000 and 2001 and was a fuel injected 929cc bike. I believe it was mostly the 600's around that date that were carburated if I am correct. I think most bigger bikes were fuel injected but I could be wrong.
-
bllabong89
- Posts: 485
- Joined: Tue Sep 01, 2009 1:25 pm
- Car: 1995 s14
Re: s14 Build
UPDATE
This is what I saw at the lake of the Ozarks last weekend...a bmw 330i. I just don't know what is going on here...


So I know I haven't updated much on the car lately so I figured I would try to get atleast one in before I got to mexico for a week. I live in Missouri aka misery and the tempature fluctuates like no other and lately it has been hot.

I decided to fight the heat and get some work in so I began work by removing some of the a/c lines in the engine bay. I removed this cylindrical thing(don't know what it is) and a couple lines on the passenger side and disconnected the line on the drivers side.


Before:

After:

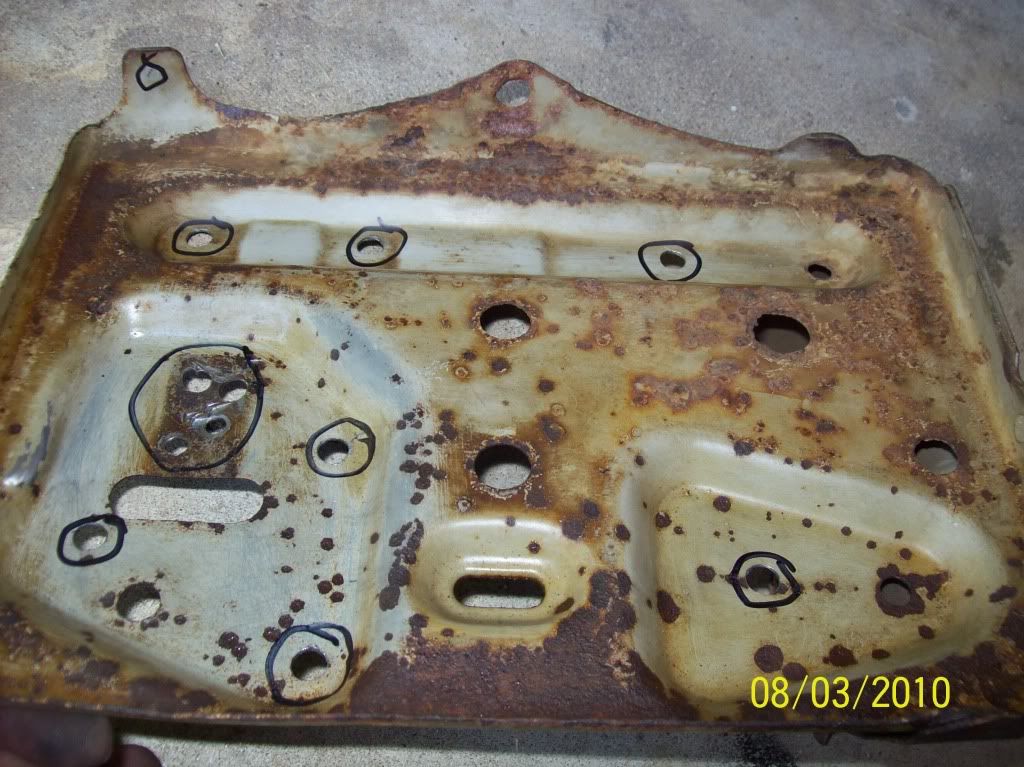
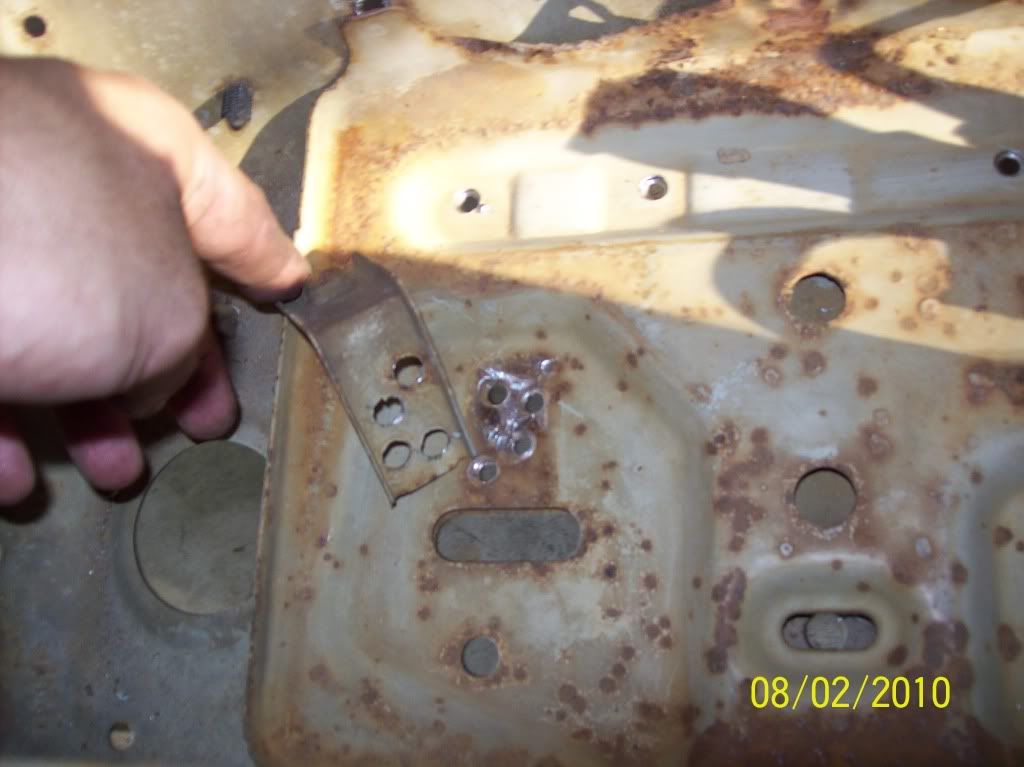
With those out of the way, I began to remove the battery tray. It is full of spot welds and is pretty easy if you know where to look so I will help you and maybe do a write up. First I will show the tray with the holes circled so you know where to look.
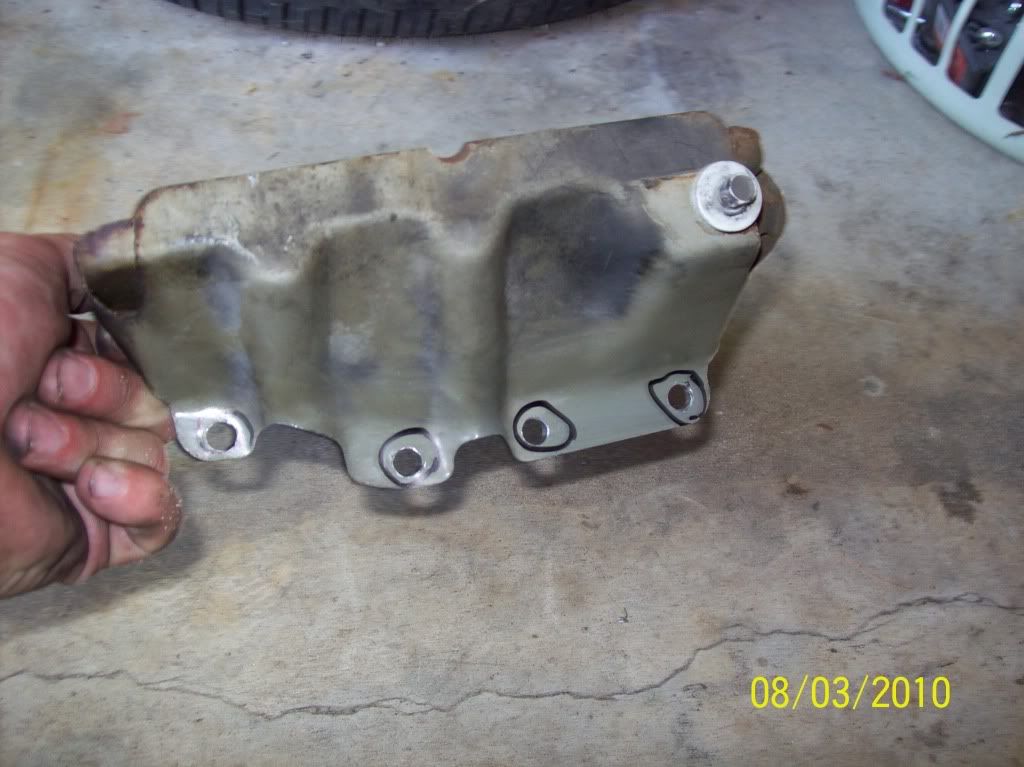
And here is it being removed. I recommend an air hammer(makes life easier). I'm not sure what size drill bits I used but I used one to drill the hole out all the way thru and then a larger one to punch thru just the metal on the tray. You can punch thru both metal of the tray and of the car but that is a larger hole left over. You can also buy a spot weld drill bit set to drill out just the spot weld but I'm cheap and lazy.lol
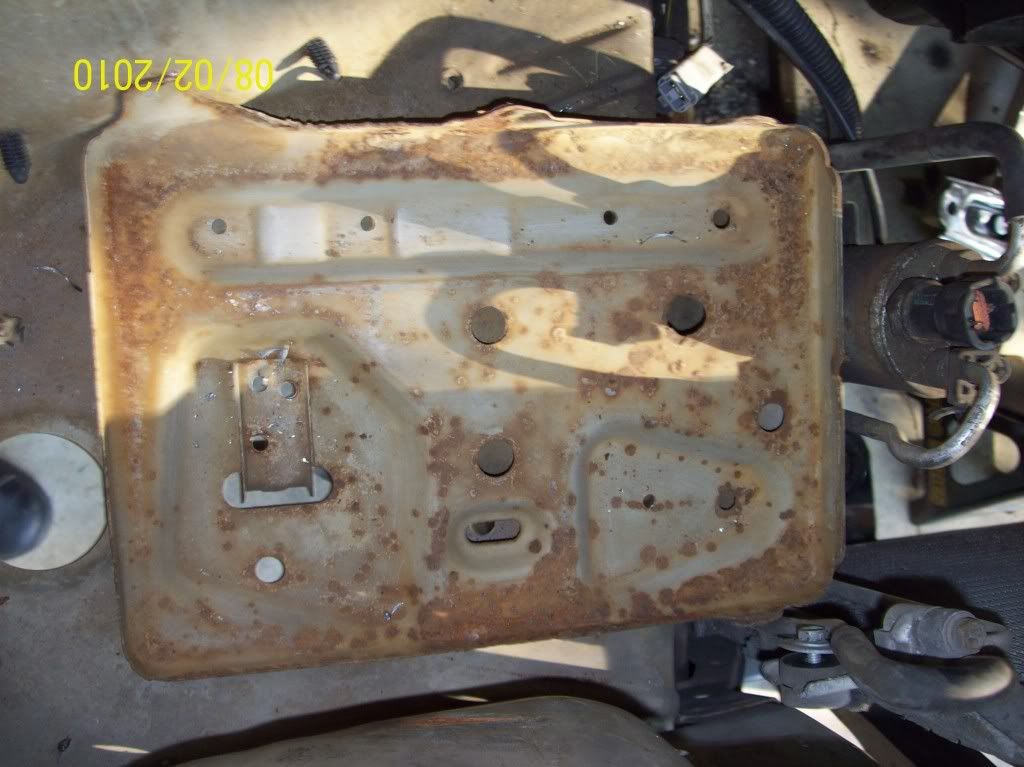
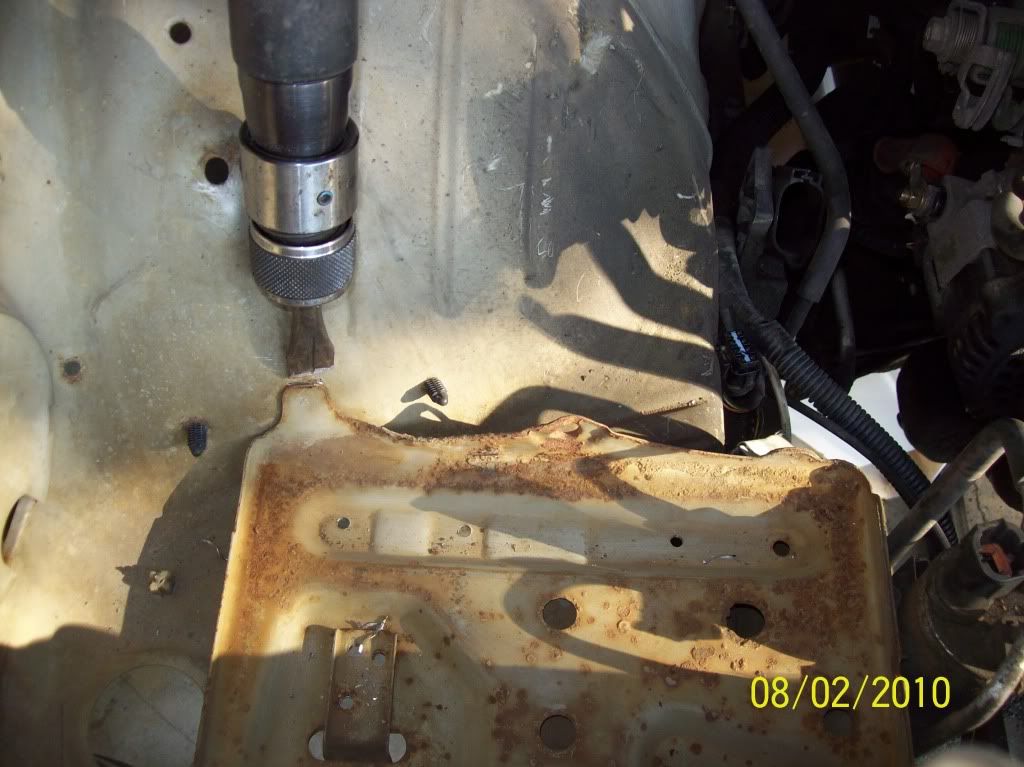
And here is the aftermath...after I scraped the gunk off the car.lol

I also figured I should show a pic of how dirty this motor is and then a pic of how its sitting as of now. I will try to get some more work done before I leave saturday. Enjoi


This is what I saw at the lake of the Ozarks last weekend...a bmw 330i. I just don't know what is going on here...
So I know I haven't updated much on the car lately so I figured I would try to get atleast one in before I got to mexico for a week. I live in Missouri aka misery and the tempature fluctuates like no other and lately it has been hot.
I decided to fight the heat and get some work in so I began work by removing some of the a/c lines in the engine bay. I removed this cylindrical thing(don't know what it is) and a couple lines on the passenger side and disconnected the line on the drivers side.
Before:
After:
With those out of the way, I began to remove the battery tray. It is full of spot welds and is pretty easy if you know where to look so I will help you and maybe do a write up. First I will show the tray with the holes circled so you know where to look.
And here is it being removed. I recommend an air hammer(makes life easier). I'm not sure what size drill bits I used but I used one to drill the hole out all the way thru and then a larger one to punch thru just the metal on the tray. You can punch thru both metal of the tray and of the car but that is a larger hole left over. You can also buy a spot weld drill bit set to drill out just the spot weld but I'm cheap and lazy.lol
And here is the aftermath...after I scraped the gunk off the car.lol
I also figured I should show a pic of how dirty this motor is and then a pic of how its sitting as of now. I will try to get some more work done before I leave saturday. Enjoi

Re: s14 Build
That's the AC Dryer (also called accumulator) and seperates moisture from the AC system. When you have moisture in your lines, it makes the condensor run warmer and makes the AC run warmer.bllabong89 wrote:I removed this cylindrical thing(don't know what it is)...
I am with you, it is too damn hot to work on the car
Re: s14 Build
build looks awesome. i had a EK hatch before i got my 240 too. actually EK hatchbacks are my favorite. ive owned 6 of them

-
bllabong89
- Posts: 485
- Joined: Tue Sep 01, 2009 1:25 pm
- Car: 1995 s14
Re: s14 Build
I see, well you learn something new everyday.lol. I also forgot to mention I picked up a gallon of Aircraft Stripper and some fiberglass resin so I will be starting on the underbody coating removal and application process and fixing my back bumper so it actually fits.
Yea, that thing looks clean. Ek's are by far the best looking civic in my opinion.
Yea, that thing looks clean. Ek's are by far the best looking civic in my opinion.
-
bllabong89
- Posts: 485
- Joined: Tue Sep 01, 2009 1:25 pm
- Car: 1995 s14
Re: s14 Build
***UPDATE***
So I took of to mexico on the 6th and got back on the 13th. It was awesome there and even though it was all inclusive, I managed to spend $550 out of the $750 I brought.lol

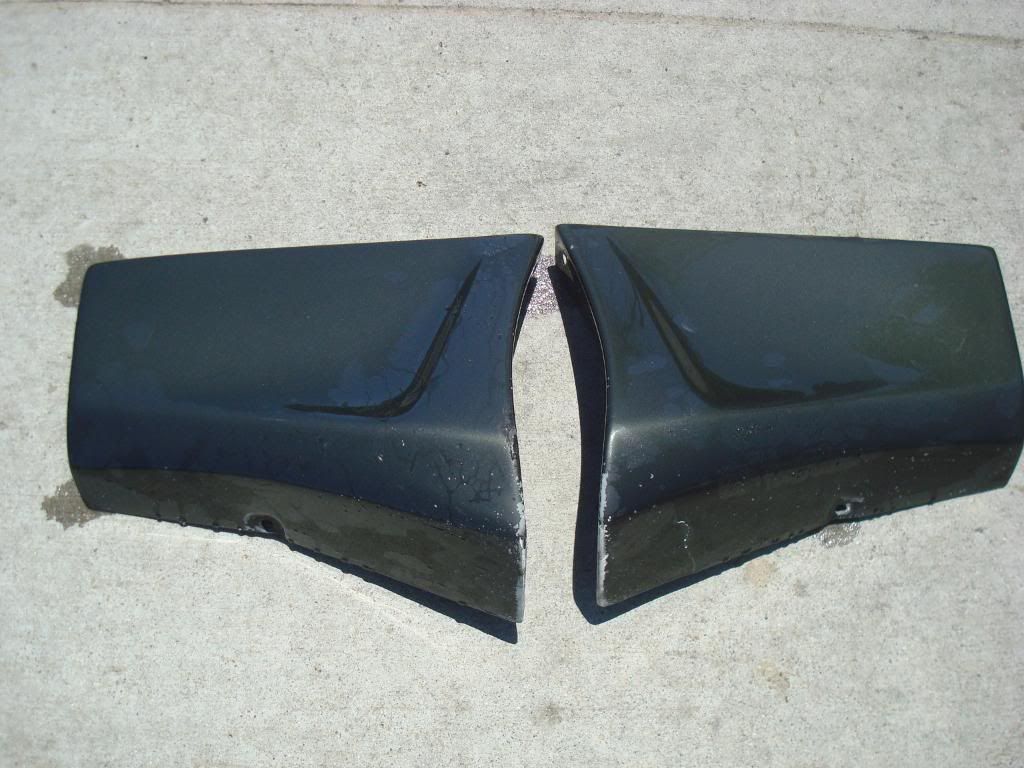
I got back and decided to work on my car a little bit. I really need to get some body work done so I started trying to mock up the back bumper. Whenever it was on, the sides would flare out atleast 6 inches on each side. I figured I would cut it and re-fiberglass it back together. I dont know how well it will work yet but there is only one way to find out.
This is what it looked like before for an idea(bad pic...sorry)

I decided to cut the sides off and screw the bumper on to try and work with it a little bit.

After that, I used some tape to hold them on to get an idea of what it will look like once it's complete.


And the exhaust clearence...

The clearence is a little tight due to the exhaust being cocked a little to the left.

Now, since I have been back with some money left over and a pay check waiting for me, I went on a spending spree a little bit. I found this replica Bride low max for 350...I offered the guy 150 and ended up paying 175 for it. It is brand new and looks pretty nice. Don't worry though, once I get the rest of my car up to par, this seat will be my xbox seat.lol.


Nismo is right at home.lol.

I also ordered a set of Muteki SR48 Lug nuts and I found some Bomex rear valances on zilvia that I bought. Now, I am waiting on my goodies to get here.


And for the road...

So I took of to mexico on the 6th and got back on the 13th. It was awesome there and even though it was all inclusive, I managed to spend $550 out of the $750 I brought.lol
I got back and decided to work on my car a little bit. I really need to get some body work done so I started trying to mock up the back bumper. Whenever it was on, the sides would flare out atleast 6 inches on each side. I figured I would cut it and re-fiberglass it back together. I dont know how well it will work yet but there is only one way to find out.
This is what it looked like before for an idea(bad pic...sorry)
I decided to cut the sides off and screw the bumper on to try and work with it a little bit.
After that, I used some tape to hold them on to get an idea of what it will look like once it's complete.
And the exhaust clearence...
The clearence is a little tight due to the exhaust being cocked a little to the left.
Now, since I have been back with some money left over and a pay check waiting for me, I went on a spending spree a little bit. I found this replica Bride low max for 350...I offered the guy 150 and ended up paying 175 for it. It is brand new and looks pretty nice. Don't worry though, once I get the rest of my car up to par, this seat will be my xbox seat.lol.
Nismo is right at home.lol.
I also ordered a set of Muteki SR48 Lug nuts and I found some Bomex rear valances on zilvia that I bought. Now, I am waiting on my goodies to get here.
And for the road...
-
motoman399
- Posts: 2982
- Joined: Mon Oct 09, 2006 9:18 pm
- Car: 98' wrecked (RHD coming soon) 240
- Location: Eureka, Ca
- Contact:
Re: s14 Build
im not sure whats going on here.. you bought the rear bumper and cut off the sides, and now your putting on the bomex valances instead? i dont know what those look like for an s14, but when my friend had a bomex kit on his eclipse it was garbage.. but also to each his own lol.
-
bllabong89
- Posts: 485
- Joined: Tue Sep 01, 2009 1:25 pm
- Car: 1995 s14
Re: s14 Build
no, no, no...I will be fiberglassing the parts that I cut off back on. I just bought the valances because they were a good deal so if and when I mess up the rear bumper, I will have something to kind of complete the rear end until I get another back bumper. Just trying to think ahead
-
motoman399
- Posts: 2982
- Joined: Mon Oct 09, 2006 9:18 pm
- Car: 98' wrecked (RHD coming soon) 240
- Location: Eureka, Ca
- Contact:
Re: s14 Build
oh lol good work then.
so where did you go in mexico? i went there a couple years ago and also went to an all inclusive resort and it was a freaking blast!
im the one in the middle

lol
so where did you go in mexico? i went there a couple years ago and also went to an all inclusive resort and it was a freaking blast!
im the one in the middle
lol
-
bllabong89
- Posts: 485
- Joined: Tue Sep 01, 2009 1:25 pm
- Car: 1995 s14
Re: s14 Build
lol...nice. I went to Riviera Maya. It was like 30-40 mins south of cancun I think at a resort called Now Saphire
-
motoman399
- Posts: 2982
- Joined: Mon Oct 09, 2006 9:18 pm
- Car: 98' wrecked (RHD coming soon) 240
- Location: Eureka, Ca
- Contact:
Re: s14 Build
oh cool. i went to playa del carmen which is about an hour south of cancun. freaking awesome beaches there. got any interesting stories about your trip?
-
bllabong89
- Posts: 485
- Joined: Tue Sep 01, 2009 1:25 pm
- Car: 1995 s14
Re: s14 Build
Yea, nothing crazy really. I went with my gf and her family and her cousins family. Half the time we were there, we were babysitting her 20 year old brother who cant handle his alcohol. Went to a place called Coco Bongo that was pretty sick and to Xel-ha to go snorkeling and then scuba diving in the ocean.
-
motoman399
- Posts: 2982
- Joined: Mon Oct 09, 2006 9:18 pm
- Car: 98' wrecked (RHD coming soon) 240
- Location: Eureka, Ca
- Contact:
Re: s14 Build
haha when i went i was babysitting my 22 year old cousin lol. and there was a coco bongo place that just opened, but we kept going back to the blue parrot. well cool man. mexico rocks lol.
-
bllabong89
- Posts: 485
- Joined: Tue Sep 01, 2009 1:25 pm
- Car: 1995 s14
Re: s14 Build
Yea, I wish I didn't have to come back.lol
-
bllabong89
- Posts: 485
- Joined: Tue Sep 01, 2009 1:25 pm
- Car: 1995 s14
Re: s14 Build
So I started to do some fiberglass work on the back bumper. I won't have any real pictures until I tomorrow but here are a couple just for now. I found another issue with the back bumper. When it is on and the trunk is closed, there is a gap between the bottom of the headlights and the bumper. I wouldn't mind so much if the gap wasn't close to an inch or so at the highest point.

I have found that using Fleece as a fabric for fiberglass work has its advantages. I used it on the sub box that I built and it is very easy to work with. When getting curves down, you can stretch it and because it is so thick, it absorbs the resin very well and cuts the time down dramatically when it comes to adding layers. One layer of fleece is the equivalant to about 3 or 4 layers of woven fiberglass at the least. And it is fairly cheap, I paid about 10 or 20 bucks for like 10 yards of it at a fabric store.

Again, I have only fiberglassed my box and haven't done body work prior to this so It may look a little rough when I get the pics up but bare with me on this one.lol
And here is what I saw when going to look at new cars for my girl...

I will try to get the bumper mostly finished tonight and I have found another thing to try my fiberglass skills on pretty soon here so you will just have to wait and see whats in store next...
I have found that using Fleece as a fabric for fiberglass work has its advantages. I used it on the sub box that I built and it is very easy to work with. When getting curves down, you can stretch it and because it is so thick, it absorbs the resin very well and cuts the time down dramatically when it comes to adding layers. One layer of fleece is the equivalant to about 3 or 4 layers of woven fiberglass at the least. And it is fairly cheap, I paid about 10 or 20 bucks for like 10 yards of it at a fabric store.
Again, I have only fiberglassed my box and haven't done body work prior to this so It may look a little rough when I get the pics up but bare with me on this one.lol
And here is what I saw when going to look at new cars for my girl...
I will try to get the bumper mostly finished tonight and I have found another thing to try my fiberglass skills on pretty soon here so you will just have to wait and see whats in store next...
-
bllabong89
- Posts: 485
- Joined: Tue Sep 01, 2009 1:25 pm
- Car: 1995 s14
Re: s14 Build
***UPDATE***
So I worked on the car a little bit yesterday. I had done some fiberglass work over the last couple of days and finally got enough time to work on it some more. I had bought an orbital sander for some body work yesterday too. I started shaping the fiberglass areas up with my grinder with a flap disk on it(made it quick work). I still need to add some more to the top of the bumper to make it sit flush with the tail lights.

I dunked the fleece in the resin so it could fully soak up the resin. After that, I laid it on the sides of the bumper where I had cut part of it off. I also cut squares and repeated the step but put them on the inside to strengthen it from both sides. Now that the resin had fully cured, I began to take take the fleece off of the visible side of the bumper. Because the fleece is so thick, it would be almost impossiple to make the bumper smooth.
After I shaved it off, I began to lay fiberglass mat on it and apply the resin with a cheap paint brush. Now I can shape it and smooth it out alot easier.

And you've gotta love fiberglass work...

I am going to have to fix a crack in my valances too. They came in the mail yesterday and there was a small crack that I was un-aware of before.

I also bought some new stuff. I got EVO powerslot rotors, a d2 hydro ebrake and some lug nuts. My brake setup is almost complete, just need to get the brackets now.

And can you guess what will be happening to this???

So I worked on the car a little bit yesterday. I had done some fiberglass work over the last couple of days and finally got enough time to work on it some more. I had bought an orbital sander for some body work yesterday too. I started shaping the fiberglass areas up with my grinder with a flap disk on it(made it quick work). I still need to add some more to the top of the bumper to make it sit flush with the tail lights.
I dunked the fleece in the resin so it could fully soak up the resin. After that, I laid it on the sides of the bumper where I had cut part of it off. I also cut squares and repeated the step but put them on the inside to strengthen it from both sides. Now that the resin had fully cured, I began to take take the fleece off of the visible side of the bumper. Because the fleece is so thick, it would be almost impossiple to make the bumper smooth.
After I shaved it off, I began to lay fiberglass mat on it and apply the resin with a cheap paint brush. Now I can shape it and smooth it out alot easier.
And you've gotta love fiberglass work...
I am going to have to fix a crack in my valances too. They came in the mail yesterday and there was a small crack that I was un-aware of before.
I also bought some new stuff. I got EVO powerslot rotors, a d2 hydro ebrake and some lug nuts. My brake setup is almost complete, just need to get the brackets now.
And can you guess what will be happening to this???
-
TheBlaiant
- Posts: 300
- Joined: Sat Jul 25, 2009 9:54 am
- Car: Slow40sx
- Location: Miami, FL
- Contact:
Re: s14 Build
^ Your gonna use them?
-
bllabong89
- Posts: 485
- Joined: Tue Sep 01, 2009 1:25 pm
- Car: 1995 s14
Re: s14 Build
lol. Yes I will be using them but I have a new part in mind...it includes a light bulb, an air duct and some fiberglass...
-
motoman399
- Posts: 2982
- Joined: Mon Oct 09, 2006 9:18 pm
- Car: 98' wrecked (RHD coming soon) 240
- Location: Eureka, Ca
- Contact:
Re: s14 Build
mind filling me in?bllabong89 wrote:it includes a light bulb, an air duct and some fiberglass...
where are you getting the fenders for the kouki?
-
bllabong89
- Posts: 485
- Joined: Tue Sep 01, 2009 1:25 pm
- Car: 1995 s14
Re: s14 Build
All in good time. When I bought the front end, I got the fenders with it but one was busted up. I worked at a body shop at the time so I bought a new one from Nissan and even with My discount it cost $300. Kinda depressing if you ask me. Lol
-
motoman399
- Posts: 2982
- Joined: Mon Oct 09, 2006 9:18 pm
- Car: 98' wrecked (RHD coming soon) 240
- Location: Eureka, Ca
- Contact:
Re: s14 Build
ya the fenders are redic. i am buying mine from europe for cheaper than i can get them in the states. even after shipping its cheaper. lol

Re: s14 Build
you said before that you were going to buy new coilovers if and when you do im interested in your used ones... let me know.

-
bllabong89
- Posts: 485
- Joined: Tue Sep 01, 2009 1:25 pm
- Car: 1995 s14
Re: s14 Build
So I didn't get much work done on the car...again. I did lay some more fiberglass down on the back bumper but don't have any pics right now. I am going to work on it some more tonight and I will get some pics for you guys.
Drift Indy was in town so I went to the event on saturday and it was a pretty good show. The one time you actually get to drive the road course at Gateway International Raceway and I don't have a car to drive.
But anyways, heres some pics.


And this is the guy that I bought my kouki front from. He got another s14 with a kouki front.

If I knew how to put videos up, I would but that is it for now.
I went on a little cruise saturday. There were two of my buddies with a white and a black wrx, my other friend with his 95 s14 w/ sr20, their buddy with a vw golf and I cruised on my bike.

On a serious note, I need to figure out something for the back brake setup. Does anyone have any ideas and if so, what all is needed for the conversion. I suck with brake knowledge so I am clueless on this stuff and I don't think I will be finding sti rear brembos any time soon.
I am going to be selling my Navan wing so if anyone wants it before I put it up, pm me.
Zenki504 I will let you know when am going to sell my coilovers.
Lincoln Continental

Drift Indy was in town so I went to the event on saturday and it was a pretty good show. The one time you actually get to drive the road course at Gateway International Raceway and I don't have a car to drive.
But anyways, heres some pics.
And this is the guy that I bought my kouki front from. He got another s14 with a kouki front.
If I knew how to put videos up, I would but that is it for now.
I went on a little cruise saturday. There were two of my buddies with a white and a black wrx, my other friend with his 95 s14 w/ sr20, their buddy with a vw golf and I cruised on my bike.
On a serious note, I need to figure out something for the back brake setup. Does anyone have any ideas and if so, what all is needed for the conversion. I suck with brake knowledge so I am clueless on this stuff and I don't think I will be finding sti rear brembos any time soon.
I am going to be selling my Navan wing so if anyone wants it before I put it up, pm me.
Zenki504 I will let you know when am going to sell my coilovers.
Lincoln Continental
-
motoman399
- Posts: 2982
- Joined: Mon Oct 09, 2006 9:18 pm
- Car: 98' wrecked (RHD coming soon) 240
- Location: Eureka, Ca
- Contact:
Re: s14 Build
i was curious on this also. i talked with broadfeild, he is running stoptech brakes in the front (which are going to be similar to our brembo's i believe) and z32 rear brakes. i asked him if the front brakes grabbed before the rears, and he said that it seemed to be a good combo. so i think im sticking with my z32's. i would go with the sti rear brakes, but they are about 500 for a set....bllabong89 wrote: On a serious note, I need to figure out something for the back brake setup. Does anyone have any ideas and if so, what all is needed for the conversion. I suck with brake knowledge so I am clueless on this stuff and I don't think I will be finding sti rear brembos any time soon.
-
bllabong89
- Posts: 485
- Joined: Tue Sep 01, 2009 1:25 pm
- Car: 1995 s14
Re: s14 Build
yea, what all is needed for the z32 brake setup? do I just need the calipers and rotors and conversion lines or are there parts that I am forgetting? Are you using the aluminum 30mm or what?
-
motoman399
- Posts: 2982
- Joined: Mon Oct 09, 2006 9:18 pm
- Car: 98' wrecked (RHD coming soon) 240
- Location: Eureka, Ca
- Contact:
Re: s14 Build
im not positive on this, but i think that all the rear brakes are the same. they are aluminum, and then the fronts get the iron/aluminum 26mm and 30mm. i have the 30mm iron fronts and aluminum rears off of a 94 300zx tt but im not going to be using the front brakes of them.
for the rear brake setup, you need the hubs, brake dust cover, ebrake assy, brake lines (either stock z32 ones or conversion ones), calipers and rotors. one reason im going with the hydro ebrake is because i have the tt rear hubs which used a bigger spline count on the axle shaft so i would have to trace down n/a hubs to use the ebrake assy. its just easier to fab a hydro one.
for the rear brake setup, you need the hubs, brake dust cover, ebrake assy, brake lines (either stock z32 ones or conversion ones), calipers and rotors. one reason im going with the hydro ebrake is because i have the tt rear hubs which used a bigger spline count on the axle shaft so i would have to trace down n/a hubs to use the ebrake assy. its just easier to fab a hydro one.