
Difficulty: ***
Time: 3 hours
Cost: refurbished rack minus core
Materials:
- Steering Rack Assembly including but not limited to:
-- Inner Tie Rods
-- Outer Tie Rods
-- Cotter Pins
-- Tie Rod dust boots
-- Hard and soft lines
-- Steering Rack Bushings
-- 1 or more quarts of Automatic Transmission Fluid (ATF, I used less than 1qt, just a precaution)
-- PB Blast or other rust removal solvent
Tools:
- Jack and jackstands
- 12, 14, 17mm open ended/box wrenches
- 17, 18, 19, 21mm sockets
- Socket wrench
- 3” or longer socket extension
- Breaker Bar
- Universal Joint separator (Not sure of the name, but they cost about $15)
- Fluid Drain pan
- A Friend, definitely helps
Procedure:
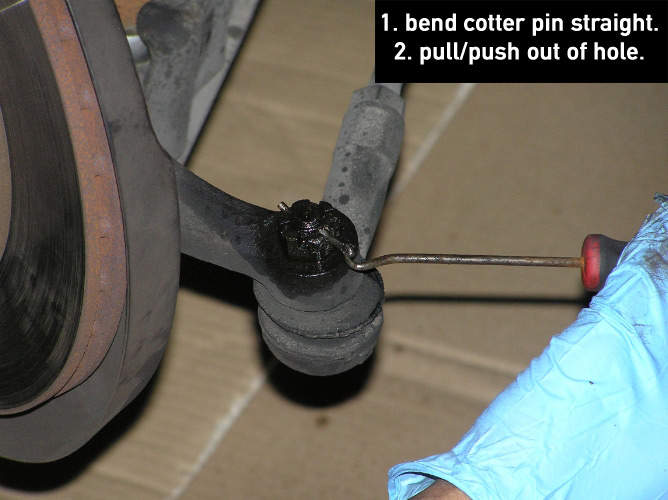
-Raise and support front of car, Remove wheels using 21mm socket. -Turn steering wheel away from side of vehicle you are working on to access Tie Rod bolts. Remove Cotter pin from Castle nut with needle nose pliers.
-Using 18 or 19mm socket (notes oily, sorry), use PB Blast if necessary, and remove castle nuts.
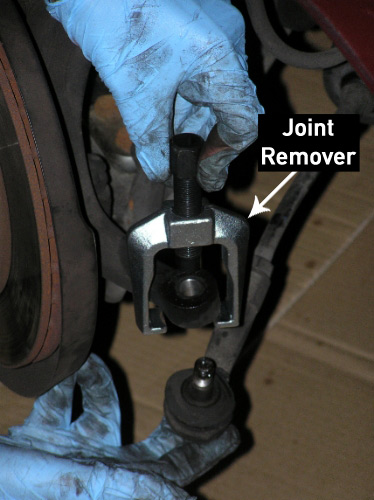
-Slide Joint remover onto Spindle / tie rod end connector and turn until it separates. Use the breaker bar and appropriate socket that fits onto the top of the joint tool, it will pop out suddenly so watch your face on those fenders!
-Repeat process on opposite side.
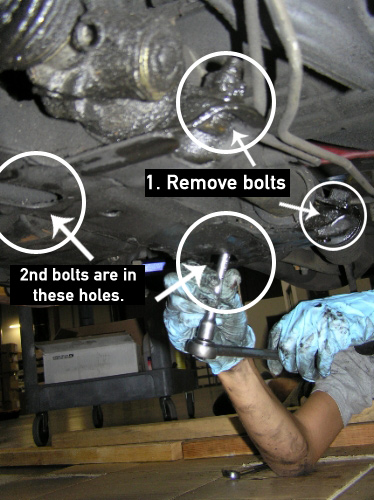
-Under car, using 12mm socket remove both bolts on the steering column knuckle. Slide knuckle upwards on shaft and disconnect, may take some effort and finagling.

-Place drain pan under where the lines connect to the rack.
-Remove necessary Fluid lines using open ended wrenches as follows:
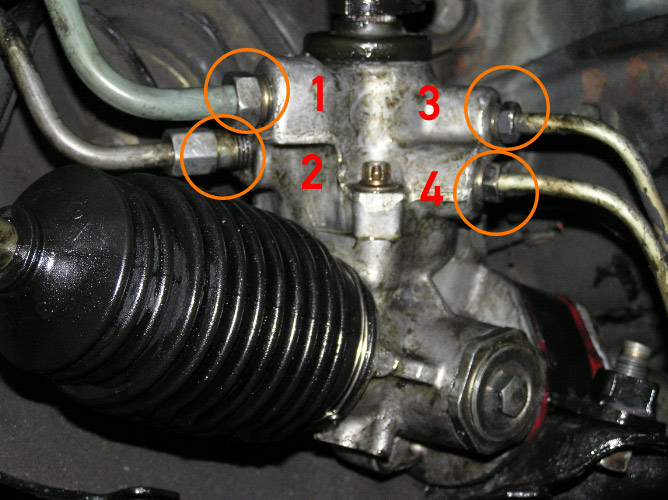
1. 17mm
2. 14mm
3. 12mm
4. 12mm
*I only removed the lines from the pump, which are 1 & 2.
-While Fluid is draining, use 17mm socket and extension to remove steering rack support brackets (x2, 1 driver side & 1 passenger side). The forward bolt is in a small 2” hole in your sub-frame, its opposite the exposed bolt on each bracket.
-Remove brackets and remove bushings, the bushings are cut so find the break and pull them out.
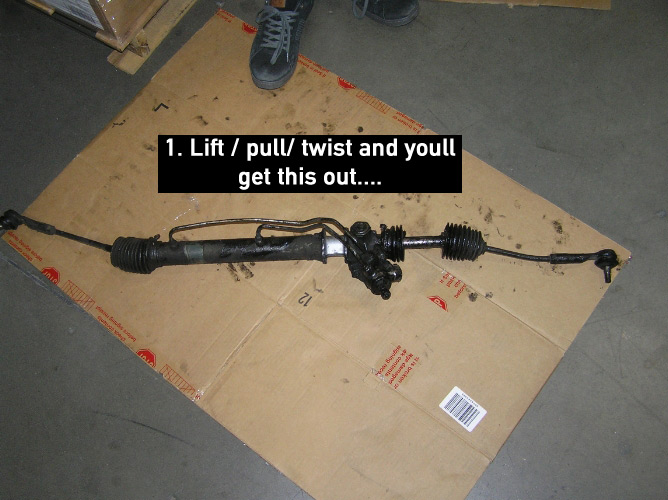
-Lift, pull, and twist OLD rack from where it sits on your sub-frame.
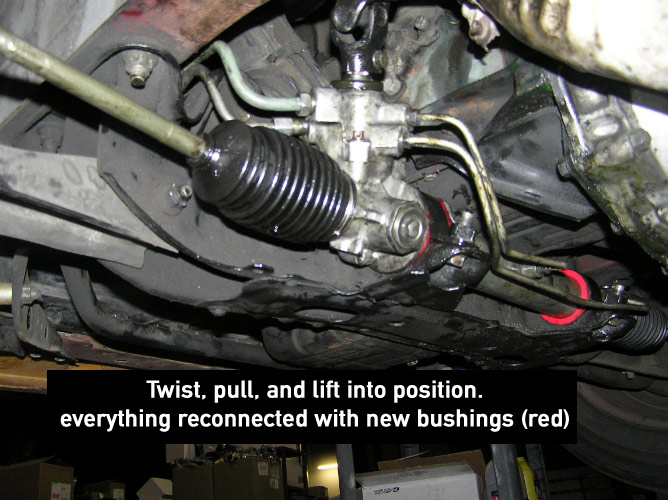
-Twist, pull, and lift NEW rack into position, leave loose for now.
-Using 12mm socket, reconnect steering column knuckle, its easier if the rack moves so do it before refastening the support brackets and fluid lines. Be sure your wheels are somewhat straight and have your friend center your steering wheel.
*Lining the steering wheel so the car is straight may take a few up and downs on the jack but you only have to remove the 12mm bolts and turn the wheel to adjust (told you a friend would help). -Using appropriate open ended wrenches, reconnect PS Fluid lines to rack.
-Install new Bushings, the “O” shaped bushing goes on the passenger side. The odd shaped one goes on the driver side and is tricky to get on, the apex points skyward and there should be no gap around the rack in the bushing.
-Using 17mm socket and extender, refasten both rack support brackets over new bushings.
-Using Jack, lift tie rod ends into holes in wheel spindles. The jack will help stop the ball joints from spinning as you tighten the castle nuts onto the spindle.
-Using 18/19mm socket, re-tighten tie-rod castle nuts onto spindle.
-Replace cotter pins and bend into locked position.
-Repeat on opposite side.
-Fill Power Steering fluid Reservoir, and bleed system by turning wheels back and forth till no more air bubbles appear in PS Reservoir.
-Reattach wheels, fasten lug nuts, lower car.
-ENJOY!
by S133P3R