Running on a Budget - '63 PL-320

1962-1965 Datsun L320 and NL320 forums - The truck that started it all in the US. All 320-specific topics and discussion can be found here.
User avatar
Li'l Truckie
Posts: 555
Joined: Thu Jan 02, 2014 9:28 am
Car: 3 x '65 PL 320
1 x '64 PL 320
1 x '63 PL 320
1 x '62 PL 320 - parts :(
1 x '60 PLG-222
and many more Datsuns from 48hp to over 500hp
Location: Leavenworth, KS

Post

Spring is here 320 fans...finally,

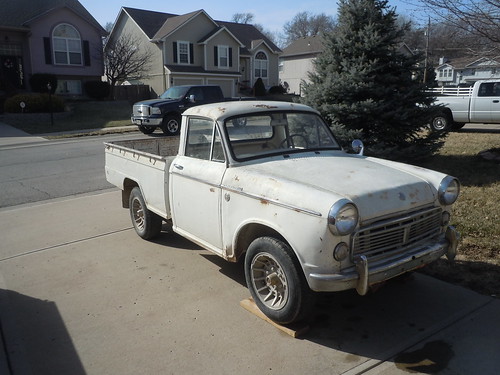
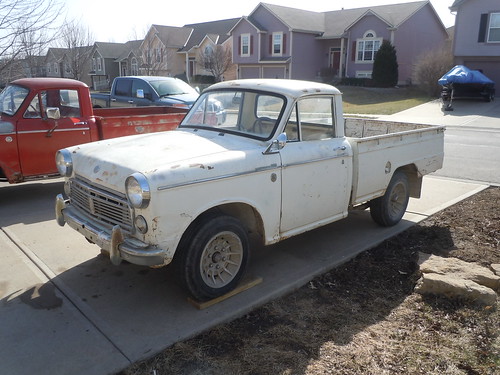
On Wednesday while cleaning up the garage a little and putting all the tools in the correct tool box and all the socket sets back together, I came across some motivation. Okay, and a wife who said "When are you going to fix that one?" (honestly I do not know which 320 she was pointing at, so the educated guess is Whitey). Well, yesterday we moved the '63 away from the garage and began to scrub off the mold, lichen fungus, and 20lbs of mud and manure.

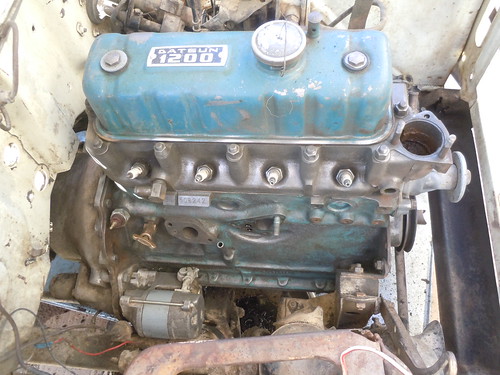
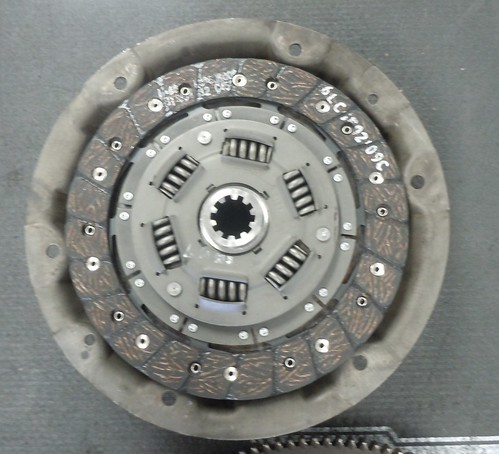
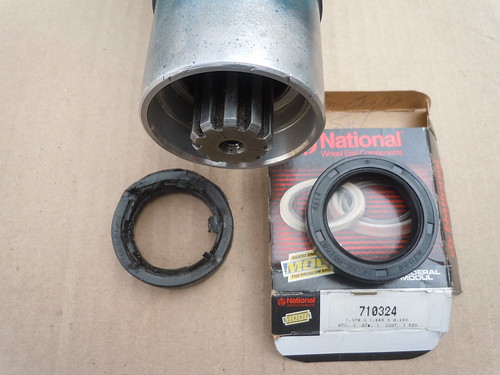
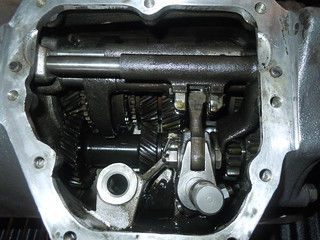
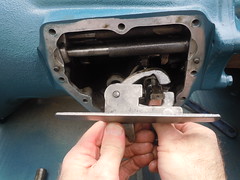
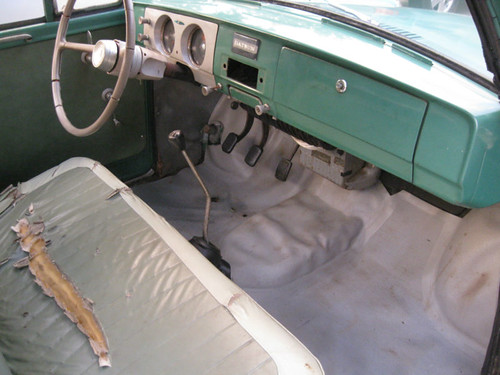
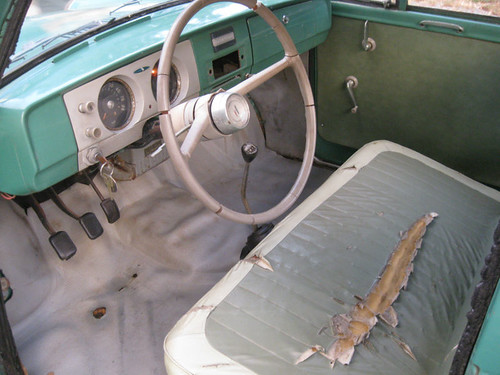
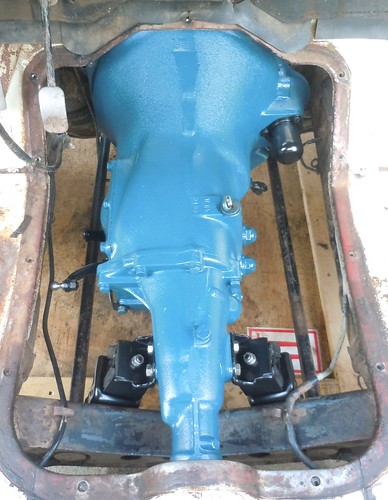
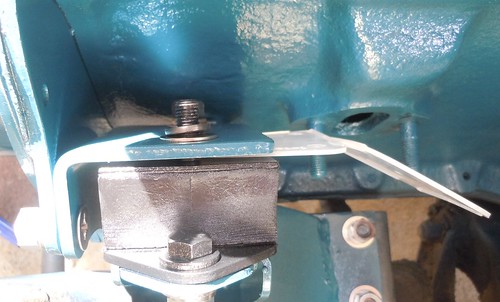
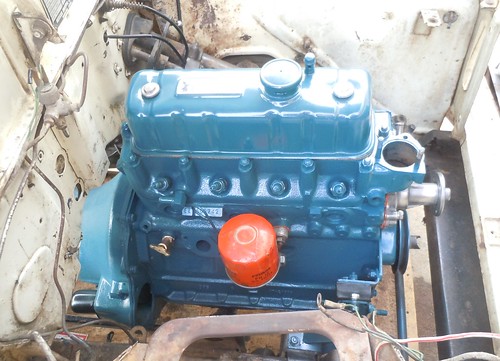
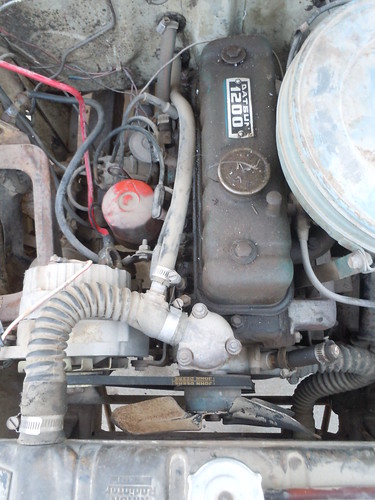
Sorry, not the gem in the rough I hoped, but I was surprised at how little rust is present. So over the next couple of weeks we will sort out the wiring mess, go through the hydraulics, clean up the engine compartment as best as possible, install some Datsun 510 front bucket seats, fix the cooling hoses (just as bad as the wiring), get it running and get it tagged! All the while we will keep the cost down as much as possible, record part numbers, keep a cost sheet for what we spend, and keep it safe. Because the ole adage of 'if it works, leave it alone' just won't cut it. So we will keep it safe while we go through the Whitey.

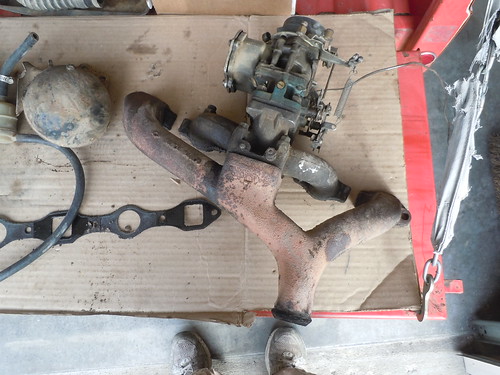
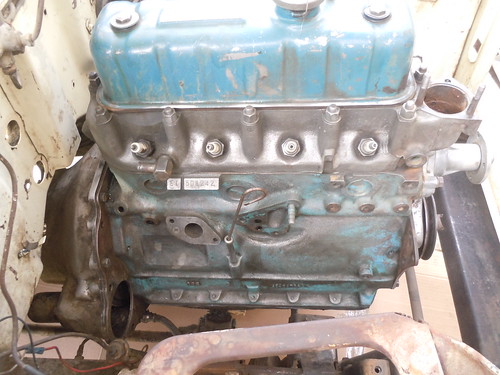
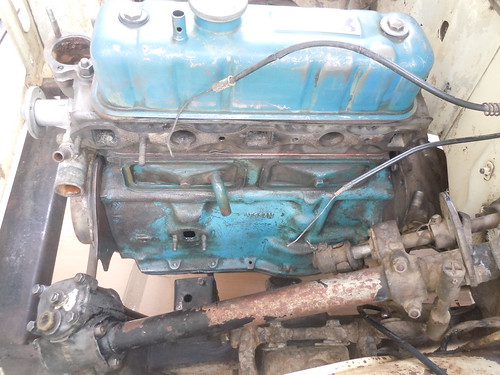
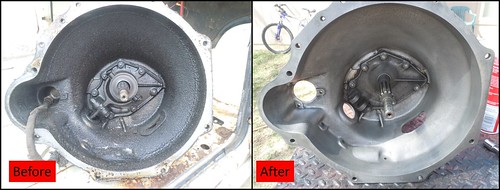
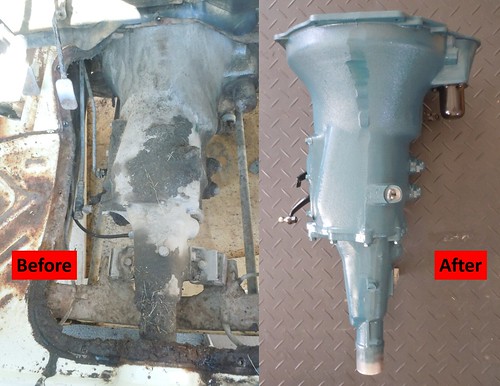
And here are a few before and after the good scrubbing -

Image

Image

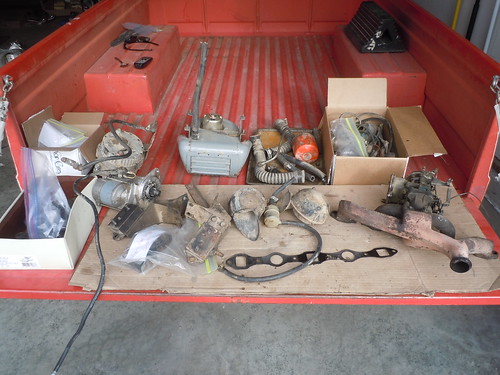
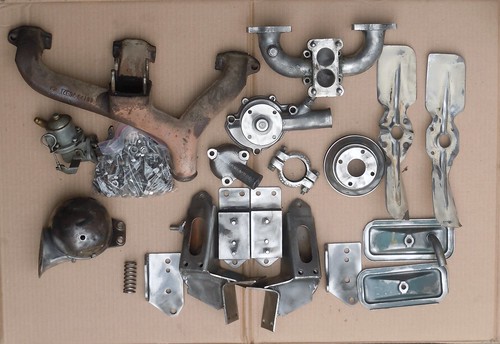
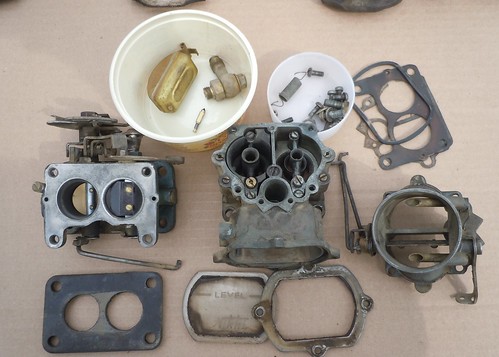
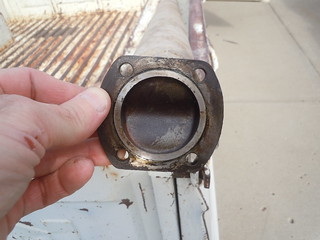
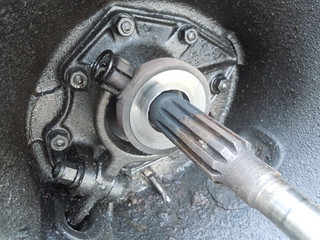
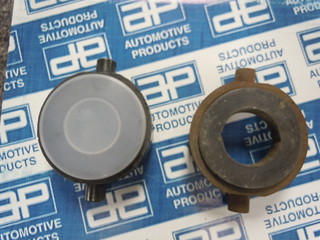
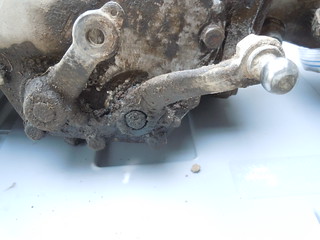
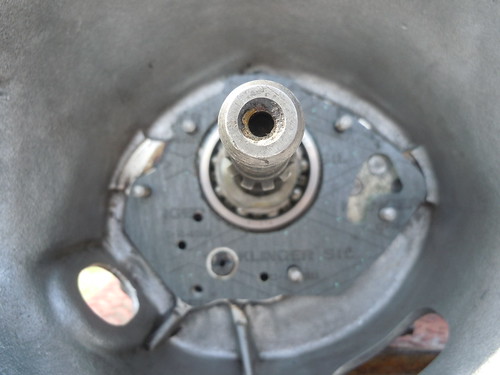
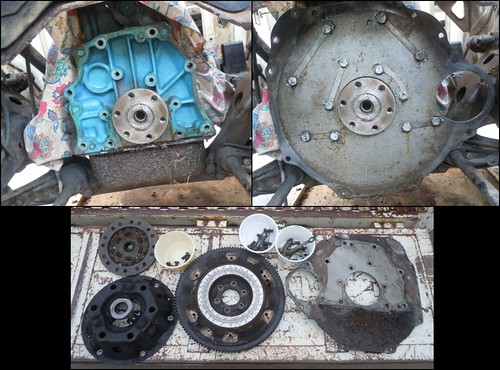
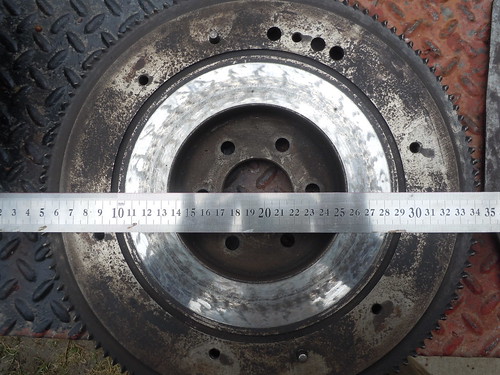
And for those of you who like to play word finds and missing your younger days and searching for all of the hidden objects in the Highlight magazine these pics are for you!

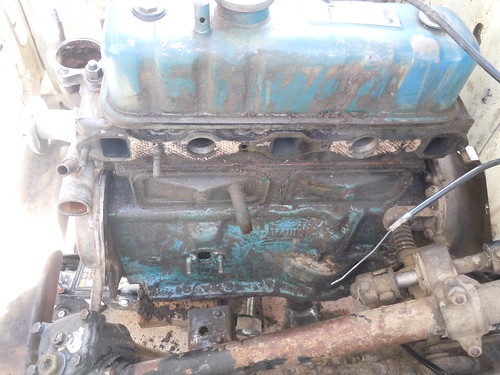
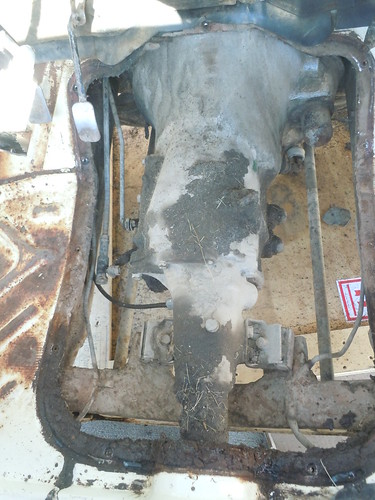
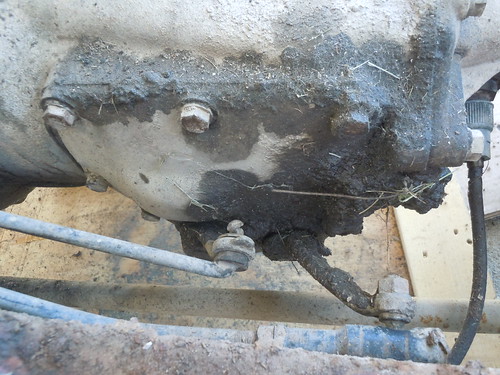
Poor Whitey, used to be towed behind an RV. What a mess-
Image

Image

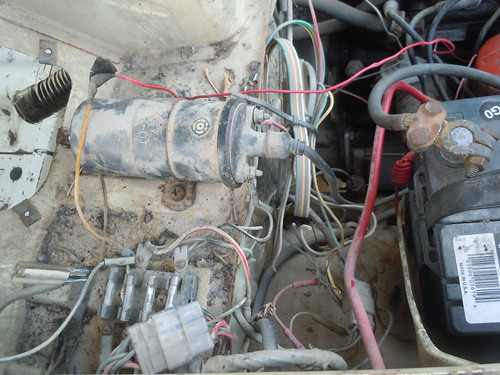
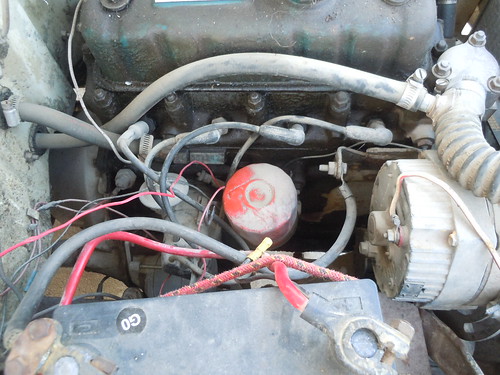
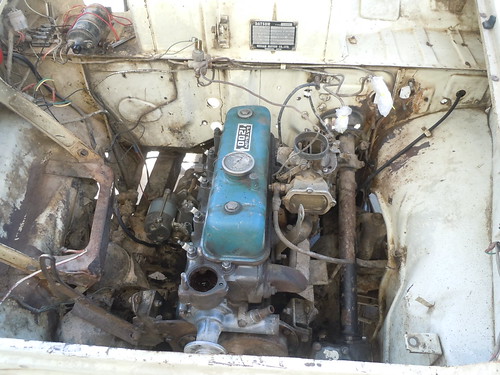
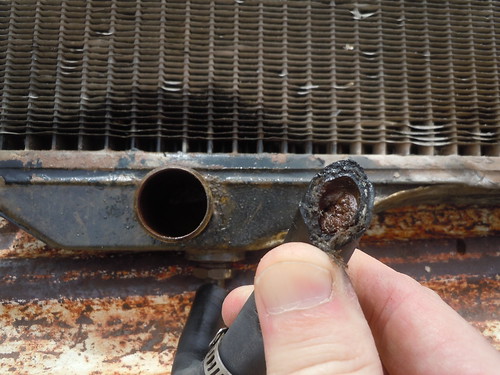
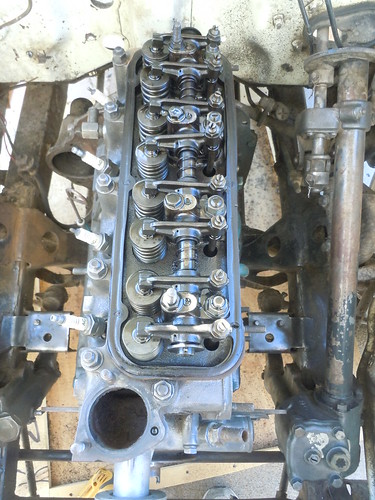
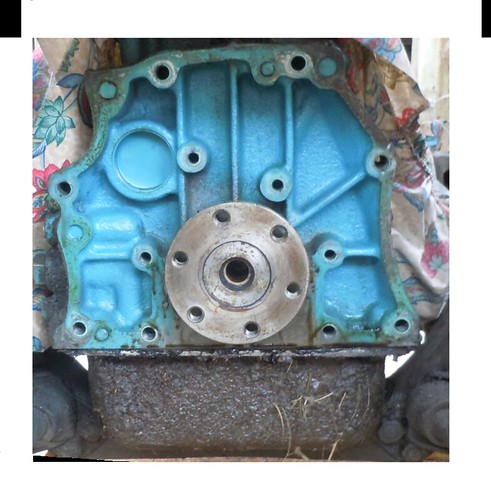
And if you thought the wiring was messed up, check out the cooling system!

Image

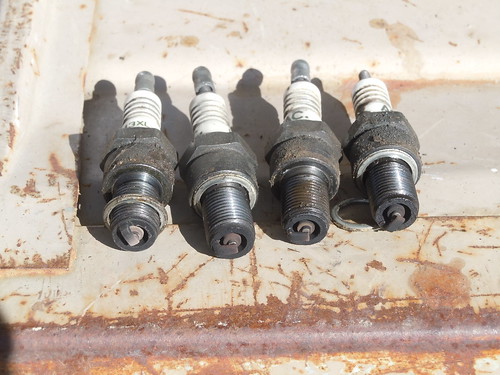
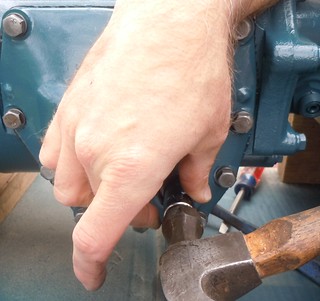
Uh, yes, that is a broken spark plug you see stuck in the little hose, but at least it's secured with a hose clamp!

Okay, gearing up and heading outside to clean the 20lbs of muck off of the driveway and stripe down the engine compartment!

Will post more pics tonight!
Here is the url for other pics of Whitey on Flickr

https://www.flickr.com/photos/113742723 ... 678451005/

TGIF!
Li'l Truckie

Go Shockers!


User avatar
Li'l Truckie
Posts: 555
Joined: Thu Jan 02, 2014 9:28 am
Car: 3 x '65 PL 320
1 x '64 PL 320
1 x '63 PL 320
1 x '62 PL 320 - parts :(
1 x '60 PLG-222
and many more Datsuns from 48hp to over 500hp
Location: Leavenworth, KS

Post

Well it's been a long day stooped over the fenders pulling off parts and scrubbing away. So here's the progress report-

Brake and Clutch Master Cylinders removed with fire wall and inner fender cleaned up'

Image
wow, that valve cover looks very nice. Time to re-appropriate this for Shroom.


Nasty brown anti-freeze drained (sort of) into container. Hoses removed and discarded. Fan, pulley, radiator, and heater removed.

So when I opened the drain c*** under the radiator - nothing happened. Then I just cut the hose in half - still not a drop. Wow, let me check to see if it even has anti-freeze. Check, a little dark green, but full. So why isn't it draining!?!?!?! :gotme

Image
Ahhh, the hose is all clogged up.

Distributor and oil filter housing removed for cleaning and engine cleaned! Check out this pic! :dblthumb:

Image
ohh, that's an expensive gear reduction starter. Wonder how much that cost???

So that's what we accomplished today. Disassembly and engine compartment cleaning.

Just a quick word of caution. When dealing with cleaning solvents make sure you wear big thick rubber type gloves up to your forearms that are impervious to gas, solvents, and cleaners. Do not forget to wear some type of eye protection and make sure you have a clean damp towel handy to wipe your face down just in case splatter residue on yourself from scrubbing. Happened more than one time to me.

Depending on the weather we will remove the intake and exhaust system. As well as the starter and the two horns for a quick cleaning. Oh, and believe it or not Whitey is still running on the OE fuel pump! All the while I thought it was some electric pump back by the tank. So lots of work scheduled for tomorrow.

Yeah, we are still putting off the wiring and cleaning up the fuse box for another day or so.

Inclement weather plan is to clean up the removed parts and rebuild the Brake and Clutch Master Cylinders.

Here is the url for all of the pics of Whitey thus far -
https://www.flickr.com/photos/113742723 ... 678451005/

Click on Post Reply if you have any question!

Cheer,
Li'l Truckie

User avatar
Li'l Truckie
Posts: 555
Joined: Thu Jan 02, 2014 9:28 am
Car: 3 x '65 PL 320
1 x '64 PL 320
1 x '63 PL 320
1 x '62 PL 320 - parts :(
1 x '60 PLG-222
and many more Datsuns from 48hp to over 500hp
Location: Leavenworth, KS

Post

Hey there 320 fans,

Started out the day with a visit down to Lenexa and Victoria British for $22.45 in gasket and other parts. So here is the roll up-

1-729 Gasket- Exhaust manifold $4.46 (fits the studs, intake and exhaust ports perfectly, just a little larger on the outside, see the three in one pic below)
1-496 Gasket - Thermostat $.86 (just need to trim the outside a little)
12-356 - Brass nuts 5 @ $.59 ea = 2.95(got these for the exhaust/intake manifolds as brass does not rust and corrode like steel)
12-4312 - Stud long/manifold 2 @ $1.31 ea = $2.62 (need to pick up 1 more, so order three)
12-1695 - Stud short/manifold 2 @ .86 ea = $1.72 (these are the front and back studs)
18-909 - Grommet set for valve cover $4.46 (these are the best one, so there are less expensive ones you can get)
1-483 - Valve Cover Gasket (this one is for the earlier valve cover WITHOUT the six screws, see pic below)
1-1723 - Gasket Side cover - (perfect fit, these are for the plate to the tappets)

Tax included was $22.45
Image
Will head back down Thursday to pick up a few more parts.

All gaskets are available separately so do not think you need to buy a complete set on eBay for one or two special gaskets. If you have any question on gaskets let me know.

Once safely back home in MNSTR 0 I headed back out and started pulling parts. Today we removed the intake and exhaust manifold, the $299 gear reduction starter (wow, might have to save this for later), and the front engine mounts.

Image

No major surprises other than a broken bolt in the exhaust manifold. It's one of the bolt that holds the bracket for the air cleaner.

Image

Okay, so after several hours of scrubbing with solvents, various scrub brushes, green scratchy pads, and a final wipe down with laquor thinner and denatured alcohol this is what the engine now looks like.

Passenger side with starter and front engine mount removed -
Image
Still need to go over with the wire wheel and get around the spark plugs better

Here's the driver side with the intake/exhaust manifold, fuel pump, and front engine mount removed and cleaned
Image
Don't worry about the covers to the tappets, we'll clean those up better once they have been removed.

So tomorrow we use the wire wheel and prep the engine and the easy to get to frame for paint.

See you tomorrow night!

oops, almost forgot - more pics can be found here of today's progress -

https://www.flickr.com/photos/113742723 ... 678451005/

Li'l Truckie

User avatar
AZhitman
Administrator
Posts: 71063
Joined: Mon Apr 29, 2002 2:04 am
Car: 58 L210, 63 Bluebird RHD, 64 NL320, 65 SPL310, 66 411 RHD, 67 WRL411, 68 510 SR20, 75 280Z RB25, 77 620 SR20, 79 B310, 90 S13, 92 SE-R, 92 Silvia Qs, 98 S14.
Location: Surprise, Arizona
Contact:

Post

LOVE this project!!! :)

User avatar
Li'l Truckie
Posts: 555
Joined: Thu Jan 02, 2014 9:28 am
Car: 3 x '65 PL 320
1 x '64 PL 320
1 x '63 PL 320
1 x '62 PL 320 - parts :(
1 x '60 PLG-222
and many more Datsuns from 48hp to over 500hp
Location: Leavenworth, KS

Post

Well, not a good day for Kansas basketball. Oh well, no money lost this year.

So between running in and out to check the scores I did manage to get a few things accomplished today. Finally decided to remove the water pump to clean things up better. Pulled the valve cover to see what lurks underneath and pulled the tappet covers so we can clean them up this week.

Image
Very nice! Nothing to be alarmed about - like bent or missing pieces or any metal shavings/filings.

Spark plugs almost look work shop manual illustration perfect!
Image

However, not a good news story when I pulled the transmission cover off late this afternoon. Uhhh...

Image

Image

Based on these ugly pictures, we need to do some clean up on the transmission. So here's the plan of attack. Over the next 4 to 5 days we will clean up all of the parts we have pulled, don't want to get to far a head of ourselves. Based upon how the parts clean up goes we will make the call Friday night on whether or not separate the engine and transmission and then pull transmission. I have all of the necessary seals and gaskets for the transmission and its also easier to work on when its on the table and not installed.

So here is the pic of the parts. Again lots of work to be done in the span of 4 to 5 days.

Image

Well that's a wrap for the day. Everything is prepped and ready to start cleaning parts tomorrow.
Oh, and we will go back and finish the distributor thread this week also!

And a few more pics are here-
https://www.flickr.com/photos/113742723@N07/

Hope your bracket is doing better than mine,
Li'l Truckie

User avatar
AZhitman
Administrator
Posts: 71063
Joined: Mon Apr 29, 2002 2:04 am
Car: 58 L210, 63 Bluebird RHD, 64 NL320, 65 SPL310, 66 411 RHD, 67 WRL411, 68 510 SR20, 75 280Z RB25, 77 620 SR20, 79 B310, 90 S13, 92 SE-R, 92 Silvia Qs, 98 S14.
Location: Surprise, Arizona
Contact:

Post

Rock & roll buddy!

It's hard for me to look at that and think of doing anything BUT a full removal / restoration / reinstall. Hats off to guys who can do it any other way!

User avatar
Li'l Truckie
Posts: 555
Joined: Thu Jan 02, 2014 9:28 am
Car: 3 x '65 PL 320
1 x '64 PL 320
1 x '63 PL 320
1 x '62 PL 320 - parts :(
1 x '60 PLG-222
and many more Datsuns from 48hp to over 500hp
Location: Leavenworth, KS

Post

Oh, believe me Hitman, if I had the garage/driveway space, shelves, money, and a different priority list I would.

And it's so frustrating. I started to clean off the transmission with the putty knife and muck was going everywhere. Down my sleeve, around my collar, crap got in behind my eye-pro. It's like, you know, this sucks, I'm pulling the transmission and I'm going to clean it up the correct way standing up or sitting down and not on my back in the dirt, oil, manure and hay.

But, yeah, where to stop and call it good enough. :confused: Truck has minimal rust, engine is good and the transmission shift so smoothly, but it does not have the original E-1 engine. So looking at going through the mechanics and leaving the body alone. The truck bed and cab can are easy enough to pull off in the future.

I'm shooting for a budget of less than $500 for a complete mechanical over haul of seals, gaskets, brakes, hydraulics, tune-up, and all new fluids (engine oil, gear oil, anti-freeze, brake fluid). That's sort of cheating as I already have lots of parts on hand, but I will figure this into the budget as will have to replace my stock.

I have the parts truck so the plan is to clean up the suspension and brake parts from it and swap them with all of the caked over parts from Whitey. All the while keeping it within budget, up dating the thread, and taking lots of pics for future reference

v/r
Li'l Truckie

Conner
Posts: 69
Joined: Wed Jun 13, 2012 9:52 am
Car: SRL31101633
1964 L320

Post

Great thread! This is good inspiration for me to get out and make some progress on my truck as the weather warms up. Keep us posted!

User avatar
Li'l Truckie
Posts: 555
Joined: Thu Jan 02, 2014 9:28 am
Car: 3 x '65 PL 320
1 x '64 PL 320
1 x '63 PL 320
1 x '62 PL 320 - parts :(
1 x '60 PLG-222
and many more Datsuns from 48hp to over 500hp
Location: Leavenworth, KS

Post

Li'l Truckie here, giving you the Hump Day Update.

No idea what happened to Monday here in Penitentiary, Kansas, something to do with freezing temperatures and snow! So not much accomplished. However, visible progress was made on Tuesday and today. All told about 8 hours of work in these photos.

Image

Just a little more work and these parts can be prepped for painting. Out of my 6 little 320s only Whitey has the engine mounts painted the Nissan Engine Blue, so we will keep them that color instead of the nice satin black. Fan blades need a little work as the are bent out of shape and I need to find a Low tone horn in the box-o-parts to replace the one with the big chunks missing. Will call about having the exhaust header bead blasted, should be under $20, if not then I just wire brush is some and call it good. The intake has cleaned up nicely and the broken stud was easily removed. As it should since the stud is steel and the manifold is aluminum.

Was also able to disassemble the carburetor some. So be very careful if you choose to clean up your Nikki 2D-30C double barrel carburetor. They do not make the gasket for these any more and I have only seen one or two kits on eBay. So if you find a rebuild kit make sure it is for the Nikki 2D-30C- because there are a lot of similar models where the parts look the same, but they are not.

From Classic Garage out of Brewster, NY (just north of Syracuse)

Hello Andy,

There are no more of these available. We have tried many suppliers and no one has them. Sorry to disappoint.
Also, be careful, Royze is still using part number NI-2K but it is for a different car. So only look for very old stock.
Good luck,
Stuart

The top gasket or Gasket Body is the hard one to make, but a technique is to cut out the inside first then cut out the outside. This way the gasket material will provide some strength as you cut out the inside with a sharp ex-acto knife/razor as well as provide material to hold onto as you rotate the gasket material to make your cuts. The bottom two gaskets are easy enough to make and should be no issue.

Image

I would also advise against tearing the carburetor down any further than what you see here. As for the emulsion tubes, jets, and venturis I would advise you to remove, clean, and refit one at an time and not to pull them all out at once. For the idle mixture, I screw it in while counting the rotations until is stops firmly and then unscrew it all the way. If you are not familiar with carburetor then it might be best to leave this one alone or reach out for some expert help. I have a link to a Nikki carb web so, but need to find it.

Image

I would also recommend to not disassembly of the butterfly assembly shafts. This can turn into a major headache if you mix up the part between the primary and secondary throttles. Best bet is to use an old tooth brush and some carb cleaner to remove and excess dirt, oil, or debris.

Image

Well that's about it. Here's one last cleaning tip for all of those nuts and washers on your wire wheel if you do not have a glass bead tumbler/vibrator or you son never told you its broke last year - Just make sure you wear thick leather gloves, eye pro, and a back stop should a lock washer fly apart.

Image

Okay, be back Friday, I have class tomorrow. I'm heading to ACE in the morning to see about the glass window O-Ring and few brass screws for the carburetor. Will also hit Victoria British for a few parts too. So I'll give you an update too on what we have spent so far on Friday.

v/r
Li'l Truckie

User avatar
Li'l Truckie
Posts: 555
Joined: Thu Jan 02, 2014 9:28 am
Car: 3 x '65 PL 320
1 x '64 PL 320
1 x '63 PL 320
1 x '62 PL 320 - parts :(
1 x '60 PLG-222
and many more Datsuns from 48hp to over 500hp
Location: Leavenworth, KS

Post

Okay 320 fans,

Getting ready for the big weekend of March Madness, nice weather, and working on our '63 PL-320. Not much accomplished yesterday and today due to school, studies, and taking the wife out. However, I was able to pick up a few more parts, so here is the breakdown and picture -

0-149 Cupped washer (valve cover washer) 2 @ .68 = $1.36
1-722 Gasket Timing Cover $2.66
1-725 Gasket Oil Pan $3.11
12-4312 Stud Long (we now have 3 total) $1.31
9-1018 Boot Clutch Arm $2.95
1-7411 Gasket-Cover Front (transmission) $1.31
1-7001 Gasket-Side Cover (transmission) $1.76
12-4106 Gasket Fiber (tappet cover) 2 @ .50 = $1.00
TAX $1.35
TOTAL $16.81

So not bad, but don't know if I want to pull the crank pulley to get to the timing cover as this entails replacing the graphite rope gasket in the timing cover. That's why I mentioned in the one photo I would look for an three bearing MGA/B timing cover as this uses a seal. The 3/8 inch graphite rope is available is sold by the inch/foot.

Image


Okay, time to get a good night sleep for our big day tomorrow!
Li'l Truckie

User avatar
Li'l Truckie
Posts: 555
Joined: Thu Jan 02, 2014 9:28 am
Car: 3 x '65 PL 320
1 x '64 PL 320
1 x '63 PL 320
1 x '62 PL 320 - parts :(
1 x '60 PLG-222
and many more Datsuns from 48hp to over 500hp
Location: Leavenworth, KS

Post

Well the Final Four for March Madness is set, hope your bracket is doing better than mine.

Any hoot, Li'l Truckie had somewhat of a productive weekend. The front motor mount, radiator, pulley, and fan blades have been painted. Will post pics tomorrow, just have to had the Gert Frobe touch to the top of the radiator, ooh....

So today I was able to pull the transmission out through the cab. Pretty simple. With the radiator, water pump, front mounts removed and the transmission mounts removed just pull the whole assembly forward and then unfasten the engine/transmission nuts and bolts. Pull the transmission back into the tunnel and then lift up, right, and out the passengers side. Be advised that two bolts, top side passenger and bottom driver side, are threaded in the rear engine plate and will not push out. Yes the heater box will have to be removed and it would not hurt to remove the black vent assembly. My vent assembly was already out as I took the complete windshield wiper assembly and put it on my '64, Shroom. Oh, and the seat removed is also very helpful as it's easier to get into the cab and lift the transmission up and out.

Image

Okay, Good news first. We made the right call in pulling the transmission and it was pretty painless (more on this later) and that's about it.

Now the bad news, from bad to worse-
-Just because all the other drive shafts you have ever dropped required the help of a 2lbs sledgehammer doesn't mean that one day you will have one fall out with no assistance and smash your face....like today. Ouch, so where your eye pro - they definitely helped today. And of course my supportive son was laughing so hard he was crying and making the noise of drive shaft hitting face over and over again.
-We found oil on inside of the rear yolk so this means the pinion seal is bad. Pain in the butt to change but a seal from a 520 will work and its available. I'll find the info on this for us. Part number, manufacturer, and dimensions.
Image
-The release bearing is shot! So again good call in pulling the transmission.
Image
A MGA or 3 bearing MGB release bearing will work so again no parts issue here. On the left is a new AP bearing and on the right is one of my extras, perfect match!
Image
-So here is the worse news. The forward lever or forward gear cross shaft or both are worn. As you can see there is a gap around the forward cross shaft. Which means the forward gear lever wiggles all around. And in turn makes for poor shifting, grinding gears, and excessive wear on the throw out bearing, pressure plate, and clutch. I'm hoping that a new wedge pin will fix this problem because if you look closely you can see the top of the pin is not visible, which may be to root problem, so let's keep our fingers crossed!
Image

Well, that's a wrap for today. The transmission is going to require lots and lots of cleaning. But don't worry about any parts, they are all available and by Thursday lunch I post the parts list with prices and then will confirm fitment of new parts on Friday. Because on Saturday this is all going back together! Down and in with the transmission, scoot the engine back a little and then mate the two together! Again, pretty simple and yes, this can all be done by one person. Spouse, Son, or daughter are an added bonus!

Here's the url to the '63 PL-320 Running on a Budget with 80 pics to date and counting!
https://www.flickr.com/photos/113742723 ... 678451005/

Li'l Truckie

User avatar
AZhitman
Administrator
Posts: 71063
Joined: Mon Apr 29, 2002 2:04 am
Car: 58 L210, 63 Bluebird RHD, 64 NL320, 65 SPL310, 66 411 RHD, 67 WRL411, 68 510 SR20, 75 280Z RB25, 77 620 SR20, 79 B310, 90 S13, 92 SE-R, 92 Silvia Qs, 98 S14.
Location: Surprise, Arizona
Contact:

Post

This tickles me no end... except the part about getting bashed in the grille with a driveshaft! :)

Gemmer
Posts: 96
Joined: Mon Jan 27, 2014 5:38 pm
Car: 1964 Datsun PU 320
Location: Roseville,Ca

Post

Thank you for posting this. I will be bringing my 64 back into service this summer after 10 years in storage. Great info!

User avatar
Li'l Truckie
Posts: 555
Joined: Thu Jan 02, 2014 9:28 am
Car: 3 x '65 PL 320
1 x '64 PL 320
1 x '63 PL 320
1 x '62 PL 320 - parts :(
1 x '60 PLG-222
and many more Datsuns from 48hp to over 500hp
Location: Leavenworth, KS

Post

Gemmer,

Sounds great and welcome aboard! Let me know if you need any specific info or parts questions. My one '64 "Shroom" sat from 1978 to till I took delivery last Spring. With minimal work it started right up.

Li'l Truckie

User avatar
Li'l Truckie
Posts: 555
Joined: Thu Jan 02, 2014 9:28 am
Car: 3 x '65 PL 320
1 x '64 PL 320
1 x '63 PL 320
1 x '62 PL 320 - parts :(
1 x '60 PLG-222
and many more Datsuns from 48hp to over 500hp
Location: Leavenworth, KS

Post

Well, here's a quick update, sorry not much 'big ticket items' to update you all on as I have been focused on the details of cleaning up the transmission. So since our last post, its been eye pro, rubber gloves, rags, solvent, paint scraper, and lots of rags.

So here is snap shot of before and after -
Image
Still need to scrub in the corners a little bit but you can see the big difference.

A few points of caution!
- The front plate is cast steel so its brittle, do not pound on it or hammer to much trying to separate it from the rest of the transmission. And do not over torque it down when you reassemble. I'll work on getting some torque specs. But 10to 15 ft lbs should be sufficient.
- Once the access plate is off you will see a black circular steel shaft with the bottom half sticking out. This is the counter shaft and it moves around. You need to be very careful when putting the access plate back on and make sure the counter shaft is in the correct position to fit into the oil gallery of the access plate. If it rotates the slightest the plate will not fit flush with the transmission. You do not want to know what happens if it does not align perfectly. Simply fit the cover before applying gasket sealer and the new gasket to make sure the still align, if not just make ever so small movements until the plate fits flush against the transmission face.

You can see the counter shaft in the middle lower left. That's the gray MGA front cover gasket in place for one last fitment before sealing it up.
Image

Okay, so enough cleaning on the transmission. It's prepped for a ride over to see John at Northtown Transmission in North Kansas City, MO, for one final inspection before pressing in the cross-shaft seals, rear input seal, and sealing up the side access cover. So this evening it was a one-man show of busted knuckles, head in dash, and hand-feet coordination before I found the old starter gear and clamped it in place as I removed the pressure plate, flywheel, and back plate.

Image

We'll replace the clutch disc for sure, compare the pressure plate bearing to a new one, and take a closer look at the pressure plate. The pressure plate should be good, but we do not want to open this up again so we will probably end up getting a new bearing too.

So let me start working on the parts list and I'll post this tomorrow of all the transmission gaskets, seals, clutch disc, pressure plate, release bearing, flywheel bolts, and locking tabs. Again, all parts are available.

till tomorrow,
Li'l Truckie

User avatar
Li'l Truckie
Posts: 555
Joined: Thu Jan 02, 2014 9:28 am
Car: 3 x '65 PL 320
1 x '64 PL 320
1 x '63 PL 320
1 x '62 PL 320 - parts :(
1 x '60 PLG-222
and many more Datsuns from 48hp to over 500hp
Location: Leavenworth, KS

Post

Another rainy day, so not much cleaning, but I did manage to get the flywheel, clutch disc, and pressure plate cleaned up good enough for the trip to check on parts.

So here is what we will check on this afternoon-

-The MGA might have a front motor mount that works so I check on both the right and left motor mount to see if either will work.

-Will check on flywheel bolts and lock tabs. My 6 have been taken off before, so that's two strikes and I'm not looking for strike three so going with new ones. Bolts are $4.95 each and the locktabs are $.45 each.

- Will have both 3-in-1 clutch disc, pressure plate and release bearing pull to make sure we ID the correct one. As well as compare bearings on the pressure plate. If mine is too worn then I will get the package deal....this is either $219.95 or $239.95 depending on which one matches up. Pretty sure the difference in the spline count. We should be good on measurements. The clutch disc for the 320 measures 180mm and the pressure plate and flywheel face both measure 190mm. So we have a little room to go 1/2 centimeter larger. Which is probably enough to convert the SAE MGA clutch disc to the Metric 320 disc.

Image
Image

- Will also have both clutch disc part numbers pulled, again to ID which is the 10 spline clutch disc.

Well that's about it. I did not see an listing for rear plate lock tabs so the MGA probably does not use these. We will just flatten the ones we have and re-use them.

Sorry no part numbers yet, I do not want to confuse anyone or have someone order the wrong part. So I will post part numbers and pics tomorrow.

Hang in there, we still have a few weekends to go before we can put our 320 on the street,
Li'l Truckie

User avatar
Li'l Truckie
Posts: 555
Joined: Thu Jan 02, 2014 9:28 am
Car: 3 x '65 PL 320
1 x '64 PL 320
1 x '63 PL 320
1 x '62 PL 320 - parts :(
1 x '60 PLG-222
and many more Datsuns from 48hp to over 500hp
Location: Leavenworth, KS

Post

Good evening there 320 fans,

First a special shout out and hearty thanks to John and Glen at Northtown Transmission and Bob down at Victoria British!!! Thank guys!

Hopefully this will be the last we talk about the transmission...maybe, but probably not. So I spent quite a bit of time with Bob at Victoria British working to determine a compatible set up. After about 30 minutes and pulling the parts from 5 different MoWoG transmission we found a suitable match. The clutch disc and pressure plate that works is from the 1098cc AH Sprite, that's the Mk II and III. The MGA/early B was too large at 200mm as pictured below-

Image

The release bearing or throwout bearing is from the 3 main bearing MGA and early MGB. Pretty sure the only difference in the Sprite and MGA/early B bearing are the clips that keep the bearing from falling out of the fork, but do not quote me on that.

Sooooo, starting at the flywheel and working our way back to transmission input shaft seal here's all the parts, part numbers, and manufacturers-

VB 4-006 3-in-1 Clutch Kit ($219.99), includes pressure plate, throwout bearing and clutch disc for the 63-66 AH Sprite w/1098cc. Sorry you will have to go the package as the disc is not sold separately. But if you look else where 63-66 AH Sprite w/1098 cc engine is the set up that will work. Again I do not know if this bearing will work, pretty sure it will though.
VB 4-322 ($14.95) this is the release/throwout bearing from a 55-62 MGA
VB 9-1018 ($3.95) Clutch lever boot - common to many British sports cars
VB 1-7411 ($1.45) Transmission Front Cover gasket
Timken 471466 (~$4.78 ea) Reverse and Forward cross shaft seals, you will need to order 2. Sorry you will have to re-use or improvise as I could not find a suitable felt gasket.
VB 1-7001 ($1.95) Transmission Side Gasket
VB 0-109 ($2.95) for a transmission drain plug, no magnet, black anodized steel allen head plug.
National 710324 (~$9.78) is the rear output shaft

Pretty sure that's all the parts you will need, let me know if something is missing.

Okay, so over the weekend we came close to getting the transmission back in, but did not make it. So here's what we did accomplish-

-Replace the engine back plate and flywheel
-Replaced the rear output shaft seal
Image
-Removed and sealed up the cross-shaft cap cover nuts on the passenger side
-Place transmission in neutral and replace the gate assembly and the forward cross-shaft as one unit. Re-insert the reverse cross-shaft, and seal up the access cover. This top pic shows the transmission in Neutral. You will need a big screw driver to align the fork so the lever, operating change speed goes from front fork to the back fork in single motion, no going left or right.
Image
Image
Image
-Replace both forward and reverse cross-shaft seals on the access cover
Image

Well that's about it. What you did not read or see is all of the cleaning, scrubbing, an almost final wipe down only to see more oil and dirt that need to be cleaned up, followed by one final wipe down with denatured alcohol before painting. This quite a bit of work that consumed much of our time.

Tomorrow we will finish up the transmission by with one last touch up paint job, install the clutch fork, throwout bearing/release bearing, the boot and dust cover. I'll post some before and after pictures. Once this is complete we will still need to install the pressure plate and clutch disc to the flywheel. And then before we install the transmission make one last inspection of everything we touched, replaced, or sealed up for one final QA/QC.

Well that's a wrap for tonight. And as always here's the link to more pictures -
https://www.flickr.com/photos/113742723 ... 3682484554
Lil' Truckie

User avatar
difrangia
Posts: 158
Joined: Fri Aug 30, 2013 10:01 am
Car: 1978 Datsun 620 'Longbed', 1964 NL320, 1961 FIAT 500D, 1964 Type 113 Beetle, 79 Ford Festiva
Location: Oklahoma

Post

Truckie,
That's some meticulious detailing of the process with nice photos. You must have been CID in the military. If you don't have the trany back in yet, how bout a good close-up of the back of that engine block with best light you can put on it. Looks like some virgin engine blue in there. Might be useful for having some near original engine paint mixed. Thanks for all the detail.

Steve

User avatar
Li'l Truckie
Posts: 555
Joined: Thu Jan 02, 2014 9:28 am
Car: 3 x '65 PL 320
1 x '64 PL 320
1 x '63 PL 320
1 x '62 PL 320 - parts :(
1 x '60 PLG-222
and many more Datsuns from 48hp to over 500hp
Location: Leavenworth, KS

Post

Steve,

Yeah, I'm pretty sure the paint on the back of the engine is faded from oxidation or just 50 years of being in the dark and temperature change. Here's a bigger pic.
Image
I wiped the back of the engine down and just left this paint alone when I put the back plate on over the weekend. Pretty sure the engine was the original Nissan Blue-Green. I get my engine paint from Datsun-parts on eBay. It's a little expensive at $35.99 a can and every six months it seems to go up $5.00, but I usually buy two cans at a time.

http://www.ebay.com/itm/Datsun-Z-240Z-T ... 5b&vxp=mtr

I'll have the engine painted by this Friday with the engine mounts and water pump installed. So I'll post new pics by then of a "Factory Fresh" 1200cc E1 engine.

v/r
Andy

User avatar
difrangia
Posts: 158
Joined: Fri Aug 30, 2013 10:01 am
Car: 1978 Datsun 620 'Longbed', 1964 NL320, 1961 FIAT 500D, 1964 Type 113 Beetle, 79 Ford Festiva
Location: Oklahoma

Post

Thanks, Truckie. Just what I was wanting. If I remember correctly, you have a J13 engine around. If you haven't put the flywheel back on I'd like to know if the J13 and E1 flywheel will mate up on each other's crankshaft. They look same/similar in the photos. Steve

User avatar
Li'l Truckie
Posts: 555
Joined: Thu Jan 02, 2014 9:28 am
Car: 3 x '65 PL 320
1 x '64 PL 320
1 x '63 PL 320
1 x '62 PL 320 - parts :(
1 x '60 PLG-222
and many more Datsuns from 48hp to over 500hp
Location: Leavenworth, KS

Post

Steve,

I just finished up your email over the weekend, sorry for the long delay -

- E1 and J13 flywheel are the same out diameter at 300mm and the same 6 bolt pattern. However, the J13 has a larger 200mm clutch disc face vs the 180 of the E1.
- E1 and J13 have a different spline count for the clutch disc, input shaft, output shaft, and drive shaft yolk, 10 vs 28 count.
- E1 and J13 engine back plates are totally different - starter bolts line up though - :dblthumb: but nothing else lines up :frown:
Yeah, on my basket case J13 or E1, whichever, it has a J13 block and all other parts are for an E1. I say that because the basket case engine has the front and back plate from an E1. So I compared the three back plates - one from Whitey, one from the basket case, and then the one from the complete J13. Whitey and the basket case are the same and both different from the J13. Pretty sure the later model MGA and MGB clutch, clutch disc and pressure plate will work. If you go this route let me know and I can verify this on a visit down to see Bob at VB.
- E1 4 speed and J13 four speed are the same length.
- No, the J13 4 speed does not line with the E1 back plate.
- No, a 510 4 speed does not line up with the E1 back plate.

And for everyone else here's a quick run down of some of the parts you might have to change out or fabricate -
Its a little complicated, but changing out the transmission means changing out everything else. Here's the list....so far

Slave cylinder
Clutch line, rubber (length and because of Metrice vs SAE)
Clutch Master cylinder, updated/newer if metric, you'll need to change the steel hose
Clutch disc (go with something more common)
Pressure plate
Pressure plate bearing (should come as a unit with the pressure plate)
Throughout bearing/Release Bearing
-all the above due to a different spline
Drive shaft - or at least a shorter one
Drive shaft yolk as the you will need to match the splines with the transmission, working to see if a MGB, Sprite/Midget will work should.
Transmission mounts (okay rear engine mounts..whatever)
Same style starter should work?????

Sheet metal fabrication for floor shift, may need to cutout more of the floor pan, have pic from an eBay 320. Here it is -
Image
And do not try to tell me this is a factory option 4 speed on the floor. :nono: I know better.

Ballpark figure is this might cost around $1000 for parts and labor. The machine work for a new back plate might raise the cost substantially.

v/r
Andy

User avatar
difrangia
Posts: 158
Joined: Fri Aug 30, 2013 10:01 am
Car: 1978 Datsun 620 'Longbed', 1964 NL320, 1961 FIAT 500D, 1964 Type 113 Beetle, 79 Ford Festiva
Location: Oklahoma

Post

Andy, I owe you. This is exactly what I've been looking for. The photo with 520 (??) tramy and the cut floor shows me exactly one thing that I need. I've been collecting photos of transmissions, flywheels, etc for a bit and this is a big piece in the puzzle. I'd done some crawl-under measuring and bouncing the dimensions off my photo collection and I'd calculated that the shifter on the J13 trany would sprout up about 4 or so behind the back of the hump in the 320 floorplate.

Ditto with the B210 5-speed which is the dream conversion. There's more to research to do at the front end on the B210 project. Most Datsuners tell me to leave the column shift, but I'm determined to get it moved to the floor. The front stuff concerns me more but still 'aint no hill for a stepper'. You're in KS, so I'm sure that you've heard that saying before. I might have more questions and will keep you informed on my progress. I'll look forward to your very informative posts.

Steve

User avatar
Li'l Truckie
Posts: 555
Joined: Thu Jan 02, 2014 9:28 am
Car: 3 x '65 PL 320
1 x '64 PL 320
1 x '63 PL 320
1 x '62 PL 320 - parts :(
1 x '60 PLG-222
and many more Datsuns from 48hp to over 500hp
Location: Leavenworth, KS

Post

Yeah, I don't like where the cut the floor out. You will also have to bend the gear shift lever forward, because 2nd and 4th are in the seat.
Image
Image

Which reminds me, I'm putting my front seats from my 510 in Whitey. So might think about bucket seats. Velour upholstery of course :dblthumb:

I have my 320 frame in the garage against the wall, so let me know if you want any measurements. Its time to pull it out and clean around it some.

Andy

User avatar
Li'l Truckie
Posts: 555
Joined: Thu Jan 02, 2014 9:28 am
Car: 3 x '65 PL 320
1 x '64 PL 320
1 x '63 PL 320
1 x '62 PL 320 - parts :(
1 x '60 PLG-222
and many more Datsuns from 48hp to over 500hp
Location: Leavenworth, KS

Post

Big, big day tomorrow 320 Fans!

Finally, no more cleaning up parts, no more wire brushes and flying steel wires sticking in my cover all. Tomorrow is go time! Time to once again turn wrenches and ratchets and start the re-assembly process.

The transmissions is ready to go and is standing by in the garage by MNSTR 0 and Shroom. Its has come a long way from two weeks ago. Check out the before and after shots -

Image
All new seals, gaskets, release bearing, and new Nissan Blue-Green paint job. It has the thumbs up from John and Glen at Northtown Transmission, so no surprises or heartaches when we are ready to drive.

Nuts, bolts, lock washers, and flat washers have been cleaned up, sifted through, matched, and grouped together for easy access-
Image

And here's a quick look and the cleaned up parts -
Image

As I said nuts, bolts, washer have all been sorted. The front engine mounts been cleaned up and painted. I did not paint over the bolts on the right/passenger side engine mount as I've been searching for parts to change it Whitey back to positive ground and a generator. But more on this later. For now we are just going to use the original engine mount that has been modified for an alternator.

The transmission or rear engine mounts have been loosely bolted together as this will help bolting them to the rear of the transmission and the cross member. Once we have the 3 cross member bolts and 2 transmission bolts threaded we will tighten them up all at one time.

The radiator has Gert Frobe touch along with the fan blades and pulley. No, I did not have the radiator boiled out. Hopefully, I will not loose the bet with my son. I know I'm taking a chance but trying to reduce some costs as boiling it out cost $100.

Well, calling it a night, here's one last look the "factory" fresh transmission -
Image

cheers,
Li'l Truckie
http://www.datsunservicemanual.com

User avatar
AZhitman
Administrator
Posts: 71063
Joined: Mon Apr 29, 2002 2:04 am
Car: 58 L210, 63 Bluebird RHD, 64 NL320, 65 SPL310, 66 411 RHD, 67 WRL411, 68 510 SR20, 75 280Z RB25, 77 620 SR20, 79 B310, 90 S13, 92 SE-R, 92 Silvia Qs, 98 S14.
Location: Surprise, Arizona
Contact:

Post

Might not be a bad idea to hit that radiator before you reinstall it, boss man.

I cap off the lower hose outlet, bring some distilled water and vinegar (1:3) to a boil, and fill that sucker up with a funnel. Cap off the upper hose and shake it like a white girl. ;)

Flush WELL with water afterwards (I run a cup of baking soda through in the first fill / shake / flush), then re-flush it again with water.

User avatar
Li'l Truckie
Posts: 555
Joined: Thu Jan 02, 2014 9:28 am
Car: 3 x '65 PL 320
1 x '64 PL 320
1 x '63 PL 320
1 x '62 PL 320 - parts :(
1 x '60 PLG-222
and many more Datsuns from 48hp to over 500hp
Location: Leavenworth, KS

Post

Son and wife are heading to the nursery in Li'l Red to pick up some flowers and a rose bush or two. I'll have them swing by the store to get the distilled water and then we'll give it a go. I used CLR and boiled water, some vigorous shaking, let sit, drain and let the hose flush it out, but not much cleaner.

thanks
Andy

User avatar
Li'l Truckie
Posts: 555
Joined: Thu Jan 02, 2014 9:28 am
Car: 3 x '65 PL 320
1 x '64 PL 320
1 x '63 PL 320
1 x '62 PL 320 - parts :(
1 x '60 PLG-222
and many more Datsuns from 48hp to over 500hp
Location: Leavenworth, KS

Post

Mission Accomplished!

Image

After an abortive attempt Friday night in which a pressure plate bearing retaining spring came off. It was a one shot stab this morning! I could not believe it.

-From the passenger slide the transmission extension down and into the transmission tunnel behind the transmission cross member.
-Swivel transmission left and down and between the torsion bars and let it rest on the torsion bars.
-Reposition self in the cab.
-Lift transmission up, align input shaft with pressure plate bearing and move transmission forward.
-Rotate transmission right and left while pushing forward....clunk. Your good daddy.
Wow, that was the easiest we have ever done that. We have not even broken a sweat yet.

Once the transmission and engine were bolted together, we move to installing the front motor mounts. The passenger side is easy enough. However, the driver side is a little tight and you will nee to place a shim between the rubber mount the engine side steel mount to lift the engine a little so you can thread the bottom nut on the mount. Once you get nut threaded simply pull out the shim and tighten everything up.
Image

On the right side of the engine we installed the oil filter housing, while ruining the cheap oil filter wrench trying to remove the oil filter. So we will get medieval and drive a screwdriver through the filter and remove it this way or so my son recommends. We'll see, I have an idea or two that is not so drastic-
Image
If the weather remains nice we'll install the gear reduction starter on this side tomorrow.

For the left side of the engine we'll need to make a blank for the mechanical fuel pump as we put this one on Shroom. I have an electrical one we will install back by the fuel tank, though Moss Motors has one, push or pull / positive or negative ground, I will research for us, so more on this later.

Picked up the manifold from Scott over in Weston, MO at Flashback Restorations so we will paint it up with some high heat engine/manifold paint. We will also finish cleaning up the Nikki 2D-30C and install new gaskets and a plunger. And then mate the two back together and install next weekend.
Image
Somewhere I have the air breather tube for the tappet cover, just need to find it, clean it up, paint, and install. And we'll see what we can do with the steering column to make it a little more presentable.

Well, that's a wrap. Heating pad is waiting for me.
Li'l Truckie
http://www.datsunservicemanual.com
Last edited by Li'l Truckie on Sat Apr 12, 2014 8:01 pm, edited 1 time in total.

User avatar
AZhitman
Administrator
Posts: 71063
Joined: Mon Apr 29, 2002 2:04 am
Car: 58 L210, 63 Bluebird RHD, 64 NL320, 65 SPL310, 66 411 RHD, 67 WRL411, 68 510 SR20, 75 280Z RB25, 77 620 SR20, 79 B310, 90 S13, 92 SE-R, 92 Silvia Qs, 98 S14.
Location: Surprise, Arizona
Contact:

Post

Spectacular!

Curious - Why an electric pump? You'll need to regulate pressure somehow, as these things don't like more than 1-2 psi.

User avatar
Li'l Truckie
Posts: 555
Joined: Thu Jan 02, 2014 9:28 am
Car: 3 x '65 PL 320
1 x '64 PL 320
1 x '63 PL 320
1 x '62 PL 320 - parts :(
1 x '60 PLG-222
and many more Datsuns from 48hp to over 500hp
Location: Leavenworth, KS

Post

Fuel Pump....ugh...this is a sore subject in my house. My wife even knows which fuel pump's work, do not work, my frustation with not finding a compatible match or even the correct size diaphragm, and the money I've spent trying to find something that works.

It's raining out. Let me take some pics and I'll start a new thread on the 320 fuel pump.

If you have a source for a mechanical fuel pump or diaphragm, I'll place my order today...like now.

thanks
Andy

Atabale
Posts: 28
Joined: Sun Dec 29, 2013 6:32 am
Car: 1963 datsun 320 pick up

Post

Hallo Li'l Truckie

Inspiring, this is the way I want to work !

Why do you not respray the body of the truck, I currently have everything out and is considering a spray paint job on the truck . Is it not easier /cheaper to get it done while the drive train etc. is removed, or there not much difference?

regards

Atabale


Return to “Datsun 320”