
I inspect the drive belt on my car every oil change; it was starting to crack a little bit as is normal with age (car has approx 40,200 miles at this point and was built in July 2007) but I wasn't worried about it yet. However, I was starting to get some squeaking so I decided to go ahead and change the drive belt. (Cheap insurance.) I didn't find any sort of writeup so I took a few pictures along the way in case anyone else out there is thinking of doing this job themselves instead of paying a shop to do it. This is for L32 Altimas (2007-2012 Sedan, 2008-2013 Coupe) with the QR25DE 2.5L four cylinder engine.
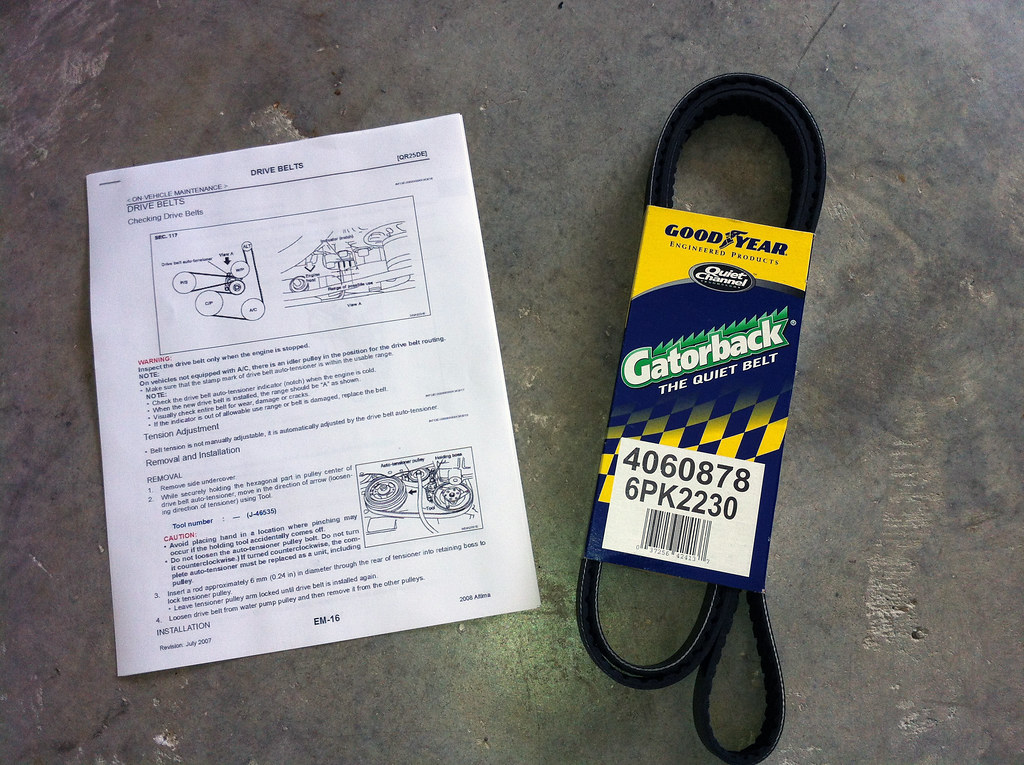
To start off, you'll need your belt of choice (I went with a Goodyear 4060878) and I'd suggest having the pages from the service manual for your year car pertaining to this job nearby as a reference. (For the service manual, go to http://www.nicoclub.com/FSM/Altima/, select your year, and then find the "EM.PDF" document. You'll probably find what your looking for on page 16.) In theory, all you need to do is gain access to the belt, lock the tensioner pulley back to remove tension from the belt, replace the belt, release the tensioner pulley, and put everything else back together. But nothing is ever that easy (for me at least).
Tools you'll need:
- Two wheel chocks
- Jack
- Jack stand
- Lug wrench (or whatever you use to get your wheels off)
- Two flat blade screwdrivers; a normal (4-6") one and one with a long shaft (or something else that you can use for leverage)
- 5mm allen wrench
- The longest 14mm combination wrench you have access to (with an offset closed end, like this) or an offset box wrench if you have one
- 19mm socket and a 12-14" breaker bar or a long 19mm wrench
- Some sort of pin about 1/4" think and two to three inches long (I used a spare bolt but your 5mm allen wrench can do the job if it isn't too long)
- A flashlight to help you see what you are doing
- Safety glasses to keep dirt and other assailants out of your eyes
- Strong fingers
- Lots of patience
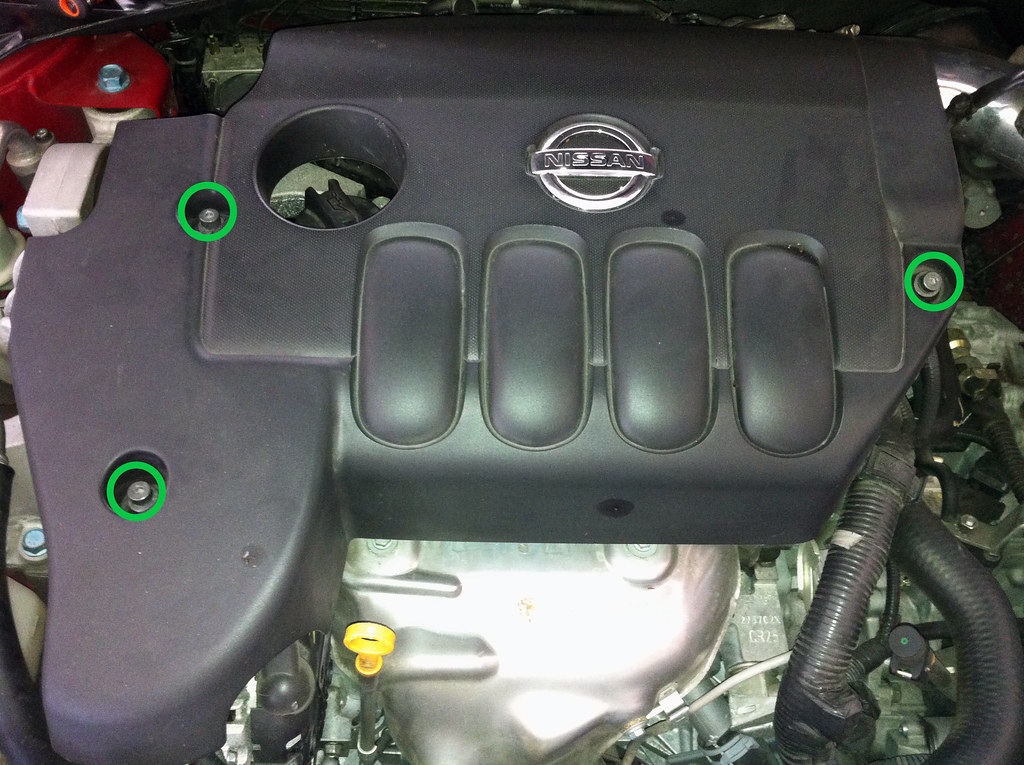
Remove your engine cover in order to gain easy access to the alternator pulley. Use your 5mm allen wrench to remove the three bolts holding the cover on.
Next, loosen the lug nuts on your front passenger side wheel. Jack the car up and take the wheel off. Make sure to do this safely by chocking the rear wheels and supporting the car with a jack stand. (You'll be familiar with this next bit if you change your own oil...) Remove the side cover panel by removing the five clips that hold it in place; you'll need to bend it a bit to squeeze it out between the axle shaft and the inner fender lining. This will give you access to the pulleys and drive belt.

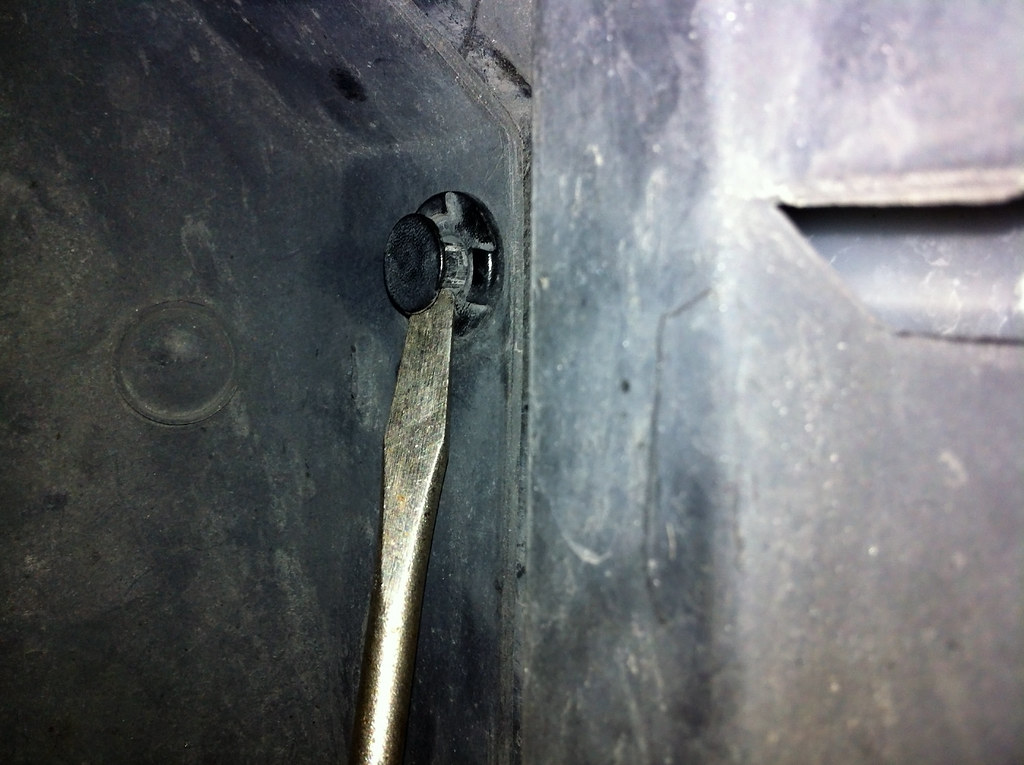
The green circles and arrows in the image above indicate where the clips are (one decided to free itself from my car as you can see). If you are unfamiliar with how to remove these clips, you need to take your smaller flat blade screwdriver, wedge it into the clip under the head, and then twist the screwdriver to pop the head out. Then you can pull the entire clip out.
With the cover panel off, you'll see some of the pulleys and drive belt. Be sure to take note of the belt's path and refer to the service manual for its path too.
Next, grab your 14mm wrench and place the closed end on the tensioner pulley's bolt. (I don't have any offset metric wrenches so I used a 9/16" wrench.) Try moving the wrench toward the back of the car (make sure not to turn the bolt counterclockwise; if you do, you'll need to replace the entire tensioner pulley assembly as explained in the service manual). If your like me, you'll be sitting on the ground, crouching down all shoved up into the wheel well and won't be able to budge the thing no matter how hard you try. In that case, use your long screwdriver for some leverage by putting the edge of the screwdriver's blade between the A/C compressor and the engine. Then move the handle back against the wrench and viola, you moved the tensioner pulley arm back enough to slide your locking pin in. Using a piece of pipe over the wrench will probably do the trick as well. You may have to be creative here if you don't have a wrench long enough nor muscles big enough; the spring on the tensioner pulley is no joke.
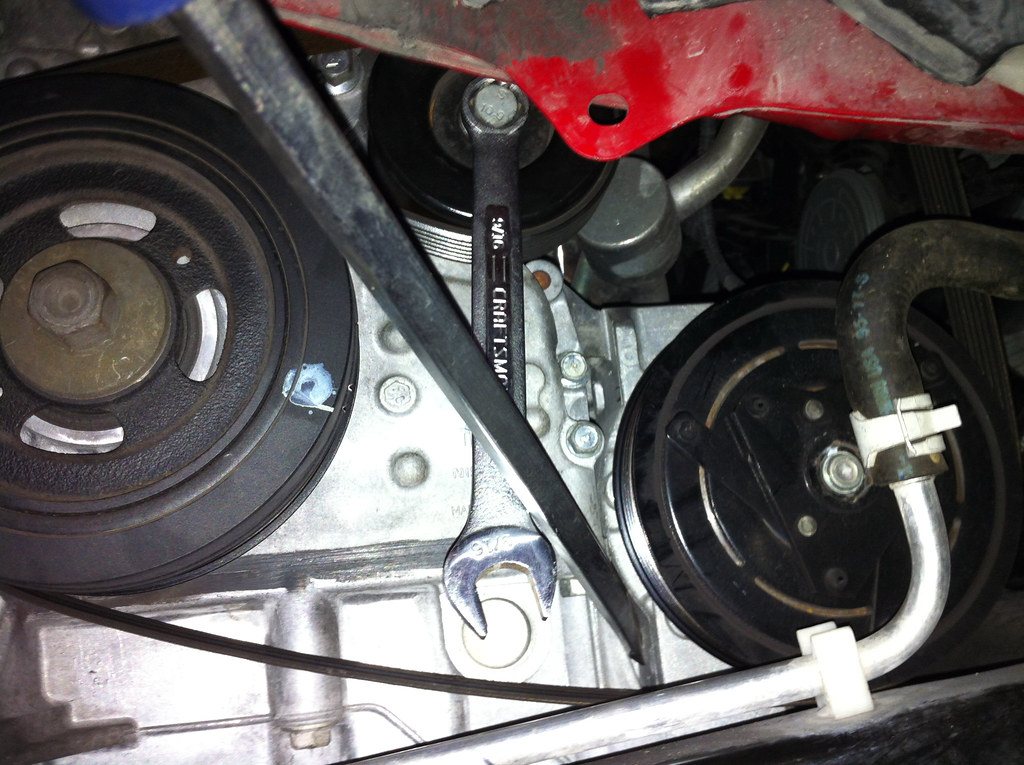
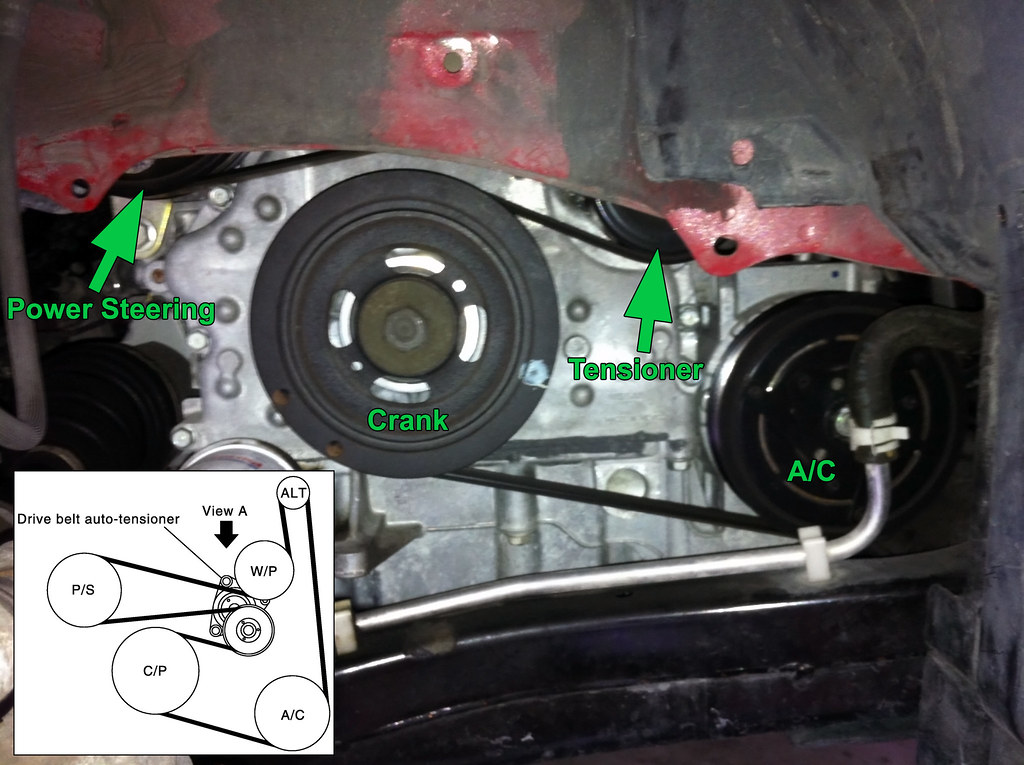
Conveniently, you won't be able to see what you are doing when you try to get the pin in. Its a tight squeeze, but slide your hand between the pulley and the car's body and fumble around a bit until you feel the hole in the tensioner pulley's arm. Then slide your pin (bolt, allen wrench, what ever you have) into place to lock the tensioner pulley arm into place. MAKE SURE you don't back off the pressure you are applying to the tensioner pulley while your hand is in the way - the pulley will likely put your hand in a world of hurt if it slips back to its extended position. Here's what your going for:

This picture was taken by sticking the camera between the radiator and other assorted bits behind the bumper with the engine's under cover taken off. You won't be able to see this same view but it gives a pretty good look at what you are working on.
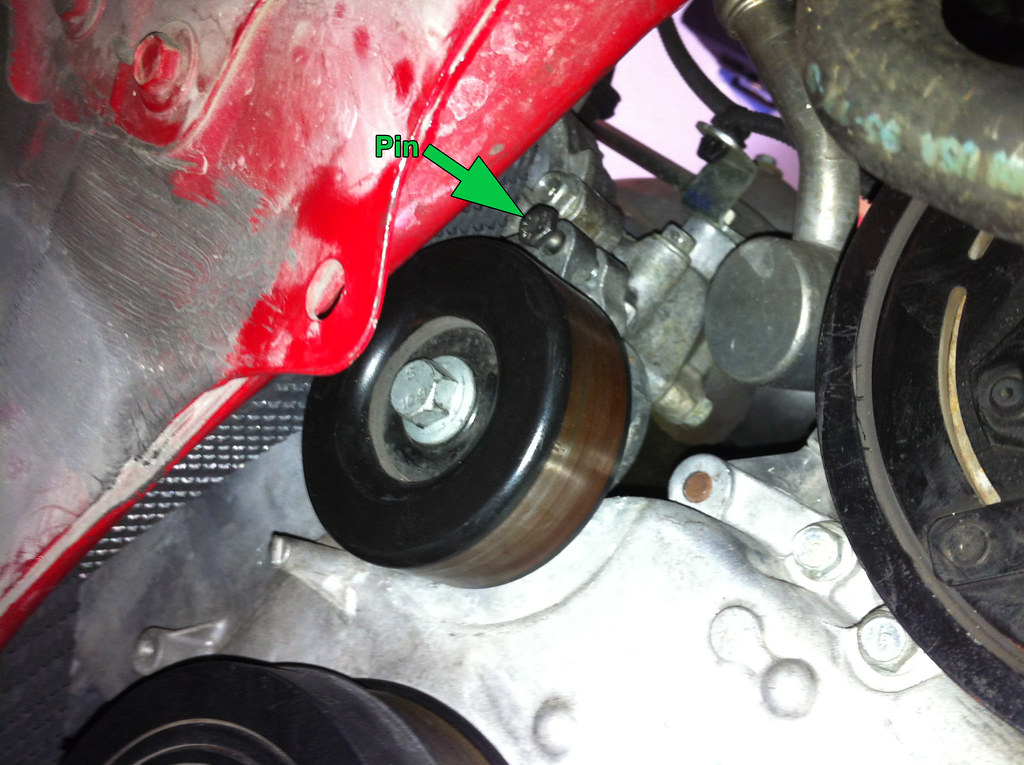
This picture was taken from the front passenger side wheel well; you'll be able to see this if you crouch down a bit and look up.
With the tensioner pulley no longer applying pressure on the belt, remove the old belt from the A/C, crank, tensioner, power steering, and water pump pulleys. I pulled the belt down and let it hang from the alternator pulley while I got around to the top of the engine bay to pull the belt straight up and out. To install the new belt, the service manual says to leave the A/C pulley for last but since that's go a lip, sliding the new, tighter belt around it is almost impossible. Route your new belt around the pulleys making sure to follow the original path leaving the tensioner pulley for last.
Now the fun part where strong fingers and lots of patience are required. My Goodyear belt put up a fight; it was very tight and difficult to get on. I finally slipped it over the tensioner pulley after a couple hours of trial and error and cursing the thing. Once its on, check the belt's path to make sure that its correctly positioned on all six pulleys. Get your 14mm wrench and long screwdriver (or leverage tool of choice) back in hand to remove the pin holding your tensioner pulley in place. Removing the pin will again apply tension on the belt. Check the belt's path again to make sure it is still correctly positioned and give the belt a few tugs to make sure that it is under tension.
Next, grab your 19mm socket and breaker bar and put it on the crank pulley's bolt. Give the pulley a few turns (clockwise) to equalize tension on the belt across the pulleys. Since you will be turning the engine, be careful here as you will be fighting the engine's compression and your breaker bar will slap back up if you don't complete the stroke. Now check the belt again to make sure everything is as it should be. Once you've confirmed that the new belt is correctly installed, button everything back up - reinstall the side cover and its five clips, put the wheel back on, lower the car, and torque your lug nuts but don't reinstall the engine cover yet. Start the car and reinspect the belt from the engine bay using your flashlight so you can see the lower pulleys. Make sure not to touch the belt nor the pulleys when the engine is running! If all is well, close the hood and go for a drive around the block. Inspect the belt again after your drive and reinstall the engine cover when you have confirmed the belt in installed correctly. Close the hood and your done!
The drive belt is a critical part of the car and you must be sure that it is installed correctly, hence me saying to check it so many times. Call me paranoid, but the last thing I want is for the belt to fly off because I didn't install it correctly. This process should be pretty much the same for all L32 Altimas (2007-2012 Sedan, 2008-2013 Coupe) with the 2.5 liter engine.
Happy wrenching!
