project:S-RB

A forum for owners and fans of the legendary Nissan Skyline and Nissan GTR.
supersayianjim
Posts: 308
Joined: Wed Nov 26, 2008 6:02 am
Car: 89 240sx(s13)

Post

well it's been over a year. and i finally figured out how to poast pics. so iam doing my swap build..

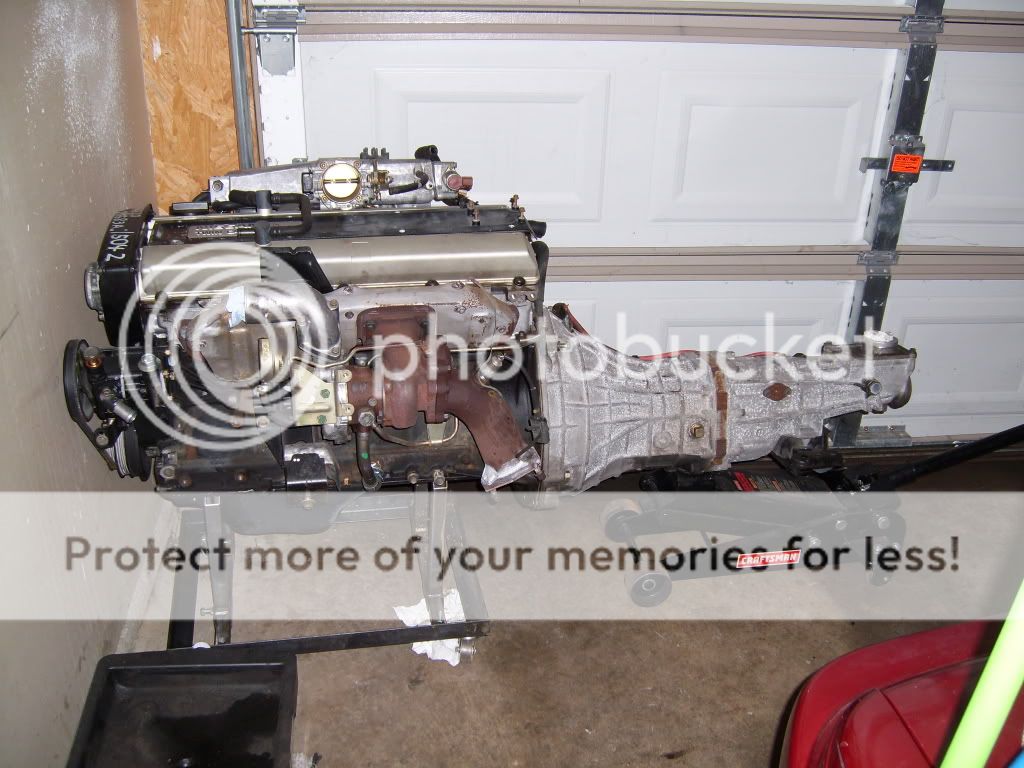
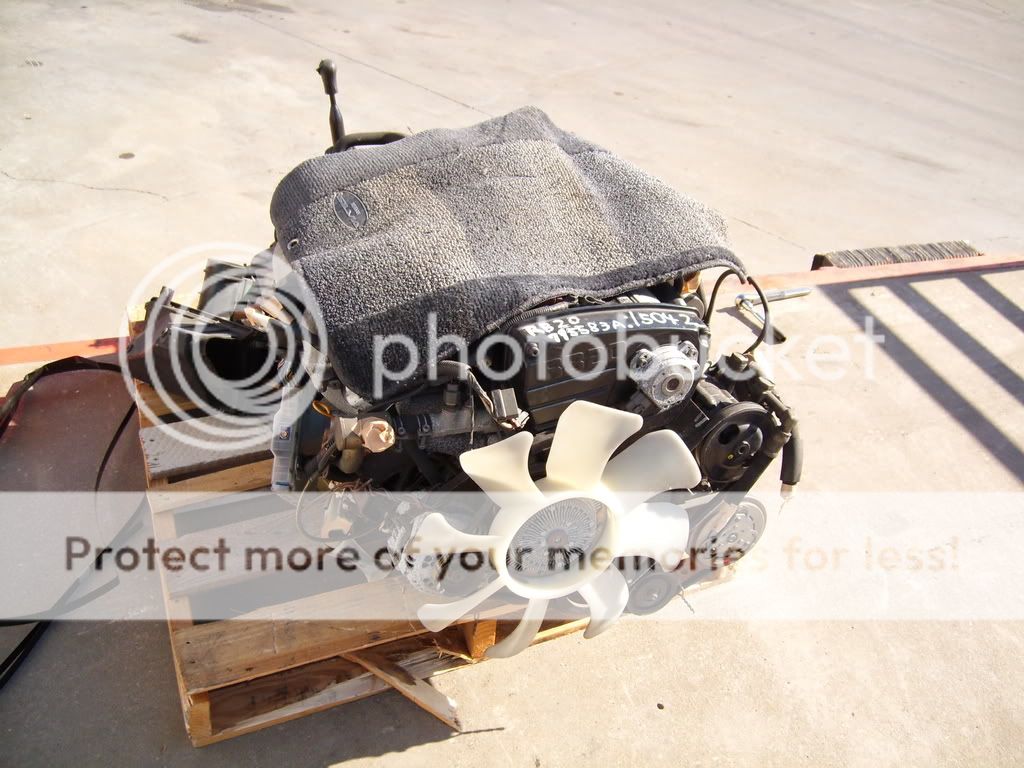
well motor finally got here today. and loaded it off the pallet signed the frieght bill and it was on. i scored an authentic silvia floor mat which was on the pallet. seems that everything i needed was included(even a fuel pump and a driveshaft). i would later learn that the skyline driveshaft is longer than the oem automatic.

Image

Image

Image

Image

Image


so the plan was to remove the transmission and move that first and come back for the engine.i had it dropped off at a local autozone and the manager was cool about it.

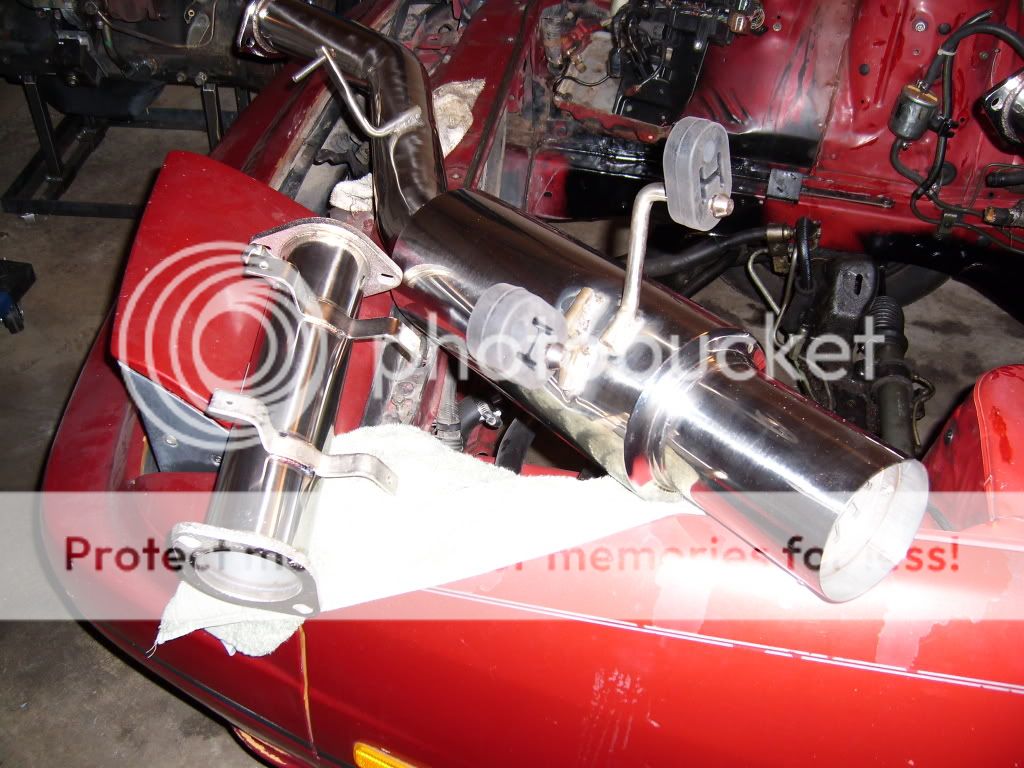
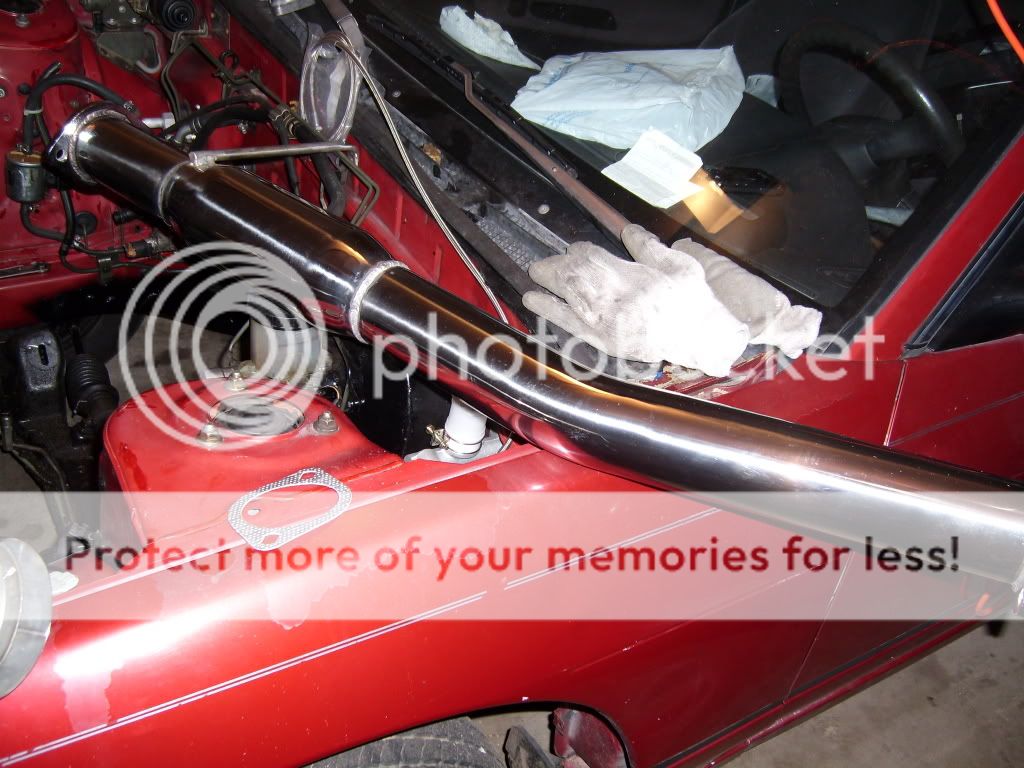
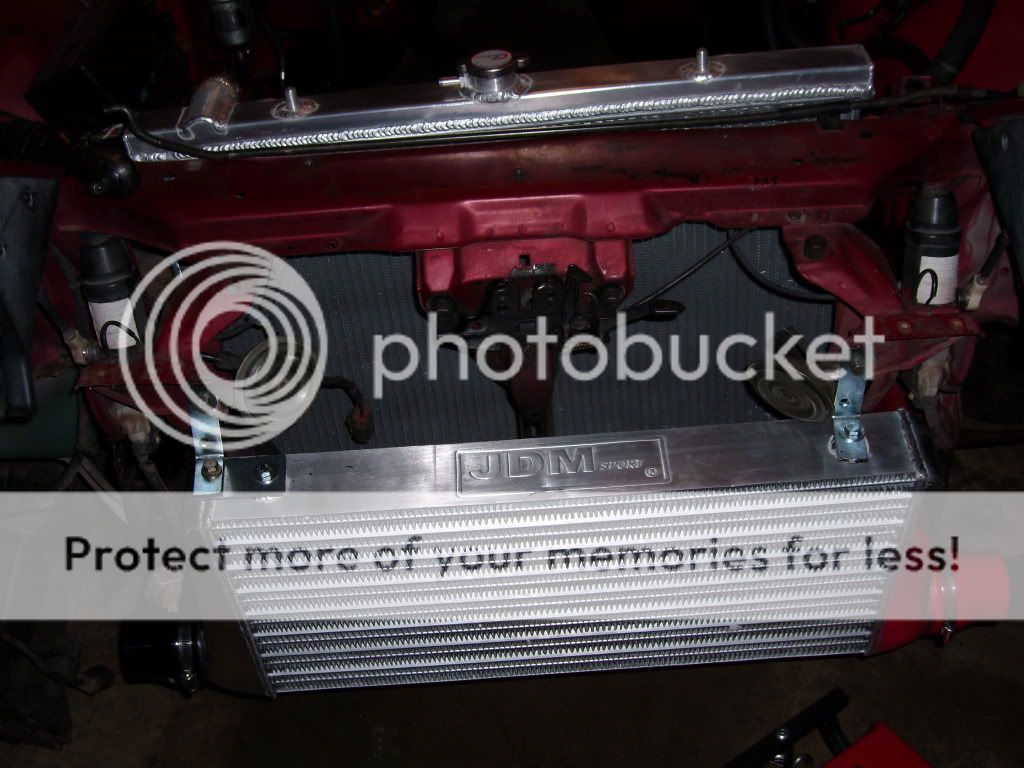
i also scored the oem intercooler and pipes. iam going with a bigger unit so are there any takers??

Image

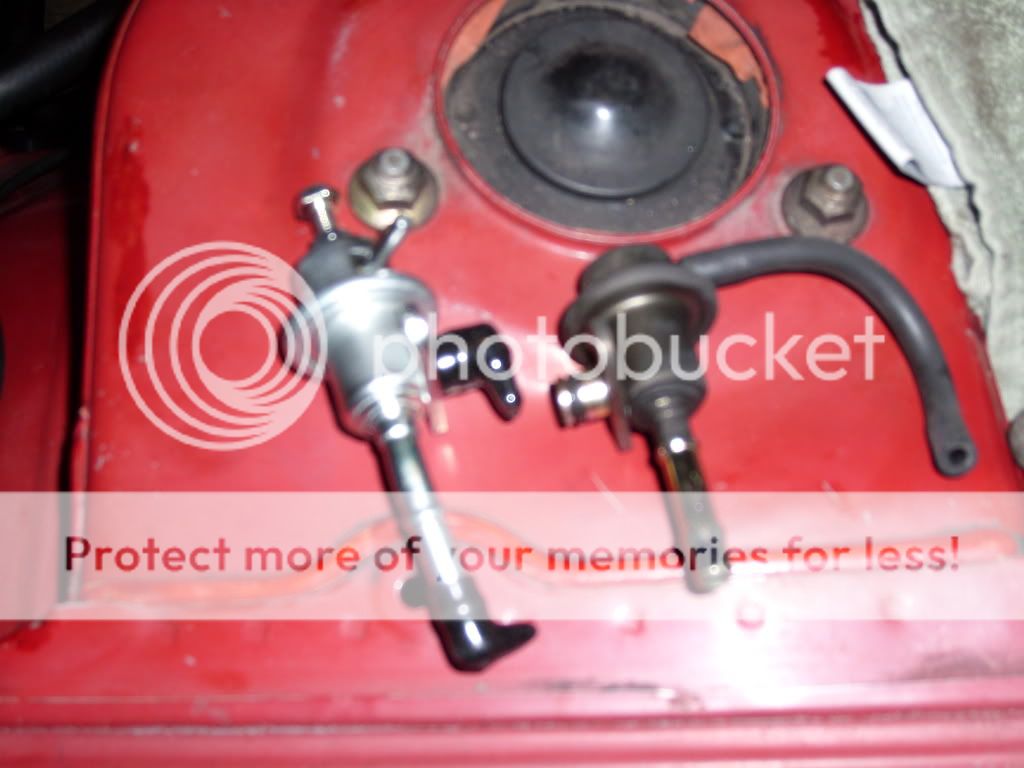
and heres the fuel pump

Image


and heres me loading in and loading it off

Image

Image

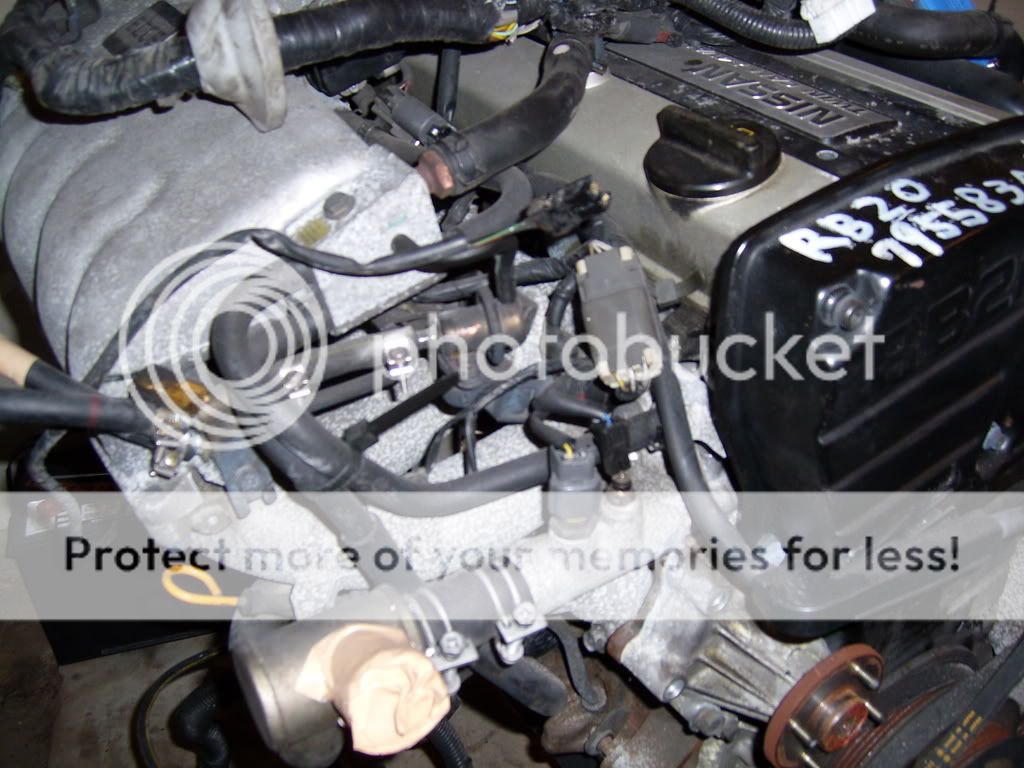
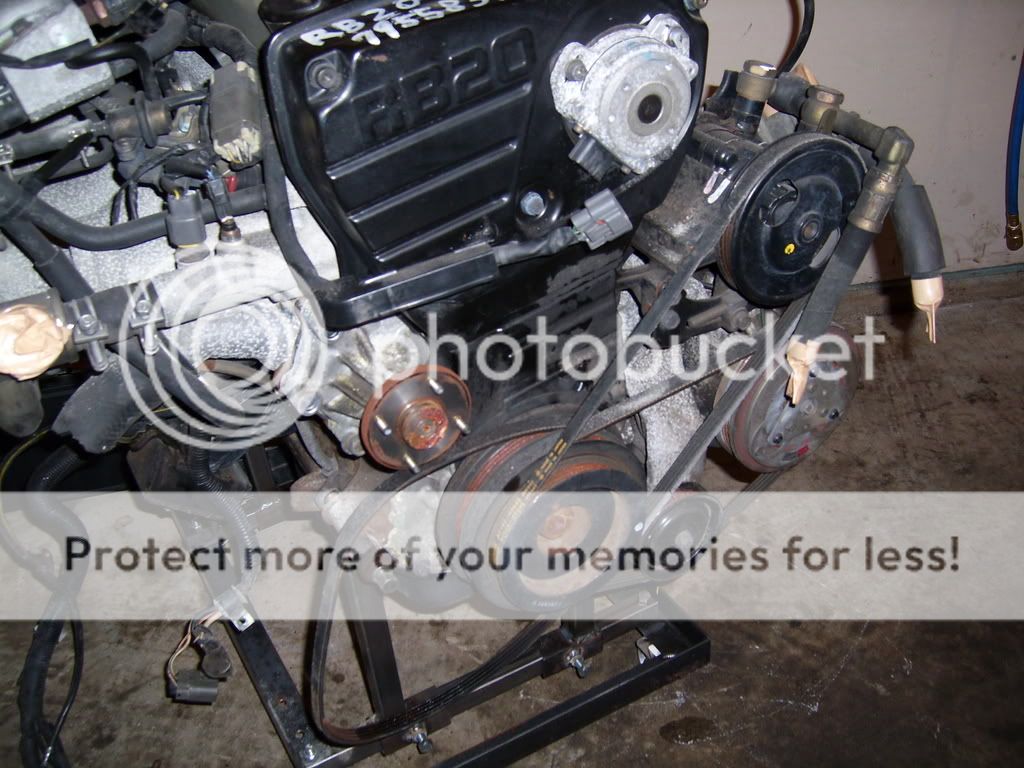
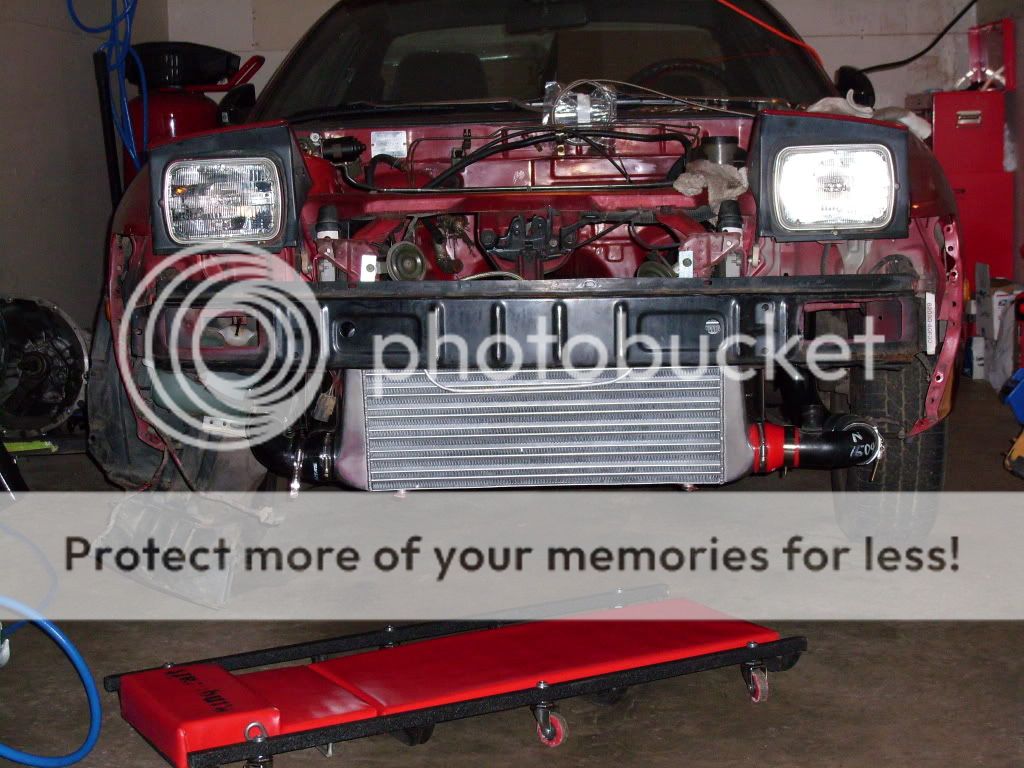
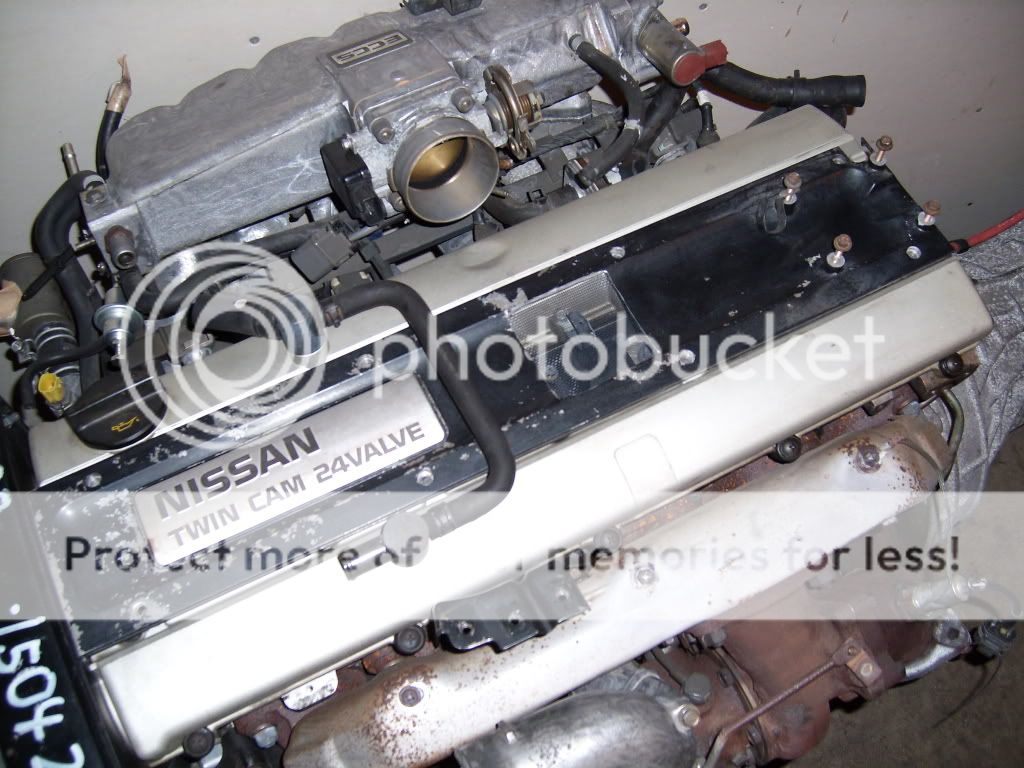
and heres home(for now) tomorrow iam going to pull off the harness and other stuff. the mounts are included and look super clean. the engine looks great overall


supersayianjim
Posts: 308
Joined: Wed Nov 26, 2008 6:02 am
Car: 89 240sx(s13)

Post

well last night i began stripping the engine down of stuff. i think i know why it was so cheap. this isnt my first imported motor. but it has a lot of oxidation(due to sea salt) so i need to get rid of this s***. does anyone have any recommendations as to what to use?? or do i have to sand everything??

Image

Image

Image

iam going to get the altenator and starter rebuilt(as finding a new one would be impossible) iam sure they work but for piece of mind later down the road.

there is a light coat of rust on the teeth of the pulley damper.

Image

and i removed and kept the belts. iam hoping to go to autozone or a parts store and match the size with another car model(likely nissan)

Image

heres the small stocker turbo. there is little shaft play but feels solid.
Image

Image

Image

i would like to upgrade to a bigger turbo before i get the car running. but that also means bigger injectors and a afc,tunning. want to just get it running and keep it simple for now. iam going to fun a nismo fpr,and a bigger intercooler and piping,along with 3" exhaust so hopefully that will give the stock hp a bump.

then i took a peek at the timing belt. youre supposted to change it out but it looks healthy and solid. the water pump is behind the belt so i dont know if i can change one without the other"yet".

Image

Image

the swap also came with the engine id plate

Image


Image

and here is the ac condensor setup for the skyline. very different fron the 240. is there a way to get these plugs moved to the 240 to make the ac work??

Image

and the powersteering pump. there are 3 hoses(anyone know where the 3rd goes??) doesn anyone have any picke of a stock 240(s13) powersteering pump setup and where the hoses go?? greatly appreciated..

Image

supersayianjim
Posts: 308
Joined: Wed Nov 26, 2008 6:02 am
Car: 89 240sx(s13)

Post

so tonight not much going on. i took off the top engine harness finally. and i removed the ac system completly.(after some hard deliberation)

Image

Image

and i want to keep the radiator fan and use it. do i need this wire(if anyone knows)

Image

and would i need to connect these ones??
Image

i also too apart half of the intake mani. and looked inside,it looks slightly ported

Image

Image

and finally removed what was left of automatic transmission.

Image

and heres the progress so far.
Image

next week i plan on finshing engine prep and start cleaning up the transmission.

supersayianjim
Posts: 308
Joined: Wed Nov 26, 2008 6:02 am
Car: 89 240sx(s13)

Post

well it's been a wile but finally back on track to getting thsi thing started. my vans transmission took a dump on easter sunday. so ive been bumming and walking ever since. i will do it but i hate walking everywhere (not like n.y.c. where i can hop a train to where i need to go).

since my last post i addressed a few issues. as far as the oxidation of my metal (from the sea salt) i got these dremel bits.

Image

they do the job,but run out fast. i didn't get rid of all of the ox,but it looks much better than before. i also put in some spark plugs(from a z31 300zx turbo) perfect fit. and the same size as the ones that came with the motor.
Image

Image

i also mounted my clutch pedal and got a cheapo master cylinder from advance(oem is $150.00) the clutch slave is the exact one used in the 300zxtt(z32). and i got a steel braided swap clutch line(sweet)
Image

Image

and i got my full 3" exhaust also(from turbo dump-back) good looking welds(not bad for ebay) running a test pipe cause there is no smog inspection downhere. mounting was fairly easy(brought 2 new hangars)

Image

Image

Image

Image

Image

Image

i also installed my turbo timer(using a z32tt harness). next up was switching out the front crossmember as the 240 one will not hold the rb20.
it started out easy but tunred out to be a pain. getting those new steering rack bushlings on.
Image
the 240 frame was gunked up bad
Image

and finally i had to switch over the powersteering lines to a later car.

Image
now ready for downpipe and transmission.

Image

and were rocking and ready for the rb. i will be done next week. as iam waiting on 2 more packages(the harness from carl h) and (timing belt, fpr,seals) from a store in cali. everything else on the car is done EXCEPT. i have to cut the bumber support to fit the intercooler. but i will do that when the engine is in. ready to go ALMOST.

supersayianjim
Posts: 308
Joined: Wed Nov 26, 2008 6:02 am
Car: 89 240sx(s13)

Post

well yesterday put some stuff on
-nismo fpr
-oem thermostat
-new water pump
-was going to change timig belt(but they sent me the wrong one)

i think i finally got this powersteering setup complete.

Image

i have to take out these tabs in the back to eliminate the 4wd steering. then i had to go to westlake(they never have the right bolt) and cut to fit and torque down(fine thread)

Image

Image
and this is whats it replacing.

Image
finished product

Image

then quickly it was a fpr swap

Image

and on to the water pump. i had to take the damper off so i had to rent a puller real quick.

Image

Image

the old water pump had it

Image

i used the dremel and polish brush to clean this up

Image

Image

and i was test fitting the radiator for a look at how i would run my intercooler piping.

Image

and finally my night got f*** up when i realized they sent me the wrong timing belt.

Image

Image

Image

iam going to call them today as its cali time and they open later. this might f*** up my plan on kcir sunday(all this work for nothing)

today iam going to mount my intercooler and cut my bumper support to fit.

supersayianjim
Posts: 308
Joined: Wed Nov 26, 2008 6:02 am
Car: 89 240sx(s13)

Post

so i had to use the timing belt that came with the engine(its in good shape) due to me getting the wrong one shipped to me. iam going to also get tensionsers and iam going to chang the belt myself later with the engine in the car(i have to move the ic and rad etc). but its not hard at all switching out.

Image

and buttoned and belted up
Image


well been working on the car for the last few dayz. and i thought mounting this intercooler would be a breeze(man it wasnt) the only really cutting tool i have is my trusty air cutter(from walmart $12.00) but the b**** is very relaible.

first i removed the bumper. iam running 2 half inch ic pipes i brought for my expo/dsm van. but my advice to anyone else is buy youre car specific kit.

Image

Image


Image

did some measurements and cut the support first. then i figured i would move onto the bumper itself. took like forever to cut this up.

and what i didn't take into account was that a high rpm cutting tool and plastic or rubber/paint. don't mix

Image

got really smokey really fast,made my eyes burn, but i had to get it done. opened the garage a few times(after turning off the noisy compressor) to air out this

Image

Image

then when i finally got that done. took some steal and was going to do the cheapo was and fad up some mounting brackets.

Image

that also took forever. cut one piece and gave up and went to lowes and got these.

Image

still it wasn't working
Image

Image

so i needed the piece after all.
Image

Image

had this left over from my (supra days) and id use this for my bottom mounting brackets.
Image

Image

http://i495.photobucket.com/albums/rr31 ... ngars2.jpg

kit came with these yummi t-clamps(only 2.5)

Image

then i test fitted the radiator to see how much room i had to run my pipe.
Image

Image

Image

also from my supra days i brought a ic cooler that i never got to mount. so i figurd i would use it.(its past the experation date but maybe it will still work)??

Image

Image

Image

heres the bumper mounted. cleared the ic pretty good.
Image

more fabbing(seems like all i do lately. was going to loop the tube back but would be too low to the ground. i want my battery up front.so i seen another guy cut (under) his battery tray.

Image

Image

after almost 3 days finally ran the pipes(bottom ones) through the car. and reattched bumper done(with that)

Image

iam not sure what kind of grease you use on transmisson parts. all i had was white lithium and i hope thats the one i needed to use.

Image

Image

then it's time to form voltron.
Image

and for my final fab for the moment. it's said the coil packs heat up,but i want to keep the cover on cause it looks badass. so i make a screen for the hot air.
Image

Image

ht[img]tp://i495.photobucket.com/albums/rr317/supersayianjim/project%20s-rb/coilvent2.jpg[/img]

so iam ready to "stick it in" but i need this f*** harness(it's a f*** week late)

Image

supersayianjim
Posts: 308
Joined: Wed Nov 26, 2008 6:02 am
Car: 89 240sx(s13)

Post

SOME ISSUES that might hamper me(or maybe iam thinking too much about it..

-the oil pan. I know and small ding in an oil pan can cause pressure drop and cause a knock. when i got the motor the pan was fine. but some moving around on the pallet. and it got pushed up (a little) it looks worse in the pictures than it does in person.
Image

Image

Image

i tried to manver a screwdriver(bent) through the drain hole to try to push it back down. but that didnt go anywhere. i stabbed the pick up mesh(not hard) but got some more oil to come out. just wanted some opinions on how bad the pan looks?? if worse case i can get someone to weld it from the outside and pull it out.(cross fingers it will be okay)

-transmission grease. i used white lithium grease on the throw out bearing and the clutch fork(is that okay) i thought there was also some other kind of grease for this?? but will the white lithium be okay??
Image

Image

also my clutch fork after i put the transmission on is compressed all the way in(like that when i took delivery or eng. is the clutch slave supposted to be compressed already or loose??(its not hooked up to the master yet.

and finally the heater hoses. is there a feed and return?? or can i use either top or bottom with the hoses from the engine??

Image

Image

supersayianjim
Posts: 308
Joined: Wed Nov 26, 2008 6:02 am
Car: 89 240sx(s13)

Post

so my harness finally gets here(this is on monday). the guy sent it out on saturday from n.c.(priority mail really does work). so i get to work. start at 4pm on monday afternoon. work 24 hrs straight to tuesday afternoon and still not done. i need a radiator hose that f*** fits.(the neck on the lower rb rad spout is weird).

anyway got most of the stuff done. had to have some help putting the actuall engine in the car. other than that this is a solo project.
tired to test the car and to get it to turn over but not yet. i have power to the fuel pump and the ecu. but when i turn the key the starter wont crank.

other than that i had to cut more under the battery tray cause clearance for the intercooler pipes wasnt enough.

Image

Image

Image

the steering column hits this part of the dump pipe. iam a moron to a point. instead of using my new die grinder(which was in the box till this happened)
i used my trusty dremel. then after a bit it fried(totally,and literally) so sparks were going off inside the thing.

Image

r.i.p. my dremel. maybe b&d makes garbage tools now. my cordless drill is stuck in the drill in position?? what happened to this company??

so i get the engine hooked up and ready yo go

Image
using my trusty hooker

Image

and after 20 mins finally got the mother in

Image
looks like i need a custom dump

Image
and so so tight(tighter than an asian virgin).

Image

had to hook up the transmission bolts first

Image

and this f*** hole gave me problems.

Image
it stripped my bolt. i tried for an hr to get this in.

Image

finishing up the exhaust

Image

Image

Image

Image

doh!!!. so close to a perfect fitting ebay exhaust. seems i can't get to turn enough to lock in that final bolt. hopefully there won't be an exhause leak. and i can pass inspection.
mount my driveshaft,and iam using this stuff in my transmission.

Image

Image

no sighn of any puny automatic
Image

Image
not big enough..(thats a first for me)

wiring and tubing up
Image

fitting radiator pipes(what a pain)
Image

well heres my delema.

EXISTING PROBLEMS
-starter won't turn over
-still no reverse lights
-only power to ecu and fuel pump when key is in (start position)
-in on or acc position there is no power to either.

any help is appreciated

supersayianjim
Posts: 308
Joined: Wed Nov 26, 2008 6:02 am
Car: 89 240sx(s13)

Post

well nothing spectacular to report now. iam just done. filled up the radiator yesterday. and cut my final custom intercooler sides too.

fabbed up a throttle cable bracket.

Image

and i wanted to keep my battery up front so i ran the pipe underneath the tray.

Image

Image

and finally done with everything else. not just to get the f*** thing started..

Image

supersayianjim
Posts: 308
Joined: Wed Nov 26, 2008 6:02 am
Car: 89 240sx(s13)

Post

well i finally got the damn car running (last thursday). seems i used a turbotimer harness for a (300zxtt) it wasnt compatable with my car but the wires hooked up. and the comp list listed (s13-guess in japan only).

so i finally go the thing running. first few daYZ had a vacuam leak or 2. but it still pulled.

Image
this was my initiaL setup. so i had to cut the ribbing in the hood.

Image

made the hood noticably lighter. i didn't install a rad fan(yet) ive been doing research and i think iam going with a large single one from a old school turbo diesel benz(from pick and pull)

also my exhaust had to get clocked by like 2 inches to be full 3 through.

Image

and heres after. not bad for $20.00

Image

Image

my front sway bar is also hitting my oil pan(none told me that would happen. anyway i NEED some gauges. i would like to know if iam rich or lean. since i got my exhaust finished iam spitting flames periodically(which i think is the s***)

my swap is complete.

supersayianjim
Posts: 308
Joined: Wed Nov 26, 2008 6:02 am
Car: 89 240sx(s13)

Post

well finally picked up some wheels.(which i would soon come to regret) some oem non scuffed g35(sedan) 17 inch wheels for $160.00.


Image


Image

now i wait for a good priced z32 brake/hub setup to buy.

also came into this super rare s13 specific steering wheel(like mint)

Image

and for now since iam defitenly going with a s13 front end conversion,id figure id do this for now since none else has really. there dot approved so the cops can suck a d!ck!!

Image

supersayianjim
Posts: 308
Joined: Wed Nov 26, 2008 6:02 am
Car: 89 240sx(s13)

Post

so finally after months of sartving and looking for a cheap s13 swap i hit jackpot. found it on craigslist in iowa(not far from dmi. for......

$500.00 jumped on it,and brought it 2 dayz later. went to pick it up and the guy was nice enough to help me hook it up. the fenders are noticably lighter than the 240sx ones. and the headlights are weird??

the high beams are h3 and the lows and fogs are (who the f*** knows) havent found a size for them yet. luckily the low beams work. i have the double projector lights.


Image

i want to run hid's on the low beams but i have to find the size first. the fenders fit perfectly. and since he ran a sr the bumber support was already cut.


Image


the only thing was the hood didnt latch closed(hitting an ic pipe) so i cut the skeleton like i did with the oem hood and viola.


Image


Image


also got my smoked tails in


Image


Image


Image


Image


Image

Image


iam mcloving the setup. just that there is really no airflow to the intake. so i might have to add a hoodscoop for good measure..


Image

supersayianjim
Posts: 308
Joined: Wed Nov 26, 2008 6:02 am
Car: 89 240sx(s13)

Post

well i fabbed up a lip from a vw jetta. to protect the hide the bottom half of my intercooler and protect it from parking stops..


Image

supersayianjim
Posts: 308
Joined: Wed Nov 26, 2008 6:02 am
Car: 89 240sx(s13)

Post

well today i finally put my silvia into hibernation until it gets warm...


Image


Image


and a moment of silence for those 240's that are still daily driven in the winter..

supersayianjim
Posts: 308
Joined: Wed Nov 26, 2008 6:02 am
Car: 89 240sx(s13)

Post

well it's time to update. iam way behind schedule. and iam approx 5-6 thousand away from finishing this to my liking(including a turbo upgrade,paint and what not). stashed it away for winter but still buying parts and getting ready for summer.

ordered a turbo dumppipe from e-gay. But it suck because it hits the steering rack because it's for a lhd car.

http://cgi.ebay.com/ebaymotors/SKYLINE- ... 5d2925e7b9

so i had to do some/hacking fabbing. luckily one of the nissan tecks knows how to weld..

Image


Image


Image


and after some hammering and cursing finally got it to clear..


Image


Image


i did notice quicker spool up, and a louder turbo note..

supersayianjim
Posts: 308
Joined: Wed Nov 26, 2008 6:02 am
Car: 89 240sx(s13)

Post

found a s14 ad local pick and pull with grey interior. so i grabbed up the seatbelts and the seats..(anyone with a 13 knows the seats suck camel balls)

but the 14 seats makes me want to drive again..
I stripped the seat cloth threw it in a washing machine and viola. clean and smeling fresh..(had to track down some hog rings and a special gun.)

Also picked up an uncracked dashboard(thanks again p+p that is for a hud).
so did this as a combo deal as it made sense..

removal of the dash was suprisingly easier than bad sex.. all the screws you see are the ones you need to remove(remember the vents by the windshield)

Image


Image


oldies must go

Image


swapping the vin plate

Image


Image

so smooth

Image


then after that it was on to the seatbelt/seat combo.
also eliminating that pesky auto seatbelt system was also a "piece of vag"


Image


iam a carpet muncher


Image

Image


Image


Image

kinda short compared to the stock one. but the bottom bolt should suffice.


Image


Image

Image

supersayianjim
Posts: 308
Joined: Wed Nov 26, 2008 6:02 am
Car: 89 240sx(s13)

Post

now i got the seats naked(no sex this time) and got to cleaning the foam and threw the skins in the washer.


Image


Image


Image


Image

Image


Image

and as you can see from the side by side comparison, the 14 seats loves youre a** more.

Image

i switched the bolts and washers from the 13 and 14 to screw and fit. the swap itself wasn't hard just the fabbing of the seatbelt holes with the dremel was time consuming.

i recommend this upgrade for any 13 owner..

up next

-motor pull(for the proper r32 crossmember)i have a cefiro on it now
-turbo/fuel upgrade
-rear diff
-5 lug swap
-z32 upgrade..

supersayianjim
Posts: 308
Joined: Wed Nov 26, 2008 6:02 am
Car: 89 240sx(s13)

Post

well it's time to decide on the next clutch iam going to use.. when i got the car the clutch that came with it had a lot of meat left on it. so i let it stay.

now i have a slight rear main seal leak and i plan on pulling the motor next month(if i can find a r32 crossmember at a fair price). but heres the clutch that came with the car and that is in it now.. not slipping now or anything. just time for CHANGE..


i was looking at these 3 alternatives.. a gtr guy in canada said that this one had a heavy pp and it over time unbalanced the crankshaft(never heard that before though)

http://cgi.ebay.com/ebaymotors/ws/eB...=STRK:MEWAX:IT

and this one is a good clutch. but is hard on the drivetrain.

http://cgi.ebay.com/ebaymotors/ws/eB...=STRK:MEWAX:IT

and i was looking at this one because it's namebrand. but i did want a ceramic disc.

http://cgi.ebay.com/ebaymotors/ws/eB...=STRK:MEWAX:IT

any experence?? takers??

supersayianjim
Posts: 308
Joined: Wed Nov 26, 2008 6:02 am
Car: 89 240sx(s13)

Post

well i went with a f1 clutch kit(yeah i know).

so it was time to upgrade some stuff.

-the steering rack had had it so it had to be swapped with a "hicas" unit i got for $40.00 off craigslist(it looks brand new).

-got a full urethane kit
-a new oem oil pan'
-a n1 oil pump
-5 lug swap and a z32(front only) brake kit
-j-30 diff swap into s13 pumpkin
-z32 brake master cylinder
-hid 10,000 install
-wahlboro fuel pump install
-oil cooler kit
-rattle can the front end($20.00 a CAN)
-GTR GRILLE(for the oil cooler)
-fabb up a better intercooler mount..
-ss brake lines
__________________

supersayianjim
Posts: 308
Joined: Wed Nov 26, 2008 6:02 am
Car: 89 240sx(s13)

Post

*update-currently*
so it's time to start the phase 2 of my project. these mods aren't intended on making it go faster(sans the lsd and bigger tires) but more efficently. new rack and bushlings etc. coilovers are going to come in the future as i don't have a grand to drop at a moments notice(would be nice though).


started off with the fuel pump.. nothing was wrong with my rb unit,it worked fine. but i do plan to upgrade later. so i got a wahl unit. i had one before on my mk3 supra. and it didn't work out so great(drank a lot of voltage). so iam hoping to have better luck this time..


Image


no it's not pee
Image


and the finished product. wasn't hard. just had to splice 2 wires and push it down on the holder.

Image


also picked up some z32 caps(front) and had some red paint left over so figured i'd give it a coat. a lot of it got nicked/chipped during install. so iam going to do again after there finally mounted and driving..

Image


also cracked open my j30 diff.. iam going to use the s13 pumpkin as i don't want to f*** around with the driveshaft and mounting points. i don't have the proper year axels(i have a post 95(i think) so iam going to use the 13 axels in the mean time..

Image


Image


i also got a hid kit from these guys. https://www.ddmtuning.com/index.php?p=cart


shipping was slow as s***. but it was $50.00 total.. so the so the japs have some weird headlight bulbs. so i got a h1 and planned to fabb it to fit..

Image


Image

got them in the low beam housing. but could not get them to point up as high as i needed them to. might have to remove the glare shield. but either way way better than halogen..


Image

supersayianjim
Posts: 308
Joined: Wed Nov 26, 2008 6:02 am
Car: 89 240sx(s13)

Post

then it was off to the garage and jackstands(for a few weeks)

Image

needed these goodies bad.

all booted and end-linked up

Image

got some rear blanks (se 5 lug) for $20.00 a piece.

Image

started on the bmc(really dirty). it's a automatic and from what i hear the auto booster has greater force than the manual one?? iam running z32 front and ss lines on all 4 and keeping the stock rears with a z32 bmc(well see what happens..)


Image

this slowed me down for 2 days. this 5 SIDED HEX stopping progress. even the guys at autozone(where i got it from) didn't have one. i finally went to nissan and one of the techs had one.

Image

got some assiatance on how the brake pads went in. as this is my first time doing brakes..

Image

also had to borrow a socket for my front hub swap(apparently the mm isn't the same as on the rear)

Image


Image

don't forget this thing. very important

Image


had to cut the dust shield so the rotors would fit.

Image

and much better

Image

supersayianjim
Posts: 308
Joined: Wed Nov 26, 2008 6:02 am
Car: 89 240sx(s13)

Post

yes the benefits of not fitting youre wheels properly(offset is a b****).

Image

Image

Image

and even with spacers(i would later find out). that the wheels would then clear the brakes. but would not turn(wtf).

supersayianjim
Posts: 308
Joined: Wed Nov 26, 2008 6:02 am
Car: 89 240sx(s13)

Post

so now it's time to pull the mill out..

Image

when using the picker you have to position the chain for an almost even weight transfer.. the transmission was tilted too far back to clear the front of the car. so i said f*** it and just seperated them right there.

Image

secured the transmission because i didn't want it running around the garage..

Image

now it's time to remove the clutch and flywheel. i got this chain wrench from autozone a year ago. a excellent purchase as this makes it so much easier(doing it alone) to torque and loosen up the bolts from the rear of the engine.

Image

Image

Image

the clutch looked chewed to s***. but it still held(barely)

Image

this looks much better

Image

and the rear main seal leak culprit. i think this block metal did a great job keeping out the leaking secrections..

Image

supersayianjim
Posts: 308
Joined: Wed Nov 26, 2008 6:02 am
Car: 89 240sx(s13)

Post

now it's on to my nemesis from the last time i had this engine out. i was determined to beat this because i got a new oil pump(n1) and i wanted to change the front main seal before it started to leak.

the clearance behind the gear is so tight(more than 6 asian virgins) so the pullers in the store wouldn't fit. i could only get the head of a screwdriver behind it.

Image

Image

Image

i had a plan and would come back to this. going for something easier now.
i decided to dremel out the old pilot bushling. as the remover tool(i loaned one from the autostore) didn't fit.

Image

Image

and i brought a new idler pully

Image

the new design keeps the spring in.

supersayianjim
Posts: 308
Joined: Wed Nov 26, 2008 6:02 am
Car: 89 240sx(s13)

Post

the new goodies continue with a "hicas" steering rack. and some new boots and control arms..

Image

Image

well i got this steering bushling replacement.

Image

didn't know where it went. and can't imagine installing it with the engine in the car..


Image


but this thing kicked my a**.. you have to turn the bolts at an exact angle(2 13 and 2 12mm) and it stripps so easily and it took forever to turn(air tools just made it worse). after an hr of loosening the bolts i just said f*** it and just tightend them up.

so now onto the toe arms.. when things go right these presses are a gem to have..

Image

Image

Image

f*** easy.

now the front sway bar..

Image

Image

i also got a sway bar spacer kit from sr20 store so my new oil pan won't be scrapped up this time..

now iam test mounting my oil cooler...

Image

wanted it around the gtr grille so the airflow can be functional..

Image

also fabbed up some new intercooler mounting brackets(need a new ic).

Image

supersayianjim
Posts: 308
Joined: Wed Nov 26, 2008 6:02 am
Car: 89 240sx(s13)

Post

so iam tired of the 3 color thing. but i don't know s*** about paint and iam broke as f***.. what to do.. $20.00 a can rattle paint was the answer. but first had to sand(i dry sanded) the finish off. used onf of my storage units as my paint booth.


Image

coat hangars for the assist

Image

Image

Image

Image

Image

the hood didn't come out too good

Image
and after clear coat

Image

Image

Image

supersayianjim
Posts: 308
Joined: Wed Nov 26, 2008 6:02 am
Car: 89 240sx(s13)

Post

so continuing with the urethane bushling install.. on to the subframe. these are inserts. to aid with the rubber units.. there are full urethane units. but there not in this kit.

Image

before. and after penetration..


Image

time to get rid of that fail 4 lug.

loosen these bolts before removing(makes life easier)

Image

Image

Image

now time to swap the rear toe bushling. the kit came with all the bushlings for the whole rear kunckle. but looking at the project car install. and the fact that i didn't have a air chizzel or a torch(or patience) i did the easy toe bushling..

Image

push it b****!!

Image

comparo between old and new..

Image

i do need new front ball joints

Image

http://i495.photobucket.com/albums/rr31 ... 732145.jpg

supersayianjim
Posts: 308
Joined: Wed Nov 26, 2008 6:02 am
Car: 89 240sx(s13)

Post

clutch time..
changing out the throwout bearing.. i liked the stock one(should had kept it) it looked more quality than the f1 unit. but new is new(right)??

Image
pressing out the old one..

Image

and the finished product.

Image

i made a good call when getting a ka clutch fork(the same as a rb) same goes for the piviot ball..

Image

Image

supersayianjim
Posts: 308
Joined: Wed Nov 26, 2008 6:02 am
Car: 89 240sx(s13)

Post

so now it's "diff time"
loosening the axels first..

Image

and using the transmission jack for the assist.

Image

and this had to be the dirtiest part on the car..

Image

so much dirt.

Image

comparo of the j30 and ka axels. seem to be the same size..

Image

scrapping off the old gasket..

Image

supersayianjim
Posts: 308
Joined: Wed Nov 26, 2008 6:02 am
Car: 89 240sx(s13)

Post

so the comparo between the ka diff and j30

Image


Image


Image


Image

the j30 teeth are a little thicker. and i wanted the j30 gear ratio so i didn't keep the ka ring gear..(a f*** problem)


Image


the rings i kept them in order that they came out in.. insert the diff in the pumpkin first then slide these in(way easier than putting in as a whole).

Image


Image


i mixed up the caps. i think i put them on the right side from the wear on the inside of the ring. but you still shoudln't mix them up.


Image

and finally i made my own lsd label


Image


Return to “GTR Forum / Skyline Forum”