For some reason this post and all others related to it do not show any pictures, would anyone know if it's me or it has been removed? Would be nice to see, sounds like cool mods.
found here: http://www.nicoclub.com/archives/altima ... lders.html
Pictures do not display
-
B-Delirious
- Posts: 4
- Joined: Tue May 31, 2011 10:38 pm
- Car: 2006 Altima 3.5SE

Re: Pictures do not display
I had only one picture show up for me in that link. That photo is hosted on photobucket. The other 12 photos in the page where/are hosted at the defunct rely.net.
-
InfinitiEric
Re: Pictures do not display
Let me know if you need any other articles fixed. I'll help you find the pictures on them as well when I have a free minute or two.B-Delirious wrote:For some reason this post and all others related to it do not show any pictures, would anyone know if it's me or it has been removed? Would be nice to see, sounds like cool mods.
found here: http://www.nicoclub.com/archives/altima ... lders.html
Welcome to NICO also!
Fixed Article wrote:My philosophy with any automotive accent lighting is that the lights themselves shouldn't be seen...only their soft, sensual glow. As such, I try to make sure that I mount my LEDs in places where they will reflect off many surfaces and give the nicest ambient light.
Tools needed:
- Screwdrivers (Philips & very thin flathead)
- Wire strippers/cutters
- Drill & 3/8" bit
- Hot glue gun
- Oznium LEDs (I recommend superfluxes and flexible LED strips)
Procedure:
*Step One - Remove the center console (cup holder area) and vent area)*
1. Bring both the driver and passenger seats as far forward as possible.
2. At the bottom corners of the console you'll see a screw on either side...take 'em out!
3. Grab the very rear of the console and give it a yank.
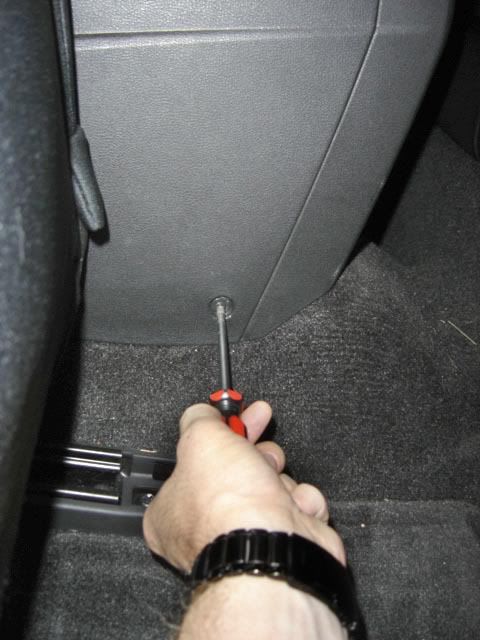
4. Put the seats back again. Pull off the panel in the footwells (they're just snapped in there) and remove the screws holding the front of the console in place.
5. Remove the panel above the storage box/cubby. Open the lid just far enough that you can stick your fingers underneath it and pull out the little panel up there.
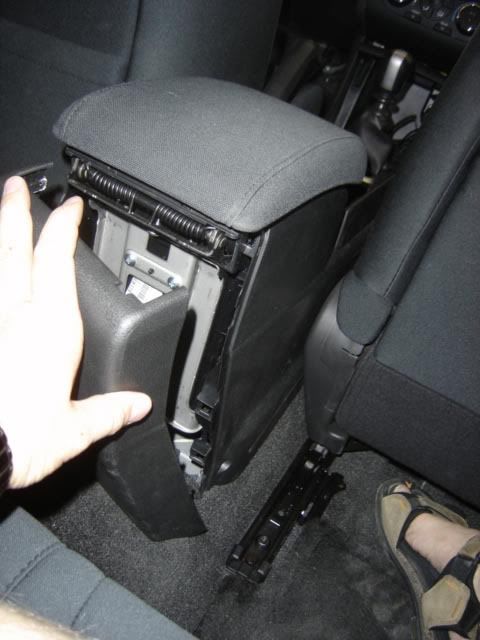
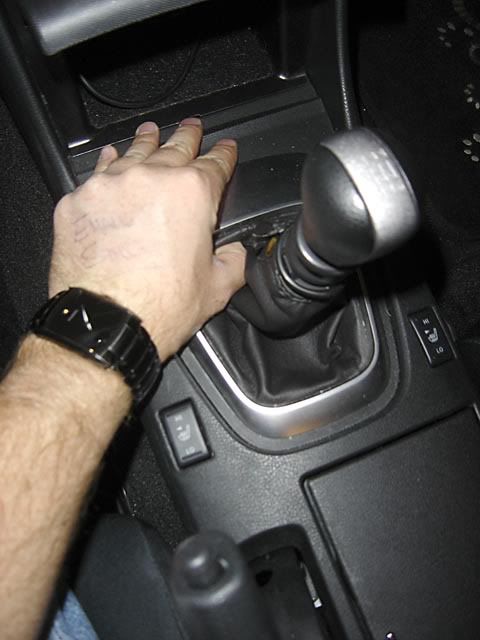
6. Next, pull up the bezel surrounding the shift boot. The easiest way to do this is by jamming your greasy digits underneath it and pulling up in the front. Also, unsnap the clasp at the top of the shift boot and remove the shift knob.
7. Remove the center console/cubby by grabbing the bottom and pulling straight out. Remember to unclip the 12V accessory connection in the back!
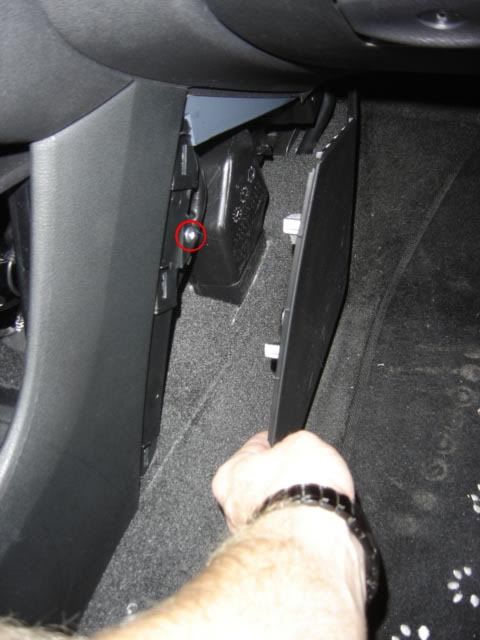
8. Stick a very thin flathead screwdriver in the corner of the air vent panel. You have to stick it in fairly far (about 2/3 to 1 inch) before you've got enough leverage to yank the sucker out.
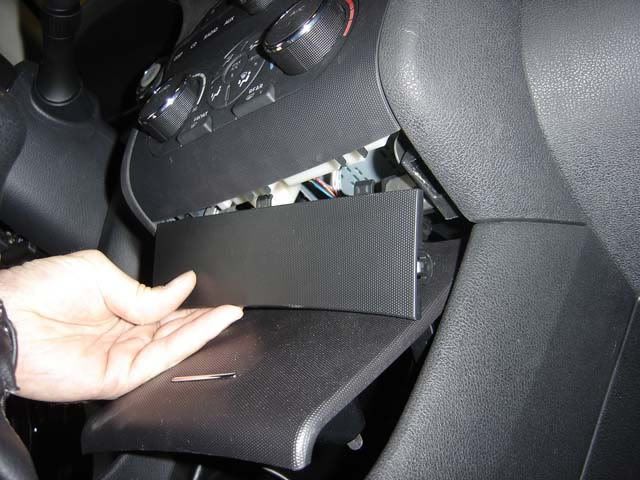
WARNING!!!
There are two connections to be undone in there...one of them is for your passenger airbag light. If you unclip it when the battery is still hooked up, you will get the airbag warning light in your gauge cluster the next time you start your car. Instructions on how to reset the warning light can be found here: http://forums.altimas.org/zerothread/327267
9. You're done! The center console should now pull up nice 'n easy. Be careful though as there are a couple of electronic clips under there (for the heated seats and something to do with the supplemental airbags). Make sure you unhook them before pulling too hard!
*Step Two - The LEDs*
1. If you're using Oznium superflux LEDs, I'd suggest using two per vent. Drill two 3/8" holes across from each other in the bottom of the vents. Make sure they're far enough back that when the LED is mounted in there it doesn't obstruct the movement of the louvers.
NOTE - If you're planning on using UV LEDs, I'd suggest getting three 4.7" flexible strips instead. UV LEDs aren't nearly as bright as regular colours so I needed some extra "oomph" in there!
2. Drill one or two 3/8" holes at the top edge of the cubby. Make sure they're at about a 45-degree angle so you get maximum light coverage.
3. If you want to put LEDs in the rear cupholders, make sure you have enough wire! Simply pull up on the cupholder to get it out.
4. Using a coat hanger, run your wires down the panel and out the bottom. From there you can tuck them neatly underneath the door sill...
5. When placing your LEDs in the center cup holders, I would suggest placing them underneath the lip so only the glow is seen. In this case, I use four superfluxes in total (two on either side.
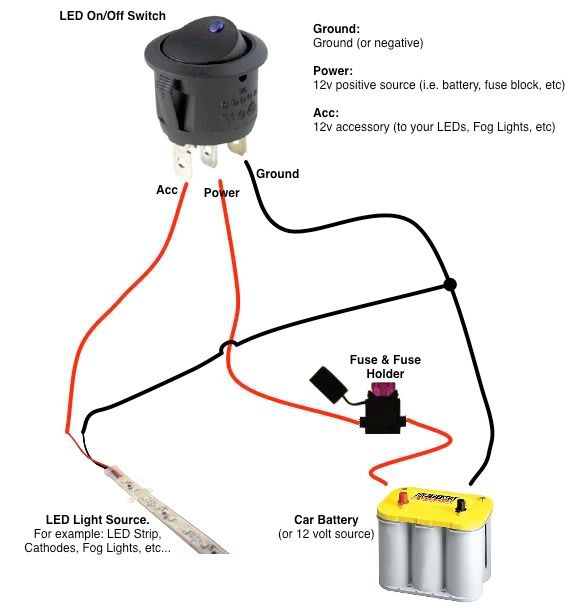
6. Here's a simple diagram (stolen from Oznium... *ahem*) on how to wire up your switch.
There you go!


-
AZhitman

- Administrator
- Posts: 54542
- Joined: Mon Apr 29, 2002 2:04 am
- Car: 58 L210, 63 Bluebird RHD, 64 NL320, 65 SPL310, 66 411 RHD, 67 WRL411, 68 510 SR20, 75 280Z RB25, 77 620 SR20, 79 B310, 90 Z32, 91 GTi-R, 92 Silvia Qs, 98 S14, 23 Z.
- Location: Surprise, Arizona
- Contact:
Re: Pictures do not display
I'll work on fixing that one tonight.
-
B-Delirious
- Posts: 4
- Joined: Tue May 31, 2011 10:38 pm
- Car: 2006 Altima 3.5SE
Re: Pictures do not display
[/quote]InfinitiEric wrote:Let me know if you need any other articles fixed. I'll help you find the pictures on them as well when I have a free minute or two.
Welcome to NICO also!
There you go!
That mod is soooooo cool! Thank you very much
Great to be here!
-
InfinitiEric
Re: Pictures do not display
It is isn't it?! Post some pictures if you do it!B-Delirious wrote:That mod is soooooo cool! Thank you very much
Great to be here!
Great to have you here.