I've been victim of the same nonworking clock in my '01 pathfinder that many others have had issues with. I searched for an easy fix on this forum and all over the internet. But found nothing other than people offering their service to fix it for a fee, or suggestions to have the clock replaced with a working one.
So, i decided to fix it myself. Since it wasn't working as it was, i didn't think i'd do any more harm to it. And i found out it is a very easy fix.
tools needed:
rag/clothmedium size flat screwdriversmall precision flat screwdriverphilips head screwdriversoldersoldering ironmultimeter
how to:
1. Disconnect negative battery terminal
2. Take your cloth/rag and place it over your medium flat screwdriver, and insert it between the gap of your dashboard and the bezel that surrounds the middle air vents and clock, just above the top right corner of the clock assembly (this spot has a notch cut out that allows leverage for the screwdriver) and rock the it back and forth while pulling on the whole assembly
3. Disconnect the plug from the back of clock by pressing the tab to release it and pull
4. Unscrew the four screws from the bottom of the clock to remove it from the vent assembly
5. Take the precision screwdriver to gently pry the holder tabs to remove the front housing of the clock
6. Now, you'll be looking at the circuit board with the digital clock display mounted above it. You'll need to use your multimeter, set to test resistance and check all the larger resistors on the board (they are rectangular in shape, with a dark plastic on top with white numbers printed on). The number on top should correspond to the resistance in ohms of that resistor (ie, 240 should equal 24 ohms; 270 should equal 27 ohms)
7. My first time testing all of them, i found no issues. But i noticed one resistor didn't seem to have enough solder on the joints like the other resistors, so i tested it again. Still gave me the right amount of resistance. I checked again, only i tested all points of the solder around the resistor and found the ohms jump all over the place, indicating the solder was not making full contact with the resistor ( make sure you test all of the solder joints on all the resistors just to make sure)
8. I then resoldered the joints on both sides of the resister by melting the solder already there and added a little more so that i was sure it had good contact. (make sure not to use too much solder otherwise it may short out the board)
9. Retest the solder joints with the multimeter to make sure they read the right amount of ohms, and then reassemble the clock housing, place it back in the vent housing and plug it up. Before placing everything back into the dash, plug the negative battery terminal back on, and turn the key in the ignition to the 'on' position and check to see if the clock works. If it does, you are done!
Hope that helps some of you guys out!
Pathfinder clock fix
-
abadlovesong

- Posts: 87
- Joined: Sun Nov 15, 2009 4:57 pm
- Car: 2001 Pathfinder LE
- Location: torrance, ca
Re: Pathfinder clock fix (abadlovesong)
Thank you sir, This fix worked for me as well. Who would of thought that all it needed was some solder.
-
abadlovesong
- Posts: 87
- Joined: Sun Nov 15, 2009 4:57 pm
- Car: 2001 Pathfinder LE
- Location: torrance, ca
Re: Pathfinder clock fix (Mr Bee)
Yeah, no kidding. Something so small. I'm just wondering why that one resistor is like that. And all the other ones are fine, and it's like that on atleast 50-60% of pathfinders.
Re: Pathfinder clock fix (abadlovesong)
I went ahead and just resoldered all of them just in case. It was kind of scary to pull that vent/clock combo off the dash, and I really didn't want to do that again anytime soon.
-
abadlovesong
- Posts: 87
- Joined: Sun Nov 15, 2009 4:57 pm
- Car: 2001 Pathfinder LE
- Location: torrance, ca
Re: Pathfinder clock fix (Mr Bee)
It does take a bit of effort to pop that thing out. But unless you are completely reckless, you aren't gonna break the assembly or the tabs that hold it in place.
-
jdmartin820

- Posts: 2
- Joined: Fri Feb 12, 2010 5:18 pm
- Car: 2001 Pathfinder SE 4wd
Re: Pathfinder clock fix
Thanks for the post. This was an easy fix. For the record, the resistor that wasn't fully soldered on my clock was R270 - I assume it's probably the same for everyone else as well. R270 is at the bottom of the circuit board if the clock display is on the top.
And to think there's guys selling this repair for 25 bucks plus shipping on Ebay. Including the time it took me to take the clock out, heat up my soldering iron, and put it back in, I was done in 30 minutes. The actual soldering time took about 10 seconds.
And to think there's guys selling this repair for 25 bucks plus shipping on Ebay. Including the time it took me to take the clock out, heat up my soldering iron, and put it back in, I was done in 30 minutes. The actual soldering time took about 10 seconds.
-
Towncivilian

- Posts: 4868
- Joined: Sun May 23, 2010 10:21 am
- Car: 2001.5 Nissan Pathfinder SE 3.5L 2WD A/T
2007 Nissan Altima 2.5L CVT
2012 Nissan Sentra 2.0L CVT Special
2012 Infiniti G37 Sedan 7A/T - Location: Florida, USA
- Contact:
Re: Pathfinder clock fix
I will need to disassemble and examine my clock, as parts of the digits are starting to go dim at random times. Hopefully it's an obvious and simple re-flow of solder somewhere to restore the clock to working perfectly for another ten years.
-
Towncivilian
- Posts: 4868
- Joined: Sun May 23, 2010 10:21 am
- Car: 2001.5 Nissan Pathfinder SE 3.5L 2WD A/T
2007 Nissan Altima 2.5L CVT
2012 Nissan Sentra 2.0L CVT Special
2012 Infiniti G37 Sedan 7A/T - Location: Florida, USA
- Contact:
Re: Pathfinder clock fix
Topic added to the how-to sticky.
In my case, there didn't seem to be any bad/cracked solder joints around the resistors, but there were some that looked pretty thin on solder. I just added some more solder on the thin looking ones and haven't had any issues since. I see one or two eBay ads offering a clock fix, but this is such an easy DIY fix that even a newbie to soldering can handle it - and the $20 for a decent soldering iron will be a better investment than the $20 eBay fix!
In my case, there didn't seem to be any bad/cracked solder joints around the resistors, but there were some that looked pretty thin on solder. I just added some more solder on the thin looking ones and haven't had any issues since. I see one or two eBay ads offering a clock fix, but this is such an easy DIY fix that even a newbie to soldering can handle it - and the $20 for a decent soldering iron will be a better investment than the $20 eBay fix!
-
ltsnotme

- Posts: 128
- Joined: Sat Feb 19, 2011 10:50 pm
- Car: 1996 Pathfinder XE 4WD
- Location: LA, CA, US
Re: Pathfinder clock fix
I don't have a clock in my '96. What's up with that?
-
Towncivilian
- Posts: 4868
- Joined: Sun May 23, 2010 10:21 am
- Car: 2001.5 Nissan Pathfinder SE 3.5L 2WD A/T
2007 Nissan Altima 2.5L CVT
2012 Nissan Sentra 2.0L CVT Special
2012 Infiniti G37 Sedan 7A/T - Location: Florida, USA
- Contact:
Re: Pathfinder clock fix
Maybe it died on the previous owner and they simply removed it. Take a picture - what does it look like now where the clock is supposed to be?
-
ltsnotme
- Posts: 128
- Joined: Sat Feb 19, 2011 10:50 pm
- Car: 1996 Pathfinder XE 4WD
- Location: LA, CA, US
Re: Pathfinder clock fix
Nope, the only clock it had was on the stereo, which wasn't of much use when the stereo was on. I installed a clock from an isuzu trooper down where the optional buttons were though.
-
Towncivilian
- Posts: 4868
- Joined: Sun May 23, 2010 10:21 am
- Car: 2001.5 Nissan Pathfinder SE 3.5L 2WD A/T
2007 Nissan Altima 2.5L CVT
2012 Nissan Sentra 2.0L CVT Special
2012 Infiniti G37 Sedan 7A/T - Location: Florida, USA
- Contact:
Re: Pathfinder clock fix
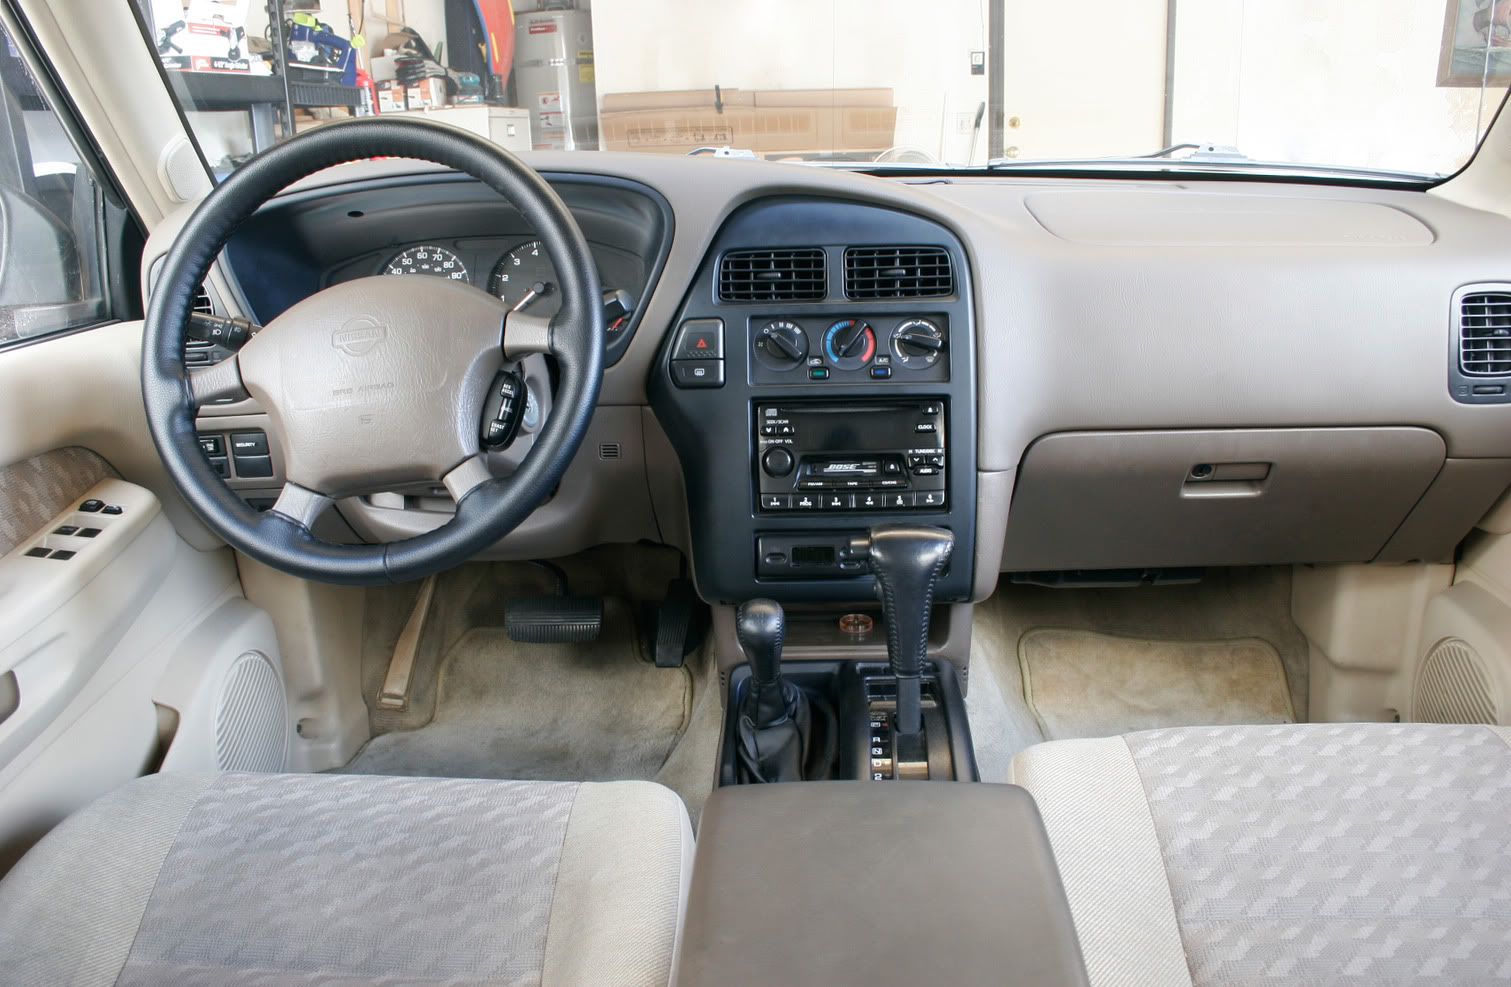
Wow, clean interior!  According to the owner's manual page 1-8, it appears that the clock is integrated into the head unit. Is your Bose head unit an upgrade?
-
ltsnotme
- Posts: 128
- Joined: Sat Feb 19, 2011 10:50 pm
- Car: 1996 Pathfinder XE 4WD
- Location: LA, CA, US
Re: Pathfinder clock fix
The Bose unit was a temporary downgrade, actually. I got the truck with an aftermarket Sony unit that I didn't like the look of. So I got this "Bose" unit (a Clarion really), but the sound quality was noticeably worse, and it skipped on bumps. So now I've put the Sony unit back in, and added an HD radio tuner to it. Still don't like the look of it. I want to put a double-din unit with built-in HD radio in (something like this JVC maybe http://www.crutchfield.com/p_105KWHD720 ... DR720.html), but the problem is that I park on the street at night, and it might end up costing me a lot more in window replacement costs.
Re: Pathfinder clock fix
Thanks for the fix info!! What an easy fix too. My clock has not worked for over a year and a half. I refused to pay the $60+ to buy a new one from the dealer. I stumbled across this fix while looking into some other stuff for my 2001 pathfinder and couldn't be happier. Took all of about 30 minutes.
-
yngw13

- Posts: 253
- Joined: Mon Oct 24, 2011 12:21 pm
- Car: 2001 Nissan Pathfinder SE
- Location: Centreville VA
Re: Pathfinder clock fix
thanks so much for this...just finished up
my mistake was that I tried to pry open the clock bezel on mine ended up having some deep gashes from the screw driver turns out the ac vents are part of the assembly..oh well...
visually it was obvious which resistor it was as it had a cracked up solder..I did have a tester and it confirmed it...there was just 4 of them which was simple enough...added a little solder to it and retested it...good to go
btw...tried to clean the clock window with windex but it wouldn't seem to take off this weird crud..used meguiars polish and its A ok now...it even made the gashes less visible
Re: Pathfinder clock fix
i still can't get the assembly off!!! any pics on how to ?? I am messing up the leather surrounding the bezel Help!!
 Re: Pathfinder clock fix
Finally got the clock off!! easily fixed after that . Wow first time using this site its was great Thanks for all the help
-
Towncivilian
- Posts: 4868
- Joined: Sun May 23, 2010 10:21 am
- Car: 2001.5 Nissan Pathfinder SE 3.5L 2WD A/T
2007 Nissan Altima 2.5L CVT
2012 Nissan Sentra 2.0L CVT Special
2012 Infiniti G37 Sedan 7A/T - Location: Florida, USA
- Contact:
Re: Pathfinder clock fix
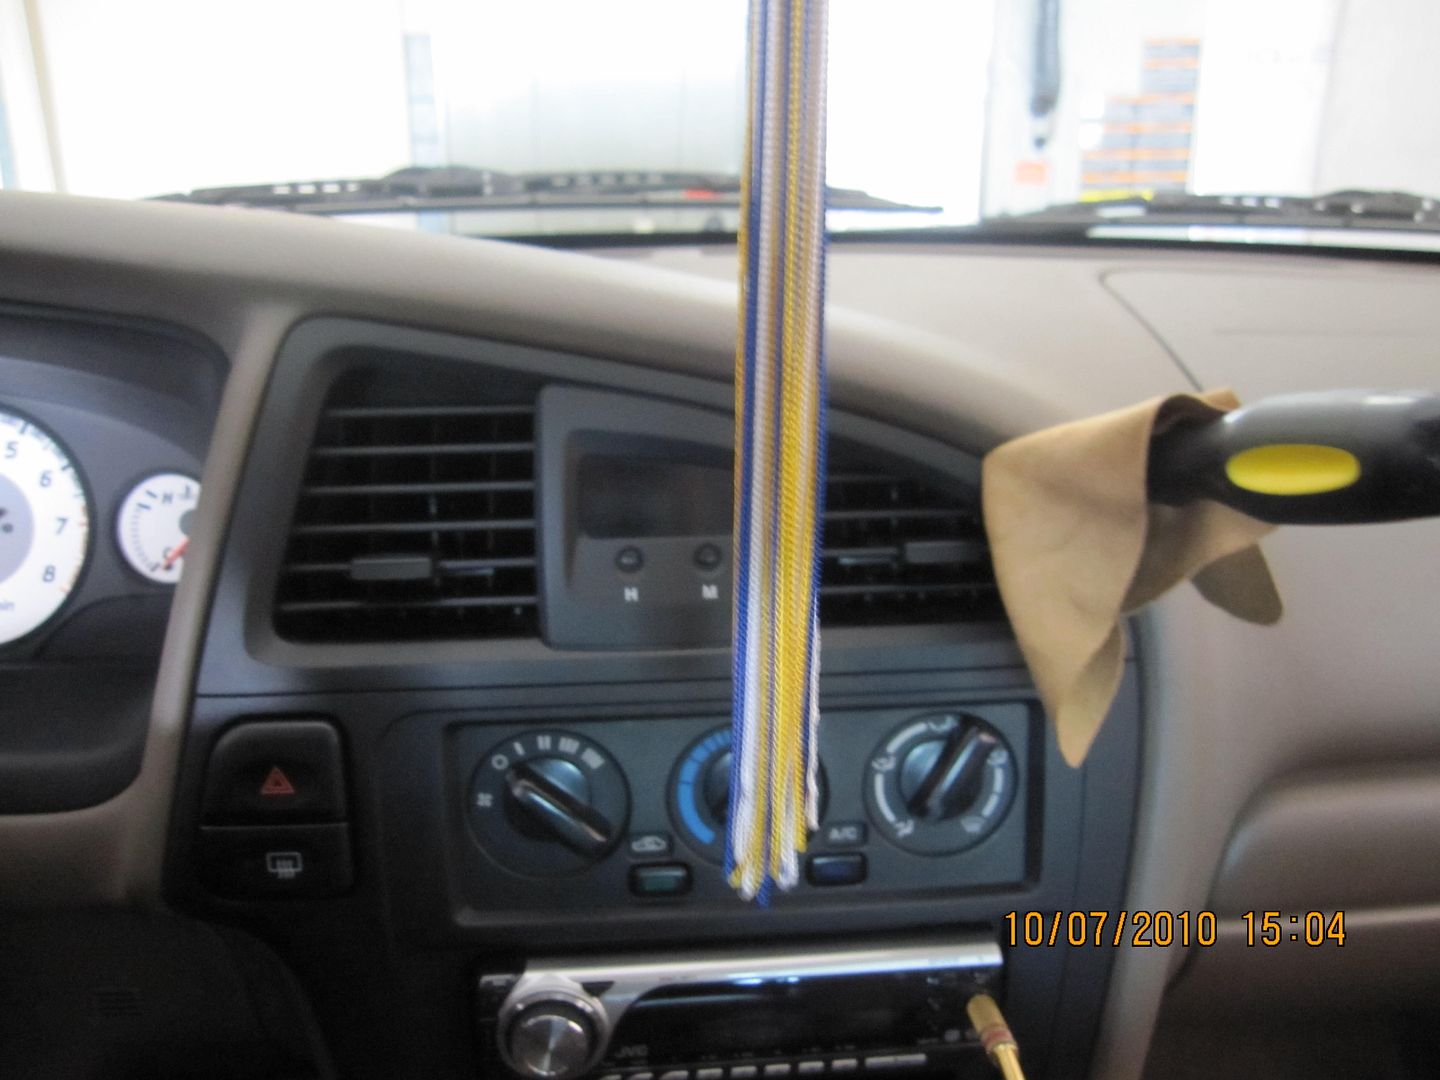
Sorry you ended up scratching your trim... for future reference, here's the best way (and the method suggested in the factory service manual) of removing the vent/clock bezel assembly:
Pry the screwdriver towards the front of the vehicle to unclip the assembly.
After that, you simply disconnect the clock's wiring harness, unscrew it (4 screws on the back if I remember correctly) and the rest should be obvious.
Pry the screwdriver towards the front of the vehicle to unclip the assembly.
After that, you simply disconnect the clock's wiring harness, unscrew it (4 screws on the back if I remember correctly) and the rest should be obvious.
Re: Pathfinder clock fix
hi i have a qx4 2002 and it came with analog clock. the clock works but both bulbs are gone, is there anyway i can replace them with color ones? i don't know the side to search for.
tks
tks
-
quicksilver53
- Posts: 4
- Joined: Fri Feb 10, 2012 1:36 pm
- Car: 2001 Nissan pathfinder
Re: Pathfinder clock fix
HEY,I've had mine out and all looked well but will give that a shot.Does anyone know where the ground is for that because I've heard that's another probability or can I check it in the wiring clip with needed precautions of course and is the wire color black for all grounds?
-
Towncivilian
- Posts: 4868
- Joined: Sun May 23, 2010 10:21 am
- Car: 2001.5 Nissan Pathfinder SE 3.5L 2WD A/T
2007 Nissan Altima 2.5L CVT
2012 Nissan Sentra 2.0L CVT Special
2012 Infiniti G37 Sedan 7A/T - Location: Florida, USA
- Contact:
Re: Pathfinder clock fix
The ground wire for the clock is indeed black.
Re: Pathfinder clock fix
I just tried this on the wife's 2001 LE. One of the resistors appeared to have a poor solder job. My own soldering skills are pretty poor, as in poor vision and poor fine motor skills, but I did manage to glob a bit into the apparent breach and it worked!!
Re: Pathfinder clock fix
Thanks for this.
Here is a visual instruction for removing the clock:
http://www.autoclockrepair.com/yahoo_si ... 952904.pdf
I have posted my experience in following the advice of others to complete the job.
It took a bit of leverage in the gap above the top right corner of the clock and at the end of he module. Once it popped out, I disconnected the plug in the back of the clock, removed the four screws holding the clock between the two vents, and gentle popped the clock module off the pins holding it in place.
When I removed the face of the clock, I was careful not to misplace the two rubber mounted "time adjustment" buttons. They simply fall away if you are not careful.
The resistors are little black rectangles affixed flat to the board, marked with an "R" and a number.
Upon examining the four resistors, it was clear that two of them had cracks in the solder. I heated (liquified) the solder that was already there and added a small amount to each joint for all four resistors (just to be safe).
Solder applied, I put the time adjustment buttons in place, and rejoined the two parts of the clock module.
TEST TIME - At this point I popped out to the truck and plugged the wire into the back of the clock module, turned the key, and looked for signs the clock was working. Yes! Bright blue numbers!
Then, back inside to complete the job, I put the module in place between the vents ports, and replaced the four screws.
Back at the truck, I reconnected the clock wire (plug) and gently slipped the entire module back into the dash.
Turned the key and the clock came on. Done!
-
Chuck Tribolet

- Posts: 1490
- Joined: Mon Nov 24, 2008 3:15 pm
- Car: '01 Nissan Pathfinder
'87 Chevy Corvette
'01 Toyota Camry daily driver
'98 Boston Whaler Montauk - Location: Morgan Hill, CA and Marina, CA
- Contact:
Re: Pathfinder clock fix
Just did this. Thanks all.
BTW, my daily driver is a low-mileage (49K miles) '01 Camry, and according to Toyota Nation, they have the same problem with the exact same fix.
BTW, my daily driver is a low-mileage (49K miles) '01 Camry, and according to Toyota Nation, they have the same problem with the exact same fix.

Re: Pathfinder clock fix
Sorry for reviving and old thread. Just wanted to thank the members here for sharing this fix. Took me 15 minutes at most to remove, solder and put everything back together. It's been a week since I got the Pathfinder and this clock fix is the first thing I have fixed on it. Had some more stuff to do, and I am glad I found this forum. Thanks for your help!
-
Towncivilian
- Posts: 4868
- Joined: Sun May 23, 2010 10:21 am
- Car: 2001.5 Nissan Pathfinder SE 3.5L 2WD A/T
2007 Nissan Altima 2.5L CVT
2012 Nissan Sentra 2.0L CVT Special
2012 Infiniti G37 Sedan 7A/T - Location: Florida, USA
- Contact:
Re: Pathfinder clock fix
Glad to hear it! Welcome to NICO.
Re: Pathfinder clock fix
Hello All,
I am new to the forum and would like to thank abadlovesong for his post.
Just went at one of the 270 "thingys" that had a bad looking solder with a very crude soldering iron and a lot of care, dropped a drop of solder on it and, ta da, the LEDs are now bright and shiny!
Again thanks.
JC
P.S.: the worse part is unclipping the vents! I always think I am going to break something.
Re: Pathfinder clock fix
I want to thank all of you for making it so easy to find the problem. It appears that the 4 large resistors R4 through R7 are used to drop some voltage. That means they heat up, so that is why the solder joint go bad. Nissan was too cheap to use a voltage regulator. A shame.
I took some pictures: https://www.flickr.com/photos/gcohen6/s ... 020653990/
Resoldering all of them is obviously needed.
I took some pictures: https://www.flickr.com/photos/gcohen6/s ... 020653990/
Resoldering all of them is obviously needed.
Re: Pathfinder clock fix
Just an additional note. When I used the official removal instructions, I cracked the wood grained plastic bezel pretty badly. It seems this is a very common occurrence. I'm not surprised. When the car gets this old, the plastic gets very brittle. So I devised a better system.
If you bend a coat hanger as shown in these pictures: https://www.flickr.com/photos/gcohen6/s ... 054604468/
You can easily insert the hanger into vent holes and snag the back of the vents, also shown. Then just pull the assy out. This relieves any strain on the front bezel.
Just be careful of the movable vents when you insert and remove the wire hanger. Don't put the hanger on a movable vent, it has to snag the back braces.
Good luck...
And PS, the clock works great now!
-
Ronmarr1
- Posts: 19
- Joined: Fri Jan 07, 2011 12:41 am
- Car: 2001 Pathfinder LE
- Location: Portland, Oregon
Re: Pathfinder clock fix
I have been unable to get the connector off of the clock - got the unit out of the dash ok
but the connecting wire seems to be stuck - Anyone got a photo or advice how to get the
connector off. Thanks
but the connecting wire seems to be stuck - Anyone got a photo or advice how to get the
connector off. Thanks