My QX4 rebuild

A forum for the legendary Nissan Pathfinder and Infiniti QX4.
anyonebutme
Posts: 19
Joined: Tue Jan 30, 2018 7:51 pm
Car: 2002 QX4

Post

Backstory is, I was shopping for a vehicle to use as a rally support truck. Needed to be AWD, have decent ground clearance, 4 seats, and a decent trunk space. My experience working on BMWs meant I was initially shopping X5's, and had passed on quite a few good deals but nothing super great. Was also randomly checking out things like the 4runner, xterra, and pathfinders but wasn't wanting a 4x4. All the reviews I read said the pathfinder rides much better than the 4runner on rough roads and higher speeds, which is exactly what I wanted. Initially didn't look for the QX4 because they were priced higher than I wanted to spend, but it did check all the boxes I wanted. The ATTESA ETS system has a big draw for me though. A random set of events though changed that as an X5 I was going to buy fell through, a local QX4 popped up was sent to me. It was decently clean enough, and more importantly it was a price I couldn't avoid. I went to look at it and verify it had some of the options I wanted it to have, mainly working HID lights, heated seats and rear LSD. So the mission was on.

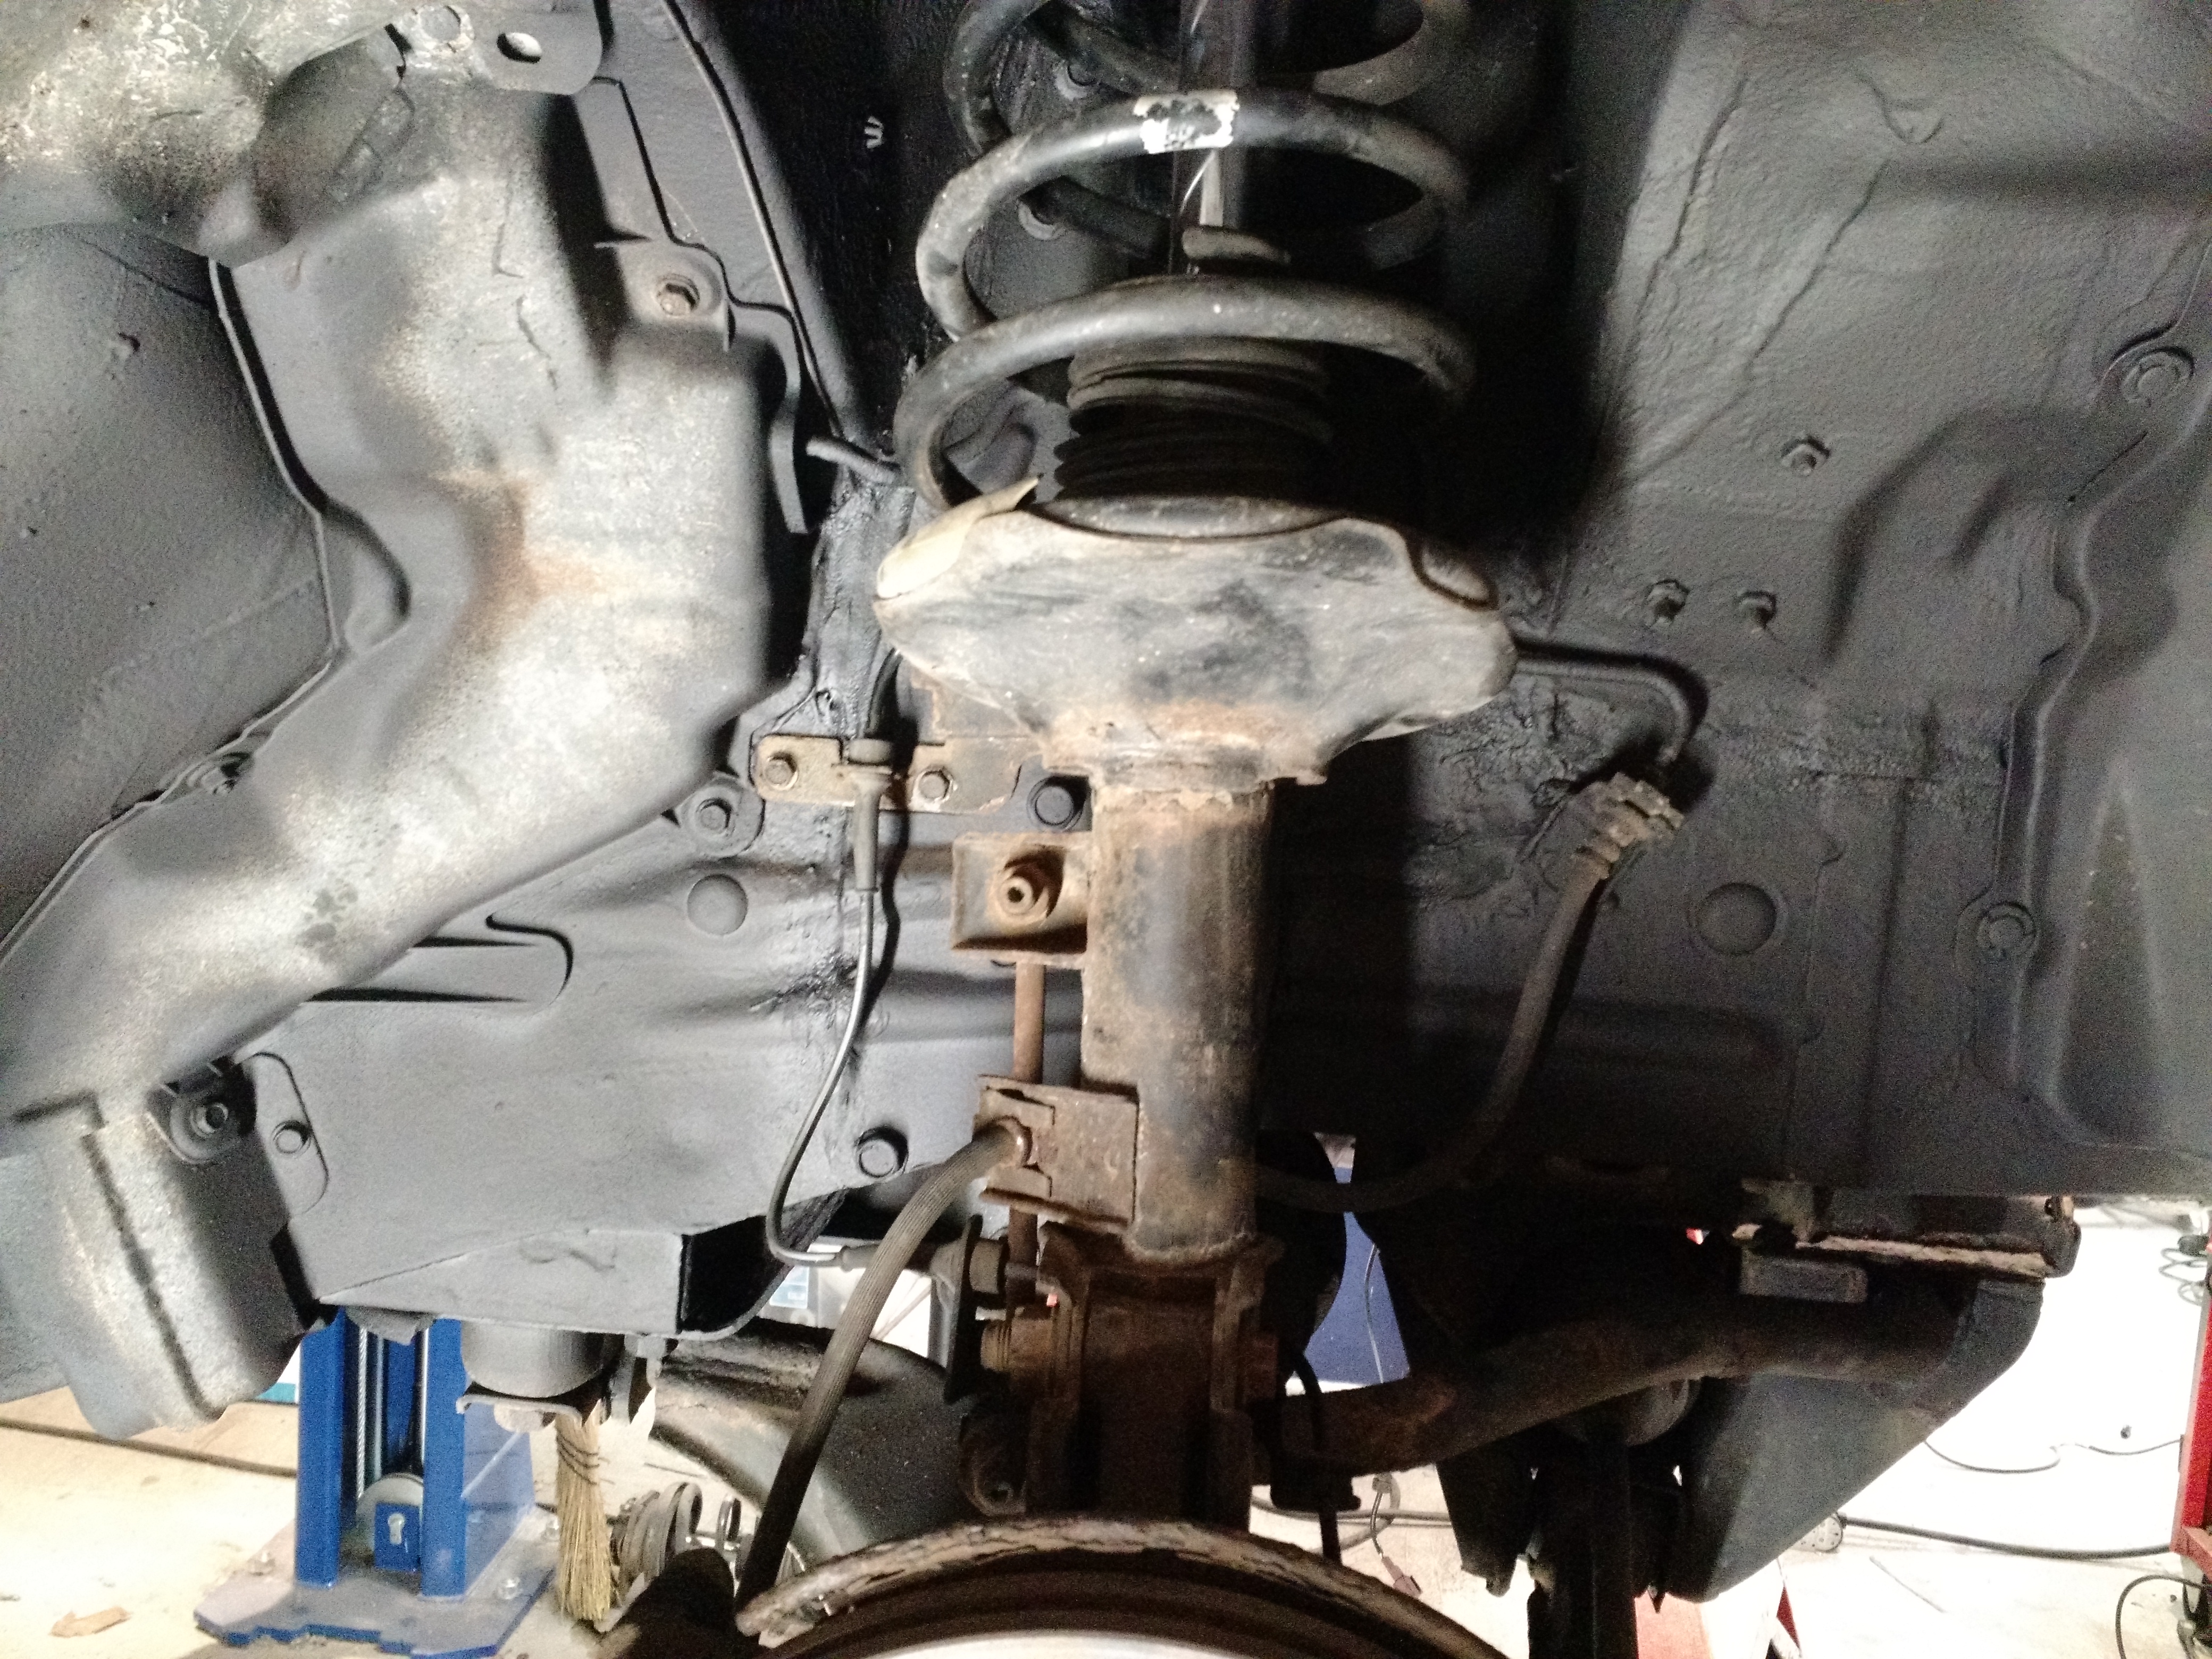
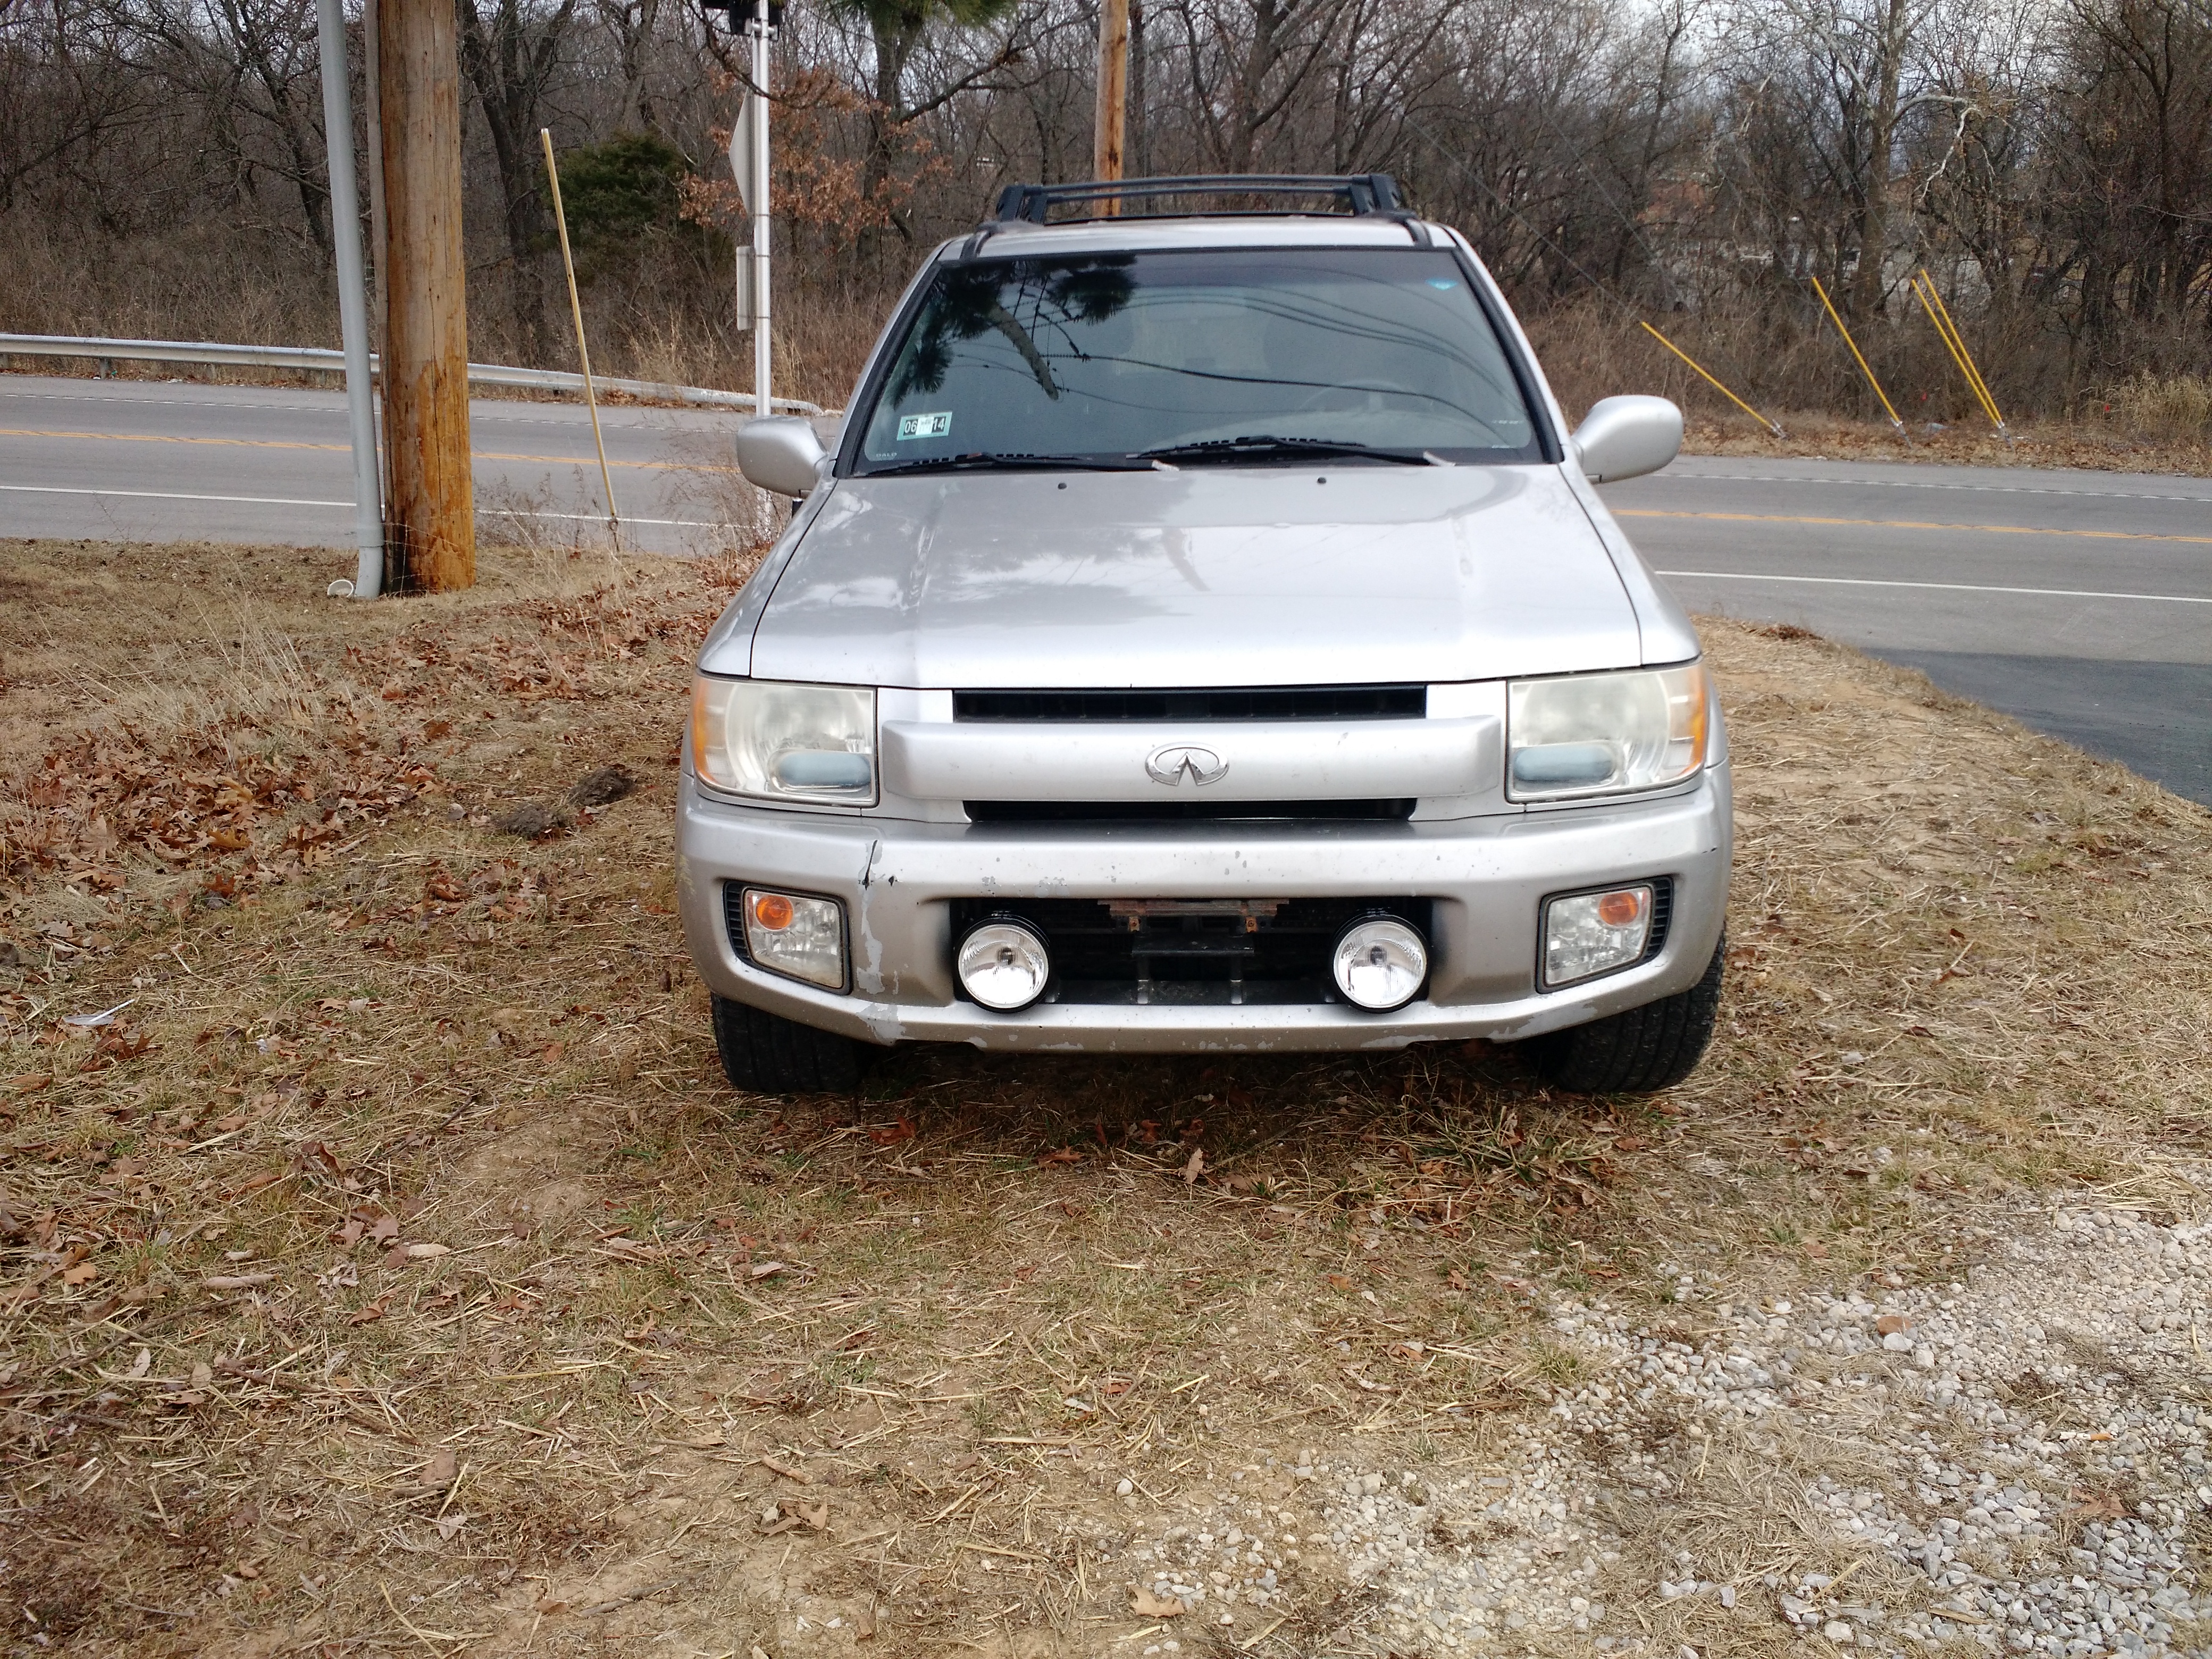
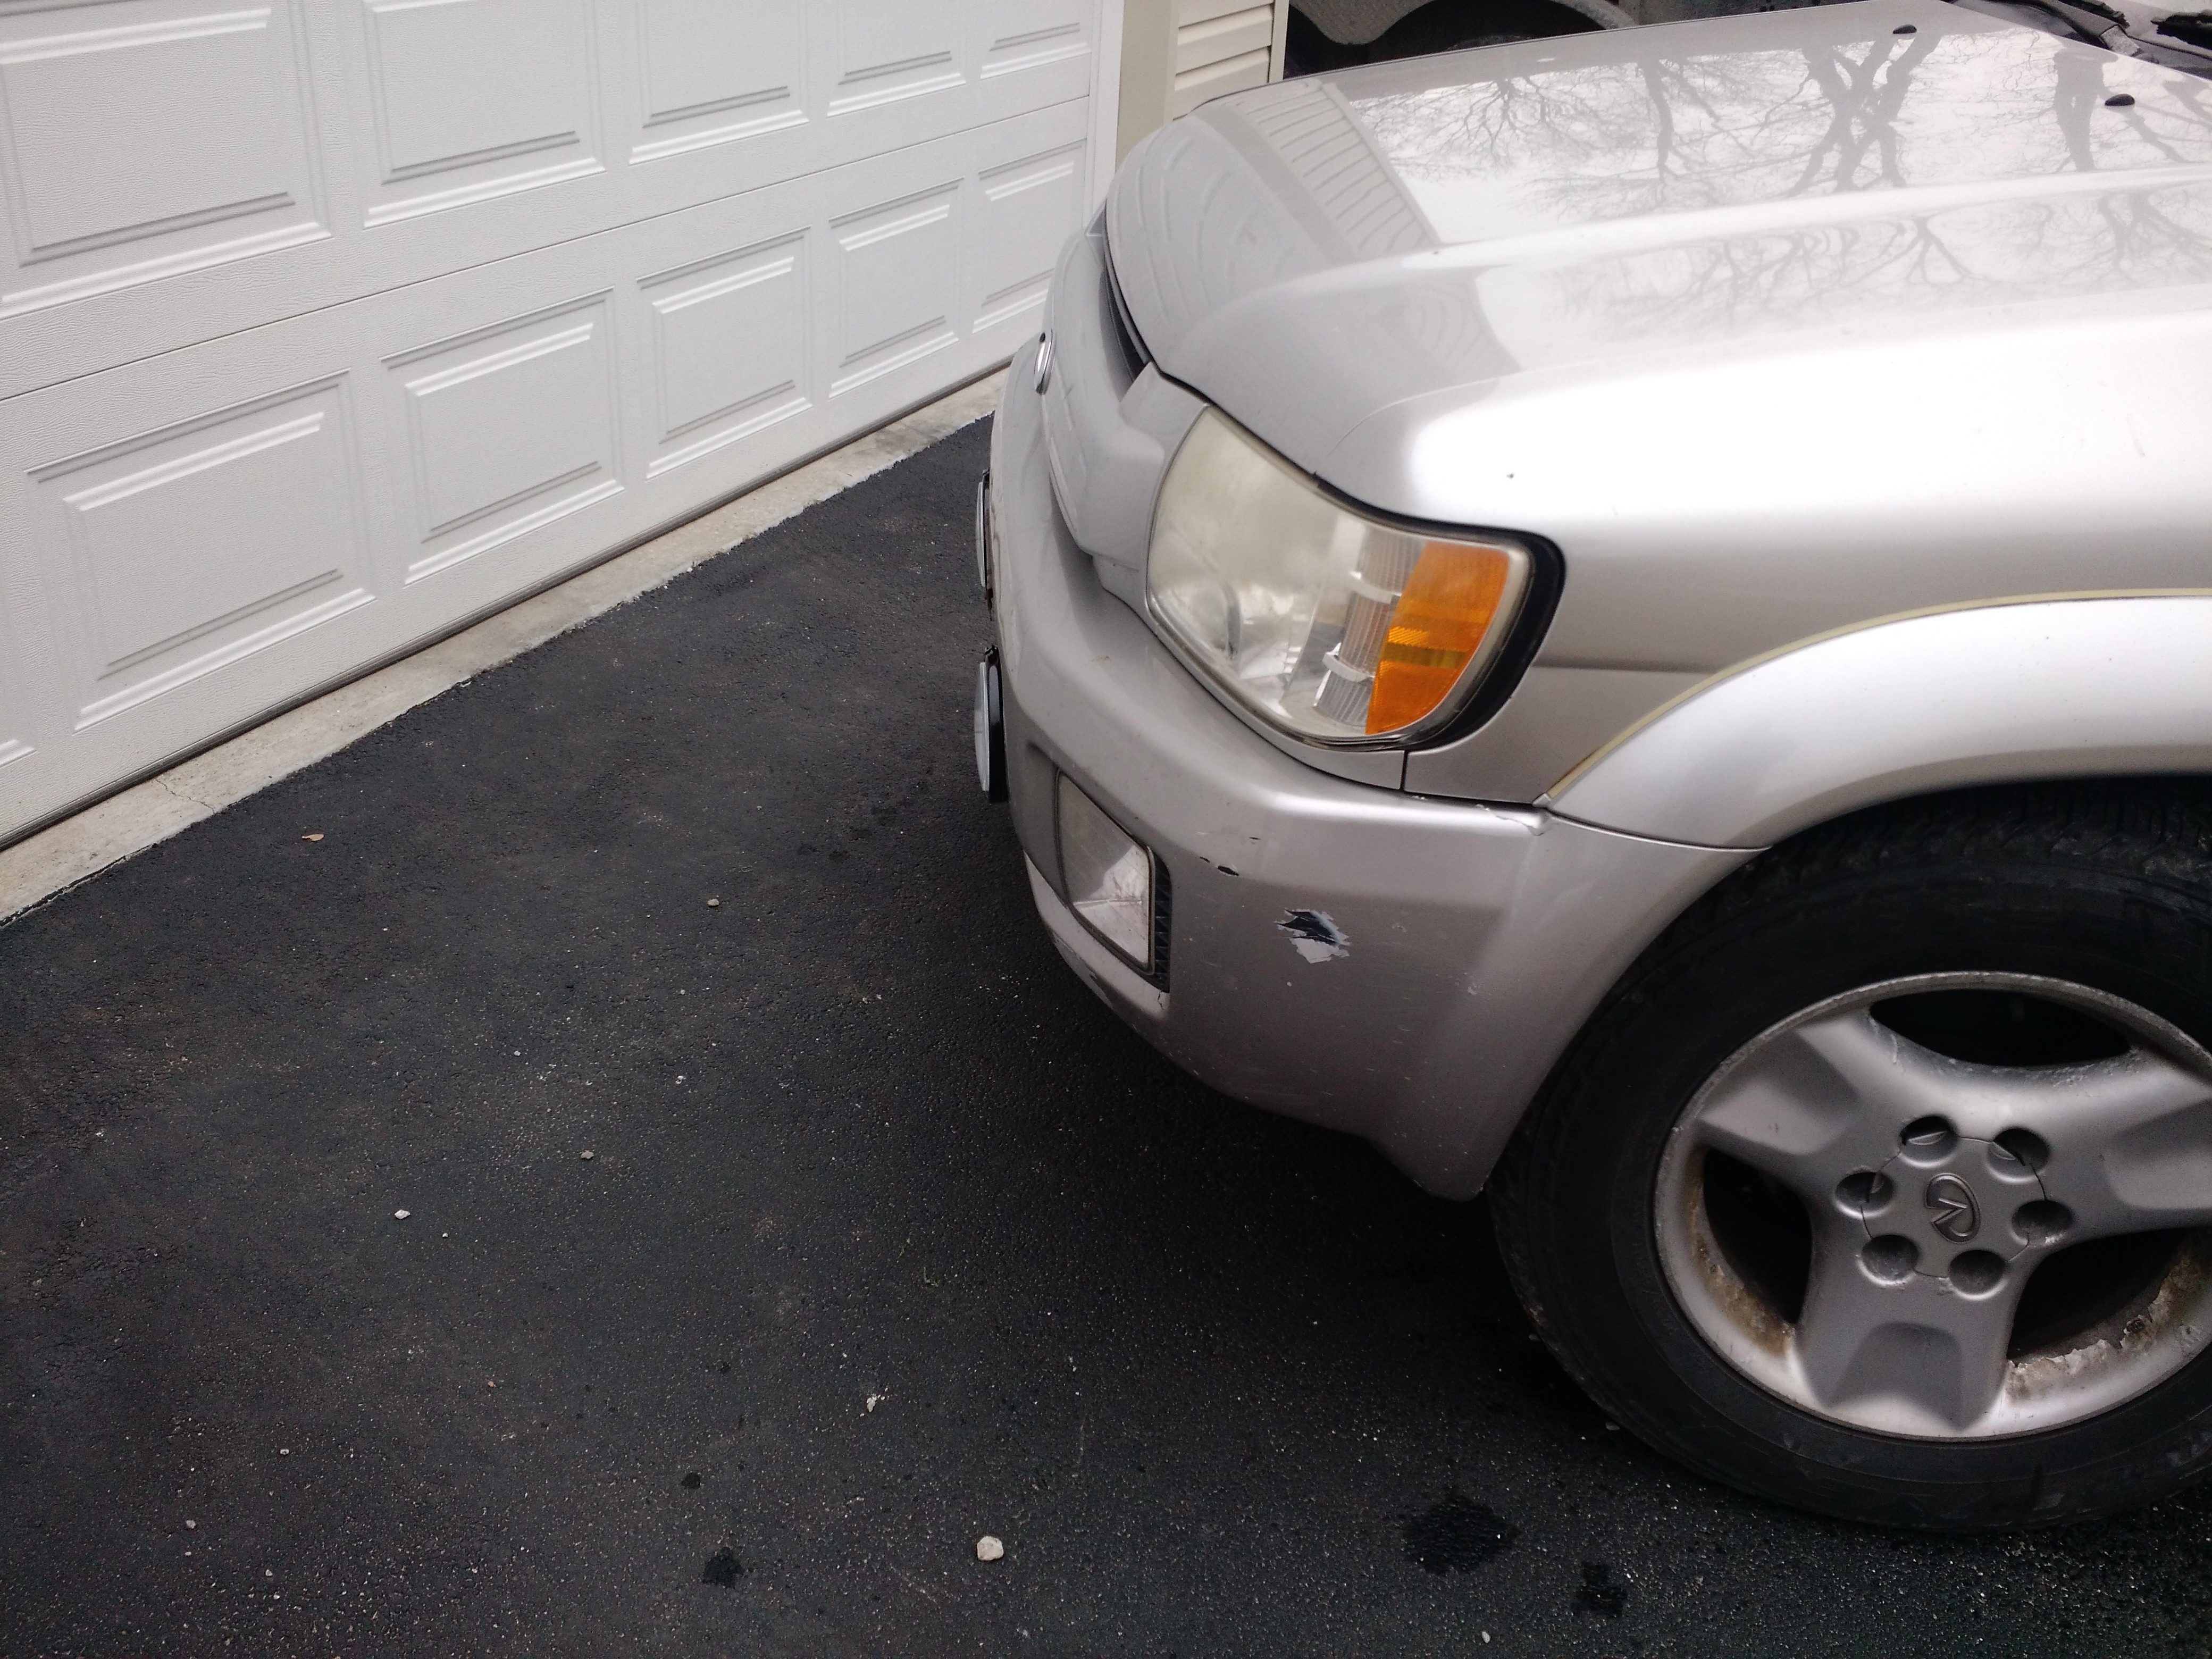
So I bought it. A relatively low mile 2002 QX4 that failed safety inspection due to the front strut towers separating due to rust, it was far enough to be dangerous to drive, as the only thing holding the front left corner up was the brake master cylinder. You could feel the bumps in the road move the pedals. I bought it knowing it needed fixing but figured I'd call Infiniti just to see if they'd fix it for free. Infiniti said the recall inspection was done in 2012, and any damage due to rust since then wasn't their problem. Time to put her on the lift and fire up the welder, bringing her back to life.

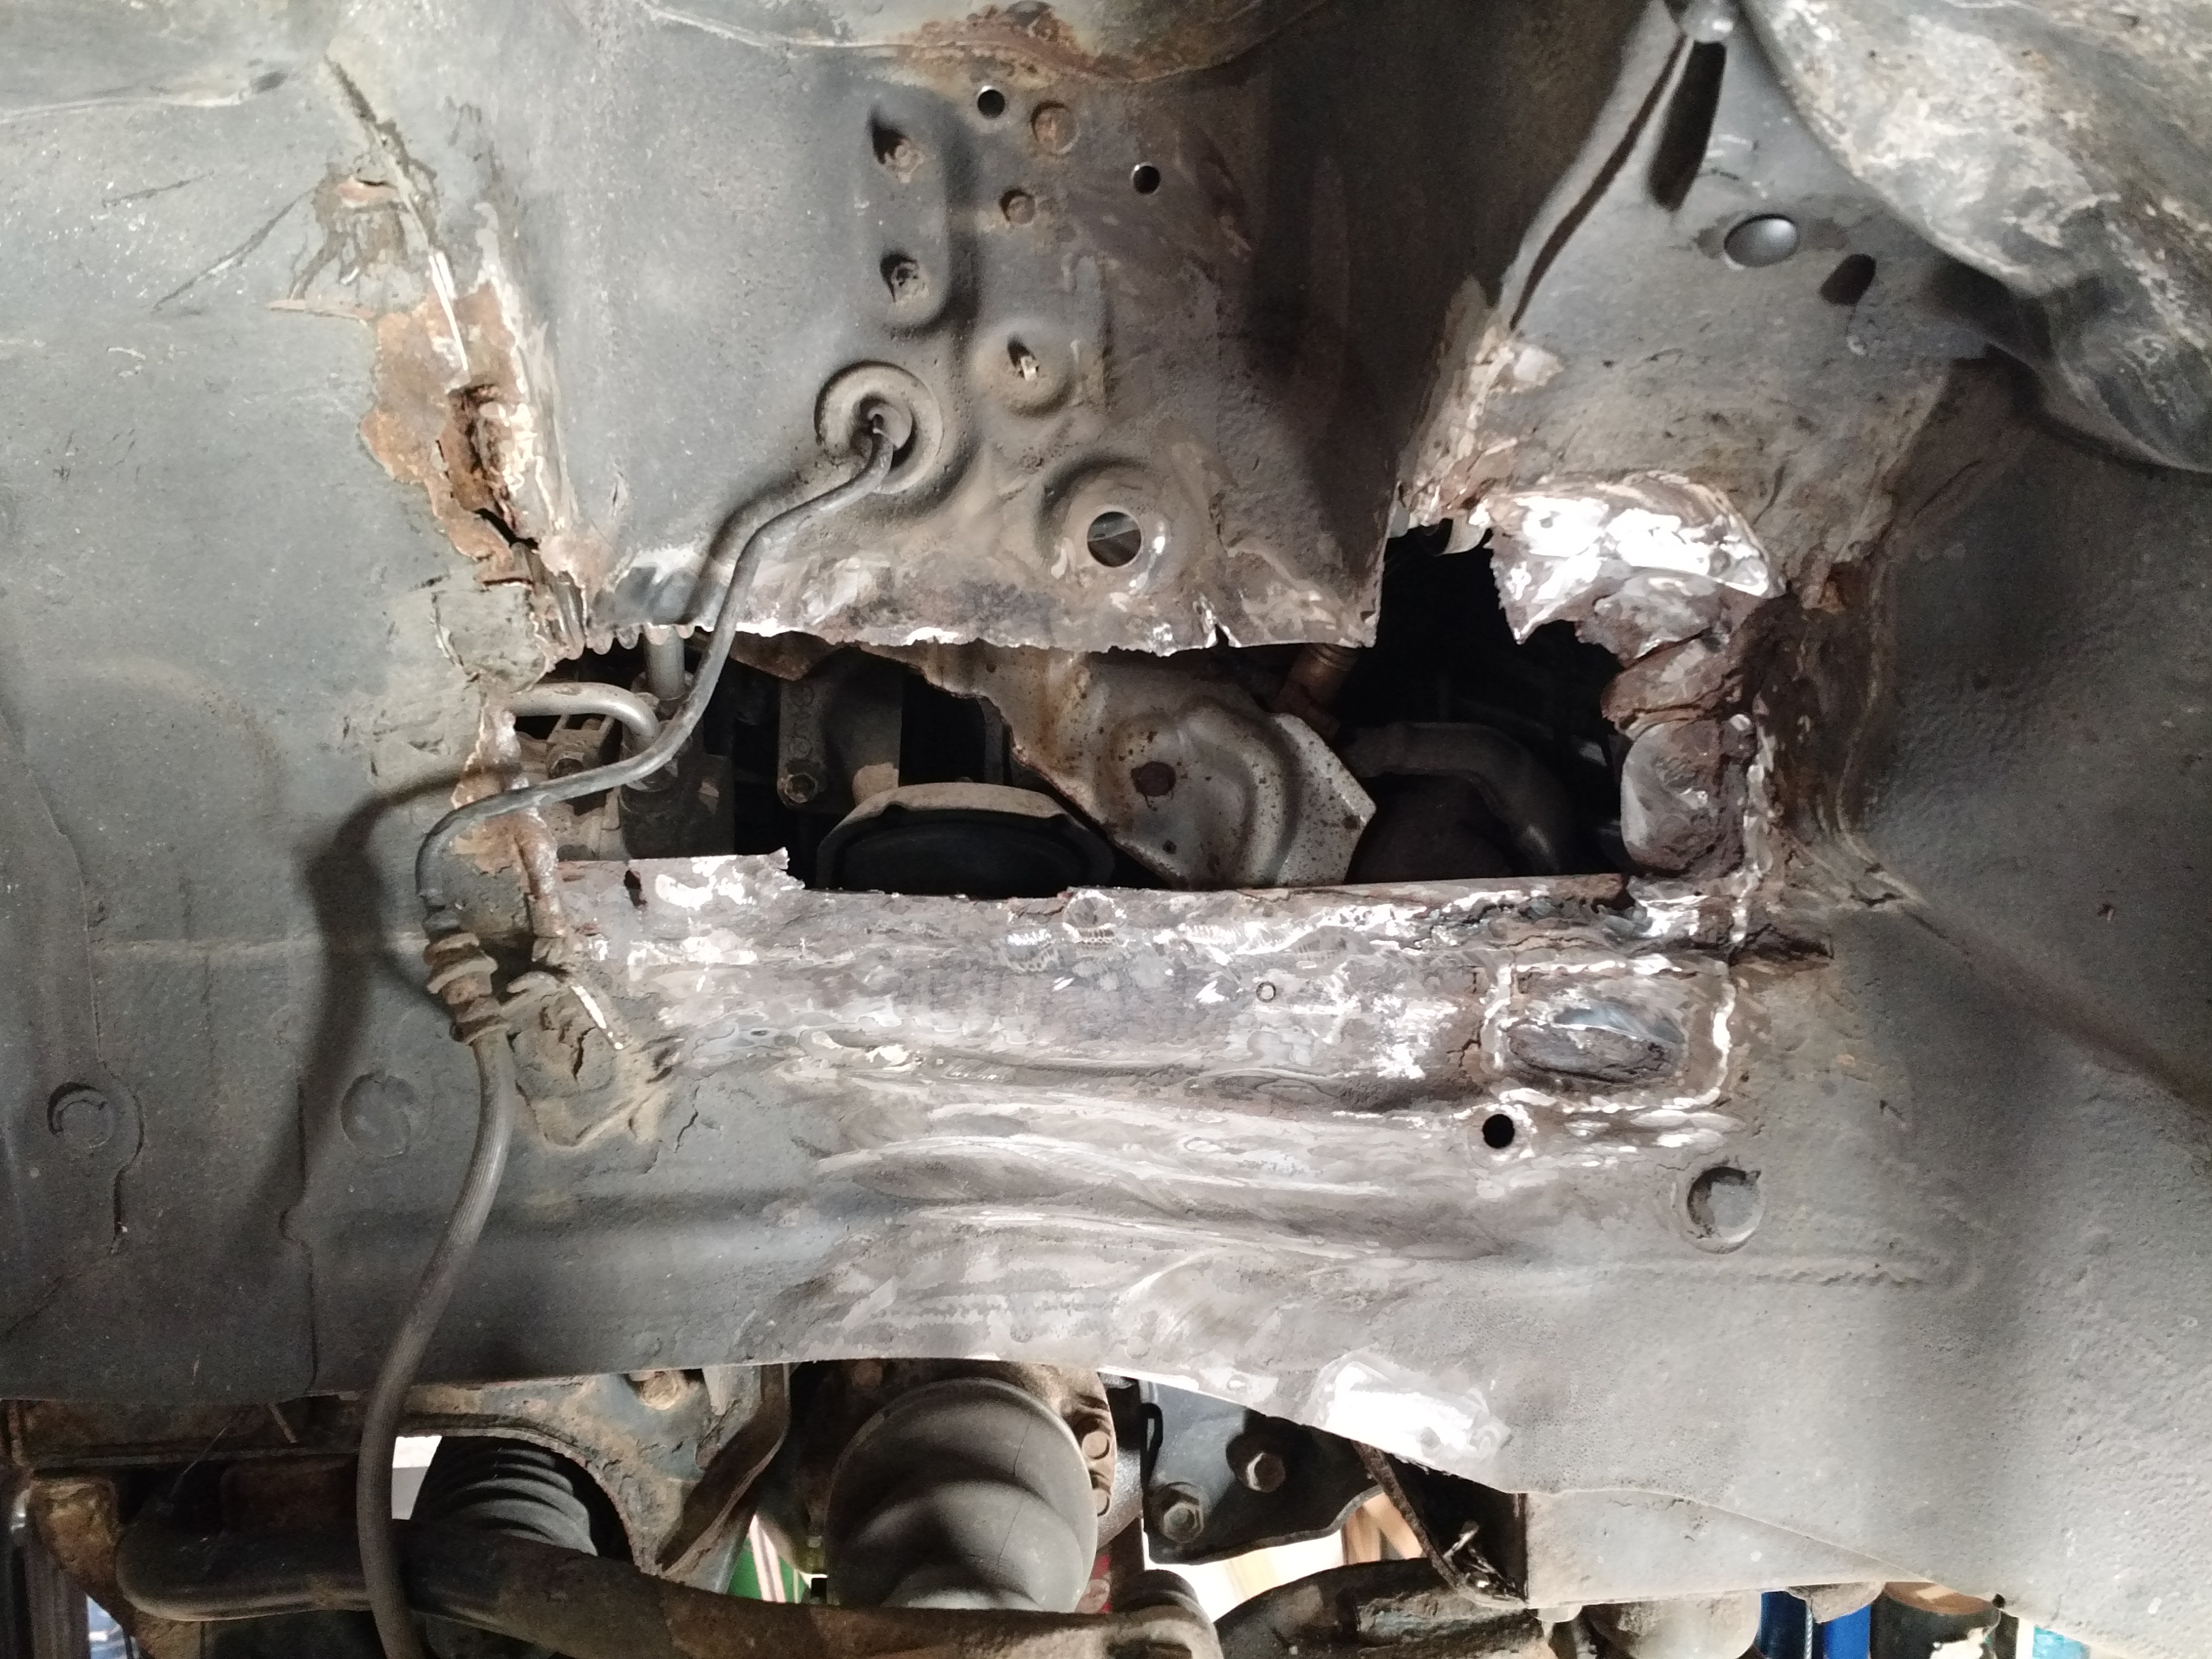
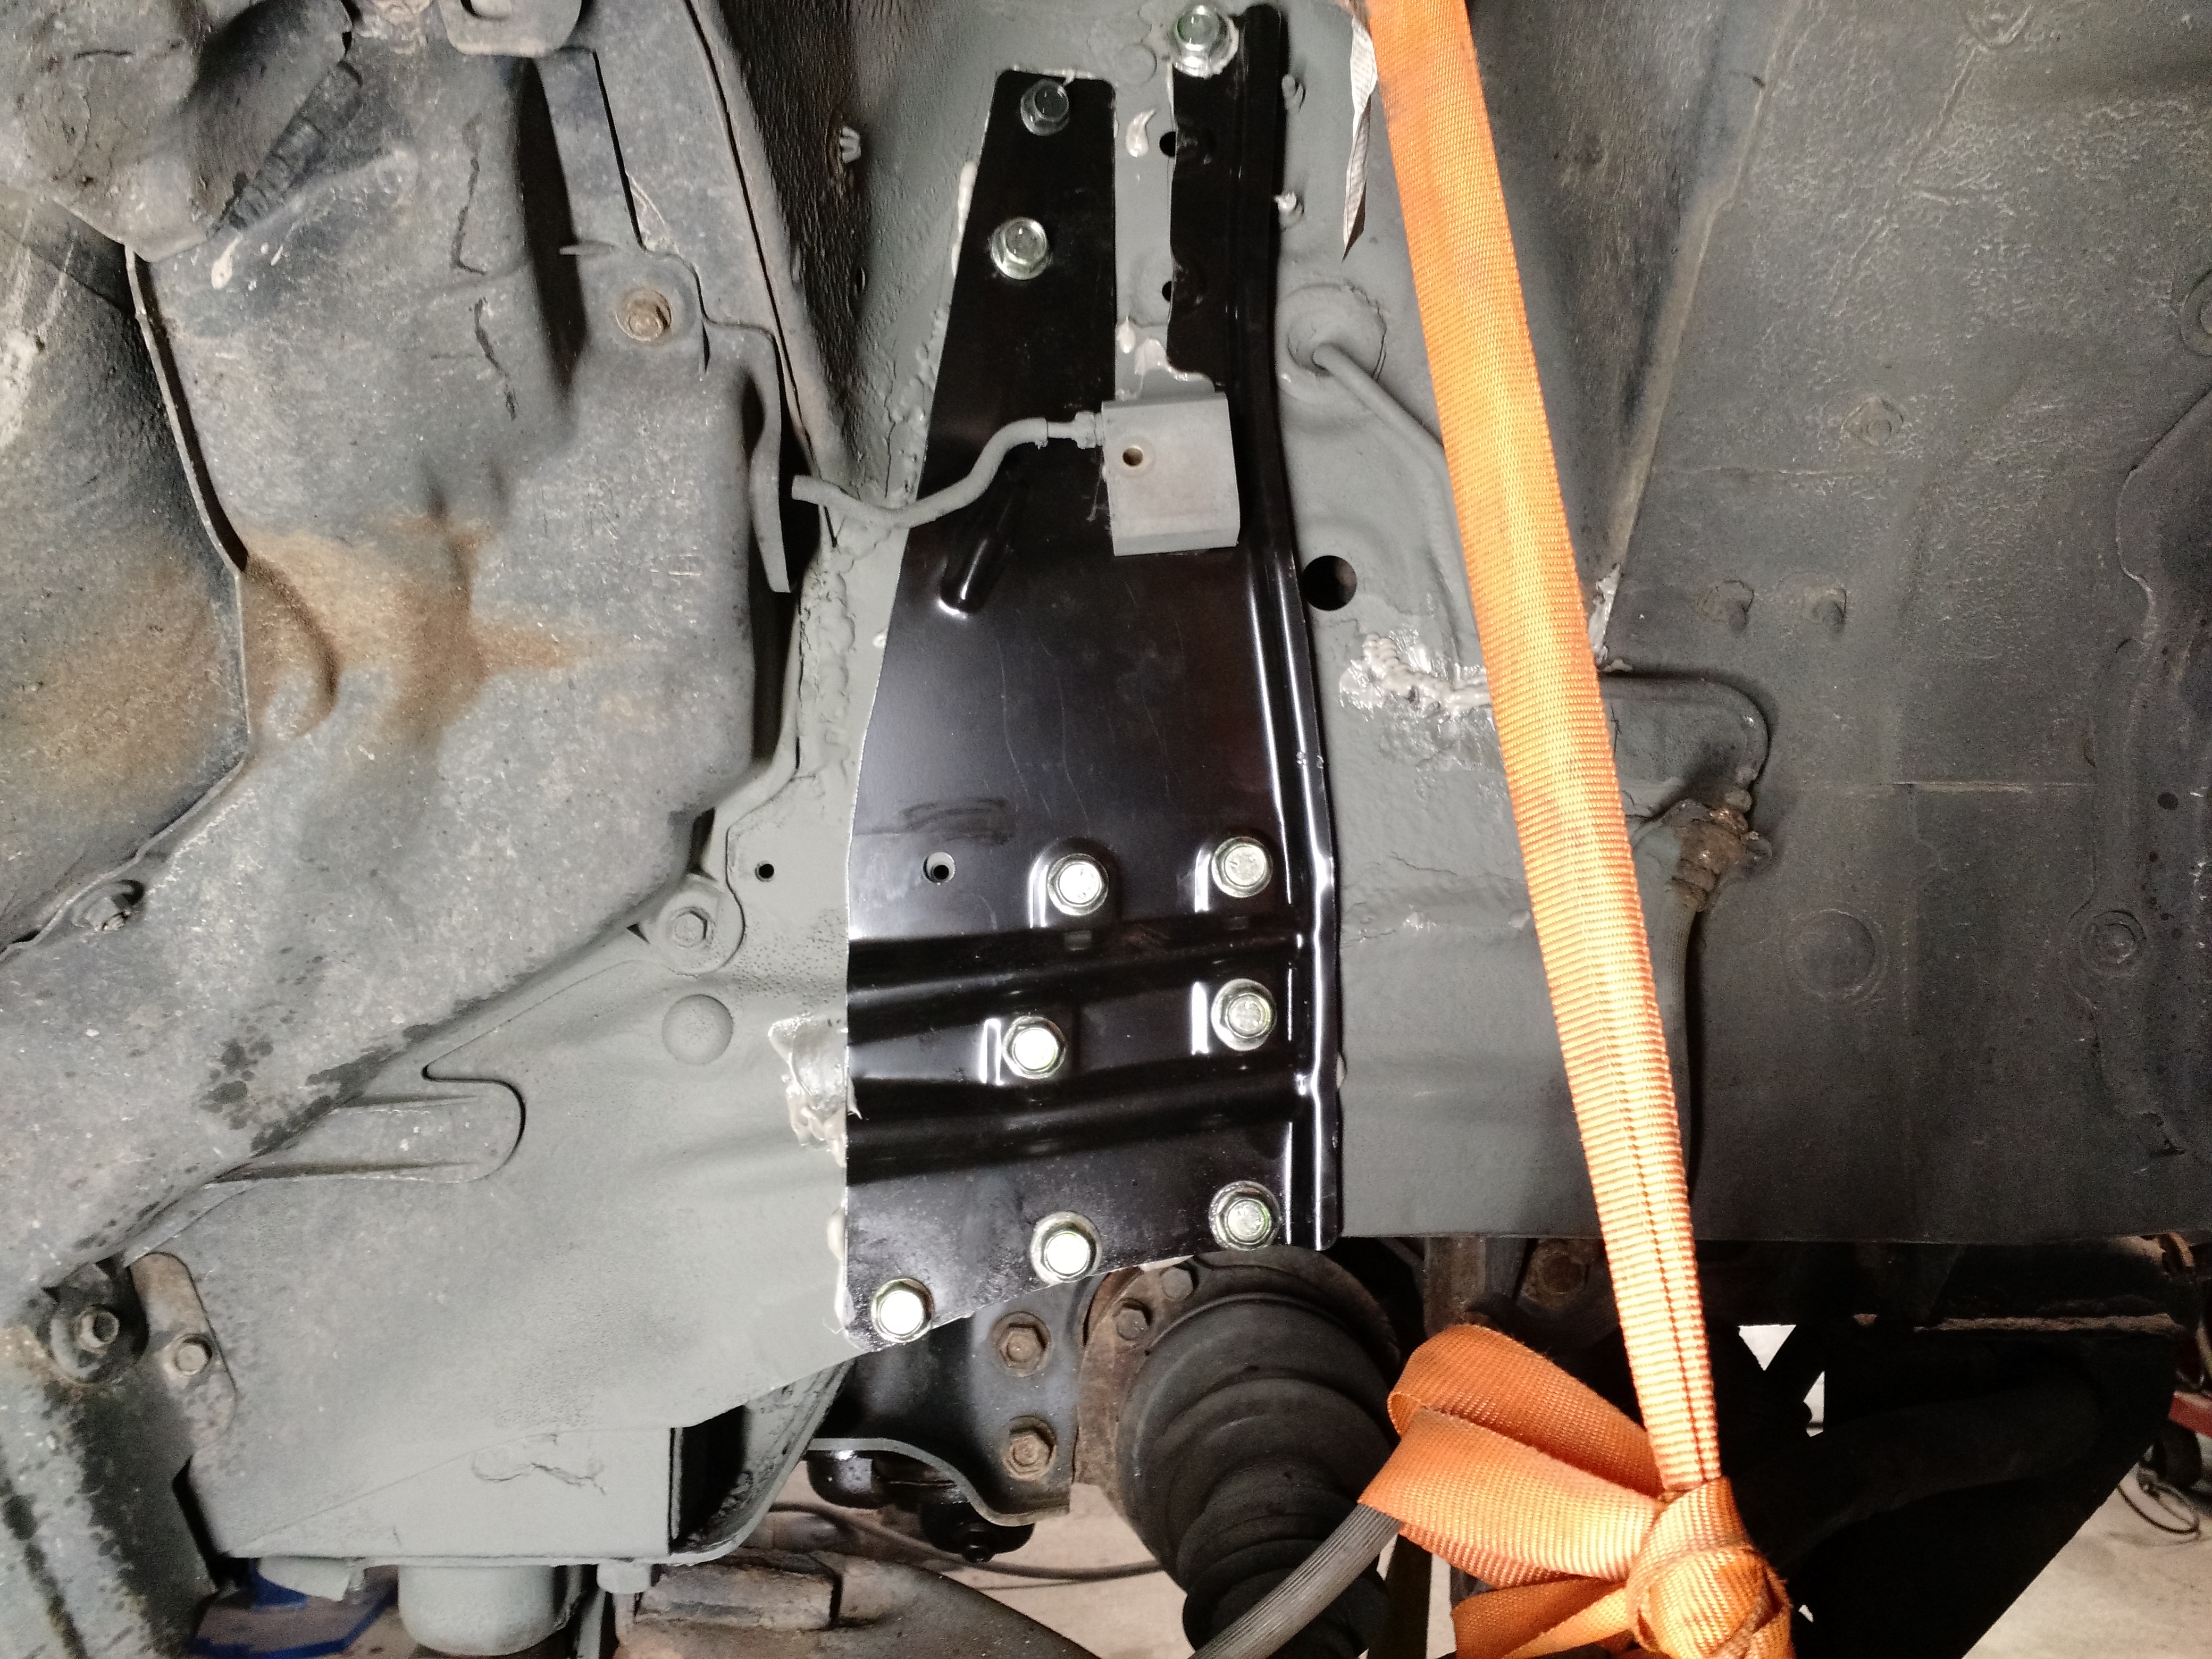
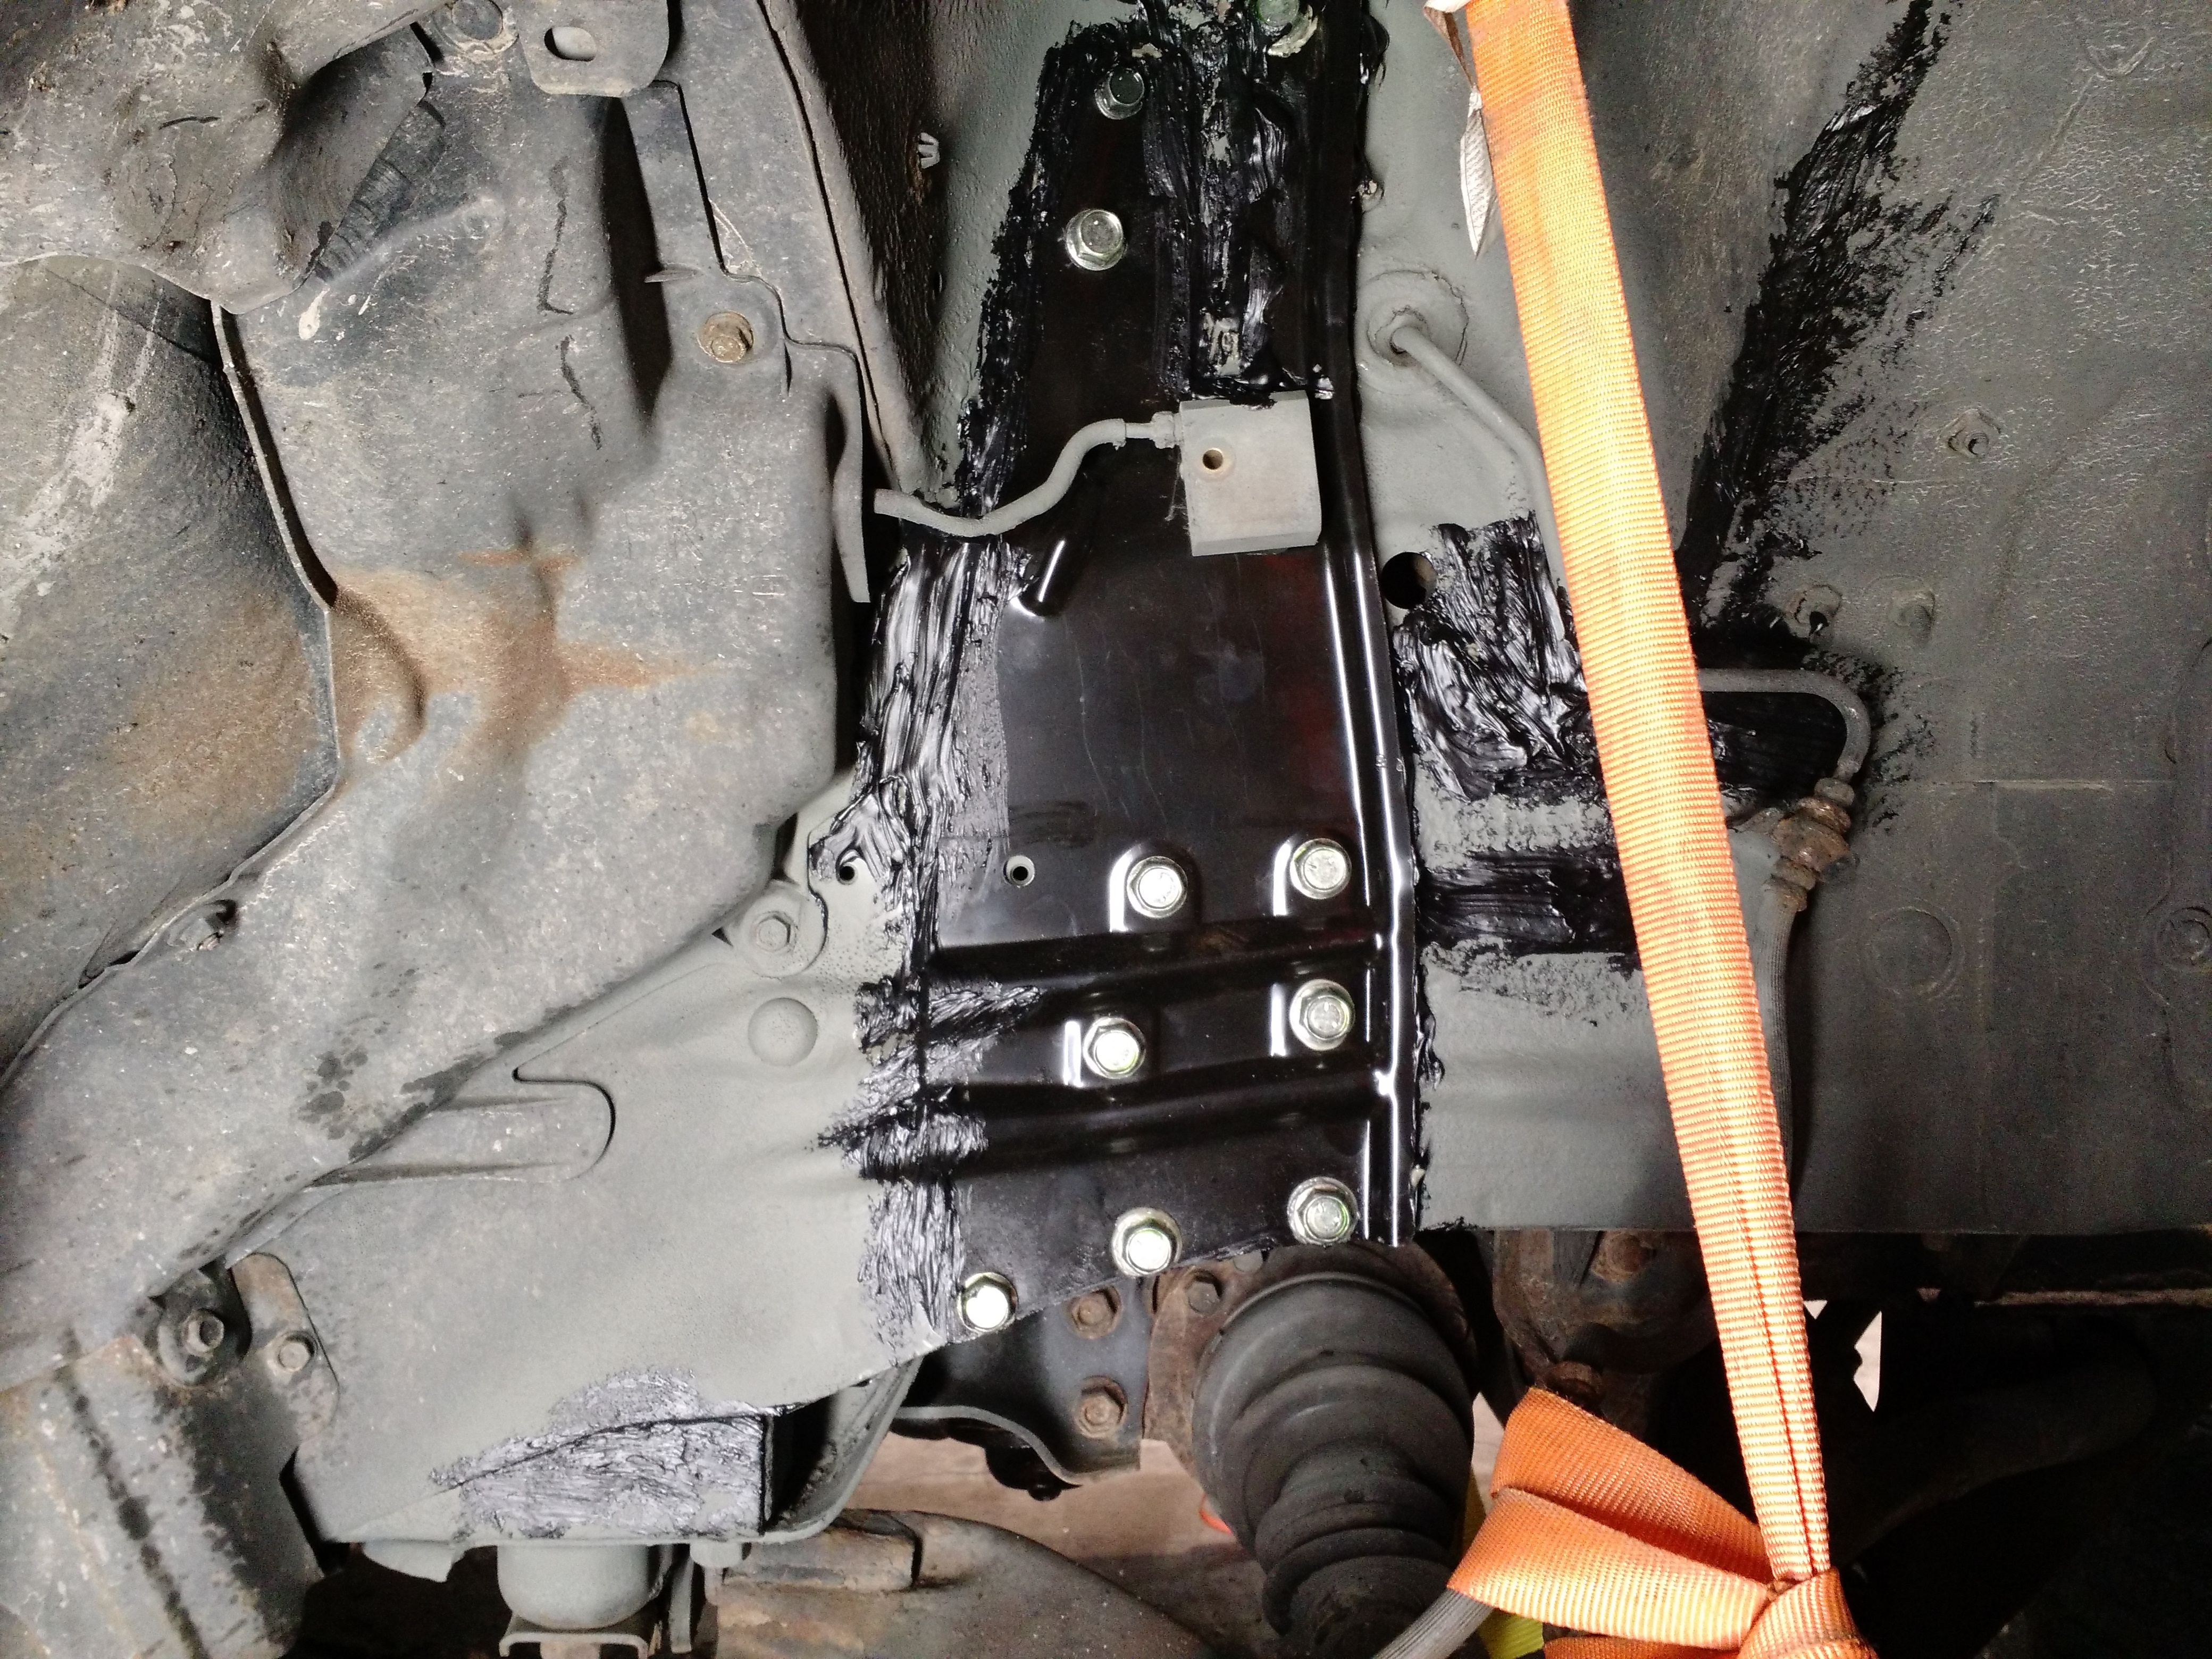
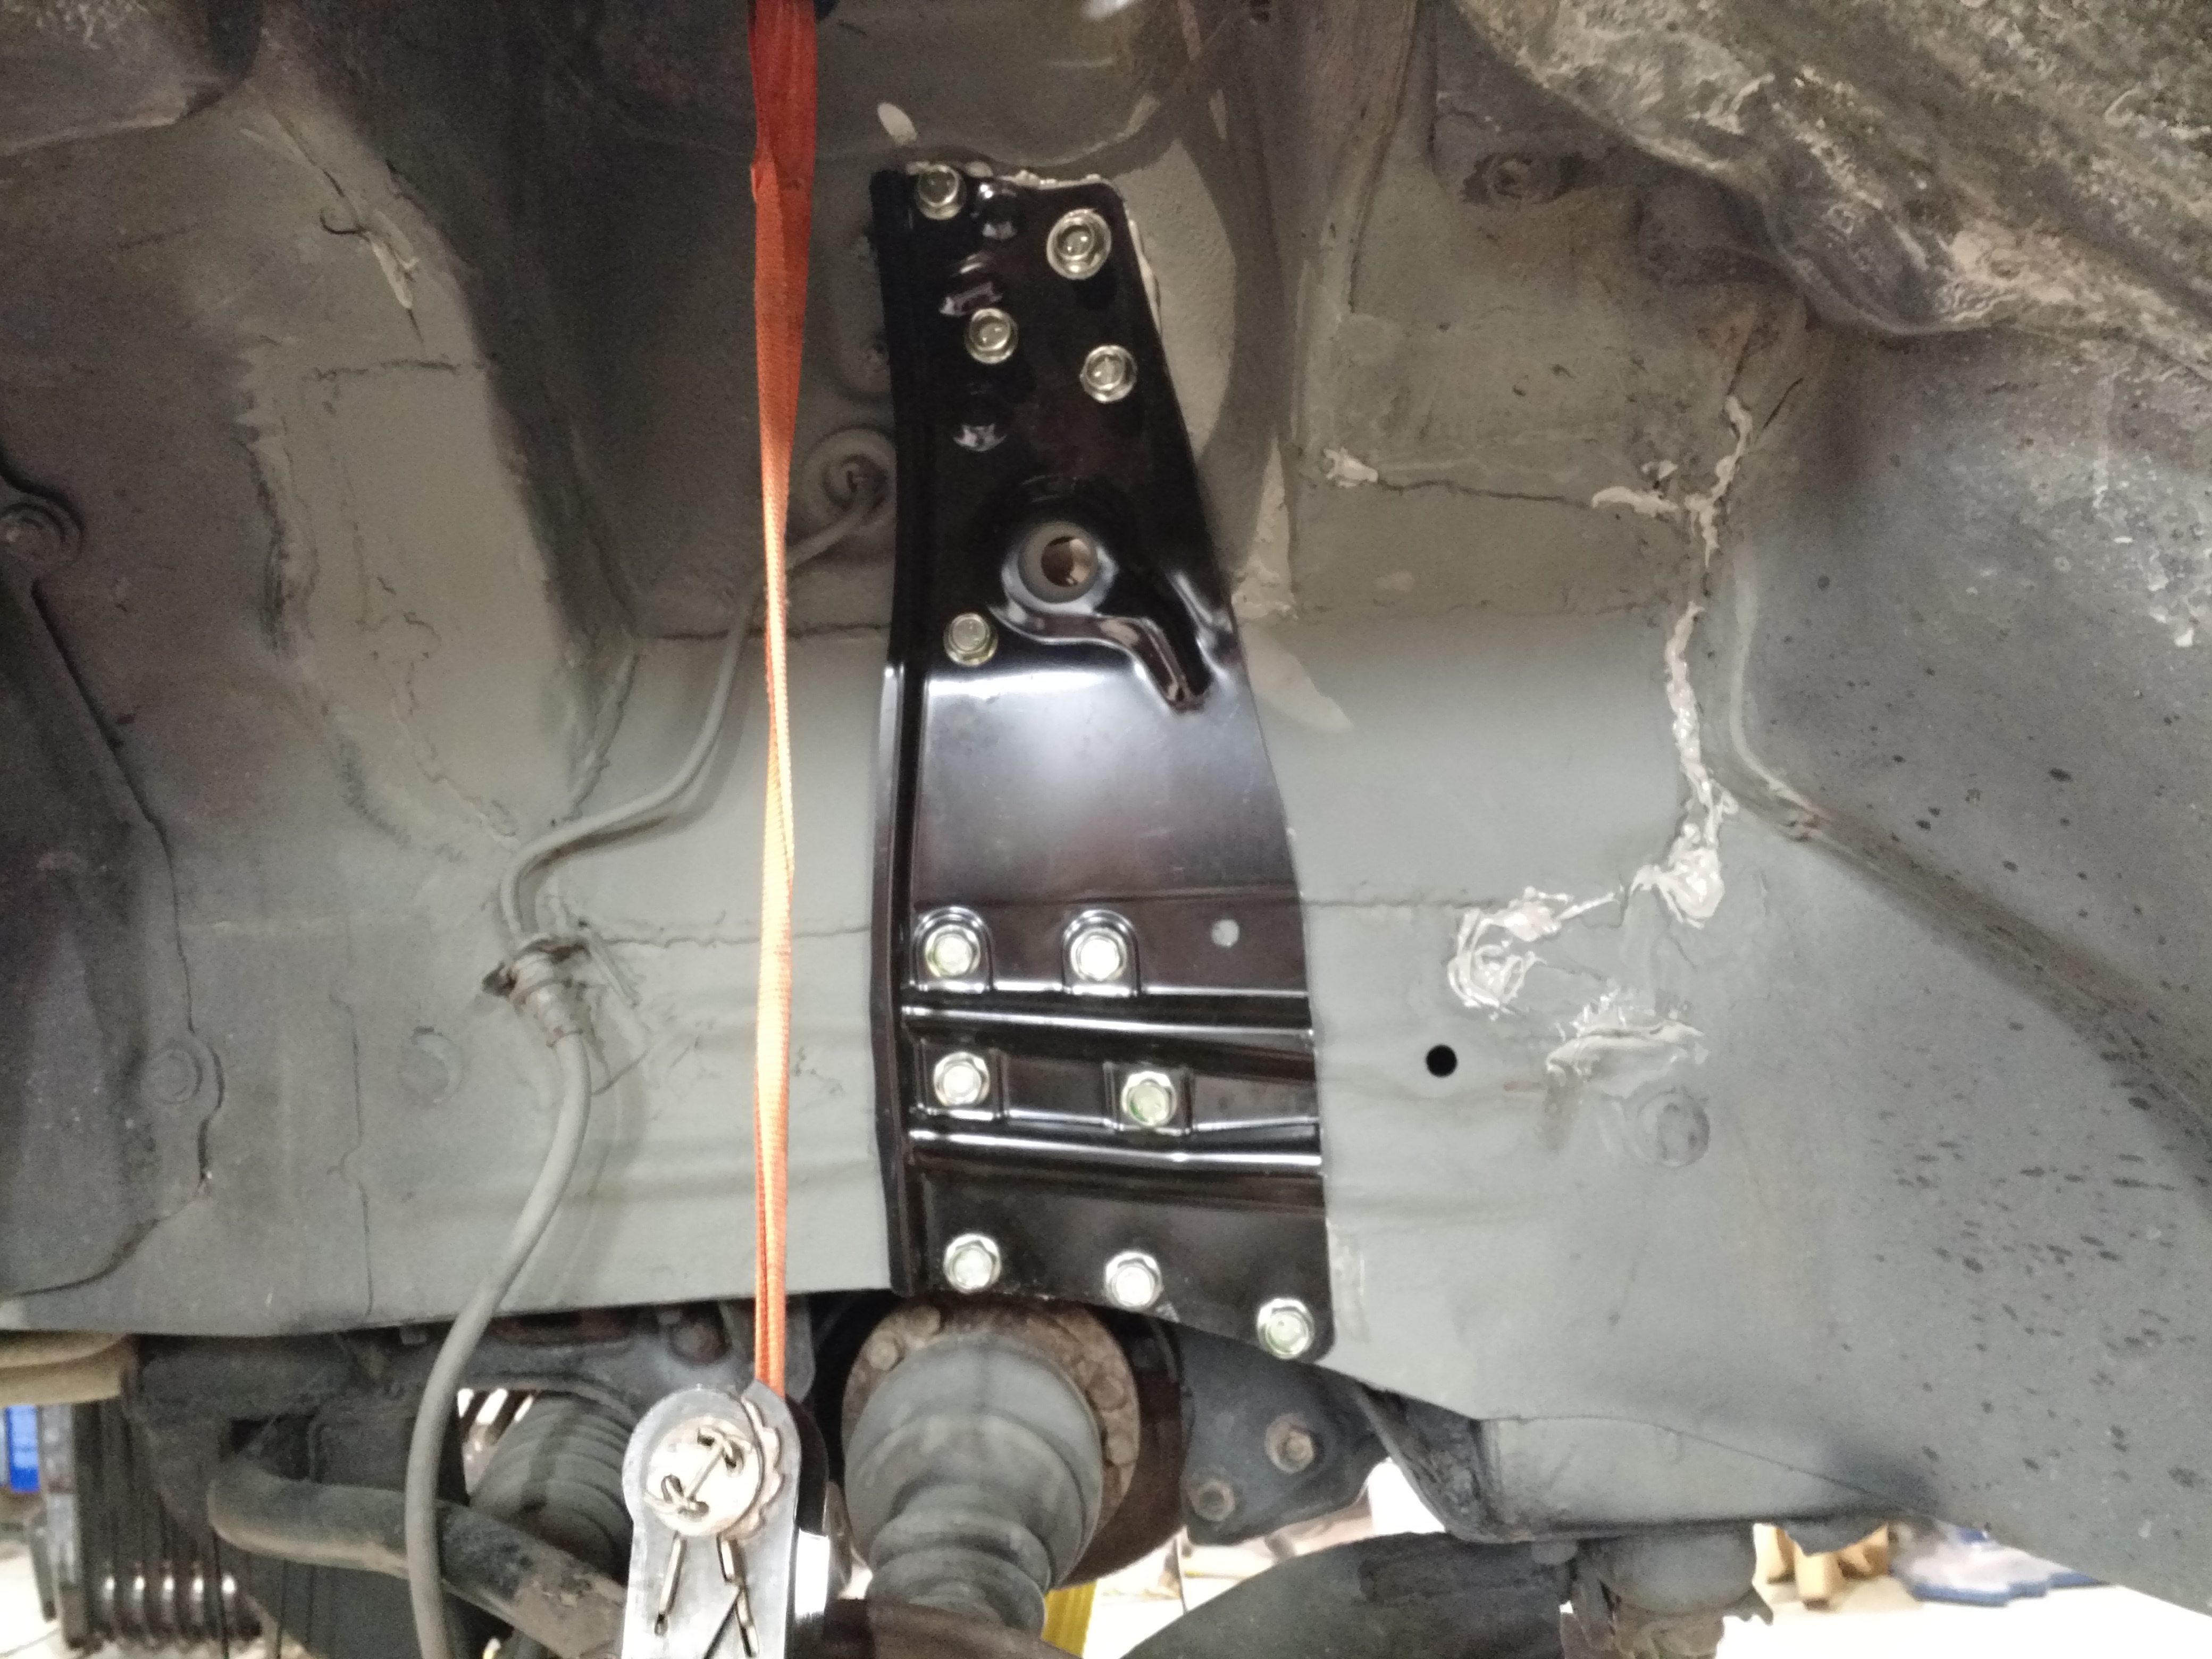
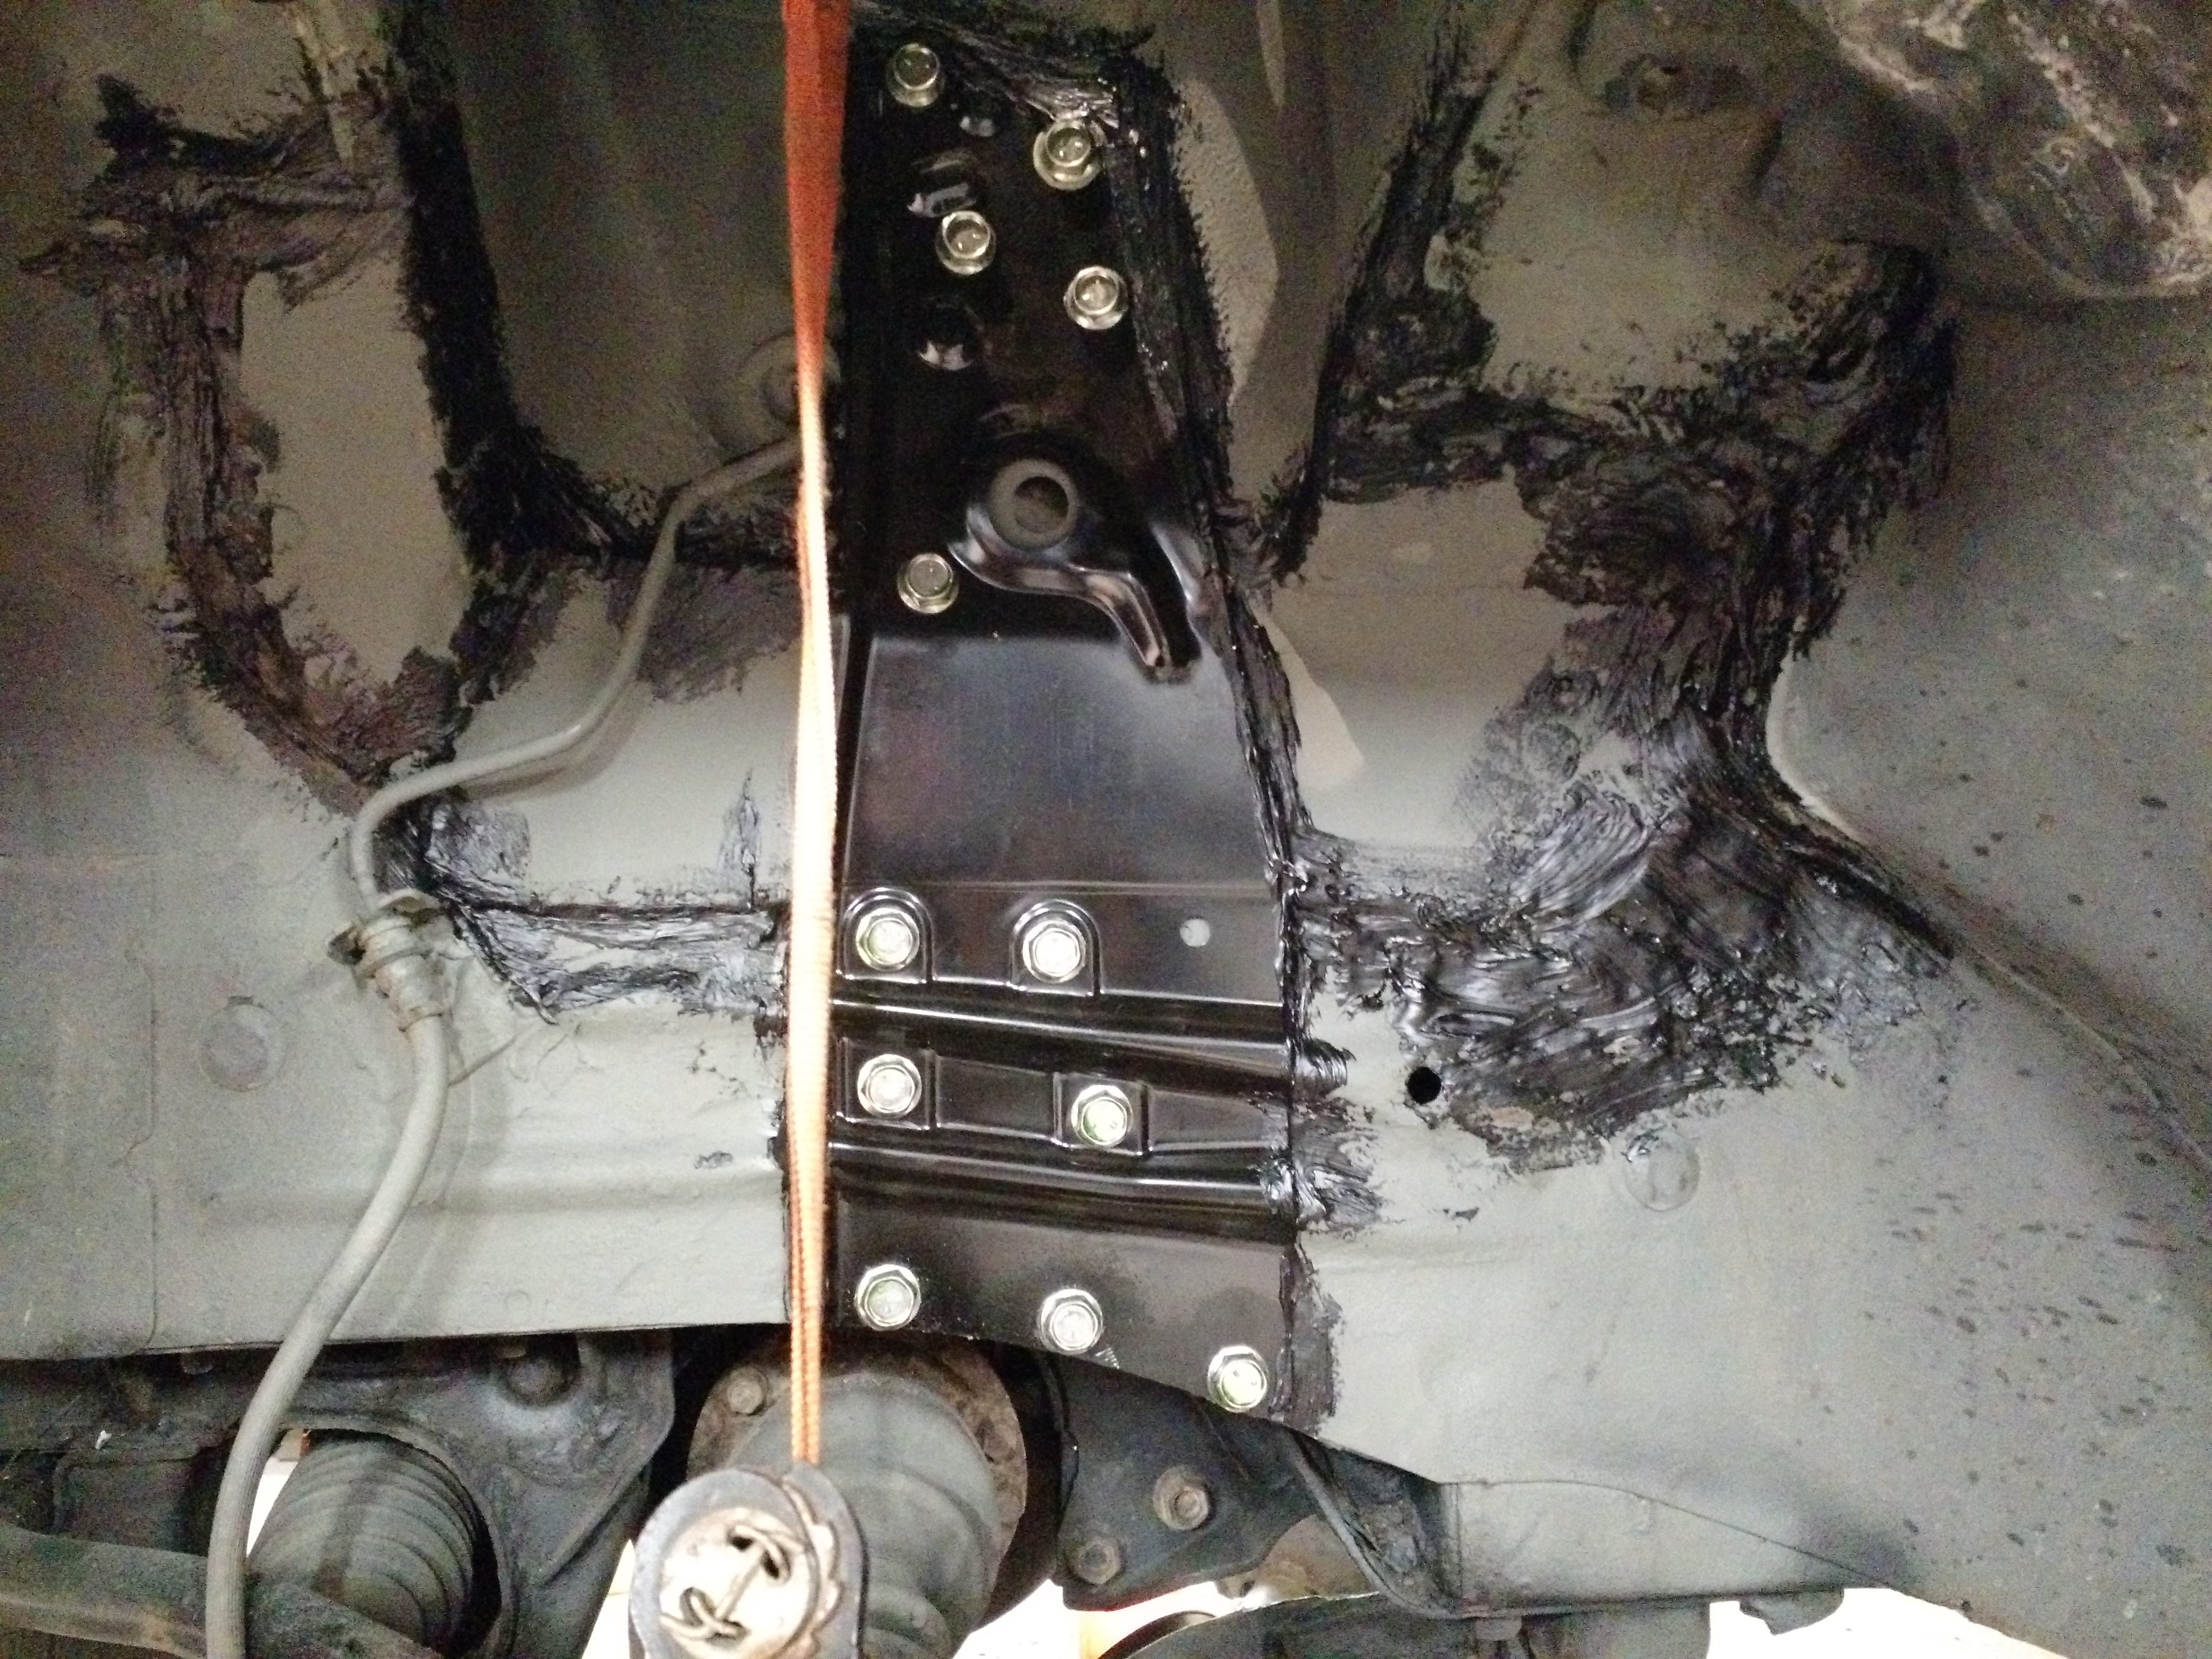
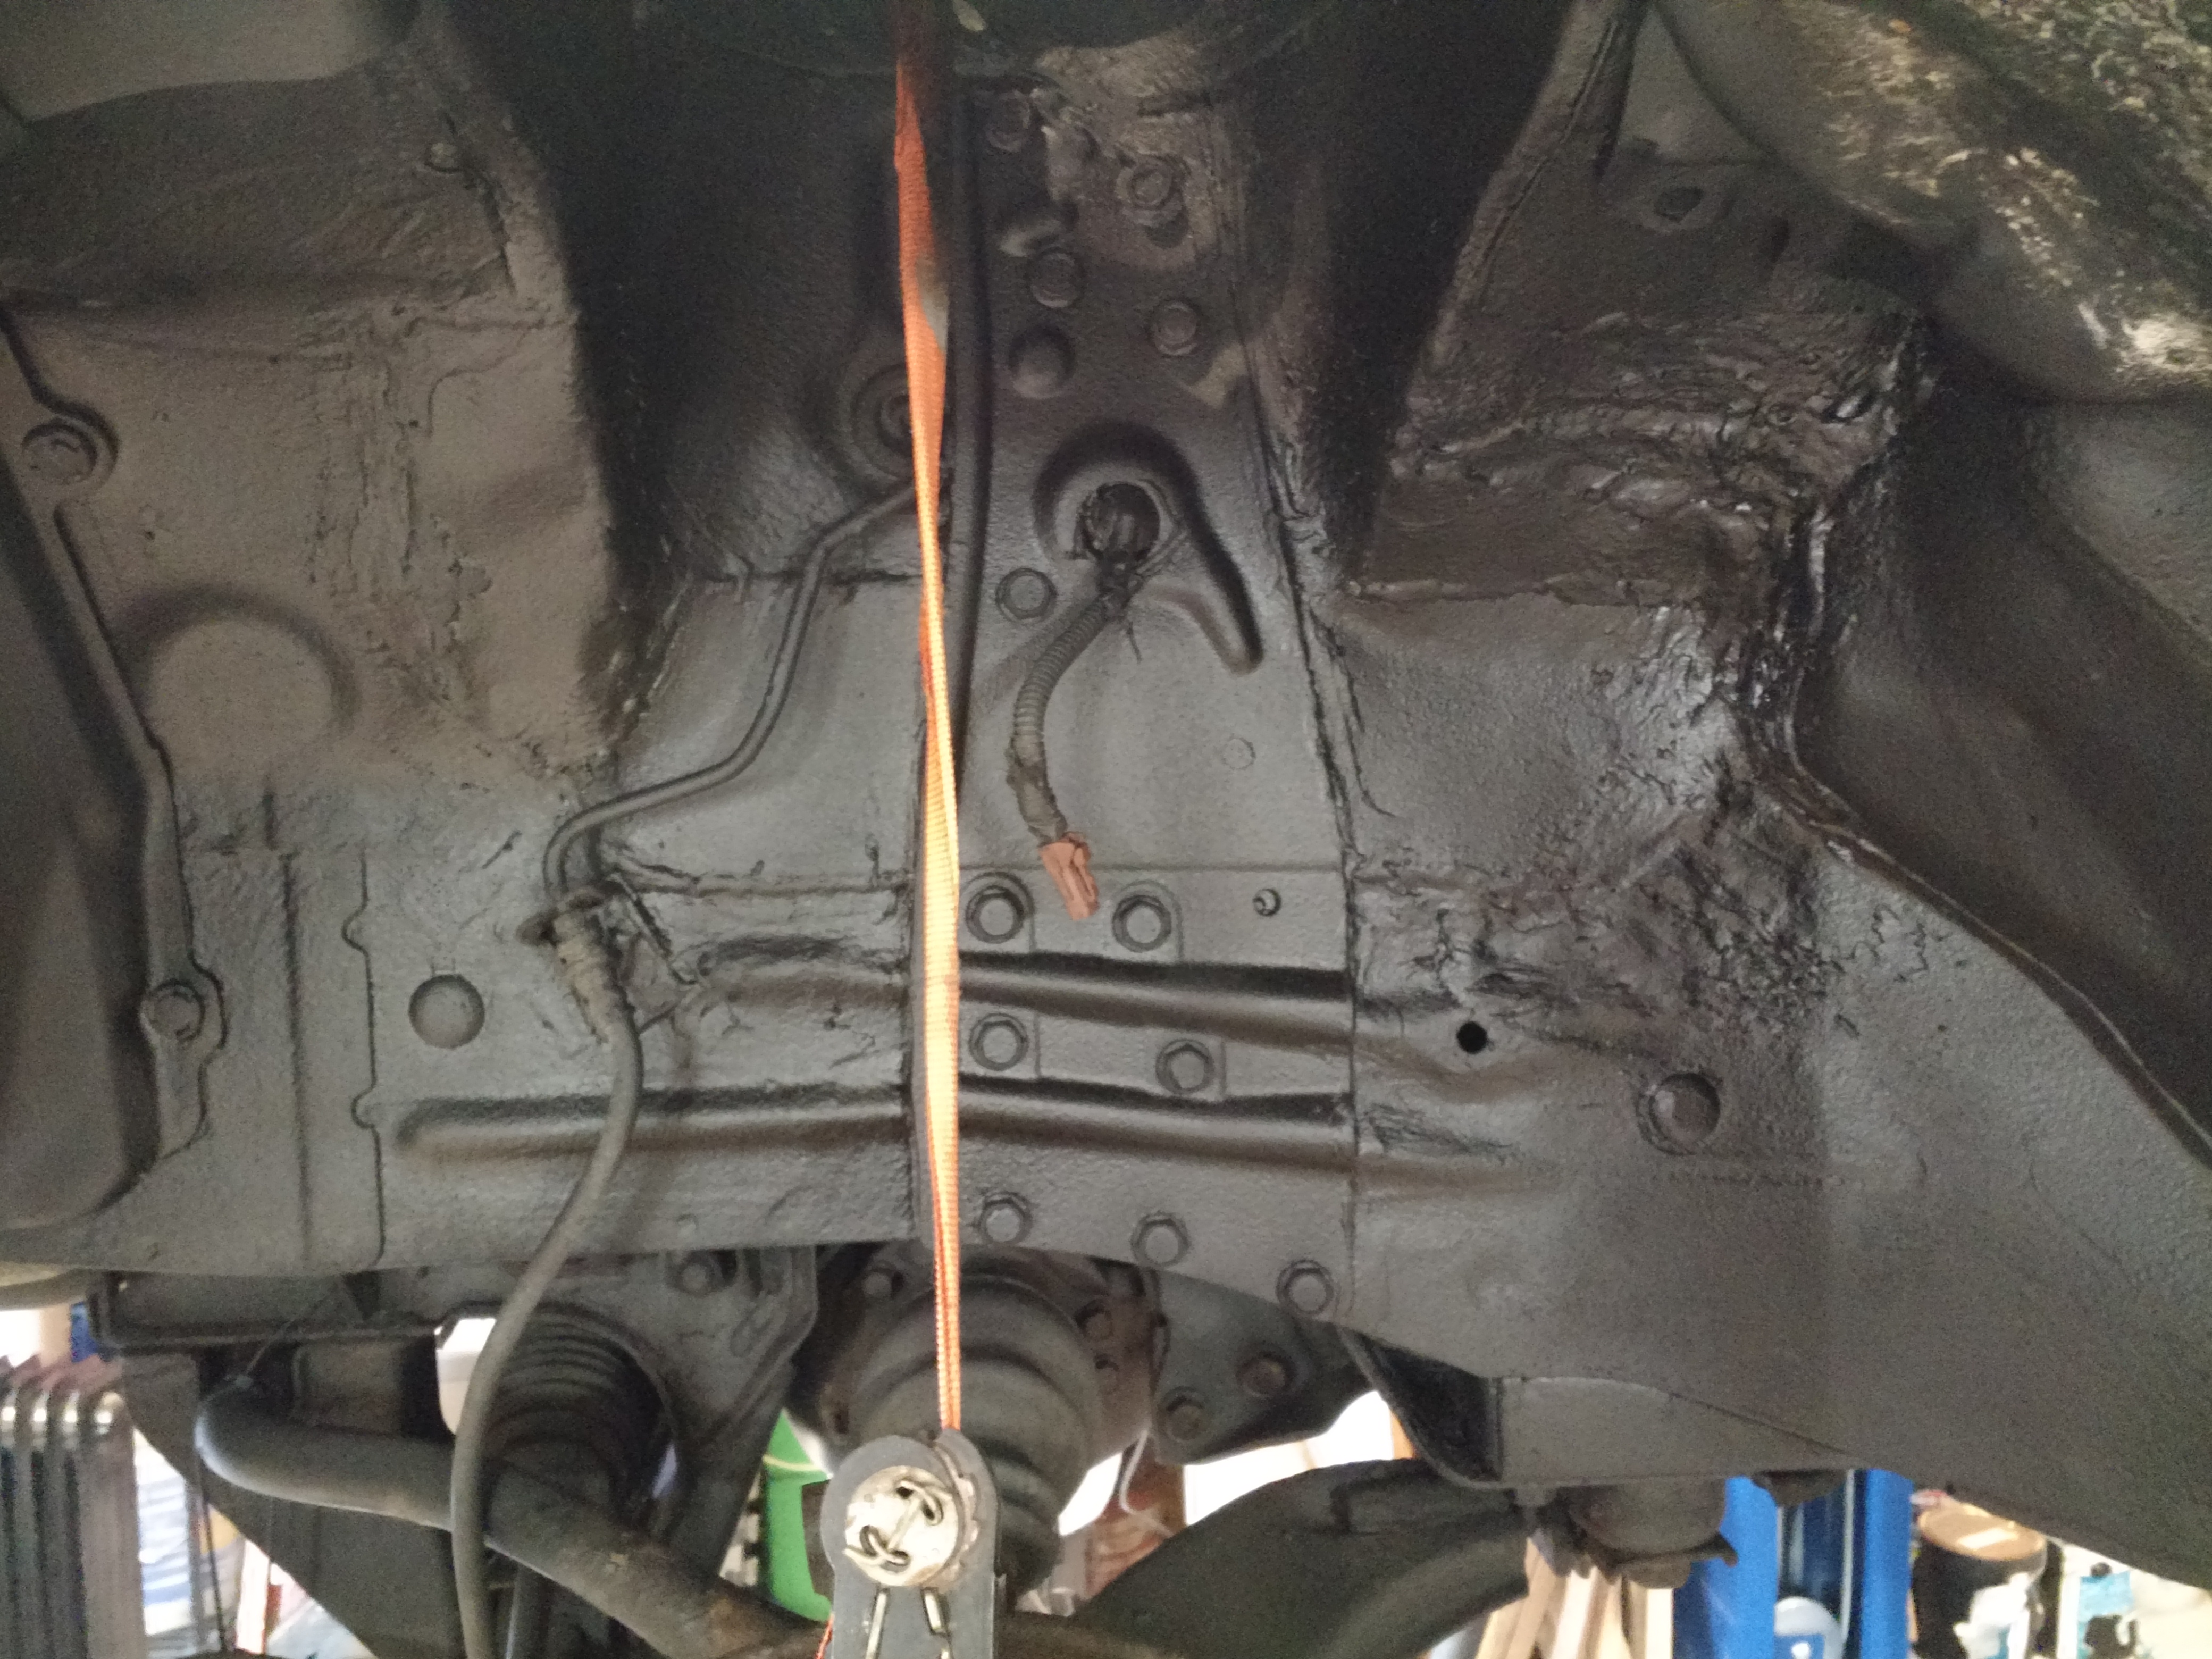
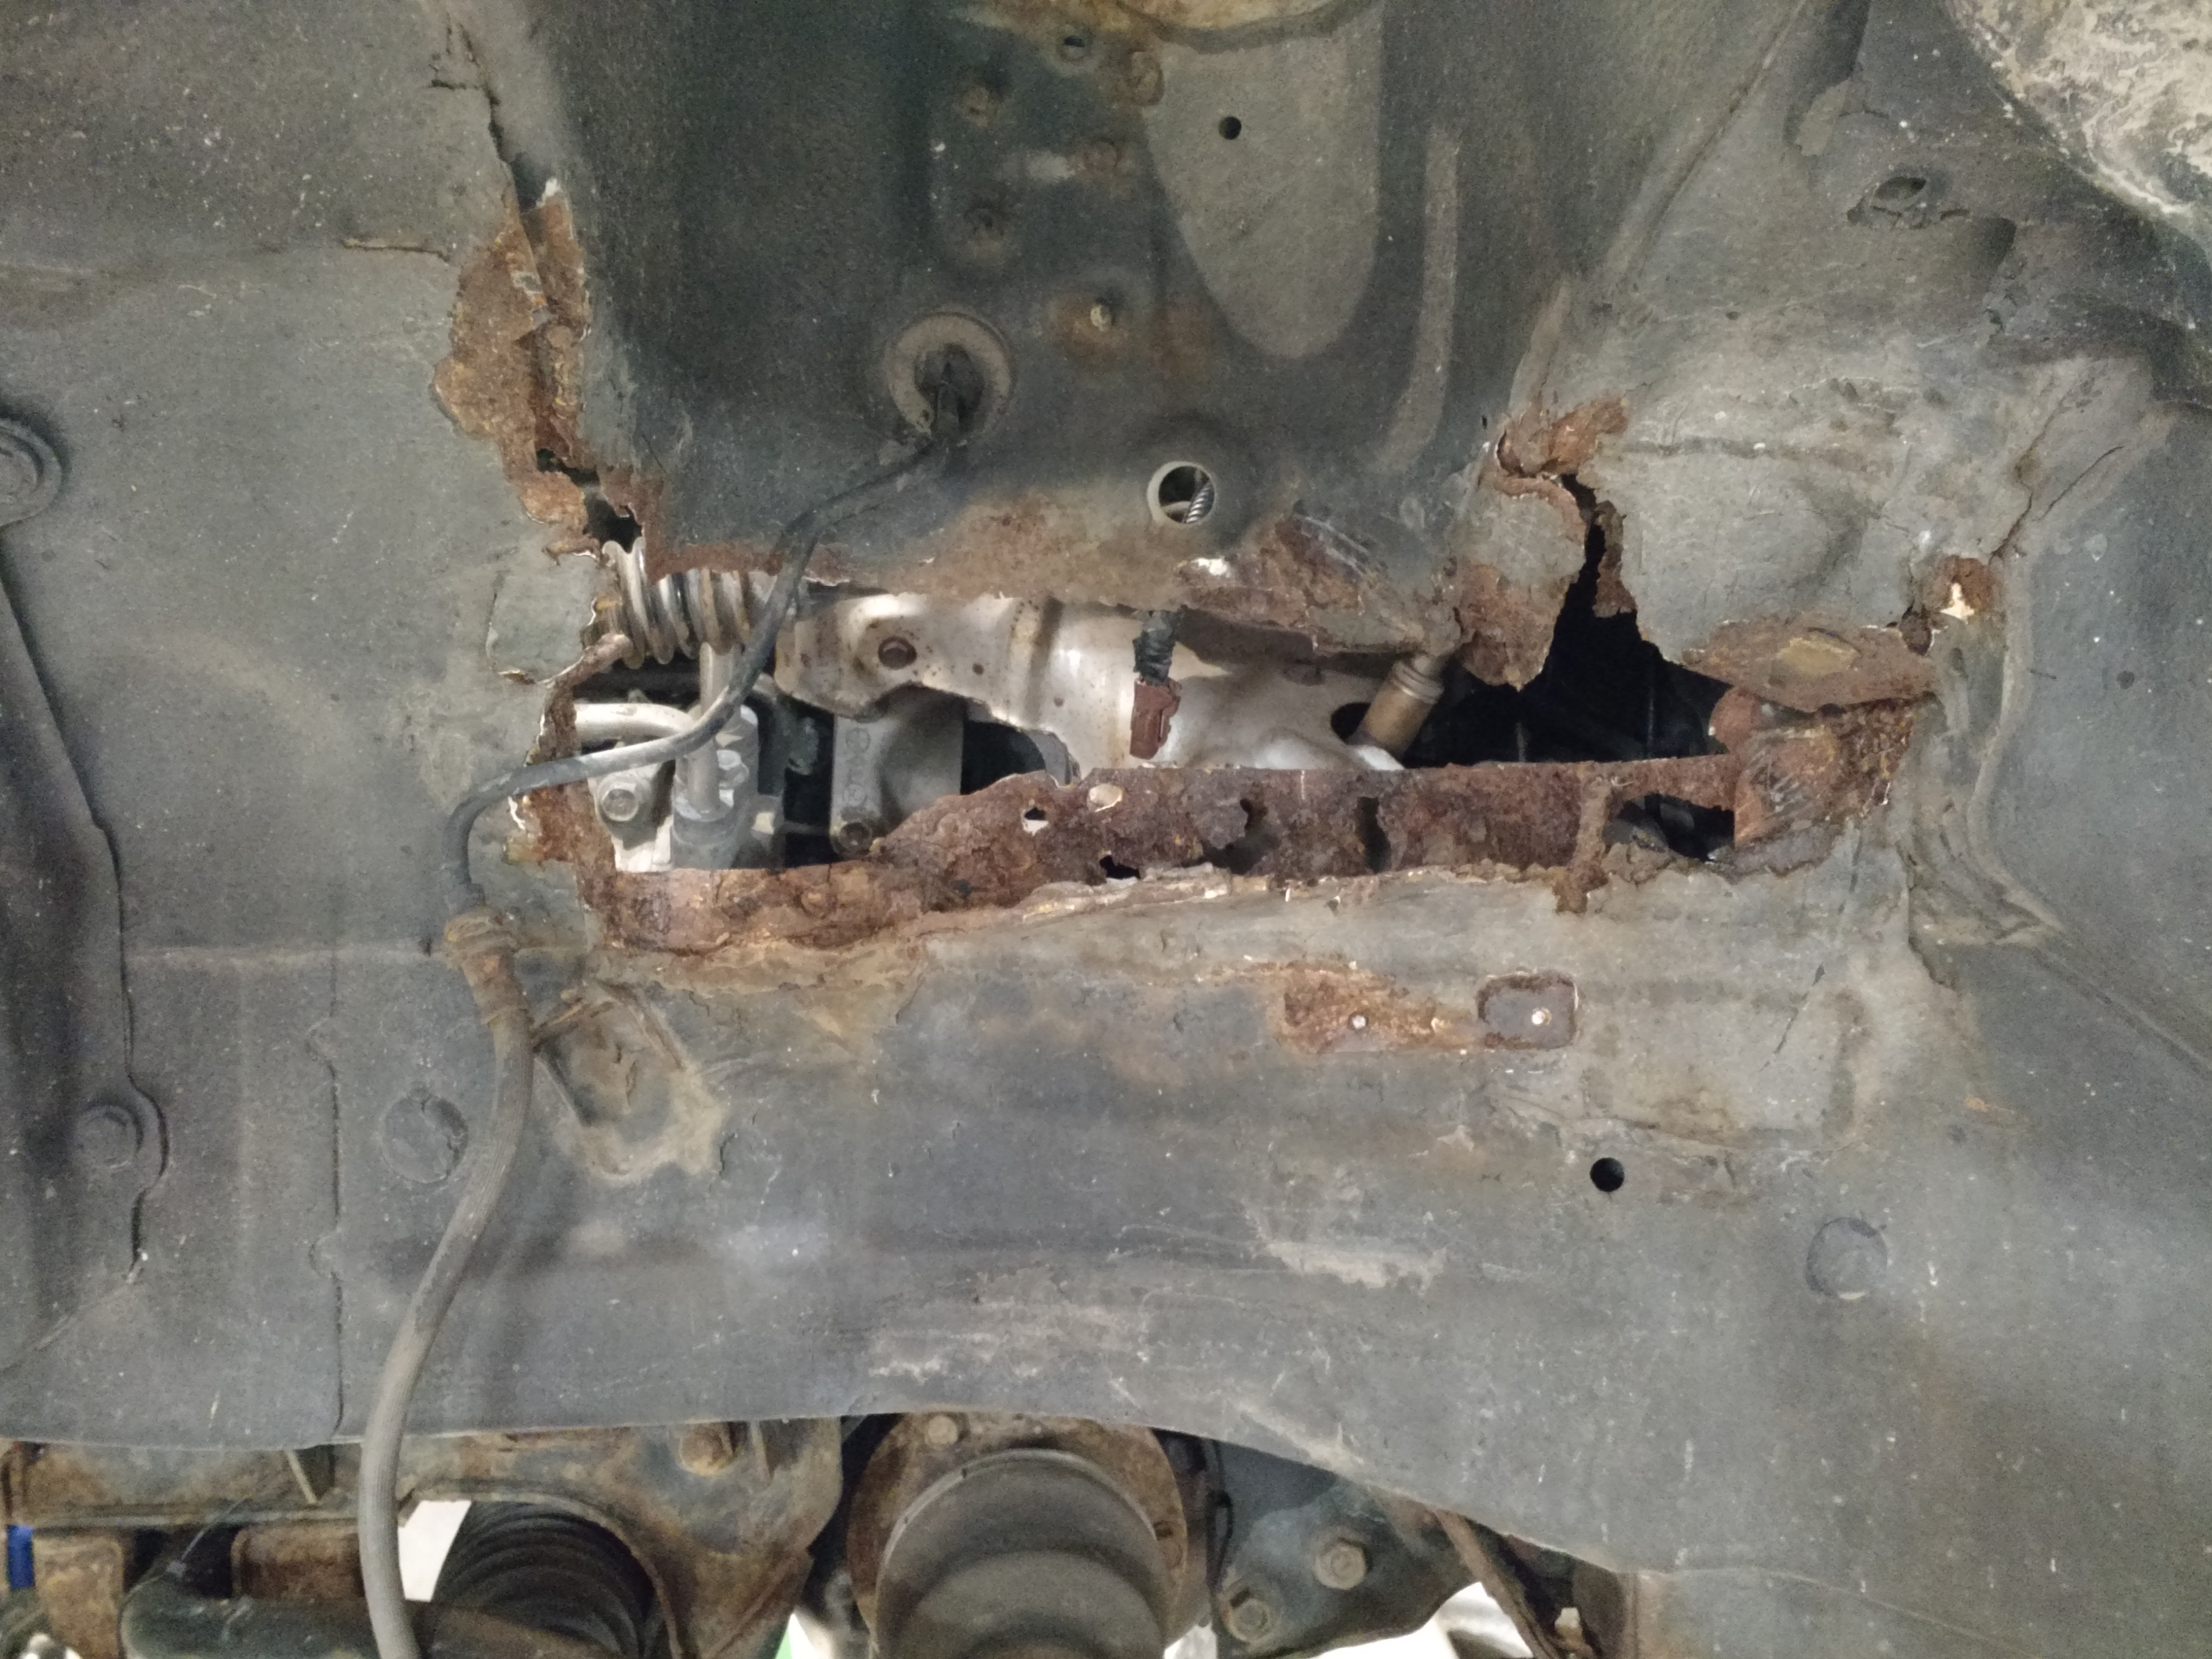
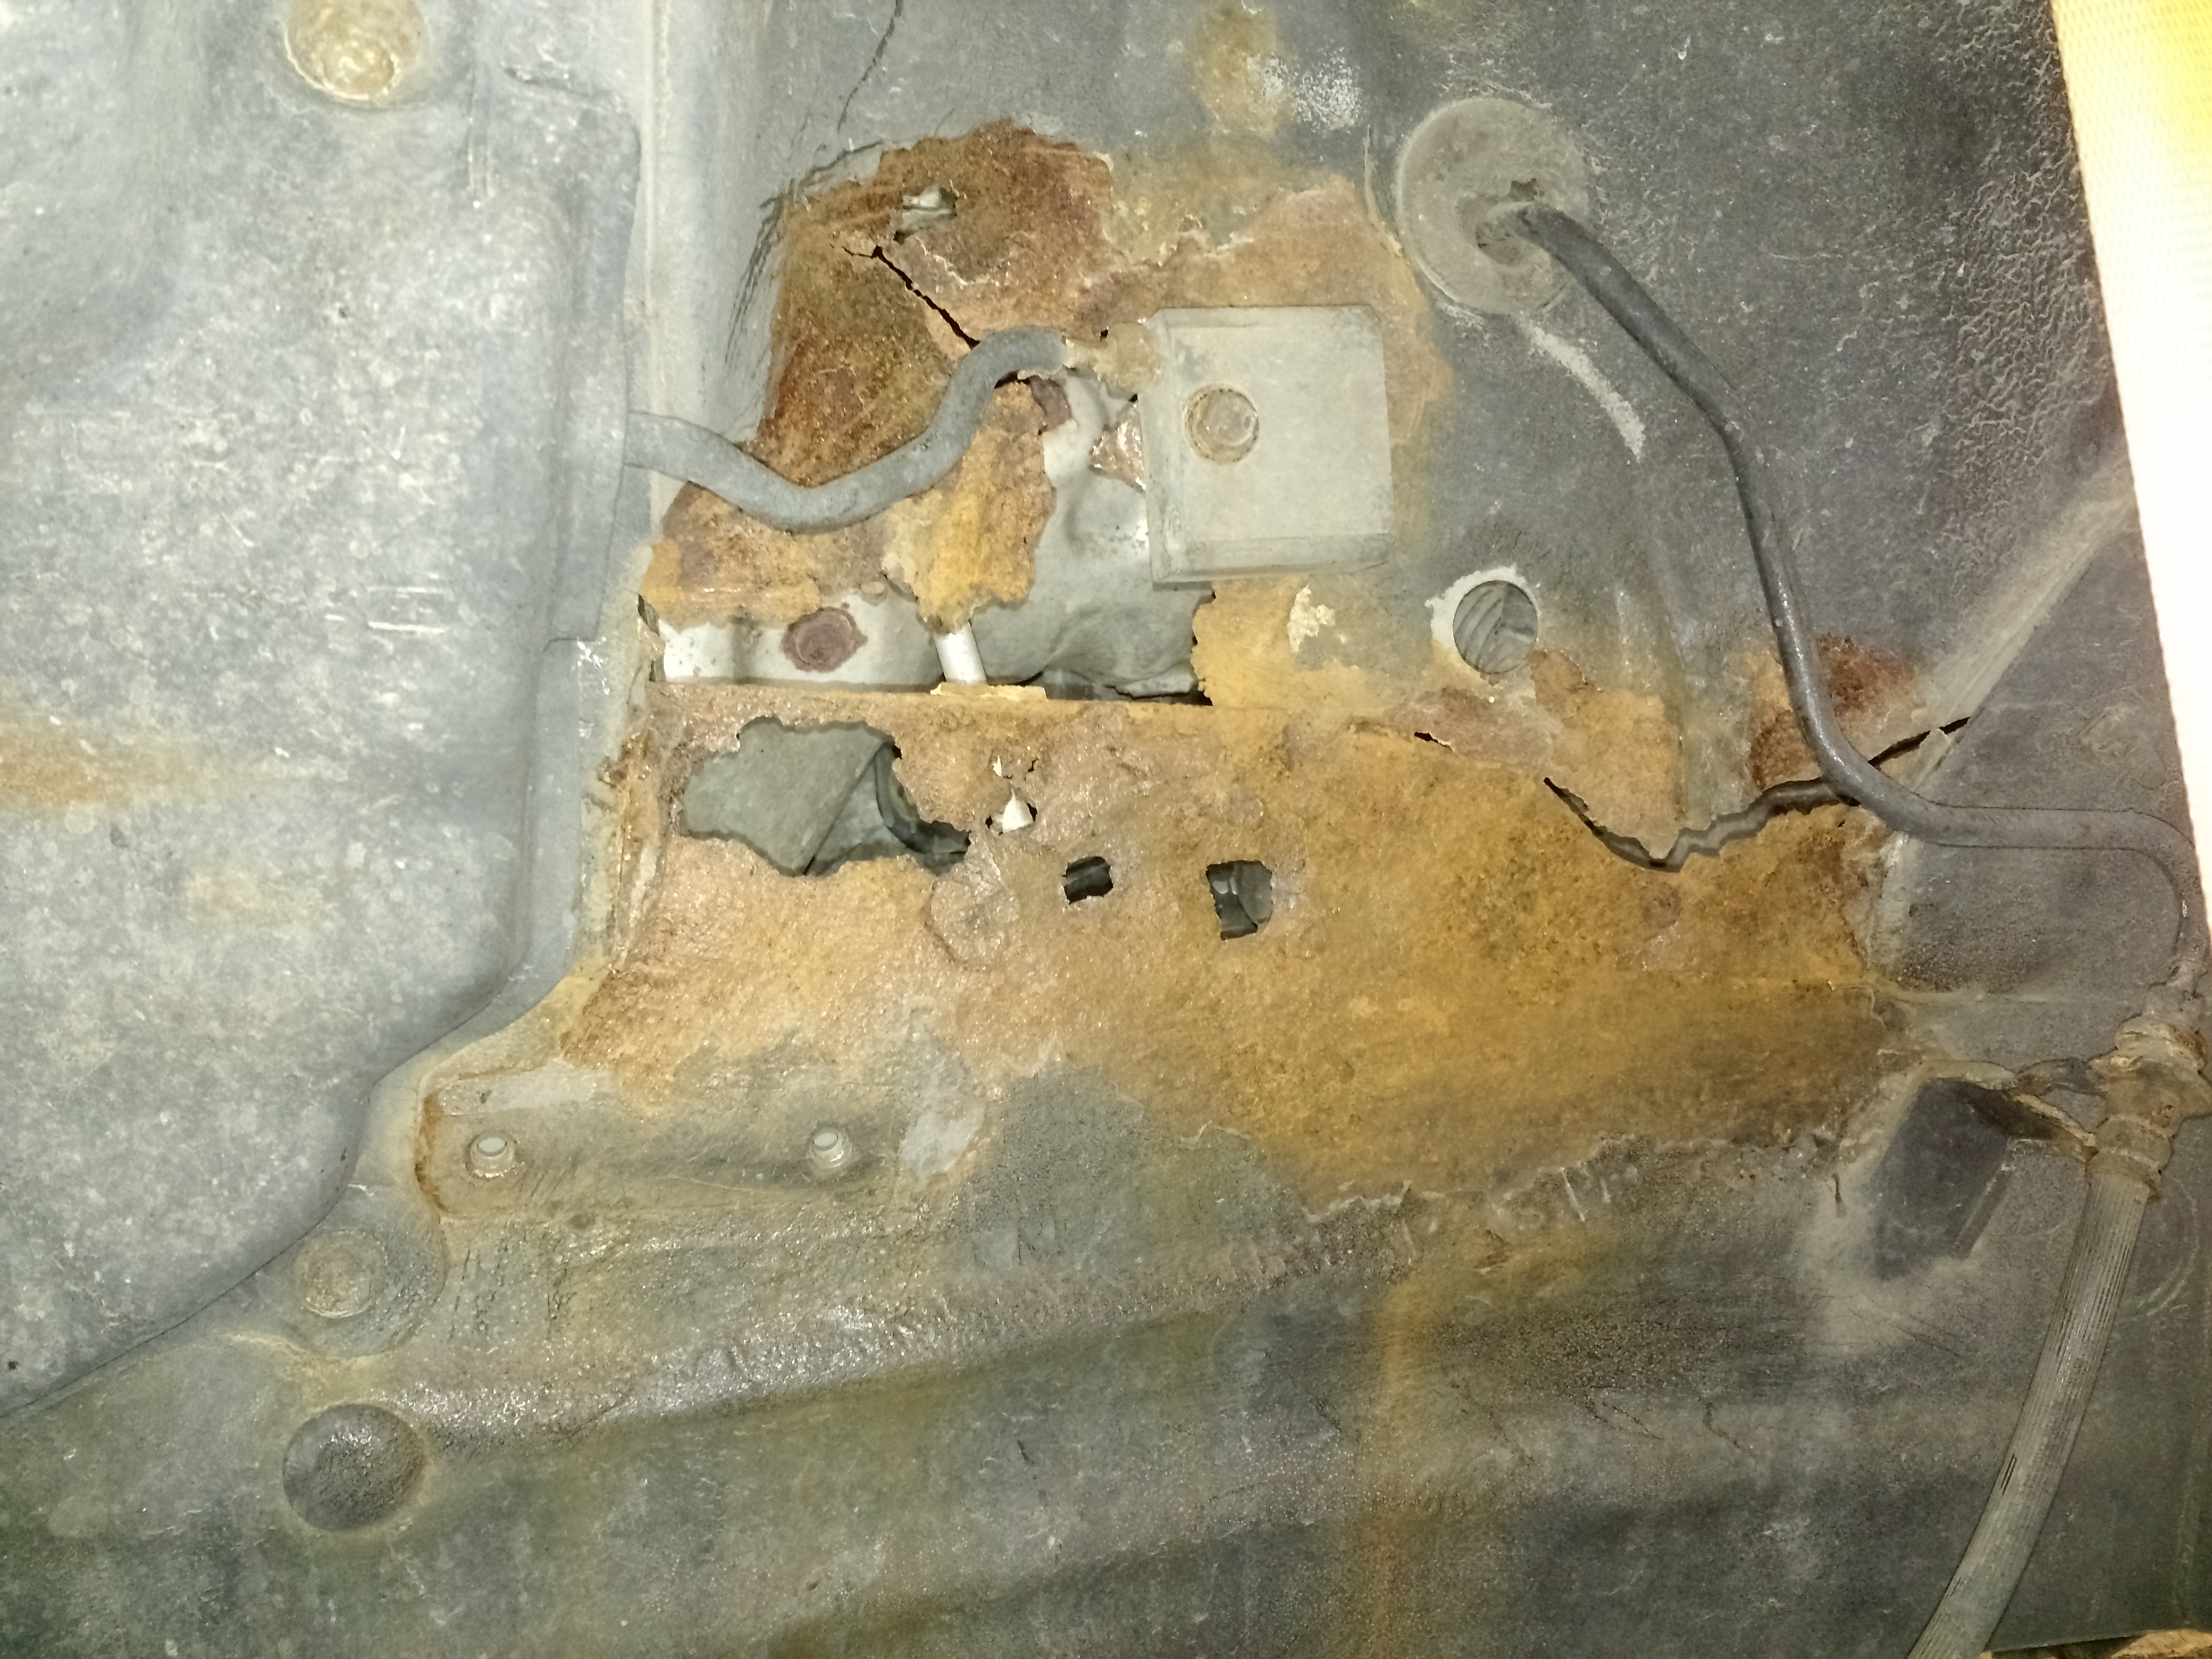
Inspecting the damage, glad to see the mounting points for the repair bracket are in good condition, as I will be using the brackets to position the strut tower in the correct location for the operation. I chose to weld in new metal because I believe the fiberglass repair Nissan came up with is a half-a** way of doing this type of repair.

Driver side:

ImageIMG_20180210_155643909 by Chris Patterson, on Flickr
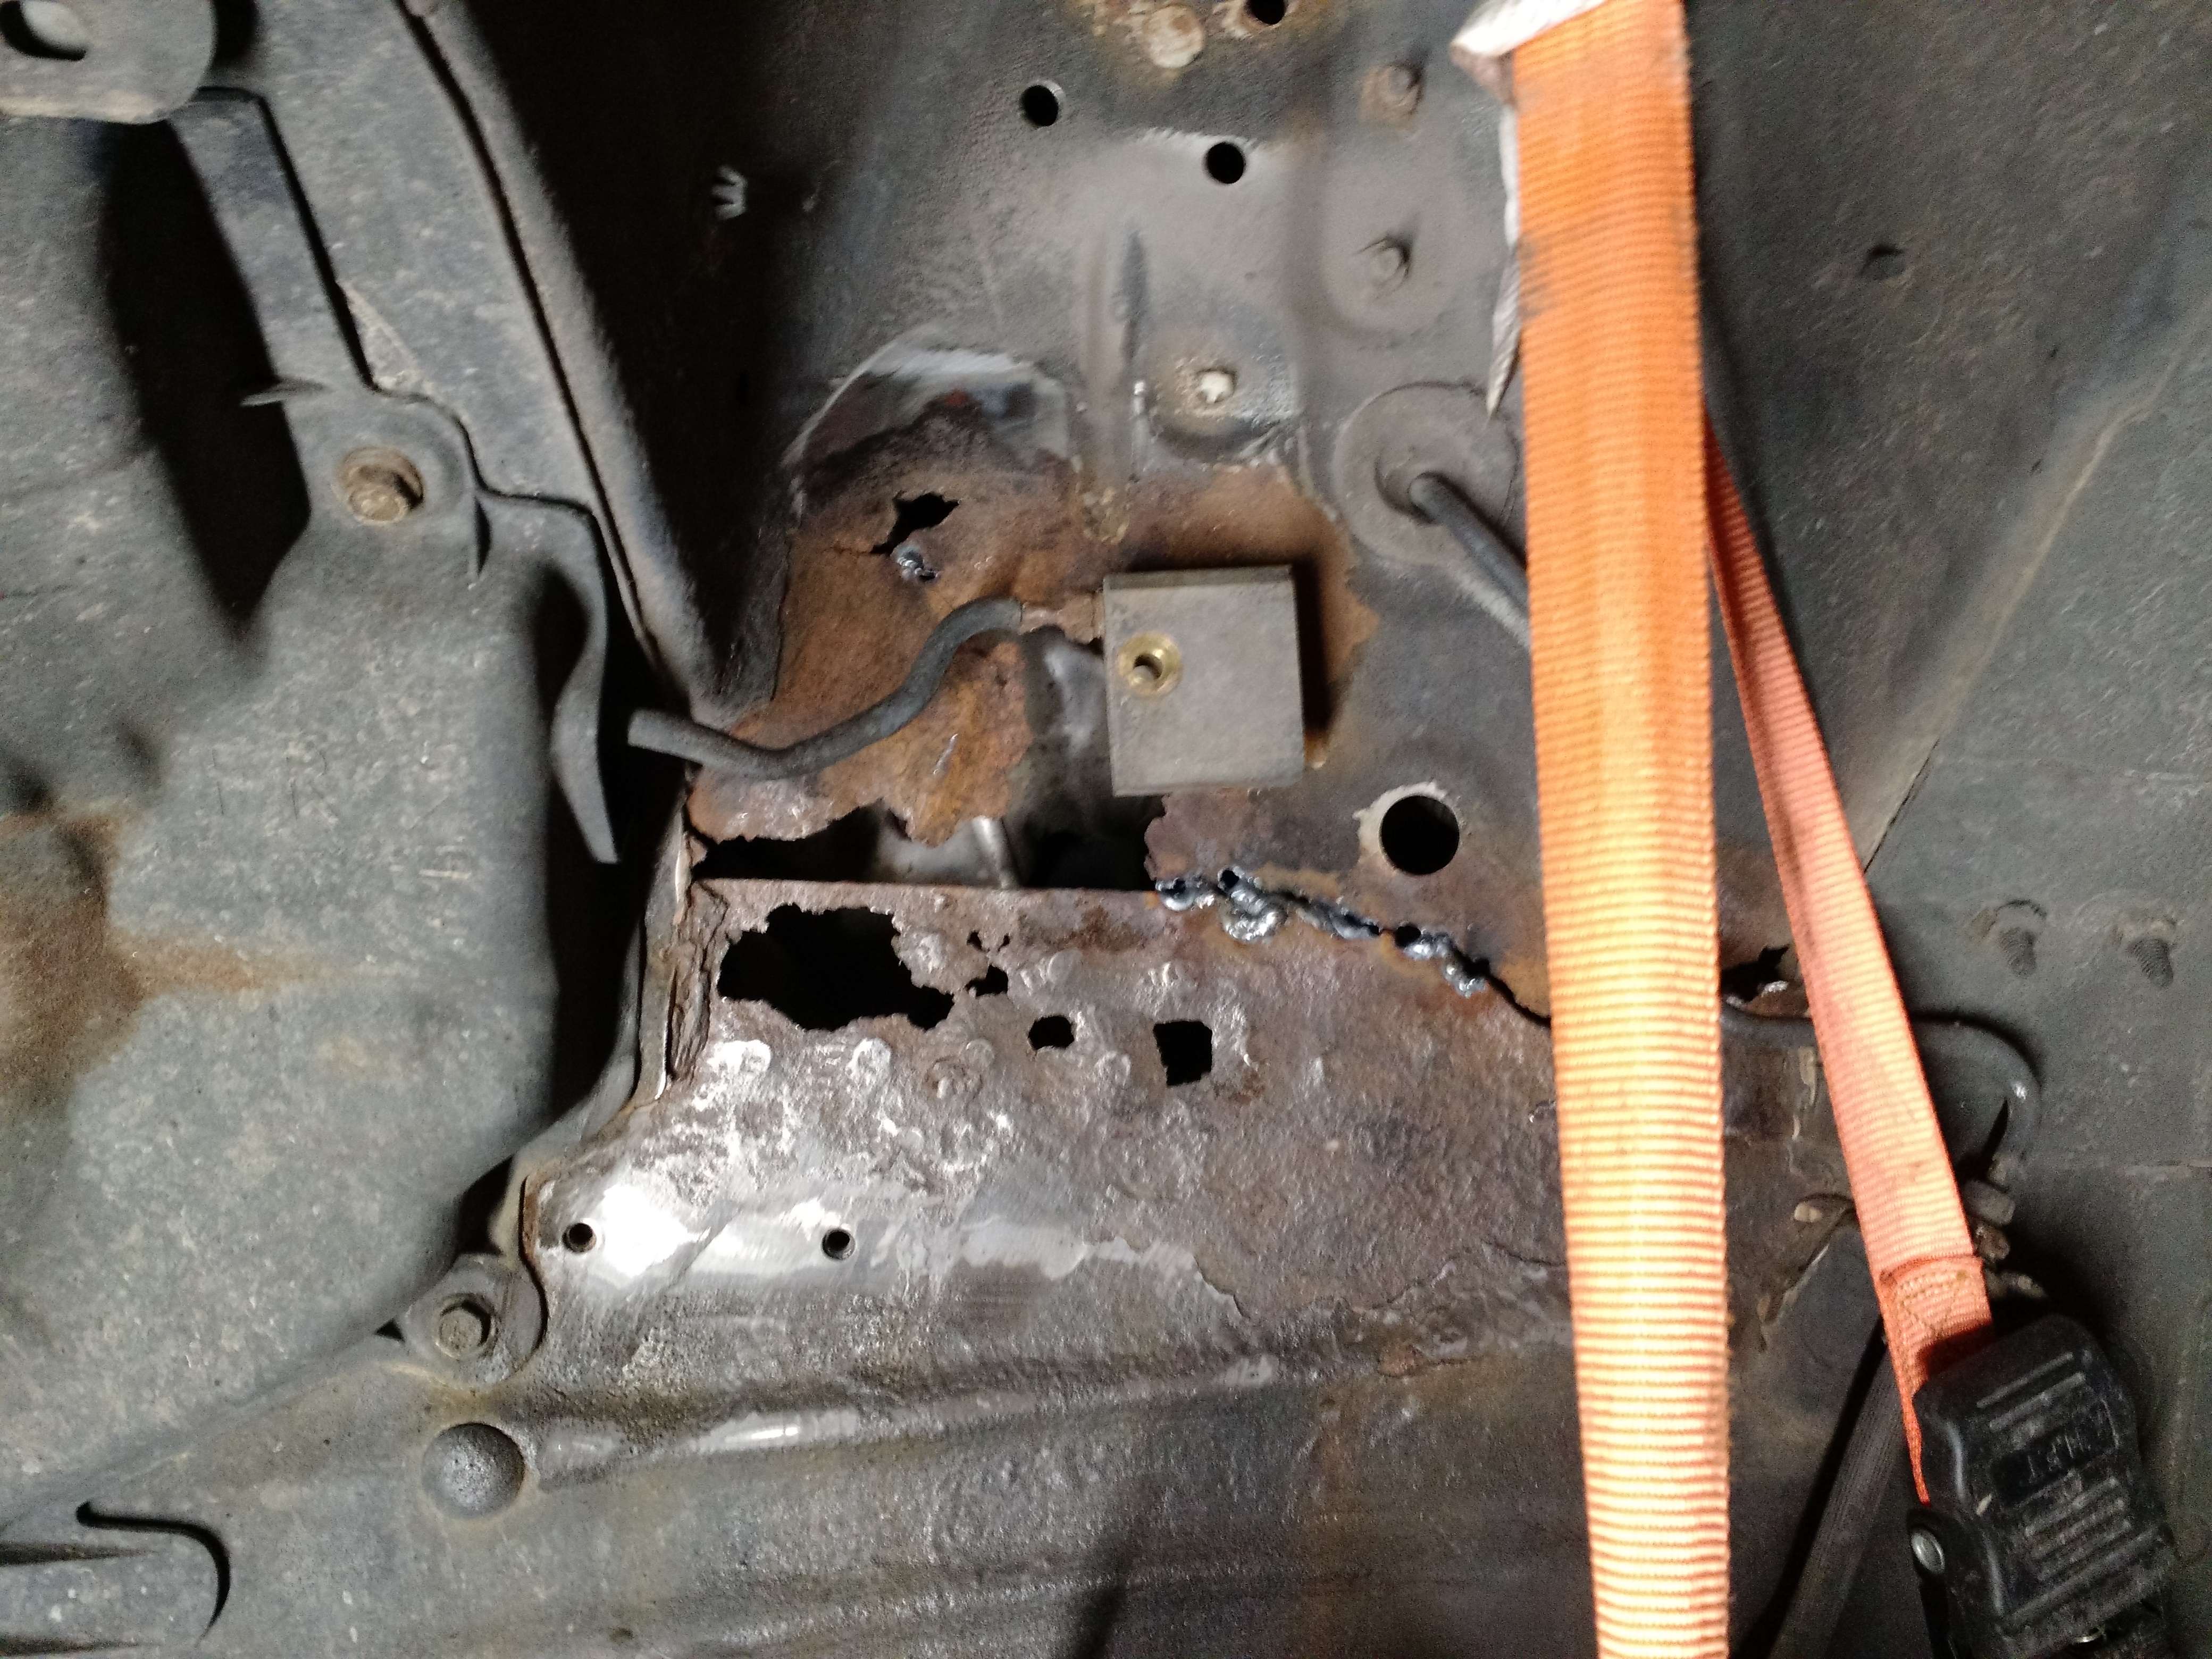
Passenger side:

ImageIMG_20180210_165932941 by Chris Patterson, on Flickr


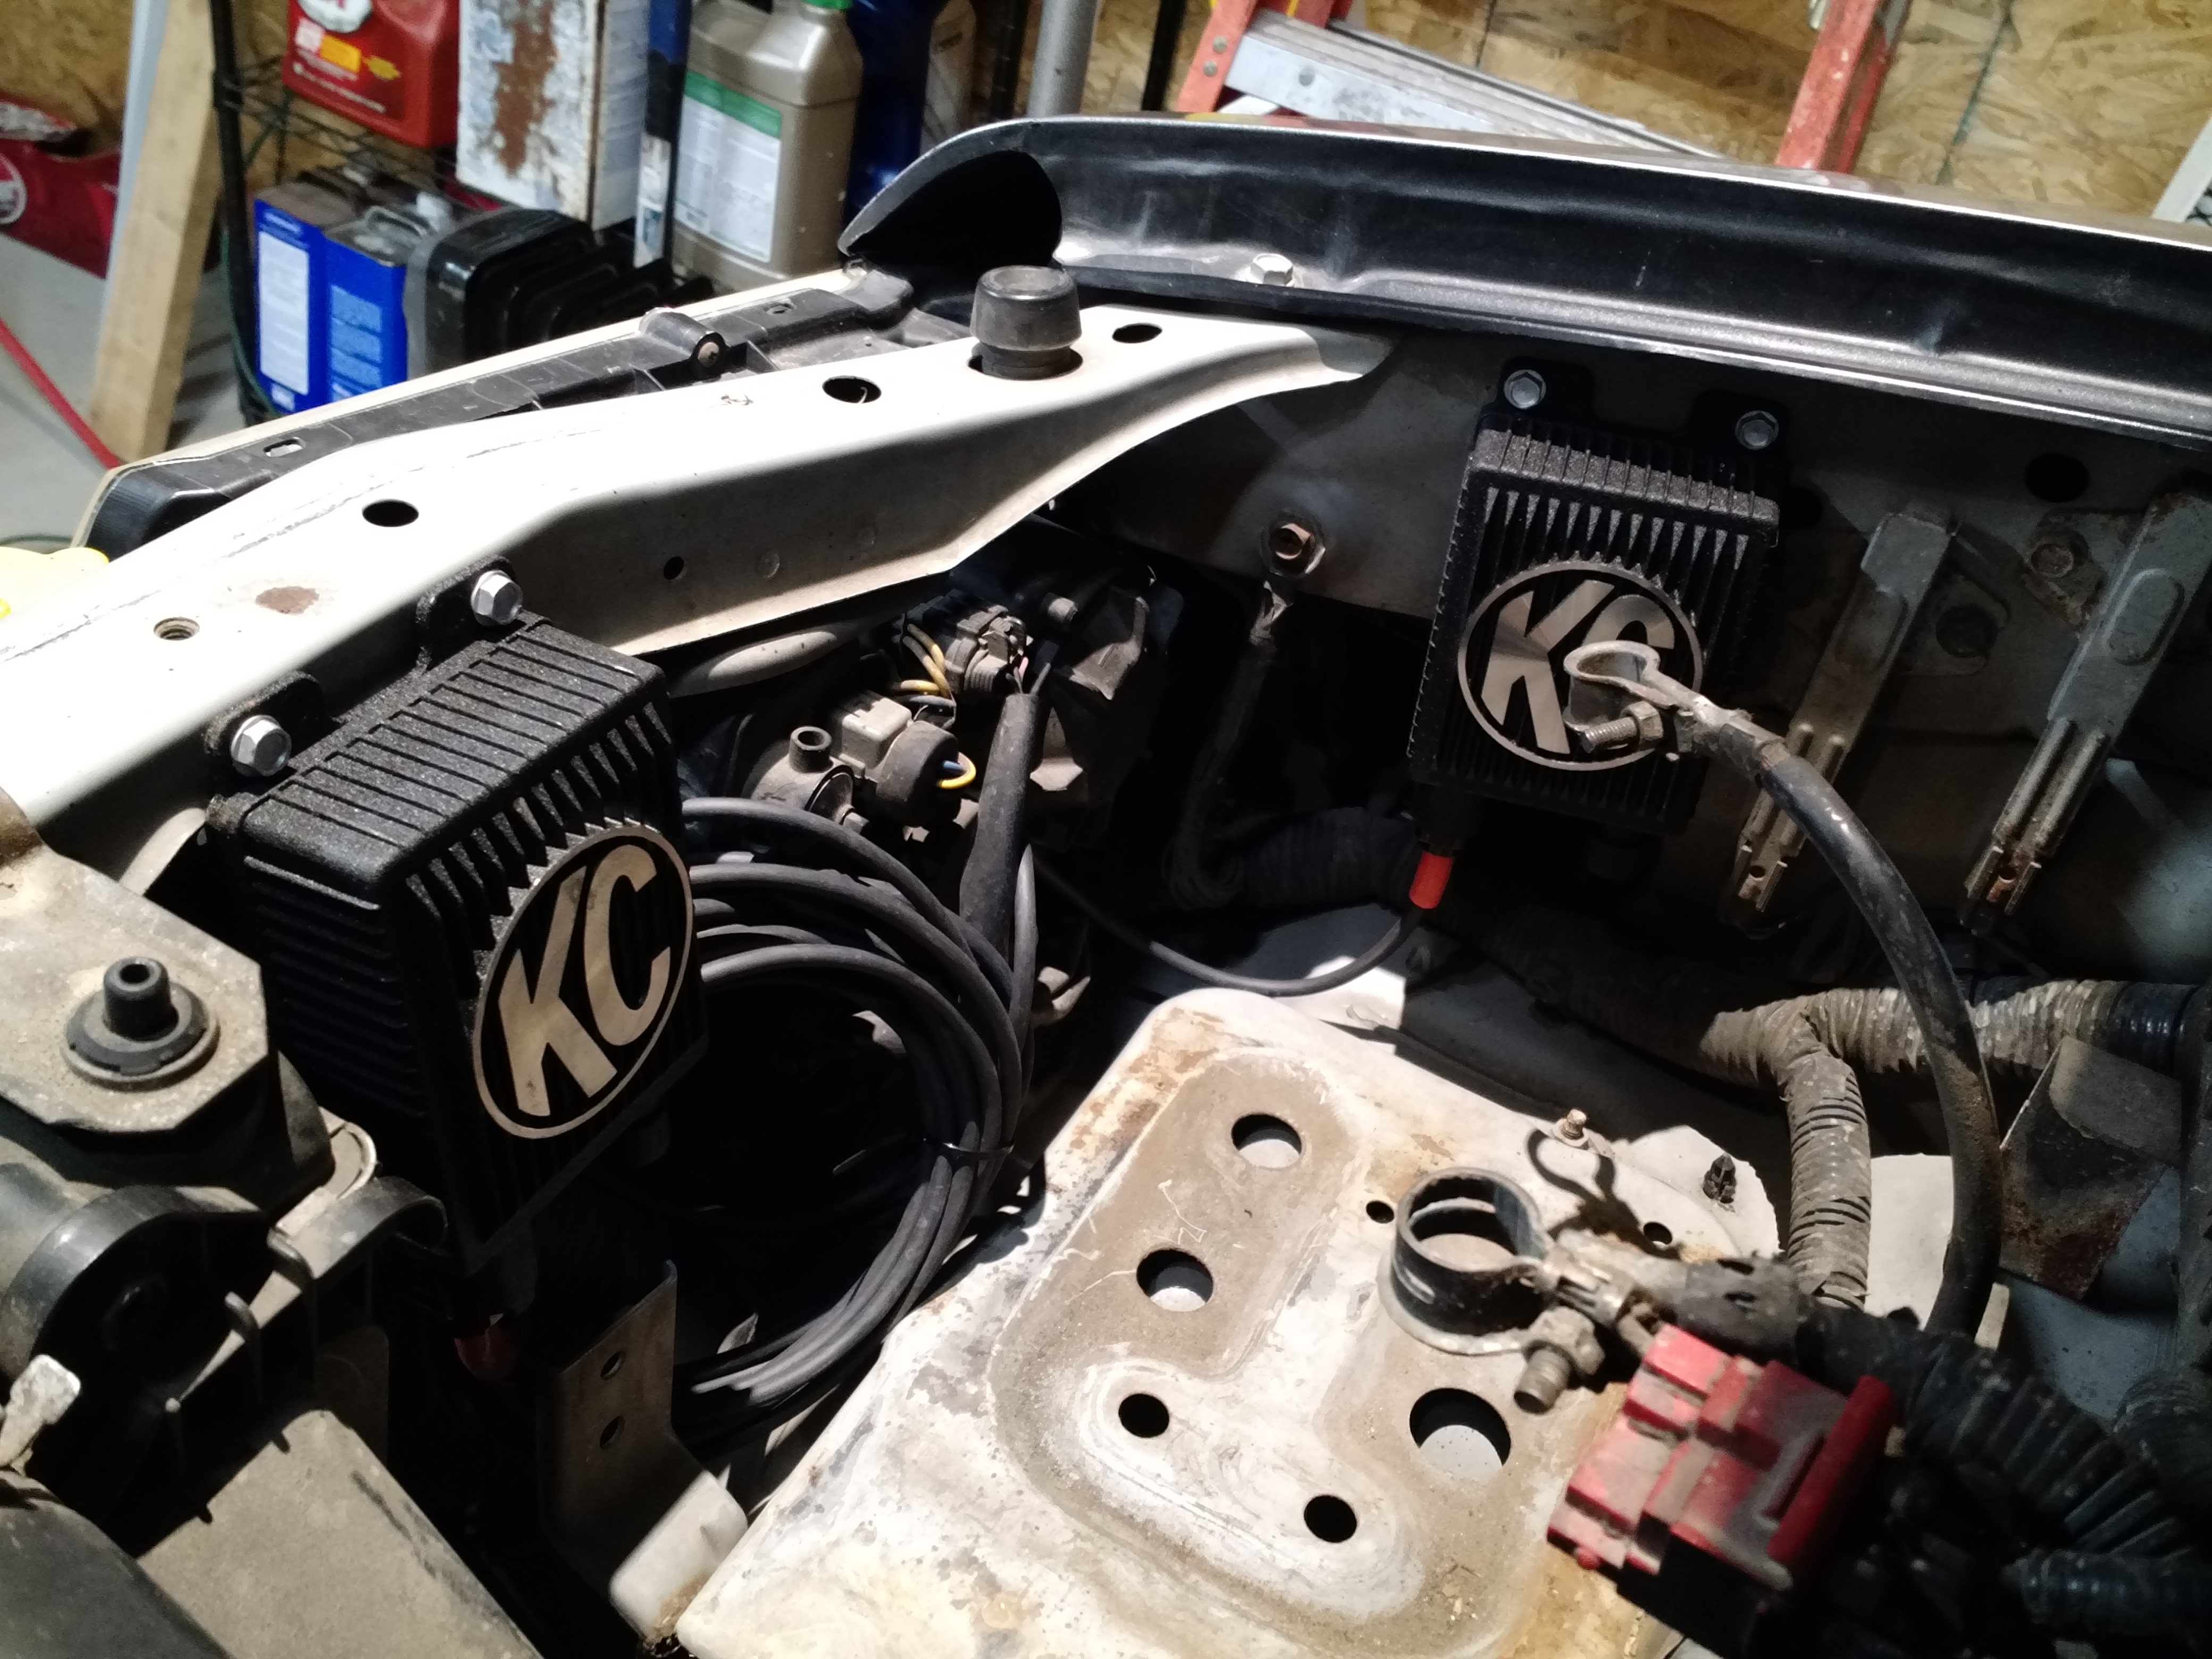
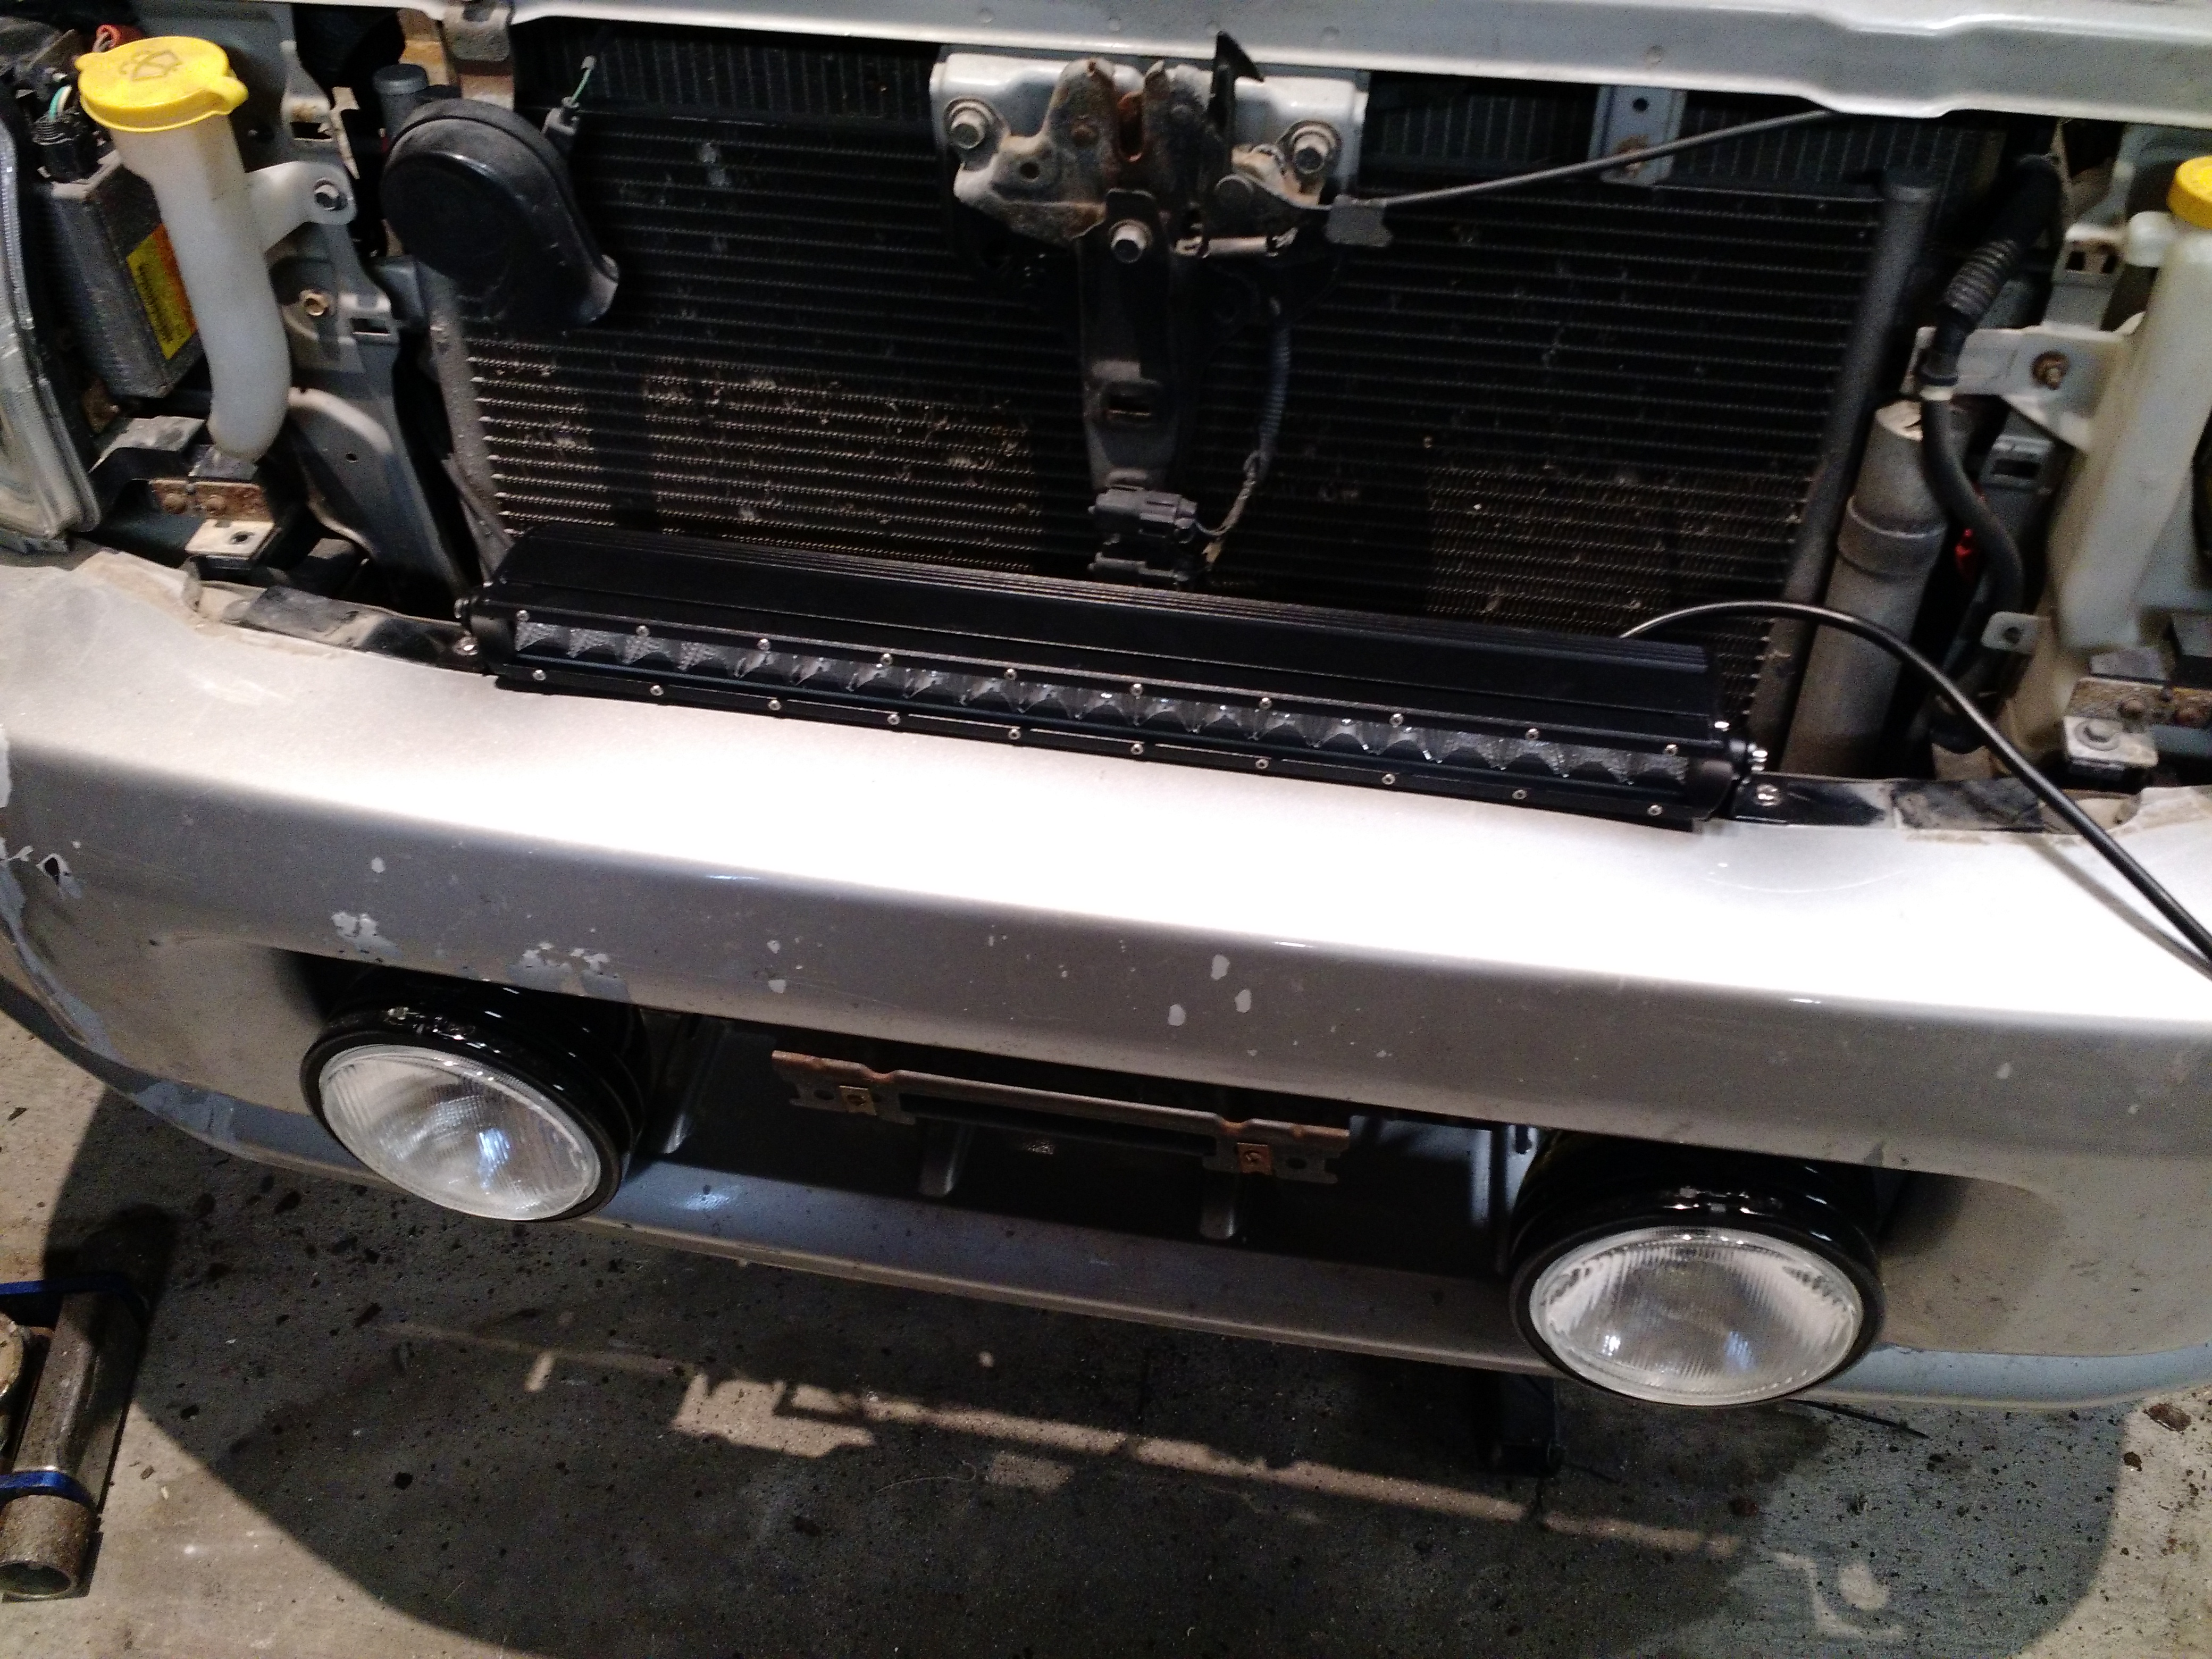
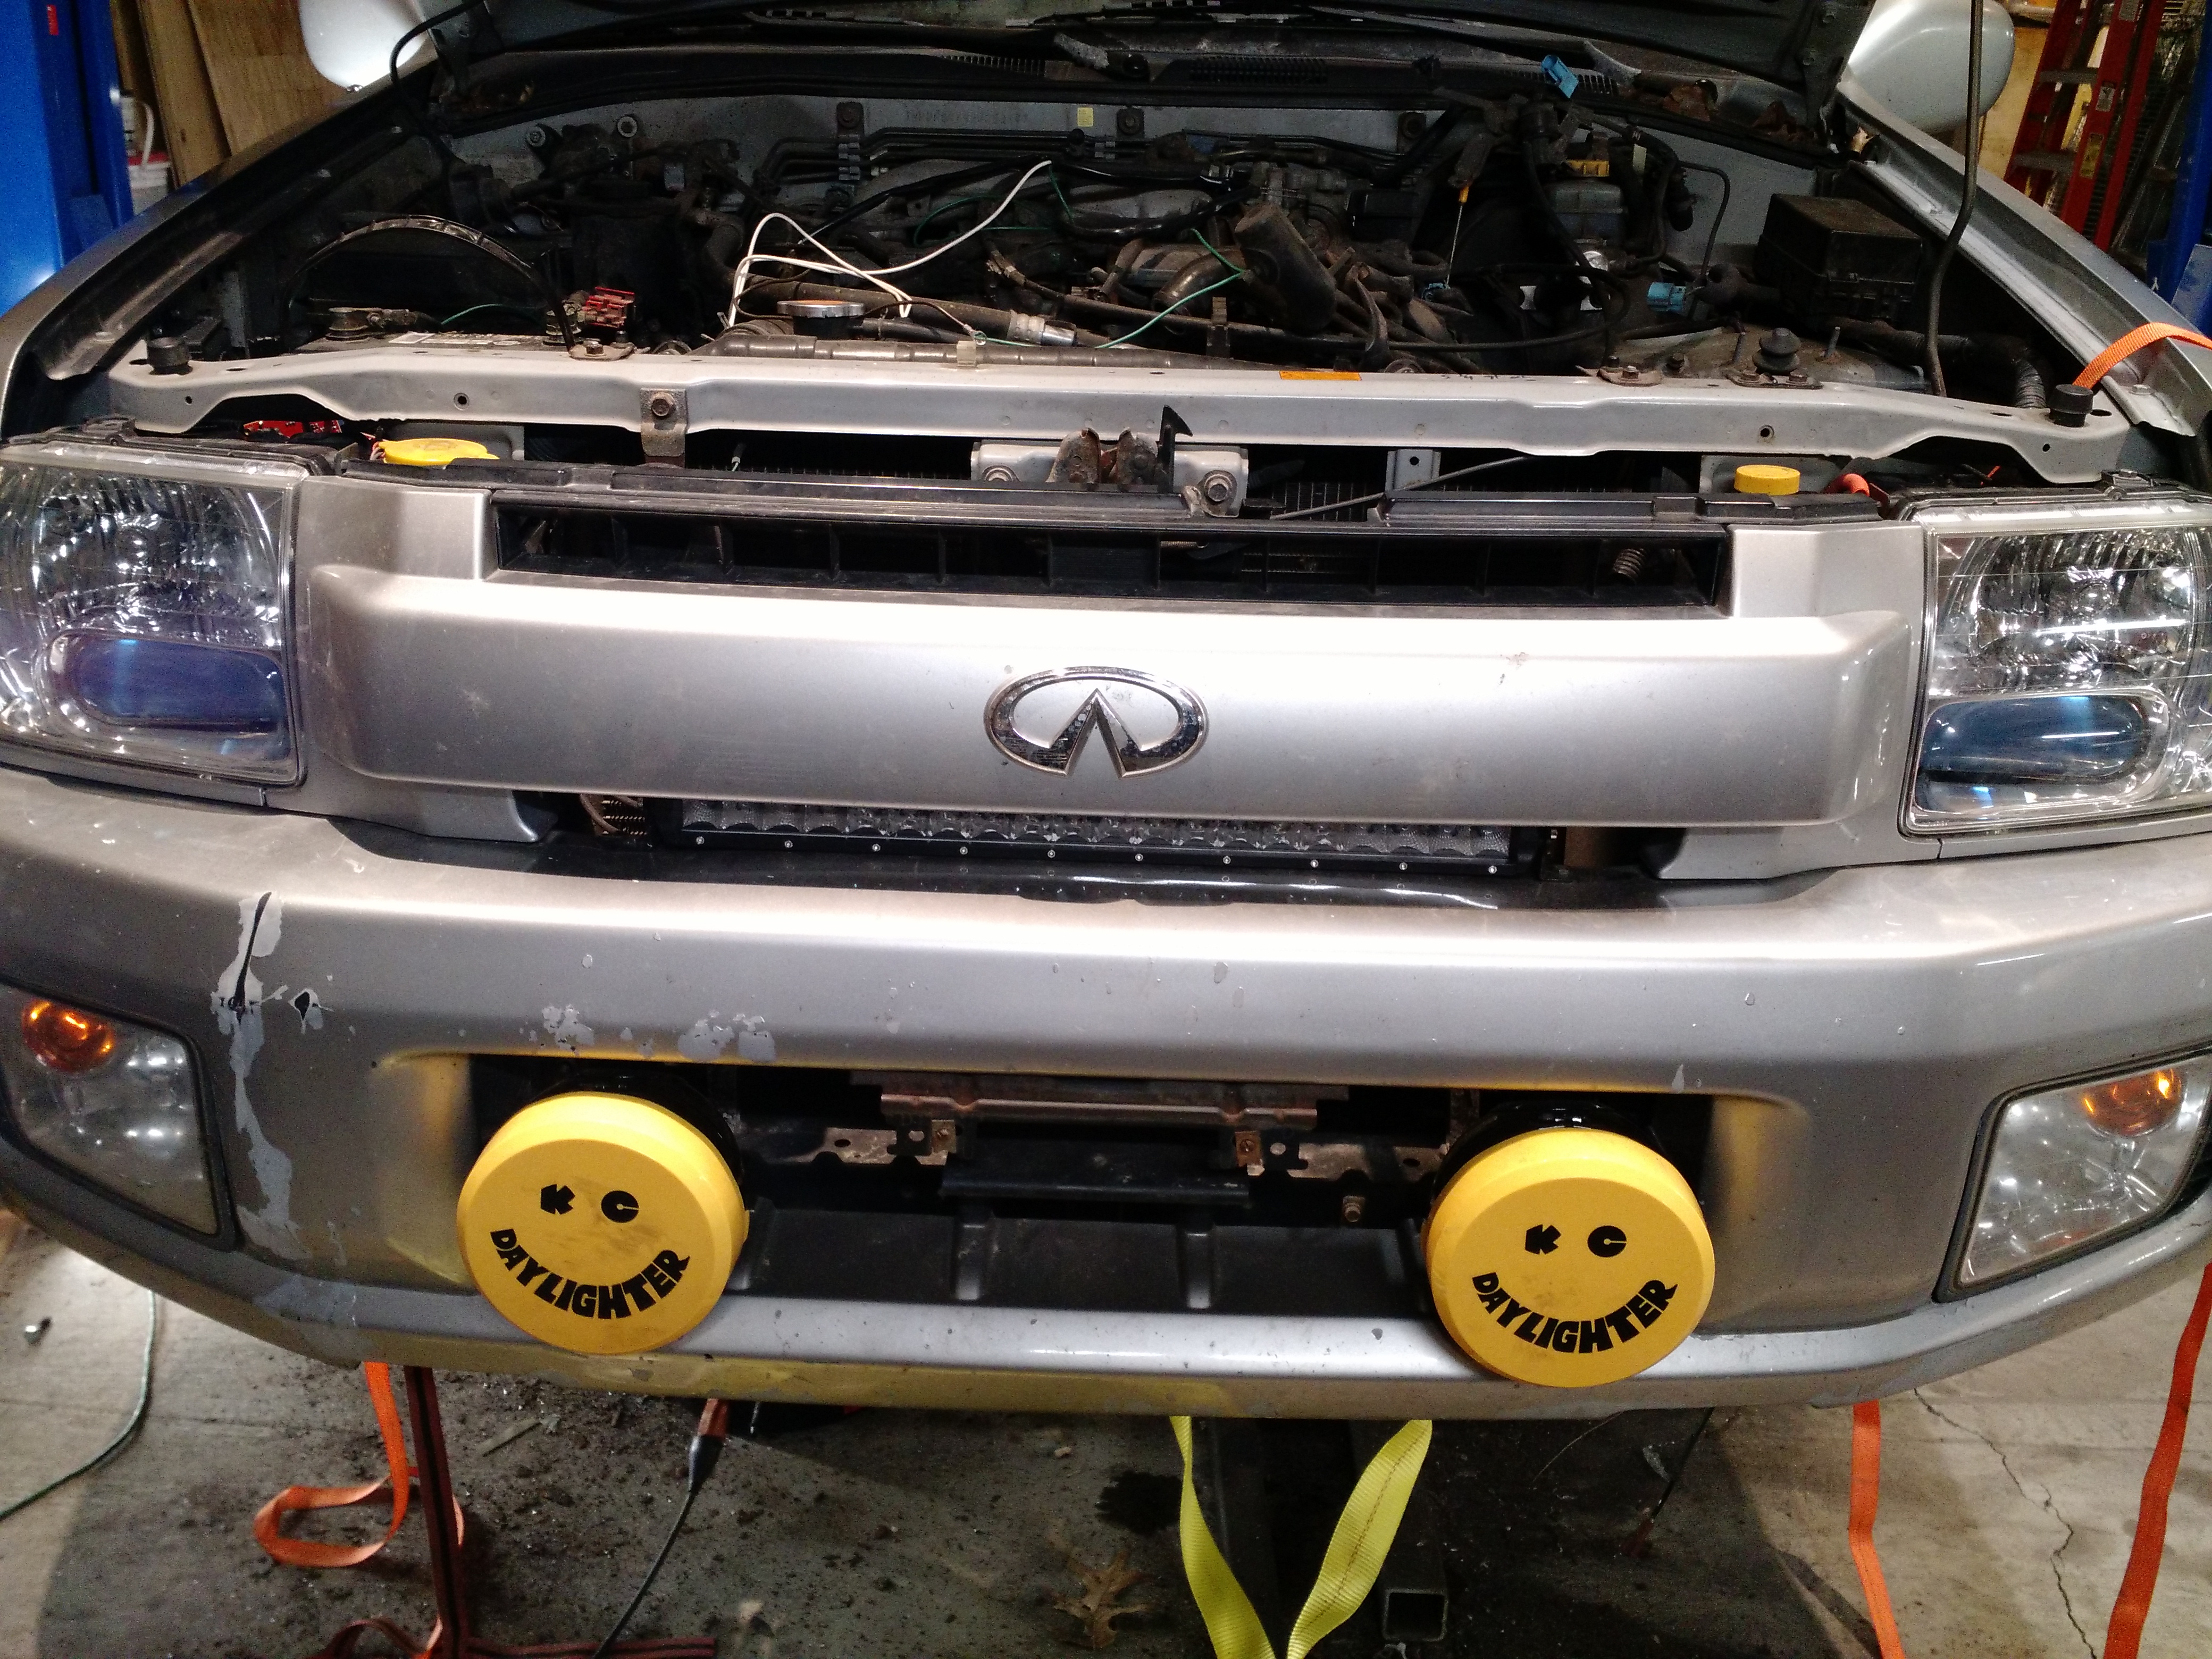
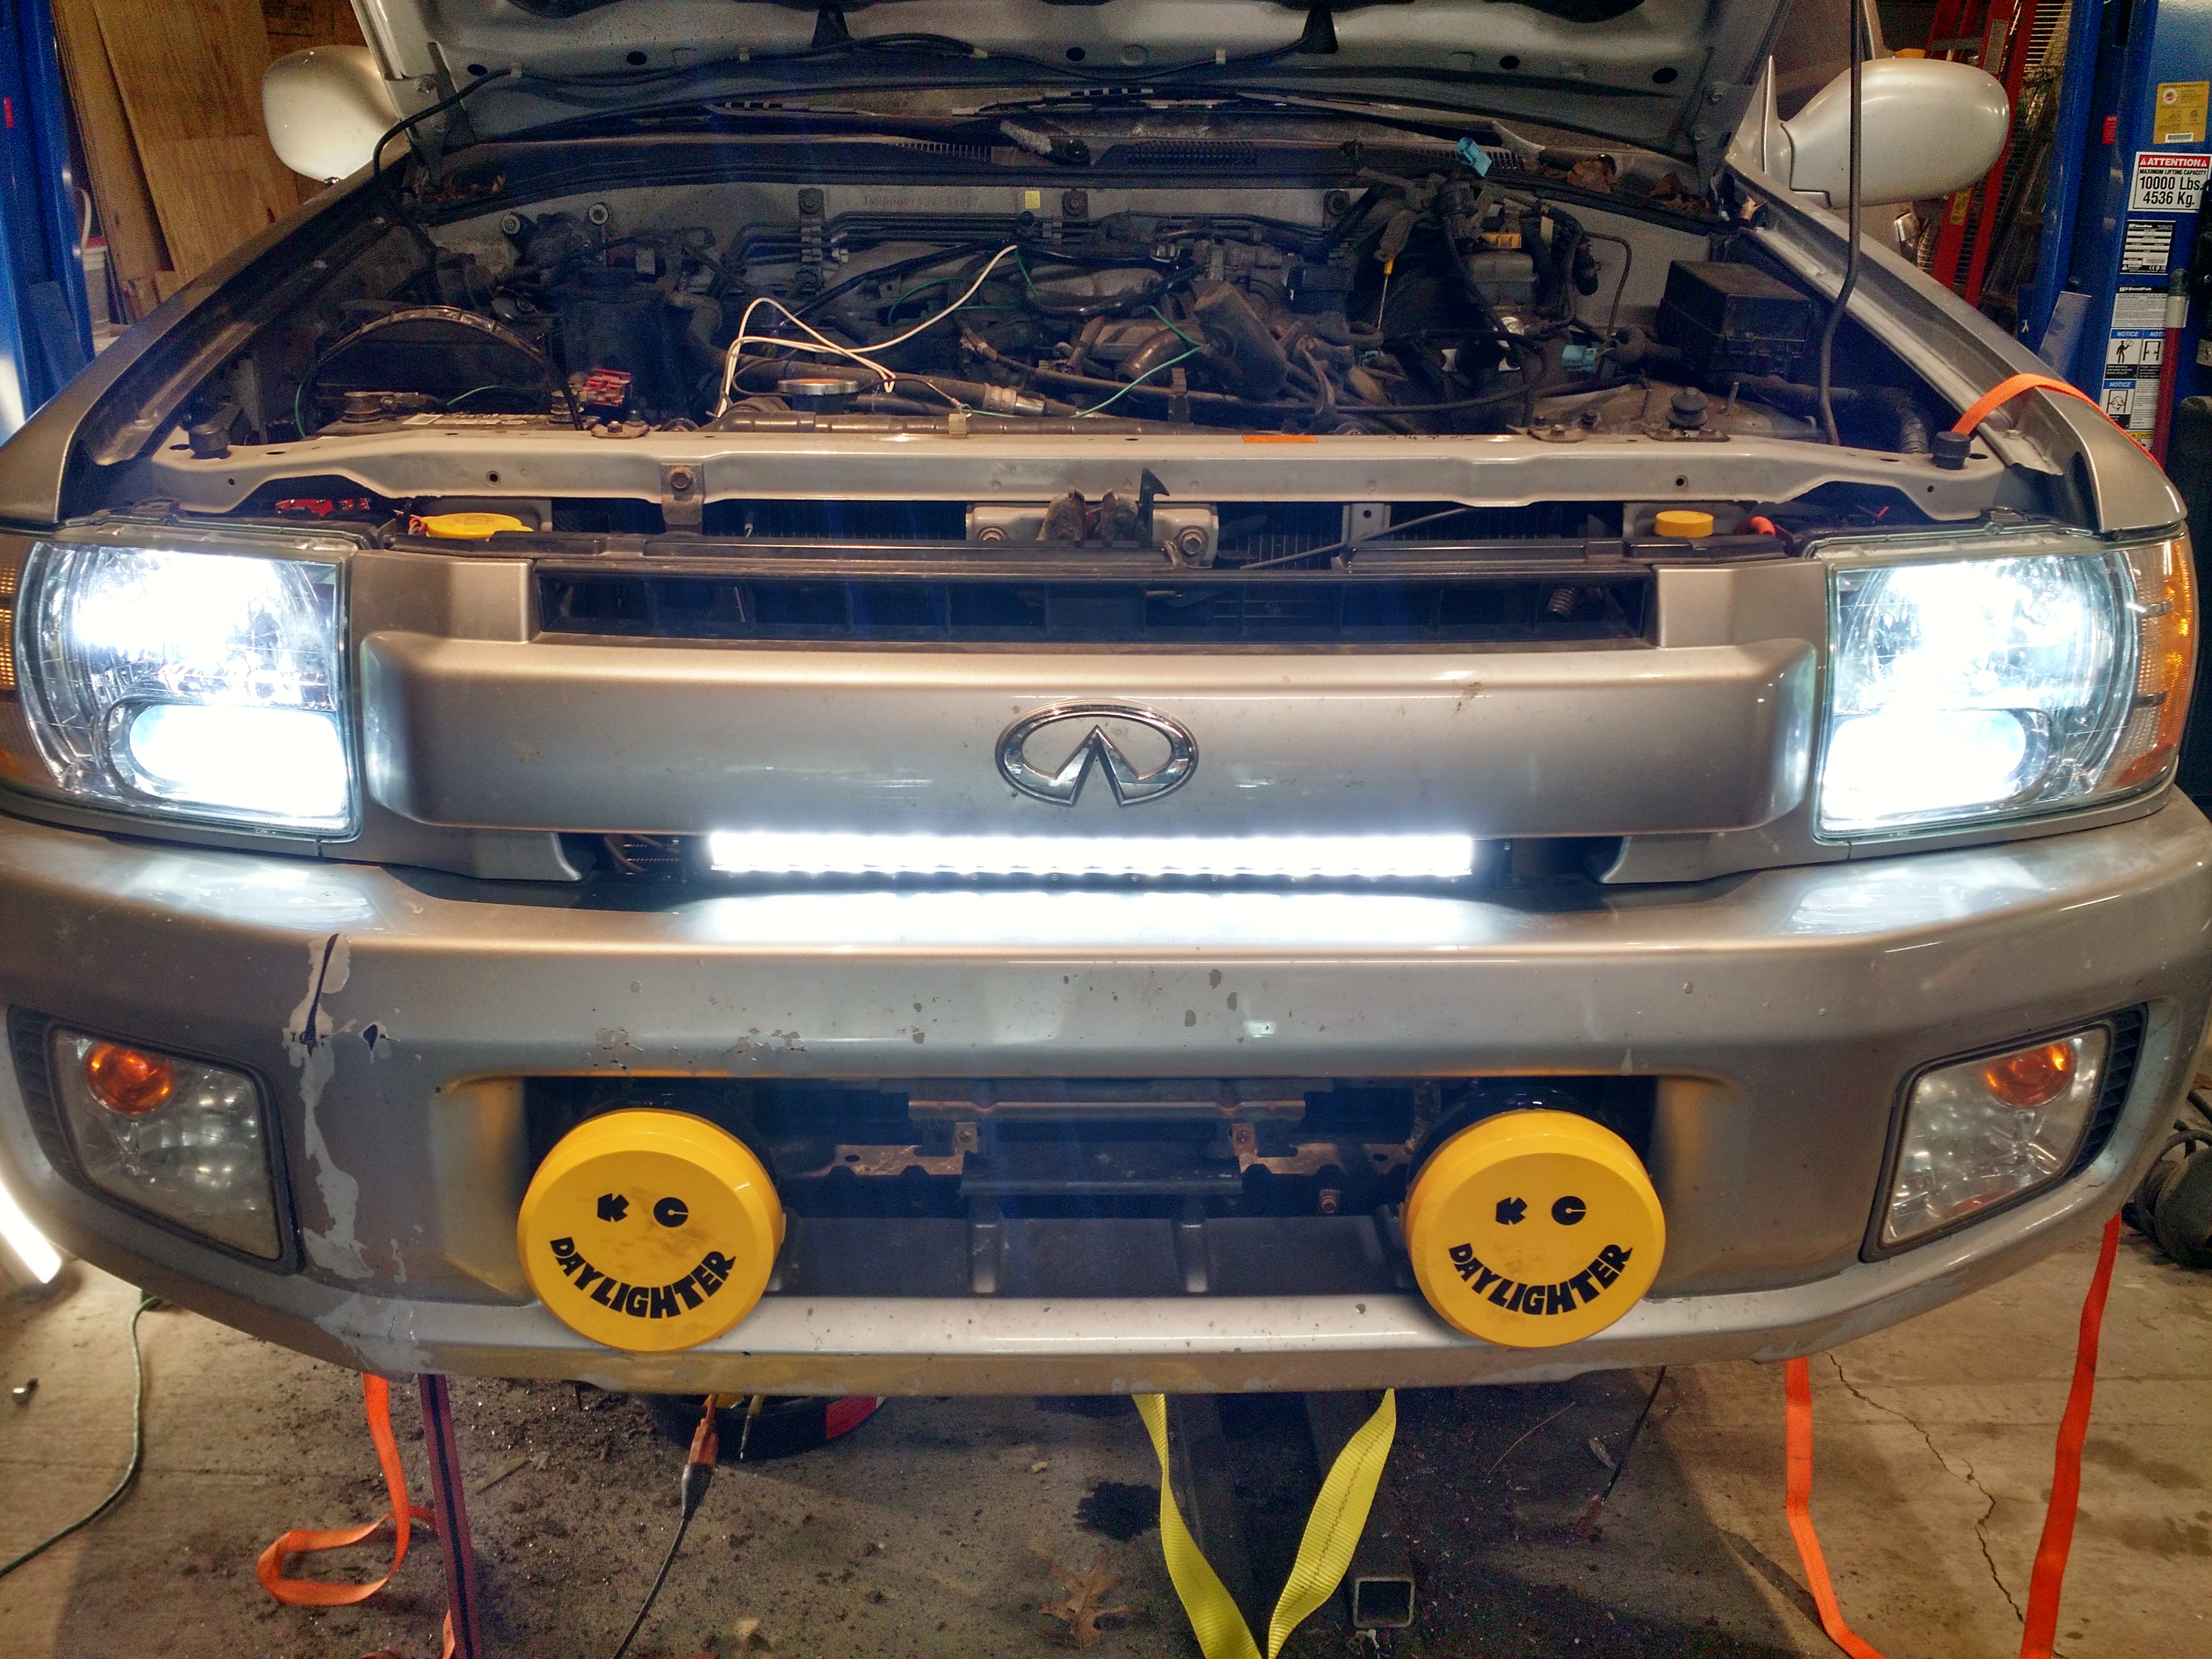
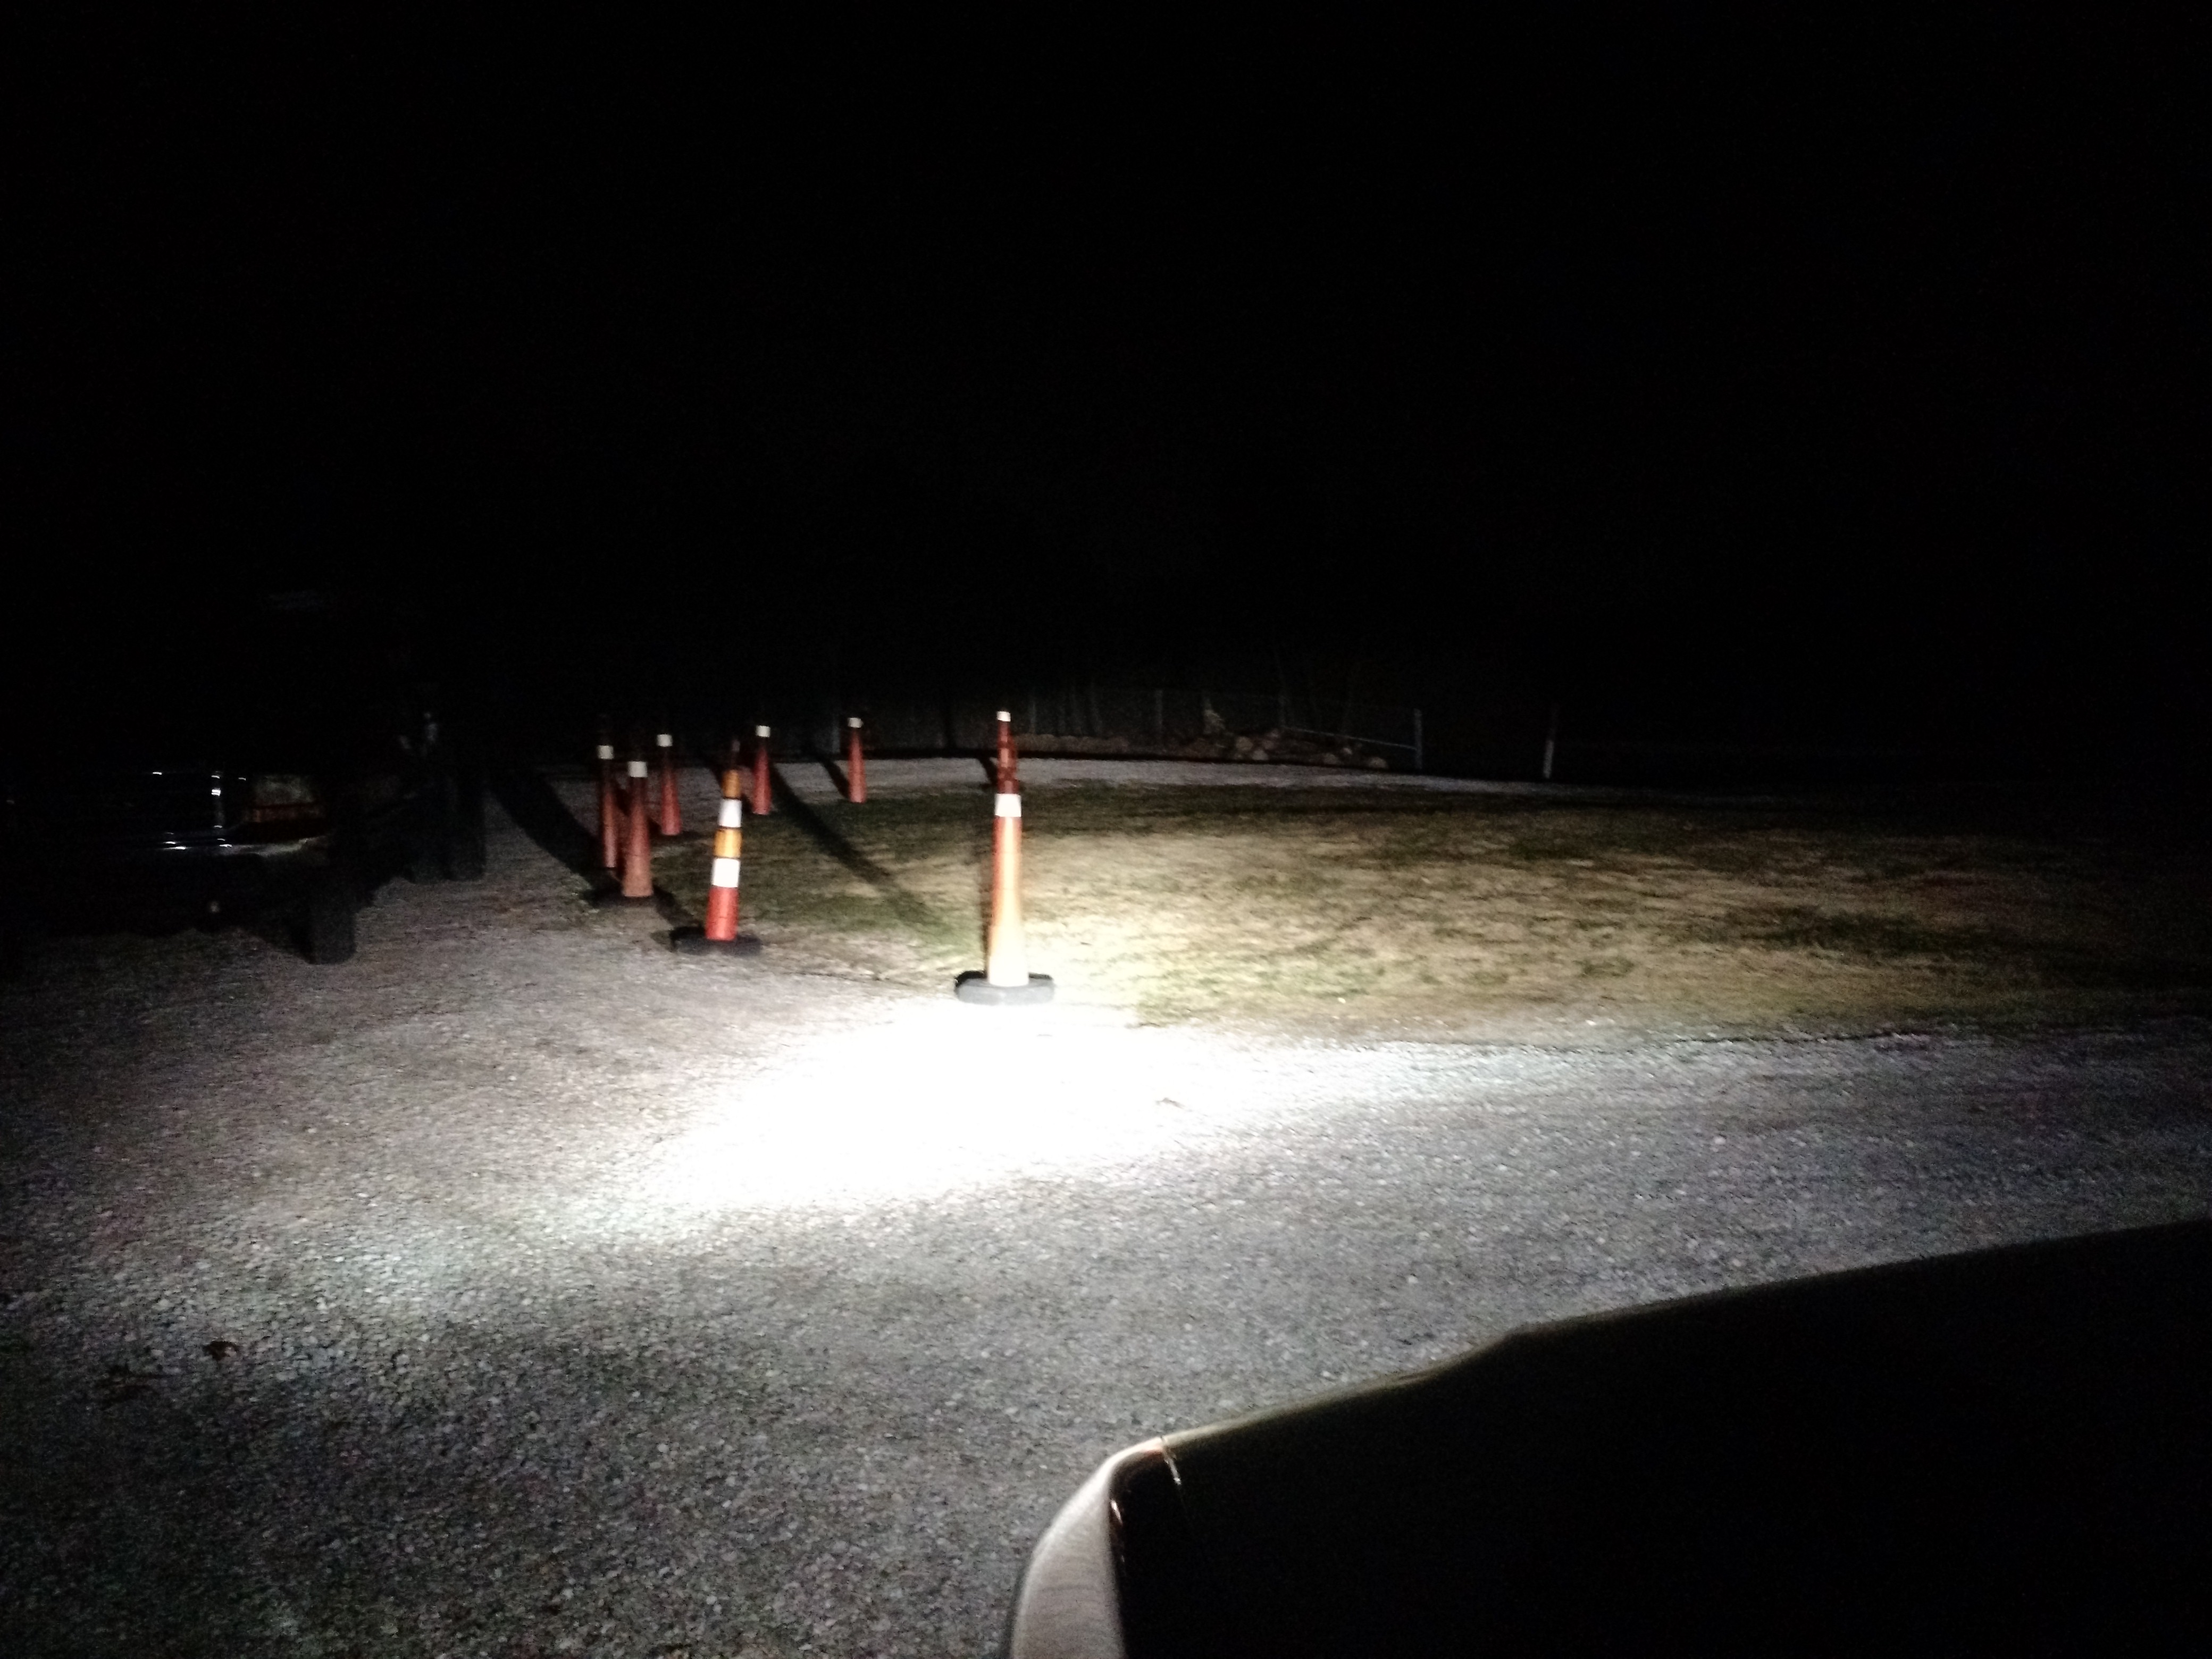
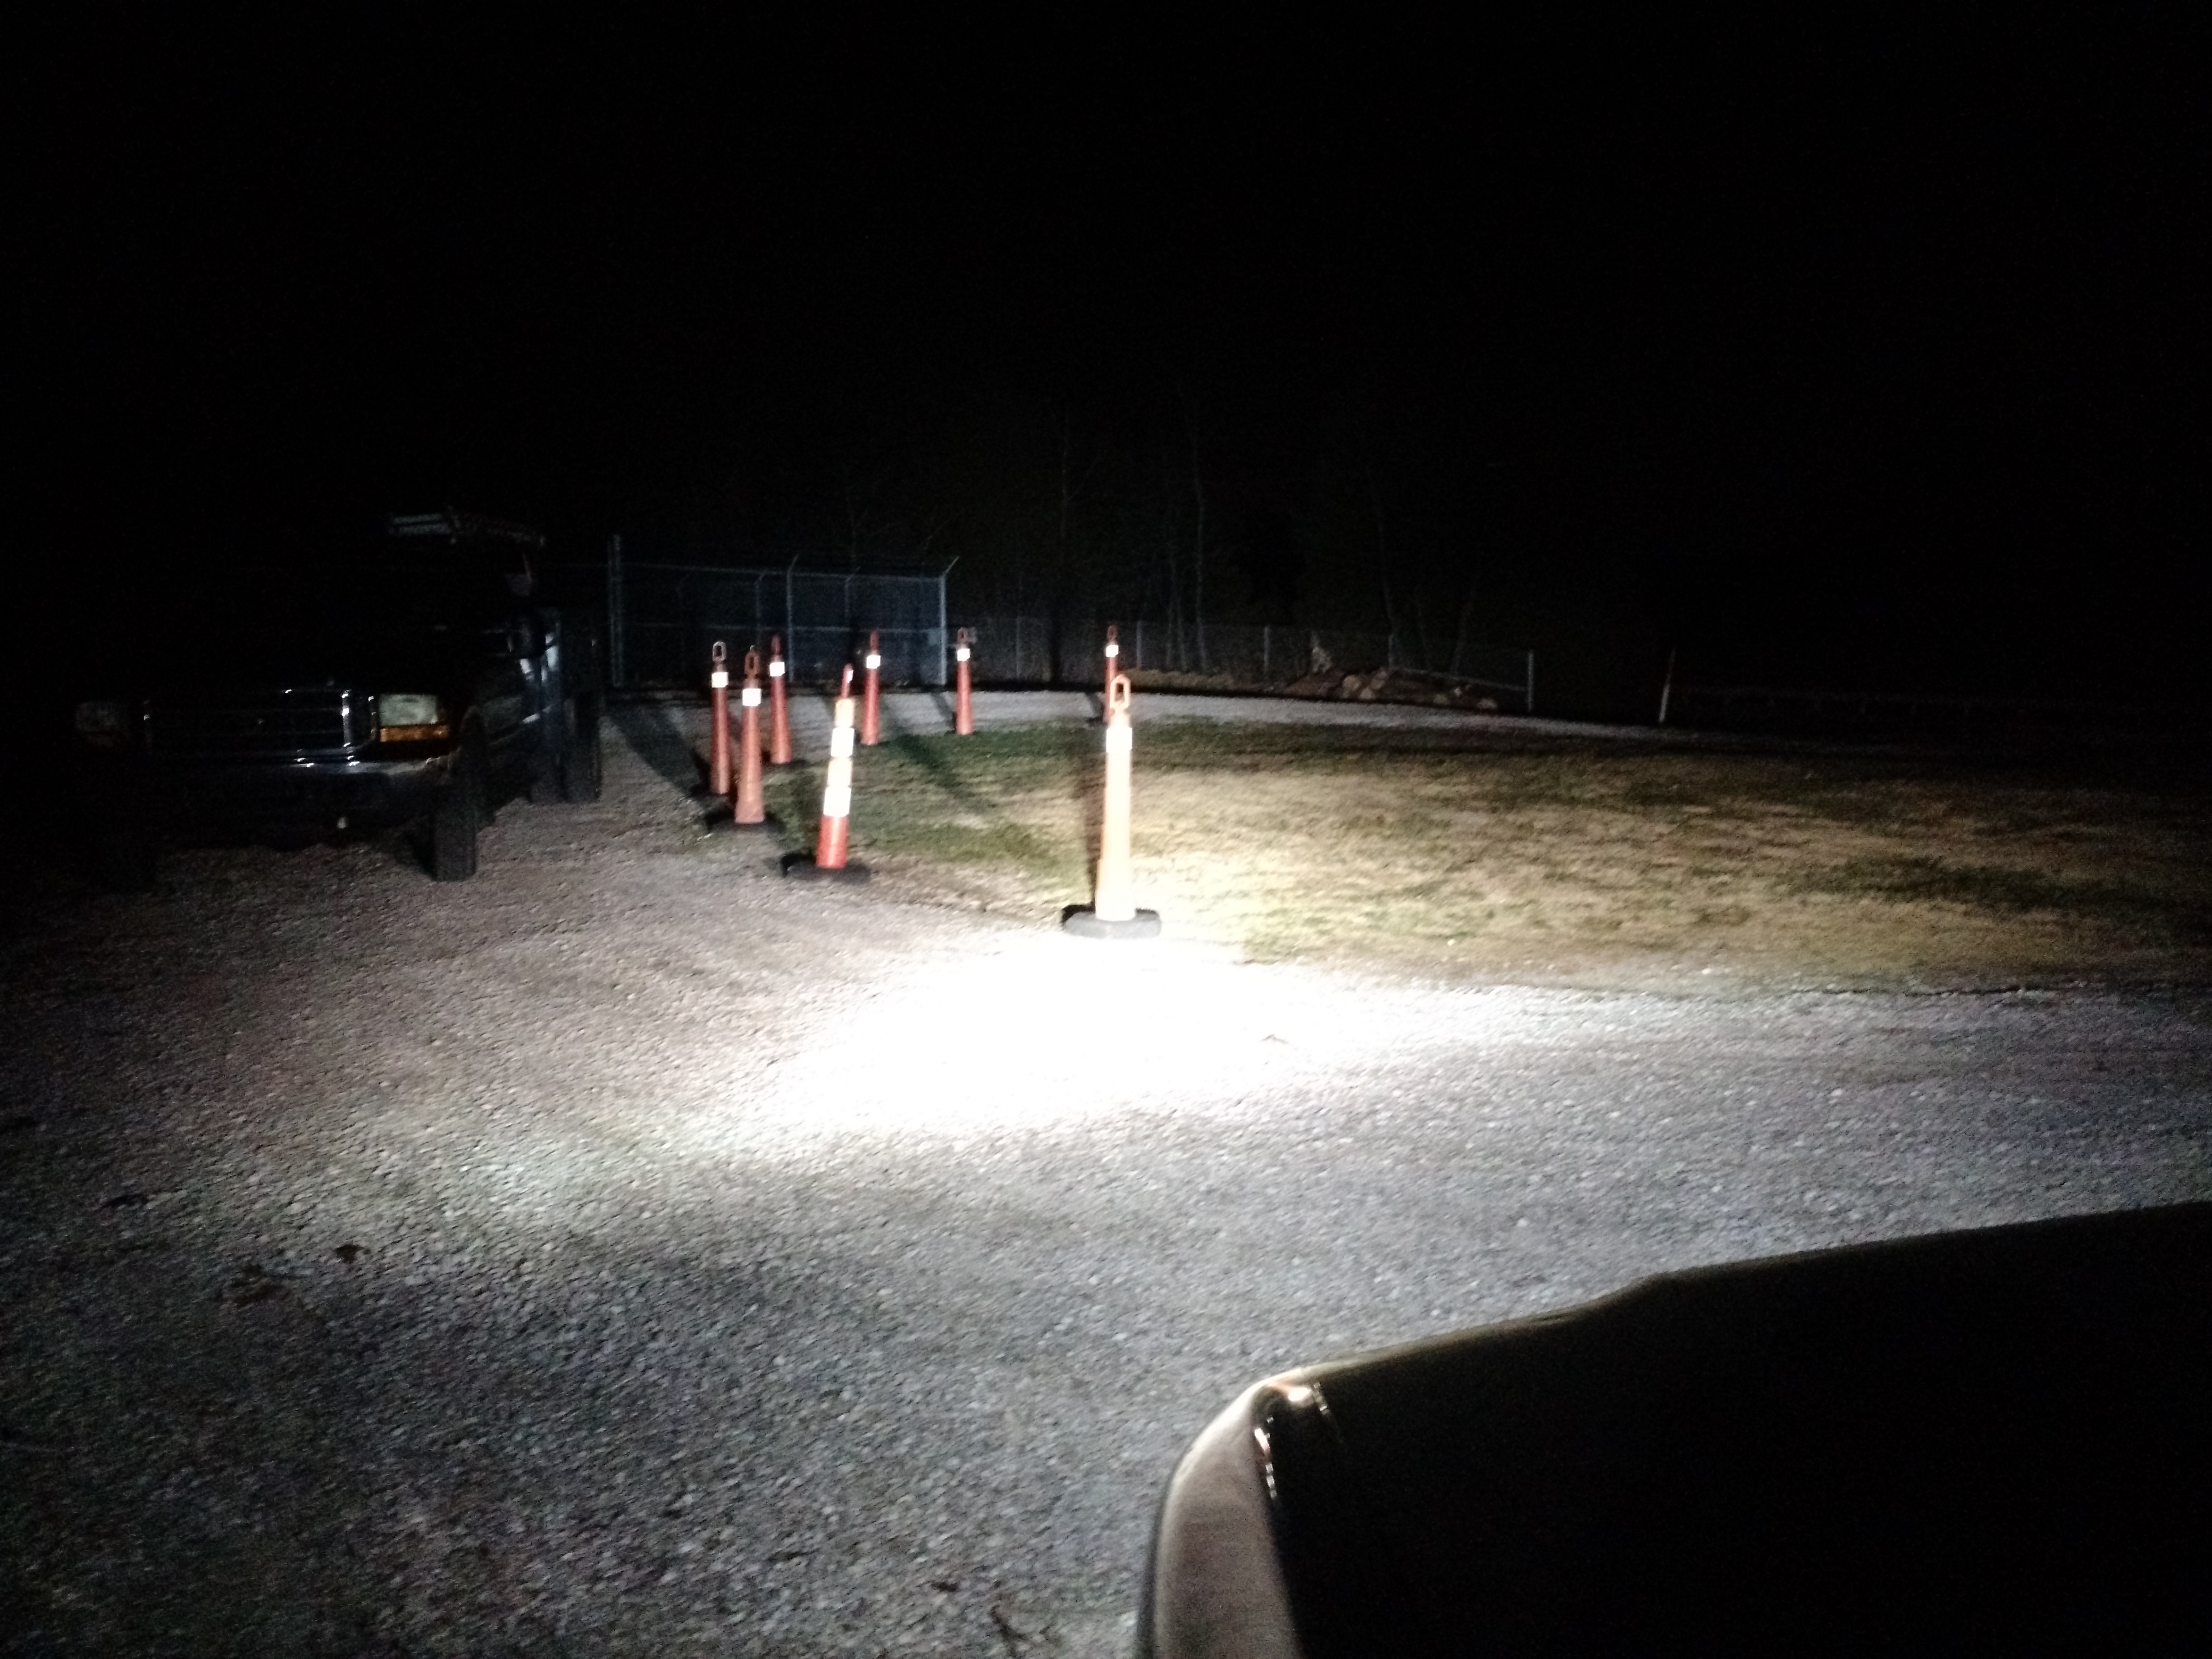
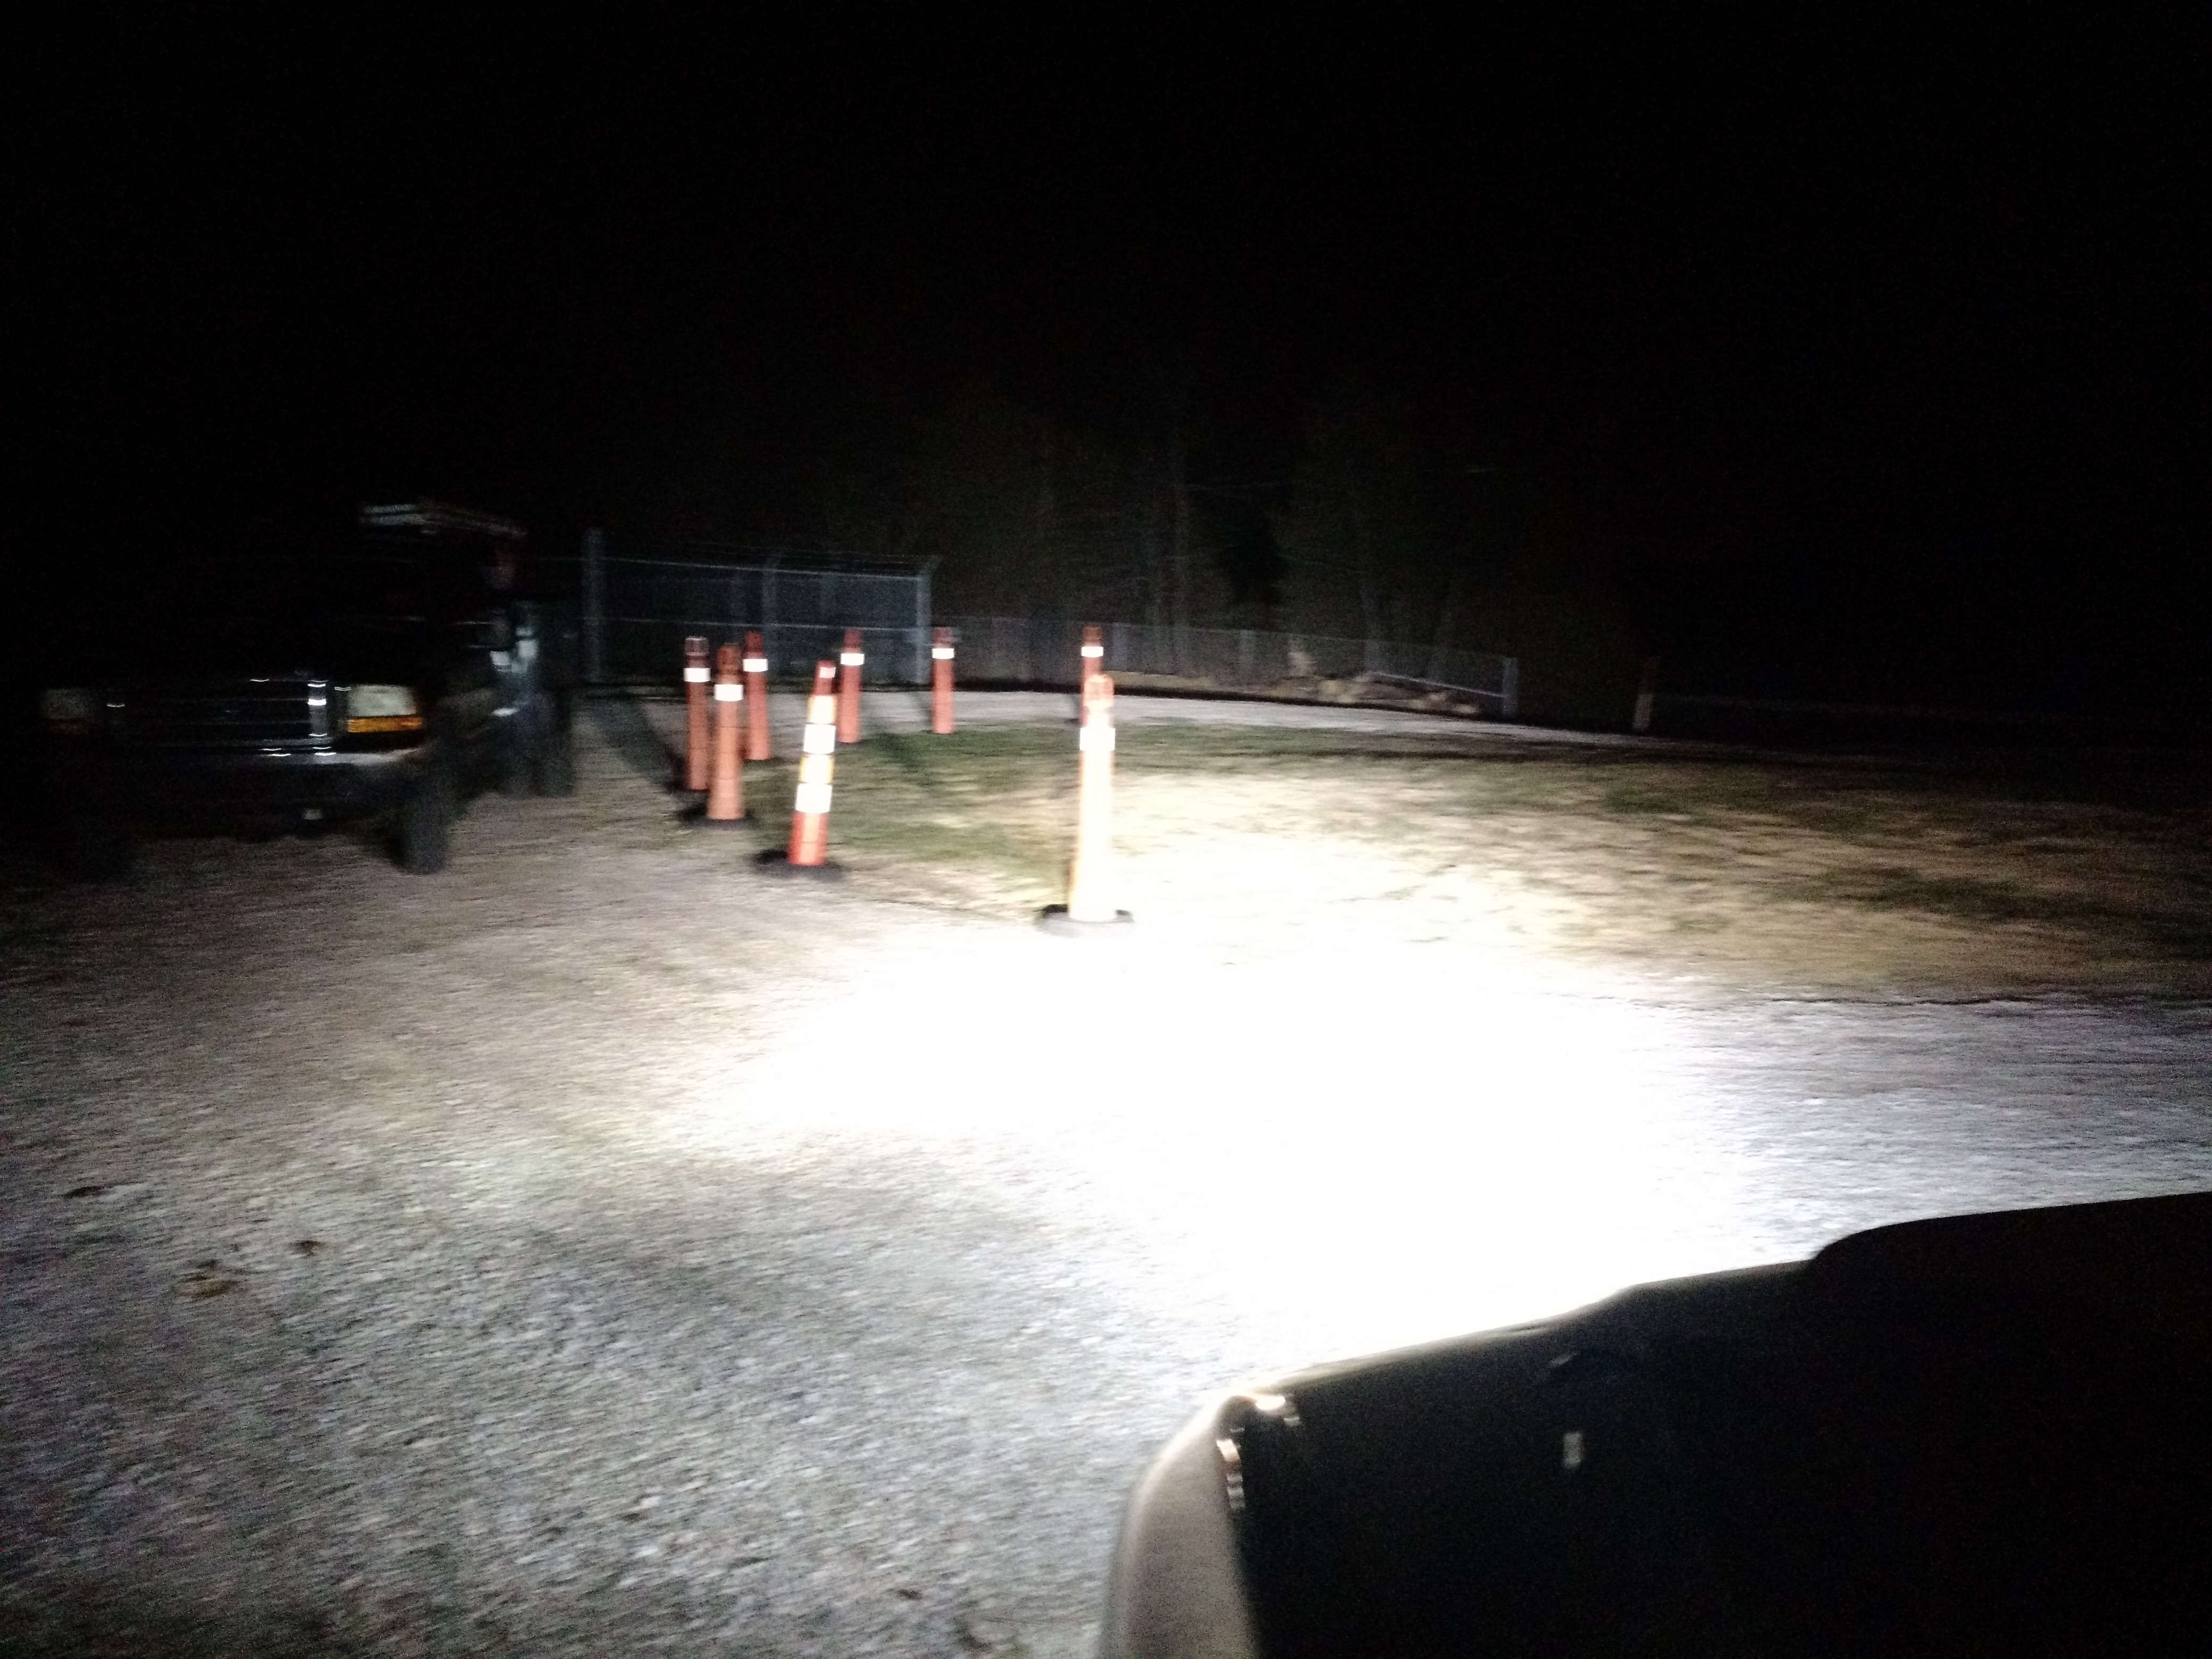
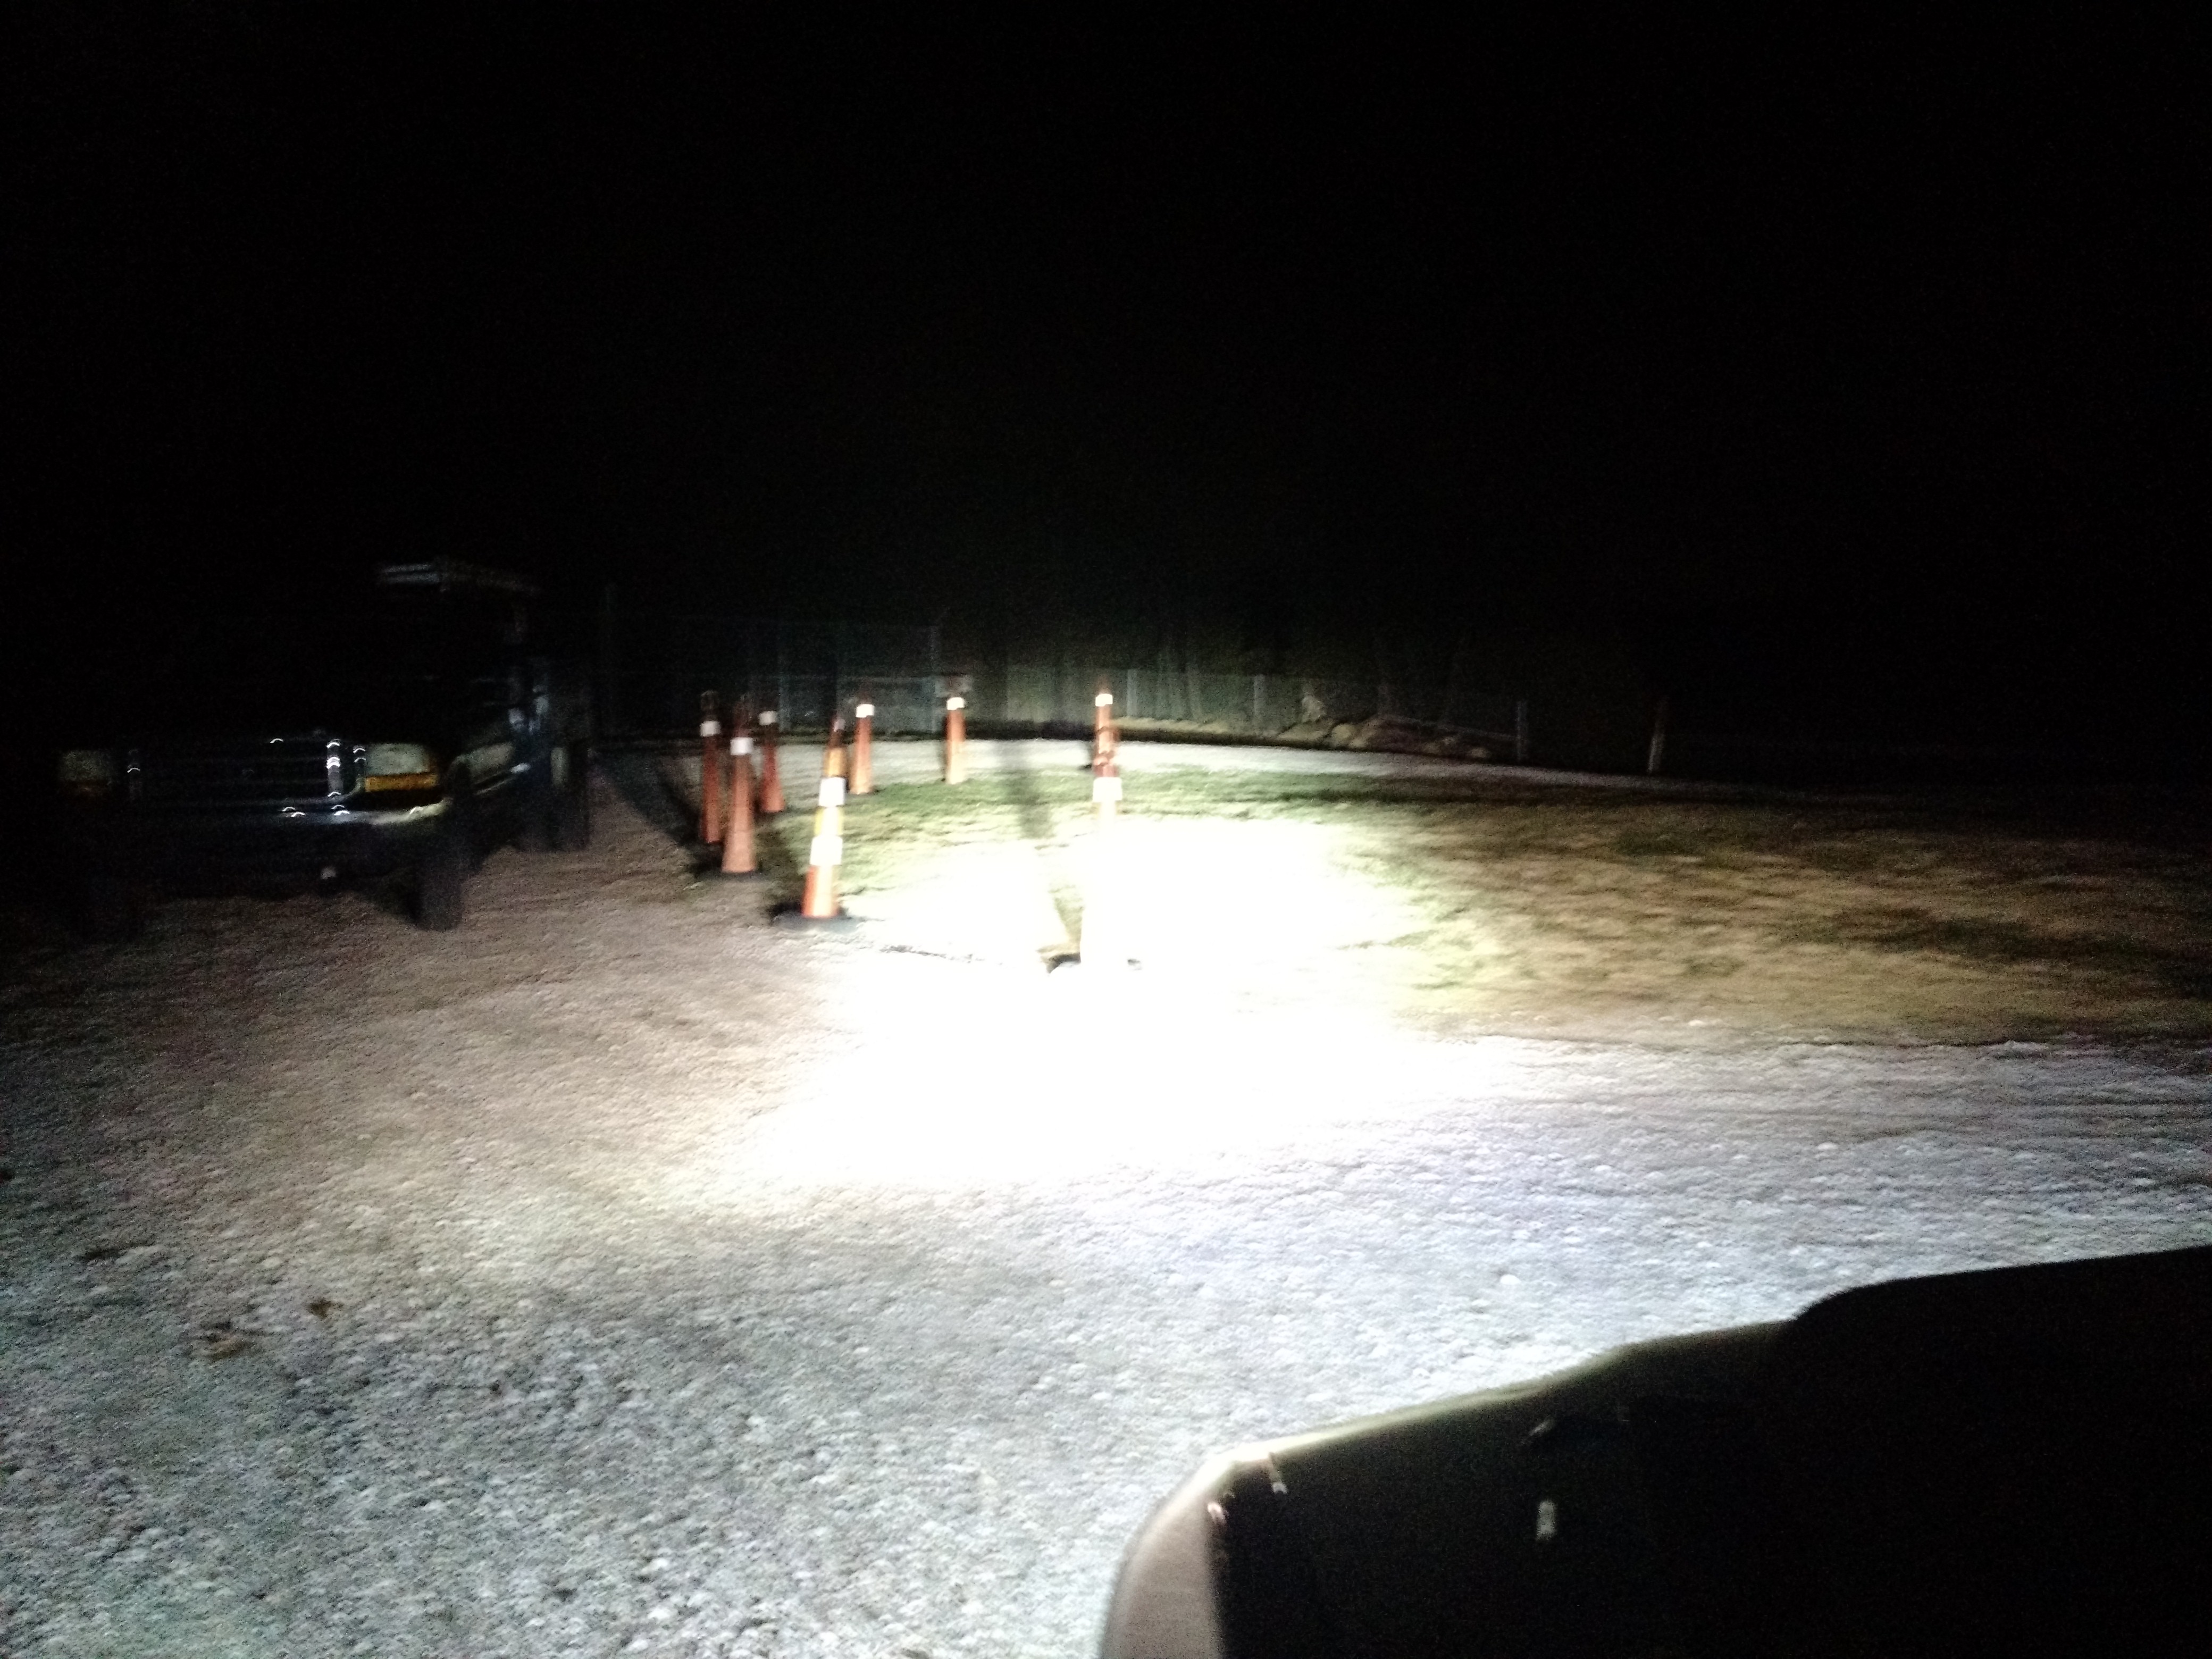
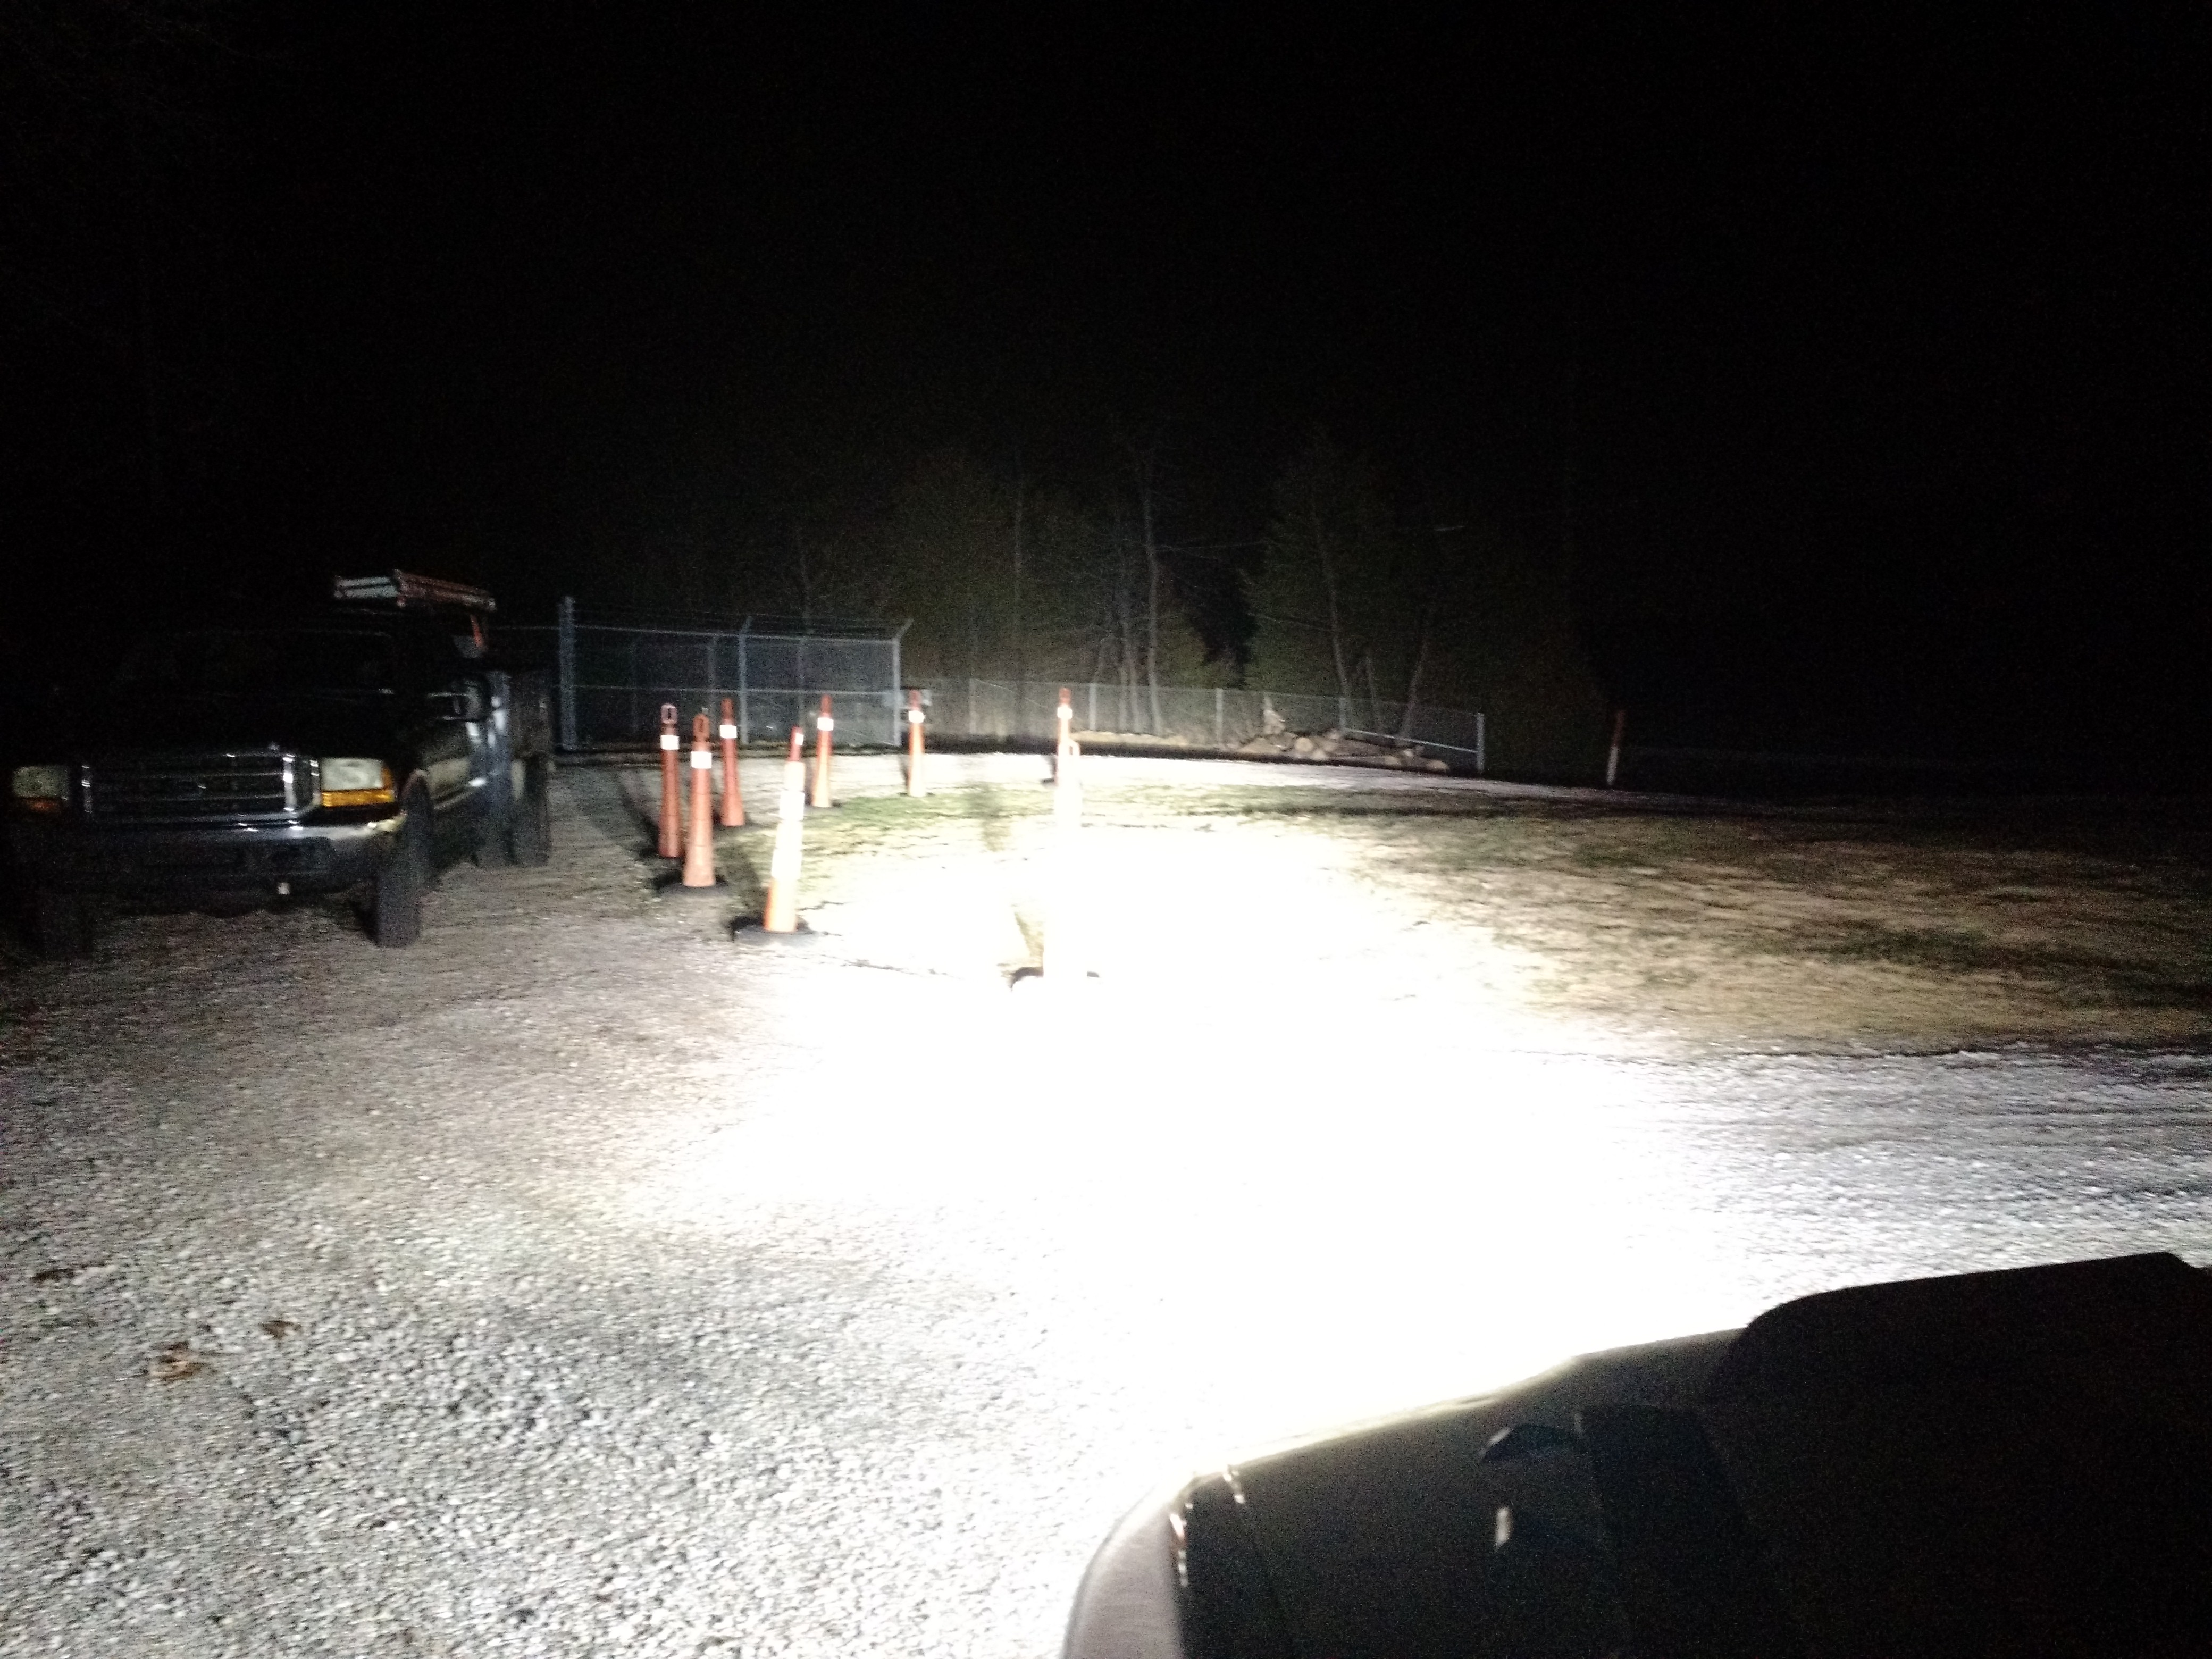
The driver's side is even worse than the pic appears, as with the weight of the car on it, the hole is another inch or two taller. Before I took that pic, I had pulled down on the tower some to check how loose it was, and was able to move it a couple inches up and down easily, nothing much was left structure wise. I now can formulate a plan on what I'm going to do. Plan is to clean it up, position the bracket, drill for the bolts, and bolt it in bracket, weld in new metal, remove bracket, finish welding, then install bracket as in the recall so it will be even stronger than when it was new. Oh, and to add to the difficulty, I will also be on a time crunch as I want this completed and back on the road to use for the upcoming Rally in the 100 Acre Wood as a support truck. I had 4 weekends that I could work on it after work, and one or two days a week I can put a couple hours in at night. Also during this time I'll be mounting auxiliary lighting because the factory lights in their current condition just wouldn't work for high speed gravel road use.


macgiver
Posts: 1625
Joined: Wed Jul 04, 2007 10:21 am

Post

Those pictures show such a bad situation , it's hard to tell what we're looking at , and I can tell that you know strut towers is what your front suspension is based onto . Man if you think you can make that better than some Fiberglass kit cause your using metal , and your doing what I hear - RALLY Support and your quote "for rough roads ... high speeds is what you want " ,honestly , seriously no one I believe seeing those pictures would think of going any faster than a Funeral procession , no joke man I worry it could be your funeral. I pray your plans work out properly ,Good Luck :yesnod . God sakes man do it right if you have to , G . 2/22/2018

nickelghandi
Posts: 205
Joined: Mon Jan 28, 2013 3:23 pm
Car: 1999.5 Nissan Pathfinder LE 4X4 (rusted out: sold)
2004 Nissan Pathfinder LE 4X4
1998 Volvo S70 GLT
2001 Ford F150 XLT
Location: Frankfort, KY, U.S.
Contact:

Post

Man, those are pretty bad looking gashes. On my 99.5 it wasn't as bad as this and the dealership wanted to total my vehicle. I am not sure you can fit enough metal in there to sure up the structure enough. Definitely take your time with this. If it comes between getting this done right and going to that rally, I know which one I would pick. At least get a good insurance policy.

Good luck.

barnaclebob
Posts: 249
Joined: Tue Feb 10, 2015 2:55 pm
Car: 2001 Pathfinder LE
2011 Altima SR

Post

Good luck man, that is BAD. Post pictures of the progress. Seems like you'd be better off spending your time and money on the actual rally vehicle considering a R50 in decent shape should be under 3 or 4 grand. I hope you didn't pay much more than scrap value for this one.

anyonebutme
Posts: 19
Joined: Tue Jan 30, 2018 7:51 pm
Car: 2002 QX4

Post

Well, my camera decided to not save half the pics, but I'll post what I have.

Step 1, Start unweaving the unibody. Unibody cars are made from layers of individual panels, so when attempting a repair like this you need to suppress the desire to just cut and replace, and try and save as many of the interior sheets as possible and bond those into the repair. Hard to explain, but in the chassis rail section there was 4 layers spot welded together. Pretty standard fare. In the first pic you'll see a piece of metal to the right that has curved shape and 2 large spot welds, That is a main chassis rail piece that runs down under the car and all the way to the rear. In the pic I already removed the top layer, and the inside most layer facing the engine, both were toast. A lot of seam sealer also had to be removed because that stuff ruins your ability to weld and catches fire. I prefer the torch method, I use it often to burn the sealant out for seam welding race cars. Way more sealer than factory, so I think someone smeared sealer on top of the rust to hide it, possibly the dealer that did the recall inspection. Problem is sealer doesn't stop rust, and this happens. You'll also notice I'm grinding off the coatings where the bracket bonds on, because the epoxy will not bond to anything but bare or etched metal. The skins I'll be using are slightly thicker than the factory metal, since it's metal I had left over from a Mitsubishi project. I'm no sure I've ever worked on a car made out of this thin of steel before, lol.

ImageIMG_20180217_163957335 by Chris Patterson, on Flickr


This is the passenger side after I started grinding off the coatings, rust, and leveling the spot welds to get to the chassis rail.

ImageIMG_20180217_140646633 by Chris Patterson, on Flickr


This is the outer most skin roughed into shape. The inside skin not shown is already welded to the frame rail and will be welded to this skin from the engine side after it's in final position. It looks like it doesn't reach, but it's because the tower is not pulled down for this picture. You'll see a large rosette weld on the right, that is where I tied back into the main chassis rail piece I spoke of before.

ImageIMG_20180217_165758623 by Chris Patterson, on Flickr


Pulling tower into position, and tacking in the tower to hold the position while the rest of the scab pieces are cut, ground, welded.

ImageIMG_20180217_172124106 by Chris Patterson, on Flickr

And moving to panel up the tower connection, this was the end of the weekend and had to stop, so a coating of weld-through primer was put on so no rust started while it rained all week:

ImageIMG_20180217_185019407 by Chris Patterson, on Flickr

anyonebutme
Posts: 19
Joined: Tue Jan 30, 2018 7:51 pm
Car: 2002 QX4

Post

And skip to bonding the repair brackets with structural epoxy, rivnuts, and bolts. Everything from here on out is the standard recall work. I had Nissan's recommended Fusor stuff so I used it. My nutsert/rivnut setter didn't have the correct fine pitch, and doing the bolt trick didn't work for me so I just welded in the rivnuts and compressed them with the bolt.

Passenger bracket bonded in, you can see the weld to the left of the bracket where I welded in the new metal, but don't have a picture anymore of the repair under the bracket.

ImageIMG_20180218_172208327 by Chris Patterson, on Flickr

Seam sealer time:

ImageIMG_20180218_190014122 by Chris Patterson, on Flickr

Impact resistant undercoating time, this stuff also great at deadening sound. The pic was taken before I installed the brake manifold bolt so that's why it's missing:

ImageIMG_20180219_140503907 by Chris Patterson, on Flickr


Driver's bracket:

ImageIMG_20180218_172157690 by Chris Patterson, on Flickr

Seam sealer time:

ImageIMG_20180218_190025335 by Chris Patterson, on Flickr

Undercoating:

ImageIMG_20180219_140441386 by Chris Patterson, on Flickr

yeldogt
Posts: 426
Joined: Sun Jan 23, 2011 8:23 am
Car: 02 Pathfinder 4X LE (X2)

Post

How could you purchase a car that failed the recall ???

anyonebutme
Posts: 19
Joined: Tue Jan 30, 2018 7:51 pm
Car: 2002 QX4

Post

It didn't "fail" the recall. The recall was done is 2012, I'm guessing there was little rust then, because nothing was fixed really but maybe a super light undercoating. The dealer told me the recall is a one time thing. Also if you read the recall information you'll see that this is still considered repairable by Nissan, and in fact has much less rust damage than the vehicle they used to make the PDF. It's actually less a rust issue than a design issue where the strut tower is connected to the frame rail with a single layer of super thin metal, instead of the tower being interweaved. I bet if you do a lot of offroading, the strut tower would still separate even without any rust, so I consider the repair brackets mandatory even on good condition cars. If the dealer would have performed the recall, they would have just installed the bracket and fiberglassed the holes, which is a sh*t repair IMO and will fail in a few years. Had they have done the recall I would have resold the car simply because I think Nissan's recall fix is terrible. Doing it myself, I know for a fact that it will be stronger than it was when the car was new. I'm kinda disappointed this car had this much damage with under 140K miles on it, but figured it was an easy fix for me and it had black leather interior and the other QX4's for sale had that terrible tan interior.

Pic with the suspension back in:

ImageIMG_20180219_190004518 by Chris Patterson, on Flickr

Before I even fixed the suspension I was already mounting lights on it, formulating a plan on where I was going to put on the lights without making a light bar. First up was a set of KC daylighter 55w HID lights I had laying around:

ImageIMG_20180203_151037102 by Chris Patterson, on Flickr

ImageIMG_20180203_162629810 by Chris Patterson, on Flickr

All I did was cut out the horizontal plastic piece in the bumper opening, and bolted them to the bumper beam. Since these are 24v models that were originally to be mounted on a HMMWV in Iraq, I had to use voltage converters to run them on 12v and replace the 24v relay, easy. Mounting the ballasts:

ImageIMG_20180217_121404484 by Chris Patterson, on Flickr


Also mounted an LED light bar to the upper side of the bumper beam, so it fits under the grill and is almost invisible when off:

ImageIMG_20180217_121347756 by Chris Patterson, on Flickr

Buffed out the stock headlights because they were super clouded, only took 15 minutes to cut and buff:

ImageIMG_20180218_151619385 by Chris Patterson, on Flickr


Replaced the factory high beams with LED bulbs also, but more for the reduced amperage draw because they're not really any brighter than the factory 65w bulbs.

ImageIMG_20180218_182049651 by Chris Patterson, on Flickr

ImageIMG_20180218_182024428_HDR by Chris Patterson, on Flickr

Rockwood
Posts: 192
Joined: Wed Aug 10, 2016 6:47 pm
Car: 2002 QX4

Post

Looks like some pretty good work. It would be nice to have a couple of pics of the strut towers from the engine bay side just to see how the back side came out. I understand that is a bit of a tight spot for pics!

So I am guessing this truck has not seen a dealership for a while. There is an open recall on Takata airbags which I think applies, and there may be one for the fuel filler tube - just depends on production dates. Did you check for open recalls on your VIN?

anyonebutme
Posts: 19
Joined: Tue Jan 30, 2018 7:51 pm
Car: 2002 QX4

Post

Yep, dealer said the airbag recall was also done, and no other open recalls. I'll try and get a camera down there, but I didn't take any pics before I seam sealed and painted it. I didn't think to take pics while I had the top of the engine apart replacing the valve covers, ect. I plan on pulling off the fuel filler tube cover and checking for rust there as I heard they can rust also. More good news is the suspension is all recently done so I won't have to do bushings yet. I'm not sure how long it's been since it was last serviced, as the spark plugs I pulled out might as well been original they were so worn. I do know the IAC was replaced at one time, and is leaking again. Think they also replaced the coil that was directly under it. Guessing a misfire due to coolant on the coil and in the spark plug tube was misdiagnosed as a failed coil and not the leaking IAC gasket. New gasket on the way, also replaced all 4 O2 sensors because I think the oil leak killed an O2 sensor.

Replacing valve covers, because of a pretty bad oil leak:

ImageIMG_20180223_163918626 by Chris Patterson, on Flickr

ImageIMG_20180223_181237265 by Chris Patterson, on Flickr

I also replace the PCV hoses as mine were cracking with softer hose, more stuff I had laying around. Man, they really didn't design these things for ease of servicing. Was having turbo 300ZX flashbacks, lol. Replaced the leather on the arm rest since mine was torn. Might fuse the IAC circuit while I'm messing with all this. Might also paint the wheels until I decide what wheels and tires I want to go with. Sometime through all this I need to clean it.

Rockwood
Posts: 192
Joined: Wed Aug 10, 2016 6:47 pm
Car: 2002 QX4

Post

You are moving pretty fast there.

There is a rear water valve on this engine - a thermostat - under the intake manifold. A couple of people have had serious engine failure when they seized shut. They never get serviced because you have to pull the top of the engine off to get to it. You can replace the thermostst, or just pull it.

Not sure if you were aware of that on this engine. But you are in there so I thought I would mention it.

Should be in pretty good mechanical shape when you are done!

EdBwoy
Moderator
Posts: 3352
Joined: Tue Dec 25, 2012 12:47 am
Location: Indiana, USA
Contact:

Post

This is impressive work. Thanks for sharing.

And I understand why you got the vehicle. I never went offroad, but before I sold the Qx4, it was simply impossible to get stuck anywhere. Smart system that ATTESA is.
I hope you are able to get on the road (off the road? :chuckle: ) soon and maximize everything around the impeccable drivetrain.

anyonebutme
Posts: 19
Joined: Tue Jan 30, 2018 7:51 pm
Car: 2002 QX4

Post

Pics taken with phone camera with exposure locked, not the best but gives you an idea the difference in power of each set of lights.

Low beams:

ImageIMG_20180303_190332 by Chris Patterson, on Flickr


LED high beams:

ImageIMG_20180303_190341 by Chris Patterson, on Flickr


High beams and light bar:

ImageIMG_20180303_190415 by Chris Patterson, on Flickr


KC HID Daylighters and low beams:

ImageIMG_20180303_190424 by Chris Patterson, on Flickr


All lights lit:

ImageIMG_20180303_190429 by Chris Patterson, on Flickr

anyonebutme
Posts: 19
Joined: Tue Jan 30, 2018 7:51 pm
Car: 2002 QX4

Post

Rockwood wrote:
Sun Feb 25, 2018 11:23 pm
You are moving pretty fast there.

There is a rear water valve on this engine - a thermostat - under the intake manifold. A couple of people have had serious engine failure when they seized shut. They never get serviced because you have to pull the top of the engine off to get to it. You can replace the thermostst, or just pull it.

Not sure if you were aware of that on this engine. But you are in there so I thought I would mention it.

Should be in pretty good mechanical shape when you are done!
I didn't know about that, so I'll keep an eye on it. Sucks that the lower intake has to come off to replace it, otherwise I would have while the upper intakes were off, but I didn't have gaskets for the lower.


New arm rest cover installed:

ImageIMG_20180303_165813867 by Chris Patterson, on Flickr


Tried my best to take pics of the inside of the strut tower before I finished installing the intake system:

ImageIMG_20180303_131429013 by Chris Patterson, on Flickr

ImageIMG_20180303_131433370 by Chris Patterson, on Flickr

ImageIMG_20180303_131454586 by Chris Patterson, on Flickr

Rockwood
Posts: 192
Joined: Wed Aug 10, 2016 6:47 pm
Car: 2002 QX4

Post

Those pics give a decent look at the inner fender. It looks good, and is probably at least as strong as new. Too bad so many of these were sent to the junkyard - a little welding / grinding and you have a great vehicle!

What did you use to cut / buff the headlights? Mine need to be done.

There is an airbag kit for the rear suspension if you end up carrying a lot of weight in the back. Unfortunately, if you load these up they do squat in the back.

yeldogt
Posts: 426
Joined: Sun Jan 23, 2011 8:23 am
Car: 02 Pathfinder 4X LE (X2)

Post

Mine did not have any rust -- by the time I took it in they were doing the bracket on all the cars .. even those not showing rust. So mine got the two brackets . Previously they would spray some undercoating and call it done

anyonebutme
Posts: 19
Joined: Tue Jan 30, 2018 7:51 pm
Car: 2002 QX4

Post

I used a rotary buffer (think drill, not a random orbital, need to be aggressive) and 3M heavy cutting compound, light compound, and finished with mother's polish. You can literally put a pad in a drill to do this, and honestly just a heavy or normal compound is all you need, then wax it. Skip those headlight kits, they've never worked for me. Lean on it hard, you literally can't mess it up like paint because too much is just right.

Also an update, took it to the rally, and it did awesome. The lights didn't have enough "throw" for me but had enough flood. Will add some spot beams later, but good enough for 60+ MPH in pitch black without feeling I'm outrunning the lights, and had the side throw for sideways gravel action.

Bad news is, stock wheels aren't very strong, lol. I'm not sure if they were cracked before, but the fronts are cracked now. $50 later, and a replacement wheel plus the spare wheel are now on front. Thinking of buying 16x8 wheels because the tires are cheaper, but finding a style and offset combination I want is harder than I imagined. Level 8 makes a TE37 knockoff that looks good and a good offset, but only in 17x9. I'm now searching for pics of 0 offset to see what they looks like, only an inch outward, might look OK. Also, rear LSD no longer works. Lasted a day, now the clutches are toasted. I'll have to replace the clutches and tighten it up.

Also, really needs poly bushings, it's like driving a marshmallow through pudding. This is no X5, not exactly confidence inspiring when going way too deep into corners. In another note, feeling the AWD system work is kinda neat, but it produces a strange oscillation during cornering on gravel as the center diff does it's thing. I forgot to check and see if it's more stable if I had locked it to 50/50. You end up kinda sawing the steering wheel a bit at a slow tempo to keep the drift at a steady angle. Might also because I think the panhard bar bushings are shot.

Rockwood
Posts: 192
Joined: Wed Aug 10, 2016 6:47 pm
Car: 2002 QX4

Post

Thanks for the info on polishing. I will have to try that.

When I first got my Q, it had snowed but was very, very slick. I did a left turn coming off a stop sign, and goosed it ( in 4WD Auto). Did an immediate spin - the transfer case took some time to engage the fronts, but by that time I was lost in the spin. Turned the switch to full time 4wd, and it became very predictable to handle. So you may end up using the full time setting - I am not sure I trust the transfer case to engage very rapidly . I had an AWD Explorer at one point that used a fluid clutch ( uses a special fluid that becomes very thick very quickly from heat). That fluid clutch would engage the fronts almost instantly - it was pretty impressive.

I think once you tighten up the rear suspension, it will be much more predictable, although you may end up in full time 4wd. Not sure it will match the handling of an X5 tho!

Some of the Pathfinder wheels are six spoke, and I think there are some steel versions. They may be available pretty cheap for an interim solution.

anyonebutme
Posts: 19
Joined: Tue Jan 30, 2018 7:51 pm
Car: 2002 QX4

Post

ImageIMG_20180322_110326172 by Chris Patterson, on Flickr

ImageIMG_20180322_110427652 by Chris Patterson, on Flickr

ImageIMG_20180322_110447993 by Chris Patterson, on Flickr

ImageIMG_20180322_110501469 by Chris Patterson, on Flickr


Good news, I managed 18.5 MPG and 19 MPG tank average. I was really worried because my first tank was 10MPG, was going to pull the cats thinking they were clogged. Still might do something with the cats because in the 350Z world they are known to break apart. Thinking 2 high flow cats and eliminating the secondaries. Maybe some headers because why not, lol.

Rockwood
Posts: 192
Joined: Wed Aug 10, 2016 6:47 pm
Car: 2002 QX4

Post

Secondaries are just boom cans (resonators) so no issue dumping those. But if you want headers, I think you may have to make your own - not sure anyone makes them for these.

You really did trash those wheels. Maybe you should post a couple of pics showing where you were rallying so we can see a litle of what you are driving the QX4 over.

Probably should close this thread tho - pics are taking a long time to load!


Return to “Nissan Pathfinder Forum / Infiniti QX4 Forum”