Love this thread.
The coupe you had is my favorite. I wasn't able to find the lip you had on it.
Ken's '91 Fastback Resto/KA-T Build
-
Mercury_Hg
- Posts: 274
- Joined: Fri Oct 01, 2010 9:36 pm
- Car: 1993 240SX Coupe
-
Jabberwocky

- Posts: 159
- Joined: Mon May 23, 2011 9:42 pm
- Car: 08 Subaru WRX
- Location: Taneytown, MD
Re: Ken's '91 Fastback Resto/KA-T Build
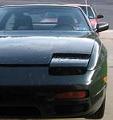
The bumper in the picture of it at the top of this thread was Do Luck style, I later switched it to a Railworx bumper because I thought the Do Luck looked too much like the blitz bumper everyone had on eclipses and such after Fast n Furious came out.
-
Jabberwocky
- Posts: 159
- Joined: Mon May 23, 2011 9:42 pm
- Car: 08 Subaru WRX
- Location: Taneytown, MD
 Re: Ken's '91 Fastback Resto/KA-T Build
Finally made a little more progress...

I have toyed with the idea of a 5 lug swap for the last few months, but decided to do that in the future after I get the body/motor/interior finished. However, I wanted to use Weld wheels and couldn't find the right width/offset in 4 lug, so I ordered Ichiba 5 lug hubs for the rear. I took a pair of s14 rotors to a local shop to have them turned down and got in to a conversation with the guy working the counter who went on to tell me he has a brand new set of Weld Pro Stars, 5x114.3, 15x8 rear and 15x? (theyre skinnies) front. He let them go CHEAP, and that couldn't have worked out any better. Im not going to swap the front to 5 lug until I get everything to do a full z32 brake swap, which will be a while from now.
I ordered JGS' polyurethane motor and transmission mounts, and went ahead and installed the MMs when they got here...

Also stuck the Walbro fuel pump down in its home...

The doors that were on the car when I bought it were full of body putty and had manual windows. I had the pair of power doors from my coupe in the shed, so I figured I would save some body work, the luxury of power windows would be pretty nice, and the windows are already tinted. Went ahead and threw those on, and heres how I hooked up the power...
The power doors have two plugs hanging out of them, Im gonna refer to them as the upper and lower. The only wires I needed were out of the upper plug, and those wires were the white/black, red/black, red/white, and solid black (solid black is only out of the driver door).

There you can see the three wires on the passenger side. For the windows, the lower group of wires is not needed. The red/black and red/white wires from the passenger side both connect to the same color wires before the driver side master switch. In the next pics you see where I fished them through the rubber plugs and connected them under the dash:


The white/black wires from both sides need to be connected to an ignition switched power source. Since I am not using a radio I hooked them in to the 12v switched wire in the radio harness.

^That is my mess of wires where the radio used to be. The two wires that are twisted together are the power wires to each side before I connected them to the radio harness. the wires I have zip tied and crimped together are the window switch wires. Instead of cutting the wire to eliminate the excess I just looped it and zip tied them. I know, shame on me.


The thick black wire (same size as the other three wires I used, 12ga?) out of the driver side upper harness needs to be grounded. Instead of running it in and through the car, I crimped a ring connector on it and put it around the screw holding the metal handle the the door. Top pic shows where I spliced in to it, bottom shows where it is grounded.
And thats all there is to it. Took about 2 hours, 6 beers and 3 cigarettes

Sitting on the floor, waiting for body work...
I got a few packages recently as well. Sold the cheap Andy's Auto quarters and bought a pair of Origin Lab 30mm pull type overfenders. Also got a pair of Summit Racing fake leather racing seats and G Force 6 point camlock harnesses. That will all be installed soon and Ill be sure to post it all up here.
As soon as I can track down a pair of fenders Im gonna try to get the body work all sewed up. Stay tuned...
I have toyed with the idea of a 5 lug swap for the last few months, but decided to do that in the future after I get the body/motor/interior finished. However, I wanted to use Weld wheels and couldn't find the right width/offset in 4 lug, so I ordered Ichiba 5 lug hubs for the rear. I took a pair of s14 rotors to a local shop to have them turned down and got in to a conversation with the guy working the counter who went on to tell me he has a brand new set of Weld Pro Stars, 5x114.3, 15x8 rear and 15x? (theyre skinnies) front. He let them go CHEAP, and that couldn't have worked out any better. Im not going to swap the front to 5 lug until I get everything to do a full z32 brake swap, which will be a while from now.
I ordered JGS' polyurethane motor and transmission mounts, and went ahead and installed the MMs when they got here...
Also stuck the Walbro fuel pump down in its home...
The doors that were on the car when I bought it were full of body putty and had manual windows. I had the pair of power doors from my coupe in the shed, so I figured I would save some body work, the luxury of power windows would be pretty nice, and the windows are already tinted. Went ahead and threw those on, and heres how I hooked up the power...
The power doors have two plugs hanging out of them, Im gonna refer to them as the upper and lower. The only wires I needed were out of the upper plug, and those wires were the white/black, red/black, red/white, and solid black (solid black is only out of the driver door).
There you can see the three wires on the passenger side. For the windows, the lower group of wires is not needed. The red/black and red/white wires from the passenger side both connect to the same color wires before the driver side master switch. In the next pics you see where I fished them through the rubber plugs and connected them under the dash:
The white/black wires from both sides need to be connected to an ignition switched power source. Since I am not using a radio I hooked them in to the 12v switched wire in the radio harness.
^That is my mess of wires where the radio used to be. The two wires that are twisted together are the power wires to each side before I connected them to the radio harness. the wires I have zip tied and crimped together are the window switch wires. Instead of cutting the wire to eliminate the excess I just looped it and zip tied them. I know, shame on me.
The thick black wire (same size as the other three wires I used, 12ga?) out of the driver side upper harness needs to be grounded. Instead of running it in and through the car, I crimped a ring connector on it and put it around the screw holding the metal handle the the door. Top pic shows where I spliced in to it, bottom shows where it is grounded.
And thats all there is to it. Took about 2 hours, 6 beers and 3 cigarettes
Sitting on the floor, waiting for body work...
I got a few packages recently as well. Sold the cheap Andy's Auto quarters and bought a pair of Origin Lab 30mm pull type overfenders. Also got a pair of Summit Racing fake leather racing seats and G Force 6 point camlock harnesses. That will all be installed soon and Ill be sure to post it all up here.
As soon as I can track down a pair of fenders Im gonna try to get the body work all sewed up. Stay tuned...
-
Jabberwocky
- Posts: 159
- Joined: Mon May 23, 2011 9:42 pm
- Car: 08 Subaru WRX
- Location: Taneytown, MD
Re: Ken's '91 Fastback Resto/KA-T Build
Got around to putting together the engine today, woo hoo!
Honed cylinders:

Clevite Main Bearings:

Crank is in place:

Girdle is holding the crank, ARP main studs are torqued:

Arias pistons on Eagle H Beam Rods:


Rods and pistons stuffed down in the cylinders:

...and the caps are torqued:

ARP head studs and the Cometic MLS headgasket:

Head torqued down, Brian Crower Stage 3 cams in as well:


Probably won't get around to anything else tomorrow because of the Super Bowl and all, but I'll be back with another update before too long.
Honed cylinders:
Clevite Main Bearings:
Crank is in place:
Girdle is holding the crank, ARP main studs are torqued:
Arias pistons on Eagle H Beam Rods:
Rods and pistons stuffed down in the cylinders:
...and the caps are torqued:
ARP head studs and the Cometic MLS headgasket:
Head torqued down, Brian Crower Stage 3 cams in as well:
Probably won't get around to anything else tomorrow because of the Super Bowl and all, but I'll be back with another update before too long.
-
S13_RB25
- Posts: 556
- Joined: Thu Jan 14, 2010 5:20 am
- Car: A 240 but no RB yet!
- Location: Burlington, NJ
Re: Ken's '91 Fastback Resto/KA-T Build
Looking good bro! That KA-T is gonna be fun  I might of missed but how much Hp you looking for?? And drifting or??
-
Jabberwocky
- Posts: 159
- Joined: Mon May 23, 2011 9:42 pm
- Car: 08 Subaru WRX
- Location: Taneytown, MD
Re: Ken's '91 Fastback Resto/KA-T Build
My goal is to work my way up to 500hp. It is going to be a drag car that can be driven to and from the track and taken out on the street occasionally.
-
Jabberwocky
- Posts: 159
- Joined: Mon May 23, 2011 9:42 pm
- Car: 08 Subaru WRX
- Location: Taneytown, MD
Re: Ken's '91 Fastback Resto/KA-T Build
Stuck the intake and exhaust manifolds on last night...


This Saturday I'm gonna go ahead with the timing chain, etc. Should be able to finish the engine up and next week I'll be putting it in the car. Looks like I'm gonna make my April deadline so it will be ready for OC cruise week!
This Saturday I'm gonna go ahead with the timing chain, etc. Should be able to finish the engine up and next week I'll be putting it in the car. Looks like I'm gonna make my April deadline so it will be ready for OC cruise week!
Re: Ken's '91 Fastback Resto/KA-T Build
Hey for the forged pistons what bore measurement did you use on the block?And what compression ratio are you going for?
-
Jabberwocky
- Posts: 159
- Joined: Mon May 23, 2011 9:42 pm
- Car: 08 Subaru WRX
- Location: Taneytown, MD
Re: Ken's '91 Fastback Resto/KA-T Build
I stayed with the stock bore size which is 89mm. Since I'm planning on seeing high boost pressure I want to keep as much wall thickness as possible. The CR I am shooting for is 8.7:1.
-
Jabberwocky
- Posts: 159
- Joined: Mon May 23, 2011 9:42 pm
- Car: 08 Subaru WRX
- Location: Taneytown, MD
Re: Ken's '91 Fastback Resto/KA-T Build
The engine has been put on hold temporarily. I torqued the bolt that holds the timing chain idler to what the FSM says and it pulled the threads right out of the head. Gotta love aluminum. Now Im waiting for a Helicoil to fix the threads and I ordered a bolt that is a little bit longer so it will thread farther in and hold with more threads. More on that soon...
I ordered a pair of Summit leather racing seats and had to fab up custom brackets Saturday. Summit sells the brackets to fit an S13, but they are $90 a piece and are not for these type seats, so you also need another bracket just to get these brackets to bolt up to the seats. Didn't want to drop $200+ on brackets, so I made some up using the stock seat rails, a piece of flat steel and angle iron. Here is the bottom view...

On the left you can see the front mounts I cut off of the stock brackets and welded to the flat plate. Then on the right I welded a piece of 3" angle to the plate to bolt to the floor in back of the seats. I also threw a gusset on each to strengthen them up a little. Pic of them both inside the car...

They weigh about 10-15lbs each, which is heavy for seat brackets, but Im alright with adding a little weight knowing they're hefty and my seats won't be coming off the floor. I painted them, then all I have to do is get the seats sitting where I want, mark and drill the holes and bolt them to the brackets.
Only other fabricating I need to do after the seats are finished is the harness bar. Good thing, that stuff is time consuming.
I ordered a pair of Summit leather racing seats and had to fab up custom brackets Saturday. Summit sells the brackets to fit an S13, but they are $90 a piece and are not for these type seats, so you also need another bracket just to get these brackets to bolt up to the seats. Didn't want to drop $200+ on brackets, so I made some up using the stock seat rails, a piece of flat steel and angle iron. Here is the bottom view...
On the left you can see the front mounts I cut off of the stock brackets and welded to the flat plate. Then on the right I welded a piece of 3" angle to the plate to bolt to the floor in back of the seats. I also threw a gusset on each to strengthen them up a little. Pic of them both inside the car...
They weigh about 10-15lbs each, which is heavy for seat brackets, but Im alright with adding a little weight knowing they're hefty and my seats won't be coming off the floor. I painted them, then all I have to do is get the seats sitting where I want, mark and drill the holes and bolt them to the brackets.
Only other fabricating I need to do after the seats are finished is the harness bar. Good thing, that stuff is time consuming.
-
Andarou
- Posts: 9
- Joined: Mon Jun 06, 2011 11:30 am
- Car: 07 corolla, 90 s13 (tore down and stripped), baby stroller n training wheels.
- Location: Fort Myers, FL
Re: Ken's '91 Fastback Resto/KA-T Build
Great build man.. huge props. Glad you stuck with the cast iron beast. 
-
Jabberwocky
- Posts: 159
- Joined: Mon May 23, 2011 9:42 pm
- Car: 08 Subaru WRX
- Location: Taneytown, MD
Re: Ken's '91 Fastback Resto/KA-T Build
Installed all the new timing components:

I ran in to a problem when setting the cams in the position they need to be in to mate up with the timing marks on the gears and chain. I set piston one at TDC and turned the cam until it was about 15 degrees or so from where it needs to be and it stopped...valves touched the pistons...
Looked at the cam card that came with them and found the problem, Crower makes their cams (stage 3s atleast) to fit FWD and RWD applications so the intake cam has a distributor drive slot on the end. When using them in a RWD KA that slot sticks out the back of the head where the valve cover gasket sits and it needs to be cut off. I brought it to work, ground it away, then you swap cams and they line up like they should. Heres the cam with the end ground off:

So the timing is set, basically all I need to do to have it ready to drop in is the timing covers, pulleys, valve cover and oil pan. Im hoping to get that done tomorrow before the old lady gets off work, then move some things around so I can get the car in the bay with the chain hoist to lower it in. Look for an update Sunday!
I ran in to a problem when setting the cams in the position they need to be in to mate up with the timing marks on the gears and chain. I set piston one at TDC and turned the cam until it was about 15 degrees or so from where it needs to be and it stopped...valves touched the pistons...
Looked at the cam card that came with them and found the problem, Crower makes their cams (stage 3s atleast) to fit FWD and RWD applications so the intake cam has a distributor drive slot on the end. When using them in a RWD KA that slot sticks out the back of the head where the valve cover gasket sits and it needs to be cut off. I brought it to work, ground it away, then you swap cams and they line up like they should. Heres the cam with the end ground off:
So the timing is set, basically all I need to do to have it ready to drop in is the timing covers, pulleys, valve cover and oil pan. Im hoping to get that done tomorrow before the old lady gets off work, then move some things around so I can get the car in the bay with the chain hoist to lower it in. Look for an update Sunday!
-
Jabberwocky
- Posts: 159
- Joined: Mon May 23, 2011 9:42 pm
- Car: 08 Subaru WRX
- Location: Taneytown, MD
Re: Ken's '91 Fastback Resto/KA-T Build
The engine is finished!
Today I took care of the small additions: timing covers, thermostat and water neck, changed the distributor cap and rotor and installed that, added the water pump and crank pulley, changed the TPS and knock sensor, put the oil pump pickup back on, changed the rear oil seal, and installed the oil pan.

Ran into another unexpected problem when I wanted to put the valve cover gasket and cover on top. The valve cover I spent a good bit of time cleaning up and painting was off my '91 KA, and I also bought a top end gasket kit for the older engine. Thus, the gasket and older cover do not fit the '96 head that I built. No big deal, I got the gasket from the auto parts store earlier this week and today I ground the letters off the '96 valve cover and painted it. As soon as that dries I can bolt it down and the engine can come off the stand.
Heres a pic of the engine with the turbo. I pulled that back off and won't bolt it down until the engine is sitting in the car though. Looks sexy though...

I also did some interior work this afternoon. Got the carpet laid which is a pain in the a$$ and put the door panels back on. Looks pretty cozy in there now.


Sunday I might spend a little time on it, hopefully I'll have another update for you all tomorrow night.
Today I took care of the small additions: timing covers, thermostat and water neck, changed the distributor cap and rotor and installed that, added the water pump and crank pulley, changed the TPS and knock sensor, put the oil pump pickup back on, changed the rear oil seal, and installed the oil pan.
Ran into another unexpected problem when I wanted to put the valve cover gasket and cover on top. The valve cover I spent a good bit of time cleaning up and painting was off my '91 KA, and I also bought a top end gasket kit for the older engine. Thus, the gasket and older cover do not fit the '96 head that I built. No big deal, I got the gasket from the auto parts store earlier this week and today I ground the letters off the '96 valve cover and painted it. As soon as that dries I can bolt it down and the engine can come off the stand.
Heres a pic of the engine with the turbo. I pulled that back off and won't bolt it down until the engine is sitting in the car though. Looks sexy though...
I also did some interior work this afternoon. Got the carpet laid which is a pain in the a$$ and put the door panels back on. Looks pretty cozy in there now.
Sunday I might spend a little time on it, hopefully I'll have another update for you all tomorrow night.
-
Jabberwocky
- Posts: 159
- Joined: Mon May 23, 2011 9:42 pm
- Car: 08 Subaru WRX
- Location: Taneytown, MD
Re: Ken's '91 Fastback Resto/KA-T Build
This afternoon I finished painting the valve cover and stuck that on.

Next up is wiring in the injector resistors/changing the injector plugs which I should have some pics of the process posted up here some day this week.
Next up is wiring in the injector resistors/changing the injector plugs which I should have some pics of the process posted up here some day this week.
-
Jabberwocky
- Posts: 159
- Joined: Mon May 23, 2011 9:42 pm
- Car: 08 Subaru WRX
- Location: Taneytown, MD
Re: Ken's '91 Fastback Resto/KA-T Build
Sunday I got around to splicing the injector resistors from JGY into the injector power wires. This is a must when you use low impedence injectors because stock KA injectors run off the high impedence ECU. The install was pretty simple, trace the 4 red injector power wires back the harness to where they all go down to a single wire that goes to the ECU. Before the junction I cut the wires then soldered in the resistors. I shrink wrapped the soldered spots, zip tied them together, and taped it all up. Here's a picture of the work being done...

Then I took the engine off the stand and cleared a space for the car in my small bay that has a chain hoist running front to back.


I put the car up on stands and this weekend it's gonna be dropped in, look for an update soon.
Then I took the engine off the stand and cleared a space for the car in my small bay that has a chain hoist running front to back.
I put the car up on stands and this weekend it's gonna be dropped in, look for an update soon.
-
Jabberwocky
- Posts: 159
- Joined: Mon May 23, 2011 9:42 pm
- Car: 08 Subaru WRX
- Location: Taneytown, MD
Re: Ken's '91 Fastback Resto/KA-T Build
Sorry in advance for the lack of pictures of the wideband wiring, my phone was busy streaming Pandora and when I get focused on something I don't think to snap any pictures. For those of you that care to read...
Friday and Saturday I had some time to get more of the interior back together. I started by checking out how the previous owner had the Innovate LC1 wideband o2 sensor wired up. He did all the splicing behind the gauge cluster, so I pulled that out to have a look. The grounds for the AF gauge and wideband control box were all spliced together (he had the wires stripped and twisted together) and grounded to a screw holding the dash in place. I pulled them apart, cut and restripped them, and soldered them all together and connected to a wire that I ran to the engine bay to ground to the engine block.
I basically did the same for the rest of the wires. They were just twisted together and taped up, so I cut the ends off, restripped them, and soldered all the connections. He was pulling the switched 12v power for the gauge and controller off of a wire coming out of one of the plugs in back of the cluster, so after I soldered them together I ran them down to the switched 12v wire in the radio harness. The speedo was very twitchy when I bought the car off of him, and Im wondering if that may have been why.
Another thing he didn't do was hook up the diagnostic LED and momentary button to the wideband. How he calibrated and checked it for diagnostic codes I do not know. With the LC1 you are supposed to calibrate the o2 sensor frequently, and you do that by holding/releasing the button and watching the flashing pattern of the LED. I made a trip to town and picked up a small LED and a button and wired those up along with the rest.
I then installed the AF gauge in a single gauge pillar pod, drilled a small hole above the gauge to hold my diagnostic LED, and screwed it to the A pillar. Heres a picture of the AF gauge, the LED up at the top left, and the Autometer Cobalt oil pressure and boost gauges.

I mounted the aforementioned calibration button on the kick panel next to my hood popper.

The two Autometer gauges are housed in an ATI steering column pod that was already in the car when I bought it, but housed the AF gauge and a Sunpro boost gauge. The Sunpro went where it belongs, in my trash. When the Autometers were pushed back in the pod there was no room for the wires or pressure fittings behind them, so I drilled/cut where I needed to make it all work.

The wires are not as tucked as I would like, but I dont think it ended up looking too hideous. When installed on the column everything tucks in fairly nice, the only way you really see the backs is if you look straight down through the windshield like this:

And with power to the lighting...

The gauge install was pretty time consuming, but I am happy with how it turned out. Everything is soldered and tucked away, and I have an almost complete dash again. I am also glad that I investigated and reworked the wideband wiring, but I wish I would have taken pictures of it before because his way of wiring was pretty cute.
I wanted to drop the motor in this week but couldn't get around to it. I was going to turn the flywheel down, but I guess it was not tight (surprise surprise) and the holes were egged out. I ordered a new one but it did not arrive until Saturday afternoon when I was about finished working for the day and with Easter being today I didn't spend any time in the shop. One day this week I'd like to bolt that, the clutch, and the transmission to the engine and have it ready to put in this weekend.
Until then...
Friday and Saturday I had some time to get more of the interior back together. I started by checking out how the previous owner had the Innovate LC1 wideband o2 sensor wired up. He did all the splicing behind the gauge cluster, so I pulled that out to have a look. The grounds for the AF gauge and wideband control box were all spliced together (he had the wires stripped and twisted together) and grounded to a screw holding the dash in place. I pulled them apart, cut and restripped them, and soldered them all together and connected to a wire that I ran to the engine bay to ground to the engine block.
I basically did the same for the rest of the wires. They were just twisted together and taped up, so I cut the ends off, restripped them, and soldered all the connections. He was pulling the switched 12v power for the gauge and controller off of a wire coming out of one of the plugs in back of the cluster, so after I soldered them together I ran them down to the switched 12v wire in the radio harness. The speedo was very twitchy when I bought the car off of him, and Im wondering if that may have been why.
Another thing he didn't do was hook up the diagnostic LED and momentary button to the wideband. How he calibrated and checked it for diagnostic codes I do not know. With the LC1 you are supposed to calibrate the o2 sensor frequently, and you do that by holding/releasing the button and watching the flashing pattern of the LED. I made a trip to town and picked up a small LED and a button and wired those up along with the rest.
I then installed the AF gauge in a single gauge pillar pod, drilled a small hole above the gauge to hold my diagnostic LED, and screwed it to the A pillar. Heres a picture of the AF gauge, the LED up at the top left, and the Autometer Cobalt oil pressure and boost gauges.
I mounted the aforementioned calibration button on the kick panel next to my hood popper.
The two Autometer gauges are housed in an ATI steering column pod that was already in the car when I bought it, but housed the AF gauge and a Sunpro boost gauge. The Sunpro went where it belongs, in my trash. When the Autometers were pushed back in the pod there was no room for the wires or pressure fittings behind them, so I drilled/cut where I needed to make it all work.
The wires are not as tucked as I would like, but I dont think it ended up looking too hideous. When installed on the column everything tucks in fairly nice, the only way you really see the backs is if you look straight down through the windshield like this:
And with power to the lighting...
The gauge install was pretty time consuming, but I am happy with how it turned out. Everything is soldered and tucked away, and I have an almost complete dash again. I am also glad that I investigated and reworked the wideband wiring, but I wish I would have taken pictures of it before because his way of wiring was pretty cute.
I wanted to drop the motor in this week but couldn't get around to it. I was going to turn the flywheel down, but I guess it was not tight (surprise surprise) and the holes were egged out. I ordered a new one but it did not arrive until Saturday afternoon when I was about finished working for the day and with Easter being today I didn't spend any time in the shop. One day this week I'd like to bolt that, the clutch, and the transmission to the engine and have it ready to put in this weekend.
Until then...
-
dc1984

- Posts: 276
- Joined: Mon Nov 14, 2005 2:44 am
- Car: 93 240sx/98 180sx blacktop sr20det :RIP/ 93 jeep grand cherokee
Re: Ken's '91 Fastback Resto/KA-T Build
im personally not a fan of the lime green color u got going on but to each his own.
outstanding work, i wish i had it in me to strip down and rebuild like that.
keep up the good work.
outstanding work, i wish i had it in me to strip down and rebuild like that.
keep up the good work.
-
Jabberwocky
- Posts: 159
- Joined: Mon May 23, 2011 9:42 pm
- Car: 08 Subaru WRX
- Location: Taneytown, MD
Re: Ken's '91 Fastback Resto/KA-T Build
The engine is finally in the car! Friday I was planning on installing the flywheel, clutch, and transmission but forgot to get one thing...the pilot bushing. It was already past 6pm by the time I discovered this, so Saturday morning I made some calls and tracked one down at a dealer in the area. I returned home with it, stuck it in, then bolted on the flywheel. Here you see it with the Centerforce clutch disk:

Pressure Plate:

Then I bolted on the transmission and dropped it down in the bay. If you can lift the engine high enough you can wiggle the trans and engine through without even taking the shifter out of the transmission. JGS' polyurethane mounts lined up perfectly and after cutting the old rubber transmission mount out of it's bracket and drilling a hole through the crossmember JGS' transmission mount kit fit great as well. I'll get a picture of the trans mount up soon...

Then I stuck the 72# injectors in the JGY top feed fuel rail like so:

And stuck them in place on the intake manifold. I bolted up the Tial 38mm wastegate, Precision 6031E along with the oil feed and return lines, hooked my oil pressure gauge up to my fitting coming off the oil filter mount, and started plugging the harness back together. The previous owner had cut the harness to wire up the N60 MAF and Blaster 3 coil, and these are the only two places the harness was tampered with. I ripped off old electrical tape and checked the wires were in good shape, then whenever I get it laid out how I want Im going to loom and tape it all back up neatly.

Im happy with what I got done this weekend. This week I'd like to get the driveshaft back in and finish plugging everything back together. Then over the weekend I can wire up the MSD box and z32 MAF, and hopefully get the intercooler piping installed.
Pressure Plate:
Then I bolted on the transmission and dropped it down in the bay. If you can lift the engine high enough you can wiggle the trans and engine through without even taking the shifter out of the transmission. JGS' polyurethane mounts lined up perfectly and after cutting the old rubber transmission mount out of it's bracket and drilling a hole through the crossmember JGS' transmission mount kit fit great as well. I'll get a picture of the trans mount up soon...
Then I stuck the 72# injectors in the JGY top feed fuel rail like so:
And stuck them in place on the intake manifold. I bolted up the Tial 38mm wastegate, Precision 6031E along with the oil feed and return lines, hooked my oil pressure gauge up to my fitting coming off the oil filter mount, and started plugging the harness back together. The previous owner had cut the harness to wire up the N60 MAF and Blaster 3 coil, and these are the only two places the harness was tampered with. I ripped off old electrical tape and checked the wires were in good shape, then whenever I get it laid out how I want Im going to loom and tape it all back up neatly.
Im happy with what I got done this weekend. This week I'd like to get the driveshaft back in and finish plugging everything back together. Then over the weekend I can wire up the MSD box and z32 MAF, and hopefully get the intercooler piping installed.
-
Jabberwocky
- Posts: 159
- Joined: Mon May 23, 2011 9:42 pm
- Car: 08 Subaru WRX
- Location: Taneytown, MD
Re: Ken's '91 Fastback Resto/KA-T Build
Friday evening I installed the one piece aluminum driveshaft and filled the transmission up with oil. Then bolted on the starter, altenator, and power steering pump. The turbo is too big for the power steering reservoir to bolt up where it used to, so I moved it over to the right a couple inches, drilled new holes and bolted it up out of the way.
Sunday I tackled the intercooler/piping. The IC is an ebay Godspeed core measuring 30.5 x 12 x 3. I went with 3" because I wanted to use the cold pipe that goes from the throttle body down that was on the car when I bought it since it already had the HKS flanged welded to it. That was 3" so I got the piping kit the same size to match. I had previously cut the old rusty battery tray out so I had plenty of hole on the passenger side to run the piping through, and I cut out a spot behind the driver side headlight to run the hot pipe through. By using two 90 degree pieces, both U shaped pieces, and the old pipe with the BOV flange I got it all routed where it needed to go.


I also installed the HKS SSQV BOV, ran my fuel line from the filter to the rail, soldered the JGY injector plugs where they need to be, and hooked up my boost gauge. Later this week I will continue tying up loose ends, hopefully next weeks post will include a video of the first start!
Sunday I tackled the intercooler/piping. The IC is an ebay Godspeed core measuring 30.5 x 12 x 3. I went with 3" because I wanted to use the cold pipe that goes from the throttle body down that was on the car when I bought it since it already had the HKS flanged welded to it. That was 3" so I got the piping kit the same size to match. I had previously cut the old rusty battery tray out so I had plenty of hole on the passenger side to run the piping through, and I cut out a spot behind the driver side headlight to run the hot pipe through. By using two 90 degree pieces, both U shaped pieces, and the old pipe with the BOV flange I got it all routed where it needed to go.
I also installed the HKS SSQV BOV, ran my fuel line from the filter to the rail, soldered the JGY injector plugs where they need to be, and hooked up my boost gauge. Later this week I will continue tying up loose ends, hopefully next weeks post will include a video of the first start!
-
SX APPEAL

- Posts: 1345
- Joined: Tue Oct 05, 2004 10:26 am
- Car: 06 G35 Coupe 6MT
95 Maxima SE 5MT - Location: Springfield, MO
Re: Ken's '91 Fastback Resto/KA-T Build
Maybe I missed it but what are you doing for cooling this thing? Big radiator, heat shielding, water cooling turbo, that kind of thing? If you'e shooting for over 500hp it's gonna take more than a stock rad and hood spacers methinks...
-
Jabberwocky
- Posts: 159
- Joined: Mon May 23, 2011 9:42 pm
- Car: 08 Subaru WRX
- Location: Taneytown, MD
Re: Ken's '91 Fastback Resto/KA-T Build
I haven't really got in to that yet because I haven't installed it all at this point. As of now I have a mishimoto thermostat, cx racing aluminum radiator with a nismo cap, dual electric fans, the downpipe is heat wrapped and I have a heat blanket for the turbo. I am also planning on fabbing up some sheet metal to go around the turbo to protect plug wires, ps/brake/clutch lines and such.
The 500whp goal is down the line. I am going to get it going with this setup and see how that goes before I step up farther. Eventually I want to go distributor less with ls1 coil packs, standalone ECU, etc. I know 500 is not going to come easy, this is my first solo build so I'm learning every day to get to my ultimate goal.
The 500whp goal is down the line. I am going to get it going with this setup and see how that goes before I step up farther. Eventually I want to go distributor less with ls1 coil packs, standalone ECU, etc. I know 500 is not going to come easy, this is my first solo build so I'm learning every day to get to my ultimate goal.
-
Jabberwocky
- Posts: 159
- Joined: Mon May 23, 2011 9:42 pm
- Car: 08 Subaru WRX
- Location: Taneytown, MD
Re: Ken's '91 Fastback Resto/KA-T Build
Got a little done before work...

Made my intake, wired in the z32 MAFS, installed the Accel Thundersport plug wires, and started hooking up the MSD 6A.
Made my intake, wired in the z32 MAFS, installed the Accel Thundersport plug wires, and started hooking up the MSD 6A.
-
Jabberwocky
- Posts: 159
- Joined: Mon May 23, 2011 9:42 pm
- Car: 08 Subaru WRX
- Location: Taneytown, MD
Re: Ken's '91 Fastback Resto/KA-T Build
Finished wiring up the MSD today. I mounted it under the intake with some double stick tape and zip ties. Here's a pic, yes I am going to do a better job tucking the wires...

Re: Ken's '91 Fastback Resto/KA-T Build
This is one awesome build, good work. I can't wait to see the finished product!
-
Jabberwocky
- Posts: 159
- Joined: Mon May 23, 2011 9:42 pm
- Car: 08 Subaru WRX
- Location: Taneytown, MD
Re: Ken's '91 Fastback Resto/KA-T Build
Thank you, sir.This Guy wrote:This is one awesome build, good work. I can't wait to see the finished product!
If I had to use one word to describe this weekend it would be FRUSTRATING...
Friday started good...I installed the new alternator along with it's belt and the one for the power steering pump. Then I put the CX Racing radiator in its place and connected the hoses. I am not a fan of CX Racing, but this radiator was in the car when I bought it. I had it cooked out and pressure tested and it came back fine, so I figure I will use it for now. Eventually it will be discarded and replaced with a Fluidyne. I then dropped in the Altima dual electric fans and wired them up. No nifty fan controller unfortunately, I wired them up on high speed with a relay and am going to use a toggle switch to flip them on. Stuck the coolant reservoir back in place and checked a couple more things off the list.

After filling up the engine with oil and radiator with antifreeze I made a few ground wires. I soldered ends on some 4ga wire and put one from the front of the head to the strut tower, block to frame, transmission to frame, and back of the valve cover to the firewall. I opted to use a Nismo Type B adjustable FPR I picked up from JGY. I stuck that on the return line from the fuel rail and supplied it with some vacuum. Now I started going over my prestart checklist ensuring that I remembered to pull the rag out of the compressor housing before installing my intake, checked I tightened all the IC piping clamps, etc...even went in the kitchen and grabbed a fire extinguisher just in case.
Hooked up the battery cables, put 5 gallons of fuel in the tank, pulled the fuel pump fuse, and cranked it over a couple times. After doing this 3 times for about 10 seconds or so each time I stuck the fuel pump fuse back in...moment of truth...
Turn the key to ON, I can hear the fuel pump priming. Turn it to START, its cranking and cranking but not even trying to run. I figured this would happen, so I walk in the house and get my girlfriend. I pulled the plugs and they are all wet, so I know Im getting fuel. Put them back except for #1, hooked the plug wire to it and got her to turn it over...no spark. I tested the MSD when I installed it and was getting spark so I check again, sure enough there is fire at the coil, but not making it through the distributor. Hmm...
Time to hit up google. After scouring Nico, KA-T.org, and even a couple of the unmentionables I say the hell with it Ill try again in the morning. Next day I go down, turn the key and I am greeted by the most frustrating sound in the world: a clicking starter selenoid. Try again, same thing. The starter is brand new, as is the battery, so
I checked the battery and was getting around 13v. Hook the tester to where my battery cable, starter power wire, and harness connection are all joined together in the engine bay (my battery is in the trunk mind you) and get right around 13v. Jump in and turn the key and the voltage drops to around 4v. This will not do!

The wires that are taped up are where I was testing the voltage.
After scratching my head, drinking a Yuengling and relaxing in a plastic lawn chair for a couple minutes I come up with a plan. I'll move the battery to the engine bay and ground it to the engine block. I ran a cable from the battery directly to the starter, and made a cable that goes from the starter to the spot where the power wires join next to the fuse box. This time I turn the key and it comes to life! I am thinking the 4ga wire I ran under the car from the battery in the hatch to the engine bay has very thin almost hair like copper wire inside, and the first couple times I cranked it the power didn't drop too much. Eventually it had enough and I burned up the wire or something causing a severe voltage drop.
After starting it up and playing with the timing I have it to where it will hold idle...although still pretty choppy. Heres a short little video of it after I got it in time enough that it wasn't smoking anymore and would idle on its own.
http://s1200.photobucket.com/albums/bb3 ... f5acef.mp4
Tomorrow I am going to find some cable strong enough to run front to back to replace the busted old cable. Then I can install the clutch slave cylinder and bleed the system, take it off the stands and move it out to the big bay of the garage where I can work on getting it in time & adjust the fuel pressure without the fear of carbon monoxide poisoning. I also need to find a serial port adapter for my laptop so I can get the LC1 up and running that way I can keep an eye on the AFR.
-
Jabberwocky
- Posts: 159
- Joined: Mon May 23, 2011 9:42 pm
- Car: 08 Subaru WRX
- Location: Taneytown, MD
Re: Ken's '91 Fastback Resto/KA-T Build
Friday night I installed the new slave cylinder on the transmission. Im having one hell of a time getting fluid from the master cylinder down into it though. After trying to pump the pedal for about 10 minutes we tried forcing compressed air through the master cylinder to blow the fluid through the lines. Got a good bit to go down through, enough that when the pedal is pumped now I can hear fluid sloshing around in the thick line that comes out of the block the clutch line goes in to. Still none in the slave cylinder though. I got frustrated and stepped away from it for now, will try again this week. I filled the transmission up with gear oil and called it a night.
Saturday I spent most the day helping my girlfriend with her Z33. She added a Nismo R Tune cold air, Seibon OEM style CF hood, and changed the worn out hatch shocks. Im jealous
I did get the chance to run to IAG and pick up an electronic fuel pressure gauge though. When I got back I T'eed the sending unit into the fuel feed line between the filter and rail. Ran wires inside, made the necessary connections, and discovered I was getting a little over 60psi at idle without vacuum at the rail. Need to get that down to about 43 or so...

There you can see the sending unit installed. Also notice in the background under the wiper motor the Nismo Type B FPR. I also would like to add the green on my engine is not that nasty yellowish green as it looks in the picture, my camera flash makes it look that way.
I also needed to fill in the hole left in the dash where the radio/pocket used to reside, and since I just added another gauge I figured I would put it there. I am not a fan of dual gauges on the A pillar, and with the single pillar pod and dual steering column pod I have enough gauges right in front of my face. I made this plate out of 1/4" thick plastic to fill the hole, hold the fuel pressure gauge, and also hold my two switches. The toggle on the left is for the lights in my boost/oil pressure gauges, and the rocker on the right turns on my radiator fans. With them mounted toward the bottom it leaves me room for more if needed in the future. The gauge is bright white in the day and blue to match the Cobalts at night...I like...

I would love to rip that cell phone clip off the dash by the heater vents but am afraid it will leave a nasty mark on an otherwise spotless dash. Anyone know any tricks?
That was all for this weekend. I have come to terms with the fact it will not be finished by Cruise Week (May 17) like I planned. I could have it finished, but I don't want to cut corners to get it going. Since the GF got the Z, I will be more than happy to take that down instead.
Saturday I spent most the day helping my girlfriend with her Z33. She added a Nismo R Tune cold air, Seibon OEM style CF hood, and changed the worn out hatch shocks. Im jealous
I did get the chance to run to IAG and pick up an electronic fuel pressure gauge though. When I got back I T'eed the sending unit into the fuel feed line between the filter and rail. Ran wires inside, made the necessary connections, and discovered I was getting a little over 60psi at idle without vacuum at the rail. Need to get that down to about 43 or so...
There you can see the sending unit installed. Also notice in the background under the wiper motor the Nismo Type B FPR. I also would like to add the green on my engine is not that nasty yellowish green as it looks in the picture, my camera flash makes it look that way.
I also needed to fill in the hole left in the dash where the radio/pocket used to reside, and since I just added another gauge I figured I would put it there. I am not a fan of dual gauges on the A pillar, and with the single pillar pod and dual steering column pod I have enough gauges right in front of my face. I made this plate out of 1/4" thick plastic to fill the hole, hold the fuel pressure gauge, and also hold my two switches. The toggle on the left is for the lights in my boost/oil pressure gauges, and the rocker on the right turns on my radiator fans. With them mounted toward the bottom it leaves me room for more if needed in the future. The gauge is bright white in the day and blue to match the Cobalts at night...I like...
I would love to rip that cell phone clip off the dash by the heater vents but am afraid it will leave a nasty mark on an otherwise spotless dash. Anyone know any tricks?
That was all for this weekend. I have come to terms with the fact it will not be finished by Cruise Week (May 17) like I planned. I could have it finished, but I don't want to cut corners to get it going. Since the GF got the Z, I will be more than happy to take that down instead.
-
Jabberwocky
- Posts: 159
- Joined: Mon May 23, 2011 9:42 pm
- Car: 08 Subaru WRX
- Location: Taneytown, MD
Re: Ken's '91 Fastback Resto/KA-T Build
After researching my problem with getting the clutch bled, I found the article on why/how you can remove the dampener between the master cylinder and slave cylinder. I went ahead and did it for ease of bleeding and hoping it gives me a better clutch feel.
Here's how it turned out:
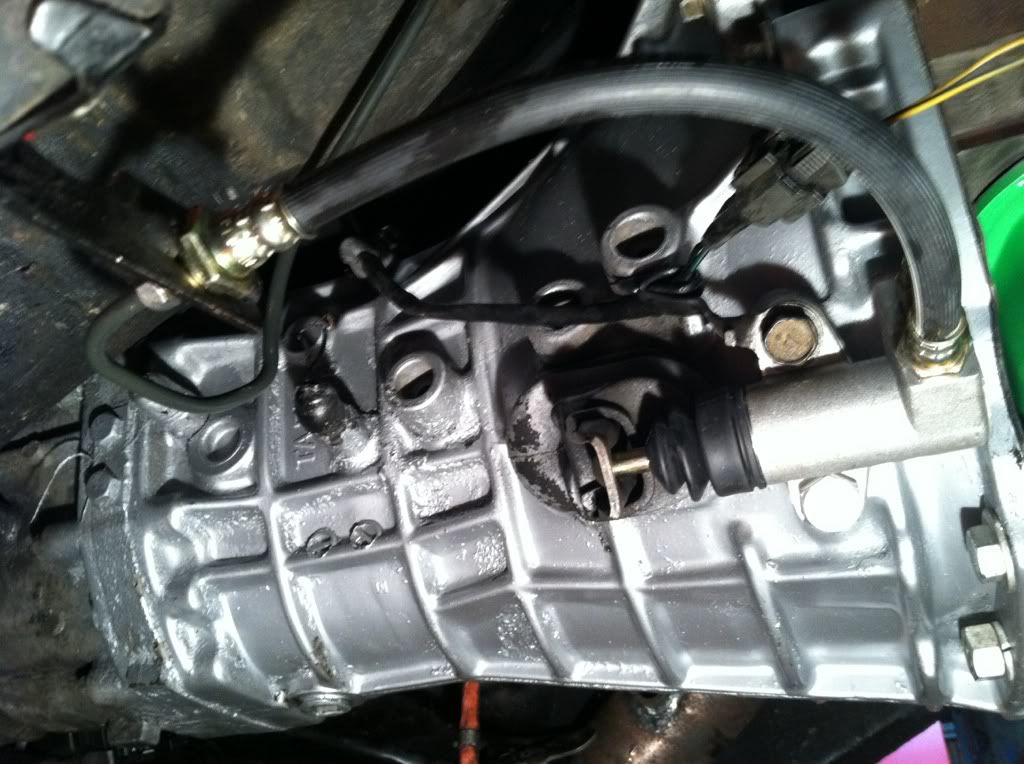
And this is the dampener removed:

Here's how it turned out:
And this is the dampener removed:
-
badbob2121

- Posts: 1989
- Joined: Sat Jan 16, 2010 9:23 am
- Car: '92 Nissan 240SXS13 Hatch ELLIS JUAN
'12 Ford Mustang GT RTR - Location: St. Louis
Re: Ken's '91 Fastback Resto/KA-T Build
Removing that damper is a must, makes bleeding so much easier.
Nice work..
Nice work..
-
Caveit77777

- Posts: 434
- Joined: Sat Nov 07, 2009 7:02 pm
- Car: 1996 240sx SE
Re: Ken's '91 Fastback Resto/KA-T Build
Hey just wondering, where do you have your oil line hooked up that goes to the turbo?
-
Jabberwocky
- Posts: 159
- Joined: Mon May 23, 2011 9:42 pm
- Car: 08 Subaru WRX
- Location: Taneytown, MD
Re: Ken's '91 Fastback Resto/KA-T Build
The oil line comes out next to the oil filter where the oil pressure switch used to be. I put a T there, it's where I have my oil pressure gauge hooked up as well.