Jared's RB-7

Discuss the RB20, RB25 and RB26 series engines.
jaredperry
Posts: 50
Joined: Sun Mar 09, 2014 8:43 pm
Car: '69 510
Location: Newbury Park, CA

Post

Hello,

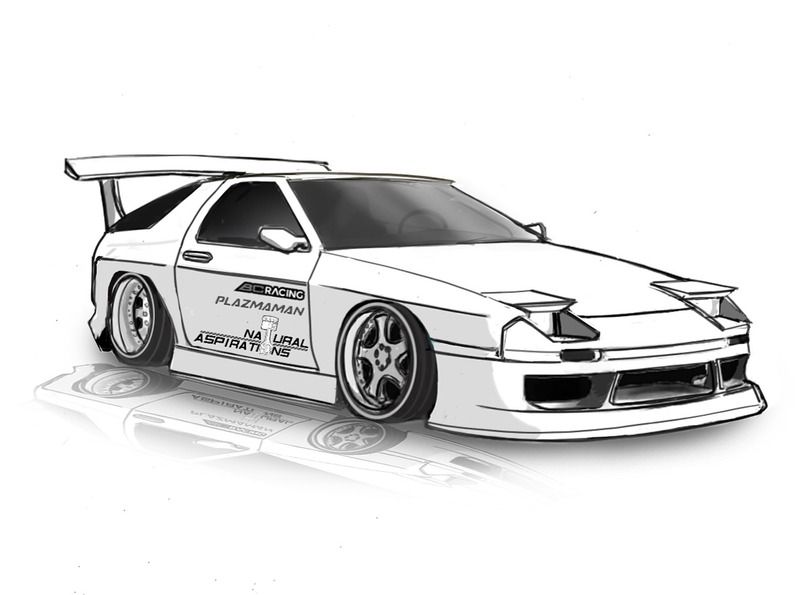
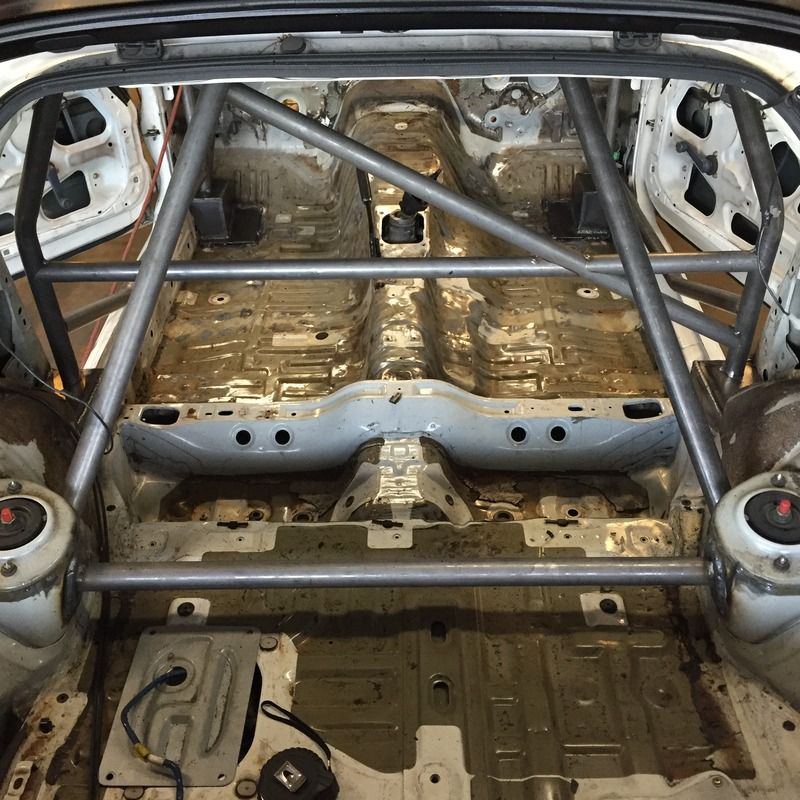
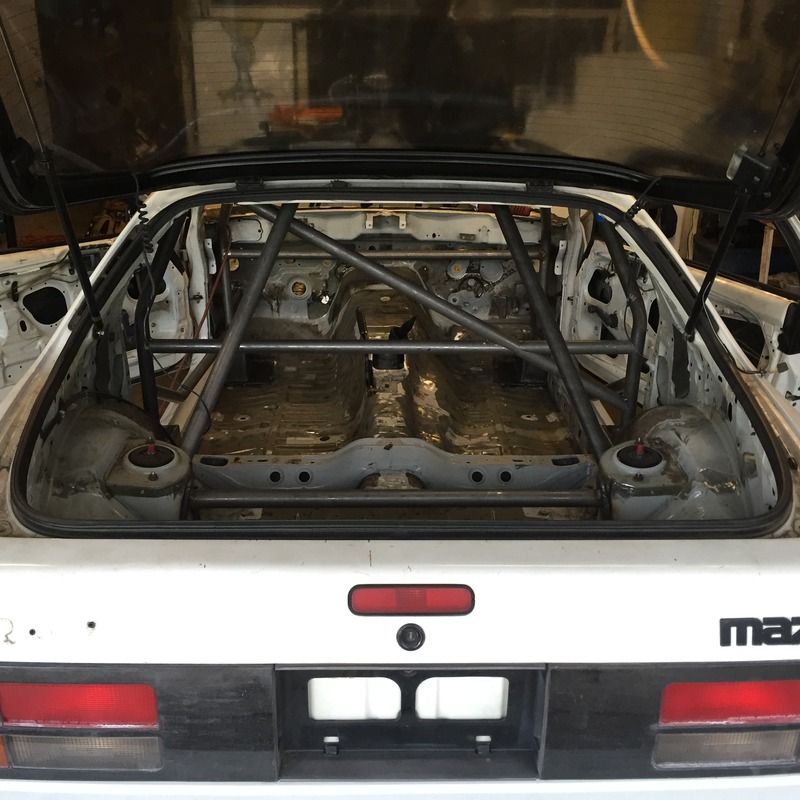
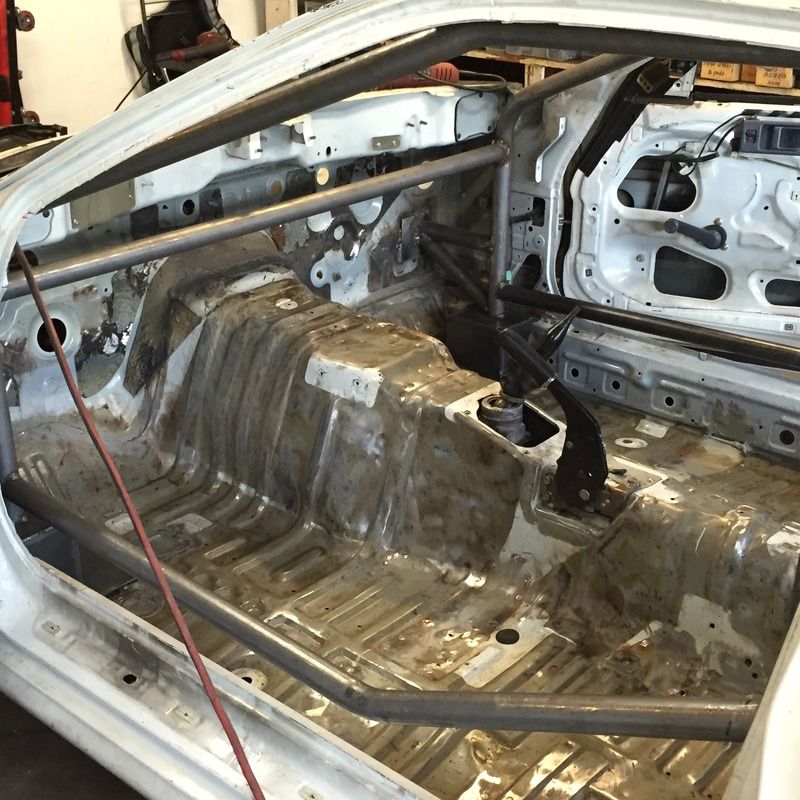
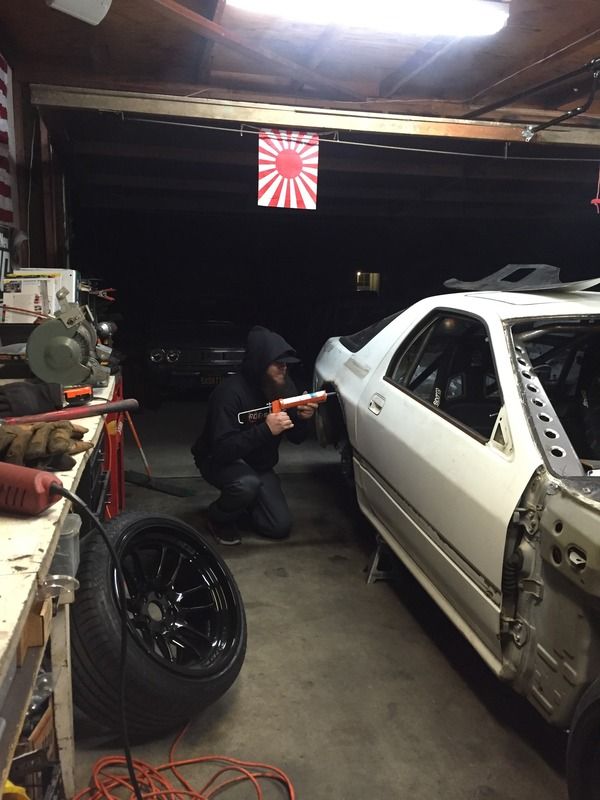
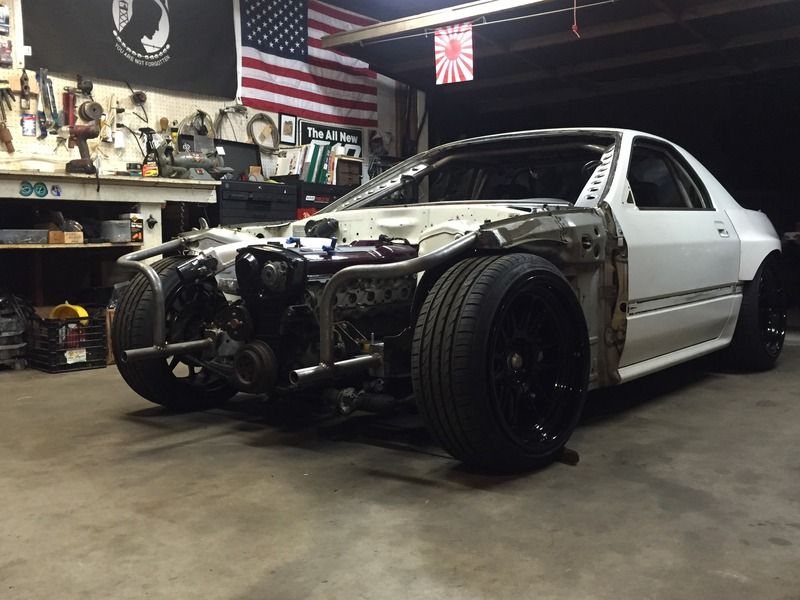
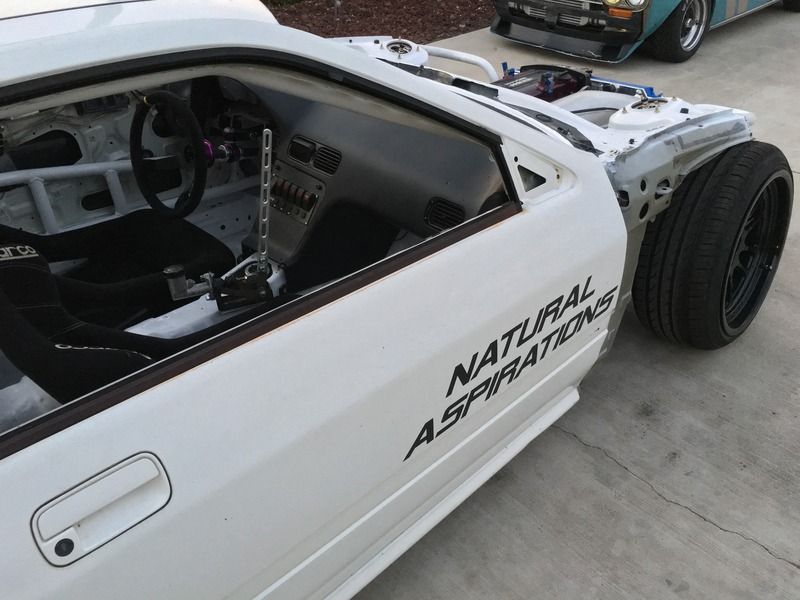
I suppose since this is official "day one" of me actually making an attempt to do this swap I should probably start documenting my progress.

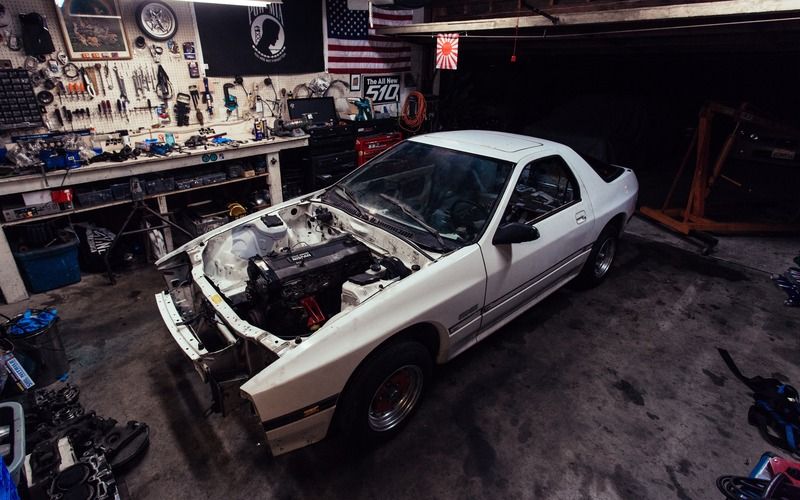
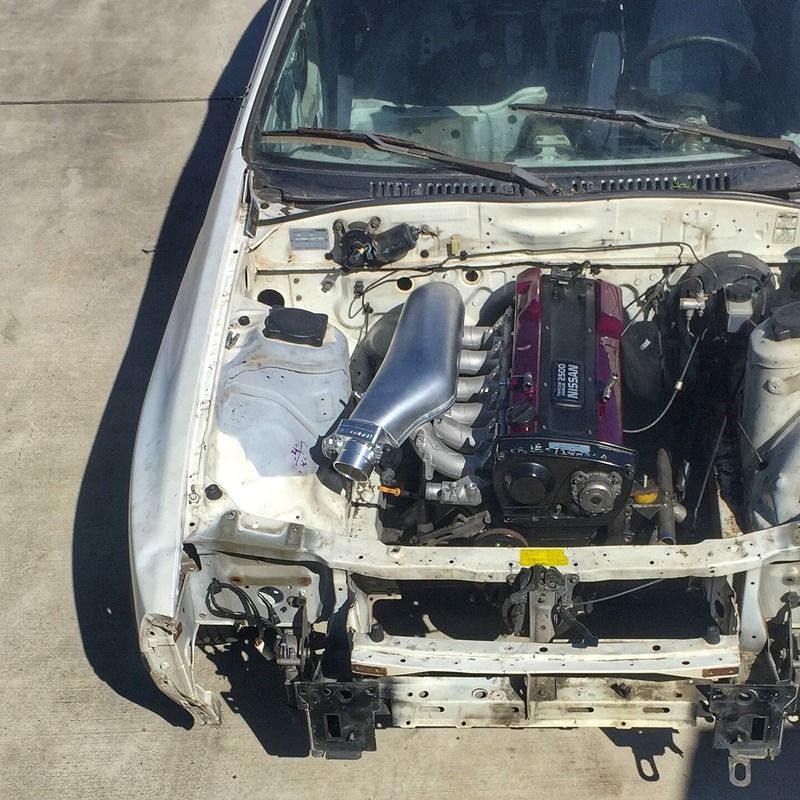
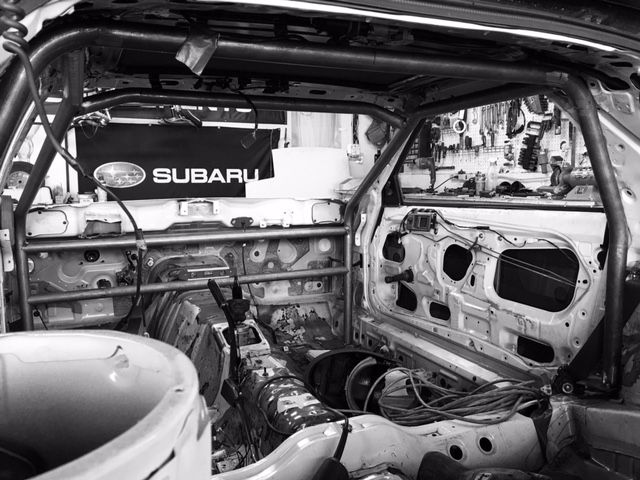
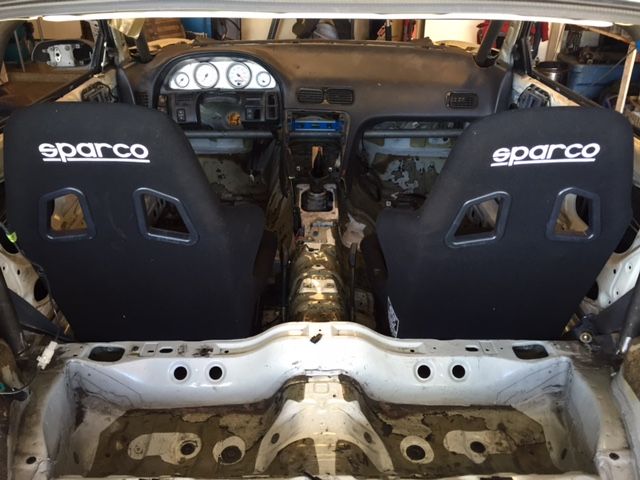
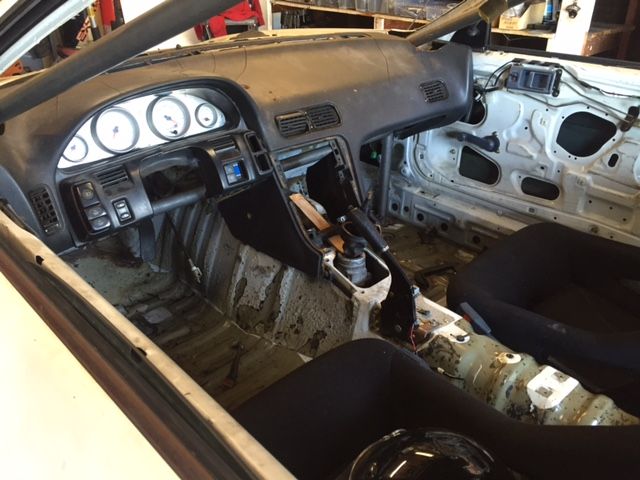
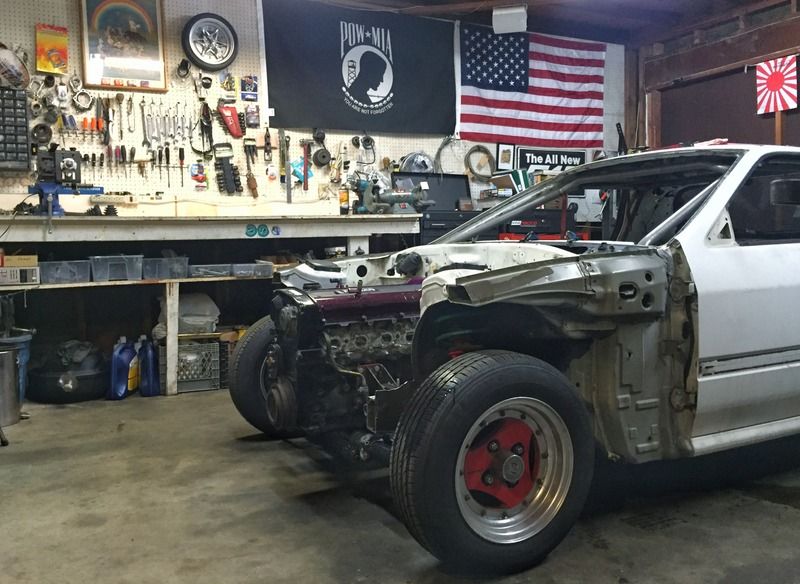
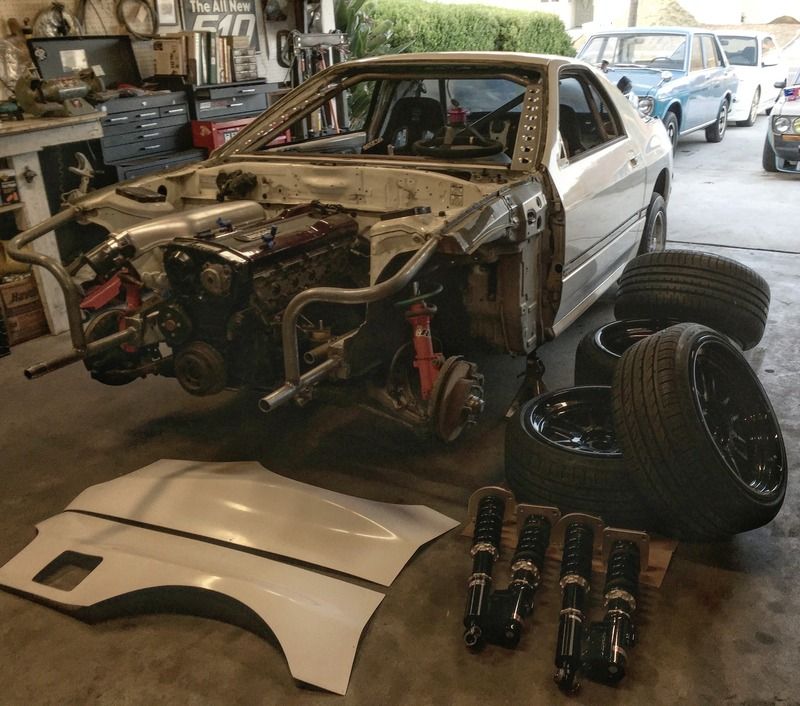
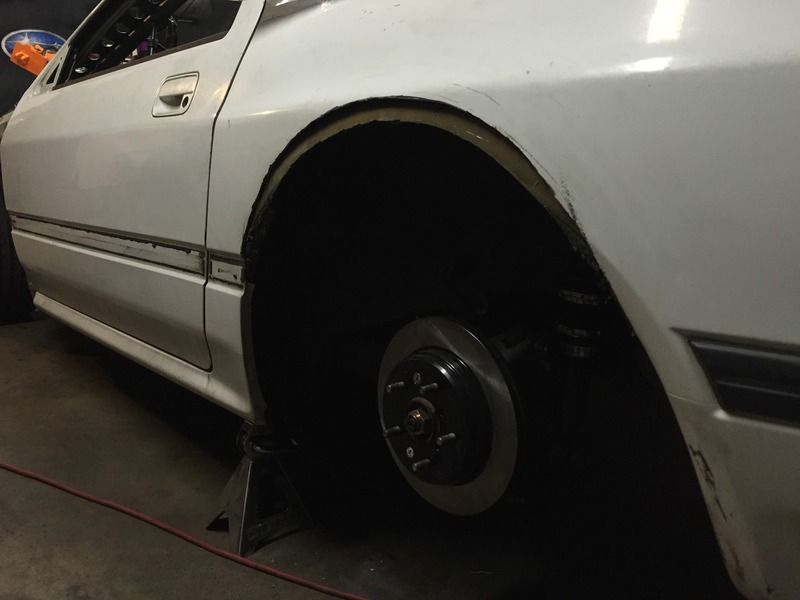
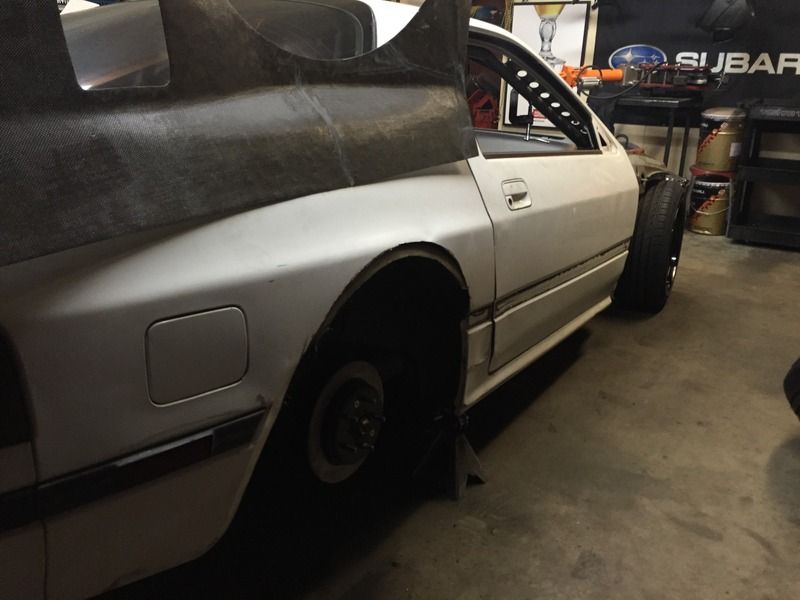
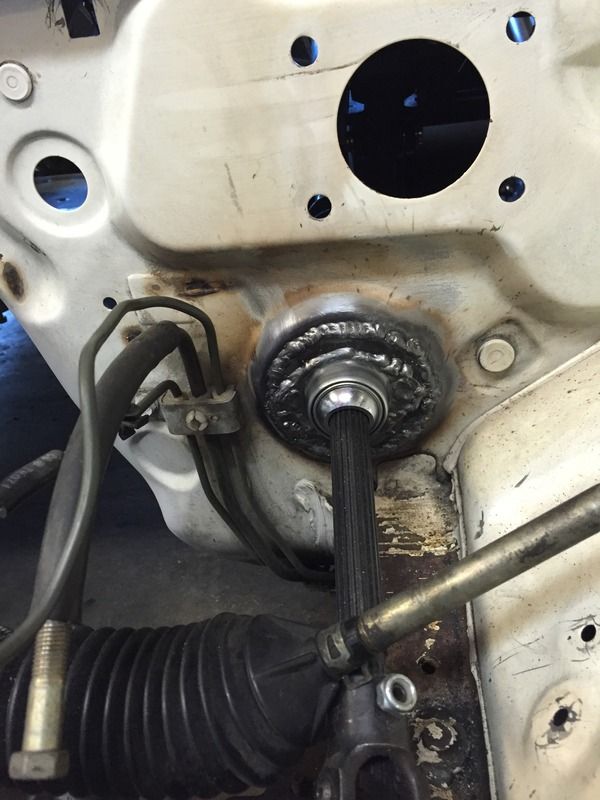
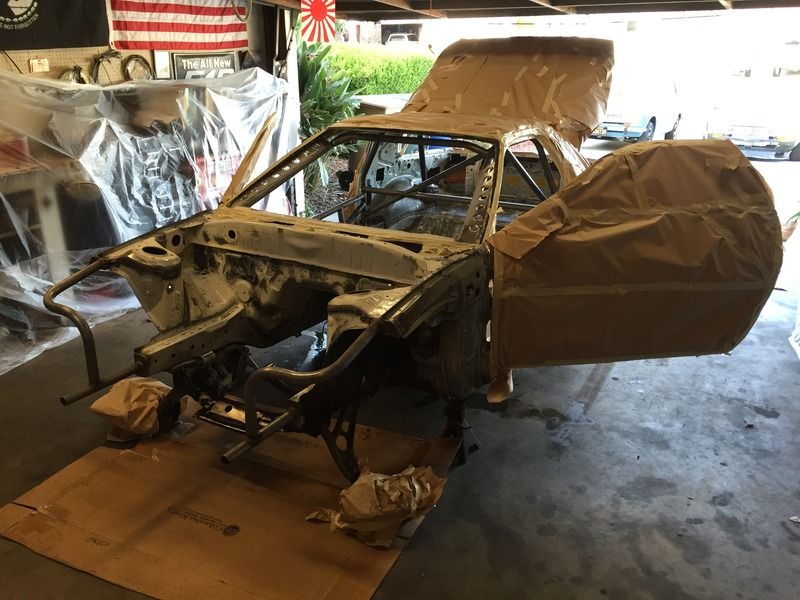
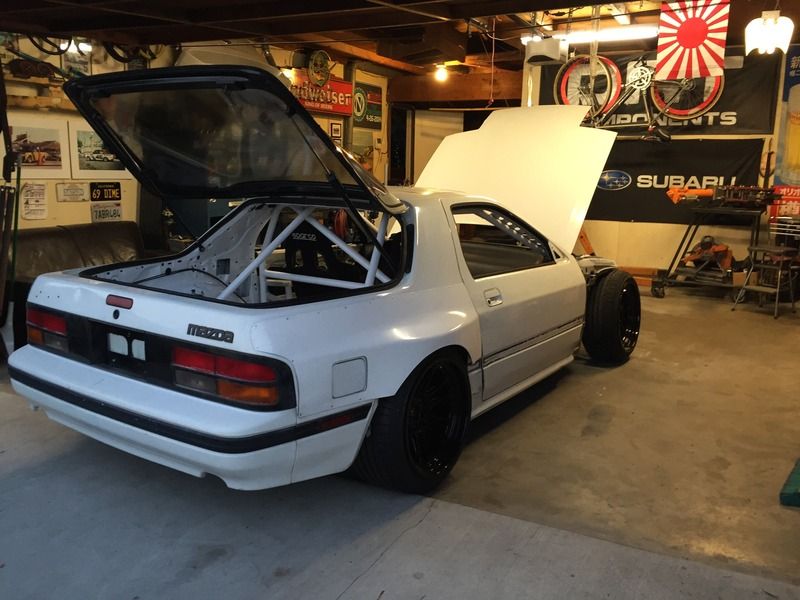
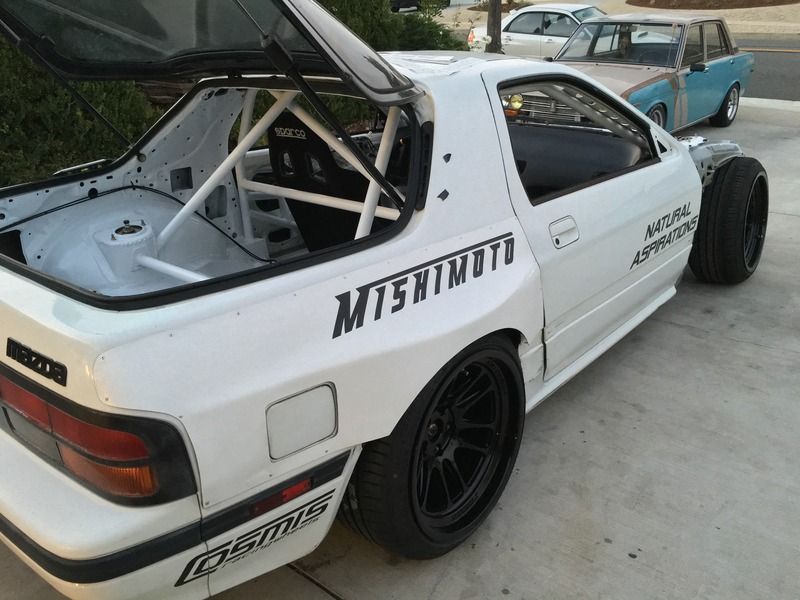
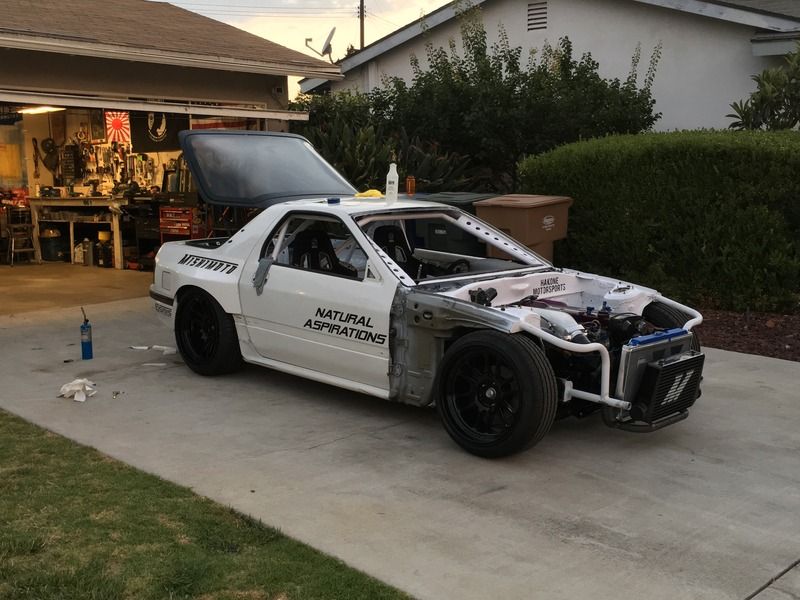
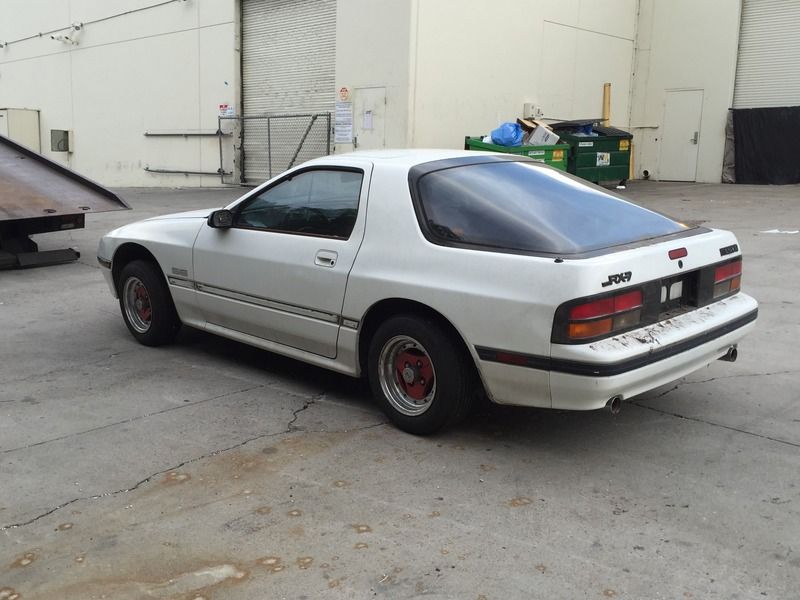
I had recently come to a stopping point with my '69 510 that I had been working on for the last year and apparently the word had gotten out that I was bored and needed a new project. I received a random text that there was an FC chassis a friend of a friend was trying to get rid of and was free for the taking. Myself being a Subaru and Datsun guy (weird mix I know) I was skeptical about the idea of a Mazda yet very excited about the idea of another obscure project. I decided to go take a look at it and upon arrival I realized that it was overall pretty clean. Additionally, the interior and engine were removed to include all four rotten tires, which wasn't really an issue. We bomb back over to my house and grab my spares and swap out the wheels. Shortly after, a phone call was made to the local towing company and the RX-7 was picked up and on its way to its new home.

Image

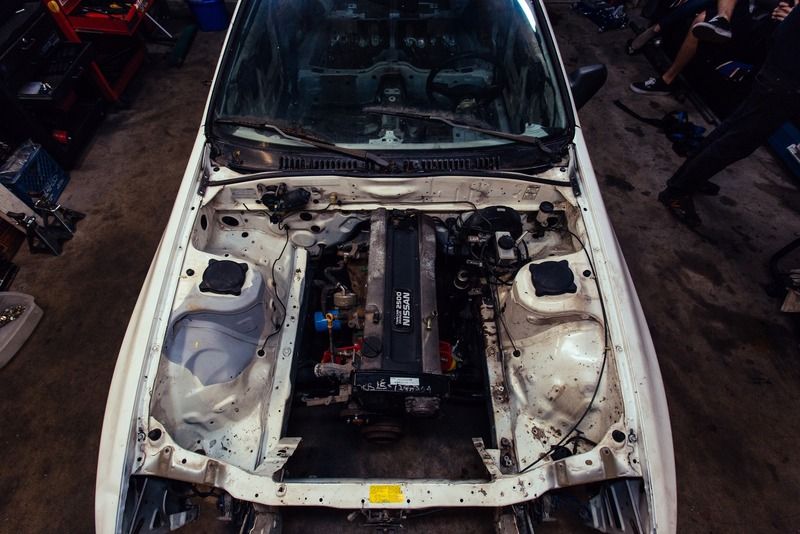
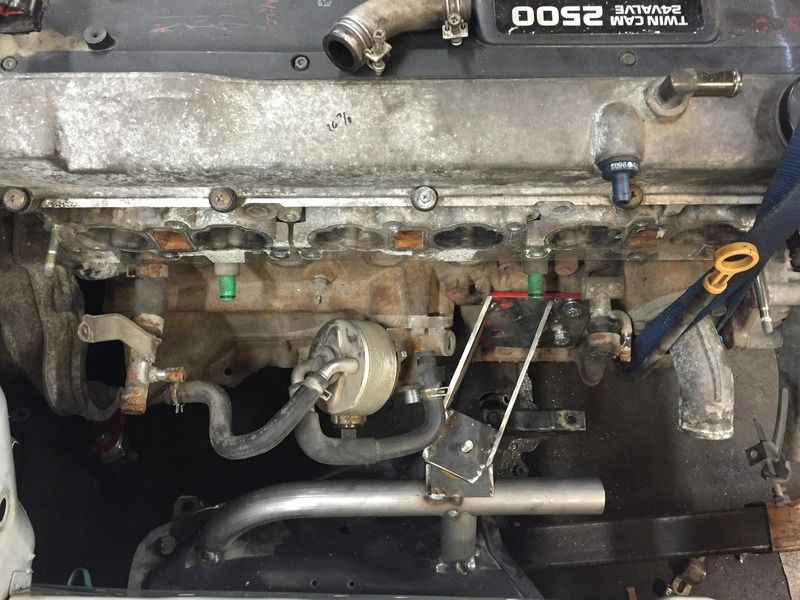
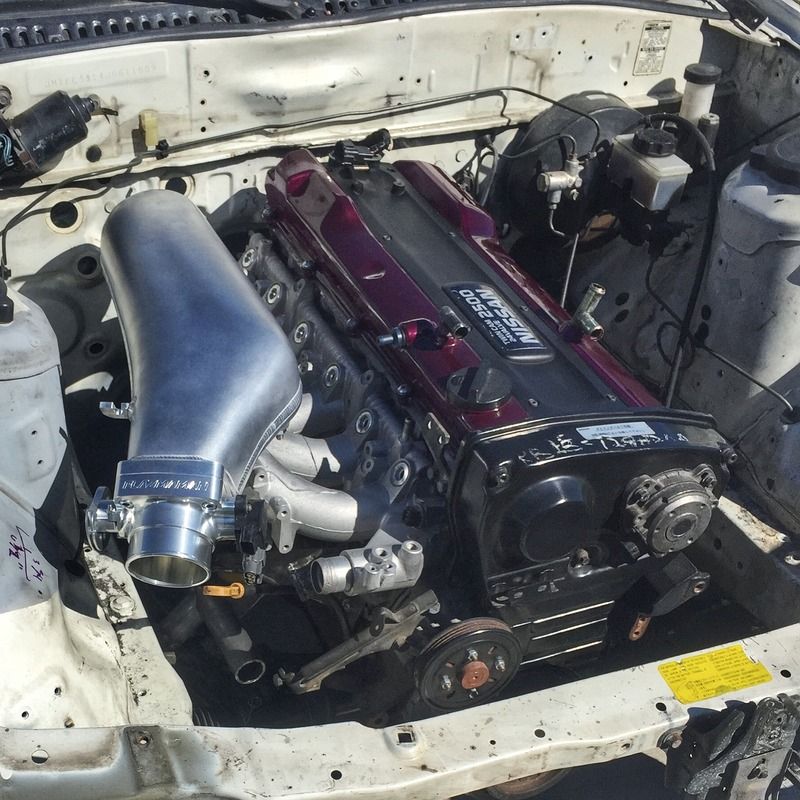
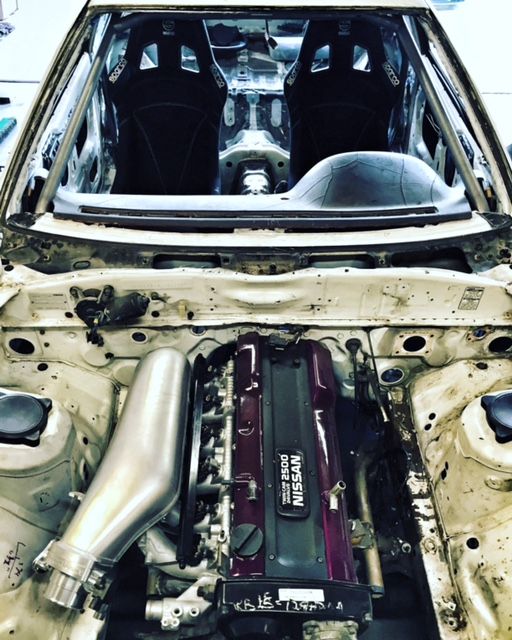
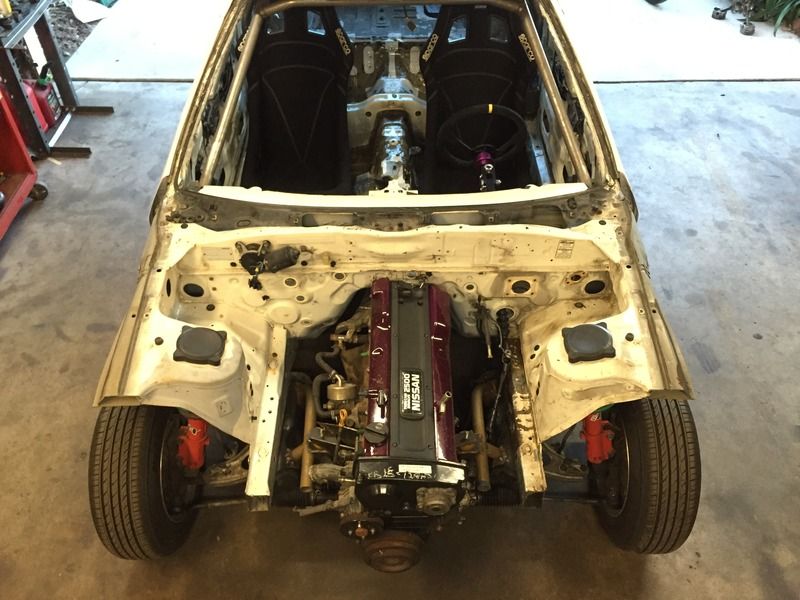
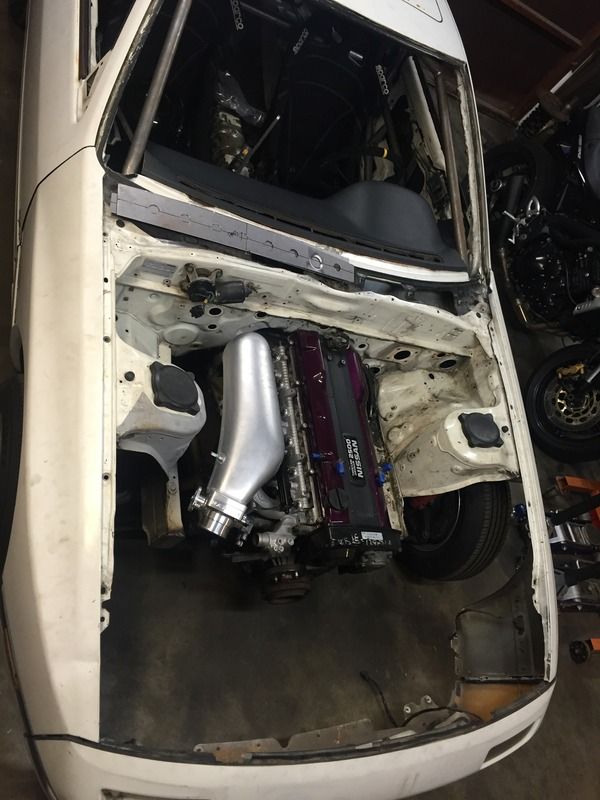
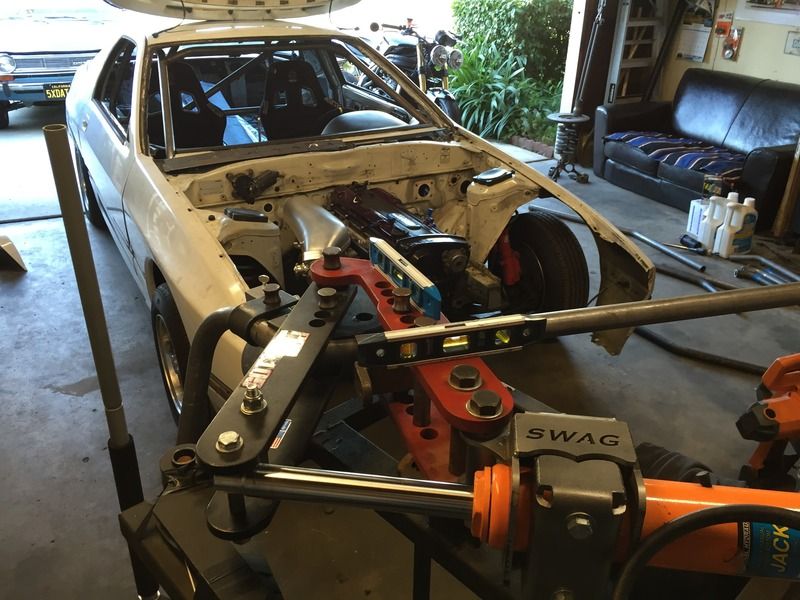
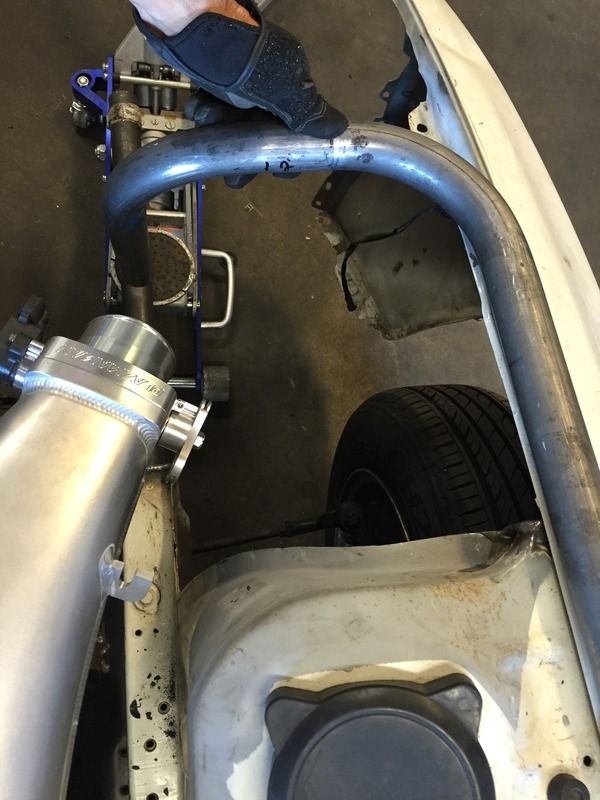
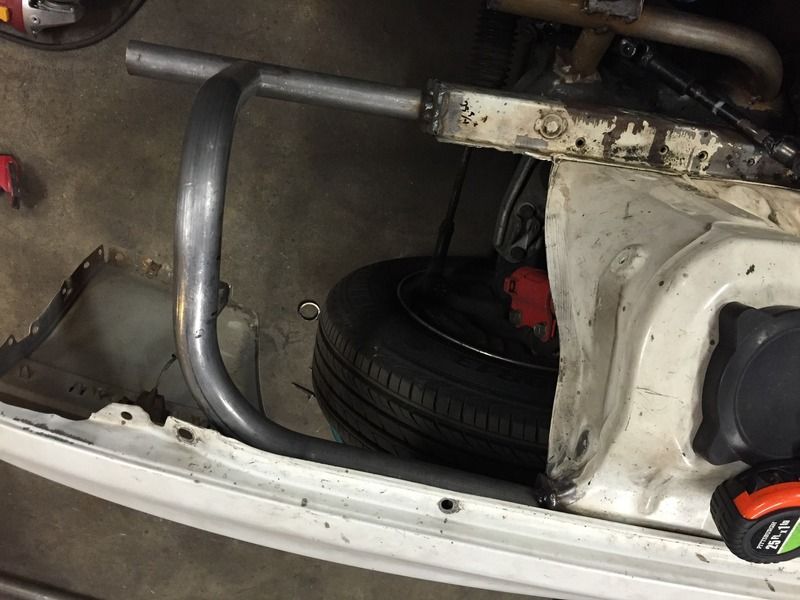
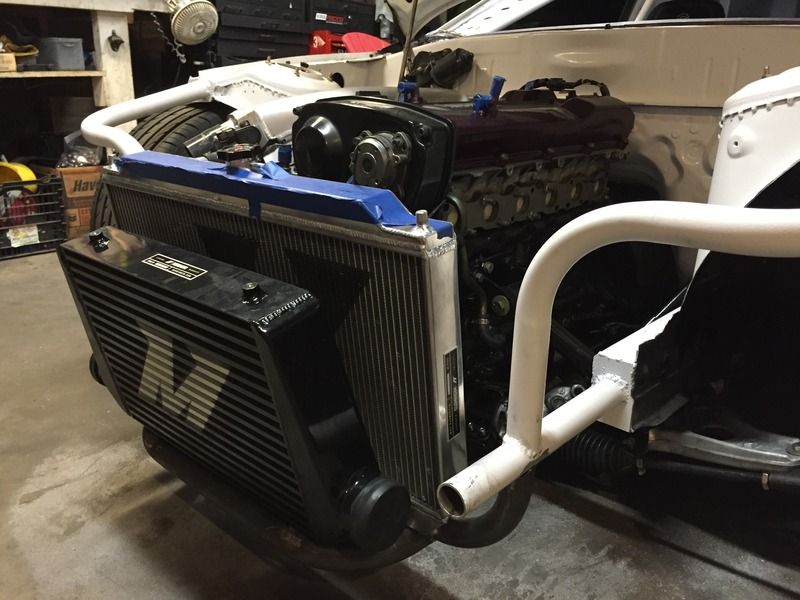
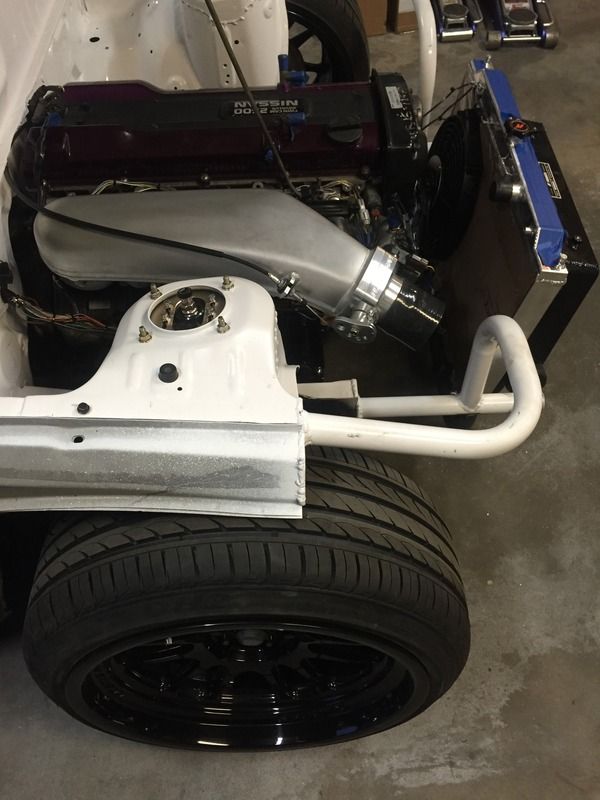
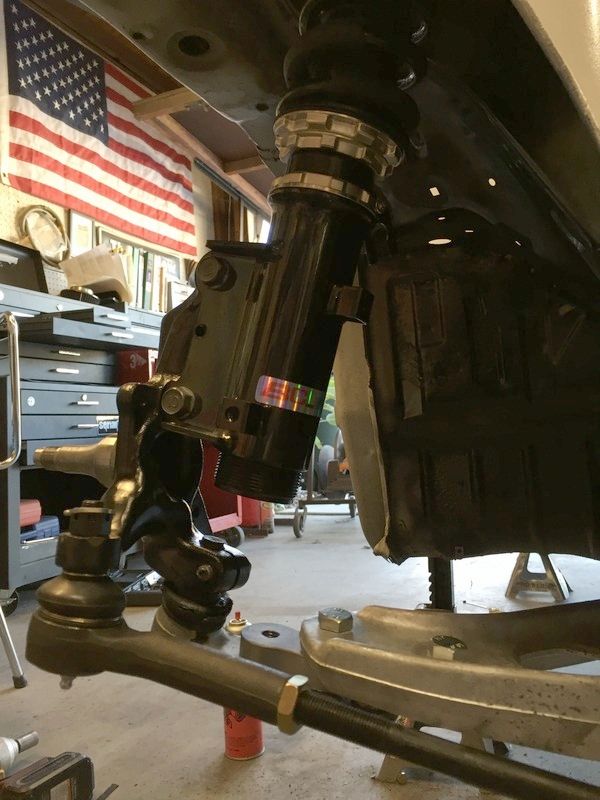
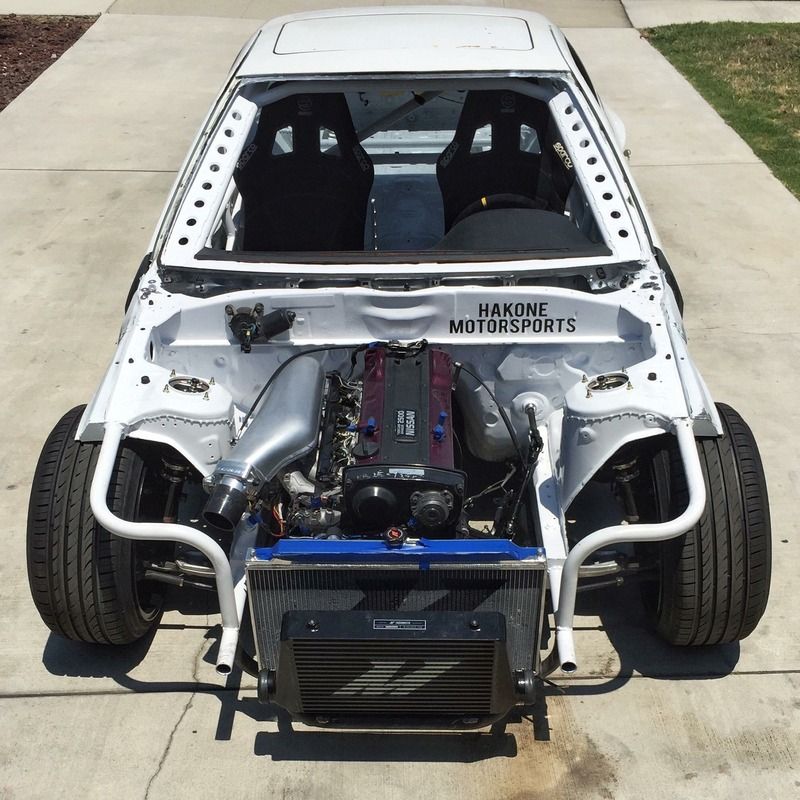
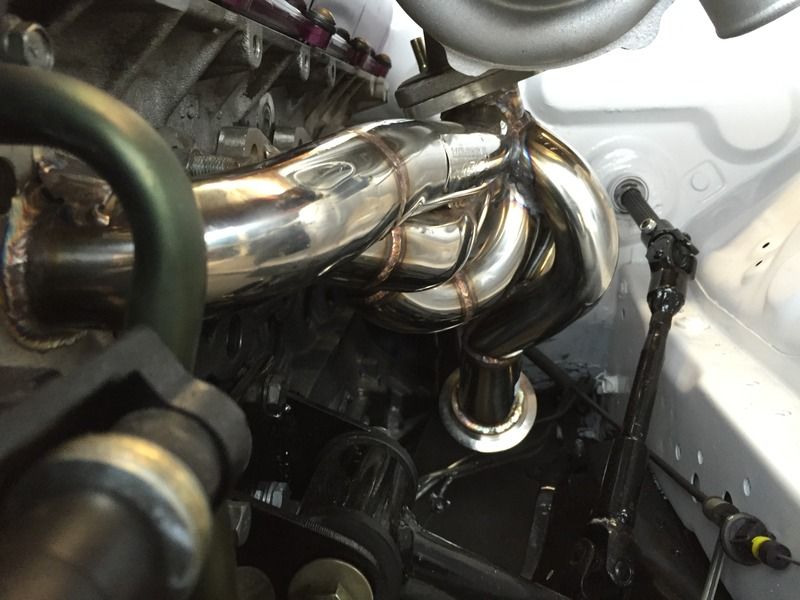
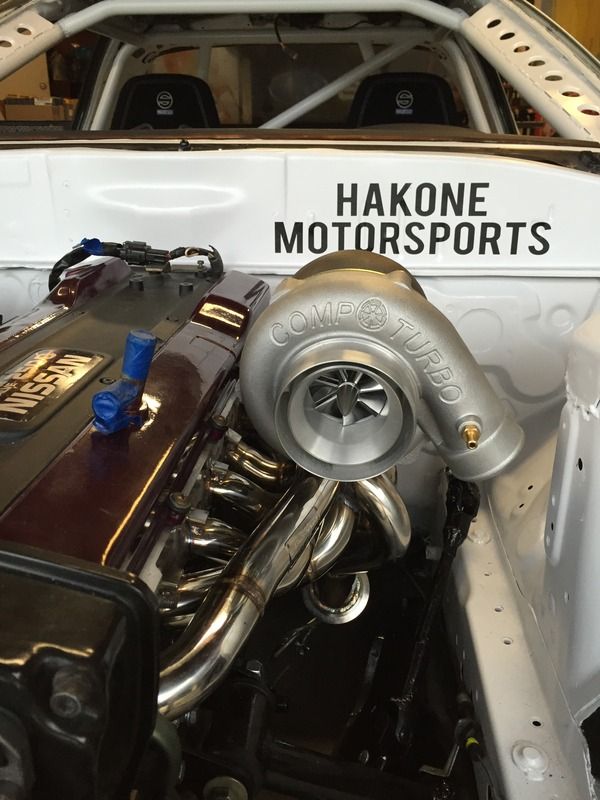
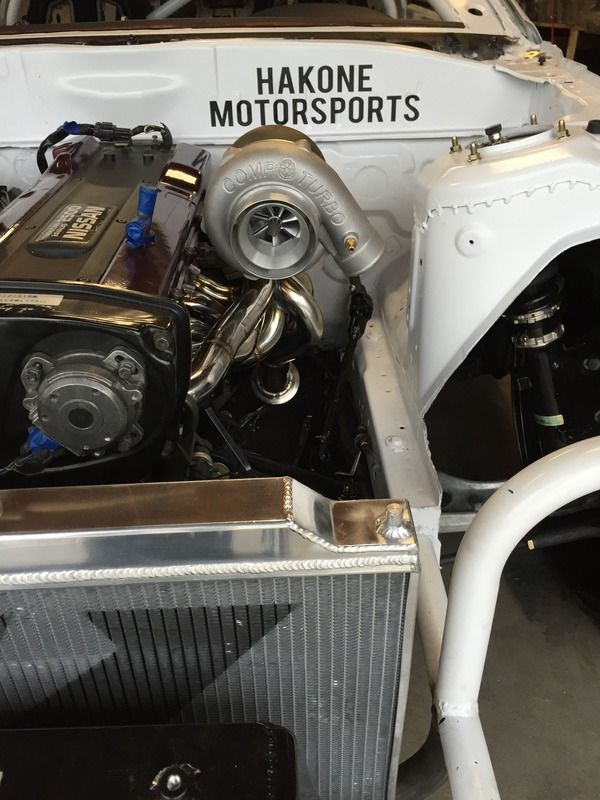
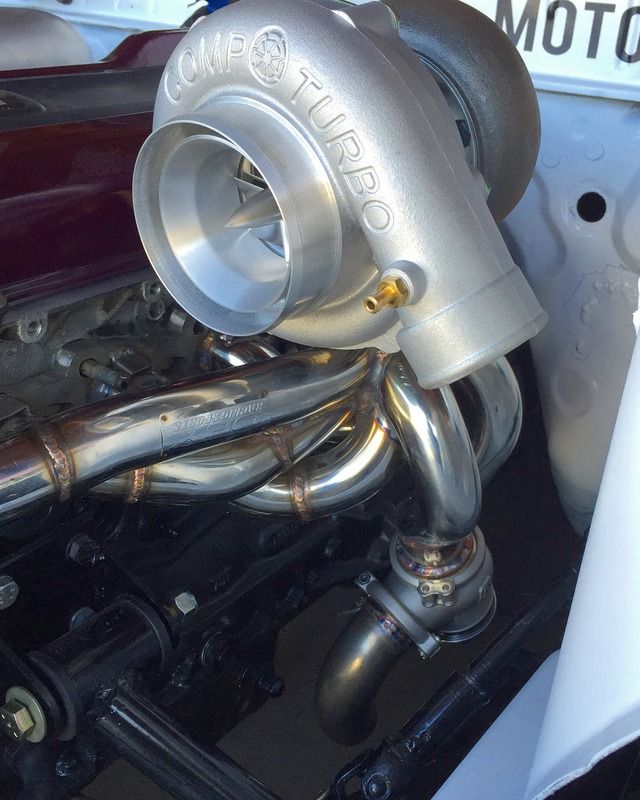
A couple days went by and I was contemplating on what engine to put in this beauty. I tossed around the idea of a LS, which bored me and I mildly entertained the JZ craze, but again didn't excite me by the unavailability of a decent transmission and commonality of the engines these days. I then decided that it needed something a bit more interesting and felt the desire to dive into some uncharted territory. I knew of an RB25DET swap in a S30 that was potentially for sale, so I called the friend and made an offer on the swap. To my surprise, the offer was accepted and another phone call I had a truck lined up to seal the deal. After I got the engine home and got it set up appropriately on a stand, I stripped all the stuff I assumed I wouldn't be needing and made an overall assessment of the purchase.

Image


User avatar
Carl H
Posts: 6018
Joined: Mon Aug 04, 2003 4:09 am
Car: 1995 240SX SE RB30DET

Post

neat, a reliable rx7 lol.
will be interesting to see how you get the motor in.

jaredperry
Posts: 50
Joined: Sun Mar 09, 2014 8:43 pm
Car: '69 510
Location: Newbury Park, CA

Post

I was able to fit the engine in after work on Friday. I was able to use the Engine Hoist and a Transmission Jack to wiggle and shimmy the engine and transmission into the appropriate location. Surprisingly, the engine fit a lot better than I anticipated. I carefully rested the engine on the powerstering rack and crossmember just to get an idea of what I needed to move around. The mounts that came with the swap were installed to get an idea of what I was working with.

Image

Image

The following day, with the help of my good friend Clint, the car was raised up and measurements were taken to find the center of the engine and then held in place. A couple sections of DOM Tubing was bent in 90* towards the end and a couple other pieces notched. His Shopping Cart Tube Bender and Notcher suit the job very well.

Image

3/16” Mild Steel was then cut and bent in various shapes to make the engine mount pedestals. The provided Engine mounts already had the bolt pattern, so of course those were also utilized. I didn't have a plasma cutter, so I had to revert to the basics and use a DA Grinder to cut the plate steel and a Jig saw, yes a Jig saw for the engine mount to crossmember sections. Keep in mid that this is all just tacked in and there is quite a bit of cleaning up to do to include the welding.

Image

Image

In the end, this is the addition to the crossmember that was created and I think it will do just fine. I was able to install the steering rack prior to removing the engine all of the way. I will need to lower the rack about 1” and it looks like the steering rod assembly should have no problem clearing the mounting assembly that was made.

Image

Image

Image

RRRRB
Posts: 758
Joined: Wed Jun 01, 2011 9:31 am
Car: 98 RB powered S14
Location: WA

Post

Cool swap always nice to see something different.. Keep us posted

jaredperry
Posts: 50
Joined: Sun Mar 09, 2014 8:43 pm
Car: '69 510
Location: Newbury Park, CA

Post

So far the Engine has been fitted with the correct aesthetically appearing 13* angle. An added benefit is that the Transmission sits properly upright in the tunnel with the engine slanted as normal.

Also, a rendering of the RB-7 has been mocked up. Ideally, this is the direction that I intend to take the vehicle.

Image

I have been working with a couple people so far in terms of getting support with the build. I have received an intake plenum, throttle body and fuel rail from Plazmaman. The quality of work with these parts is literally insane. I did a little test fitting with the manifold on the engine and it will compliment the engine bay very nicely.

Image

Image

Image

Image

Image

Image

jaredperry
Posts: 50
Joined: Sun Mar 09, 2014 8:43 pm
Car: '69 510
Location: Newbury Park, CA

Post

I did a little test fitting to see how much clearance I have when the engine is sitting in the RB-7 with the Plazmaman Manifold. It looks like I still will be able to tub the wheel wells.

Image

Image

jaredperry
Posts: 50
Joined: Sun Mar 09, 2014 8:43 pm
Car: '69 510
Location: Newbury Park, CA

Post

I would like to give a big shout out to Chris over at Natural Aspirations. He has been a crazy amount of help with this build so far. In the past he has offered guidance for the CA18DET powered 510 I built in addition to tuning the vehicle with Nistune. So far, Chris has facilitated the purchase of a 6262 Comp Turbo that is to come with a Billet wheel, Billet center section and triple ceramic ball bearings. Additionally, Five o 1200 cc injectors will fuel the fire. The supporting Waste Gate and BOV are by Turbonetics. Here is a pic of the Wastegate and BOV. Photos of the injectors and Turbo to come…

Image

User avatar
HxC_Nismo
Posts: 1036
Joined: Sat Sep 23, 2006 10:26 am
Car: 98' Nissan 240sx SE R33 RB26DET, 07' Nissan Titan SE, 05' Toyota Corolla
Location: Missouri
Contact:

Post

looking pretty slick man, keep up the good work :)

RRRRB
Posts: 758
Joined: Wed Jun 01, 2011 9:31 am
Car: 98 RB powered S14
Location: WA

Post

lookin good, how much power you going for?

jaredperry
Posts: 50
Joined: Sun Mar 09, 2014 8:43 pm
Car: '69 510
Location: Newbury Park, CA

Post

RRRRB wrote:lookin good, how much power you going for?
I am shooting for a comfortable 500+ hp from the get go. The turbo I am looking at is a Comp 6262, but more to follow on that...

jaredperry
Posts: 50
Joined: Sun Mar 09, 2014 8:43 pm
Car: '69 510
Location: Newbury Park, CA

Post

I was messing around with bend tech software this weekend and was able to come up with a roll cage design that should do the trick to facilitate amateur hour on the slide track. The software is pretty neat; the ability to print off a master materials list, cut and angle steps to include templates are all available in .pdf format after the export is complete. The dimensions are close, but not final. I will do another verification prior to actually cutting and bending. If all goes well I should be able to start in the next week or so. The tubing will be .090 1.5” 1025 Mild Steel.

Image

jaredperry
Posts: 50
Joined: Sun Mar 09, 2014 8:43 pm
Car: '69 510
Location: Newbury Park, CA

Post

Below are pictures of the Comp Turbo, Injectors, BOV and EWG that will be used in this build.

Image

Image

Image

Image

Image

RRRRB
Posts: 758
Joined: Wed Jun 01, 2011 9:31 am
Car: 98 RB powered S14
Location: WA

Post

what made you go with a Comp turbo?

jaredperry
Posts: 50
Joined: Sun Mar 09, 2014 8:43 pm
Car: '69 510
Location: Newbury Park, CA

Post

RRRRB wrote:what made you go with a Comp turbo?
The testing prior to release of the product, the data sheets provided, the built to order based on the engine requirements business model, quality in manufacturing and the customer service I experienced.

RRRRB
Posts: 758
Joined: Wed Jun 01, 2011 9:31 am
Car: 98 RB powered S14
Location: WA

Post

right on, be interesting to see results, dont see alot of Comp turbos on smaller displacement engines.

User avatar
ANVIL
Posts: 1133
Joined: Sun Apr 08, 2007 11:36 am
Car: RB25DET S13.5
Location: Alaska

Post

Nice baller parts

jaredperry
Posts: 50
Joined: Sun Mar 09, 2014 8:43 pm
Car: '69 510
Location: Newbury Park, CA

Post

ANVIL wrote:Nice baller parts
Thank you! :dblthumb:

jaredperry
Posts: 50
Joined: Sun Mar 09, 2014 8:43 pm
Car: '69 510
Location: Newbury Park, CA

Post

I recently started working on the roll cage over the weekend. I used .095 DOM to fill the cabin to include mocking up the sparco seats an S13 dash. The lower bar naturally wont be there, but it is keeping the upright portion vertical while the floor plates and boxes are being installed. “A” and “B” pillar dimple die gussets, door bars and rear bracing is coming up next and then it’s onto the tubed front end.

Image

Image

Image

Image

User avatar
ANVIL
Posts: 1133
Joined: Sun Apr 08, 2007 11:36 am
Car: RB25DET S13.5
Location: Alaska

Post

Is that a broadfield cluster

jaredperry
Posts: 50
Joined: Sun Mar 09, 2014 8:43 pm
Car: '69 510
Location: Newbury Park, CA

Post

ANVIL wrote:Is that a broadfield cluster
nah, breh

jaredperry
Posts: 50
Joined: Sun Mar 09, 2014 8:43 pm
Car: '69 510
Location: Newbury Park, CA

Post

I have been away for a bit due to work, but I had a couple days over the last couple weekends to catch back up.

I was able to get 90% of the roll cage finished up. It is all tacked in place except for the halo to front drop down bars, which are fully welded. The four corners are boxed in with 1/8” plate steel. It took a couple bars to get the symmetrical offset from A pillar to rear halo while keeping close to the roof line. I still need to install the upper door bars with vertical mounts, gussets along the A pillar, door bars and rear halo.

Image

Image

Image

I also thought it would be a good idea to cut off the front endo for a tube front end. I was pretty surprised as to how much the removed sections weighed.

Image

Image

The floor pans were cleaned up in the cabin and in addition to mounting a wilwood reverse swing pedal mount. A speedway steering column was also mounted into the cabin via the roll cage horizontal bash bar.

Image

I then was able to make some tabs along the lower windshield area and installed some nutserts to properly mount the dash. I had to trim a little out for the drop down bars on the cage. Overall I feel the dash fits pretty good to include the steering column and wheel placement.

Image

jaredperry
Posts: 50
Joined: Sun Mar 09, 2014 8:43 pm
Car: '69 510
Location: Newbury Park, CA

Post

I stuck the front fenders back on along with the stock bumper to see what kind of clearance I have. Look like there is enough for a intercooler and radiator.

Image

I had some scrap DOM tubing laying around, so I used an existing 90*, measured and added a 15* offset to account for the front fender line that comes forward off of the shock tower.

Image

Looks like enough clearance for the intercooler piping.

Image

Passenger side

Image

I need to run the stock headlights, so I extended it far enough so that I can still use the classy pop up lights.

Image

The wheels also arrived this weekend. Sponsorship support by Cosmis provided wheels in 18x11 +8 and 18x9.5 +10

Image

Fitting four wheels with tires in a Datsun 510 is pretty interesting.

Image

Mounted and ready for installation

Image

Goals this weekend included over fenders, brakes, axles, wheels.

BC Coilovers showed their support by building a full custom set of custom valved coilovers for the RB-7

Image

Cutting out the rear with a angle grinder, which was followed by a lot of hammering the under metal up, welding and seam sealing before the over fenders were installed.

Image

Back to the Future

Image

Here is ol @vaderwerks on IG exercising his talent with black caulk

Image

Pre riveting of the over fenders

Image

User avatar
lexcrob
Posts: 559
Joined: Mon Sep 22, 2008 7:38 pm
Car: I get a different ride faster than I could update this.
Location: Clarksville, TN

Post

Dear god what a build! I wish my build threads were this good. Im still wiping up drool all over my laptop.

I gotta see this jig saw that did all that.
Keep it coming this is gonna be an ape!

jaredperry
Posts: 50
Joined: Sun Mar 09, 2014 8:43 pm
Car: '69 510
Location: Newbury Park, CA

Post

I hung the comp 6262 turbo yesterday. I might actually stick it behind the strut tower for a more equal length.

Image

Image

The turbo is as big as Devins head.

Image

jaredperry
Posts: 50
Joined: Sun Mar 09, 2014 8:43 pm
Car: '69 510
Location: Newbury Park, CA

Post

Today I worked on the engine mounts and converted them to an enclosed type. A new transmission mount was made and a spherical steering shaft mount was welded to the firewall. Its nice to have full steering now. Easy on the welding judgment… Ha Ha I am workin with what I have.

Image

I also started filing in the cross member and getting the steering rack mounted properly. The intent is to seal up the firewall and finish welding in the cage tomorrow.

Image

Image

jaredperry
Posts: 50
Joined: Sun Mar 09, 2014 8:43 pm
Car: '69 510
Location: Newbury Park, CA

Post

I decided to paint the car this weekend so I can get the windshield on and start the wiring and plumbing portion. I still have a ton of stuff to do like mount the radiator and intercooler along with figuring out what to do about the manifold situation.

Here are a couple photos of the prep and paint portion. Five cans of primer and three quarts of the finest of rustolium gloss white were applied with a Harbor Freight HLPV spray gun.

In the end, its at 20' or 20 mph the "race cars" all look good, right?

Image

Image

Image

Image

Image

Image

Image

Image

jaredperry
Posts: 50
Joined: Sun Mar 09, 2014 8:43 pm
Car: '69 510
Location: Newbury Park, CA

Post

This weekend I mocked up the Radiator and the Intercooler. Both parts were provided by Mishimoto, which I am blessed to have been provided a sponsorship. The radiator is a dual row and the Intercooler apparently flows 1250 CFM, so we will see how they do in the near future.


Image


Image

Image

Image

Image

Image

Image


Dash, handbrake and tentative switch panel was installed along with brakes and rotors.

Image

Image


I also installed BC Racings custom built coilovers on the RB-7. I am really stoked on the sponsorship deal they were able to work out.

Image

A villans angle kit and coils make the car sit really nice now.

Image

jaredperry
Posts: 50
Joined: Sun Mar 09, 2014 8:43 pm
Car: '69 510
Location: Newbury Park, CA

Post

A little update to what has been done… My schedule has been insane lately, but I have been making attempts to keep hammering away at this car to completion. I have wiring, plumbing and some minor aesthetics until the car is able to fire… At least I keep telling myself that.

Ok, so my good friend Gino, owner of vaderwerks vinyl co., stopped by with some neat stickers to put on the car to aid in brand representation for the sweet parts I have been getting for the build.

Image

Image

Image

Image

Image

Also, I found that the OBX manifold fits extremely well. The way the plumbing on the manifold couldn’t have been any better, which was desired due to the engine mounts on this engine. Also, in addition to the amazing price on these manifolds, they have a lifetime warranty. I think that’s pretty rad! One thing I will have to do is drill all the holes maybe 1/16” bigger and weld on a new EWG flange. Overall, fitment is pretty spot on!

Image

Image

Image

jaredperry
Posts: 50
Joined: Sun Mar 09, 2014 8:43 pm
Car: '69 510
Location: Newbury Park, CA

Post

Over the weekend I dove into the project of mounting the racepak and haltech pro platinum ECU I got through Chris at Natural Aspirations. I also started figuring out what to do with some of this wiring, but I will post pictures later about that. I used the mounting plate that was included. I used a couple pieces of flat stock and riveted it to the bottom of the plate and added the ¼” ABS contour cut section to the front using a 90 degree bent piece of flat stock. More photos of the mounting assembly if anyone is interested… Anyways, here is the end result.

Image

jaredperry
Posts: 50
Joined: Sun Mar 09, 2014 8:43 pm
Car: '69 510
Location: Newbury Park, CA

Post

Today I was fortunate enough to be able to break away from my normal schedule and work on the car a bit today. I wanted to get the manifold to mount up a little better and retrofit the correct external waste gate flange and further get a dump tube fabricated. Sean over at Empire Fabrication really hooked me up with getting this whole external waste gate setup sorted out. He cut the existing oversized flange and fabricated a 50mm dump tube for the waste gate. The welds, height and placement couldn’t have been done any better.

Image

Image

Image

Image


Return to “RB20DET / RB25DET / RB26DETT Forum”