
Pictured: a totally boring car.
I weighed a color change and decided to try a vinyl wrap. It’s removable, so I wouldn’t hurt the value of the car if I wanted to sell it. I didn’t have the facility, equipment, or time to paint anyway. Also, I wanted to learn a new skill.
I hunted around for companies to buy from and eventually ended up with Fellers. I didn’t like how they require an account before you can shop, but they had shipping options I liked. Shipping weight was around 30 pounds. Vinyl is heavier than you think. However, some of that was supplies and packaging. I estimate that I added no more than ten pounds of vinyl to the car.
A roll of vinyl is generally five feet wide. It’s basically a big sticker. You peel off the backing and stick it to the car. I bought a 20 yard length of 3M 1080 Green Envy, and 1 yard of black. I also got two felt edge squeegees, one teflon squeegee, four magnets, a roll of knifeless tape, a bottle of vinyl primer, and a soft glove. Total price came to just shy of $800. 3M 1080 vinyl is almost $2 per square foot, and I bought 300 square feet of green and 15 of black.
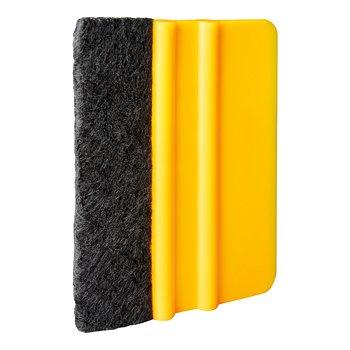
Felt edge squeegee
In hindsight, I only needed one squeegee, one with a felt edge. If I needed a sharper edge, I could just use the back of it. I found myself wishing I’d bought a second glove, though. Smoothing out the vinyl with my fingers was the best option probably 60% of the time.
The magnets helped, but remember the front clip of an R32 GT-R is aluminum. Masking tape might have also worked to hold the vinyl in place.
The vinyl primer helps the material stick better. It’s recommended for places like concave curves, where the vinyl might come up. I used a dab here and there. Probably should have used more. It does make the vinyl difficult to remove, however.

My box of tools.
I went into the project knowing a little about the process, but never having done a wrap before. My first effort was on a bright and sunny day and I did the trunk lid. It ended up with a few bubbles and wrinkles.
I believe warmer weather is better for applying vinyl so it will stretch. The 3M 1080 I was using can apparently stretch 30%. Still, if given the choice, I would rather do vinyl indoors to keep out of the wind.
To prep for applying vinyl, I washed the area where I was working and then gave it an additional rubdown with isopropyl alcohol. It was kind of amazing how much additional dirt the alcohol can take off. For the whole car, I ended up using about 8 oz of isopropyl. And a little more ethanol
After my meager efforts on the trunk lid, I had to move on. I didn’t know how far 20 yards of vinyl would go and resolved to come back and fix it if I had any left. I took apart the rear, stripping the body kit and bumper cover. While I was at it, I painted the exhaust tip to go with the theme.

Zip-tied backup lights to keep it legal.
I did the bumpers and bodykit indoors. I bought a cheapo hair dryer. Heat is your friend when it comes to vinyl. Use it often.

An actual heat gun might have been better, so I could get the heat while regulating the speed of the blower. The hair dryer got hot, but blew so much that it tended to make the vinyl flutter a lot.
Next up, I had to tackle the quarters. Stretching a single piece of vinyl from taillight to A-pillar is a challenge. A lot of careful measuring and even more careful cutting went into it.

This is where it started to become apparent that one or even two helpers would make things so much easier.
I did get my wife to help me peel the backing and lay the roof and hood pieces to keep them as flat as possible. I then smoothed it out. The roof was probably the easiest panel, despite being hard to reach.
For the seams between quarters and roof, I used knifeless tape to create a butt joint. You lay knifeless tape under the vinyl and it has a kevlar filament that you pull up through the vinyl to cut it. I probably should have used it more, to slice along weatherstripping and such.
That was it for one weekend. Doing the quarters and roof took around six hours.
When I had time over the course of the next week, I managed to do the hood, fenders, and reinstall the bodykit and rear bumper.
The front bumper is aftermarket. I knew just looking at it that it was going to be a pain, and it sure didn’t disappoint. Four hours’ work all by itself.

Don’t look too close or the flaws start to pop out.
In retrospect, I maybe could have done the bumpers while still on the car. They would have been securely held in place a few inches off the ground, instead of wrestling with them on the living room floor. However, for both of them I really needed the hairdryer to help stretch the vinyl, so I’d have to park somewhere with a power outlet.

Not pictured: zip-tied license plate to keep it legal.

The mirrors had complicated curves, but were easier than I expected.

Putting the final piece on. Notice how I’ve peeled the backing off the corners and stuck the vinyl to the glass to help hold it in place.
I decided to do some black accents.

Some eye shadow for that pretty face.
And that’s it. The black stripes on the roof help cover the seams in the green. The others are just for decoration.

Due to stretching, the vinyl has patches of slightly different colors, which you might be able to see in the pictures.. This might have been less of an issue with a lighter color or a nonmetallic color. A couple of people who have seen it say it looks like fish scales and thought it was intentional.
I decided not to reinstall the spoiler. The whole point of this was to make the car look unique, after all.
I estimate I had about thirty hours of labor, spread over the course of two weekends and the evenings of the weekdays in between. With a garage and a friend or two to help, the whole thing probably could have been done in two long weekend days.
I think I was pretty frugal with the vinyl. For example, I got the vinyl for both fenders from scraps of one quarter piece. I ended up with a few yards of vinyl left over, plus lots of scraps. Maybe I’ll wrap some interior trim. I should also probably rewrap the trunk.
The car looks awesome from twenty feet away. As you walk up on it, you start seeing bubbles and creases in the vinyl. Maybe I only notice them because I spent 30 hours staring at them
The process of spraying paint is a lot easier than stretching vinyl, even though paint takes more prep time. The results of paint are better and more durable than vinyl. If you do it right, paint can even be cheaper than vinyl.
Still, I think a vinyl wrap worked well for me in this situation. Does anyone have questions?