Beautiful!!!
Now I want to start working on my 240 again!!
I received a letter from my bank, it told me i should have kept my KA....SR SWAP
-
shadow_s13

- Posts: 7
- Joined: Wed Aug 05, 2009 10:29 am
- Car: 1990 S13 Coupe
2008 Civic SI Sedan - Location: Ashland, KY
-
OM3GA

- Posts: 3041
- Joined: Fri Apr 14, 2006 11:41 pm
- Car: A Sexy Mobile, 1993 Nissan 240sx 180sx Hatcher
Re: I received a letter from my bank, it told me i should ha
Thank you! Yeah working on them is a lot of fun as long as you take your time and do it right:)shadow_s13 wrote:Beautiful!!!
Now I want to start working on my 240 again!!
-
mastakilla08

- Posts: 130
- Joined: Wed Sep 16, 2009 9:00 am
- Car: 1992 hatch, 1989 piggy coupe, 1991 coupe silv.
Re: I received a letter from my bank, it told me i should ha
you wasted all that royal purp.??? lol Awsome build man i like your whole setup clean and done right!!
-
OM3GA
- Posts: 3041
- Joined: Fri Apr 14, 2006 11:41 pm
- Car: A Sexy Mobile, 1993 Nissan 240sx 180sx Hatcher
Re: I received a letter from my bank, it told me i should ha
Lol i simply used the royal purp to flush out the engine. Thanks for the compliments 
Time for an update soon!
Time for an update soon!
-
OM3GA
- Posts: 3041
- Joined: Fri Apr 14, 2006 11:41 pm
- Car: A Sexy Mobile, 1993 Nissan 240sx 180sx Hatcher
Re: I received a letter from my bank, it told me i should ha
Alright well here is an update. I had done a lot of research/interrogation about a battery setup and decided to go with a Braille B14115 battery.
I also went with their Universal Aluminum mount kit 2318.
I ordered it and about a week later i received everything!
Here is the mount in its packaging

And here it is assembled

Here is the battery in the assembled mount

I then measured and drilled the holes (Ignore the rusty holes and tears, that will be repaired :P)

Here is the bottom plate mounted

Here it is with the battery mounted

Anyways time for sleep and then you know what tomorrow is!

I also went with their Universal Aluminum mount kit 2318.
I ordered it and about a week later i received everything!
Here is the mount in its packaging
And here it is assembled
Here is the battery in the assembled mount
I then measured and drilled the holes (Ignore the rusty holes and tears, that will be repaired :P)
Here is the bottom plate mounted
Here it is with the battery mounted
Anyways time for sleep and then you know what tomorrow is!
-
knifedag007
- Posts: 2
- Joined: Mon May 16, 2011 3:29 pm
- Car: '91 240sx Hatch
Re: I received a letter from my bank, it told me i should ha
Motul is good stuff, I used to use it in my Si but no longer have a hook up for it. Still have lots of friends with 350Z's running it. It actually smells like apples < fun fact 
-
OM3GA
- Posts: 3041
- Joined: Fri Apr 14, 2006 11:41 pm
- Car: A Sexy Mobile, 1993 Nissan 240sx 180sx Hatcher
Re: I received a letter from my bank, it told me i should ha
Awesome! I am glad to hear of more people using it. I have not noticed the apples lol now i am curious.  We have been using 10W 40 300V in my friends CA18DE-T for around 200-300 miles now and it has eliminated a bit of valve train noise. We are also running Gear 300 in the transmission and It seems a little less notchy, am definitely impressed with it so far; we will be changing it ever 2000-2500 miles depending on the type of driving that is done. I am also going to be running Motul Gear 300 75W 90 in the Transmission and Diff.
Stay tuned for more updates.
Stay tuned for more updates.
Re: I received a letter from my bank, it told me i should ha
Did you have to do any triming to your cobra downpipe to get it to mount onto your turbo? I just got mine and it seems the "flap" is to long/ and or crooked and wont bolt onto my turbo.
-
OM3GA
- Posts: 3041
- Joined: Fri Apr 14, 2006 11:41 pm
- Car: A Sexy Mobile, 1993 Nissan 240sx 180sx Hatcher
Re: I received a letter from my bank, it told me i should ha
Hmm that is strange. I did not have to do a thing although i have heard of that causing problems before. Let PBM know i am sure they will trim it for you or at least instruct you on exactly what to do, you should not have to do anything unless you are running the Cobra made for the T25 and are using it on a T28.
Re: I received a letter from my bank, it told me i should ha
Yea I have a t-25. Its both crooked and to long, I just measured it. If they wernt on the other side of the country I would happily let them trim it lol. Thank you for your help.
-
OM3GA
- Posts: 3041
- Joined: Fri Apr 14, 2006 11:41 pm
- Car: A Sexy Mobile, 1993 Nissan 240sx 180sx Hatcher
Re: I received a letter from my bank, it told me i should ha
No problem at all, yeah i'd either cut it completely off or trim it down a little with a dremel. Or send it back and get another one.
-
splintercell

- Posts: 1764
- Joined: Sat Mar 19, 2005 1:28 pm
- Car: 1989 Nissan 240sx HB CA18DET
1991 Nissan Silvia Q's SR20DE ITB's - Location: Virginia
- Contact:
Re: I received a letter from my bank, it told me i should ha
wow...thread always delivers 
always like to see new parts and step by step details.
always like to see new parts and step by step details.
Re: I received a letter from my bank, it told me i should ha
Keep us updated!
-
OM3GA
- Posts: 3041
- Joined: Fri Apr 14, 2006 11:41 pm
- Car: A Sexy Mobile, 1993 Nissan 240sx 180sx Hatcher
Re: I received a letter from my bank, it told me i should ha
Updates are coming soon!
-
240sxAli4Life

- Posts: 493
- Joined: Mon Sep 27, 2010 7:08 pm
- Car: 1990 S13 Hatch SOHC... SOLD :(
1993 S13 Hatch DOHC!! Super Sexy!! - Location: Florence, KY
Re: I received a letter from my bank, it told me i should ha
Cant wait for updates... but where the hell is your BOV?? I dont see one on the hotpipe or the cold pipe??? Is it just me, or is that the COOLEST part about being turbo'ed!

Re: I received a letter from my bank, it told me i should ha
Updates?! Great build thus far, I'm looking forward to seeing the ground clearance of your exhaust.
-
OM3GA
- Posts: 3041
- Joined: Fri Apr 14, 2006 11:41 pm
- Car: A Sexy Mobile, 1993 Nissan 240sx 180sx Hatcher
Re: I received a letter from my bank, it told me i should ha
Updates are coming soon! I actually had an HKS hotpipe with SSQV3 BOV and decided to sell that setup and run a Greddy Hotpipe with no BOV. Flutter is sexy and people can argue all day about whether or not it hurts the turbo.240sxAli4Life wrote:Cant wait for updates... but where the hell is your BOV?? I dont see one on the hotpipe or the cold pipe??? Is it just me, or is that the COOLEST part about being turbo'ed!
Updates are coming soon, possibly now because i am sitting here thinking about updatingWhitecar. wrote:Updates?! Great build thus far, I'm looking forward to seeing the ground clearance of your exhaust.
The ground clearance of my exhaust is a bit better than it was here


I will get a new picture and measurement to post up for comparison.
-
Lobo240sx

- Posts: 779
- Joined: Wed Dec 01, 2010 7:39 am
- Car: 1991 Nissan 240sx Coupe SR2.35DET Redtop Build
- Location: Austin, Texas USA
Re: I received a letter from my bank, it told me i should ha
No speed bumps 4U. Turbo flutter is fine. As long as it is not surging while you are boosting.
-
OM3GA
- Posts: 3041
- Joined: Fri Apr 14, 2006 11:41 pm
- Car: A Sexy Mobile, 1993 Nissan 240sx 180sx Hatcher
Re: I received a letter from my bank, it told me i should ha
Exactly, i've never been a fan of speed bumps.
-
OM3GA
- Posts: 3041
- Joined: Fri Apr 14, 2006 11:41 pm
- Car: A Sexy Mobile, 1993 Nissan 240sx 180sx Hatcher
Re: I received a letter from my bank, it told me i should ha
Well i have been working a lot as usual but have still managed to get some time to work on the car and now update this thread!
So to start off a couple months ago i was curious about what was in this black oil/air seperator box which is located at the back of the head on the exhaust side. I planned on cleaning out the one i have but was not sure if i could just blast it out with air or if there was some fragile element in there.
So a friend and i cut a spare one in half.

Basically it is just a metal shell with baffles inside (two metal plates) to stop oil from getting sucked out of the block into the intake.
(Picture coming soon )
)
I took mine off and blew it out with air. I then bolted it back on with 3 brand new OEM bolts which i torqued to 15 Ft Lbs.

I also filled up the Power steering system with some sweet Motul Dexron III fluid.

Net up i have been searching for a 3/4" vinyl cap to replace my rubber Dorman/Help brand cap which i have replaced 4 times already without even starting the motor!
Here you can see the cracks which were forming for who knows what reason.

Here it is a little closer.

Here is the nipple on the Apexi MAF adapter.

A company called MoCap has all of the caps and plugs you will ever need. I got a 3/4" Vinyl High Temp rated cap from them and installed that bad boy along with a new ABA clamp from FRSport.

Here they are installed.

Since I am not using a carbon canister, i have been looking for some sort of filter or screen to put over it so dust/dirt does not build up or get inside. (Very unlikely, but i am anal)
Here is the tube with a cap over it just while i was working on other things.

I have purchased everything i could think of to place on this line.
I have ordered the smallest K&N breather filter which did not fit, since this hardline uses 7/32" vacuum tubing.
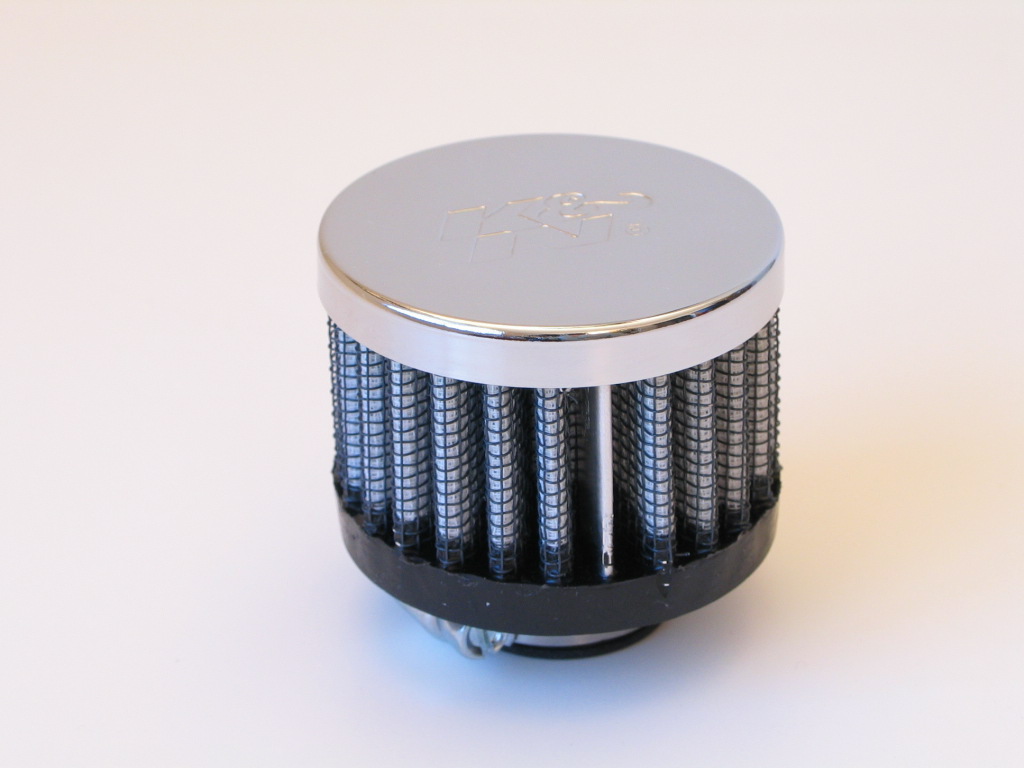
I also ordered some assorted pipe screens hoping they would work since they are very fine, but they were not flexible enough when bent around the hardline to slide a piece of tubing over. I even ordered some titanium ones from Canada but they did not work out either.

So what i ended up using was actually an inline HKS vacuum line filter used for 7/32" vacuum line when running to some sort of sending unit/boost controller.
Here it is

After searching for a good place to mount it that would be far from open flames or sparks in the event something caught fire (since this is a fuel vapor hardline) I ended up running some vacuum line and mounting it near the air filter.


Here is the HKS filter in place.

A zip tie for extra security, even though it fit in there REAL GOOD.

Here it is mounted far from danger.

Well, until UPS shows up that is all for now.

Time to watch some sweet videos on youtube

So to start off a couple months ago i was curious about what was in this black oil/air seperator box which is located at the back of the head on the exhaust side. I planned on cleaning out the one i have but was not sure if i could just blast it out with air or if there was some fragile element in there.
So a friend and i cut a spare one in half.
Basically it is just a metal shell with baffles inside (two metal plates) to stop oil from getting sucked out of the block into the intake.
(Picture coming soon
I took mine off and blew it out with air. I then bolted it back on with 3 brand new OEM bolts which i torqued to 15 Ft Lbs.
I also filled up the Power steering system with some sweet Motul Dexron III fluid.
Net up i have been searching for a 3/4" vinyl cap to replace my rubber Dorman/Help brand cap which i have replaced 4 times already without even starting the motor!
Here you can see the cracks which were forming for who knows what reason.
Here it is a little closer.
Here is the nipple on the Apexi MAF adapter.
A company called MoCap has all of the caps and plugs you will ever need. I got a 3/4" Vinyl High Temp rated cap from them and installed that bad boy along with a new ABA clamp from FRSport.
Here they are installed.
Since I am not using a carbon canister, i have been looking for some sort of filter or screen to put over it so dust/dirt does not build up or get inside. (Very unlikely, but i am anal)
Here is the tube with a cap over it just while i was working on other things.
I have purchased everything i could think of to place on this line.
I have ordered the smallest K&N breather filter which did not fit, since this hardline uses 7/32" vacuum tubing.
I also ordered some assorted pipe screens hoping they would work since they are very fine, but they were not flexible enough when bent around the hardline to slide a piece of tubing over. I even ordered some titanium ones from Canada but they did not work out either.
So what i ended up using was actually an inline HKS vacuum line filter used for 7/32" vacuum line when running to some sort of sending unit/boost controller.
Here it is
After searching for a good place to mount it that would be far from open flames or sparks in the event something caught fire (since this is a fuel vapor hardline) I ended up running some vacuum line and mounting it near the air filter.
Here is the HKS filter in place.
A zip tie for extra security, even though it fit in there REAL GOOD.
Here it is mounted far from danger.
Well, until UPS shows up that is all for now.
Time to watch some sweet videos on youtube
Last edited by OM3GA on Sun Nov 27, 2011 4:49 am, edited 1 time in total.
-
bladetech8

- Posts: 36
- Joined: Thu May 28, 2009 1:35 pm
- Car: S13 Hatchback
Re: I received a letter from my bank, it told me i should ha
Epic!
Just creamed my pants with that 2nd to last picture!
Just creamed my pants with that 2nd to last picture!
-
OM3GA
- Posts: 3041
- Joined: Fri Apr 14, 2006 11:41 pm
- Car: A Sexy Mobile, 1993 Nissan 240sx 180sx Hatcher
Re: I received a letter from my bank, it told me i should ha
Haha, thanks BRO. Yeah she is pretty creamy.
-
OM3GA
- Posts: 3041
- Joined: Fri Apr 14, 2006 11:41 pm
- Car: A Sexy Mobile, 1993 Nissan 240sx 180sx Hatcher
Re: I received a letter from my bank, it told me i should ha
Hello everyone!
I am still here. I have been extremely busy with work lately but have managed to make great success. Updates coming very soon!
omg an albino squirrel!

I am still here. I have been extremely busy with work lately but have managed to make great success. Updates coming very soon!
omg an albino squirrel!
Re: I received a letter from my bank, it told me i should ha
Good to see you're still alive!
-
OM3GA
- Posts: 3041
- Joined: Fri Apr 14, 2006 11:41 pm
- Car: A Sexy Mobile, 1993 Nissan 240sx 180sx Hatcher
Re: I received a letter from my bank, it told me i should ha
Definitely alive Just extremely busy. Updates coming very soon!
Re: I received a letter from my bank, it told me i should ha
Fantastic thread, makes me want to go work on mine right now. I bought a 1990 240sx with a crap sr20 swap, been undoing all the mistakes and cleaning it up for a month now. Just pulled the engine out this weekend and im just waiting to find out if i will ever be able to register it (screw california) before i start replacing parts.
-
OM3GA
- Posts: 3041
- Joined: Fri Apr 14, 2006 11:41 pm
- Car: A Sexy Mobile, 1993 Nissan 240sx 180sx Hatcher
Re: I received a letter from my bank, it told me i should ha
Thank you! I have seen many of those. There are alot of people that throw swaps together nowadays.  Good job on taking your time and cleaning it up, it is best to make it how you want it especially when purchasing someone elses project. This way you know what you have and where everything is. I would say the biggest headache item on a swap would be the wiring harness. It is much better just to get a new harness right off the bat, luckily we have Wiring Specialties which is now producing a great plug and play harness.
Hopefully you can get the car registration figured out. I wonder if there is a way to register in a different state?
Good luck and if you have any questions let me know, i am always here to help. I will be releasing a new website shortly with some cool high quality items. Should be nice.
Updates soon, i just need to get my pictures loaded up and have more than 10 minutes of time in front of my computer
-
OM3GA
- Posts: 3041
- Joined: Fri Apr 14, 2006 11:41 pm
- Car: A Sexy Mobile, 1993 Nissan 240sx 180sx Hatcher
Re: I received a letter from my bank, it told me i should ha
Finally time for an update, i have not had much time on my computer lately. This year seems to be flying by :/ The end of the world is coming soon apparently too right?
In between the last time and now i made an attempt to get it running. I was getting ready to set the fuel pressure to 43.5 (3-Bar) and the fuel pump did not prime. I figured the fuel pump could of been bad but it was a brand new Walbro 255 and we had not had a problem with that pump ever so i looked elsewhere first. During the process of turning the ignition to the 'ON' position i could smell hot electronics which got me worried. I turned the ignition back to the 'OFF' position and smelled around the engine bay to find that the Ignitor chip was burning hot. I then did a little research and found that others with a bad ECU had similar issues.
I did a test on the 5-pin connector coming from the ECU feeding the signal to the ignitor chip. I found that the center pin was ground which was correct and two of the coilpacks did not have any reading with the key in the on position but the other two did have a erratic pattern which looked like a short.
Meanwhile, i borrowed a known working ECU from a friend of mine. The ECU connector on this one was fairly worn so it was easy to put together unlike the "like new" condition ones i was using. I installed his and the fuel pump came right on. I set the fuel pressure to 43.5psi(3-Bar) I figured it must be my ECU.
I then started the hunt for an E5 ecu, after looking around i found one very clean one in Australia which i purchased and had shipped. I also called my buddy at JDM of Miami who also had a very clean one. I received them both. I wanted to have one as a back-up since it took me nearly 3 weeks to locate one that did not look damaged.
I then installed the new ecu and turned the key to 'ON' hoping to hear the fuel pump prime but it did not prime. I then removed the ECU connector and reseated it again. Turned the ignition to the 'ON' position and at this point the fuel pump did come on. Since i have the brand new wiring harness and the ecu connector looked brand new as well it was a bit harder to get the connector fully seated.
I tested the 5-pin connector coming from the ECU feeding the signal to the ignitor chip, everything checked out fine which was ground in the center and the outer pins had no measurable reading with the ignition in the 'ON' position.
After that ordeal was worked out, i decided to go on a crazy frenzy replacing a lot of ignition parts.
First off, I bought a brand new coilpack harness which was the only part of the engine harness that i had not replaced.


Here is the part number for reference as well

Next up i worked on obtaining an OEM Ignitor chip bracket that would work and be nice for my for my brand new OEM Ignitor chip. I had made my own bracket before but now that i had bought a brand new ignitor chip i wanted to get a brand new OEM bracket as well.
After a bit of research, i found that the S14 Silvia Ignitor chip bracket was the way to go. It was a lot smaller than the S13 bracket and is possibly to mount on the opposite side of the engine bay which was definitely needed.
Here is a test fit

With the old ignitor chip (You can see i drew a line so i could have something to line the bracket up with. This line follows the same angle as the two bolt holes)

I then took out my brand new OEM Ignitor chip and brand new OEM Ignitor chip bolts and installed those.


Installed!

Next, i decided to fill up the cooling system. Since i have the new Koyorad N-Flow radiator the filling process is a little different than the standard Koyorad non N-Flow.
1. Remove Radiator cap and bleeder screw from the upper radiator hose water neck on the engine.
2. Remove the bleeder screw from the top of the Koyorad N-Flow radiator.
2. Fill the radiator with coolant until a steady stream of coolant flows out of the bleeder screw on the upper water neck.
3. Put the stock bleeder screw back in place and tighten it with a 10mm socket.
4. Continue to fill the radiator until a steady stream of coolant comes out of the bleeder screw on the top of the radiator.
5. Put the bleeder screw back in place on the top of the radiator and tighten it using a 12mm wrench. (Not too tight because the threads are aluminum)
6. If there is any room left to put a little more coolant in the radiator neck, go ahead and do so.
7. Fill the coolant resevoir
Here is what it looked like for me
(Filling using our WOW! Bleeder funnel which will be available on our website and are available elsewhere. These things make bleeding the S13's way better, it lets gravity do the hard work for you and makes no mess.)

Full!

I then filled the coolant resevoir with Redline Water Wetter and Distilled Water.

Next up in preparation for starting the engine, since it has been sitting a long time i decided i would be extra cautious and put some ATF in the cylinders and let it sit overnight.
I did some research to see what amounts other people were putting in but i did not find anything too useful. I decided to order a brand new SR piston and do the test myself. I heard a lot of people say "Only put in a cap full" This makes NO sense to me at all because a cap full will not even fill the dish in the piston which means it will not contact the rings at all which is the entire reason i am doing this.
I started out with 10ml which is probably about 2 cap fulls


I then did another 10mL

and another 10mL

and another 10mL

another 10mL and i finally got something!


So i decided i would do 55mL in each cylinder and let it sit overnight (8+ hours)
Before adding the fluid into the cylinders i changed the oil with fresh Motul 300V 10W40. Great stuff!
I also installed a new Power Enterprise MAG oil filter. Here is a good shot of it along with the Greddy Oil PSI sending unit!

I then added 55mL of Motul Dexron III ATF into each cylinder.
You can kind of see the fluid in there.

I then covered the Valve cover up with towels so nothing would get inside. This is how it sat overnight.

The next morning the engine was cranked over by hand about 10 revolutions.

I then cranked it over a few times after that with the starter. I would hold it cranking for 3-5 second intervals and did that about 10 times as well (with time in between to let the starter cool down).
New spark plugs were then installed!

As well as brand new OEM coilpacks!


I then cranked it and it fired right up!
A little smokey because of all the ATF in the cylinders burning off. It ran smooth!
Here is a picture of the Greddy Informeter Touch after the engine had fully warmed up (With the Nismo Thermostat)

I have ran the engine a few times since then and changed the spark plugs again since the old ones had to put up with burning the ATF out of the cylinders.
I then purchased and installed the blue Tomei coilpack cover!

Here is how it sits now!

More updates coming soon!

In between the last time and now i made an attempt to get it running. I was getting ready to set the fuel pressure to 43.5 (3-Bar) and the fuel pump did not prime. I figured the fuel pump could of been bad but it was a brand new Walbro 255 and we had not had a problem with that pump ever so i looked elsewhere first. During the process of turning the ignition to the 'ON' position i could smell hot electronics which got me worried. I turned the ignition back to the 'OFF' position and smelled around the engine bay to find that the Ignitor chip was burning hot. I then did a little research and found that others with a bad ECU had similar issues.
I did a test on the 5-pin connector coming from the ECU feeding the signal to the ignitor chip. I found that the center pin was ground which was correct and two of the coilpacks did not have any reading with the key in the on position but the other two did have a erratic pattern which looked like a short.
Meanwhile, i borrowed a known working ECU from a friend of mine. The ECU connector on this one was fairly worn so it was easy to put together unlike the "like new" condition ones i was using. I installed his and the fuel pump came right on. I set the fuel pressure to 43.5psi(3-Bar) I figured it must be my ECU.
I then started the hunt for an E5 ecu, after looking around i found one very clean one in Australia which i purchased and had shipped. I also called my buddy at JDM of Miami who also had a very clean one. I received them both. I wanted to have one as a back-up since it took me nearly 3 weeks to locate one that did not look damaged.
I then installed the new ecu and turned the key to 'ON' hoping to hear the fuel pump prime but it did not prime. I then removed the ECU connector and reseated it again. Turned the ignition to the 'ON' position and at this point the fuel pump did come on. Since i have the brand new wiring harness and the ecu connector looked brand new as well it was a bit harder to get the connector fully seated.
I tested the 5-pin connector coming from the ECU feeding the signal to the ignitor chip, everything checked out fine which was ground in the center and the outer pins had no measurable reading with the ignition in the 'ON' position.
After that ordeal was worked out, i decided to go on a crazy frenzy replacing a lot of ignition parts.
First off, I bought a brand new coilpack harness which was the only part of the engine harness that i had not replaced.
Here is the part number for reference as well
Next up i worked on obtaining an OEM Ignitor chip bracket that would work and be nice for my for my brand new OEM Ignitor chip. I had made my own bracket before but now that i had bought a brand new ignitor chip i wanted to get a brand new OEM bracket as well.
After a bit of research, i found that the S14 Silvia Ignitor chip bracket was the way to go. It was a lot smaller than the S13 bracket and is possibly to mount on the opposite side of the engine bay which was definitely needed.
Here is a test fit
With the old ignitor chip (You can see i drew a line so i could have something to line the bracket up with. This line follows the same angle as the two bolt holes)
I then took out my brand new OEM Ignitor chip and brand new OEM Ignitor chip bolts and installed those.
Installed!
Next, i decided to fill up the cooling system. Since i have the new Koyorad N-Flow radiator the filling process is a little different than the standard Koyorad non N-Flow.
1. Remove Radiator cap and bleeder screw from the upper radiator hose water neck on the engine.
2. Remove the bleeder screw from the top of the Koyorad N-Flow radiator.
2. Fill the radiator with coolant until a steady stream of coolant flows out of the bleeder screw on the upper water neck.
3. Put the stock bleeder screw back in place and tighten it with a 10mm socket.
4. Continue to fill the radiator until a steady stream of coolant comes out of the bleeder screw on the top of the radiator.
5. Put the bleeder screw back in place on the top of the radiator and tighten it using a 12mm wrench. (Not too tight because the threads are aluminum)
6. If there is any room left to put a little more coolant in the radiator neck, go ahead and do so.
7. Fill the coolant resevoir
Here is what it looked like for me
(Filling using our WOW! Bleeder funnel which will be available on our website and are available elsewhere. These things make bleeding the S13's way better, it lets gravity do the hard work for you and makes no mess.)
Full!
I then filled the coolant resevoir with Redline Water Wetter and Distilled Water.
Next up in preparation for starting the engine, since it has been sitting a long time i decided i would be extra cautious and put some ATF in the cylinders and let it sit overnight.
I did some research to see what amounts other people were putting in but i did not find anything too useful. I decided to order a brand new SR piston and do the test myself. I heard a lot of people say "Only put in a cap full" This makes NO sense to me at all because a cap full will not even fill the dish in the piston which means it will not contact the rings at all which is the entire reason i am doing this.
I started out with 10ml which is probably about 2 cap fulls
I then did another 10mL
and another 10mL
and another 10mL
another 10mL and i finally got something!
So i decided i would do 55mL in each cylinder and let it sit overnight (8+ hours)
Before adding the fluid into the cylinders i changed the oil with fresh Motul 300V 10W40. Great stuff!
I also installed a new Power Enterprise MAG oil filter. Here is a good shot of it along with the Greddy Oil PSI sending unit!
I then added 55mL of Motul Dexron III ATF into each cylinder.
You can kind of see the fluid in there.
I then covered the Valve cover up with towels so nothing would get inside. This is how it sat overnight.
The next morning the engine was cranked over by hand about 10 revolutions.
I then cranked it over a few times after that with the starter. I would hold it cranking for 3-5 second intervals and did that about 10 times as well (with time in between to let the starter cool down).
New spark plugs were then installed!
As well as brand new OEM coilpacks!
I then cranked it and it fired right up!
A little smokey because of all the ATF in the cylinders burning off. It ran smooth!
Here is a picture of the Greddy Informeter Touch after the engine had fully warmed up (With the Nismo Thermostat)
I have ran the engine a few times since then and changed the spark plugs again since the old ones had to put up with burning the ATF out of the cylinders.
I then purchased and installed the blue Tomei coilpack cover!
Here is how it sits now!
More updates coming soon!
Re: I received a letter from my bank, it told me i should ha
Damn. Engine bay is looking awesome.
Re: I received a letter from my bank, it told me i should ha
daaaaang. forgot about this thread. incredible stuff man!
now is the atf in the cylinders recommended? im getting ready to swap motors and the one going in has been sitting for quite some time
now is the atf in the cylinders recommended? im getting ready to swap motors and the one going in has been sitting for quite some time