I'm back, and sharing my NA build

The Nissan 300ZX (Z32) general community discussion forum
User avatar
ArticDragon192
Posts: 2767
Joined: Fri Sep 10, 2004 5:35 pm
Car: 91 Z32 2+2

Post

Hello all,
Decided to come back and see if it has gotten a bit more lively around here, lol. I thought I would share my experiences with my new NA build going on. I know a lot of NA owners will be curious as to what it takes to build a proper NA together. Now keep in mind, I'm trying to keep this build sane, with the main goals being reliability (running day to day without issue) and longevity (long term usage).
Some may know of my misfortune with my current car, and some may not. I'll refresh everyone with story time.
A bit over 2 years ago, I bought my new Z32.
Image

Turns out I overpaid for the car due to a s*** motor. 4 out of 6 all died in a span of 5 weeks and it would spew oil out the back under high rpms. Decided to pull it out and swap in the motor from my old white car. That lasted a few months under a dent to the pan, and subsequently, a damaged oil pick up caused the death of old reliable at 245k miles or so on the track.
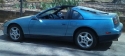
Immediately before her death (she blew up on the turn I was entering in the pic)
Image

Ended up getting a motor from someone I knew. Said he did replaced the headgaskets on it and that it had a new water pump. Spent around $700 on everything 120k service related. And it blew up 3 days later. HGs were not properly done and the coolant and oil mixed. Joy.

On to swap #4 for those keeping track. Ended up picking up a parts TT car with a TT motor with blown HGs. I planned on frankensteining a motor. Taking the block (supposedly rebuilt and good) from the original motor that was in the car initially (motor that was spewing oil out of the heads and killing injectors) and rebuilding the TT heads and transferring them to the block. This worked out decent.
[youtube]http://www.youtube.com/watch?v=fQDoqXzI_XY[/youtube]
[youtube]http://www.youtube.com/watch?v=3kk1ekLZQt8[/youtube]
[youtube]http://www.youtube.com/watch?v=opvOBNzqSUA[/youtube]

There was always something off though. Didn't make the power it should, and a lot of blow by. Well, about a year ago, my doubts about the health of the bottom end were verified. I knew it was a gamble, but it was the quickest way to get the car running again. About 15k miles later, a trip to AZ and back for ZCon 2012 (awesome experience btw!), she gave up the ghost. After a night where I installed a catch can due to the blow by issues, she developed rod knock. Seems like she was down to her last quart of old due to either burning oil, blow by issues, or both. Which brings me to my current build, with swap #5 upcoming.

I decided to take no risks, and take a completely different NA, and rebuild it myself from the ground up. I'll separate most of the build entries into many posts. Hope you all enjoy my build and learn something from it.


User avatar
ArticDragon192
Posts: 2767
Joined: Fri Sep 10, 2004 5:35 pm
Car: 91 Z32 2+2

Post

I thought I would share my NA rebuild with you guys. Anti was pushing for me to share my rebuild, so might as well let you guys in on what I'm doing for a new motor for my car. I'll get you guys caught up on to what has been going on since the motor developed rod knock back in the beginning of October. Please pardon all the copy/ paste entries, as they are all older entries from another forum. I will keep this thread more updated as I start reassembling the motor, now that I have a majority of the parts.

Day 1
Image
It's a 90 VG30DE with about 212k miles on it. A bit dirty, but it won't be for long. Picked it up with the intention of doing a full rebuild on it and not leaving anything to chance. The last motor I put together reused the bottom end of a previously running motor I had that was "rebuilt" before being swapped into my current Z by the previous owner. I can only assume the rebuild was pretty crappy, as the motor had a ton of blow-by and developed rod knock after a few months of my driving it around.

Day 2
Started with the basics on this motor for full tear down:
Plenum pull, removal of water pipes, fuel rail removal. Removed the EGR as well and all the PCV hardpipes as those are getting eliminated also.
Image

Day 3
Went to remove the front coolant pipes in order to remove all the timing belt components, but ended up stripping one of the allen bolts (shown in the picture with the still to be removed lower coolant pipe)
Removed all the accessories except for the AC, the upper coolant pipe, and the bypass hoses as well.
Image

Day 4
Ended up borrowing an extractor kit and removing the stripped bolt. Removed the lower coolant pipe and called it a night.

Day 5
Received my order from Coz using their New Years Day Special of free shipping and 5% off. Ordered some BDE billet motor mounts to replace my dead OEM ones and ordered a full engine gasket kit since I will be needed nearly everything for this rebuild. No pic of the gasket kit, but here are the mounts :)
Image

Started removing all the timing belt covers and timing belt components. Discovered one of the idler pulleys was BEYOND dead.
Image
Hopefully it didn't cause any funky stuff to happen to the timing belt.

Also discovered this motor came with "adjustable" VTC cam pulleys which are compatible with older style cams (The adjustable style pulleys are more common in the later model motors). Looks like I'll be sending these in to BDE to be made into fully adjustable pulleys as well as having them refreshed to pretty much eliminate the VTC tick that our motors are known for
http://bde-performance.com/vtc_late.htm
Image
Should help with getting the most out of the motor with my JWT cams. I've had my TT heads machined, so the timing might be a bit off with all the cams, so this should help get everything timed properly as well.

Everything from the front of the motor was removed, AC compressor and bracket was removed, and the stock headers were removed as well.
Image

Ready for pulling the heads off

Day 6
This brings me to tonight.
Started by removing the valve covers and removing the NA heads. Luckily it seems like the timing belt didn't do anything weird and the valves didn't make friendly with the pistons. Awesome. While I was at it, I removed the oil pan and started removing the rods/ pistons. Removed the oil pump as well.
Image

How she currently sits, just a block, with only the girdle, crank, and oil squirters installed.
Image

I did run into some curious issues. Pulling off rods 5 and 6 I noticed this...
Bearings for rod 5
Image
Image
Image

The bearings for rod 6 has heat marks, but no scoring. Thoughts?

Here is the crank:
Image
Image

Seems like the crank is fine. Will inspect further tomorrow once I completely remove the crank.

Now I run into a new dilemma. Will the rods be ok to reuse? And if not, do I just replace 2 rods with OEM rods, or replace all 6 with new aftermarket rods and keep the stock pistons?

Plans for this motor build are as follows:
-New OEM rod and main bearings (WPC treating these)
-New OEM rings for all pistons (WPC treating these as well)
-Hot tanking the block and honing the cylinders
-Installing my freshly rebuilt TT heads with JWT S1 cams installed
-Installing BDE Bullseye exhaust cam gears and more than likely BDE VTC pulleys as well
-Transferring my ceramic coated Stillen headers
-Tuning the car at SpecialtyZ once the motor is broken in

Possible additions to the build:
-knife edging and balancing the crank
-installing a crank scraper and windage tray
-boring out the stock TBs and mating those to my current short dual intakes with Selin kit

Should make for a fun and super responsive NA set up. Pair that with the 4.3 final drive I have yet to install, and it should definitely be a fun car to drive around in :)

User avatar
ArticDragon192
Posts: 2767
Joined: Fri Sep 10, 2004 5:35 pm
Car: 91 Z32 2+2

Post

And for those wondering why I'm doing all this work for only a lowly NA motor? Well, why not?
My original VG30DE lasted me till 244k or so miles. I drove that motor since it has 103k miles on it, and since it was in my possession, it saw a lot of abuse both on the track with near monthly track events, both drifting and road racing, and abuse on the streets while daily driving it. It was super reliable, and never gave me any issues until it died a viking death on the track due to a dented oil pan and oil starvation.

I am looking to regain that reliability that another properly done NA motor can give me. Also, not many people have gone into trying to extract more power out of the NA and responsiveness with all the plans I have in store, so this is also an experiment I am excited in carrying out.

It also gives me the experience of tearing down and putting a motor together, an experience that will be valuable once I finally get the 1JZ motor I desire since I plan on tearing down and rebuilding that motor as well.

Also, a properly rebuilt VG will hold it's value better than a used VG30 will, especially if it dyno's favorably. So here goes for the 5 motor set up I will run in my current Z :)

User avatar
ArticDragon192
Posts: 2767
Joined: Fri Sep 10, 2004 5:35 pm
Car: 91 Z32 2+2

Post

Talking to a buddy right now who works for a shop that does one off billet cranks. Might be able to do the work and balancing for me :)

Day 7

Pulled out the crank, girdle, and oil squirters.
There are the main bearings. They definitely show 200k+ miles of usage.
Image

Very tempted do clean out the flashings in the casting... but I've never had an issue before. Lazyboy problems, lol.
Image
Image
Image
Looks a little dirty, giggidy, lol

Shot of the cylinders. Nice and shiney, but with visible crosshatching still. Won't be shiney for long...
Image
Image
Image
Image
Image
Image

Image


All naked!
Image
Image

She goes to the machinist tomorrow for honing and hot tanking.[/QUOTE]

[QUOTE=articdragon192;1354280]Day 7:
Redid the threads in one of the plugs in the oil passages in the block. Stock, it is 1/8 BSPT pipe threading. Was going to install an aftermarket oil temp gauge in there since it is directly in the pass of oil within the block itself. So I retapped it for a 1/8-27 NPT pipe thread. Worked perfect!
Image

Also took Corey's advice and got to grinding. Made a MASSIVE difference. As shown. Before pics are in the previous page.
Image
Image
Image
Image
Image
Image
Image
Image
Image
Image

User avatar
ArticDragon192
Posts: 2767
Joined: Fri Sep 10, 2004 5:35 pm
Car: 91 Z32 2+2

Post

Image

Just a small list of parts ordered

Day 8

Decided to pull the rods and pistons apart.
Image
Image
Apparently these are also know as Jesus clips. I learn something new everyday lol.

Pulled the rings off as well, since I bought new ones.
Image

And the old wrist pins. Taking your guys' advice and putting in TT ones.
Image

Now to clean these up!
Image

Tomorrow I should be picking up all of my parts from the dealership :)

User avatar
ArticDragon192
Posts: 2767
Joined: Fri Sep 10, 2004 5:35 pm
Car: 91 Z32 2+2

Post

Ran into some "issues" with the stock pistons.
Image
Image


Did not like the pitting at all on the surfaces of the oem pistons. So.... I did this.
Image

88mm bore. 11.5:1 compression.
Image

And weight comparison with stock.
Image

Time to get the block bored out, and get the crank worked on.

And got these as well.
Image

so, I spent more money while I was waiting for the crank to be finished.
Image
completed the set. The motor I bought actually had the new servicable VTC pulleys with the built in adjustment for the 90-93 cams. So I sent them to BDE to make them fully adjustable from the front, and for the redesign of eliminating the VTC tick. They look great in person. Can't wait to show before and after of the cam tuning of both the intake and exhaust cams. I hope these small details push me over the 250whp barrier.

Now I wait for the crank to come back. Should come back looking very similar to Mike Kojima's crank. Cept he cryo treated his, whereas I'm WPC treating mine :)

User avatar
ArticDragon192
Posts: 2767
Joined: Fri Sep 10, 2004 5:35 pm
Car: 91 Z32 2+2

Post

Got a few parts back from WPC treatment.
Image
Did all my main bearings (shown) and rod bearings (not shown).
Here is a close up of the metal after treatment. It has this cool dull titanium finish afterwards.
Image
Should help a lot with bearing life and reducing friction. Awesome voodoo magic available nowadays.

I also got something non-engine related WPC treated.
Image
Bought a rebuild kit for my Carbonetic 2-way LSD and got the cone spring disk and the clutch disks WPC treated as well. This will help reduce noise, reduce wear, keep the diff cooler, and extended oil change intervals. Win win win :)

The crank is also done at the machine shop from being bull nosed, balanced, and all the other fun stuff I had done to it. Now it's also getting WPC treated. Hopefully I can start reassembly next weekend.

A few articles on WPC treatment:
http://www.motoiq.com/magazine_artic...about-wpc.aspx

Article on real world benefits on WPC
http://www.motoiq.com/magazine_artic...ur-engine.aspx

http://www.motoiq.com/magazine_artic...nion-gear.aspx

User avatar
ArticDragon192
Posts: 2767
Joined: Fri Sep 10, 2004 5:35 pm
Car: 91 Z32 2+2

Post

Got picture of the crank work done. Just needs WPC treatment now and we're good to go!

Before (excuse the s*** pic)
Image

And after (bull nosing, tack welding of bolts to middle counterweight, and full rebalancing)
Image
Image
Image
Image
Image
Image
Image
Image
Image
Image

The machinist actually opted to not teardrop the passages, as in his experience, it is not really required. I'm going to go ahead with his experience. The WPC treatment of the crank and bearings should help with oil retention and reduction of friction anyways. One more week and I should have this bad boy treated and in the block.

User avatar
ArticDragon192
Posts: 2767
Joined: Fri Sep 10, 2004 5:35 pm
Car: 91 Z32 2+2

Post

Got the crank in my possession now. And man, does it look brand spanking new!
Image

Close up of the bullnosing
Image

Tackwelds, even grinded flush with the counterweight
Image

And a shot of one the of journals with and without flash to show how the WPC treatment looks
Image
Image

Time to get this thing together! Only waiting on the crank scraper and new oil pick up tube to get the bottom end completely assembled. At least I can get the rotating assembly in now!

Even got the car washed in celebration!
Image

User avatar
ArticDragon192
Posts: 2767
Joined: Fri Sep 10, 2004 5:35 pm
Car: 91 Z32 2+2

Post

Got a few new bits in lately. More to add to the parts list:

RobZ bored out my OEM TBs out to 54mm. I also went ahead and had him install his delrin spring spacers as well. Time to clean these up now and spray them matte anthracite to go along with my plenum
Image

Also order an Ichihara-Johnson crank scraper with the option teflon extension to help with an windage in the pan, and to literally scrape any oil off the sides of the counterweights.
Image

User avatar
ArticDragon192
Posts: 2767
Joined: Fri Sep 10, 2004 5:35 pm
Car: 91 Z32 2+2

Post

Finally put some time in to install my wpc treated bearings and my specially done up crank. checked all the clearances before assembling everything for the final time. Clearances were all within standard spec! Did the final install with brand new main bolts. Next up: rods and pistons.
Image
Image

Everything spins so smooth!

Not much work. Ran into a bit of a speedbump due to lack of tools. I'll show the current progress though. Installed all the new rod bearings into the rods.
Image

Also pressed out the old rod bolts and installed the new OEM rod bolts I bought.
Image
It was interesting figuring out a proper way of pressing out and pressing in the new hardware, but I got it all squared away properly.
Also cleaned up the inside of the rod surfaces before installing the bearings.

I was about to assemble the rod and piston assembly, but I wouldn't be able to install them into the motor, so I decided to wait.
As for the speedbump I hit, well, I didn't realize I had to gap my rings. I thought they came ready to go. NOPE.
Image
Sweet ring gap, lol. Luckily, I have since been able to source a proper ring file and some feeler gauges to properly gap the rings. That's next on the agenda. At least I don't need to do anything to the oil ring.

User avatar
ArticDragon192
Posts: 2767
Joined: Fri Sep 10, 2004 5:35 pm
Car: 91 Z32 2+2

Post

I got a lot of work done today.
Had to file my own rings to get the proper gap. Yay for proper tools!
Image

Checking the gap. Running a gao of 0.156" for the top ring, and 0.019 for the second ring.
Image

Clearances were within spec to they get torqued down with lots of lube.
Image

Behold the dome!
Image
That's what 11.5:1 looks like in a decked blocked.

All done! Man those circlips for the wrist pins were a pain to install!
Image

Next up!
The crank scraper with teflon extension, and my new oil pump and oil pick up/ strainer.

User avatar
ArticDragon192
Posts: 2767
Joined: Fri Sep 10, 2004 5:35 pm
Car: 91 Z32 2+2

Post

Some small progress.
New style oil pump installed as well as a brand new oil pick up tube and strainer. Why not just reuse the old one? Because I like spending money on new oem parts for no reason, lol. Plus, it looks cool all new and clean there to match my new oil pump haha.
Image
Image

Also installed the rear main seal retainer.
Image

BTW, here are some differences between the old oil pump set up, and the new one. Seems like the pump had been replaced before with a TT pump for some reason?
Image

Differences in the oil pick up tube. Old style uses an o-ring, whereas the new style uses a gasket.
Image
Image

Also mocked up the crank scraper. Totally forgot to get RTV, so this will do for now.
Image

And some comparison shots of clearances with and without the scraper in place.
Image
Image


Image
Image


Image
Image

Tolerances should be much much tighter once the teflon extension is added on. It will literally scrape the oil off the crank.

And the windage tray.
Image
Image
ImageImage

User avatar
ArticDragon192
Posts: 2767
Joined: Fri Sep 10, 2004 5:35 pm
Car: 91 Z32 2+2

Post

Did some work on the car.
Image
Pulled the harness from the motor prepping it for the motor pull.

Also painted my TBs. Went with matte gunmetal and black springs to go with my textured gunmetal plenum. I'm also getting some Injen hardpipes and powdercoating them textured black.
Image
Repainting the cable cover as well. Currently waiting for the primer to cure. Dax, I'm gonna need another sticker, LOL

And also got a few more parts for the rebuild.
Image
Brand new regulator, damper, o-rings for the fuel rail and injectors, new O2 sensors, and some Nissan Threebond silicone, some of the best there is. Not taking any chances of an old part failing on this motor.

User avatar
ArticDragon192
Posts: 2767
Joined: Fri Sep 10, 2004 5:35 pm
Car: 91 Z32 2+2

Post

Pics of the crank scraper with the teflon extension installed. Instruction say that it is ok for the teflon to touch the ccrank and even some deflection is ok. The crank will bed into the teflon making the clearance it needs.

Image
Image

Touchy touchy!
Image

Real close!
Image

Some more friendly touching action
Image
Image

More clearance here since the counterweight has a slight step in it, so instructions say to clearance more so that nothing catches on the teflon. It needs to be a smooth scrape.
Image

User avatar
ArticDragon192
Posts: 2767
Joined: Fri Sep 10, 2004 5:35 pm
Car: 91 Z32 2+2

Post

And now caught up with this week.

Managed to finally pull out the old motor Wednesday.
Image

Thursday I got this done.
Did some small amount of work on the old motor and installing some new parts.
Evidence of blow by :/
Image
Image
The manifold was spotless before I put it on the motor. PCVs were also dripping loads of oil.

Plugged up the PCV ports since I'll be running a catch can set up.
Image

Also opened up the TB openings on the plenum. Smoothed out the openings as well.
Image
Image

Bored out TBs painted matte gunmetallic with new black hardware :)
Image

And Friday I got this done.
Did some work taking apart the old motor.
Pretty much everything timing belt related is off. (my Z [photobombed me, lol)
Image

The Holy Grail of thermostats, Billion. Such a reliable piece.
Image

Decided to paint the VTC gear cover and 4-bolt washers matte black to go along with my BDE units. Gonna buy some black hardware as well to get everything matching.
Image

Everything removed. All nuts and bolts sorted according to area in baggies.
Image

Quick shot of my exhaust set up. Going to eventually ceramic coat the test pipes, and also modify the h-pipe and turn it into an x-pipe for more NA rasp. And possibly some more power, lol.
Image

This is what I had in mind. Move the resonators closer to the bottom flanges, and put the crossover piping afterwards.
Image

Hopefully I'll have the heads off this week. Soooooo close to getting this whole things done. Just a few minor details needed to have everything I need/ want.

User avatar
DCaff300ZX
Posts: 4202
Joined: Sun Jun 14, 2009 8:18 am
Car: .
1993 CRP TT- Modified
Location: Tacoma, Washington

Post

I had noticed your thread on the other site and saw some of it, but not all of it- nice work so far.
VERY interested to see how this all works out for you, I love your spirit of going it your way and wish you all of the best and look forward to more updates! :yesnod

User avatar
ArticDragon192
Posts: 2767
Joined: Fri Sep 10, 2004 5:35 pm
Car: 91 Z32 2+2

Post

The other site, lol. Yeah, that's the one I frequent the most. I'm interested in the results as well. Should be a fun car for sure, especially once I install my 4.3 final gearing in :)

More progress. Just about ready to yank the heads off.
Found more evidence of oil blow by :/
Image

Pulled the plugs too. What do you all think?
Image
Image
About maybe 10k miles on them. Maybe.

Weird wear marks on the cams, but only on the closed section of the profile. So odd.
Image
Image

The ramp up and ramp down sections are fine though.
Image

Also pulled the pump out of the tank. Going to install a TT one to handle the extra flow needed for the E85 tune. Siphoned the gas out as well. It helps that the tank was completely filled. Helped in keeping moisture out and preserving the gasoline.
Image

Tomorrow, the heads come off, and they get disassembled, ready to go to the machine shop.

User avatar
sebazztard
Posts: 2583
Joined: Fri Mar 02, 2007 9:44 pm
Car: 1992 Nissan 240sx rb25det project. 2000 Honda Accord LX DD. 1992 Nissan 300zx NA.

Post

this is a great thread! thanks for posting so many pictures, its very informative.

User avatar
300ZXttZMAN
Posts: 6800
Joined: Mon Nov 22, 2010 4:07 pm
Car: 1990 Nissan 300ZX TT 5spd pearl white

DD: 2008 Nissan Frontier NISMO pkg 4x4 Crew Cab
Location: Sulphur, LA 70665
Contact:

Post

Looking great Edgar! Keep it up!

I love how the crank turned out... Simply beautiful.

User avatar
ArticDragon192
Posts: 2767
Joined: Fri Sep 10, 2004 5:35 pm
Car: 91 Z32 2+2

Post

Soooo, I guess the motor was flat out guzzling the oil :/
Pulled the heads off finally and took some pics. Needless to say, the heads are off to get hot tanked for cleaning, lol.
Image
Image
Image
Image
Image
Image
The intake valves are also being replaced as I believe these are the softer 90s intake valves. Some preventative maintenance.

IonZ32
Posts: 117
Joined: Mon May 21, 2012 11:46 pm
Car: 1990 300zx TT
1992 300zx
1964 Malibu

Post

The coolest NA build I've seen!

Also funny that I've seen those videos on youtube, always thought that was a beautiful Z, well done, I cant wait to see where this goes!

User avatar
ArticDragon192
Posts: 2767
Joined: Fri Sep 10, 2004 5:35 pm
Car: 91 Z32 2+2

Post

haha thanks. I'm excited to see the results too.
Well, got the news from the machine shop. 6 of the oem intake valves in one head are toast. and 2 of the replaced intake valves on the other head are done as well. The fix? ordered some Supertech 0.5mm oversized SS intake valves to handle the abuse and help bring in a little bit more air into the motor

User avatar
ArticDragon192
Posts: 2767
Joined: Fri Sep 10, 2004 5:35 pm
Car: 91 Z32 2+2

Post

Got a few more supporting mods for the car. Picked up a TT fuel pump for when I do the E85 tune as the NA pump might not pump enough for E85 use. Also grabbed some Injen intake hardpipes. Already shaved off the unnecessary nipples. Now I just need to get it powdercoated textured black. Also grabbed some stock TT injectors to hold me over until I get some 555s for E85 usage. The TT injectors should work just fine for a regular tune on 91. Heads should be done some time this week.

User avatar
nexus08
Posts: 319
Joined: Sat Apr 13, 2013 4:38 pm
Car: 1990 300ZX NA
Location: Holly Springs, NC

Post

Wow... lots of work there...

ThisIsSparTTa
Posts: 738
Joined: Wed Sep 26, 2012 6:02 pm
Car: 91 300ZX TT 2+0

Post

Injen hardpipes are a PITA with poor fitment and couplers that are just barely long enough. PO had them on my car. I like the look, but they are a pain to deal with.

User avatar
ArticDragon192
Posts: 2767
Joined: Fri Sep 10, 2004 5:35 pm
Car: 91 Z32 2+2

Post

ThisIsSparTTa wrote:Injen hardpipes are a PITA with poor fitment and couplers that are just barely long enough. PO had them on my car. I like the look, but they are a pain to deal with.
I actually bought them used from a friend who was running them. Also, I'm removing all the ports it has minus the AICV port so fitment only matters with regards to that hose, and the car has been converted to true dual intakes with filters relocated to under the headlamps.

User avatar
ArticDragon192
Posts: 2767
Joined: Fri Sep 10, 2004 5:35 pm
Car: 91 Z32 2+2

Post

https://www.youtube.com/watch?v=9giGvXlARdY
quick video of the bottom end in motion. So smooth!
Also installed the motor mount brackets and BDE motor mounts.
Image
And cleaned up the AC compressor bracket and installed the compressor.
Image
And cleaned and installed the alternator bracket. I still need to clean off the alternator, so it isn't going on just yet.
Image
Also got a shot of my new high pressure power steering line. No more leaks!
Image

As a bonus, a quick shot of my old reliable motor that suffered it's Viking death. That's where rod #2 used to be.
Image
Pretty gnarly haha.

User avatar
ArticDragon192
Posts: 2767
Joined: Fri Sep 10, 2004 5:35 pm
Car: 91 Z32 2+2

Post

Quick WPC demo.
http://www.youtube.com/watch?v=PBJ8mhx6lQo
First part shows a crank sprocket on a stock crank snout. If you've ever installed or removed a crank sprocket, you know how much of a pain they are to slide on and remove without grease. I sprayed WD40 here.
Second part shows how easily the sprocket spins on my WPC treated crank. I had to install the crank bolt and washer in order to keep the sprocket from flying off! Pretty amazing to see in person. Can't wait to see the results of the massive reduction of internal friction with the complete crank paired with the wpc treated rod and main bearings. How exciting!

Took care of some smaller stuff as well while I wait to pick up my heads.
Installed the Ramey idler stud.
Image

Installed the det sensor. I'm not a fan of relocating it.
Image

Thermostat housing and related piping installed as well. So glad the threads in all the holes are perfect.
Image

Cleaned up the PS pump. This will hold me over until I get my spare one rebuilt. Planning on WPC treating the internal, and converting the fittings to AN in order to run full SS lines for my power steering.
Image

Cleaned the alternator as well and installed it. So much better than before. It was encrusted with PS fluid grime :/
Image

New dowels
Image

The set up for my auxiliary oil pressure sensor. BSPT to NPT adapter. Relocated the stock unit back more. We'll see if I end up keeping it there. Definitely not permanent.
Image
Image

Fun stuff. Heads tomorrow! For sure!

User avatar
ArticDragon192
Posts: 2767
Joined: Fri Sep 10, 2004 5:35 pm
Car: 91 Z32 2+2

Post

Picked up my TT heads finally. Had them completely cleaned and full valve job. All the components were checked out as well to make sure everything was within spec. Exhaust valves were good, and all the intake valves were replaced with 0.5mm oversides stainless steel Supertech valves.
Image
Image

Quick shot of the worn down intake valves. Here's the 90s OEM one.
Image

And the aftermarket one that was replaced about 10k miles ago.
Image

Can't wait to pop them on. I'm still in the middle of rebuilding my lifters.


Return to “300ZX (Z32) General”