Most new cars have what are referred to as "integrated speakers" in the doors. The speaker and the mounting locations are connected and inseparable unless you make modify them yourself.
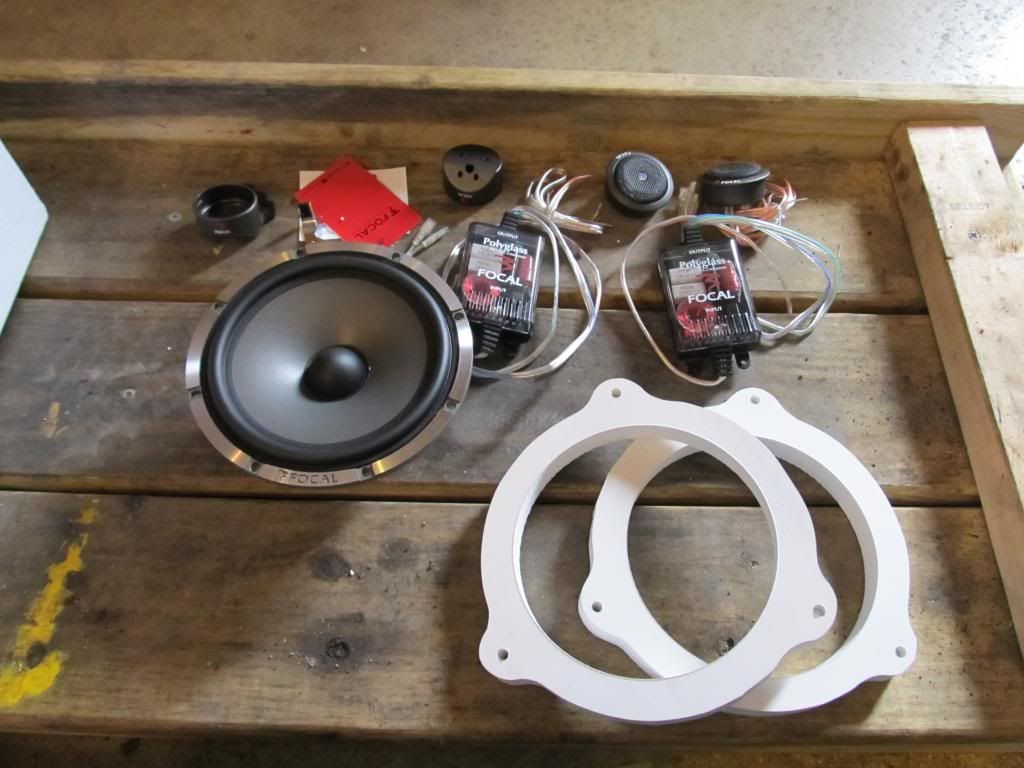
I purchased some 2 way Clarion 6" speakers for my car and after removing the door panels realized that there was no way this would be a quick R&R. I decided to modify the existing speaker to adapt my aftermarket sound.
Things you'll need:
Flat head screwdriver
Drill
Razor blade or knife
JB weld
Crimp connectors
Self tapping screws
Wire cutter/stripper
Small knife/razor blade/gasket scraper
Putty knife
Popsicle stick
3-4 C Clamps
2-3 beers
Steps
1. Remove your door panels. Almost every car is different, so I did not take any photos or include any specific steps. You may want to refer to your FSM for this.
2. Remove your speakers and disconnect your positive and negative leads.
3. Study your speaker. The woofer cone on mine is integrated into the plastic housing and the speaker is held in place with the plastic housing in two places- at the magnet and at the perimeter. The wiring has a handy connector to keep things clean.

4. On the flip side, there is some foam that will need to be removed in order to have a suitable mating surface the new speaker. I chose to remove it carefully with a knife. A razor blade or gasket scraper will also work.

5. Once the foam is removed, scrape the remnants off and remove a layer of the cardboard paper for a clean spot to spread JB Weld for a clean mounting surface.

6. Next, I wanted to free the old speaker from the oppressive OEM cage. I used a Dremel with a cutting blade to cut through the upper layer first.

This allowed the speaker to sag with the weight of the magnet.

7. I then cut out the woofer since it was structurally integrated into the housing.

8. The positive and negatives from the plug to the speaker had to be cut as well.

9. I was left with this hole and the rest of the supports.

They were also cut out with the Dremel.

I also cut out the leads and cut into the housing for the connector plug to allow my new wires to pass through the stock location.
10. Remember that foam we cleaned up and then scraped the cardboard really clean? I mixed up some JB Weld and spread it around the cleaned cardboard paper surface with a small putty knife. A popsicle stick will also work.
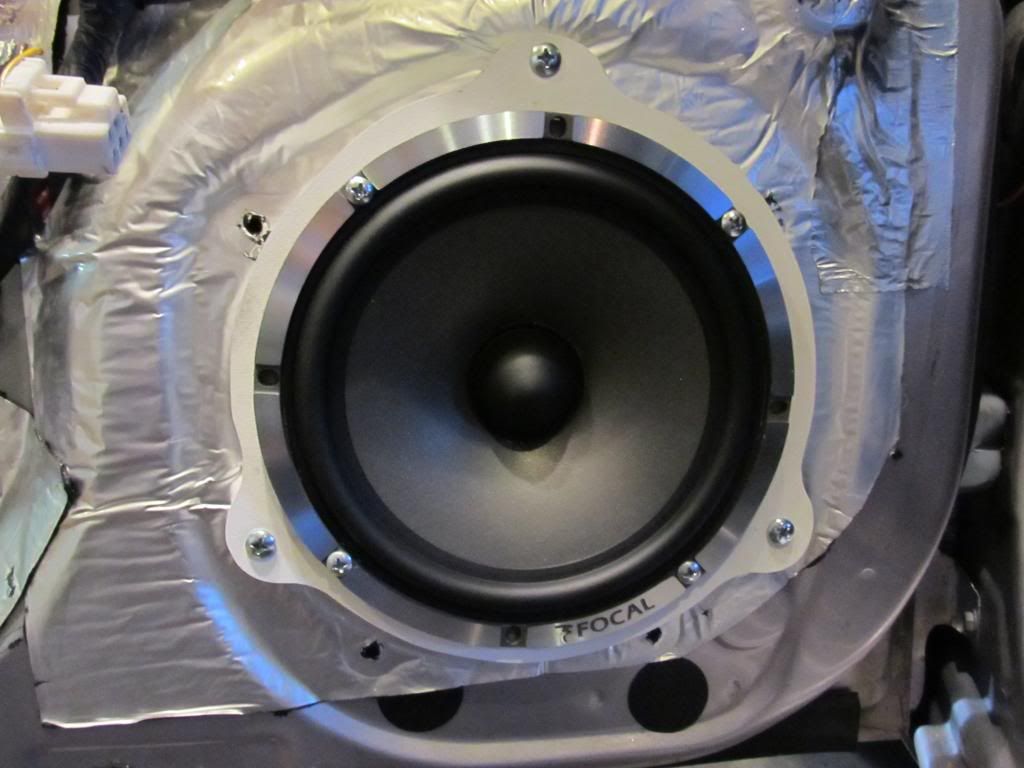
Press the speaker onto the cardboard ring and clamp it with 3-4 C clamps for 30-40 minutes. Drink a beer to pass the time. I also used some self tapping screws to further mount and reinforce the speaker.

11. Next, the OEM plug was cut and the wires were stripped to reveal the bare copper. I used crimp connectors to join the OEM wiring to the new leads.

12. I ran the new leads through the hole I punched through the housing where the OEM connector was and connected them to the positive and negative speaker terminals.

13. I remounted the speakers and tucked the new wires.

BICKITY BAM, You're done! Go drink the other beer to celebrate!