Overview: The following tutorial will explain how to replace the bulbs which illuminate the instrument cluster (speedometer, tachometer, odometer, fuel gauge and temperature gauge). The following images are based on a 2003 Pathfinder; the process is similar for all R50 models with the exception of the number of cluster lamps and wiring harnesses. It is recommended that you unplug the negative terminal of your vehicles battery before beginning the following procedures, it is not required, however.
IMPORTANT: If you do not disconnect the vehicles negative battery terminal for the duration of the procedure, then DO NOT turn the vehicle to ACC or ON mode while any of the clusters wiring harnesses are disconnected. Doing so will result in an open circuit for many of the vehicle systems and the SERVICE ENGINE SOON lamp will illuminate and you will need to reset the ECU.
Disclaimer: I am posting this tutorial for educational purposes and cannot be held liable for any damage to your vehicle resulting from this tutorial. The following information is given to you at the best of my ability and if used correctly, will result in a successful instrument cluster lamp replacement. The following tutorial is based on the circuitry for a 2003 Nissan Pathfinder and may differ slightly for other vehicles.
If you need help with any parts suggestions or calculations, please feel free to post on this thread and hopefully someone will promptly help you.
Difficulty: 1 out of 4
Time: Approximately one hour, depending on your skill level
Cost: The replacement bulbs
Tools: Phillips head screwdriver (a short screwdriver is best), Needle-nosed pliers
_________________________________________________________________________STEP 1 (Removing instrument cluster surround)_________________________________________________________________________Begin by removing the two Phillips-head screws which hold the instrument cluster surround in place. Once they are removed, you firmly pull on the cluster surround (pulling on the bottom of the trim closest to the steering column) towards you. There are two small metal clips which hold the surround trim in place (see picture below). It is easiest to remove the cluster surround with the steering wheel lowered as much as possible.
(Picture 1) Remove the two screws shown
(Picture 2) Note the two metal clips which hold the trim in place
_________________________________________________________________________STEP 2 (Removing Instrument Cluster)_________________________________________________________________________Now you need to remove the instrument cluster assembly from the dash. Remove the four screws in the following image and pull the cluster towards you as far as possible. Now tilt the cluster so it is facing up (towards the roof). You need to unplug all of the wiring harnesses going into the instrument cluster. Once all of the harnesses are disconnected, you can remove the instrument cluster from the vehicle.
(Picture 3) Remove the four screws shown
(Picture 4) Unplug all wiring harnesses from rear of instrument cluster
_________________________________________________________________________STEP 3 (Lamp Replacement)_________________________________________________________________________Now you will need to lay the cluster face-down on a solid surface (on a soft cloth as not to scratch/damage clear lens). In the following image you can see the designation for each bulb in the cluster. The amount of lamps or the placement of each lamp will likely differ from production years. To remove each bulb, you want to twist each base counter-clockwise (about 90 degrees) and pull the socket and bulb from the cluster.
You will see that the bulbs which come from the factory are incandescent, and sometimes covered with blue latex (for softer light). Is is common to replace these bulbs with LED's for longer bulb life or to customize the cluster illumination cluster. It is important that you save the factory bulb sockets, as some aftermarket sockets will not fit the cluster. If using the factory sockets, you will need to remove the bulbs from the sockets. To do so, just pull each bulb out using the needle-nosed pliers. The bulbs will probably get crushed and this is common, they are usually seated in the sockets pretty tight. Just make sure you pull all of the old bulbs remnants.
Now you can just place the new bulb in the socket and put the bulb/socket back into the cluster (installation is reverse of removal).
NOTE: When using LED replacement bulbs, it is necessary to use correct polarity or the bulb will fail to illuminate. There is no way to tell the clusters polarity, so you just have to guess. If the bulb does not illuminate when you test the cluster, then you will need to remove the bulb/socket and rotate the socket (WITH the bulb in it) 180 degrees and then re-install. The bulb should now illuminate when you test the cluster. If using incandescent replacement bulbs, then polarity is unimportant and the bulb will always illuminate.
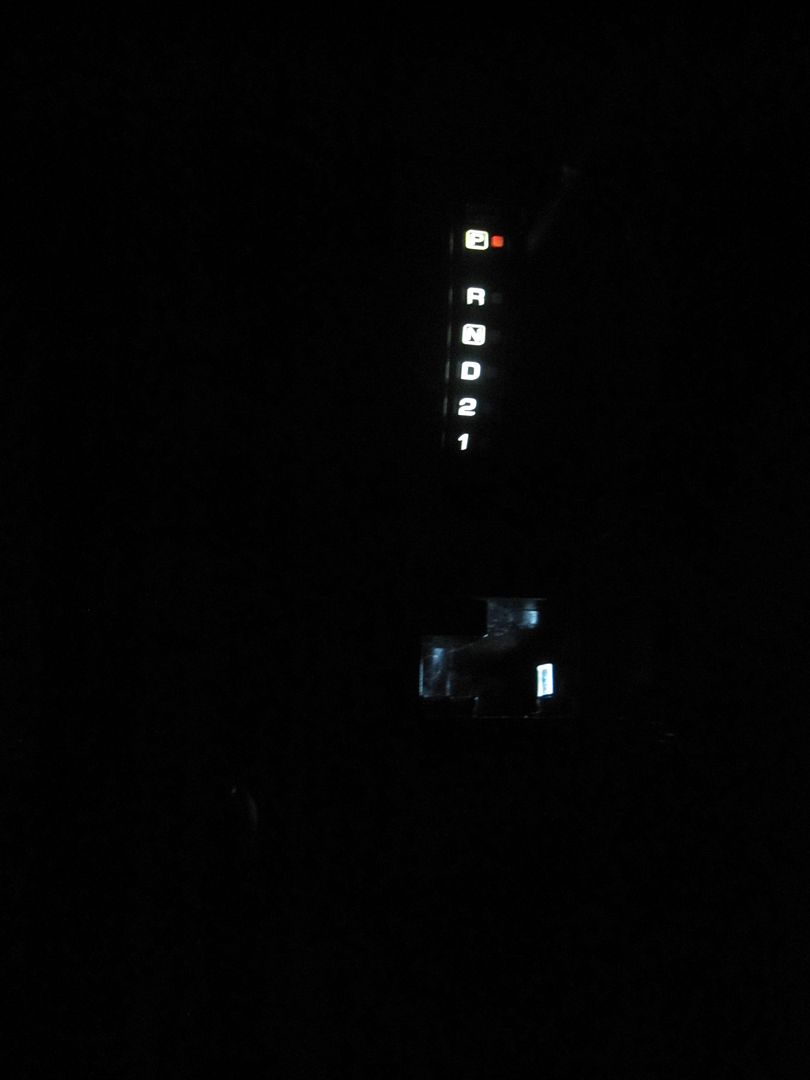
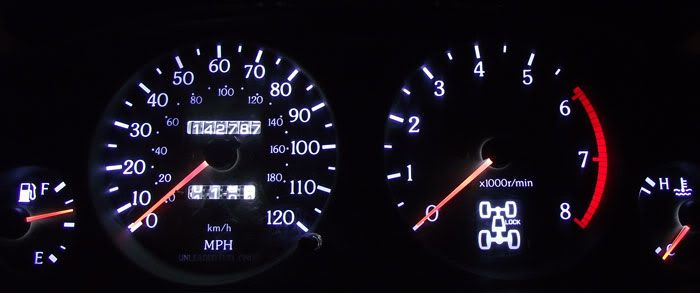
(Picture 5) The lamp layout for the 2003 Pathfinder. The cluster lamps illuminate the speedometer, tachometer, fuel gauge and temperature gauge. The odometer lamp only illuminate the digital odometer.
_________________________________________________________________________STEP 4 (Testing)_________________________________________________________________________Once you have replaced all of the lamps, it is necessary to test the cluster. Plug all of the wiring harnesses into the cluster (and replace negative battery cable). Turn headlamps on (without putting key in) and ensure proper lighting of all lamps. If you replaced the turn signals then turn on hazards to test both simultaneously. If you replaced the headlamp brights lamp, then you will need to put key in and turn to ON (without starting vehicle) to use brights.
(Picture 6) This is a picture of my instrument cluster after replacing the cluster lamps with blue LED's and the odometer lamp with a white LED.
_________________________________________________________________________STEP 5 (Cluster Installation)_________________________________________________________________________Installation is the reverse of removal.
GOOD LUCK!

HOW TO: Replace Instrument Cluster Lamps
-
Pwnin O'Brien

- Posts: 1717
- Joined: Wed Jun 24, 2009 1:10 pm
-
Empty V

- Posts: 2308
- Joined: Mon Jan 21, 2008 10:53 am
- Car: 2001 Infiniti QX4, 1982 Corvette C3 Shark
Re: HOW TO: Replace Instrument Cluster Lamps (Pwnin O'Brien)
Nice Pwnin, thanks! Also note that main illumination lamp for the 01+ QX4's a thin compact fluorescent tube and can't be swapped out.
Billy
Billy
-
slickroger

- Posts: 919
- Joined: Sun Jan 06, 2008 12:33 pm
- Car: Nissan Pathfinder 2001
- Contact:
Re: HOW TO: Replace Instrument Cluster Lamps (Empty V)
Nice Pwnin' I'm going to add this to the other gauge lamp post.
zer...ights
I'm also going to steal your disclaimer to protect myself if you don't mind.
zer...ights
I'm also going to steal your disclaimer to protect myself if you don't mind.
-
lino

- Posts: 3533
- Joined: Mon Aug 15, 2005 7:48 am
- Car: 1991 Q45a Fed-Spec, IQP/White, Texasoil 9 Accumulator Recharge, '93 TCU 1st Gear Start, JWFSB, B&M 70268 Transmission Cooler, BBS Forged Wheels, DRLs, Silverstars, Tint, Very Well Serviced.
- Contact:
Re: HOW TO: Replace Instrument Cluster Lamps (Pwnin O'Brien)
I never knew that. Thanks!Pwnin O’Brien wrote:NOTE: When using LED replacement bulbs, it is necessary to use correct polarity or the bulb will fail to illuminate. There is no way to tell the clusters polarity, so you just have to guess. If the bulb does not illuminate when you test the cluster, then you will need to remove the bulb/socket and rotate the socket (WITH the bulb in it) 180 degrees and then re-install. The bulb should now illuminate when you test the cluster. If using incandescent replacement bulbs, then polarity is unimportant and the bulb will always illuminate.
-
datsunfool
- Posts: 1
- Joined: Mon Apr 18, 2011 6:18 pm
Re: HOW TO: Replace Instrument Cluster Lamps
I have a 2003 nissan pathfinder. The back side of the instrument cluster plainly shows the shape of the lamp holder. The dealer lamp holder part number for the 2003 pathfinder is incorrect. The part comes with a lamp and holder as one unit. The lamps are replaceable with a #37 common wedge bulb. In this particular case the lamp holder if broken is not the same as the part nissan will order for you. Nobody seems to know what the part number is to replace the 2003' lamp holder. It appears that the 03' lamp holder ( six each ) makes electrical contact inside the panel not on the outside like most cluster bulbs that have been used for years. HELP Y'ALL FROM NOT SO SUNNY NORTH FLORIDA
-
Towncivilian

- Posts: 4995
- Joined: Sun May 23, 2010 10:21 am
- Car: 2001.5 Pathfinder SE 3.5L 2WD A/T
2007 Altima 2.5L CVT
2012 Sentra 2.0L CVT Special
2012 G37 Sedan 7A/T - Location: Florida, USA
- Contact:
Re: HOW TO: Replace Instrument Cluster Lamps
Click here then scroll down to "Pathfinder (R50) 248 Instrument Meter & Gauge - REAR VIEW: 2003 W [* 09]" and you will find the correct part numbers and product SKUs (well, half of the product SKU - my dealer says the "R50xxx" portion means nothing) there. Provide these along with your VIN to the dealer and they should be able to provide you with the correct part. And strange that #37 bulbs fit - they are huge in comparison to the #74s that are in my 2001.5!datsunfool wrote:I have a 2003 nissan pathfinder. The back side of the instrument cluster plainly shows the shape of the lamp holder. The dealer lamp holder part number for the 2003 pathfinder is incorrect. The part comes with a lamp and holder as one unit. The lamps are replaceable with a #37 common wedge bulb. In this particular case the lamp holder if broken is not the same as the part nissan will order for you. Nobody seems to know what the part number is to replace the 2003' lamp holder. It appears that the 03' lamp holder ( six each ) makes electrical contact inside the panel not on the outside like most cluster bulbs that have been used for years. HELP Y'ALL FROM NOT SO SUNNY NORTH FLORIDA

Re: HOW TO: Replace Instrument Cluster Lamps
With that said, since I have an 03 SE as well, should I order the 74 or the 34? I'm a tad confused. 
-
Towncivilian
- Posts: 4995
- Joined: Sun May 23, 2010 10:21 am
- Car: 2001.5 Pathfinder SE 3.5L 2WD A/T
2007 Altima 2.5L CVT
2012 Sentra 2.0L CVT Special
2012 G37 Sedan 7A/T - Location: Florida, USA
- Contact:
Re: HOW TO: Replace Instrument Cluster Lamps
Uhhh... difficult to tell, but it would appear that the 2003 twist bases are larger than the 2001. Compare with one of the photos in the first post:

I'm not certain, and I can't verify the bulb size obviously. Ideally Pwnin O'Brien will tell us the answer but I haven't seen him around here lately. Anybody else with a 2003 chime in?
If you remove one of your twist bases and photograph the bottom of it along with the bulb out of the base (it should come out with some pliers, be gentle to avoid breaking it!) I can discern the size.
Re: HOW TO: Replace Instrument Cluster Lamps
Ok, I'll open it tomorrow and get you a picture!
-
Pwnin O'Brien
- Posts: 1717
- Joined: Wed Jun 24, 2009 1:10 pm
Re: HOW TO: Replace Instrument Cluster Lamps
Your '03 should use #74 bulbs for the cluster.SBK03SE wrote:With that said, since I have an 03 SE as well, should I order the 74 or the 34? I'm a tad confused.
Re: HOW TO: Replace Instrument Cluster Lamps
Ok thanks, and should I order 5 bulbs?
-
Towncivilian
- Posts: 4995
- Joined: Sun May 23, 2010 10:21 am
- Car: 2001.5 Pathfinder SE 3.5L 2WD A/T
2007 Altima 2.5L CVT
2012 Sentra 2.0L CVT Special
2012 G37 Sedan 7A/T - Location: Florida, USA
- Contact:
Re: HOW TO: Replace Instrument Cluster Lamps
Yep, 5 bulbs - 1 for each gauge, and one for odometer. Order what you posted as a "final" list in your other thread.SBK03SE wrote:Ok thanks, and should I order 5 bulbs?
Re: HOW TO: Replace Instrument Cluster Lamps
Ok thanks Town! You've been a great help man.
Re: HOW TO: Replace Instrument Cluster Lamps
Ok, I managed to break the old bulb and a piece of the socket. I cant get the remnants of the bulb out of the socket. Am I screwed?
UPDATE: FOR THE 2003, USE the larger bulb. I just tried and the 74s are dangling in there. I'm using foil to hold them in place. This process has me scared as heck. I broke a lot of stuff while trying to be as gentle as possible. I need the cluster illuminated because I do a lot of night driving. I'm going to have to overnight a whole new order.
Don't let my failure deter any of you though..
UPDATE 2: Perseverance prevailed. Common sense kicked in (VTEC POWER YO!) and instead of foil I bent the contacts so the LEDs fit snugly.
-
Towncivilian
- Posts: 4995
- Joined: Sun May 23, 2010 10:21 am
- Car: 2001.5 Pathfinder SE 3.5L 2WD A/T
2007 Altima 2.5L CVT
2012 Sentra 2.0L CVT Special
2012 G37 Sedan 7A/T - Location: Florida, USA
- Contact:
Re: HOW TO: Replace Instrument Cluster Lamps
I broke a bulb in its twist base and used a pair of needle nose pliers to carefully remove the remnants.
And yes, bending the LED's contacts helps to keep them in. But if the larger bulbs fit, those would probably be better.
I got like 20 extra twist bases from the junkyard today, but it's from a WD21 so I dunno if it'd fit correctly in an R50. But the twist base says "Toshiba V-2" like my R50's original ones and they look the same, so they probably will. Are the illumination twist bases larger than the bright/turn signal indicator ones as seen in the first post/
Re: HOW TO: Replace Instrument Cluster Lamps
Nope, they are Toshiba V-2s all around. So, I ended up only using 3 of the leds for the cluster and gauge. I don't think the turn signals and brights deserve leds, they're fine by me. So I have two extra 74s, where can I install them?
-
Towncivilian
- Posts: 4995
- Joined: Sun May 23, 2010 10:21 am
- Car: 2001.5 Pathfinder SE 3.5L 2WD A/T
2007 Altima 2.5L CVT
2012 Sentra 2.0L CVT Special
2012 G37 Sedan 7A/T - Location: Florida, USA
- Contact:
Re: HOW TO: Replace Instrument Cluster Lamps
If you have manual A/C controls you can put them in there. Other than that, your options are glovebox or ashtray, or turn signals/brights indicators. I think that's all that uses #74 in your year PF.
Re: HOW TO: Replace Instrument Cluster Lamps
Auto A/C, Glovebox doesn't have a light that I know of, is the ashtray right next to the shifter? I thought it was a coinbox lol.
-
Towncivilian
- Posts: 4995
- Joined: Sun May 23, 2010 10:21 am
- Car: 2001.5 Pathfinder SE 3.5L 2WD A/T
2007 Altima 2.5L CVT
2012 Sentra 2.0L CVT Special
2012 G37 Sedan 7A/T - Location: Florida, USA
- Contact:
Re: HOW TO: Replace Instrument Cluster Lamps
Yeah, ashtray is between the shifter and cupholders.
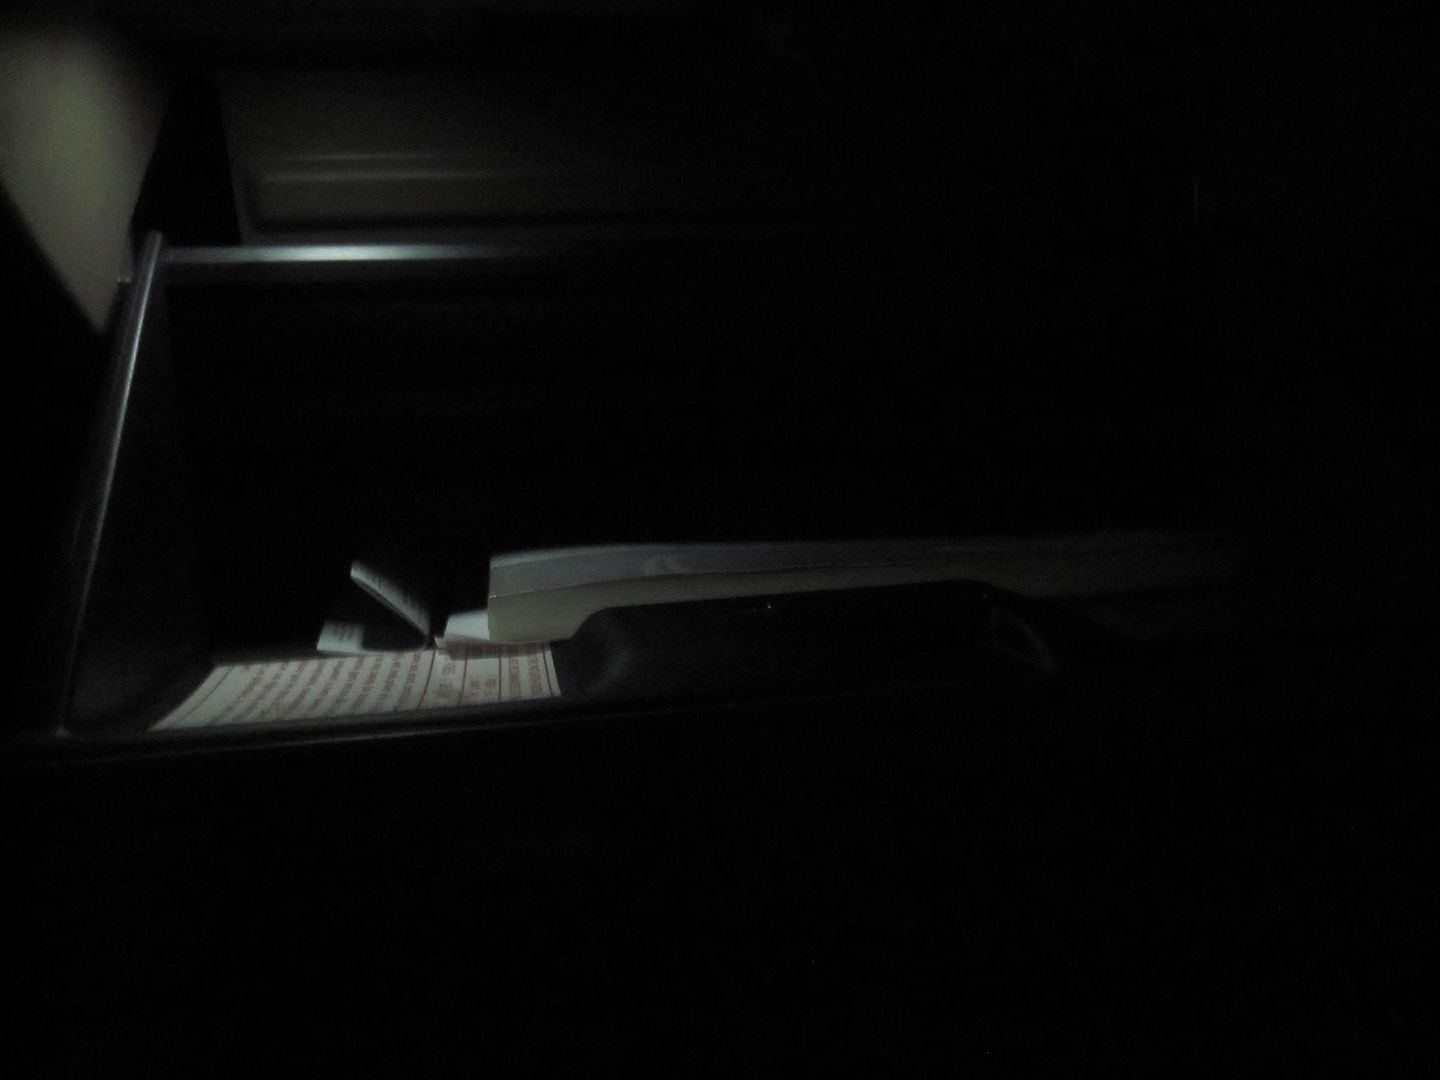
I have a normal 74-W (cool white, normal [not high-power] LED) LED bulb in there, it's quite bright enough. A tri-LED might be overkill.
Glovebox should have a light, maybe yours is dead.
I have a 74-WHP (cool white high power) in this spot. Still quite dim as you can see. A tri-LED bulb might be useful here, try it.
I would not put your white tri-LED bulbs in the turn indicators as the color would be more neon and not pure green unless you have green LEDs. If you put one in your bright indicator, you'll just have a very bright indicator.
You can put LEDs in your auto A/C control unit, read here. They take NEO-4x size bulbs.
Re: HOW TO: Replace Instrument Cluster Lamps
First of all many thanks to Nico Club and Pwnin O’Brien for giving me the confidence and information to make this repair possible. If you have any doubts let me say that the job is even easier than it seems after reading the tutorial.
I did a time check and then started removing the instrument cluster surround. It only took a couple of minutes and a short Phillips to have the plastic surround out of the dash. The top two screws came right out and the clips on the bottom didn’t stick, so all it took was a little wiggling and out it came. The four cluster screws were easy with the help of a small magnet as the bottom left and right screws are recessed. If you have a magnetic Phillips, that would be perfect for the job.
All the information I’ve read advises disconnecting the wiring harness connectors and removing the cluster. In my 2001 pathfinder I found it much simpler to just roll the cluster face down in the hole without removing it. All the bulbs were easily accessible, and with a little twist came right out. If you want to save some money NAPA #74 bulbs will work ( $2 vers $6 each ) for the Tach-Temp, Speedo-Fuel, and trip meter, a total of three bulbs..
Total time from start to finish, which included cleaning the instrument cluster, ohm metering all the bulbs, re-assembly and testing was 30 minutes. When I stopped at the Nissan dealership to pickup the bulbs ( which were out of stock ) I asked for an estimate. It was $120 plus parts. Thanks everyone for the help.
-
BoostMyQX4
- Posts: 126
- Joined: Mon Feb 06, 2012 6:38 pm
- Car: 96 Infiniti QX4
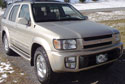
Re: HOW TO: Replace Instrument Cluster Lamps
So the cluster bulbs for a 97 qx4 are the same as the 97 pathfinder?
This is what mines looks like.
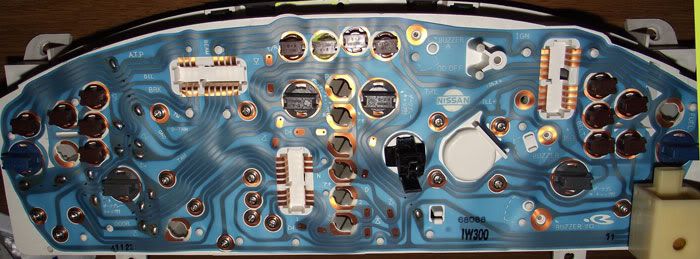
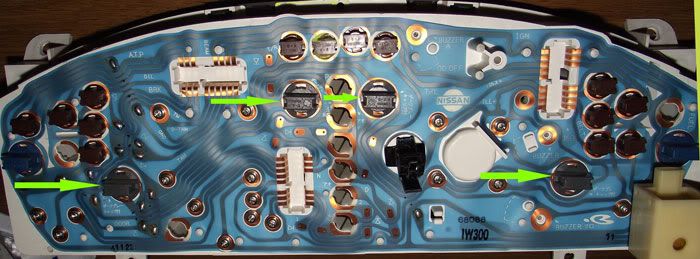
Do i replace the four bulbs pointed with the green arrows? if so they look to be 168 bulbs same as license plate.
This is what mines looks like.
Do i replace the four bulbs pointed with the green arrows? if so they look to be 168 bulbs same as license plate.
-
Towncivilian
- Posts: 4995
- Joined: Sun May 23, 2010 10:21 am
- Car: 2001.5 Pathfinder SE 3.5L 2WD A/T
2007 Altima 2.5L CVT
2012 Sentra 2.0L CVT Special
2012 G37 Sedan 7A/T - Location: Florida, USA
- Contact:
Re: HOW TO: Replace Instrument Cluster Lamps
Yes, replace all four of those with LED bulbs. I'm not sure whether the bulbs are 168 or 74 on a QX4, sorry.
-
Ron Burgundy
- Posts: 318
- Joined: Fri Jun 12, 2009 1:54 am
- Car: 1999.5 Nissan Pathfinder 3.3 LE
- Location: La Habra, CA
Re: HOW TO: Replace Instrument Cluster Lamps
They are likely not 168 - those are some pretty large bulbs. 74 is the typical for instrument clusters.
BUT pull one out to make sure!
BUT pull one out to make sure!
-
BoostMyQX4
- Posts: 126
- Joined: Mon Feb 06, 2012 6:38 pm
- Car: 96 Infiniti QX4
Re: HOW TO: Replace Instrument Cluster Lamps
Ok they are 168, i took out the bulbs from the back on my Scion license plate and its the same bulb, so i order 4 white LED.
And here is the results.
Before
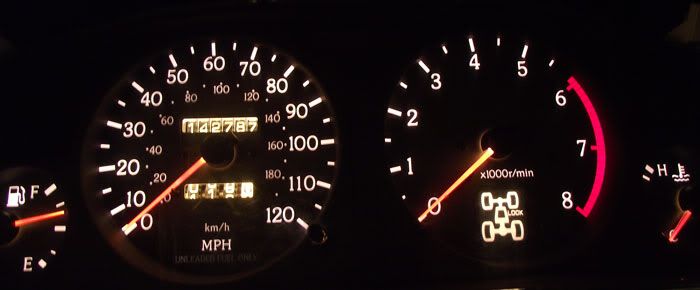
After
And here is the results.
Before
After
-
04LEMASS
- Posts: 97
- Joined: Wed Mar 07, 2012 4:59 pm
- Car: 2004 Nissan Pathfinder LE Platinum
-K&N Air Intake
Re: HOW TO: Replace Instrument Cluster Lamps
I have an 04 pathfinder and im about to do the same thing. Im getting the sense i should use 74 bulbs? is that correct?
-
Towncivilian
- Posts: 4995
- Joined: Sun May 23, 2010 10:21 am
- Car: 2001.5 Pathfinder SE 3.5L 2WD A/T
2007 Altima 2.5L CVT
2012 Sentra 2.0L CVT Special
2012 G37 Sedan 7A/T - Location: Florida, USA
- Contact:
Re: HOW TO: Replace Instrument Cluster Lamps
Yes, your 2004 will take #74 bulbs.
-
Towncivilian
- Posts: 4995
- Joined: Sun May 23, 2010 10:21 am
- Car: 2001.5 Pathfinder SE 3.5L 2WD A/T
2007 Altima 2.5L CVT
2012 Sentra 2.0L CVT Special
2012 G37 Sedan 7A/T - Location: Florida, USA
- Contact:
Re: HOW TO: Replace Instrument Cluster Lamps
I don't know. When I replaced my bulbs, I used the stock twist bases and used these bulbs in cool white color temp.
Re: HOW TO: Replace Instrument Cluster Lamps
I have a Nissan Altima 1999 I want to know the part number
for the socket where it is installed the instrument cluster lamp
As well as the bulb part number
for the socket where it is installed the instrument cluster lamp
As well as the bulb part number
-
Towncivilian
- Posts: 4995
- Joined: Sun May 23, 2010 10:21 am
- Car: 2001.5 Pathfinder SE 3.5L 2WD A/T
2007 Altima 2.5L CVT
2012 Sentra 2.0L CVT Special
2012 G37 Sedan 7A/T - Location: Florida, USA
- Contact:
Re: HOW TO: Replace Instrument Cluster Lamps
You really don't want to buy new OEM twist bases with bulbs, they're $18+ each. Why do you need replacement twist bases? The bulbs are likely #74 size.precio6 wrote:I have a Nissan Altima 1999 I want to know the part number
for the socket where it is installed the instrument cluster lamp
As well as the bulb part number
Find Your Forum!