HOW TO: NB Miata radiator swap

Since so many NICOclub staffers and members own a Miata, here's a spot to discuss the car Nissan wishes it had built!
User avatar
PapaSmurf2k3
Site Admin
Posts: 24000
Joined: Thu Nov 21, 2002 3:20 pm
Car: 2017 Corvette, 2018 Focus ST, 1993 240sx truck KA Turbo.
Location: Merrimack, NH

Post

Yeah I know this is NICO, not MCO or whatever, but if you look at my old posts, you'll see I don't care (how many How To threads have I made about the Prelude?).

Anyway, this will outline my experiences swapping a crappy modern age plastic end-tank radiator for a more robust all aluminum radiator. Difficulty ranges from a 1 to a 4... depending on the quality of the replacement radiator you get.
So here we go:
Image
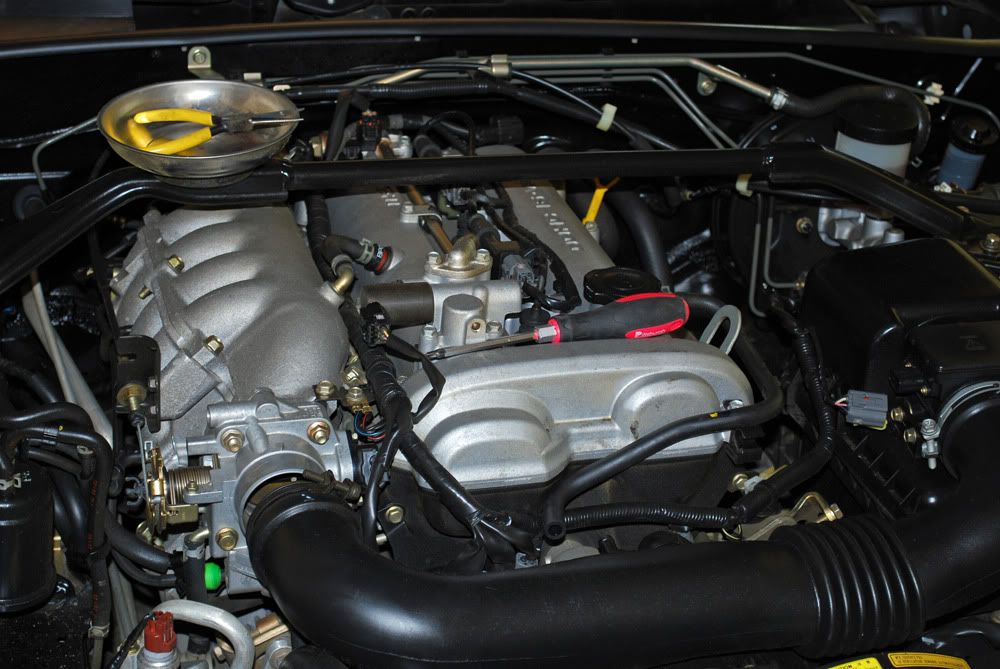
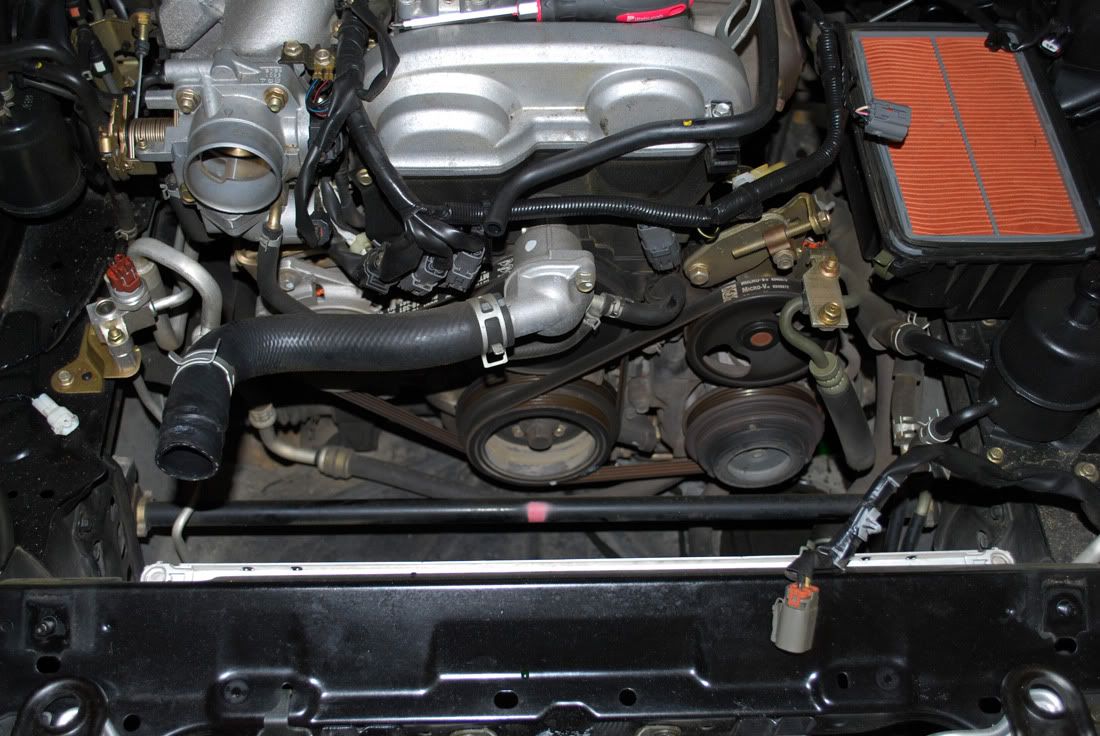
I started by removing my intake tube. This is done by loosening the clamp holding it on to the throttle body, pulling off one of the hoses going from the intake tube to the valve cover, and unplugging the associated sensors from their respective wiring harnesses. You will also have to remove the harness clips that hold the wires to the intake themselves. I did this by squeezing the back side of them with some needle nose pliers, and pulling them out (your basic snap-fit design). I suppose you could also loosen the hose clamp holding the intake tube to the MAF/filter box, and just remove the tube... but I also wanted to check my filter and a few other things... so it just worked out this way.

Image

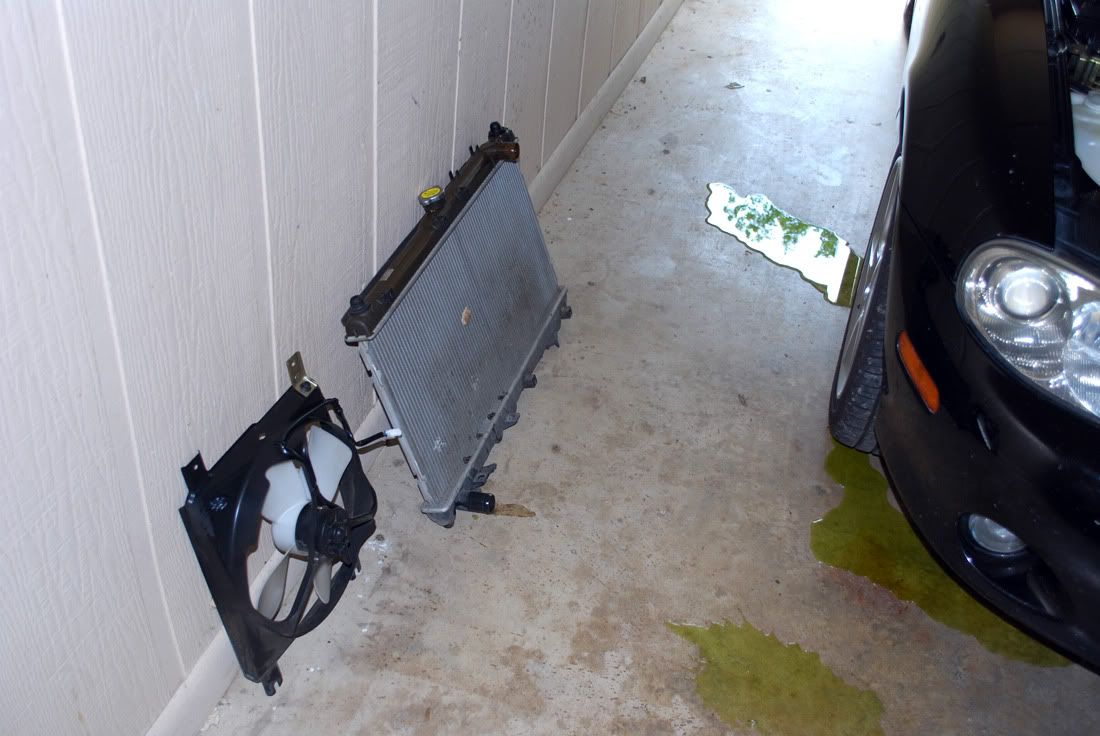
Next up, remove the electric fans. I did the driver's side first so that there was plenty of room to get at the passenger side one when the time came. The driver's side just has the 1 electrical connection, the harness anchors, and 2 bolts that hold it to the radiator. Remove all that stuff and it should just lift right out.

Image
Next up is the passenger side. This one, you can leave the harness anchors attached to the fan, but you'll have to unplug the 1 white connection using a flathead screwdriver to lift up on the little clip thingy.
Image

In addition to the 2 bolts up top (as on the driver's side), there are 2 bolts on the bottom of the fan as well. Remove them and slide the fan assembly out under the radiator hose to the driver's side, and lift it out.

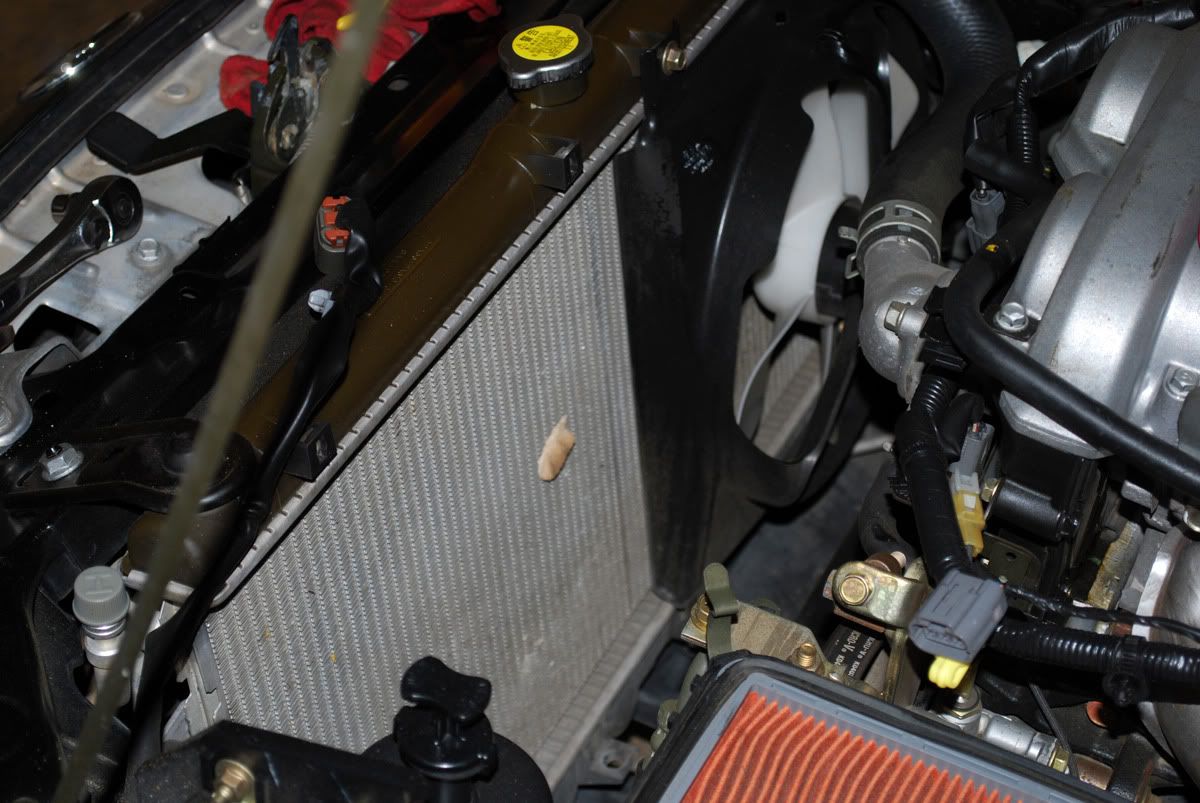
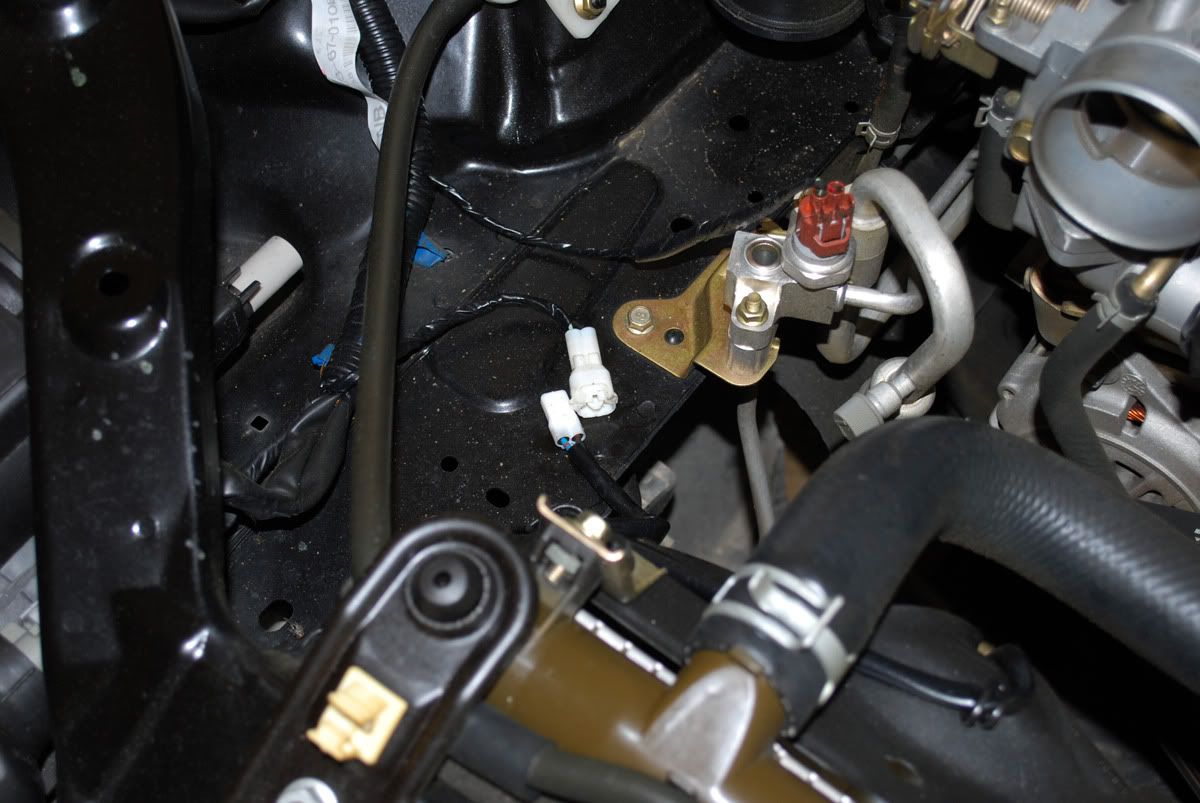
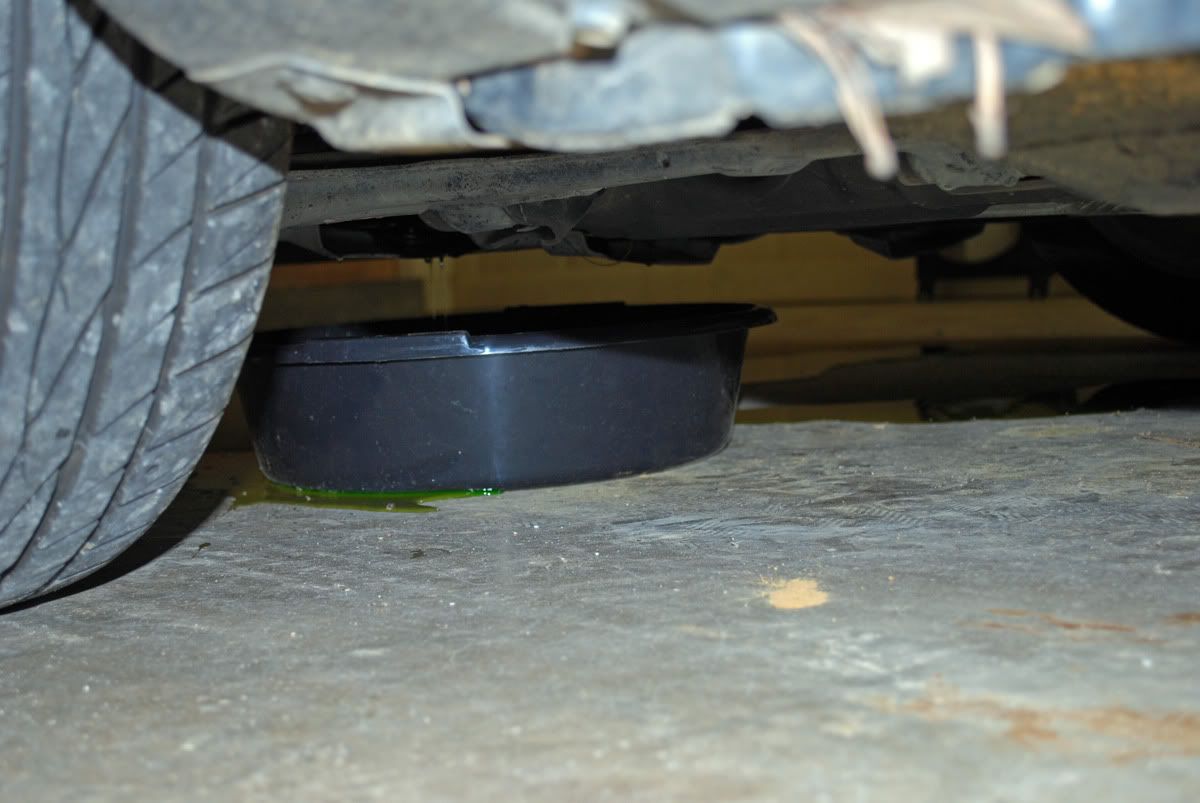
Next, place a catch can under the car to catch the sea of coolant that will inevitably spill everywhere. Squeeze the hose clamp on the lower radiator hose using some sort of wide pliers. Slide it back on the hose and pull the hose off the radiator outlet.
Image
Image
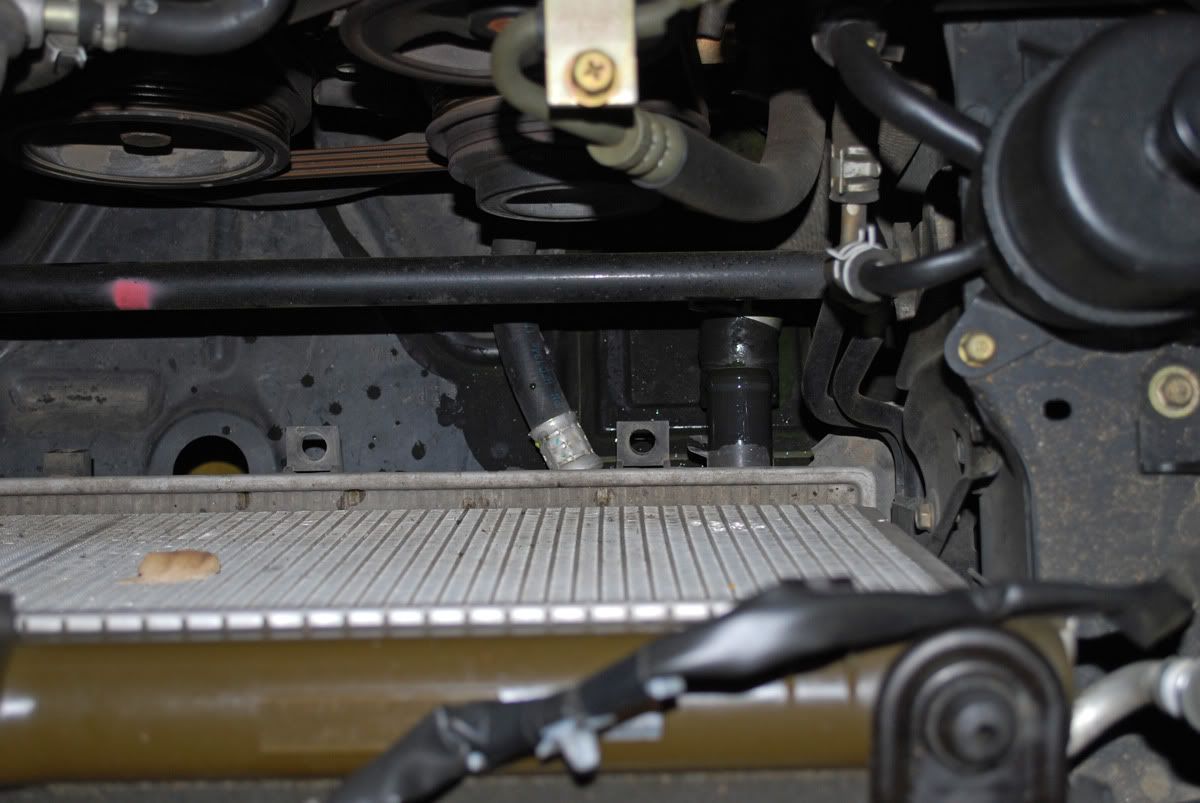
Do the same for the upper hose. There shouldn't be much coolant coming out of that one at this point. After the upper hose is pulled off, remove the hose going to the overflow tank. Remove the nut from each of the upper radiator mounts. The radiator should just pull right out. Time invested to this point? About 15 - 20 minutes. The car is extremely easy to work on.
Image
Image

Now grab the new radiator and flush it out with water (in all the ports) to remove any packing material that may be stuck in there... or whatever else might have come from China or wherever the hell the damn thing was made.
Image
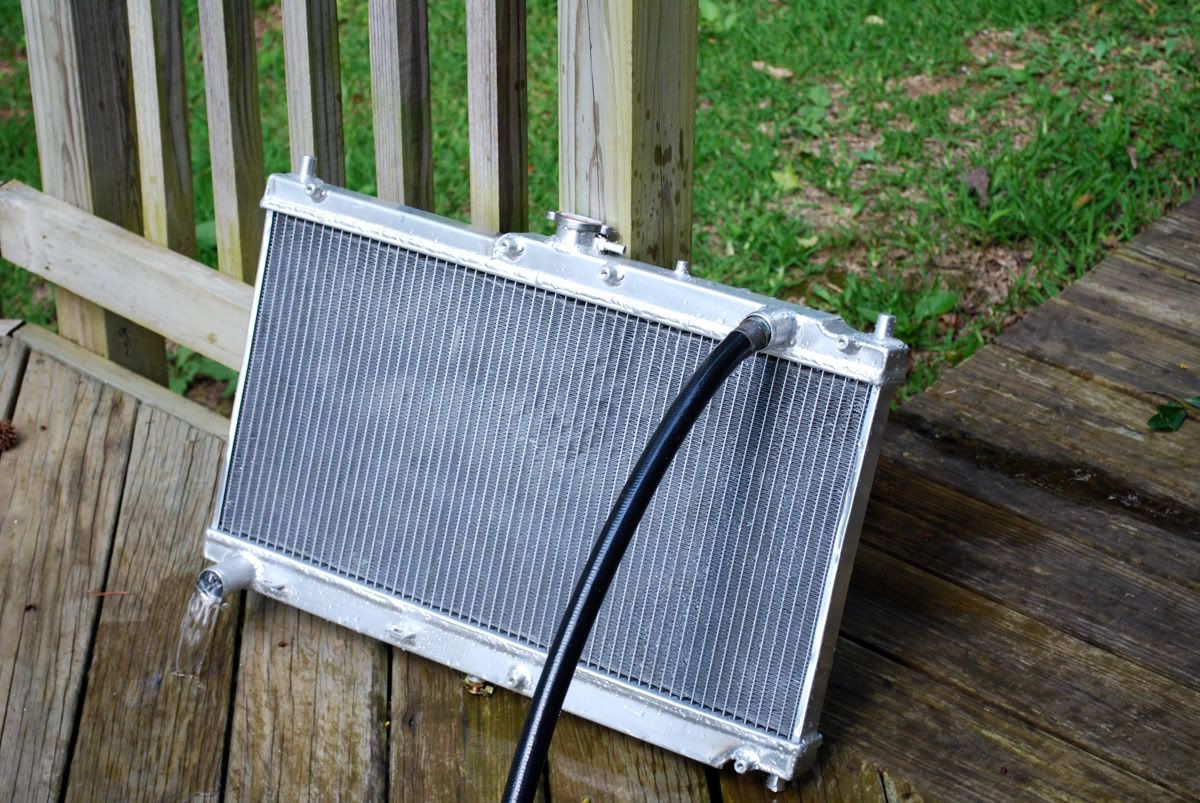
Remove the bushings from the top and bottom of the old radiator and put them on the new ones.
At this point, installation should be reverse of installation. I started by removing some stupid chain that was attached to the radiator cap and anchored to the radiator... dunno why it's there (so you don't lose the radiator cap?).
Now put the radiator in the car. The 2 lower bushings are supposed to engage 2 holes that are attached to brackets. Mine did not. At this point you realize you bought some cheap Chinese made piece of s***, and that this 45 minute job is now going to turn into a 3+ hour job. You also realize that no matter what a vendor says, "direct replacement, no modifications necessary" is a complete lie when dealing with an Ebay/aftermarket company.
So anyway, I pulled the radiator back out and removed the rubber bushings in an attempt to gain enough wiggle room... evidently it wasn't enough because it still didn't fit.
Image
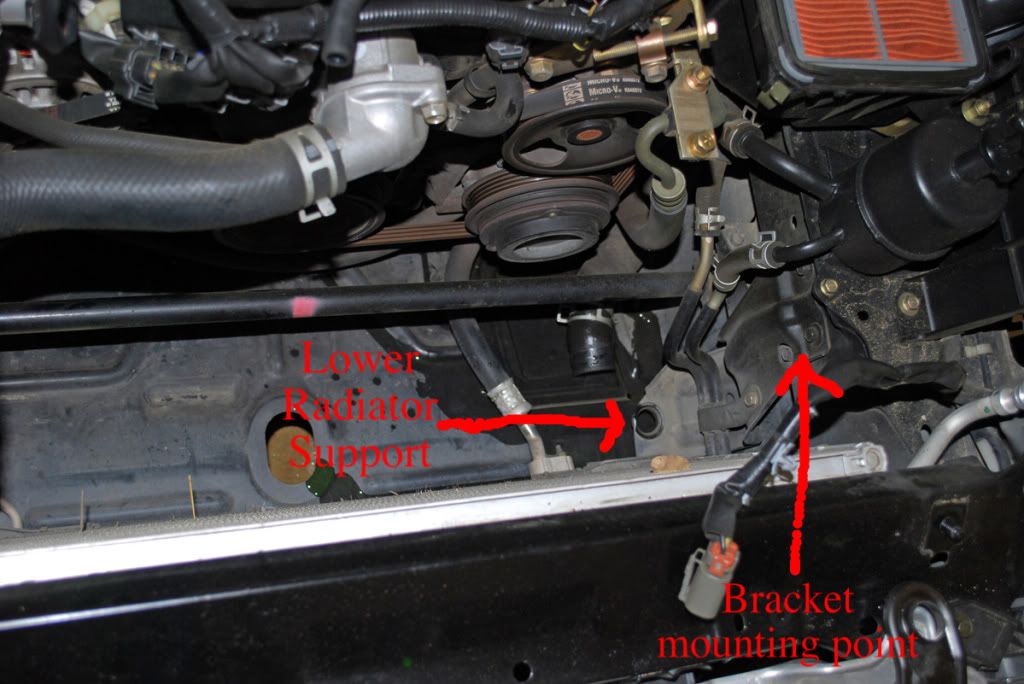
At this point I had to remove the bolts holding the bracket on and put some washers behind it to shim it towards the center of the car (the direction I needed to go in order to get it to fit). I left it loose, as well as loosened the other side to get optimum wiggle room. It dropped into the mounts, and I tightened up the lower brackets. Bolt down the upper mounts and make sure everything fits correctly to this point (everything might be shifted to one side or something). Re-install the lower radiator hose and slide the clamp up the flange.

Now install the passenger side fan. Install the lower bolts first (very loosely). This will act as a guide for the fan. The lower supports on the fan are slotted and open, so you just slide it on to those bolts, and then swing the fan forward, so its flush with the radiator. Tighten the lower bolts evenly, as well as the upper bolts. The incredibly quality control of the Chinese-made radiator once again played a role at this point. One of the upper fan mounts was all sorts of out of whack. Luckily, those crafty Japs at the Mazda R&D department anticipated this, and designed that mounting tab on the fan so that it could move/pivot a little bit... accommodating their Asian neighbors. Loosen that 1 bolt and move the tab where you need it. Tighten down all the mounts and re-install the upper radiator hose.
Image

Now onto the driver's side fan. This is what caused me the most headaches. The lower support tabs were WAY out of whack. Something like a full .5-1" away from where they were supposed to be... and slightly bent. The Chinaman at the assembly plant didn't feel it necessary to weld these in the correct location, and the Chinese Engineer didn't feel it necessary to anticipate his brother's carelessness, and slot the mounting holes... so I had to get crafty. This pic was taken about halfway through the slotting process.
Image
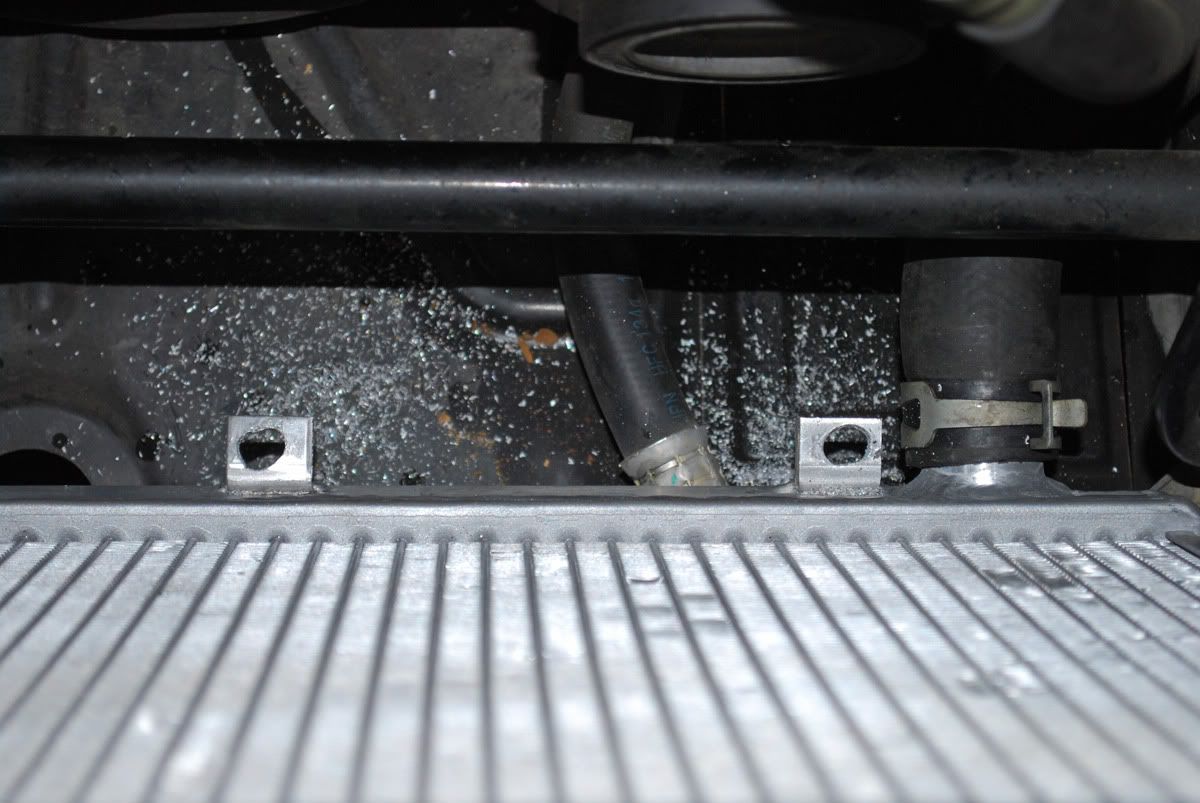
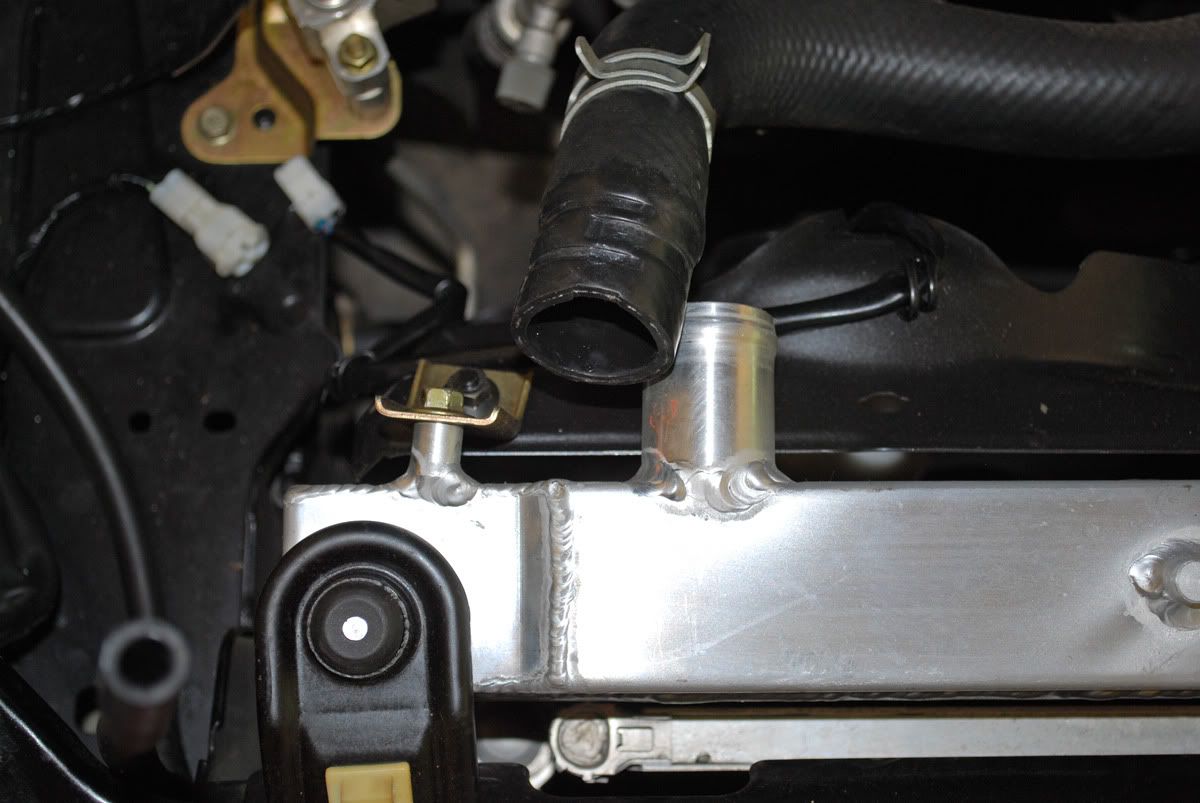
I ended up having to go almost to the end of the mounting tab... coming really close to actually punching through the side wall. MAKE SURE YOU HAVE YOUR LOWER RADIATOR HOSE ATTACHED IF YOU DO THIS! You do NOT want to get metal shavings in your cooling system. I also had to slot the upper bolt holes on the fan in order to get it to fit (although not THAT much) :(

Tighten all your bolts, re-install the intake tube, reconnect all your electrical connections and harness anchors. Fill the radiator with coolant and distilled water while massaging the upper radiator hose. I went with about a 60/40 mixture (60% distilled water). Start the car up and check for leaks. Let it warm up completely until the thermostat opens, and make sure there are no air bubbles in the system, and it doesn't overheat.
Image
DONEZO!!!


User avatar
Otto.
Posts: 8434
Joined: Mon Feb 25, 2008 5:24 pm

Post

Very in depth. I wish all tutorials were written like this.

Glad you got it to work after the holes not being in the right place. :\

User avatar
PapaSmurf2k3
Site Admin
Posts: 24000
Joined: Thu Nov 21, 2002 3:20 pm
Car: 2017 Corvette, 2018 Focus ST, 1993 240sx truck KA Turbo.
Location: Merrimack, NH

Post

Yeah, I often have to write work instructions at my job that are supposed to be in depth enough for any idiot to complete the job (along with tons of pictures). This isn't quite up to those standards... but I guess it kinda stuck with me a little bit.

User avatar
simmode1
Posts: 7918
Joined: Fri Aug 17, 2007 4:51 pm
Car: Red '95 S14
Location: Euless, TX
Contact:

Post

Quite a few 240 guys here are trading their cars for Miata's, so this could be pretty useful. Hell, I want one myself. I got that Miata luv!
Image

User avatar
PapaSmurf2k3
Site Admin
Posts: 24000
Joined: Thu Nov 21, 2002 3:20 pm
Car: 2017 Corvette, 2018 Focus ST, 1993 240sx truck KA Turbo.
Location: Merrimack, NH

Post

Trading?? What's that? :gotme

BTW, that miata looks pretty BA. A little too low for me... but hey, if your roads are smooth enough, I guess why not.

User avatar
Otto.
Posts: 8434
Joined: Mon Feb 25, 2008 5:24 pm

Post

simmode1 wrote:Quite a few 240 guys here are trading their cars for Miata's, so this could be pretty useful. Hell, I want one myself. I got that Miata luv!
Image
That thing is so smooth looking.

User avatar
s0m3th1ngAZ
Posts: 3858
Joined: Fri Mar 25, 2005 10:11 am
Car: 96' Miata
2014 Focus ST

Post

I'm currently replacing the HLA's in my miata along with TB and water pump. (I could clean them...but at $90 for all 16 why not buy new?) $300 in parts total. Took me 20 minutes to get the timing belt off...30 minutes to get the water pump off...and 45 mins to get both camshafts and the 16 lifters out. These cars are amazingly simple to work on.
My cams look pretty bad. They've worn through the hardened casing and allot of the lifters are pretty scarred. Someone didn't change the oil regularly...

User avatar
Mr1der
Posts: 37617
Joined: Tue Sep 02, 2003 8:35 am
Car: It's still not a Nissan...
Location: Lebanon TN

Post

you left out the part where you cradle your partner's balls.

User avatar
PapaSmurf2k3
Site Admin
Posts: 24000
Joined: Thu Nov 21, 2002 3:20 pm
Car: 2017 Corvette, 2018 Focus ST, 1993 240sx truck KA Turbo.
Location: Merrimack, NH

Post

Yeah I was wondering how difficult the TB job was. Miata.net made it sound like it was the end of the world to do it... but then again there were a lot of weird threads on there, people panicking about really small stuff.

My engine seems kinda loud and harsh, like it needs a valve adjustment or lifter adjustment or something... but I dunno... I'd rather just drive the car for a while before I start tearing into it. Then again, I'm kinda comparing it to the H22 in the Prelude, which isn't really a fair fight haha. My plan was to pull the engine and trans this winter and put my old turbo on it, along with upgrading the clutch and all.

User avatar
HashiriyaS14
Posts: 14966
Joined: Fri Dec 05, 2003 8:02 pm
Car: 95 S14, 08 CL9, 08 NPS50, 03 Ninja 250, '60 Super Cub
Location: DC Metro Area
Contact:

Post

In before Charlie "hates on" the low NB posted above.

Anyway, I just swapped a radiator in my MX73 last weekend, got it done in about 30 minutes. I was just going from busted stock to working stock though, no real aluminum/copper rads for x73's.

User avatar
PapaSmurf2k3
Site Admin
Posts: 24000
Joined: Thu Nov 21, 2002 3:20 pm
Car: 2017 Corvette, 2018 Focus ST, 1993 240sx truck KA Turbo.
Location: Merrimack, NH

Post

^oh yeah that reminds me... I still have the stock one that I pulled out if anyone wants it. There isn't really anything wrong with it, I just don't trust plastic end tanks.

User avatar
PapaSmurf2k3
Site Admin
Posts: 24000
Joined: Thu Nov 21, 2002 3:20 pm
Car: 2017 Corvette, 2018 Focus ST, 1993 240sx truck KA Turbo.
Location: Merrimack, NH

Post

Mr1der wrote:you left out the part where you cradle your partner's balls.
You know... ever since I got this thing, you've been hitting me with gay jokes left and right...

Don't hate just cos its not your balls I'm cradling.

User avatar
s0m3th1ngAZ
Posts: 3858
Joined: Fri Mar 25, 2005 10:11 am
Car: 96' Miata
2014 Focus ST

Post

Miata engines are known for HLA noise. Dirty oil gets in there, can't get out the tiny oil passages fast enough, and causes the camshaft lobes to smack against the now stiff lifter. It's almost expected of the engines. If you are getting lifter tick...I'd try an engine flush along with a technique where you rotate the crankshaft pulley a little at a time, allowing the lifters to fully drain.

User avatar
Urabus GodofTraction
Posts: 6178
Joined: Wed Nov 03, 2004 4:36 pm
Car: 2002 WRX Wagon, 2004 SV650, 1988 Land Cruiser, 1994 XR600R

Post

HashiriyaS14 wrote:In before Charlie "hates on" the low NB posted above.
You bet your" hipster a**". Why somebody would ruin the whole reason the Miata exists is beyond me.

User avatar
MellowZ32
Posts: 27320
Joined: Sat Feb 16, 2008 8:29 pm
Car: Pornographer's car
Location: Parts Unknown

Post

Mr1der wrote:you left out the part where you cradle your partner's balls.
:spitout:
charlieo wrote:
HashiriyaS14 wrote:In before Charlie "hates on" the low NB posted above.
You bet your" hipster a**". Why somebody would ruin the whole reason the Miata exists is beyond me.
f*** YOU CHARLIEO! YOU DON'T KNOW s*** ABOUT HOW TO STANCE A CAR AND HOW TO BE HELLAFLUSH PROPERLY!
i HOPE YOU DIE! THAT THING IS HELLATYTE Y0! :woot:

User avatar
krash
Posts: 5064
Joined: Mon Apr 11, 2005 10:43 am
Car: 1993 Nissan 240sx Convertible
Location: Memphis, TN
Contact:

Post

charlieo wrote: You bet your" hipster a**". Why somebody would ruin the whole reason the Miata exists is beyond me.
........to not make more fun?

Pretty good write up man. Sometimes miata's get to me haha

User avatar
Dattebayo
Posts: 33297
Joined: Sun Aug 25, 2002 10:04 am
Car: 2004 Frontier Desert Runner
Location: NE DC

Post

charlieo wrote:You bet your" hipster a**".

Chris is one of the biggest geeks I know. lol @ you.

User avatar
Urabus GodofTraction
Posts: 6178
Joined: Wed Nov 03, 2004 4:36 pm
Car: 2002 WRX Wagon, 2004 SV650, 1988 Land Cruiser, 1994 XR600R

Post

Dattebayo wrote:
charlieo wrote:You bet your" hipster a**".

Chris is one of the biggest geeks I know. lol @ you.
Hipster is a slang term that first appeared in the 1940s, and was revived in the 1990s and 2000s often to describe types of young, recently-settled urban middle class adults and older teenagers with interests in non-mainstream fashion and culture.
Hipsters are a subculture of men and women typically in their 20's and 30's that value independent thinking, counter-culture, progressive politics.
First two results from Google, and our internet overlord is never wrong. Close enough for government work. lol @ you.

User avatar
PapaSmurf2k3
Site Admin
Posts: 24000
Joined: Thu Nov 21, 2002 3:20 pm
Car: 2017 Corvette, 2018 Focus ST, 1993 240sx truck KA Turbo.
Location: Merrimack, NH

Post

Moved to the Miata section!


Return to “Miata Madness”