Jack
Jack stands or ramps
Small block of wood (for jacking up the differential)
3/8" Ratchet
14mm, 17mm sockets
3' aluminum pipe (for leverage while breaking subframe bolts free)
Pry bar
Install time:
1 hour +/- 30 mins
Difficulty:
Anybody who can safely lift a vehicle can do this; it's very simple
Procedure:
Get the back of the car in the air. I used ramps, you can use ramps or jack stands. CHOCK THE FRONT WHEELS.
Next, you need to jack up the differential. The diff is attached to the subframe, and the subframe will raise with the diff. When the subframe moves up, it takes the weight off of the subframe bolts which makes the nuts (at the bottom of each of the 4 bushings) easy to remove in the next step.
Use a block of wood between your diff and jack to provide a better surface to support the diff. Here's a picture of what it looked like in my driveway

You want to raise the diff enough to remove the weight from the subframe bushings, but don't raise it too much because when the subframe is all the way up you will start lifting the whole back of the car.
Next, remove the nuts underneath each subframe bushing. There are two in the back near the diff and the exhaust, then there are two in the front of the subframe. I found it easiest to get under the car to remove the back two. For the the front ones, I went over to the side of the car and could easily reach the nuts without going under the car.
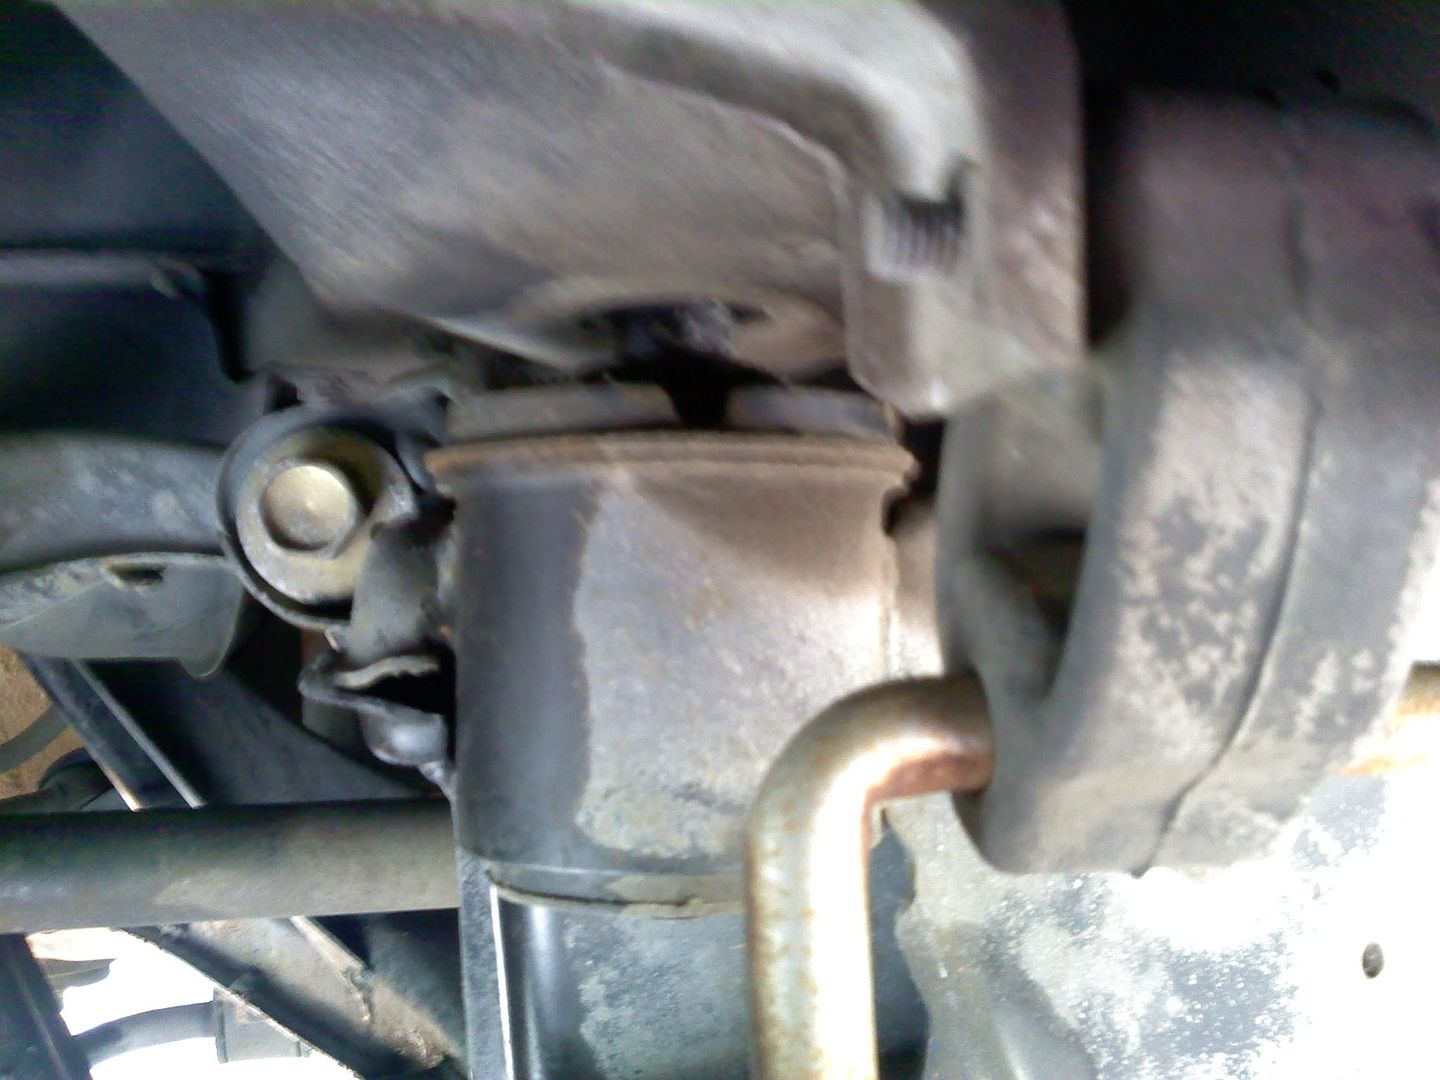
The nuts you have to remove are 17mm, and they are in the middle of the bottom of each bushing. When the nuts are removed, a metal circle shaped piece that is used to support the bushing will come off. That is what the 17mm nuts are holding against the bushing. Here's a picture of it

The front subframe bushings have little arms that run between the subframe bushing to the frame. The arms are held onto the frame by 2 14mm bolts, and they will have to be removed as well.
Here is a pic of one of the front bushings and the arm I was describing:

So with the differential lifted, there is no room to put the new spacer in on the top. You need to lower the differential SLOWLY, just enough to squeeze the spacers on to the top of the bushings. Don't lower it all the way. Because you have all the supports removed, the subframe itself will actually drop when you lower the diff. The back ones should fit in with no problems, the front ones are a little more difficult because it is a bit tighter.
You have to be underneath the car to put the top spacers on the front bushings. I had my brother stand on the side of the car and pull on a pry bar to pry the subframe down a little and give me some room to slip the spacers on. I don't have any pics of that but you will understand when you do the install, it's not a big problem at all.
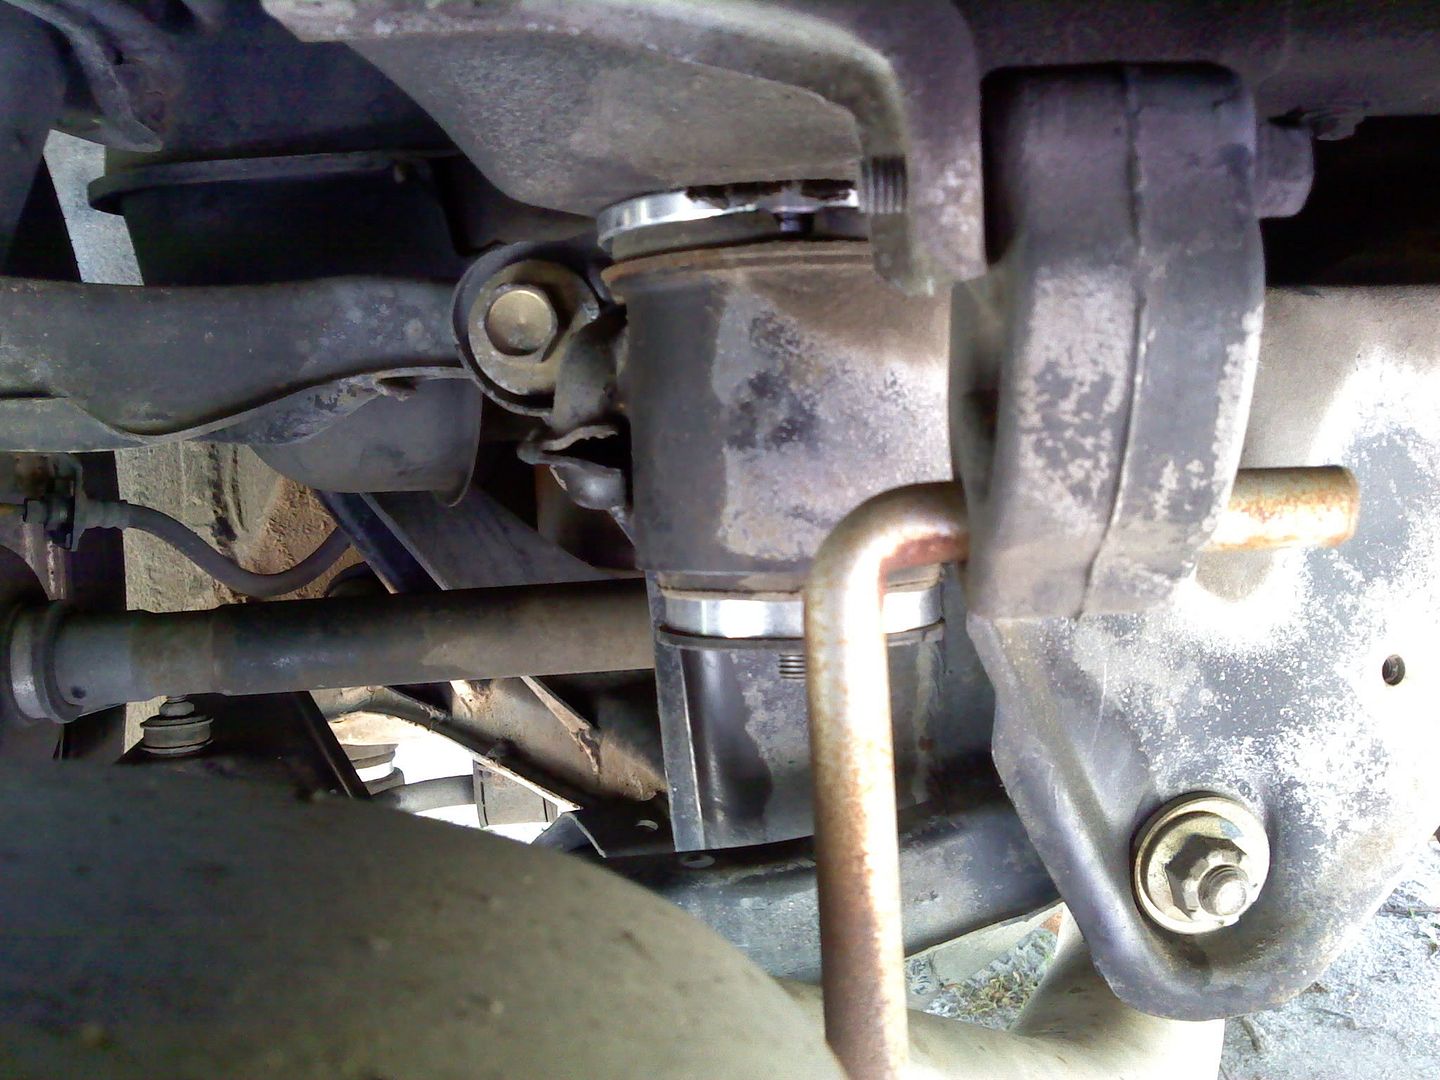
Picture of one of the back bushings before the spacer was inserted, but after the diff was lowered:
Same bushing with the spacer inserted:

After all the top spacers are installed, make sure they are all nice and centered, then lift the diff back up. Want to put it around where it was last time, just enough to lift the subframe all the way back up, but don't lift the whole car.
Notice after you lift the differential back up there should be no gap between the frame and the top spacer:

Next, you place the bottom spacers on the "supports" that came off with the 17mm nuts. The fronts had the two extra bolts holding the arm to the frame, remember?
The front bushing arms and spacer:


For the back bushings:

Now take all the lower pieces with the spacers on them and bolt them back up the way they came off, and your almost done!!!!
One of the back bushings with the 17mm nut loosely attached

Torque the 17mm nuts to 80 ft/lbs! If you don't have a torque wrench, borrow one from a friend or go buy one. Shoot, even the Harbor Freight $15 one is better than nothing.
After it's torqued down it should look like this:
Now lower the differential, put your car back on the ground, clean everything up and go for a drive. You should notice a lot less subframe slop, resulting in a tighter feeling back end and little to no wheel hop now!
Happy Z-ing!