BTW this took me over like 2 hours to do "meaning the writeup" been doing it since the weekend bc i only get a half an hour here or there so CHOOSE A CHOICE ON MY POLL
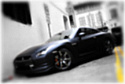
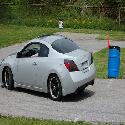
Well for those of you that have seen my coupe i love lights. Ive had my underglow forever but recently installed them on mikes car vtechnique. He got blue on the front and back and white on the sides.
I hate doing the writeups bc it takes so much more time to take pics of the steps and i forgot some pics towards the end bc he had work so we had to rush.
Also i wired the switch to the inside BUT not through the firewall bc its such a b**** to get to. It easier to do it this way unless you can get through the firewall easily....btw thanks surman for doing this to my car at HIN lol which is how i got the idea.
SOOOOOOO
you need
1. Wire cutters2. Wire crimps3. Screwdriver/Philips Head4. Knife of some sort5. Tie down thingys "lol i forgot what they are called well call them twist ties for now"6. Electrical Tape7. Paper Towels8. Cleaner9. Oznium Strips w/ tape it comes with10. A s*** TON OF WIRE lol i bought 30 ft and we had to go get about 14 more. 11. Switch from Oznium
steps
1. Clean and prep surface you are putting the strips onto. This is essential to do this bc if you dont the tape wont stick.
2. Put the double sided tape on the led strips. Peel off the white side and stick them along the WHOLE STRIP. Leave the red side on until later
3. Take the strip and line it up to fit in the middle of where your putting it. If its the side skirts than they fit from edge to edge perfectly.
4. Place a tie at the end of the sideskirt so it goes arounf the edge by the wheel well. Tie it but keep it loose so you can put the led strip through it. This tie will hold the strip along with the tape. You do this in case the tape goes it will still hold with this.
5. Take the red tape off ONE section at a time. The best way to get it off is to have nails but for those of you who dont lol use a pocket knife "ie w/out one i hated it" lol
6. Next start sticking the lights to the underneath of the car. BUT there are little sections where you can put a twist tie around the light and than stick it down. "i tried to get a pic of it but didnt come out its where every twist tie is in this pic"
7. Next cut the extra off the ties BUT make sure there as tight as can be first. LEAVE the little circle part like i did youll need it later
8. Next do the same to the front. Depening on if you have the stillen front "like this pic" or if you have stock itll differ on if you can add twist ties. Add as many as you can on the stillen one itll only be on both ends of the bumper it doesnt have anywhere else to grab.
this is where you put the end w/ the wire...... bc the hole to the left of the wire you will be using that to bring the wire up when wiring.
9. SORRY but i forgot a pic for this one.....NOW you do the rear. There is a metal pan it looks like towards the read You WILL reach from the support bars on both sides going across the pan. Tie a twist tie from each of these ends to the light and use the tape going across the metal pan.
The wire will end up on the right of the car "passenger side" you need to tuck the wire and feed it throught the back right wheel well. This pic shows where the wire will be fed through
10. Next you will need to wire the rear end to the passenger side sooooooo follow my diagram. White=the wire. The red circle to the left is where the screw is you need to take out. Once its out start peeling back the shaded red area all the way through the wheel well. "you WILL get dirty from this" Take the rear wire and meet it with the side wire and put it together w/ the extra wiring. You will need about 20 ft of wire to do this. You will follow the side going through the circles and pillars under the side going all the way to the front wheel well.
11. Next the 2 wires will be at the front wheel well. Take the screw out "its circled in red" and peel back the wheel well TURN THE WHEEL SO THAT YOU HAVE MORE ROOM and feed the wire up towards the engine going through the side panel. Wire is the red and white. The BEST way to wire it up is to have a spare wire go through it from the top ie bc of gravity lol
12. From the drivers side you will go up that wheel well the same way and through the fender.
13. You will take the front wires and bring it through going into the engine on the right side closest to the fender "drivers side". Also when you do this you need to run the wire w/ the side wire passenger side up to the topright of the engine bay.
The bottom arrow shows where to bring the front wires and drivers side wires. There is "by where i circled" a hole so it will stay more hidden in between that piece of metal.
The top arrow is where your wires from the passenger and back side will come from. BRING them across the engine bay under the foam in the back to keep them hidden.
14. All these wires should meet in the top right corner of your engine bay bring them through the gay and up towards the door. You need to lift the plastic piece up to get it off and youll see it fits. Take the wires and shove then through the slit to keep them under the body pannels.
15. Run them behind the stuff along the door and out to under the steering wheel. If you havent done it you need to pop off the side panel first "where the door would meet". Than pull out the bottom under the steering wheel. Best bet if using the oznium switches is NOT to make a hole for the switch. I put mine UNDER the whole unit where there is a small box shaped hole where it sits perfectly. And its hidden so "if your umb and have them on while driving and a cop pulls you over and says you have light say officier where would the switch be lol well u could but hed prob just look under the car lol"
The switch goes like this
the middle red goes from all the light to this switchThe edge red and Black go to the power source i just went to the battery to m ake it easy but ESP has a true diagram of how it should be on his led vents and cupholder install
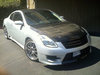
FINISHED PRODUCT MINE IS RED HIS IS BLUE
"THE ONLY DIFFERENCE IS HIS ARE WIDE LED STRIPS AND MINE ARE THE REGULAR ONES ANY ?'S EMAIL ME [email protected] or [email protected] ide RECCOMEND the wide ones they are cheaper and i think better overall for this project "
mine
now his
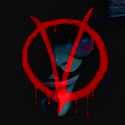
Also had some night shades so we painted his emblem
HOW TO
tools-fishing line-hair dryer-VHT nite shades-water/paper towel
1. Take off emblem by heating with hirdryer and a piece of fishing line. Take the fishsing line and bring it under the emblem after heating it.
2. Clean and dry emblem
3. Spray it with 3 coats of VHT nite Shades 2 is more of a smoked look 3 is more metallic
haha the oznium box came in handy
I also added more interior leds. 2Superflux leds from oznium under the stereo so it lights up the shift knob. I dont have that led by the sunglasses holer bc i bought THE MOST STOCK ALTIMA POSSIBLE with the exception of kickplates and floor mats lol. "got those free" so i decided i wanted light here too......more to come also just havent gotten a chance.....takin classes and working so yea bio 2 sucks
How to
Drill a hole in the part i put them in lol and run the wire ........the way to run it is to take out the center drawer thingy. Take the shifter top pop it out, and then pop out the drawer by pulling it......everythings plastic and pops into place every once and a while theres a screw andy ?'s email me
now custom title ummmmmmm
Light God or King of Lights lol
DIY - Oznium LED Underglow....more leds and other stuffG
-
PHENOMenalVinyl
- Posts: 4607
- Joined: Fri Apr 11, 2008 4:17 pm
- Car: 08 altima coupe 2.5 mt
- Location: New York City
- Contact:
-
PHENOMenalVinyl
- Posts: 4607
- Joined: Fri Apr 11, 2008 4:17 pm
- Car: 08 altima coupe 2.5 mt
- Location: New York City
- Contact:
Re: DIY - Oznium LED Underglow....more leds and other stuff...POLL (PhEnoM78)
LIGHT GOD OR KING OF LIGHTS
-
Bmore-coupe

- Posts: 6440
- Joined: Fri Sep 26, 2008 4:00 pm
- Car: 08 Altima Coupe 3.5
- Location: Baltimore, MD
Re: DIY - Oznium LED Underglow....more leds and other stuff...POLL (PhEnoM78)
I clicked on King of Lights and now it says Ghey
-
PHENOMenalVinyl
- Posts: 4607
- Joined: Fri Apr 11, 2008 4:17 pm
- Car: 08 altima coupe 2.5 mt
- Location: New York City
- Contact:
Re: DIY - Oznium LED Underglow....more leds and other stuff...POLL (Bmore-coupe)
WTF BRIAN OR DARYL !!!!!!!!!!!!!!!! lol not kool lol
-
vTechnique1x1

- Posts: 94
- Joined: Thu Sep 25, 2008 3:17 pm
- Car: 2008 Nissan Altima Coupe
Re: DIY - Oznium LED Underglow....more leds and other stuff...POLL (PhEnoM78)
Thnks for doing all this great work to my carand nice job on the wrrite up it's sick u diserve a custom title I'll be seeing u soon for some morb projects invvolving more lights your da best no **** thnks man
-
PHENOMenalVinyl
- Posts: 4607
- Joined: Fri Apr 11, 2008 4:17 pm
- Car: 08 altima coupe 2.5 mt
- Location: New York City
- Contact:
Re: DIY - Oznium LED Underglow....more led ... (vTechnique1x1)
no prob bro it was def a good time too sry u were late to workvTechnique1x1 wrote:Thnks for doing all this great work to my carand nice job on the wrrite up it's sick u diserve a custom title I'll be seeing u soon for some morb projects invvolving more lights your da best no **** thnks man
now brian or daryl please change my poll bk...........
ok well idk who did it bc it doesnt say which mods are on lol
-
Bmore-coupe
- Posts: 6440
- Joined: Fri Sep 26, 2008 4:00 pm
- Car: 08 Altima Coupe 3.5
- Location: Baltimore, MD
Re: DIY - Oznium LED Underglow....more led ... (PhEnoM78)
MOAR VOTES FOR GHEY!!!!!!!!!
-
PHENOMenalVinyl
- Posts: 4607
- Joined: Fri Apr 11, 2008 4:17 pm
- Car: 08 altima coupe 2.5 mt
- Location: New York City
- Contact:
Re: DIY - Oznium LED Underglow....more led ... (Bmore-coupe)
yea i voted for that bc i was tryin to change it lol it wont let meBmore-coupe wrote:MOAR VOTES FOR GHEY!!!!!!!!!
-
Bmore-coupe
- Posts: 6440
- Joined: Fri Sep 26, 2008 4:00 pm
- Car: 08 Altima Coupe 3.5
- Location: Baltimore, MD
Re: DIY - Oznium LED Underglow....more led ... (PhEnoM78)
If it wins, you are stuck with it
All of that work for "GHEY"
All of that work for "GHEY"
-
crayzitalian3
- Posts: 1187
- Joined: Tue Jan 15, 2008 4:11 pm
- Car: 2007 Nissan Altima 2.5S
- Contact:
Re: DIY - Oznium LED Underglow....more led ... (Bmore-coupe)
lol all this work to be known as ghey.....classic
-
PHENOMenalVinyl
- Posts: 4607
- Joined: Fri Apr 11, 2008 4:17 pm
- Car: 08 altima coupe 2.5 mt
- Location: New York City
- Contact:
Re: DIY - Oznium LED Underglow....more led ... (Bmore-coupe)
NO f***IN WAY lol not happeningBmore-coupe wrote:If it wins, you are stuck with it
All of that work for "GHEY"
i didnt even write that someone changed it and it had to be a mod and i SAY NO thats not what i want the custom title to be I WILL DECIDE lol i hope.....crayzitalian3 wrote:lol all this work to be known as ghey.....classic
Re: DIY - Oznium LED Underglow....more leds and other stuff...POLL (PhEnoM78)
GRRRRRRREAT! custom title get!!
btw, this is too funny
btw, this is too funny
-
Bmore-coupe
- Posts: 6440
- Joined: Fri Sep 26, 2008 4:00 pm
- Car: 08 Altima Coupe 3.5
- Location: Baltimore, MD
Re: DIY - Oznium LED Underglow....more leds and other stuff...POLL (mcheddadi)
(sorry Matt)
Modified by Bmore-coupe at 10:56 PM 7/20/2009
Re: DIY - Oznium LED Underglow....more leds and other stuff...POLL (Bmore-coupe)
i think that it looks awesome and all... and you can chhose your own title but ghey has to win the poll... its destiny....Bmore-coupe wrote:
(sorry Matt)
Modified by Bmore-coupe at 10:56 PM 7/20/2009
Re: DIY - Oznium LED Underglow....more leds and other stuff...POLL (mikegtr06)
perfect modification = )
-
dangeris

- Posts: 5139
- Joined: Wed Sep 19, 2007 6:18 pm
- Car: 08 Code Red 3.5
08 BMW 328xi Coupe
90 300ZX 2+0 NA - Location: Lansdale PA
- Contact:
Re: DIY - Oznium LED Underglow....more leds and other stuff...POLL (DAAN.)
Nice write up Matt! but I'll have to agree..Ghey is your destiny! GHEY FTMFW YO!!!!!
Hey LBC,..Give this Ghey Man A Custom Title...Ghey God Of Lights!!!!!
Sorry Matt,..had to do it..
Hey LBC,..Give this Ghey Man A Custom Title...Ghey God Of Lights!!!!!
Sorry Matt,..had to do it..
-
marlin29311

- Posts: 8342
- Joined: Sun May 18, 2008 8:21 pm
- Car: 2008 Infiniti G35x
Re: DIY - Oznium LED Underglow....more leds and other stuff...POLL (dangeris)
Diagrams like this deserve a custom title
Edit - DOH!
Modified by marlin29311 at 9:25 AM 7/21/2009
-
dangeris
- Posts: 5139
- Joined: Wed Sep 19, 2007 6:18 pm
- Car: 08 Code Red 3.5
08 BMW 328xi Coupe
90 300ZX 2+0 NA - Location: Lansdale PA
- Contact:
Re: DIY - Oznium LED Underglow....more leds and other stuff...POLL (marlin29311)
either that or a gibbs
Re: DIY - Oznium LED Underglow....more leds and other stuff...POLL (Bmore-coupe)
Sorry dude, but i seriously LOL'd!!!!GHEY FTMFW COLLEGE BOY!!!!!Bmore-coupe wrote:
(sorry Matt)
Modified by Bmore-coupe at 10:56 PM 7/20/2009
-
2008AltiCoupeDan
- Posts: 931
- Joined: Thu Feb 19, 2009 5:23 am
- Car: 2008 Altima Coupe 2.5s - Gone, 2008 Subaru WRX Premium - built
- Contact:
Re: DIY - Oznium LED Underglow....more leds and other stuff...POLL (ESP)
nice writeup matt  i think mine are tubes LED's tho- i'll find out tomaro lol im not as rich as u- however..... things on my project r goin fantastically u can be light god-
we shall see lol :P
we shall see lol :P
-
dangeris
- Posts: 5139
- Joined: Wed Sep 19, 2007 6:18 pm
- Car: 08 Code Red 3.5
08 BMW 328xi Coupe
90 300ZX 2+0 NA - Location: Lansdale PA
- Contact:
Re: DIY - Oznium LED Underglow....more ... (2008AltiCoupeDan)
Dan, if you bought them from Oznium and they are the inferno then yes they are tubes; 2 4'tubes and 2 3' tubes2008AltiCoupeDan wrote:nice writeup matt
we shall see lol :P
-
SHIFT_confucius

- Posts: 93
- Joined: Tue Jul 08, 2008 9:32 am
- Car: 08AltiCoupe 2.5 6M silver
- Location: Chicago Metro
Re: DIY - Oznium LED Underglow....more leds and other stuff...POLL (Bmore-coupe)
[QUOTE=Bmore-coupe]
Cool write. Hope you get the title you want...but everyone here will always think GHEY from now on. (jk)
Cool write. Hope you get the title you want...but everyone here will always think GHEY from now on. (jk)
-
PHENOMenalVinyl
- Posts: 4607
- Joined: Fri Apr 11, 2008 4:17 pm
- Car: 08 altima coupe 2.5 mt
- Location: New York City
- Contact:
Re: (toxik)
lol no one pays attention thats not on my cartoxik wrote:booo phenom take off the black burger, its mine!
mine is all debadged this is for vtechniques car lol
-
PHENOMenalVinyl
- Posts: 4607
- Joined: Fri Apr 11, 2008 4:17 pm
- Car: 08 altima coupe 2.5 mt
- Location: New York City
- Contact:
Re: DIY - Oznium LED Underglow....more leds and other stuff...POLL (Bmore-coupe)
i owe you a beating at the next carlisle lol WAD lolBmore-coupe wrote:
(sorry Matt)
Modified by Bmore-coupe at 10:56 PM 7/20/2009
-
dldjros69
- Posts: 3170
- Joined: Fri Sep 21, 2007 3:52 pm
- Car: 2012 Evo Gsr
A/C 2.5 Turbo 6MT (SOLD) - Location: Quakertown Pa
Re: DIY - Oznium LED Underglow....more leds and other stuff...POLL (dangeris)
Haha Gheydangeris wrote:
Hey LBC,..Give this Ghey Man A Custom Title...Ghey God Of Lights!!!!!
-
Bmore-coupe
- Posts: 6440
- Joined: Fri Sep 26, 2008 4:00 pm
- Car: 08 Altima Coupe 3.5
- Location: Baltimore, MD
Re: DIY - Oznium LED Underglow....more leds and other stuff...POLL (PhEnoM78)
PhEnoM78 wrote:
i owe you a beating at the next carlisle lol WAD lol
I was on very little sleep and couldnt help myself.
-
PHENOMenalVinyl
- Posts: 4607
- Joined: Fri Apr 11, 2008 4:17 pm
- Car: 08 altima coupe 2.5 mt
- Location: New York City
- Contact:
Re: DIY - Oznium LED Underglow....more leds and other stuff...POLL (Bmore-coupe)
LBC just change the poll already just put up King of Lights as my title and change my poll bc the s*** wont let me do it.....light king is pissed bc led tails f***in blow