Build thread 444: In rust we trust

A forum for owners of S30 and S130 Datsun Z's... 240Z, 260Z, 280Z and 280ZX!
datsun-s30
Posts: 48
Joined: Tue Dec 15, 2015 5:30 pm
Car: 1972 Datsun 240z
Location: Chicago, Illinois
Contact:

Post

Hello everyone, I'm Jason and I'd like to begin a build thread for my 1972 Datsun 240z.

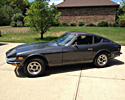
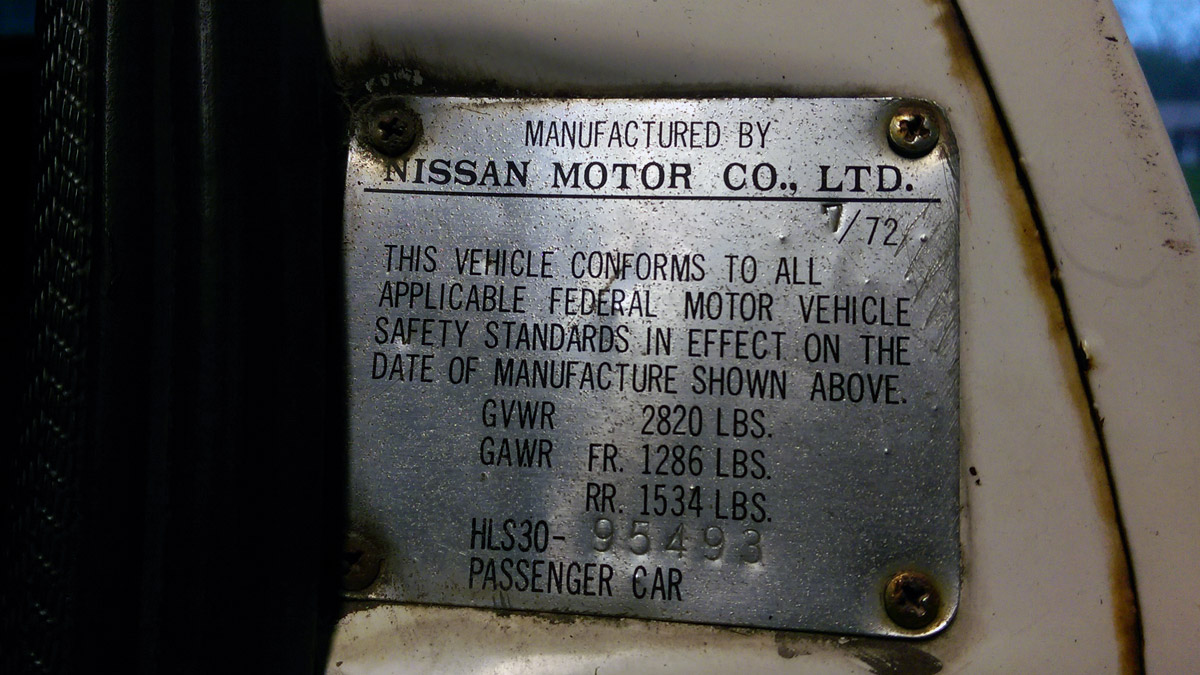
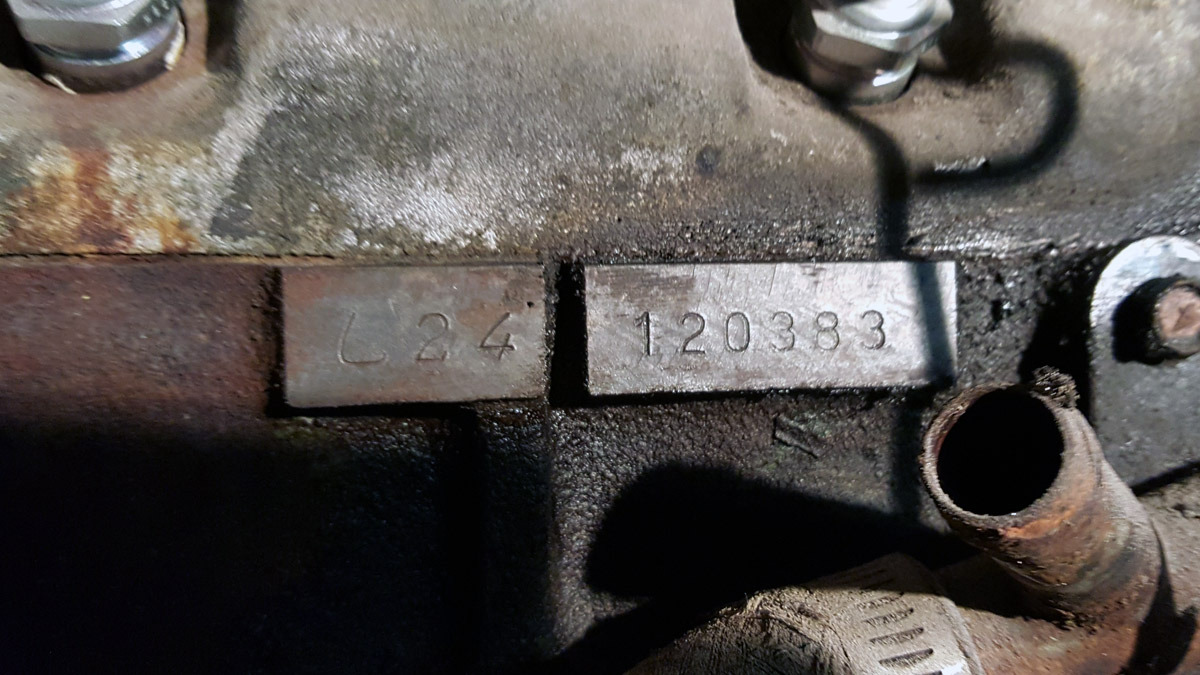
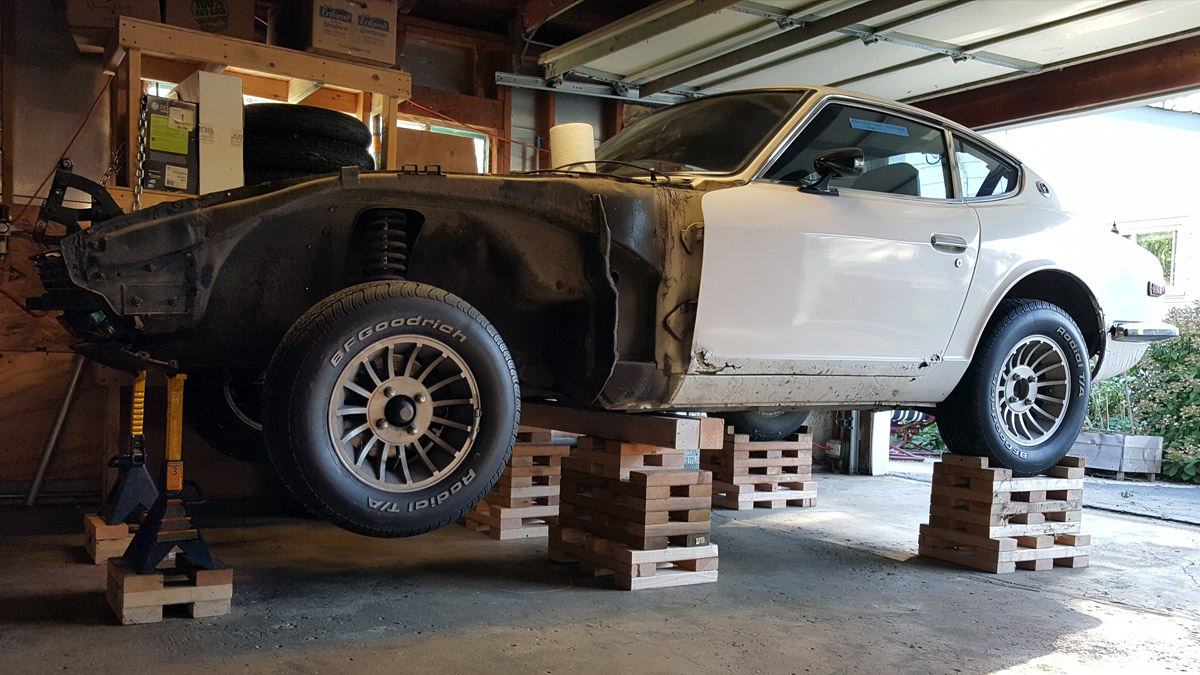
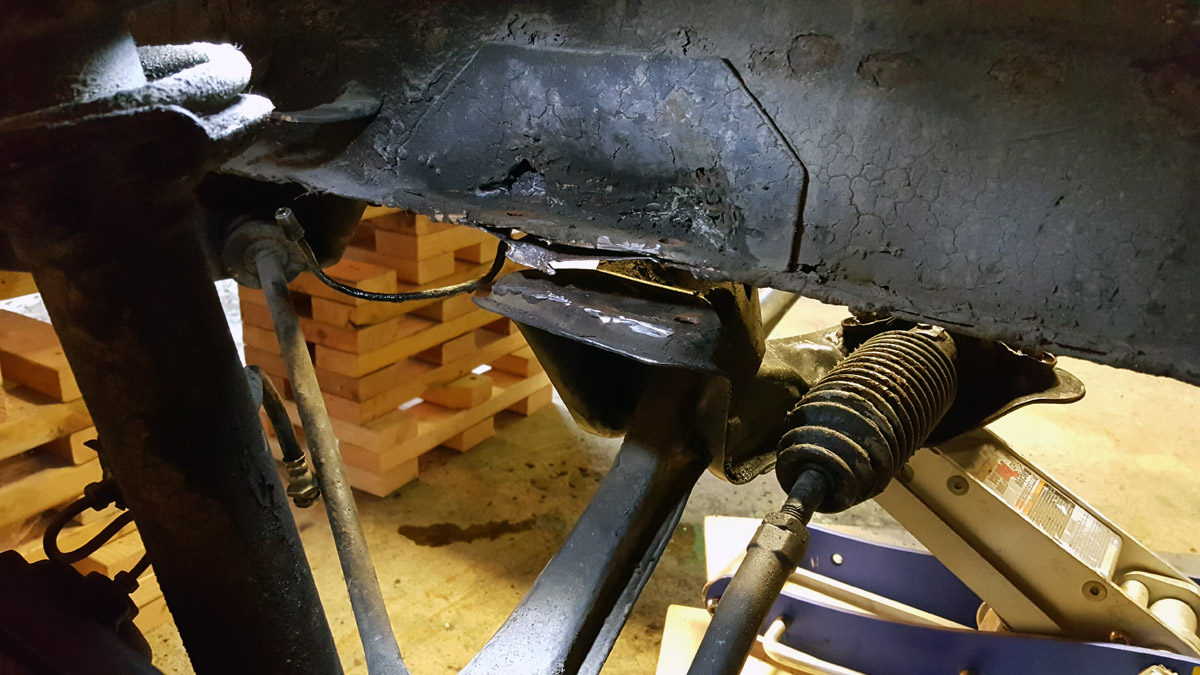
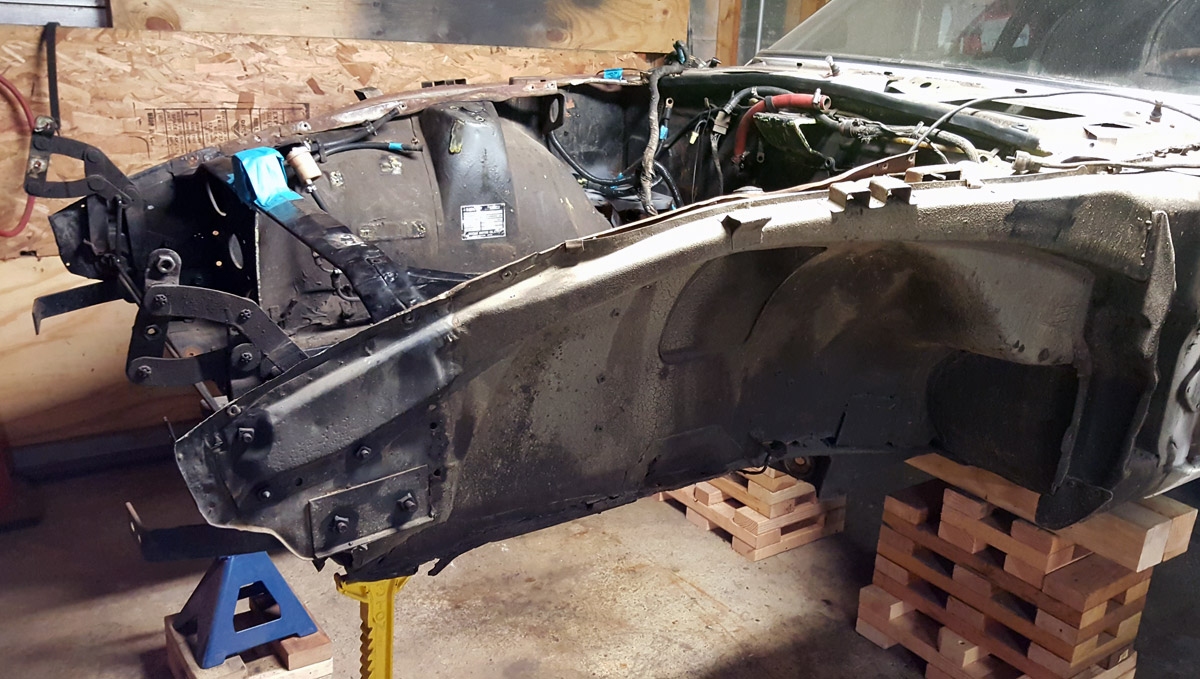
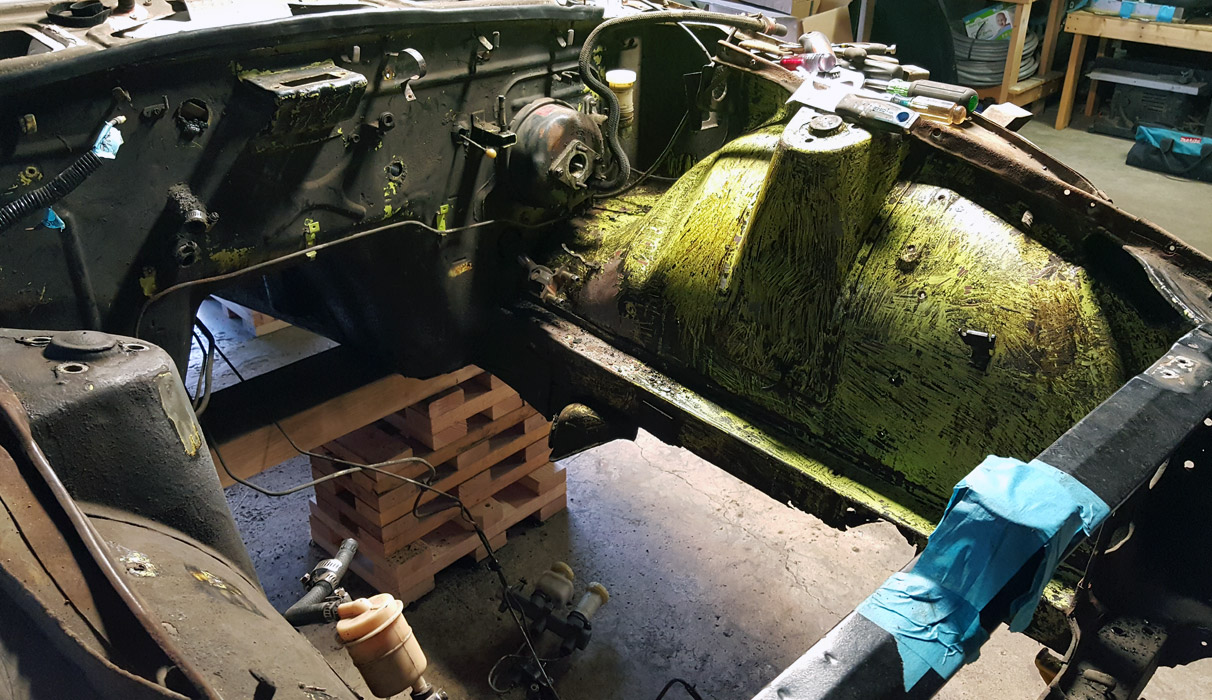
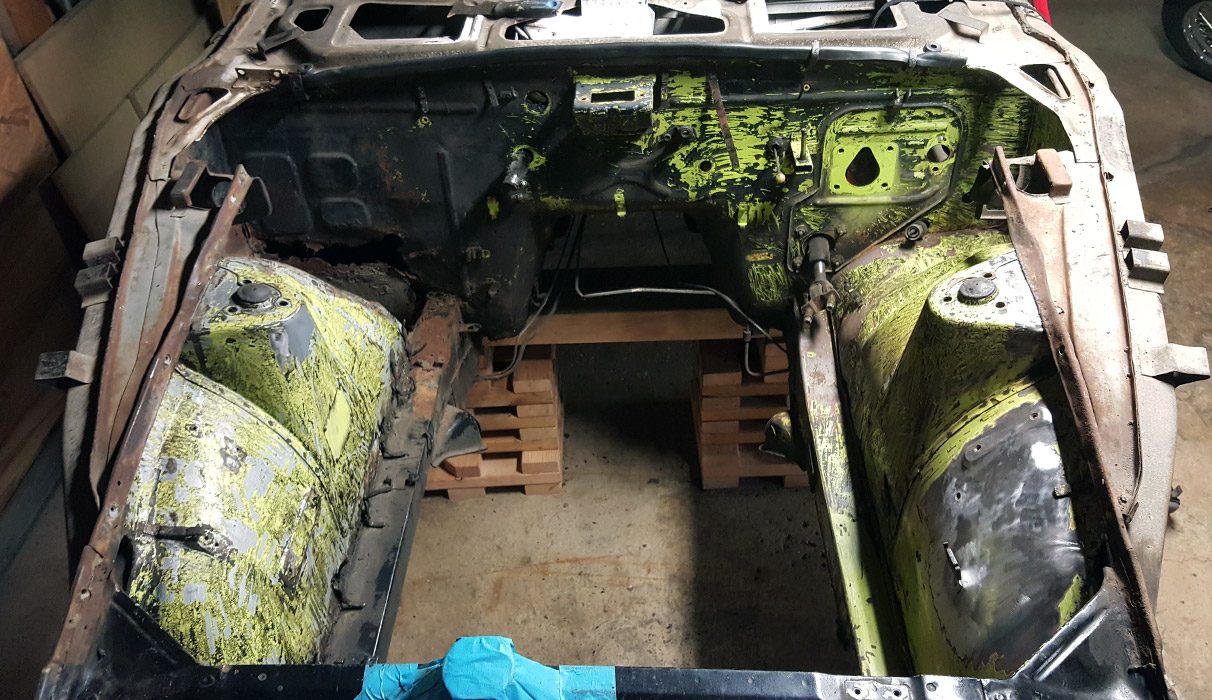
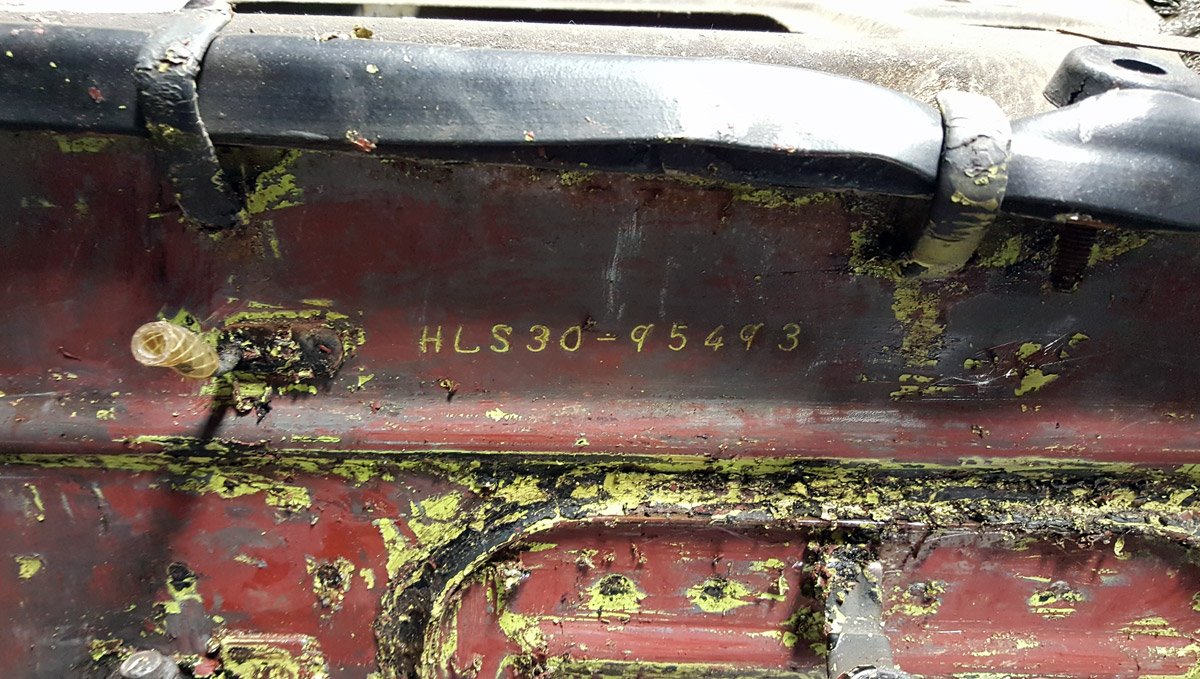
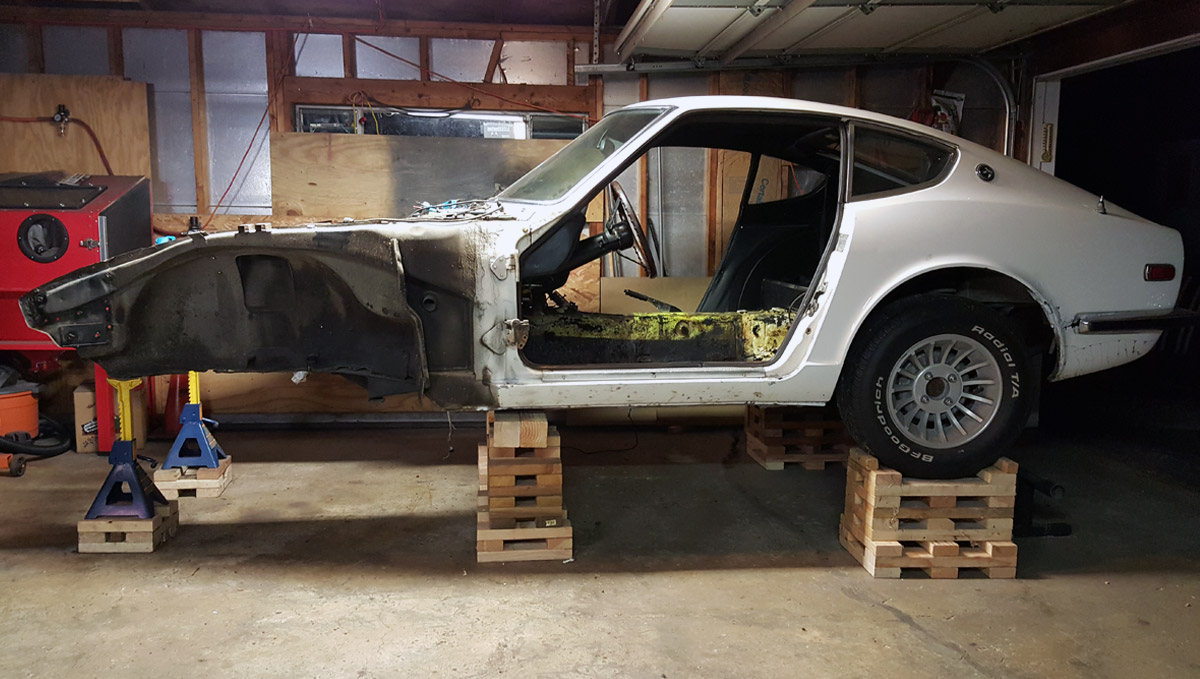
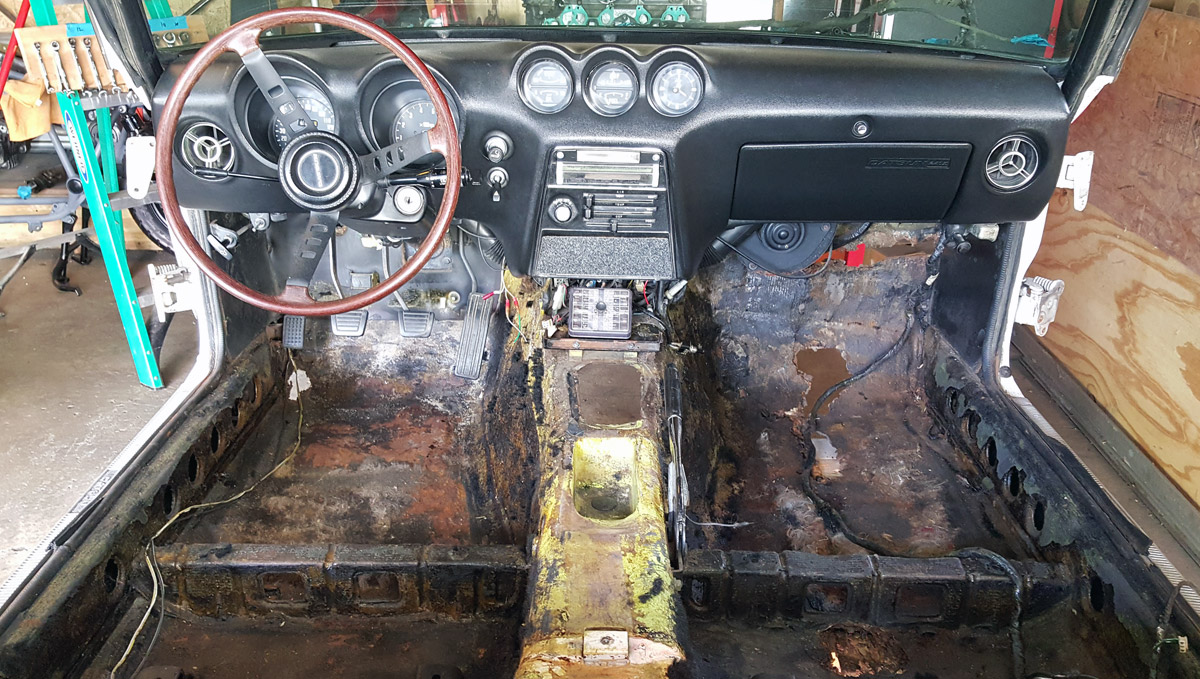
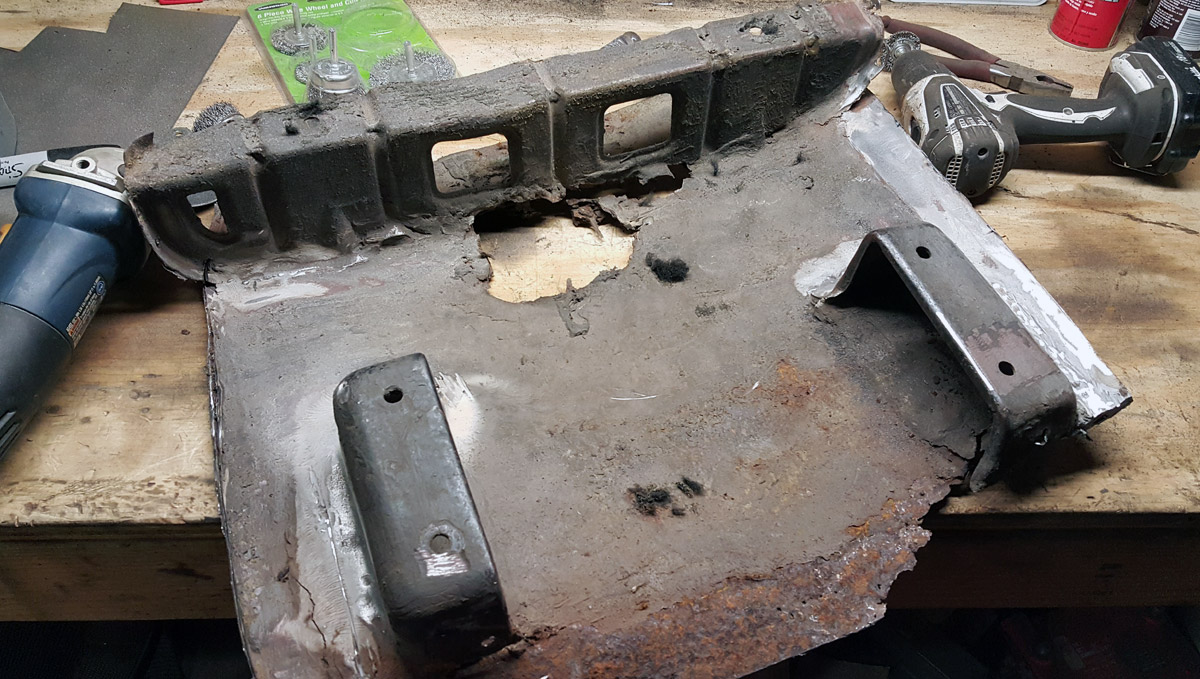
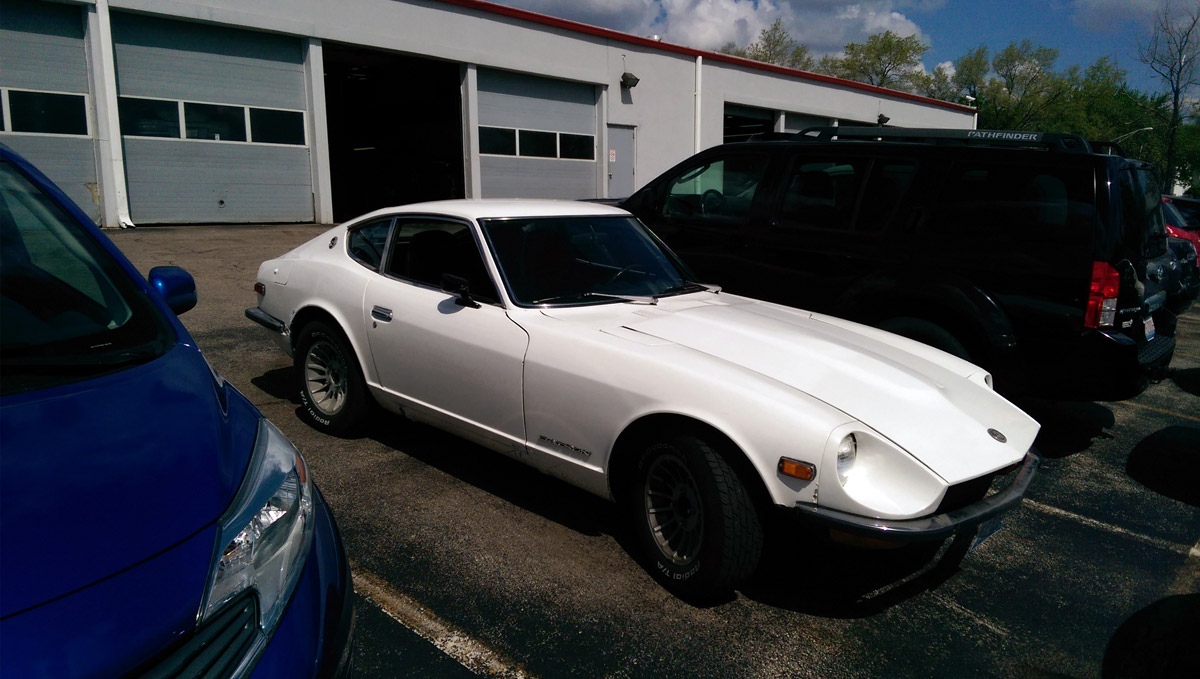
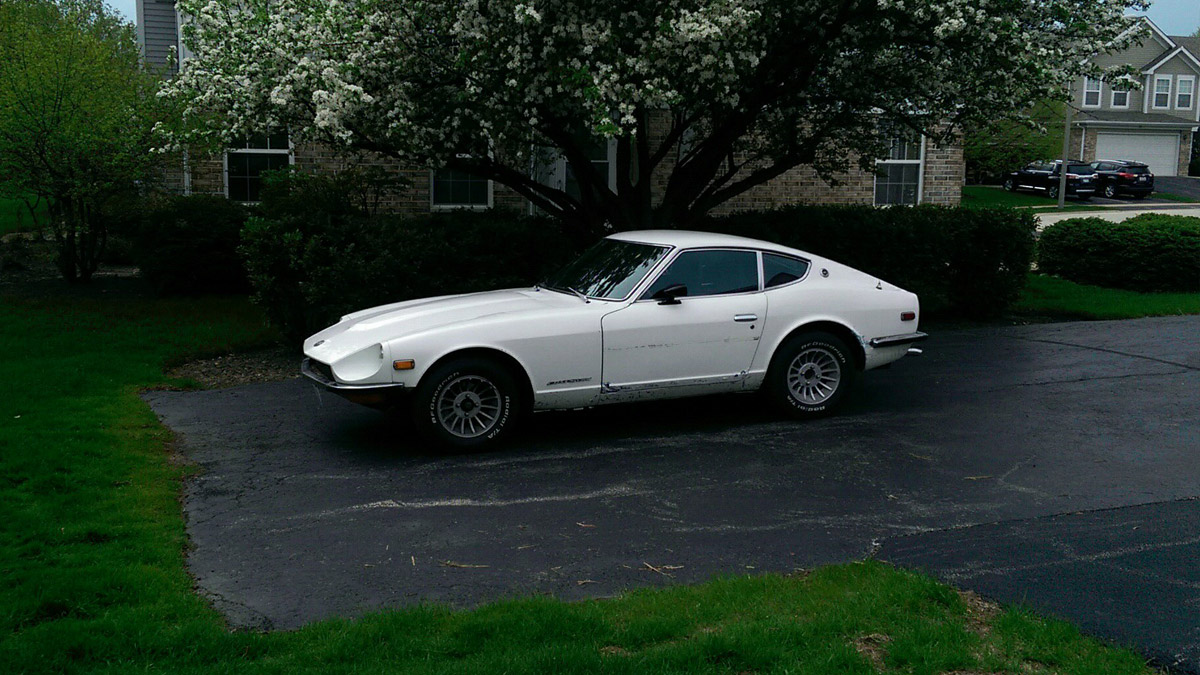
I bought this car in 2014 from a guy named Scott, who bought it from the original owner, Lem, in 2009. I drove it for about 6 months until the clutch went out, then parked it in my garage where it sat while I worked out of town for the last year and a half or so. And even though the exterior of the car looked decent, both floor boards and frame rails were completely destroyed. As well as a "restoration" that was performed in the mid 80's that, according to Lem (I called him shortly after buying the car), consisted of painting the original lime green exterior white and replacing the interior vinyl with carpet. Also, from what I can tell, there was a hack job attempt at trying to repair rust that already began to appear on the car.

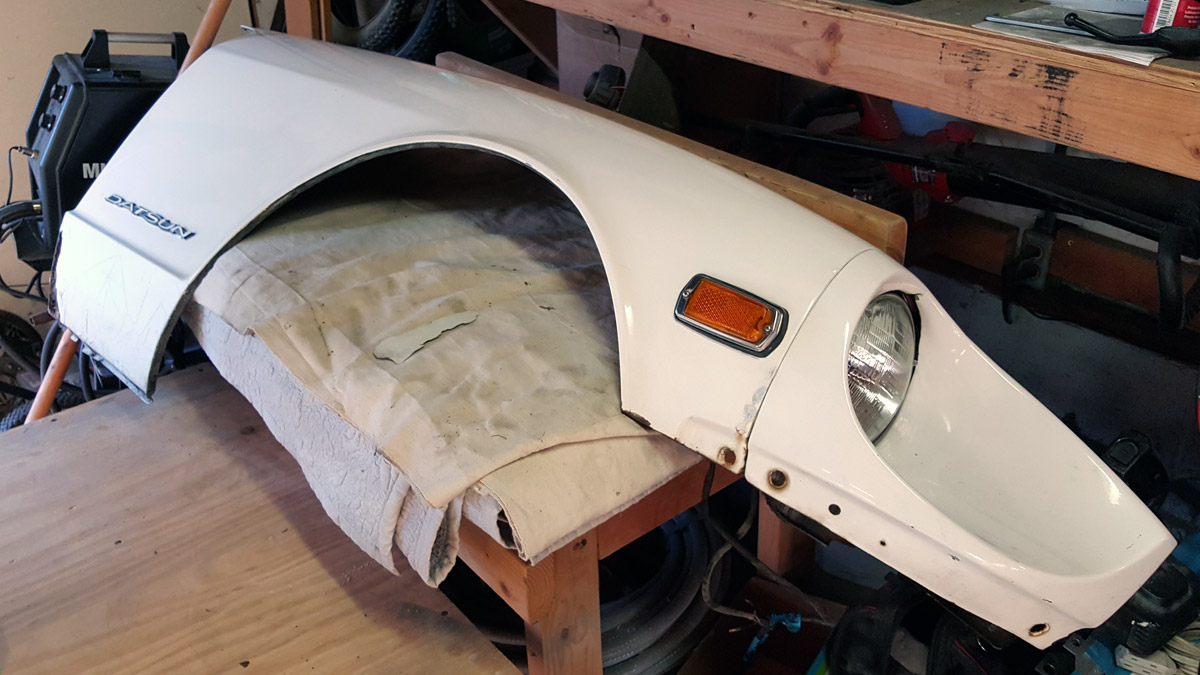
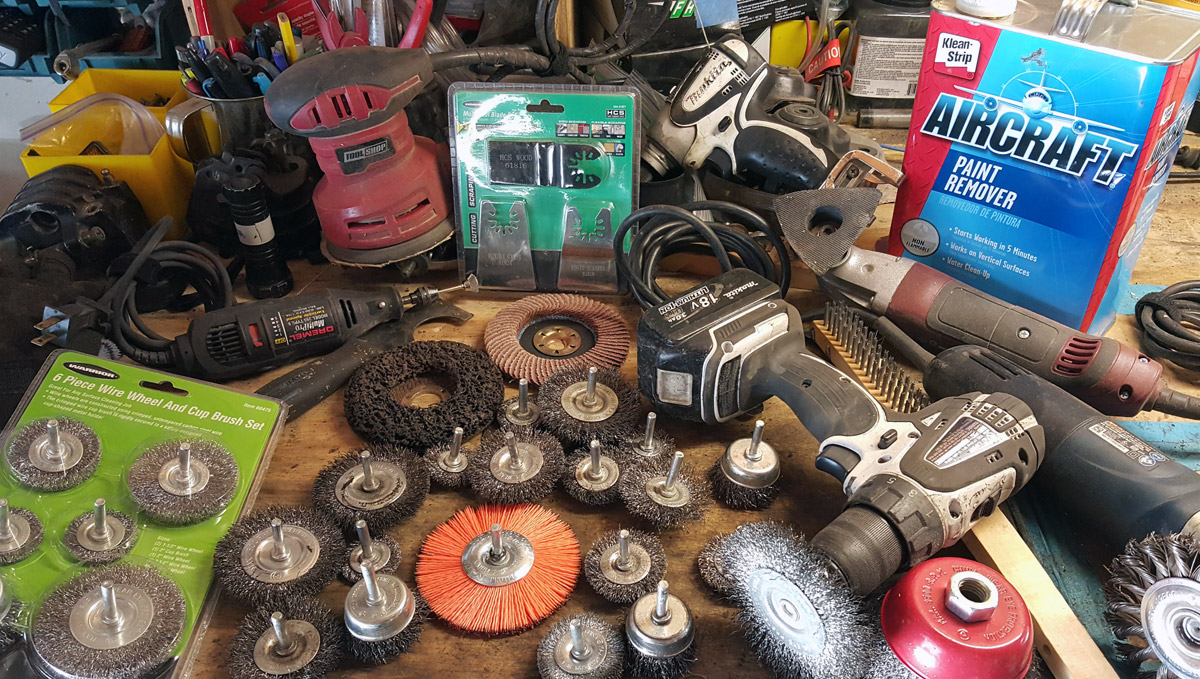
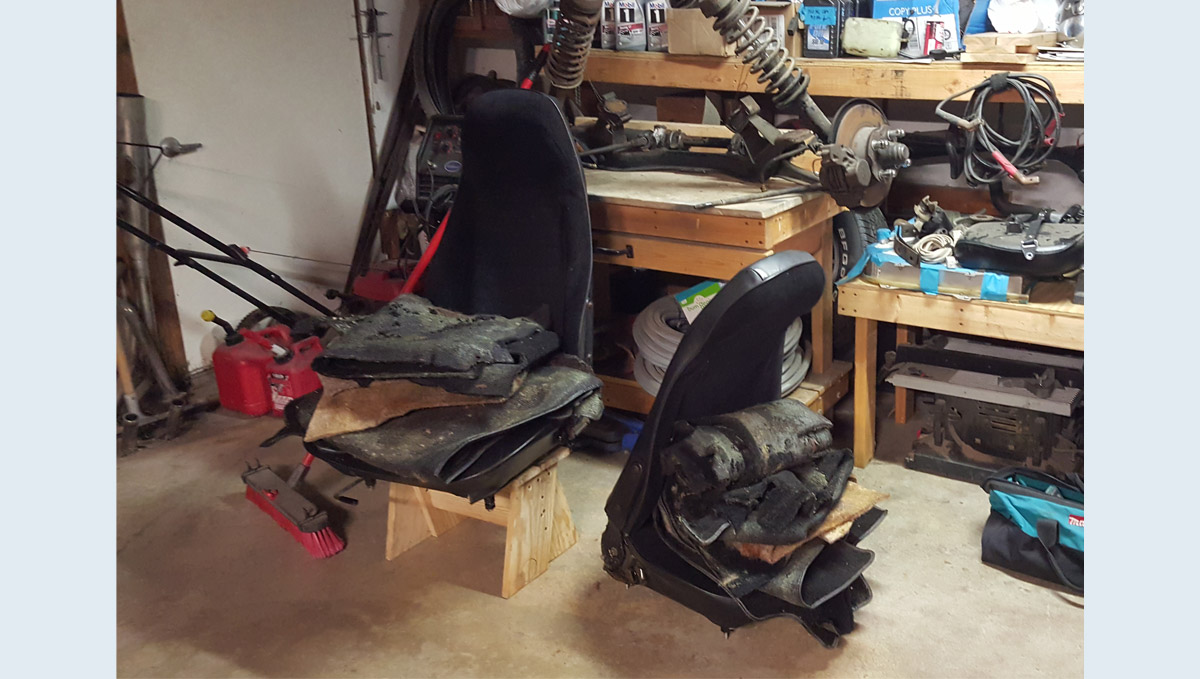
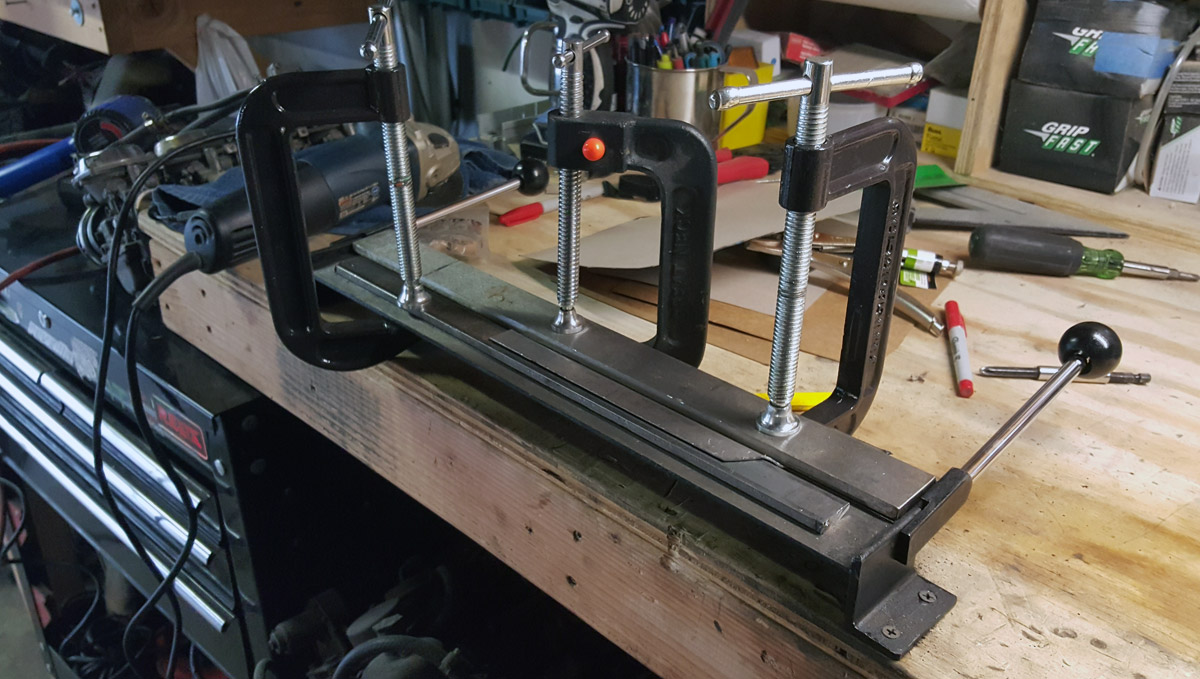
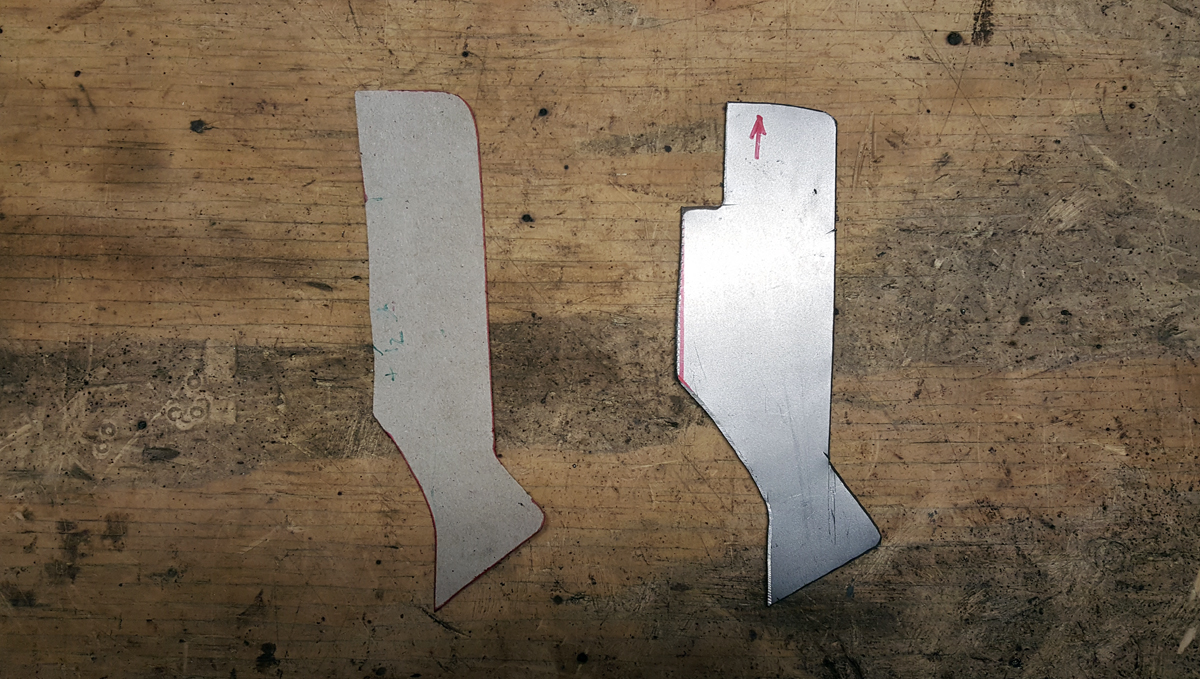
And now for the pictures. For every picture I post, I've probably taken a dozen more, so I apologize if the thread gets a little picture happy.

Image

Image

Image

Image

Image

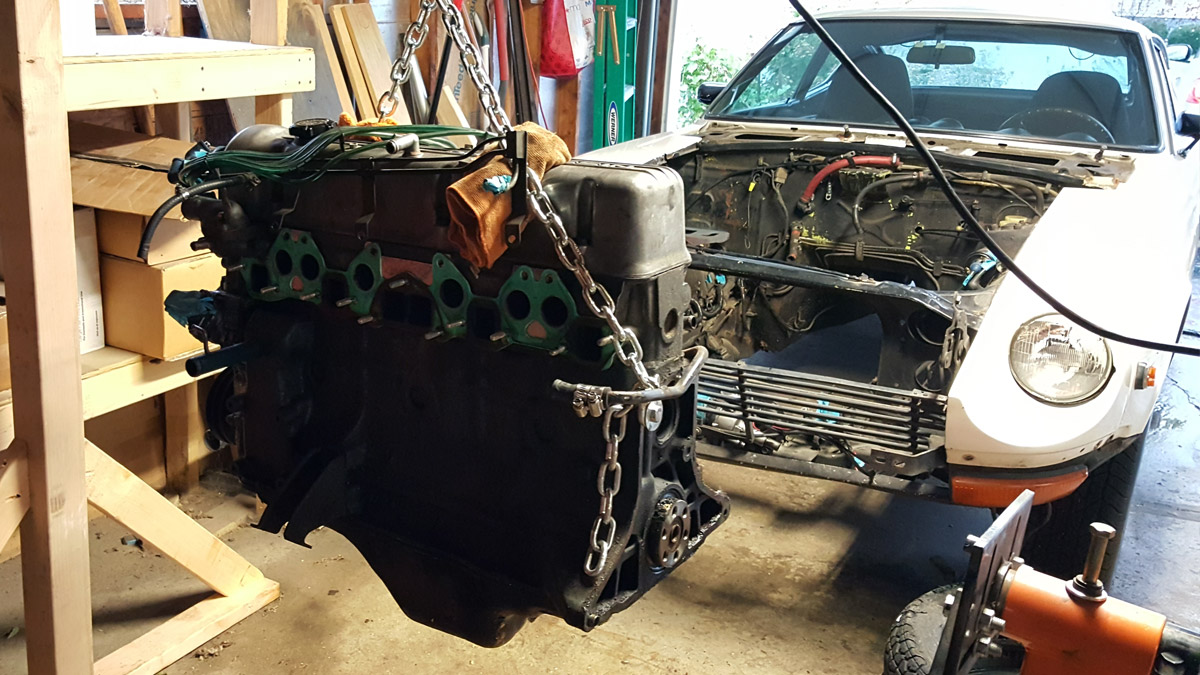
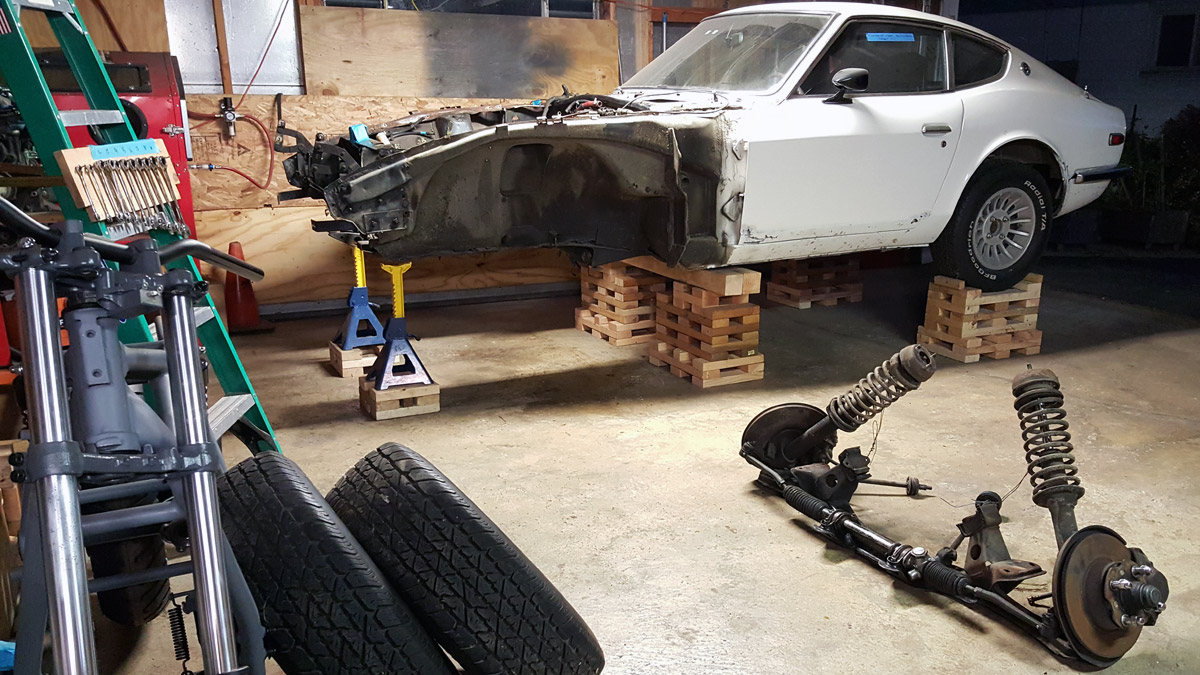
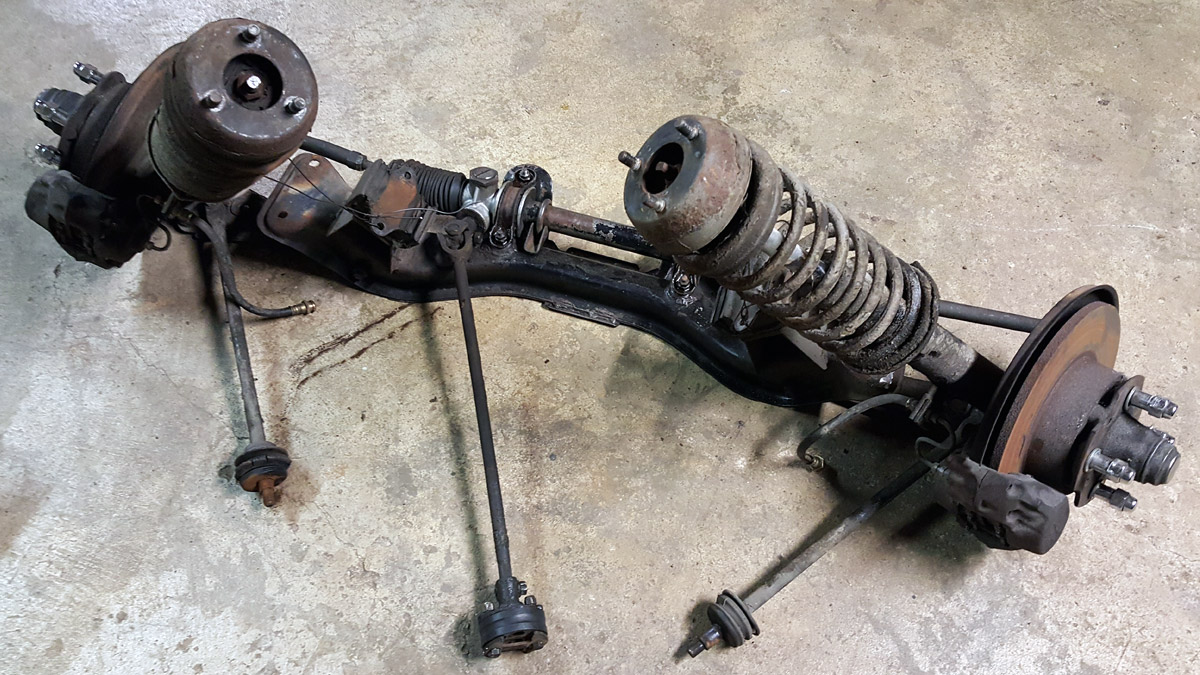
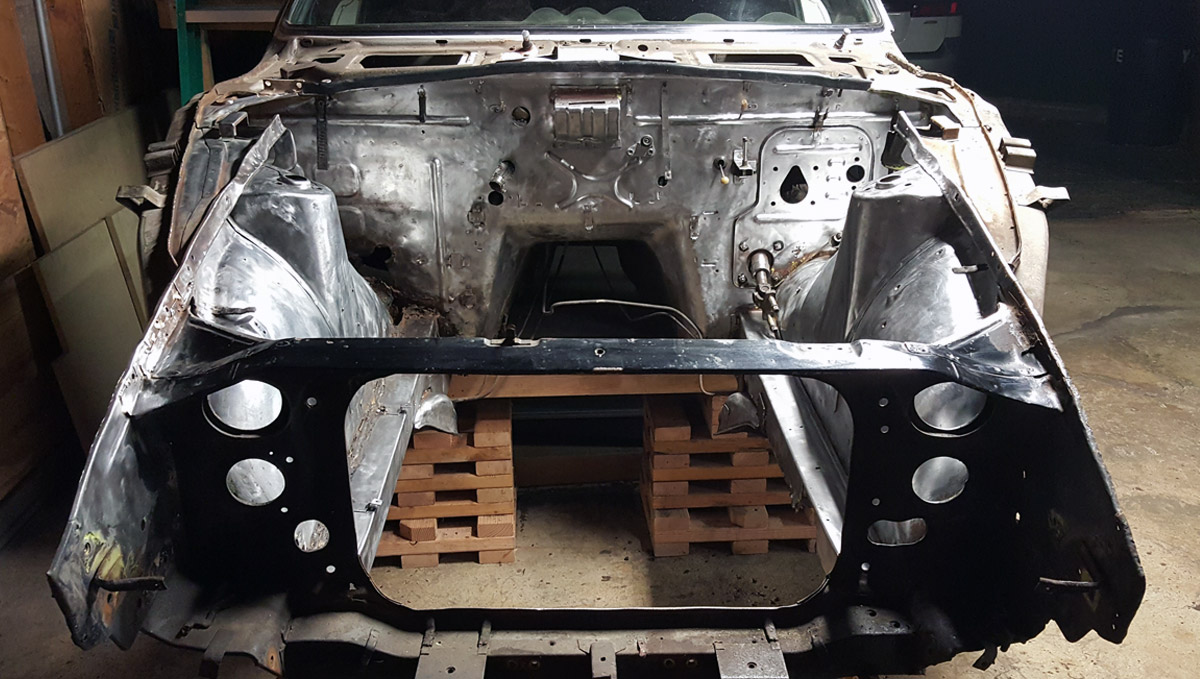
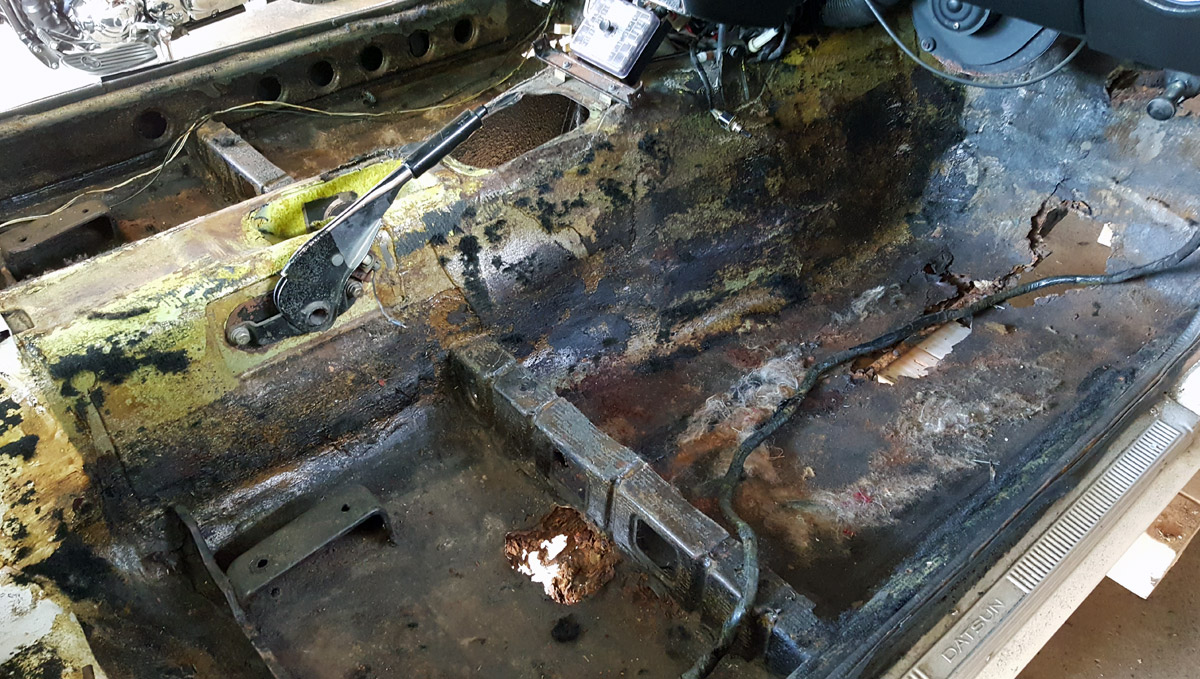
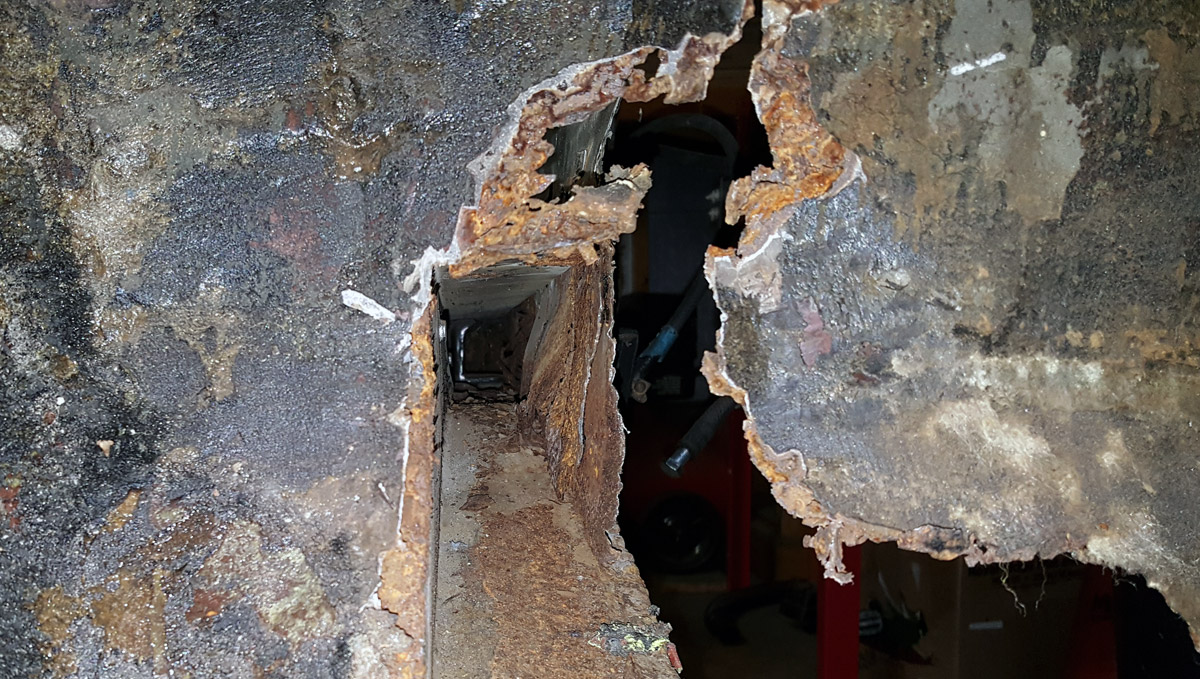
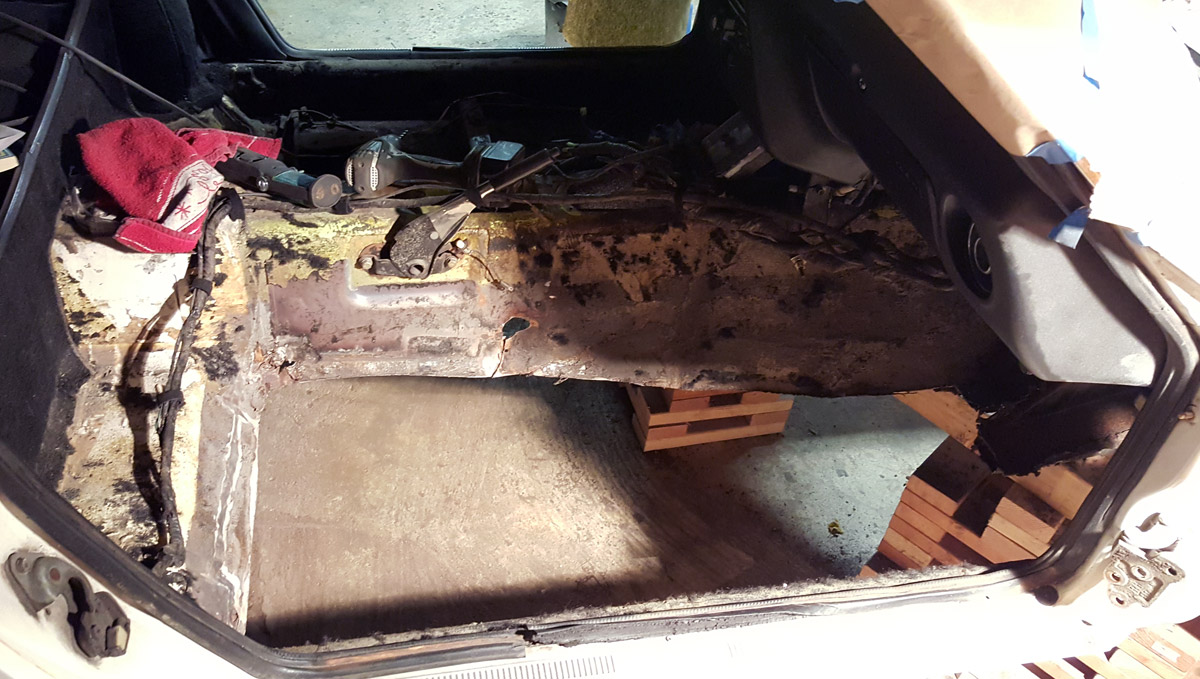
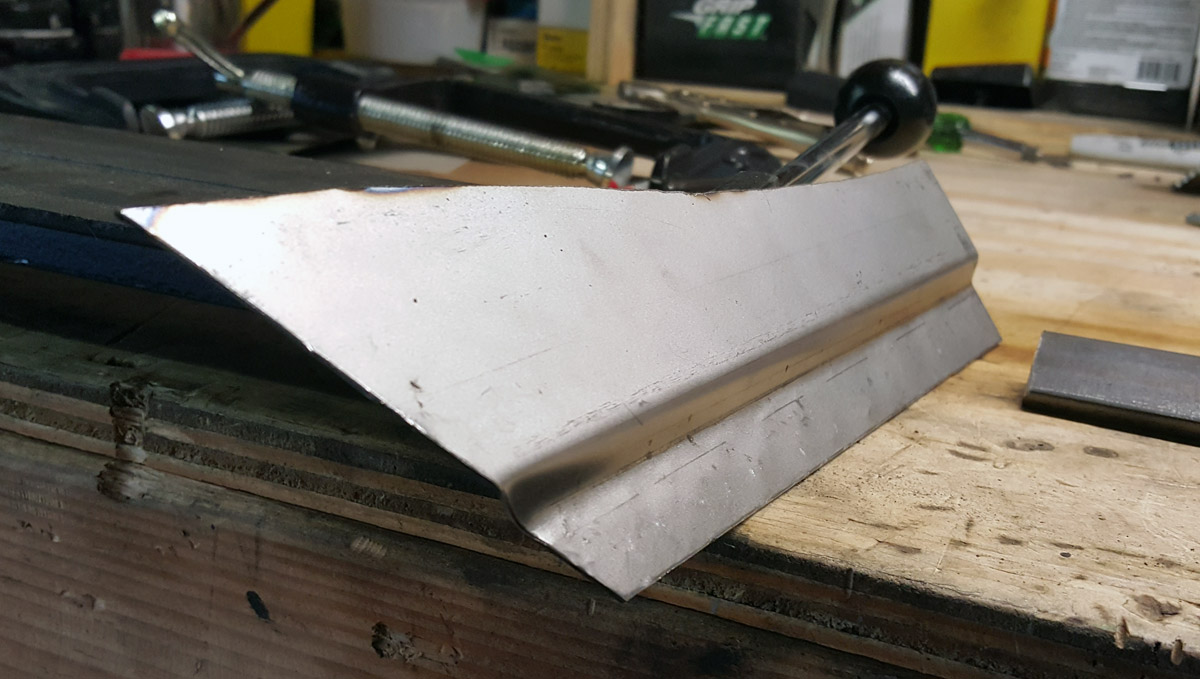
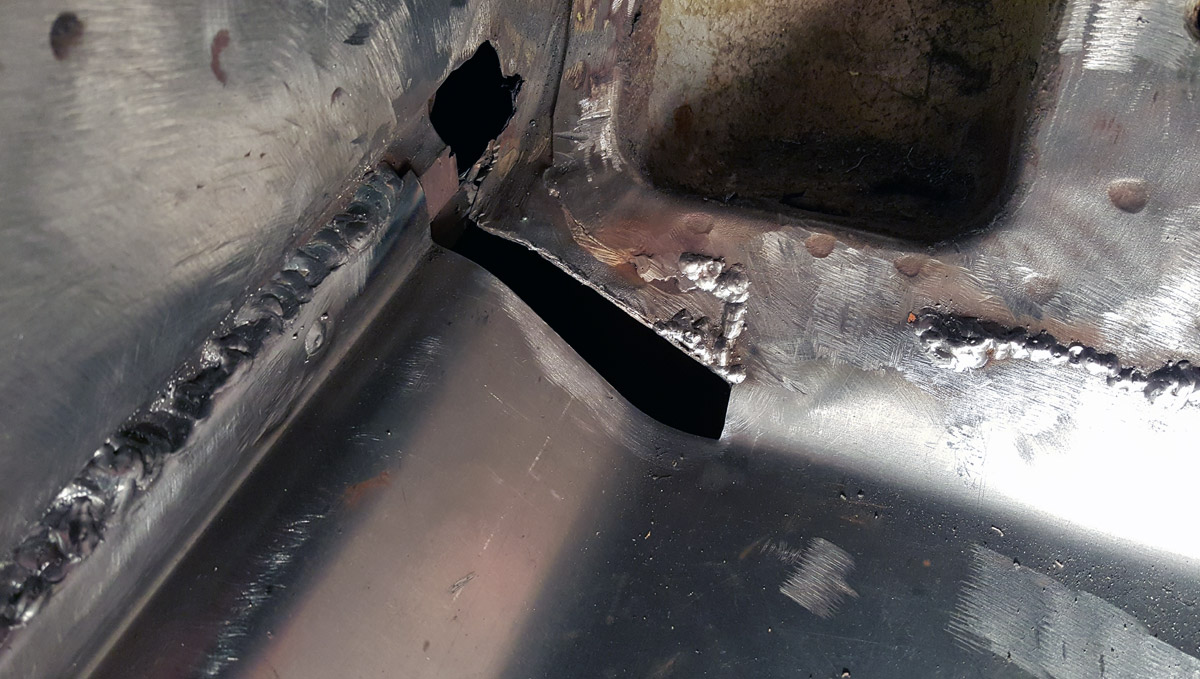
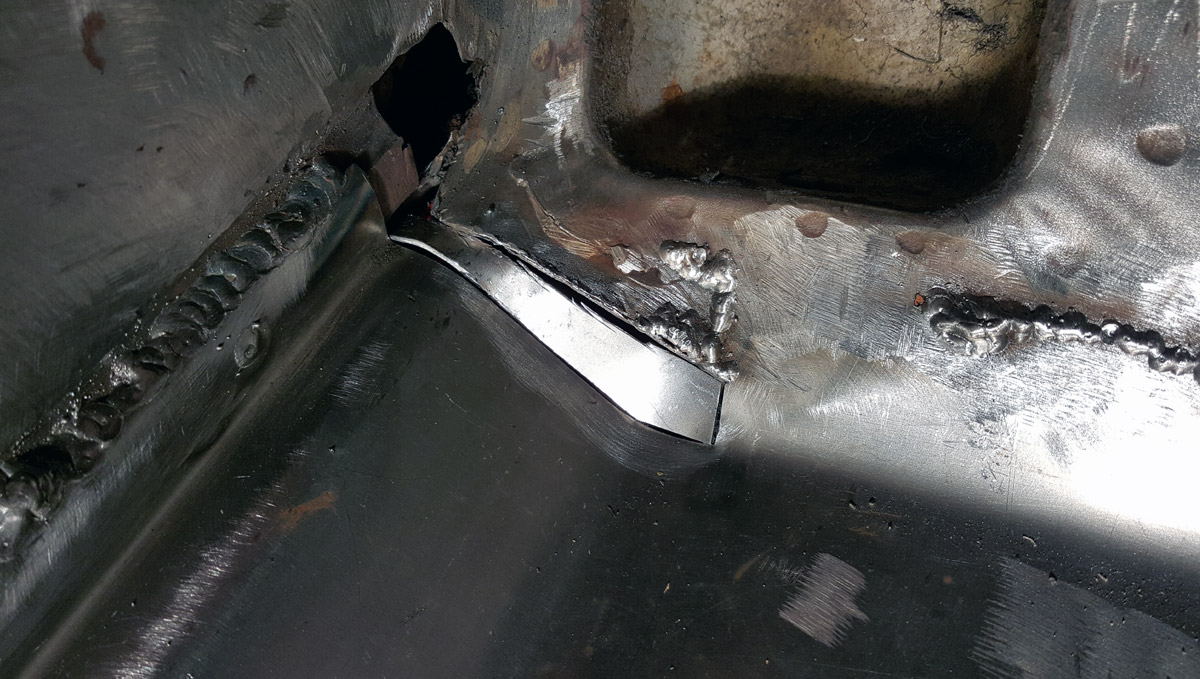
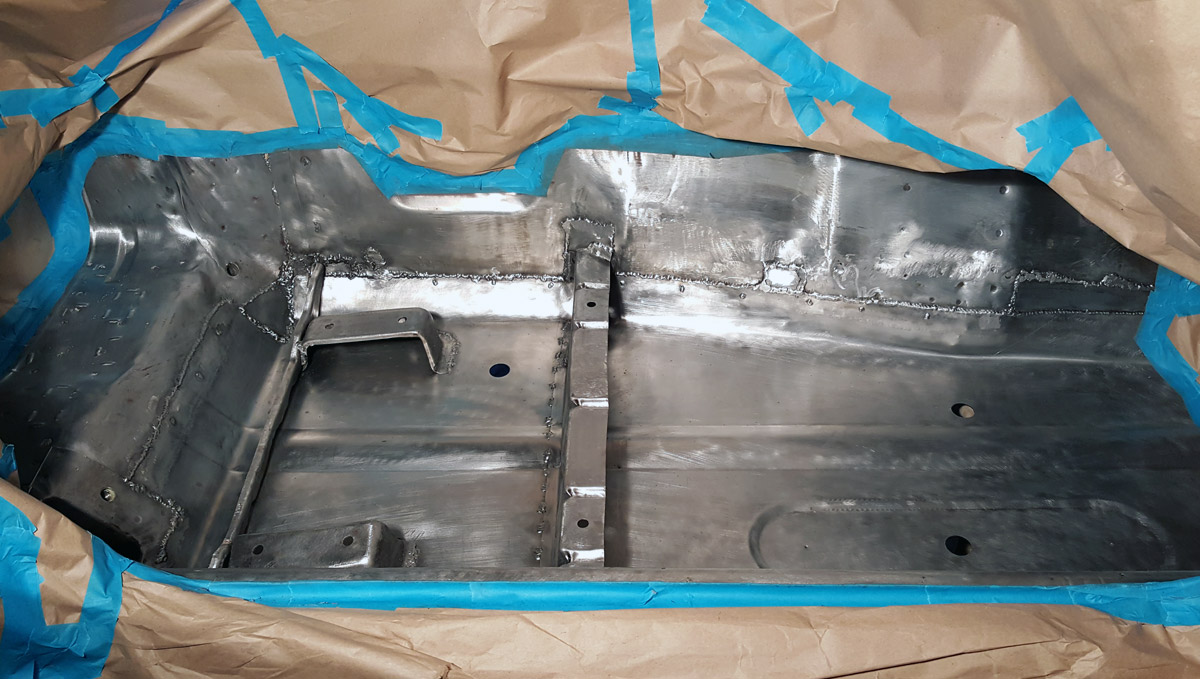
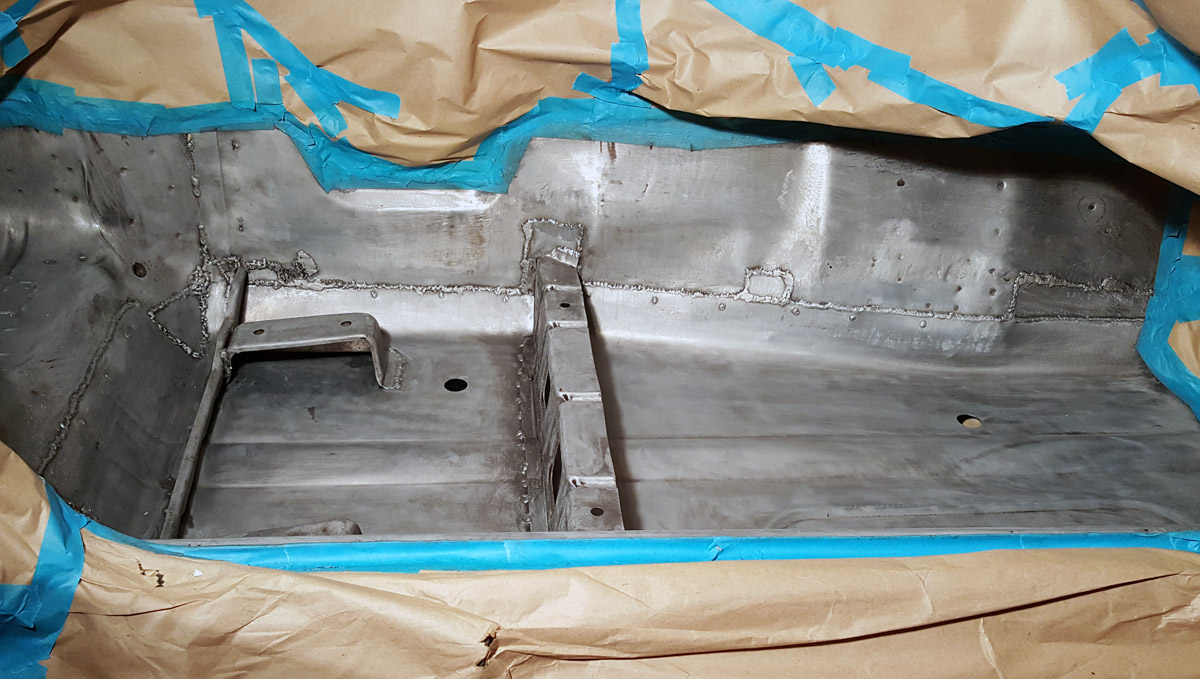
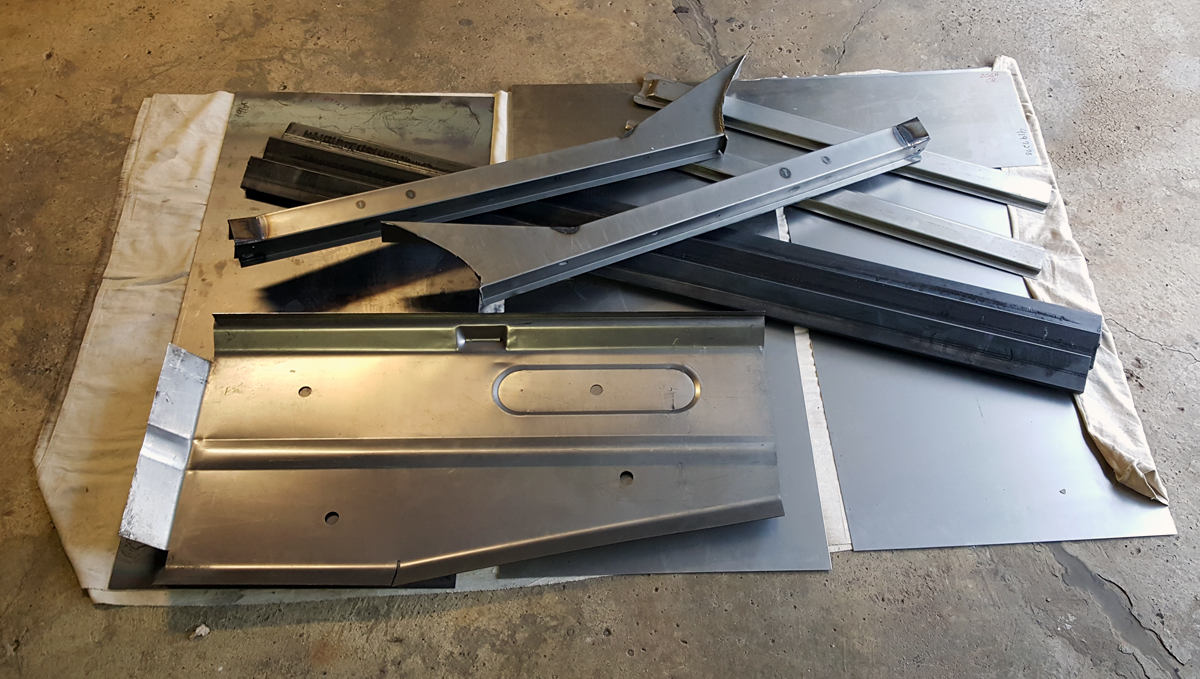
Here's where the fun begins:
Image

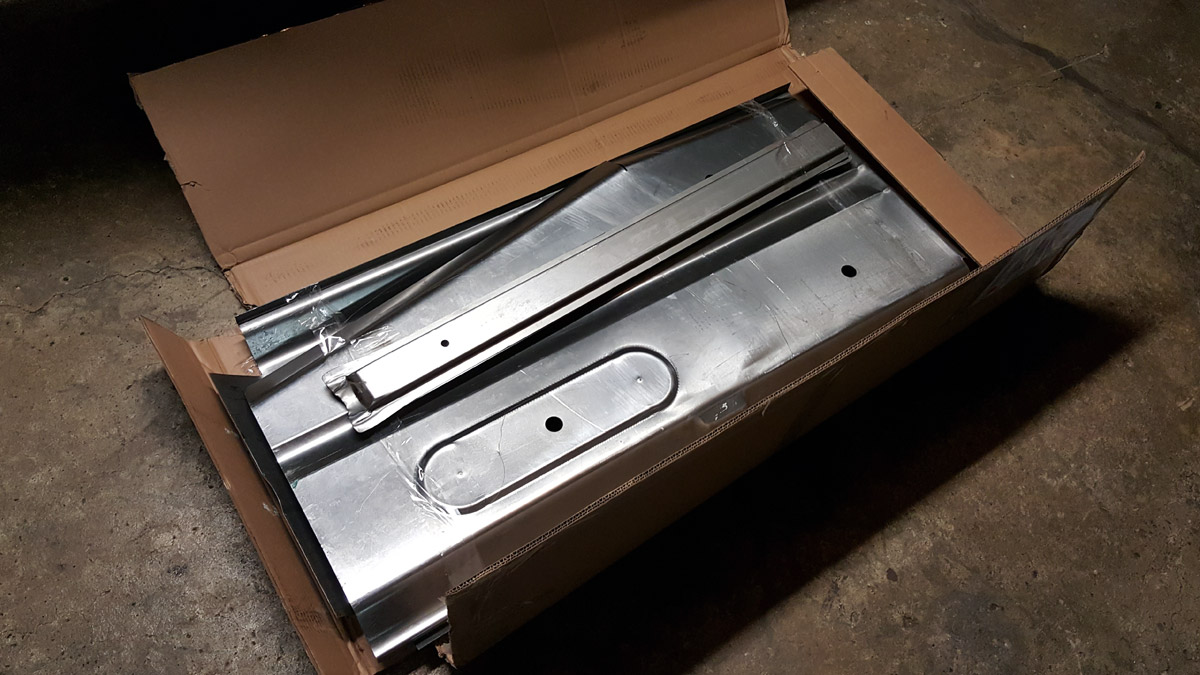
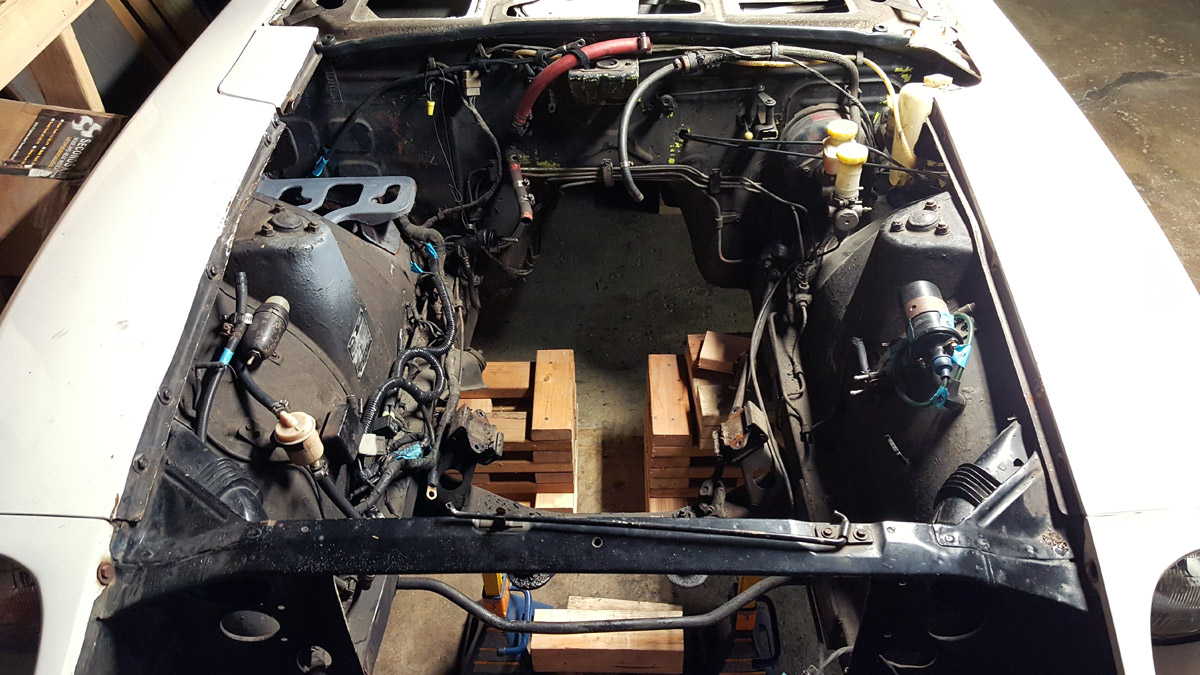
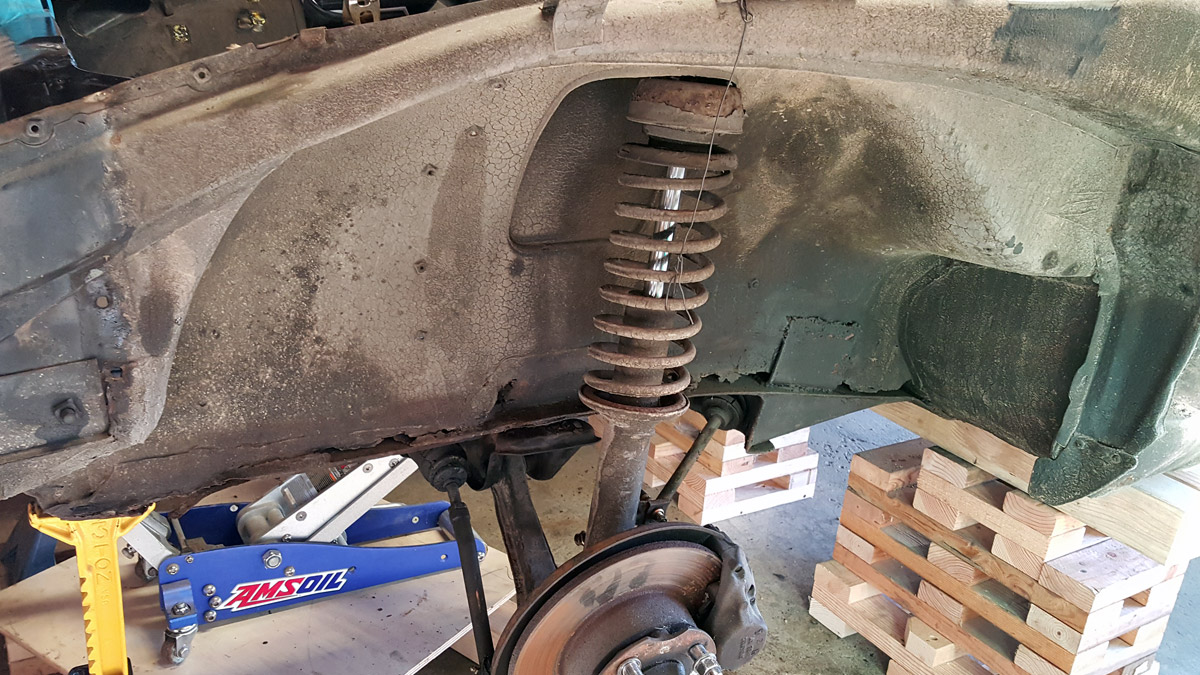
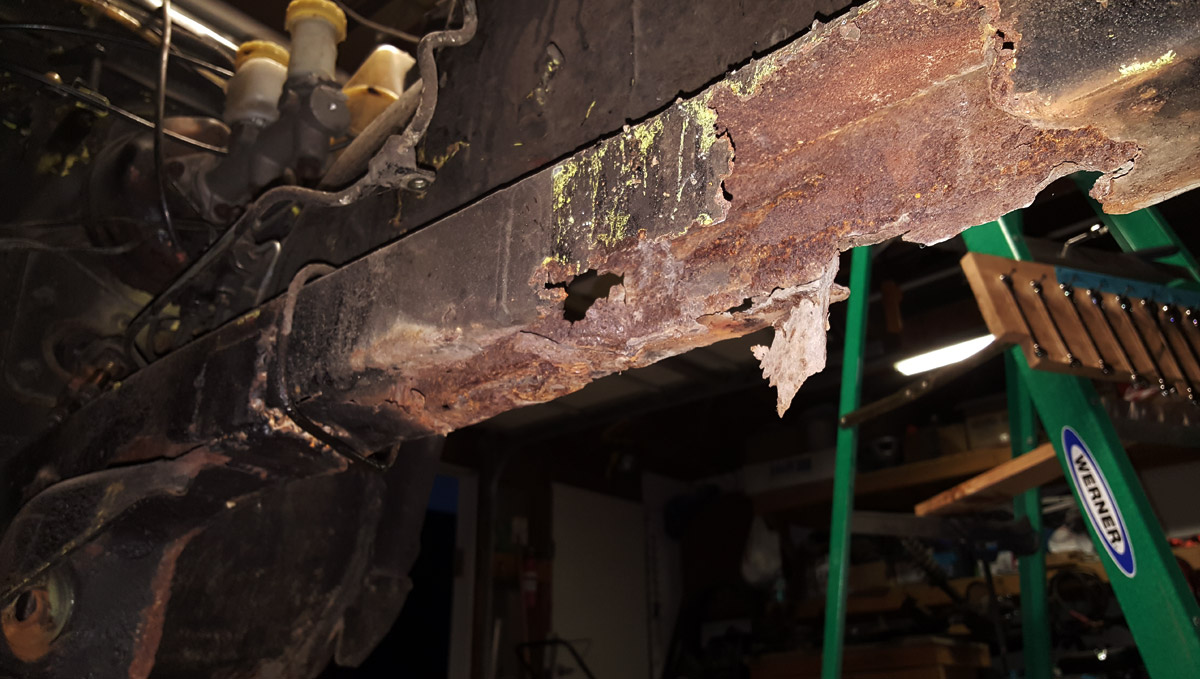
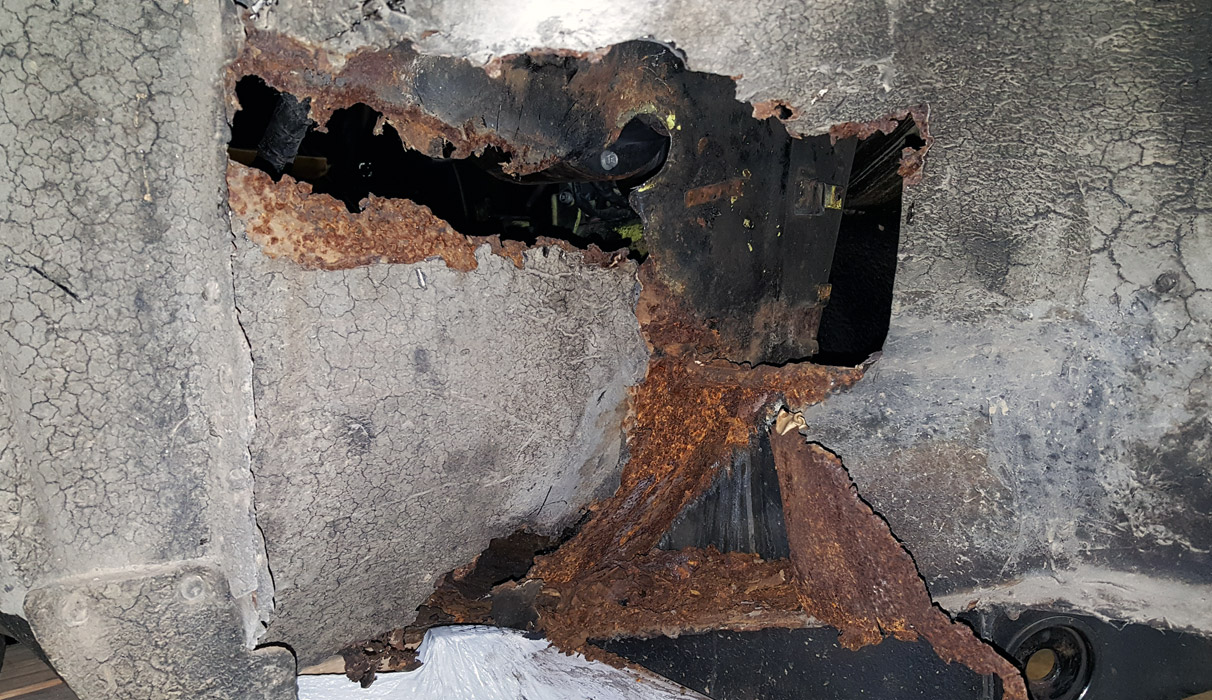
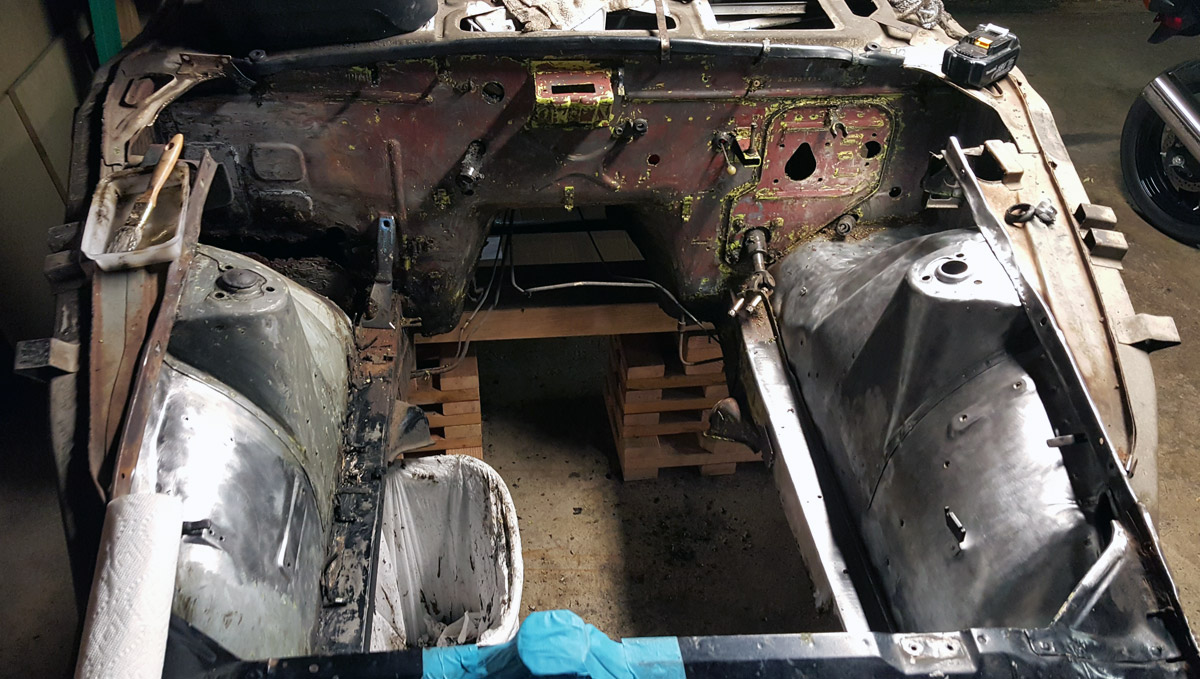
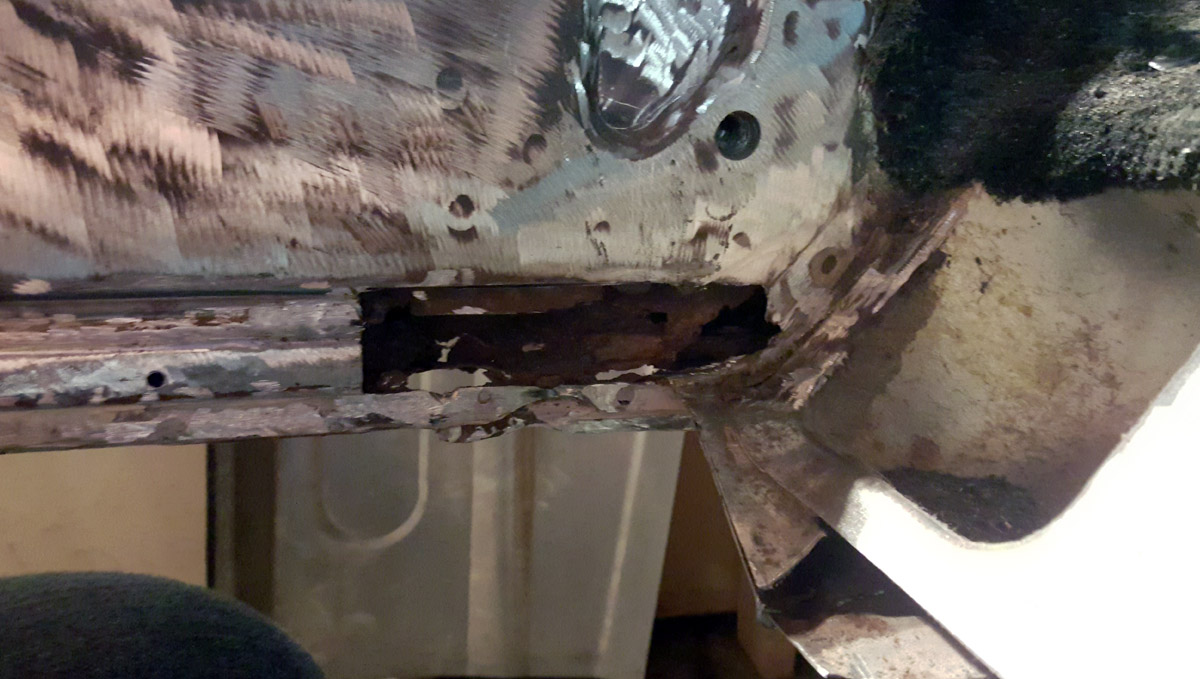
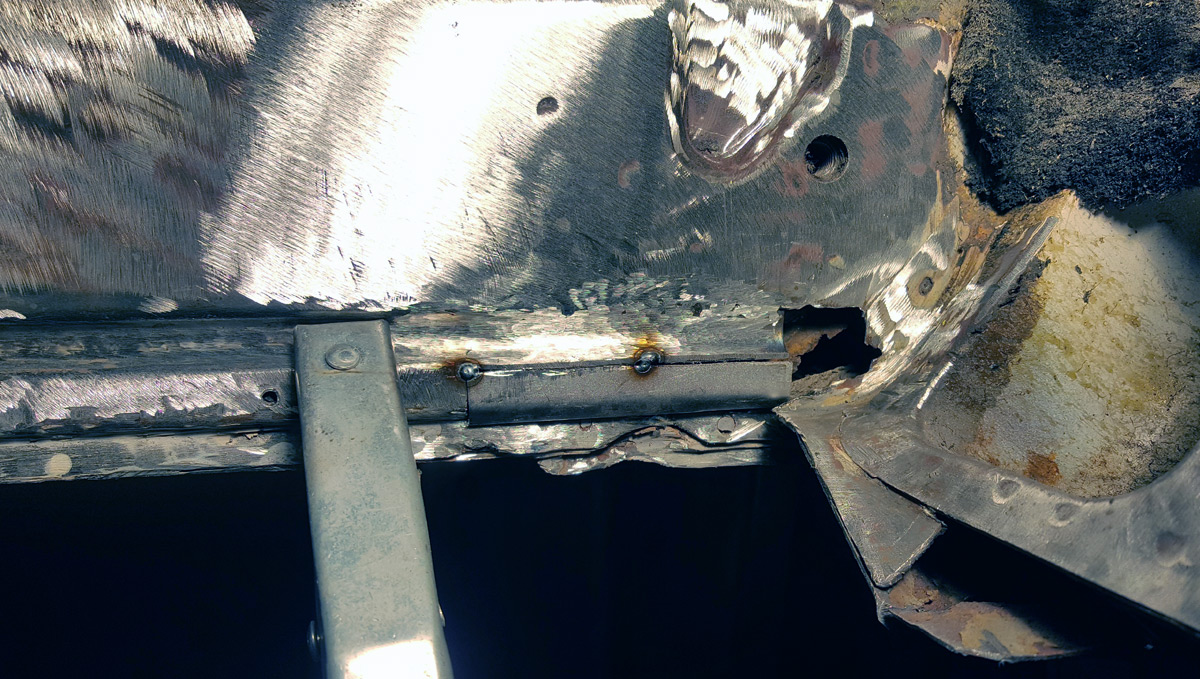
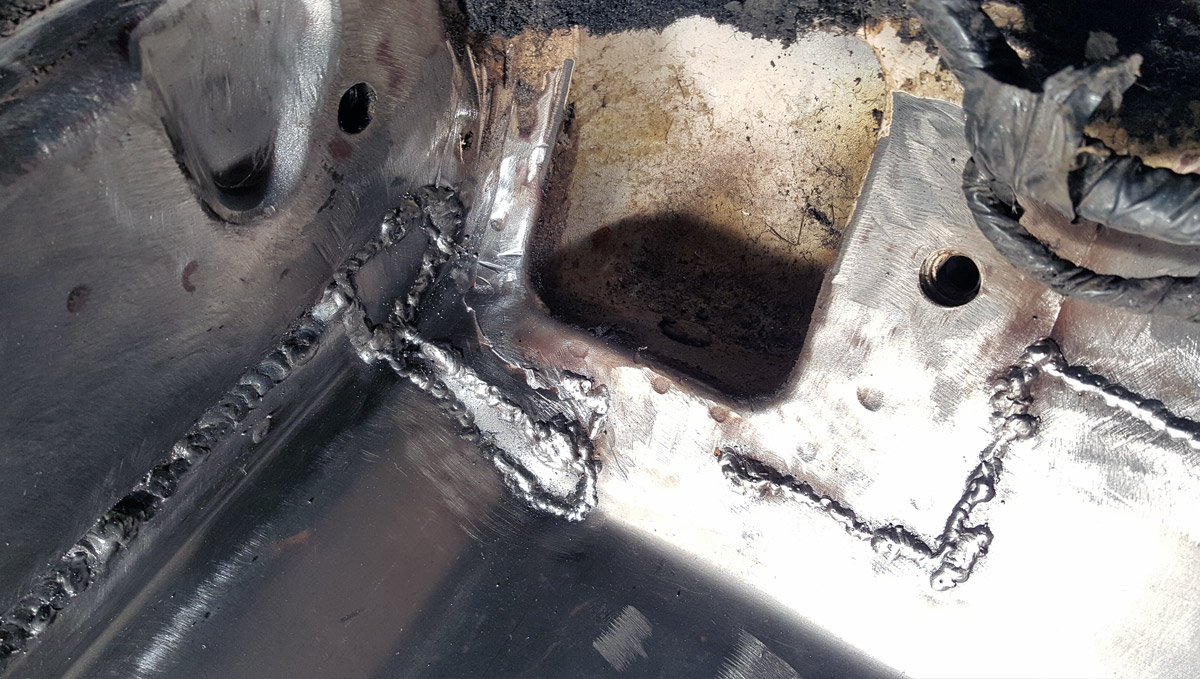
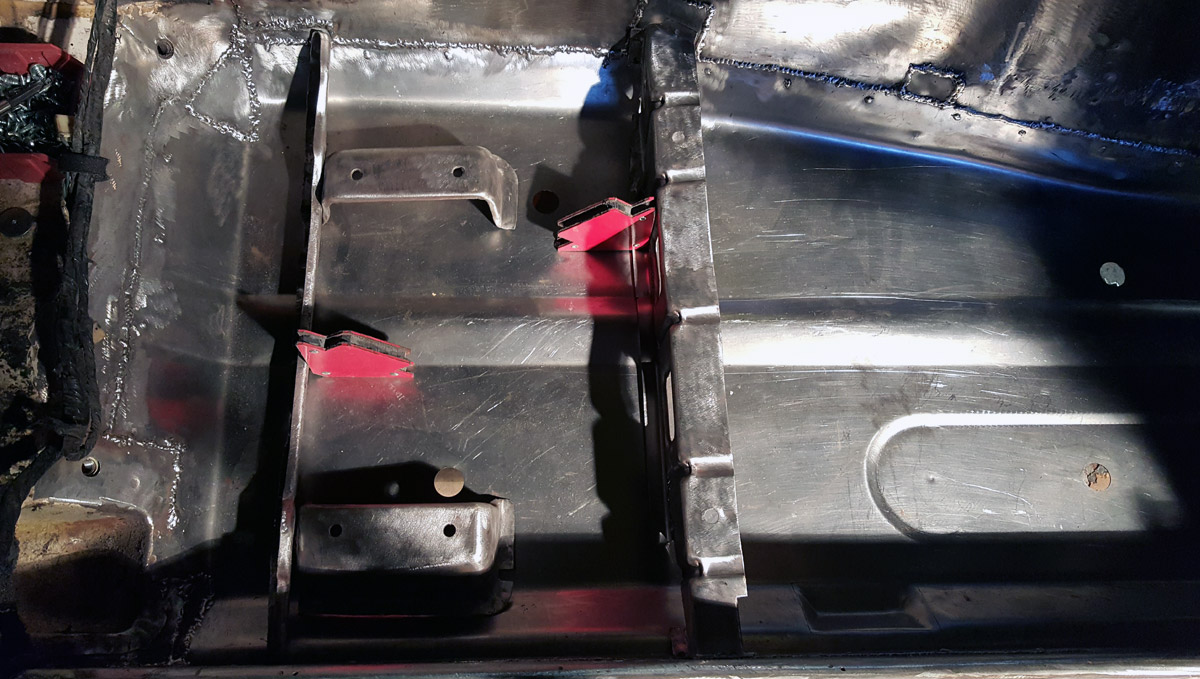
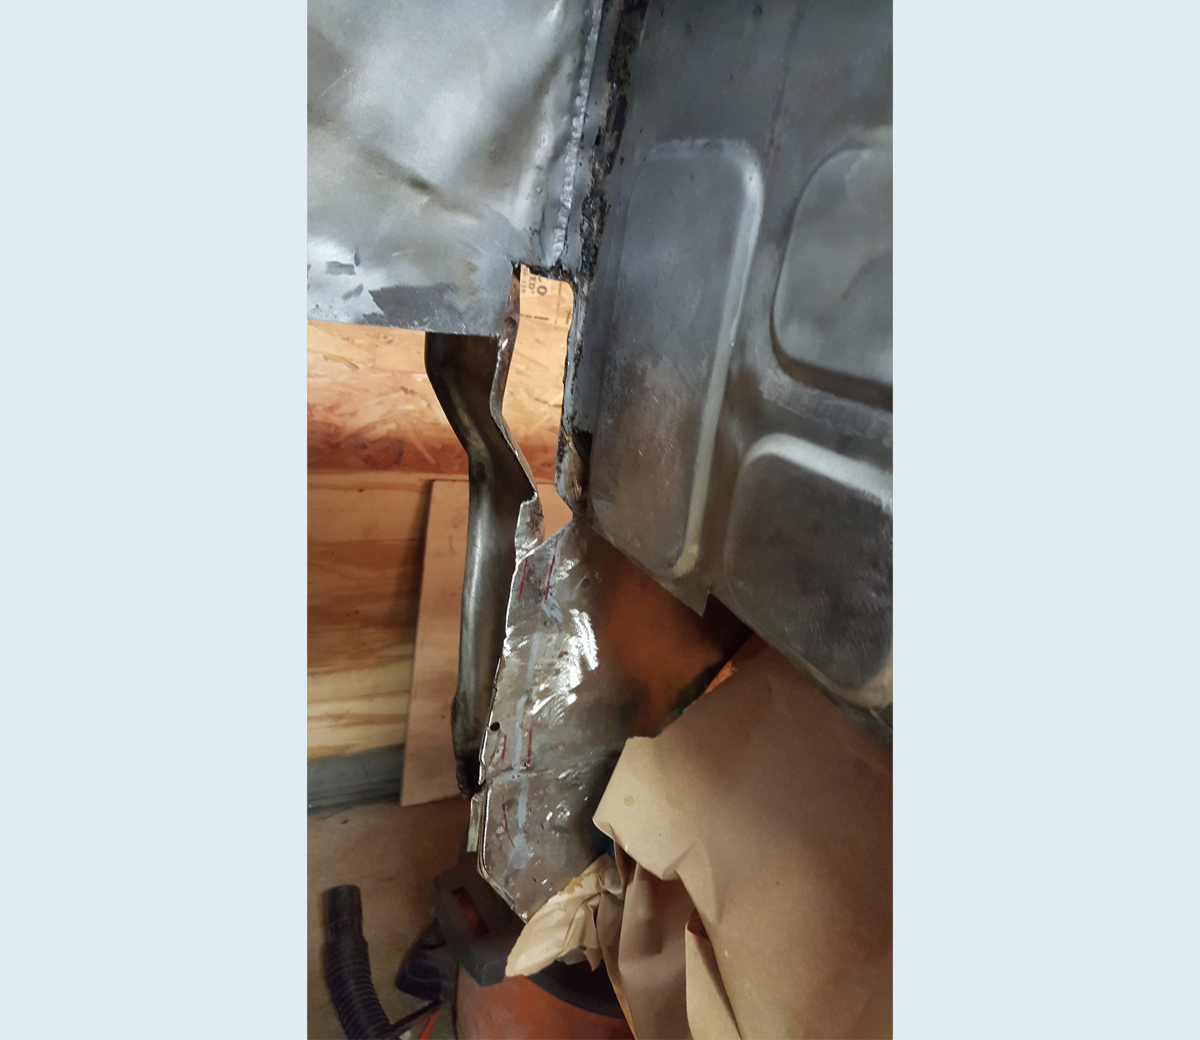
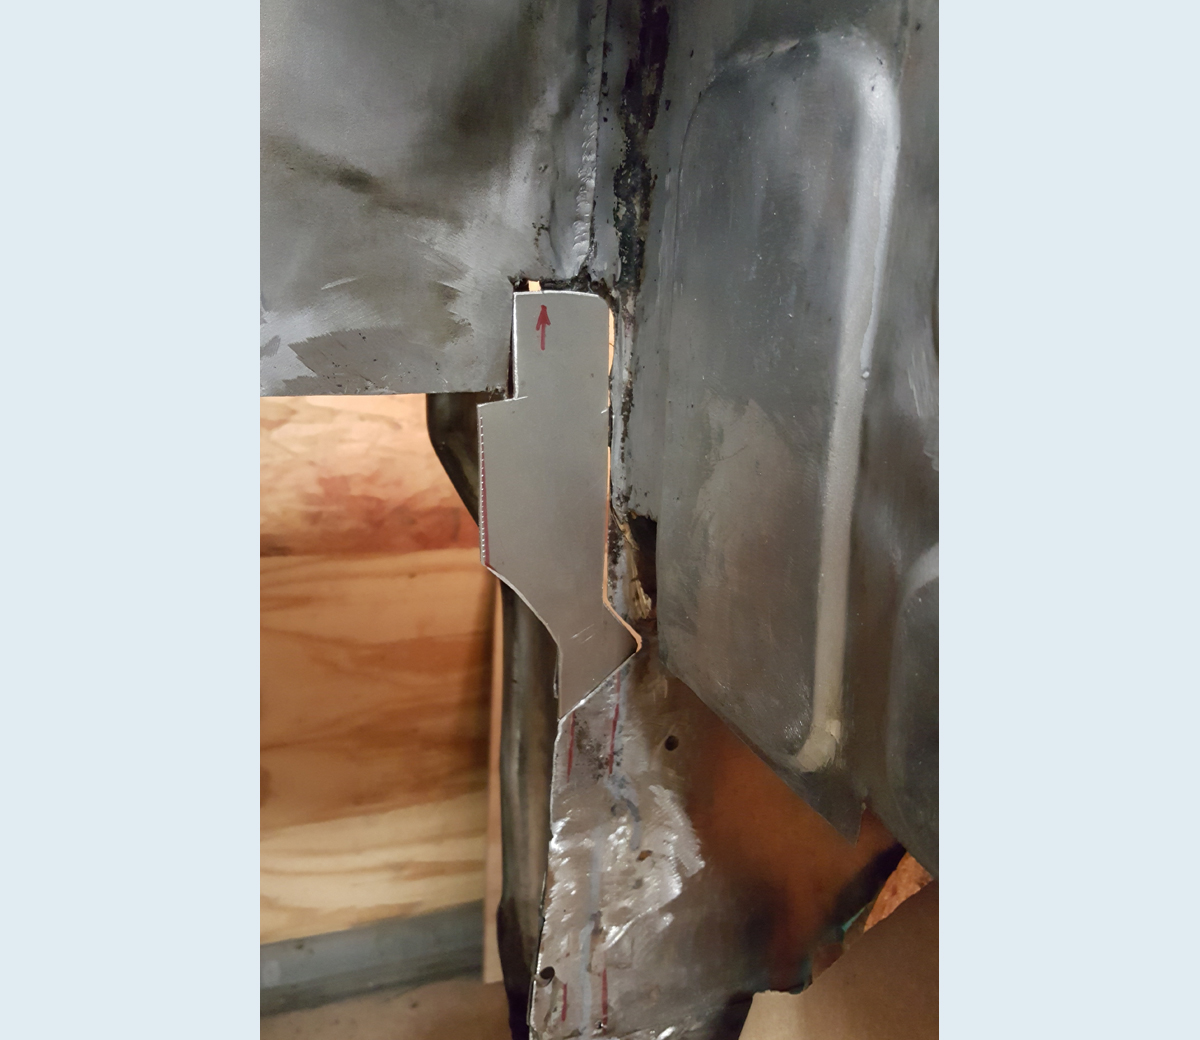
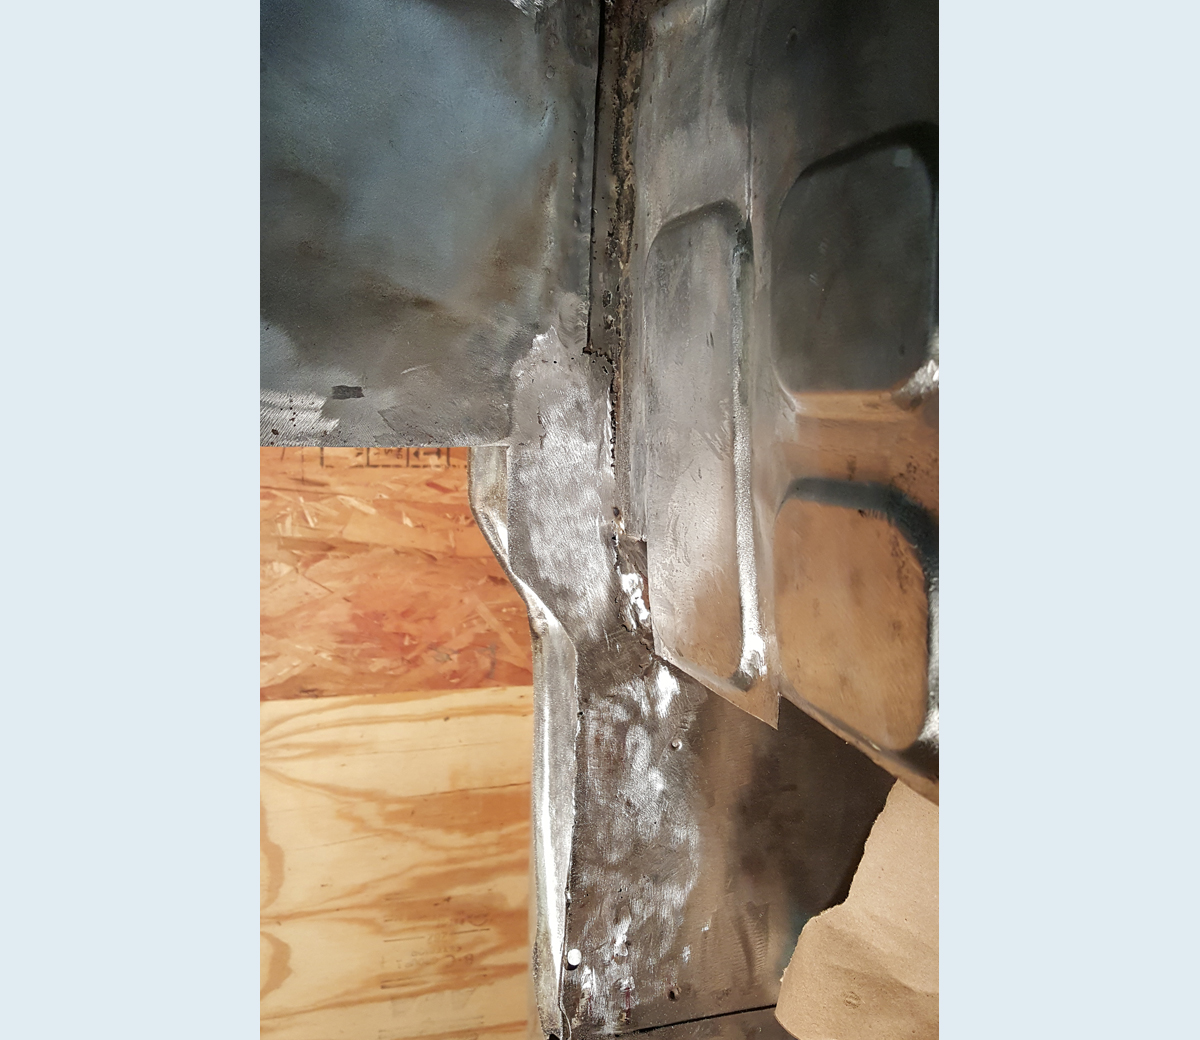
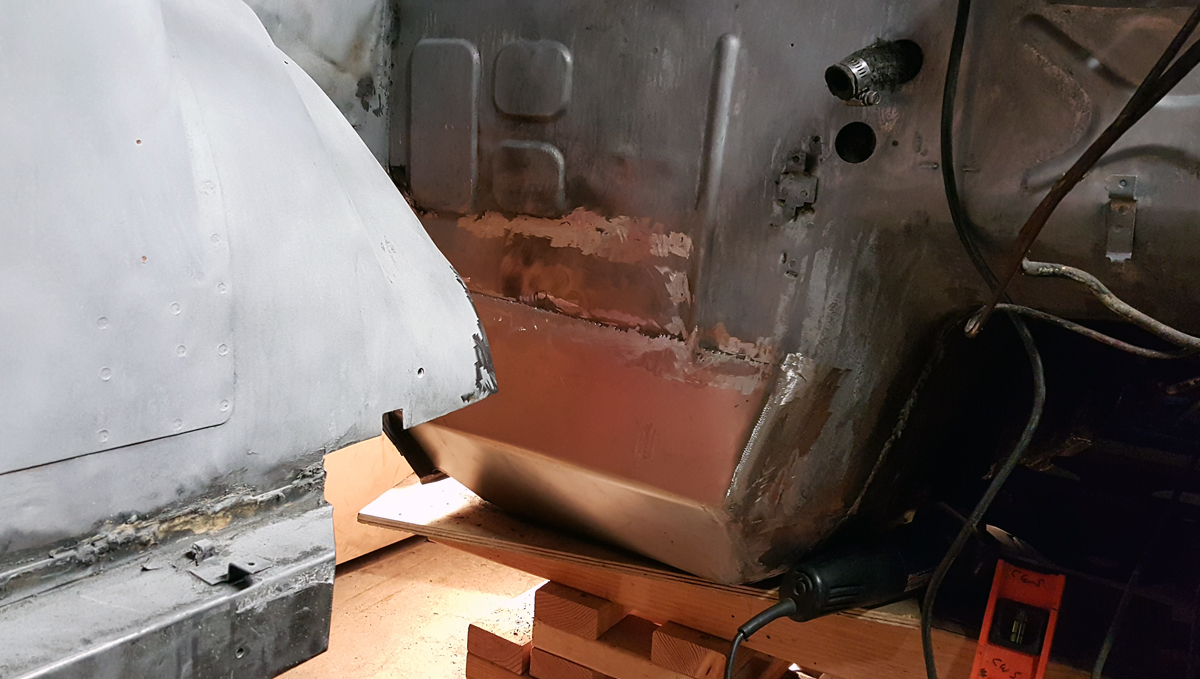
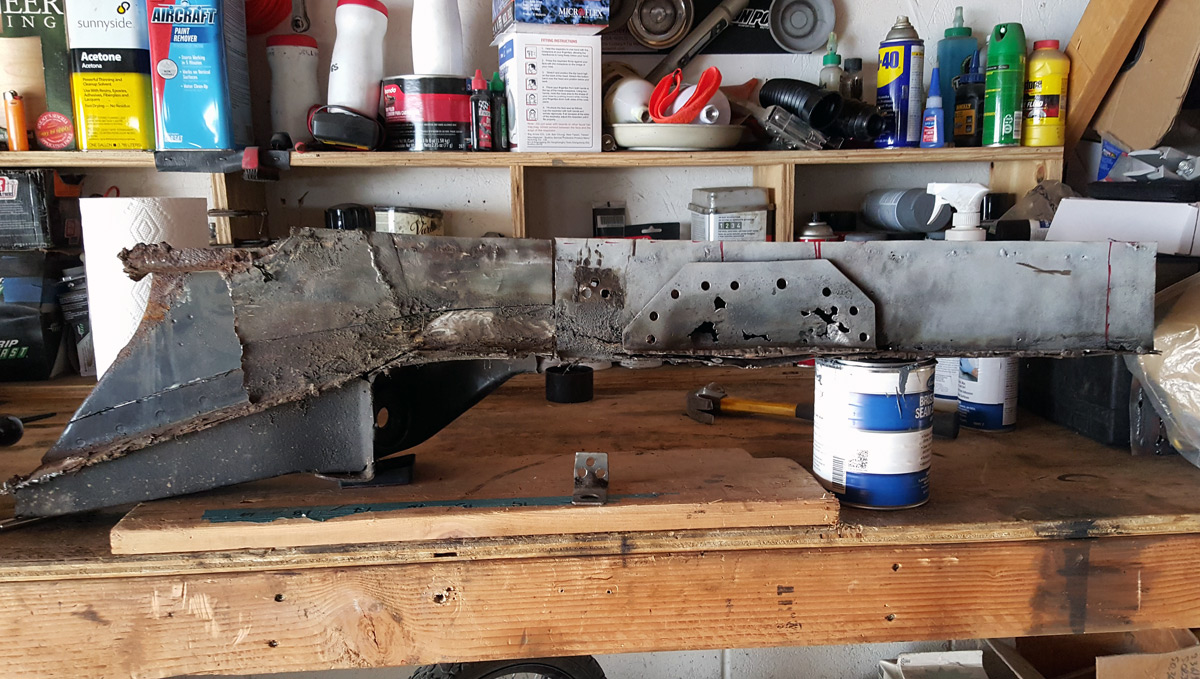
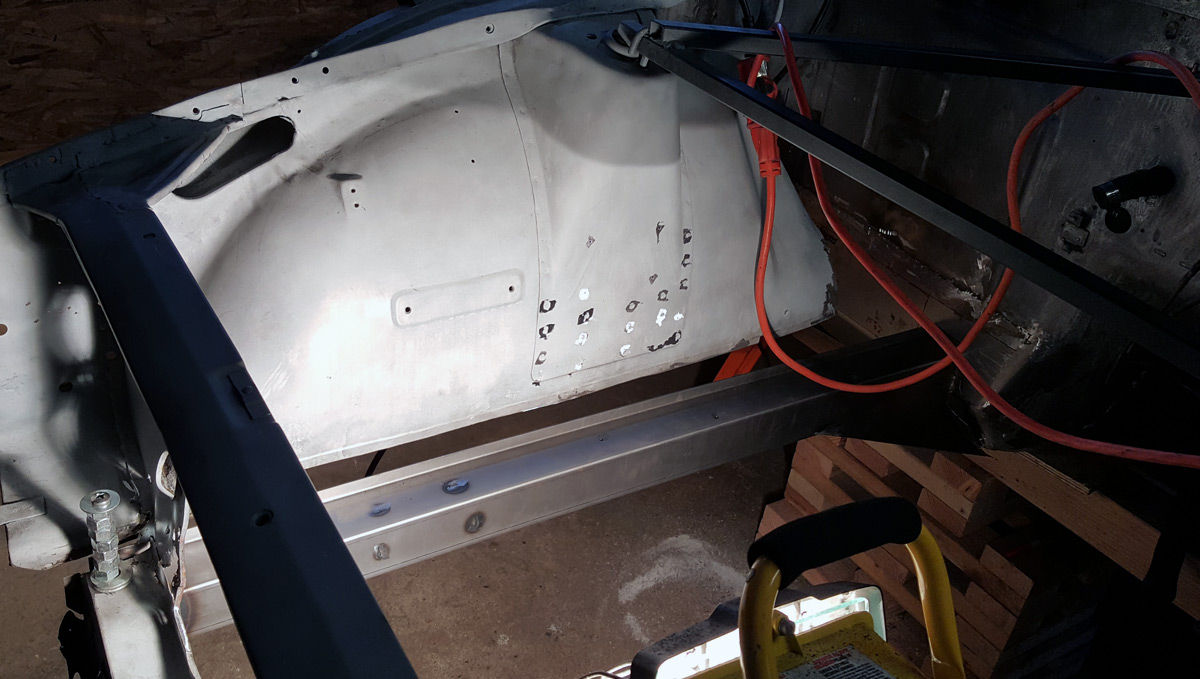
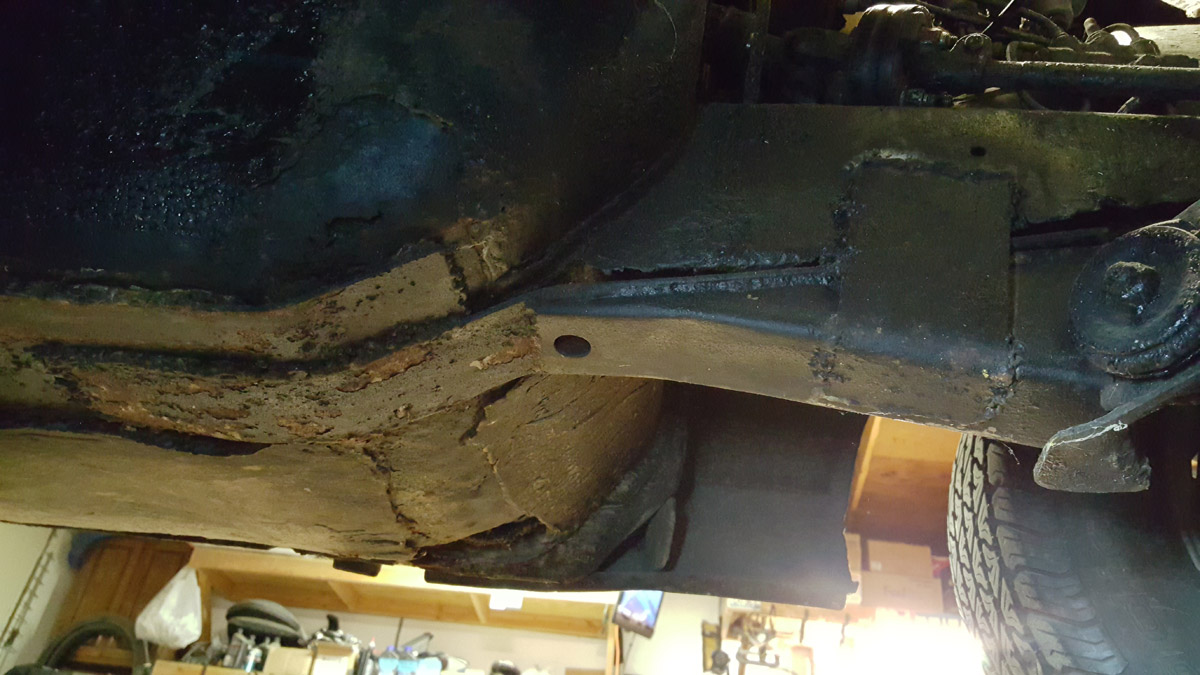
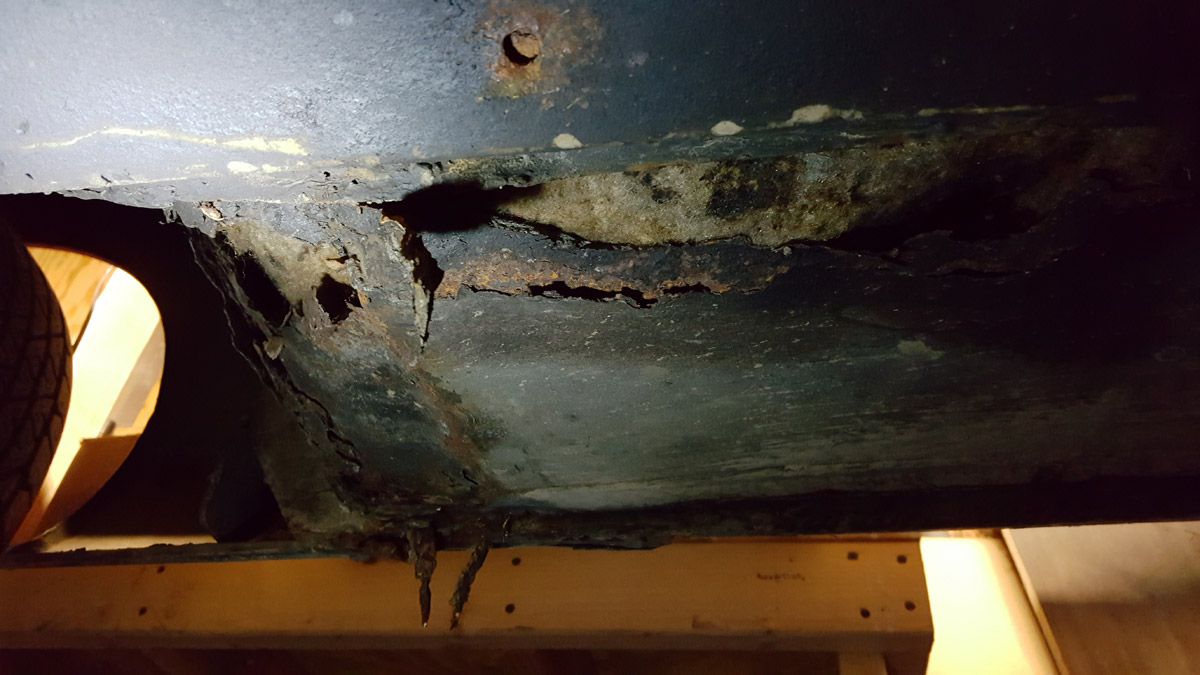
Drivers side frame rail:
Image

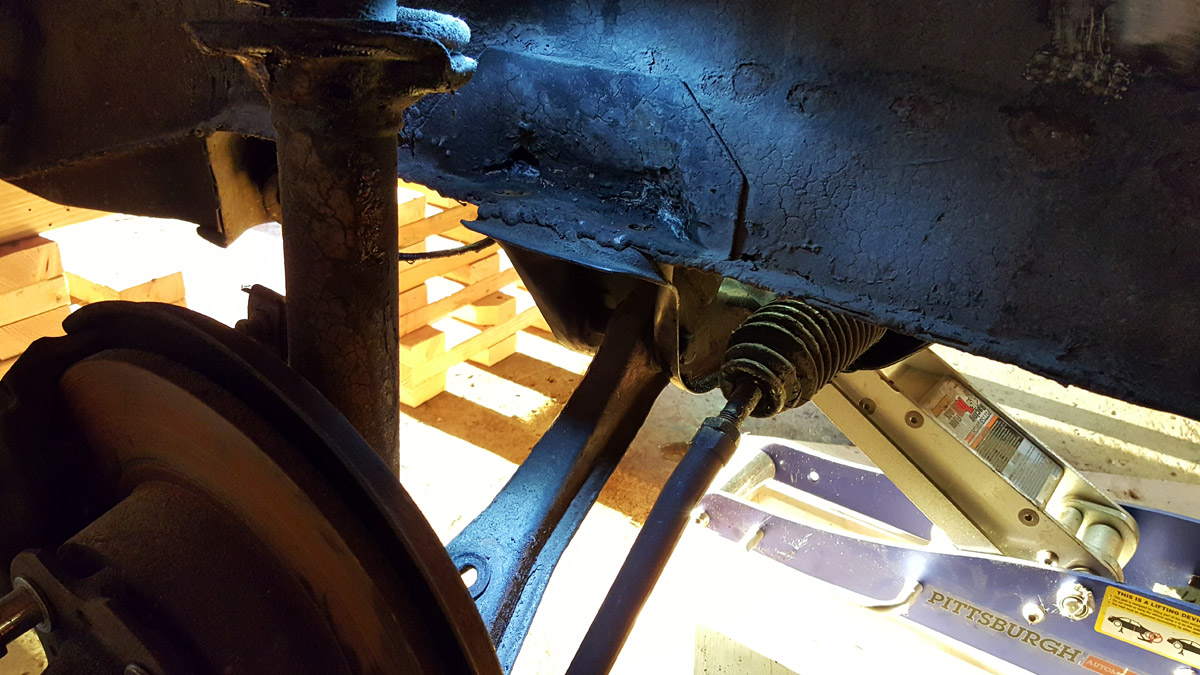
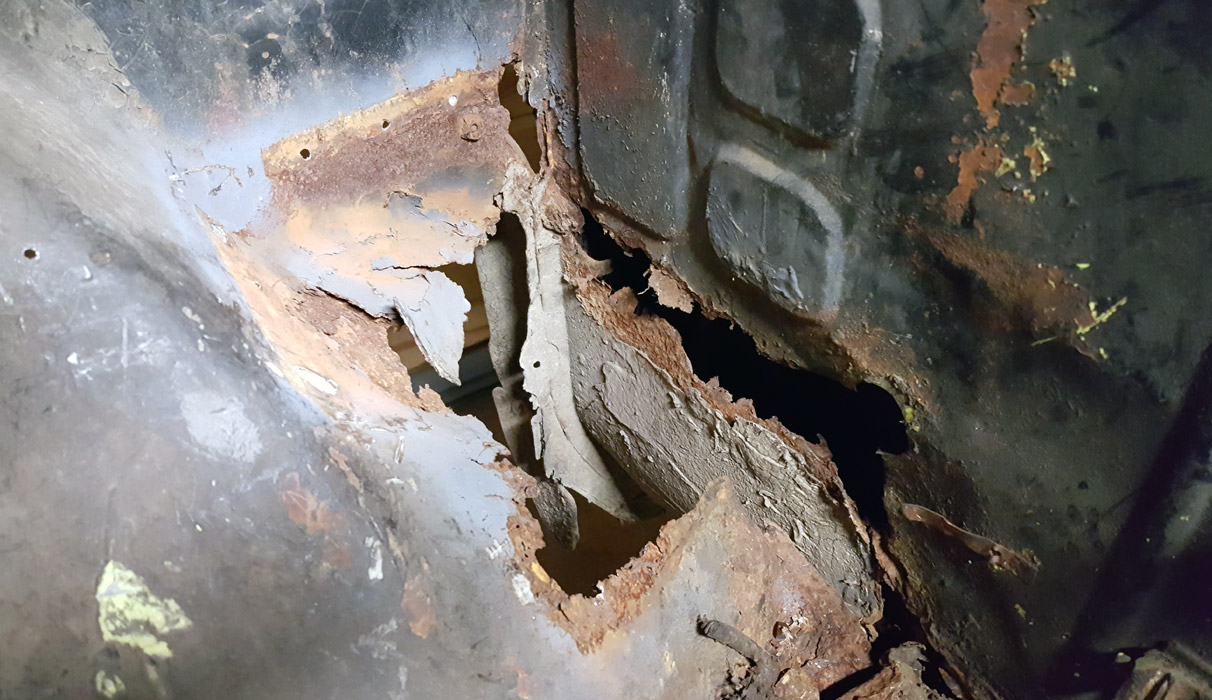
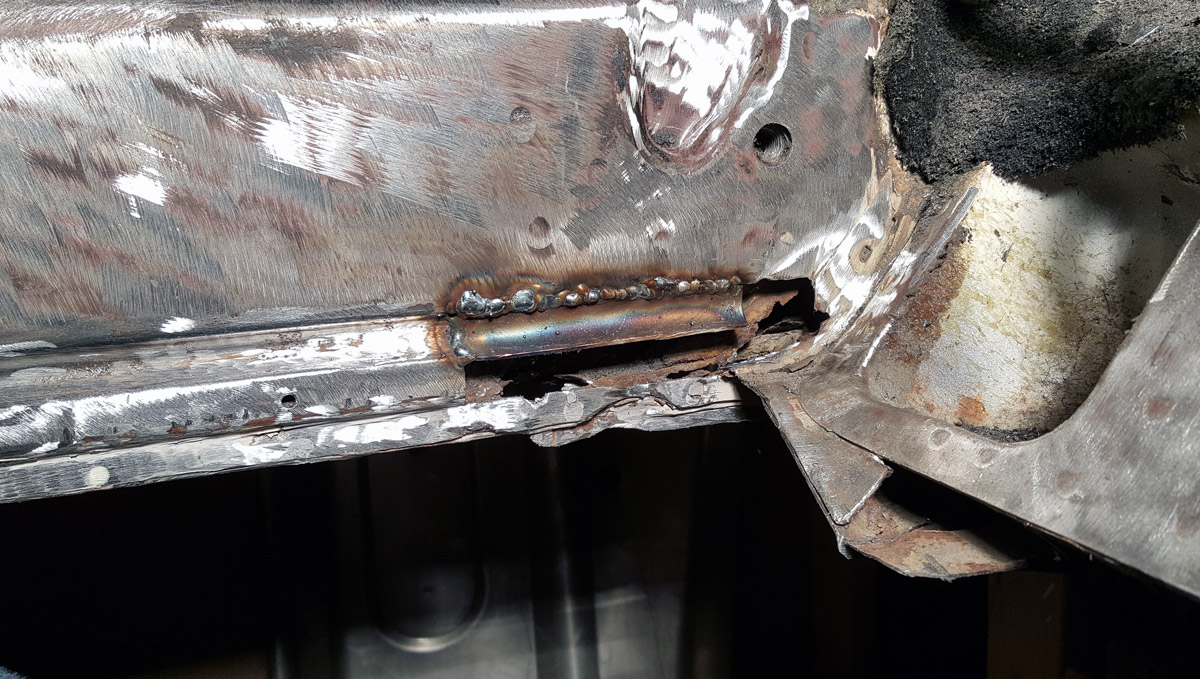
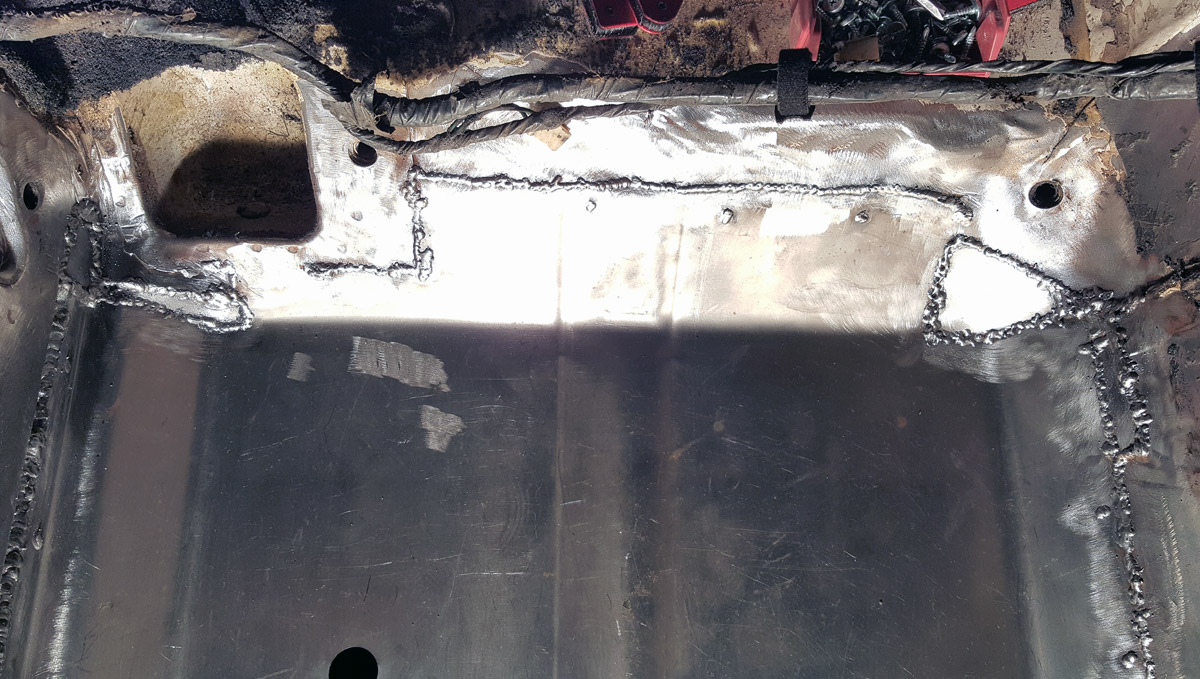
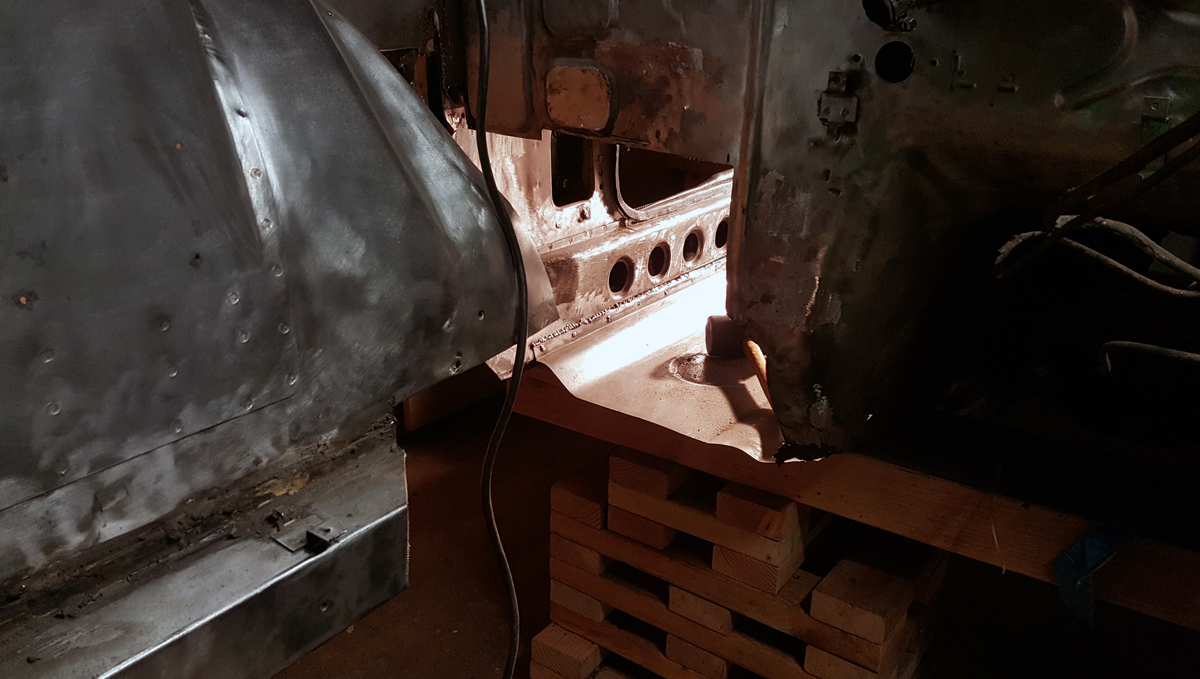
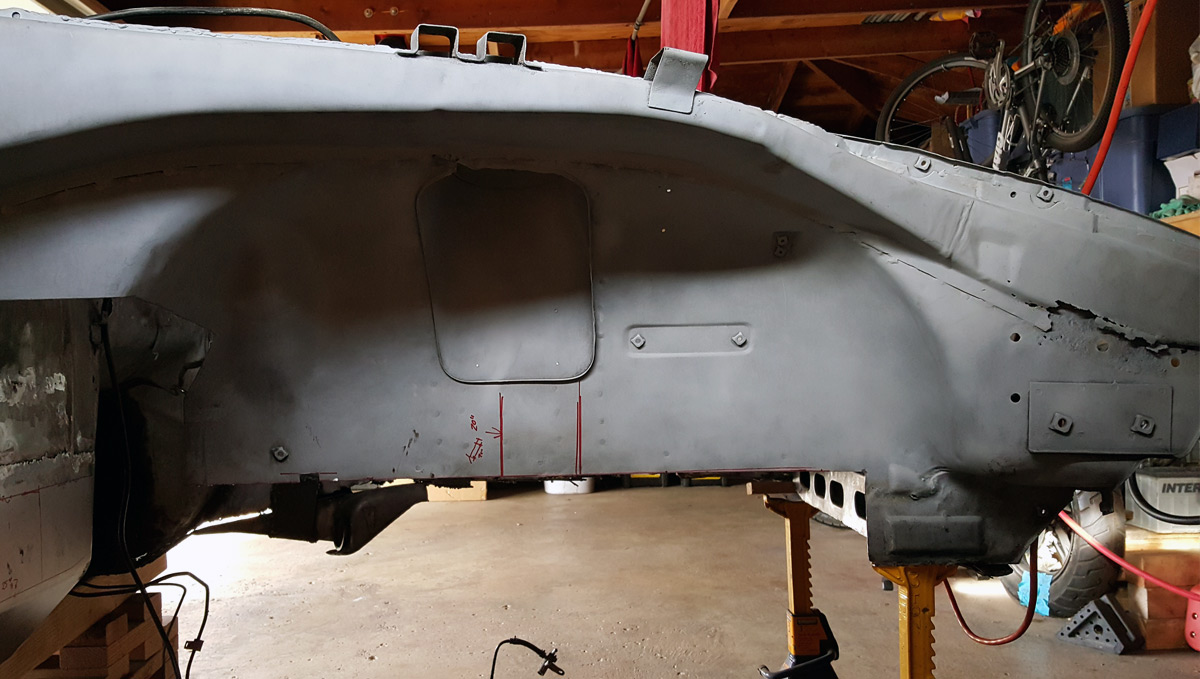
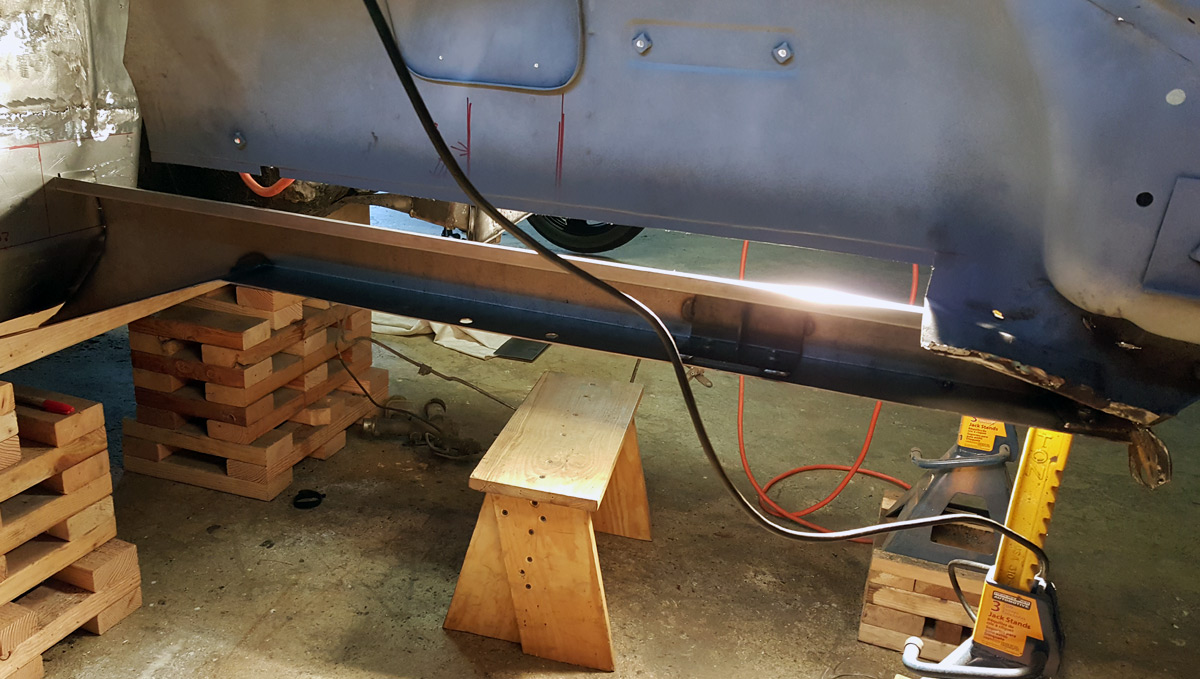
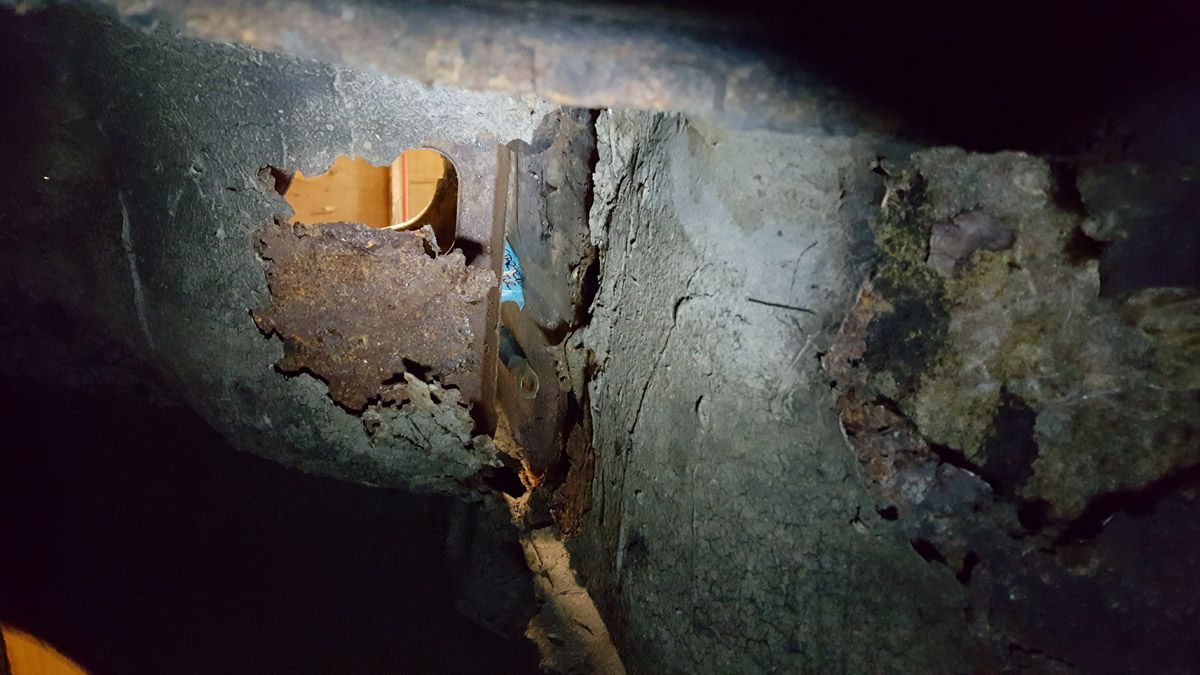
Drivers side floor support:
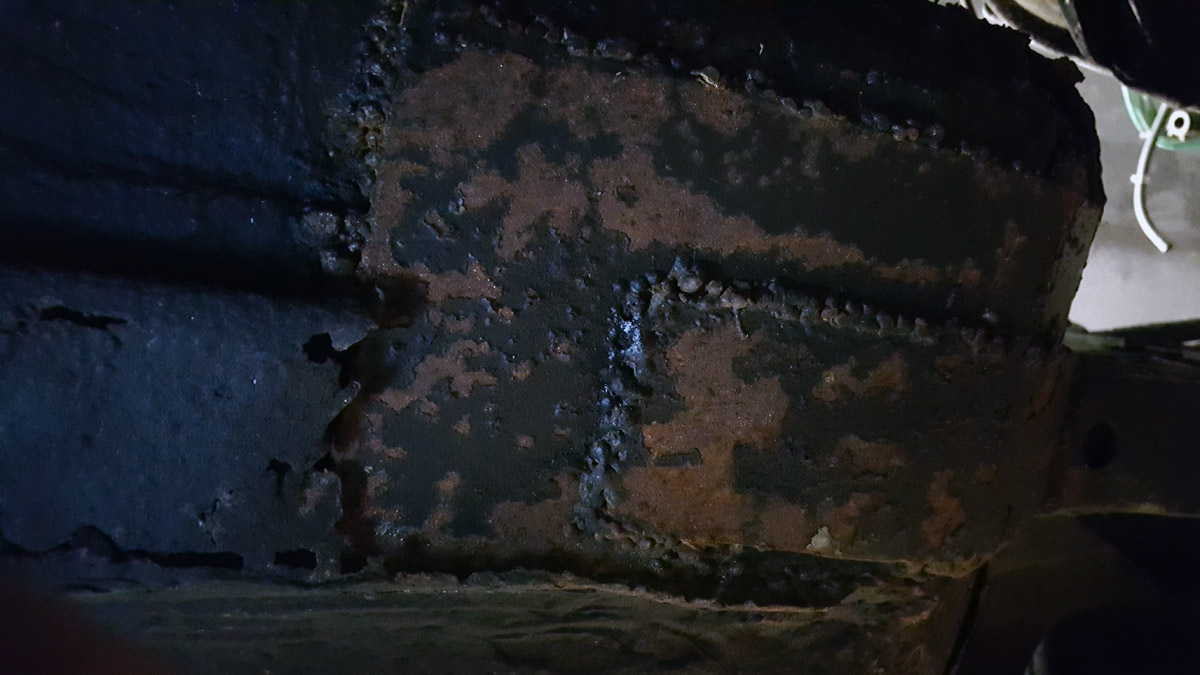
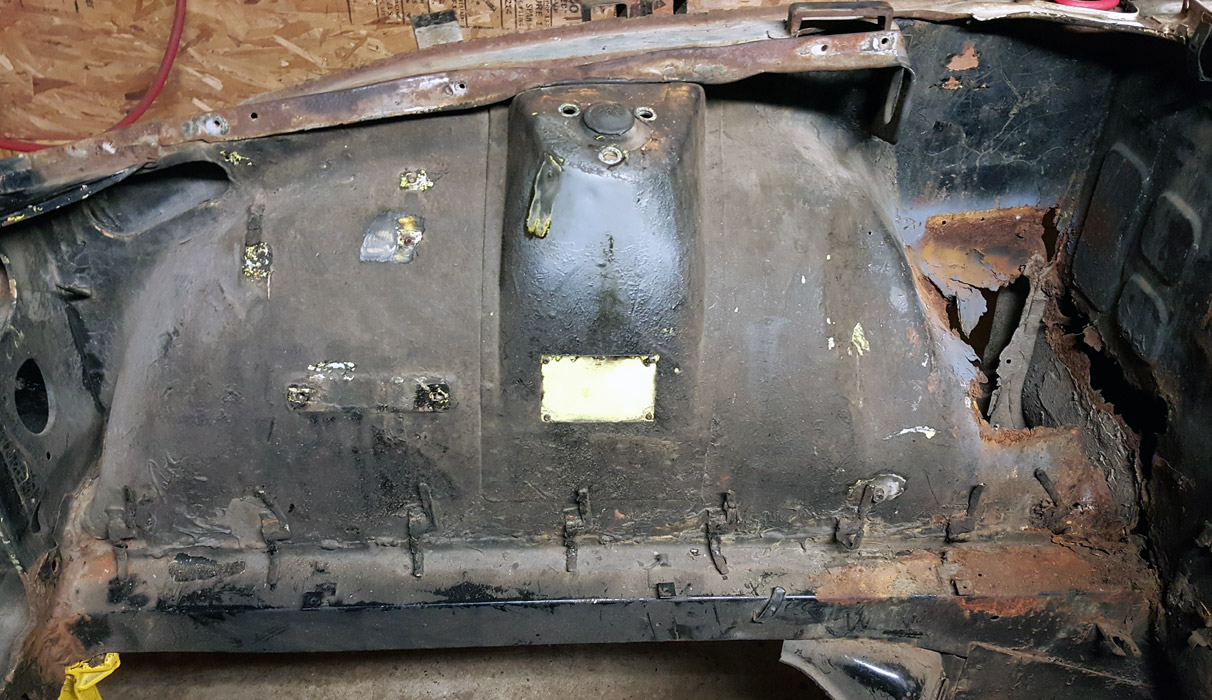
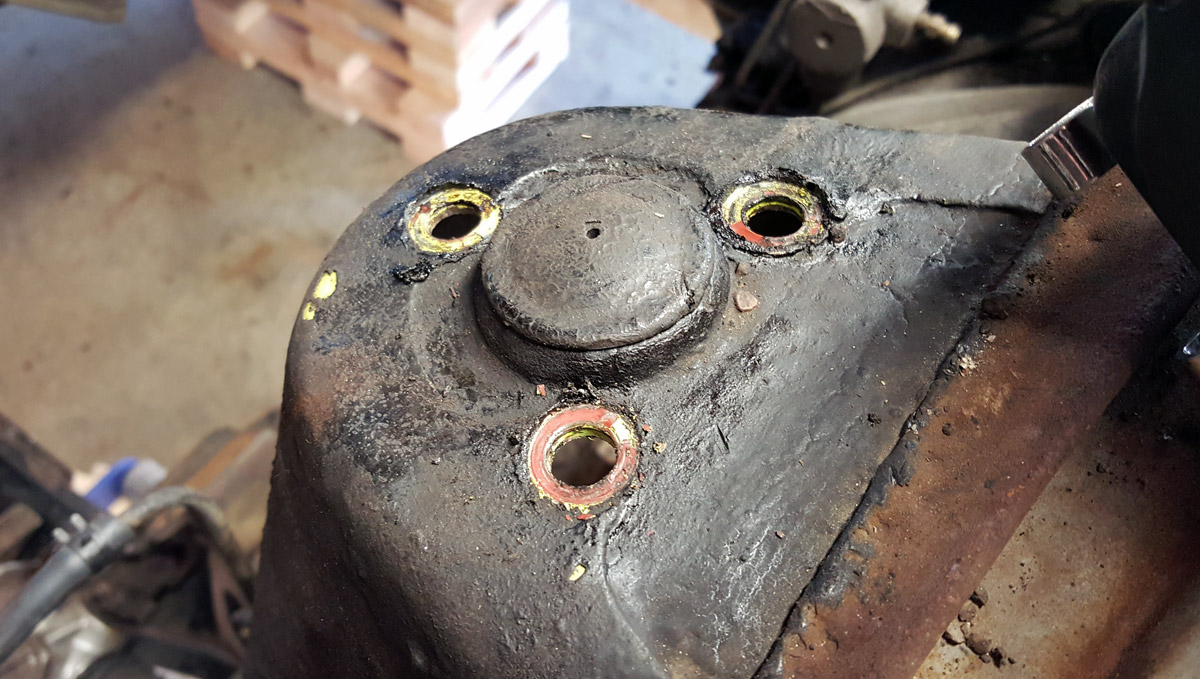
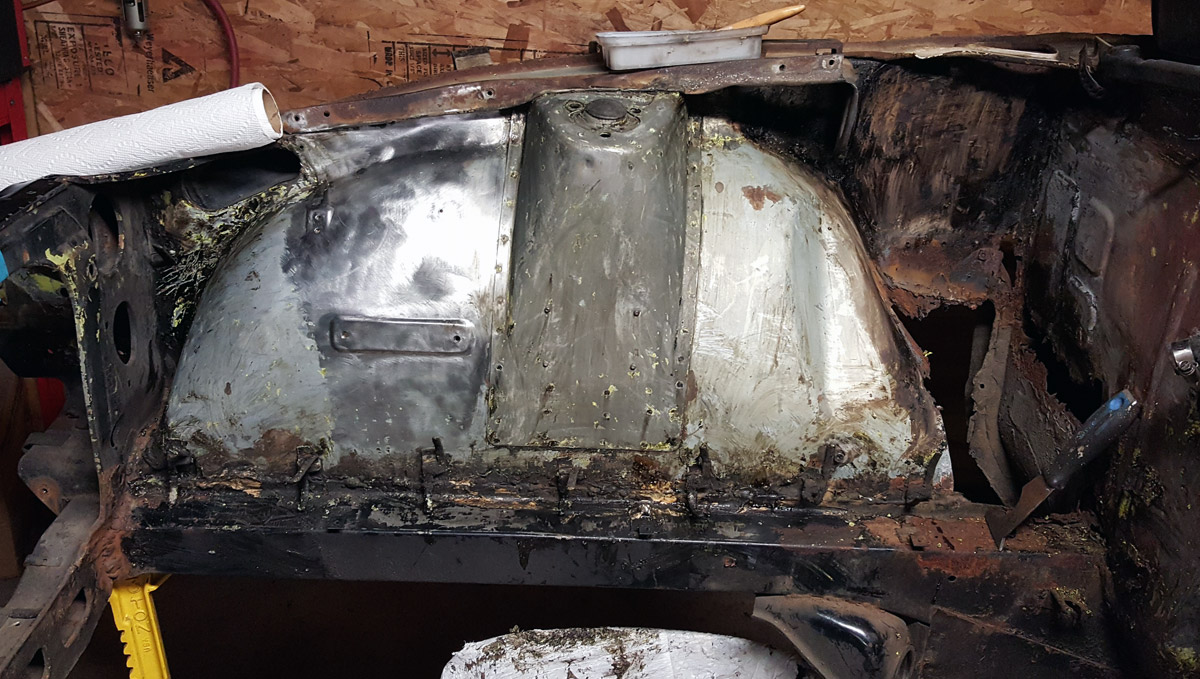
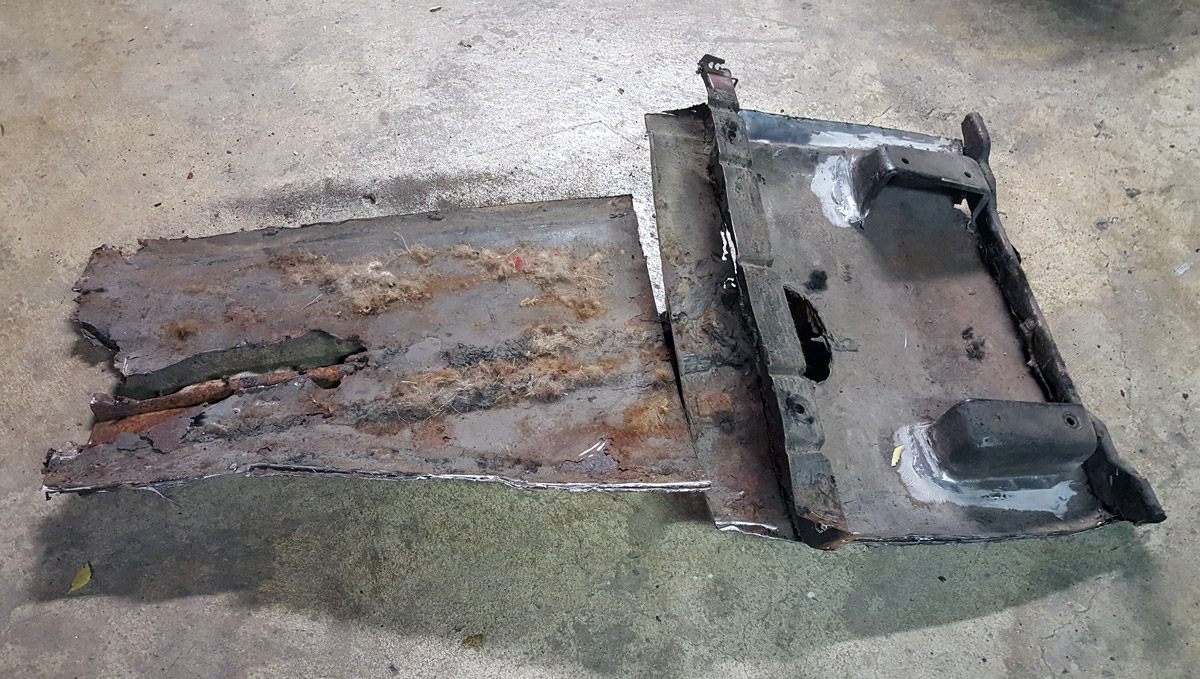
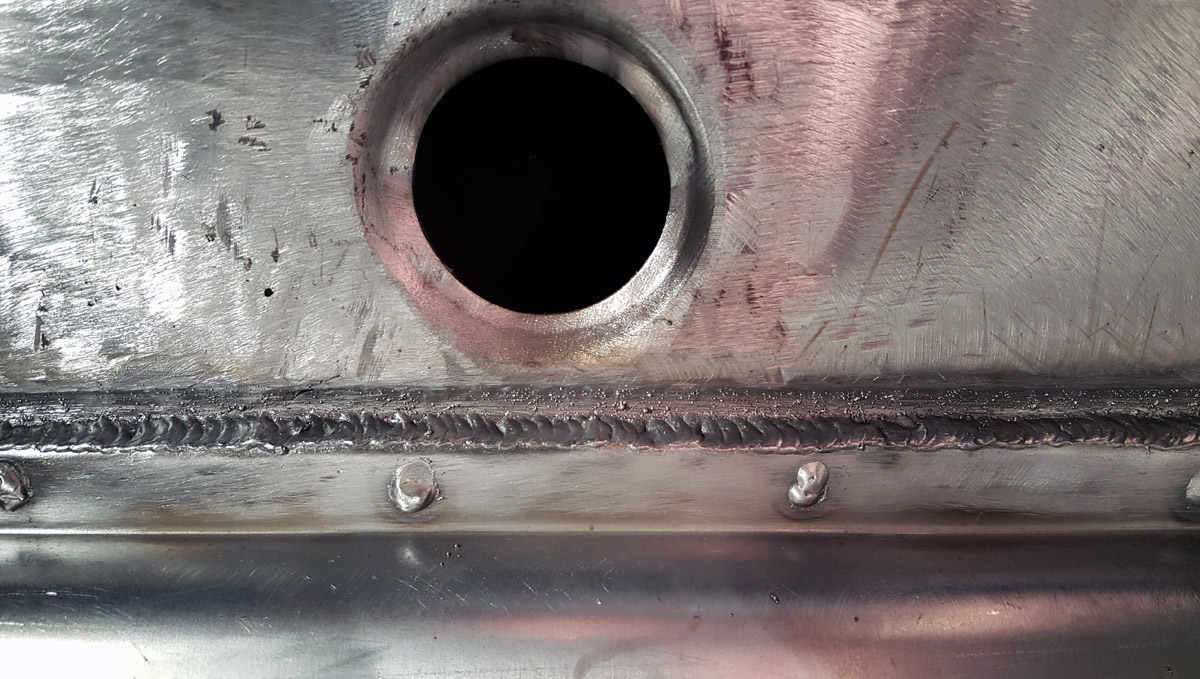
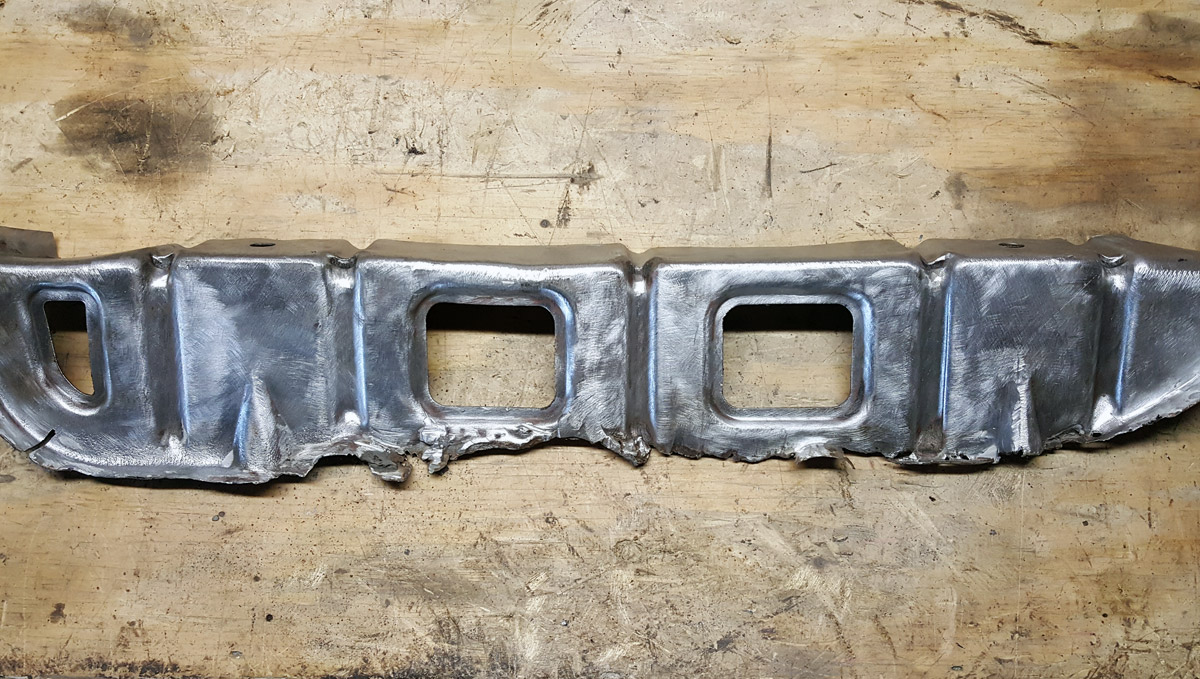
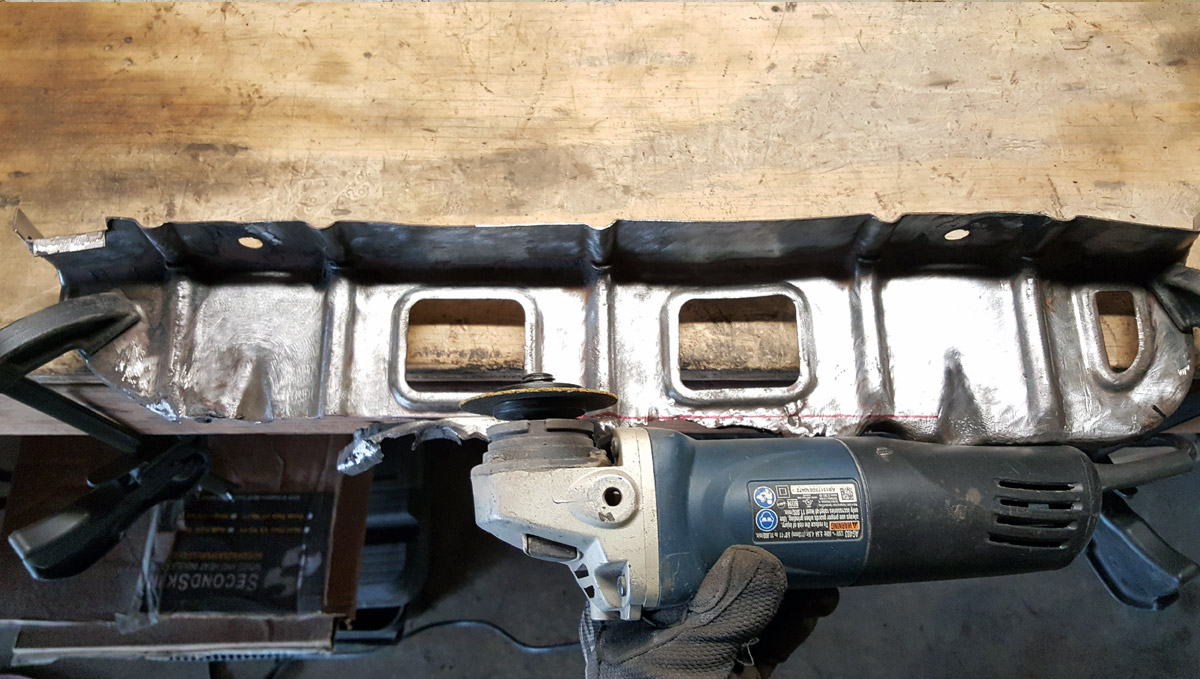
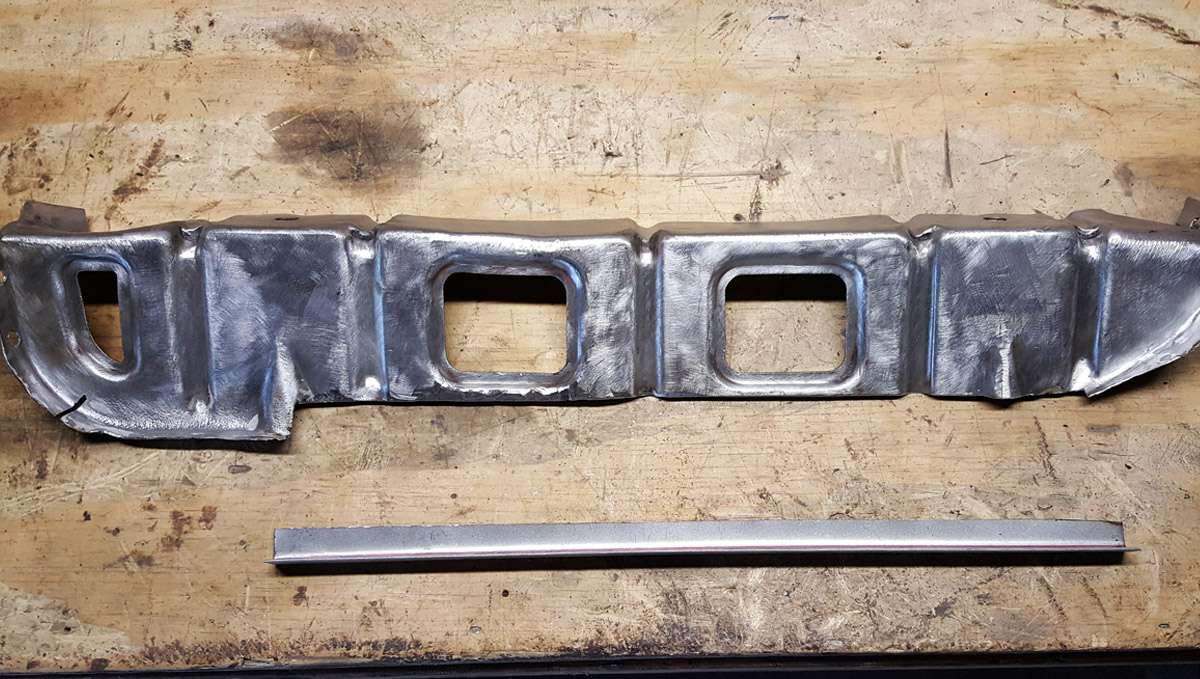
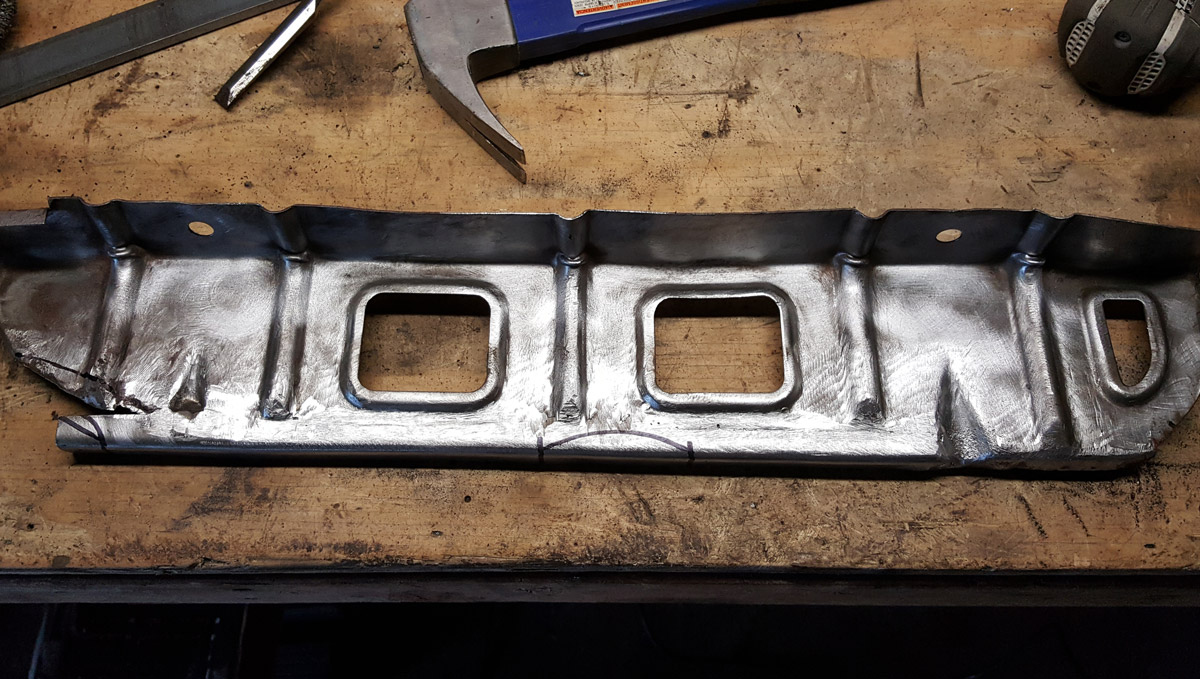
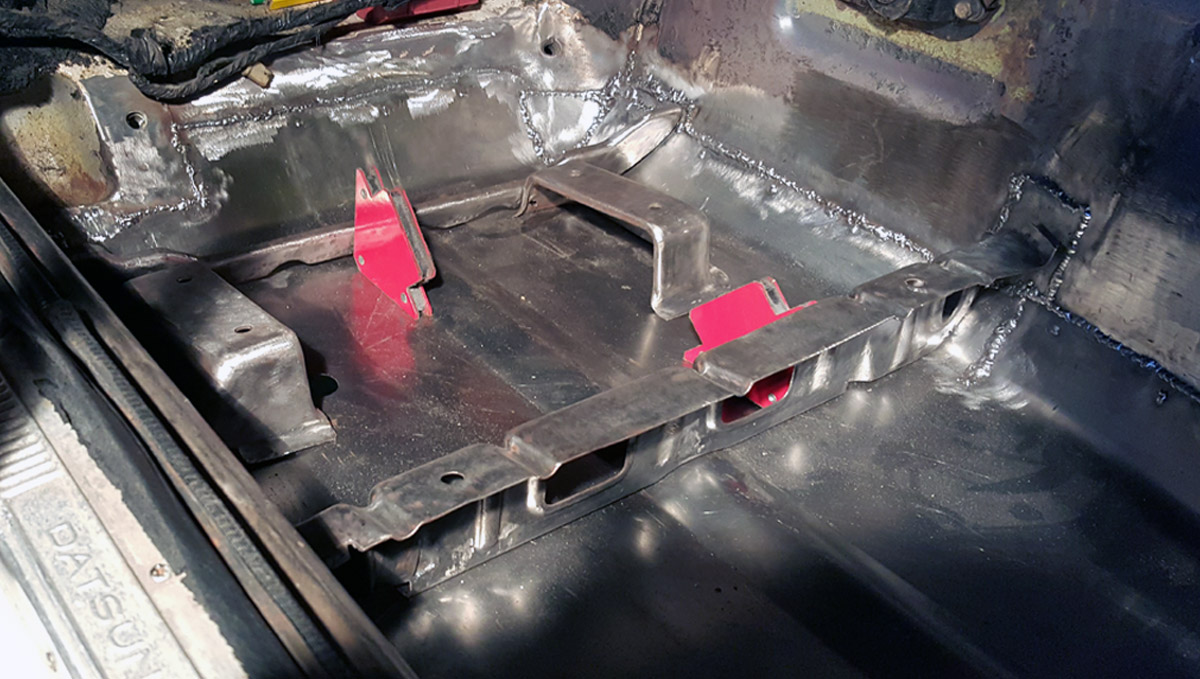
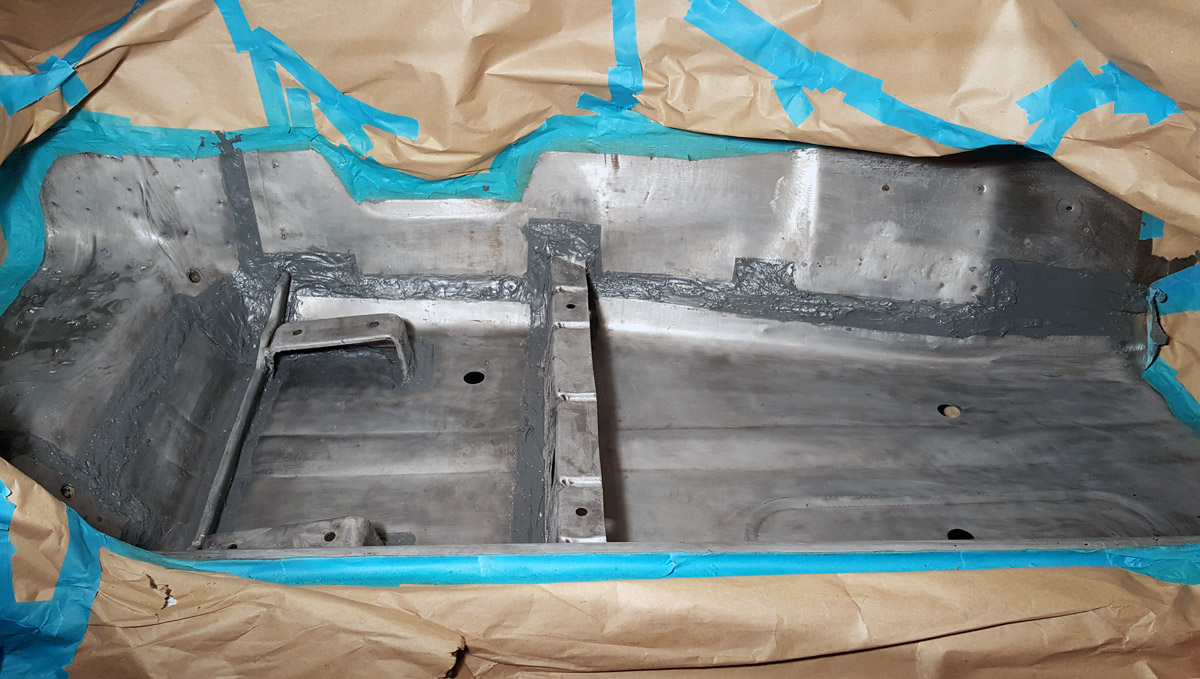
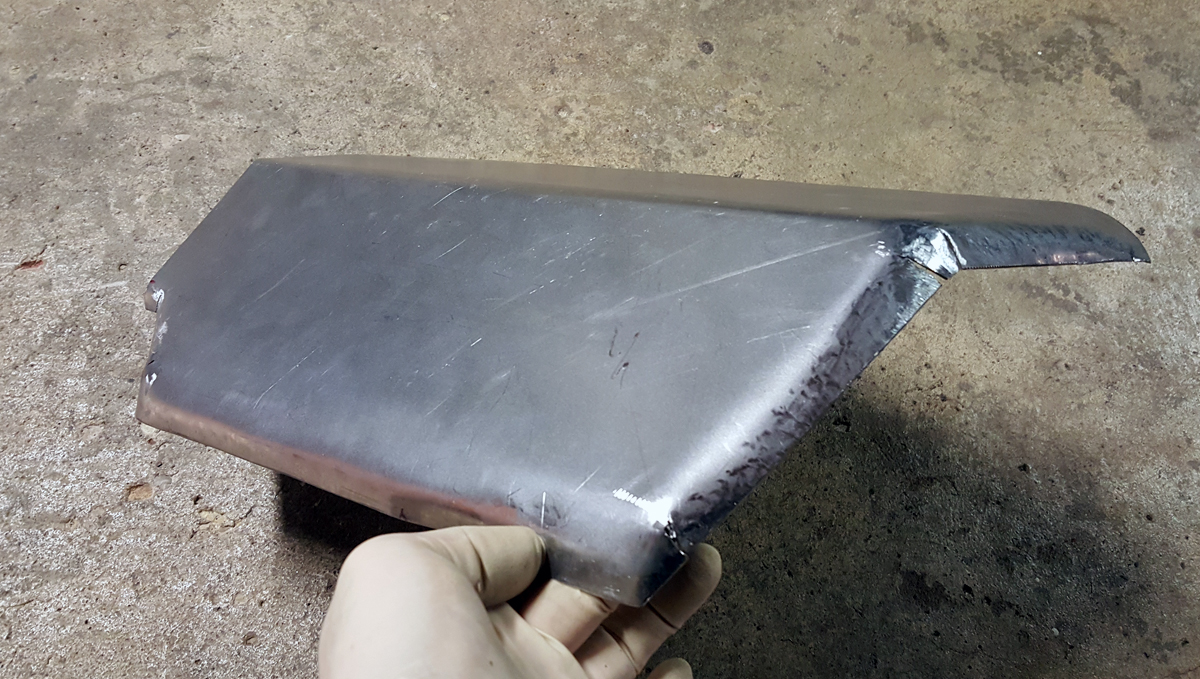
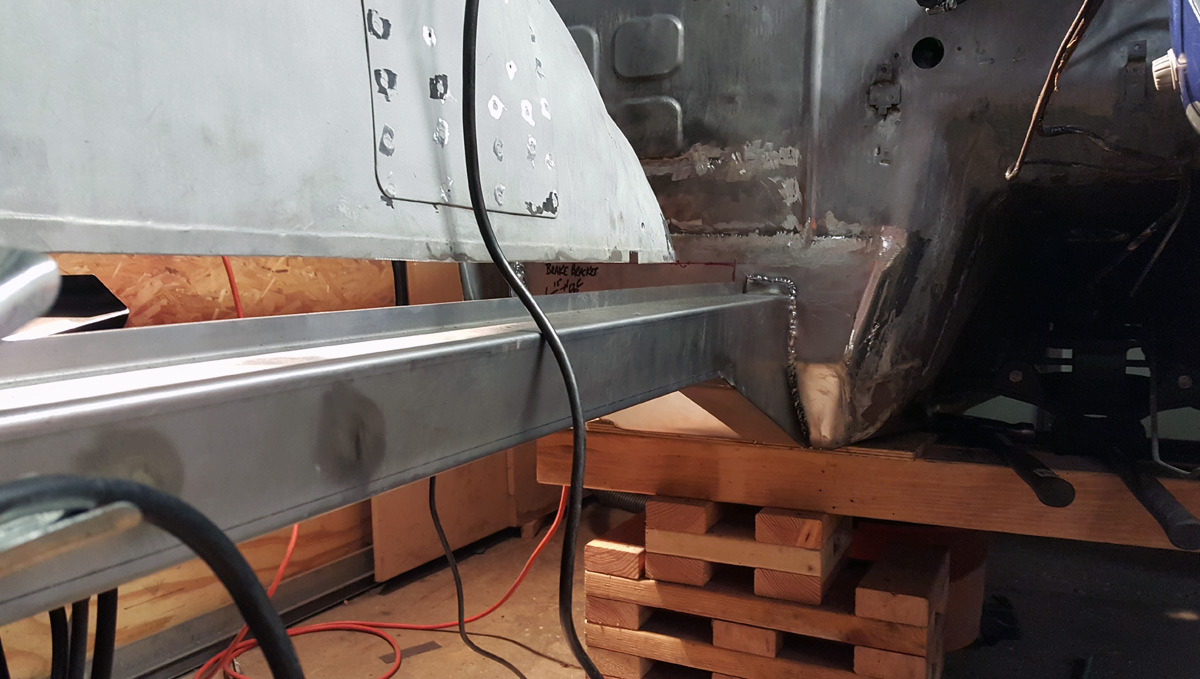
Image

Battery tray:
Image

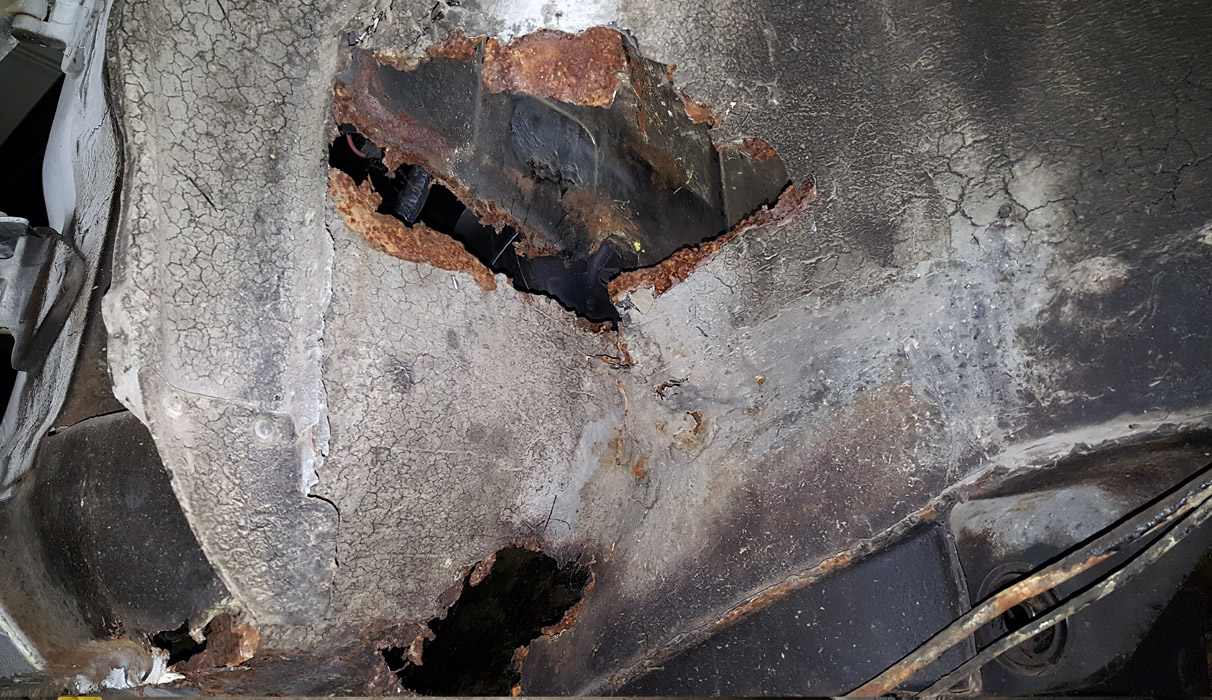
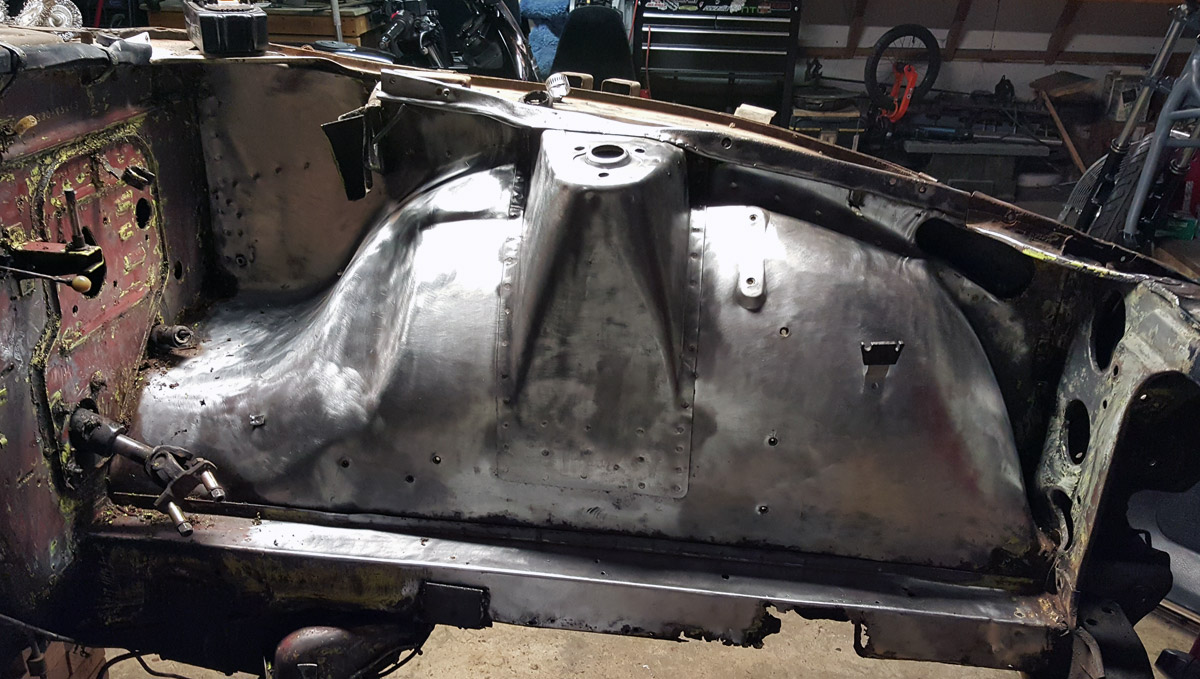
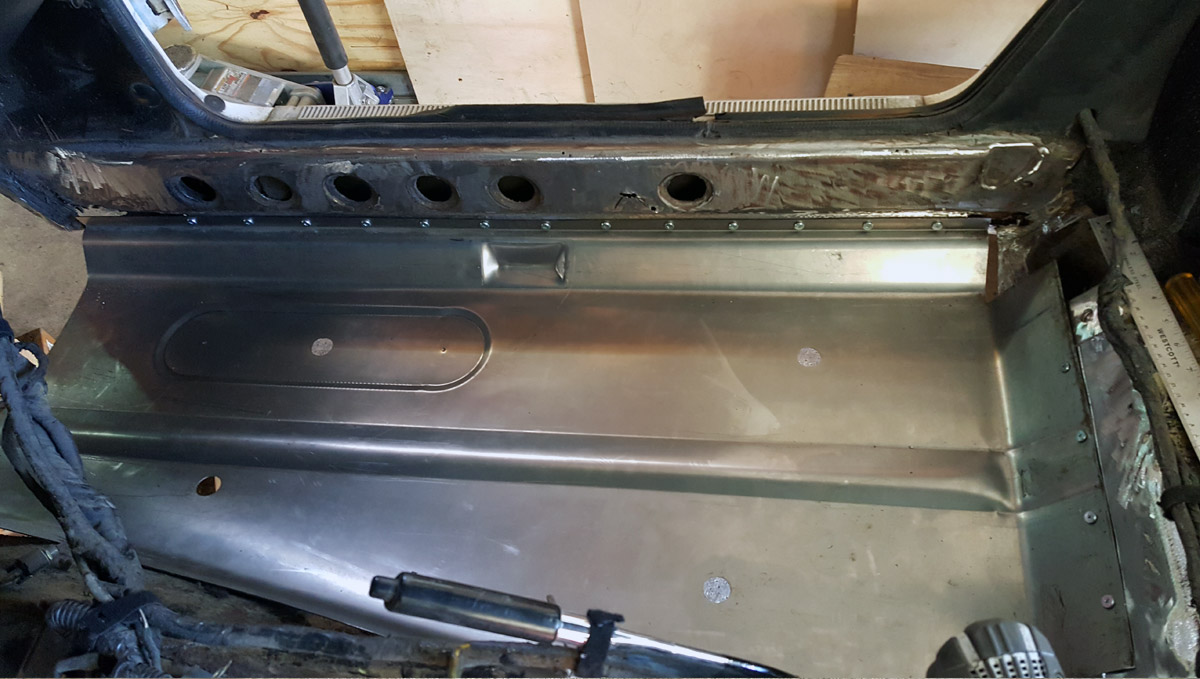
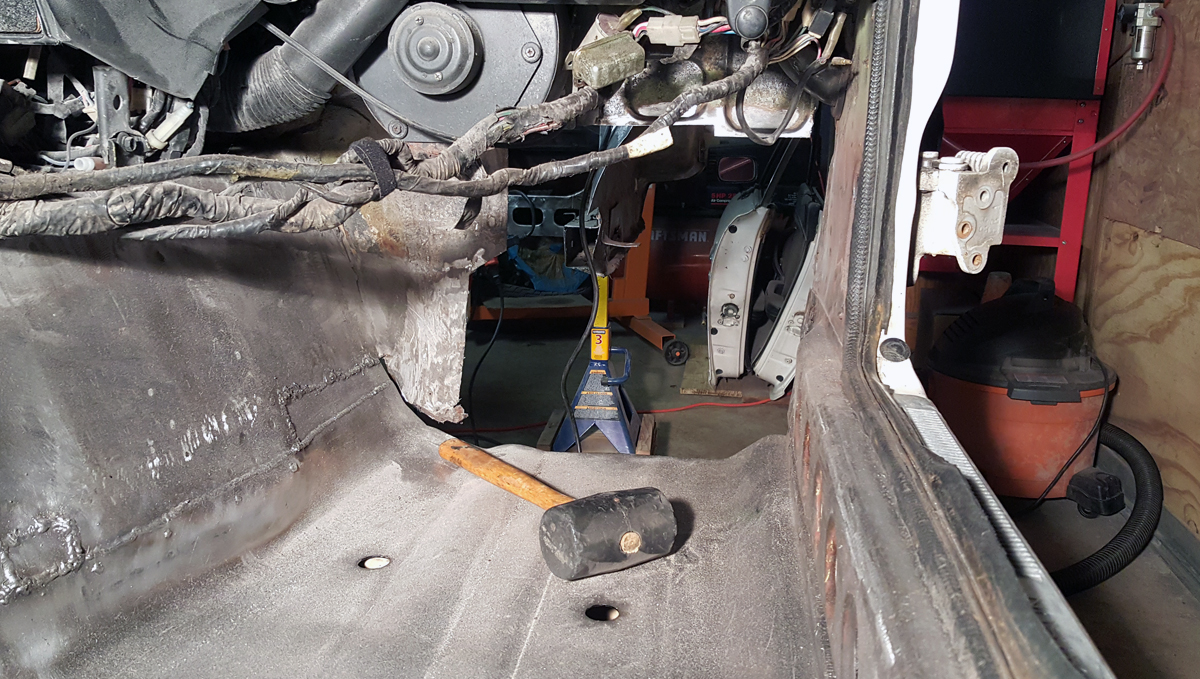
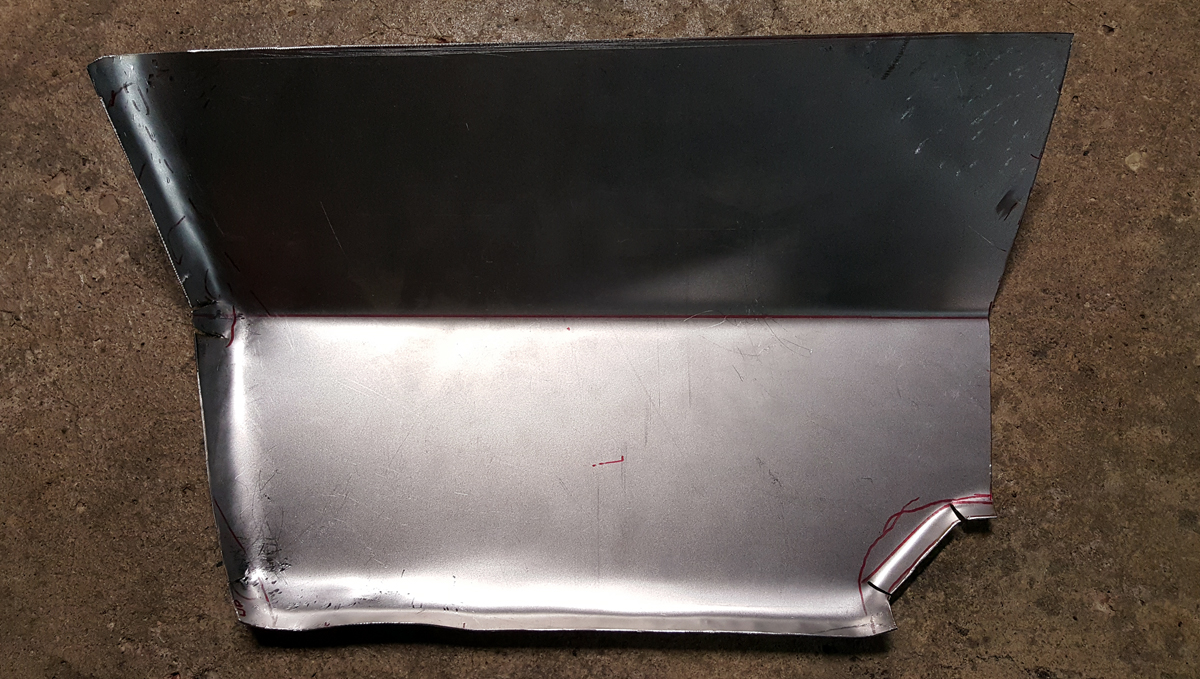
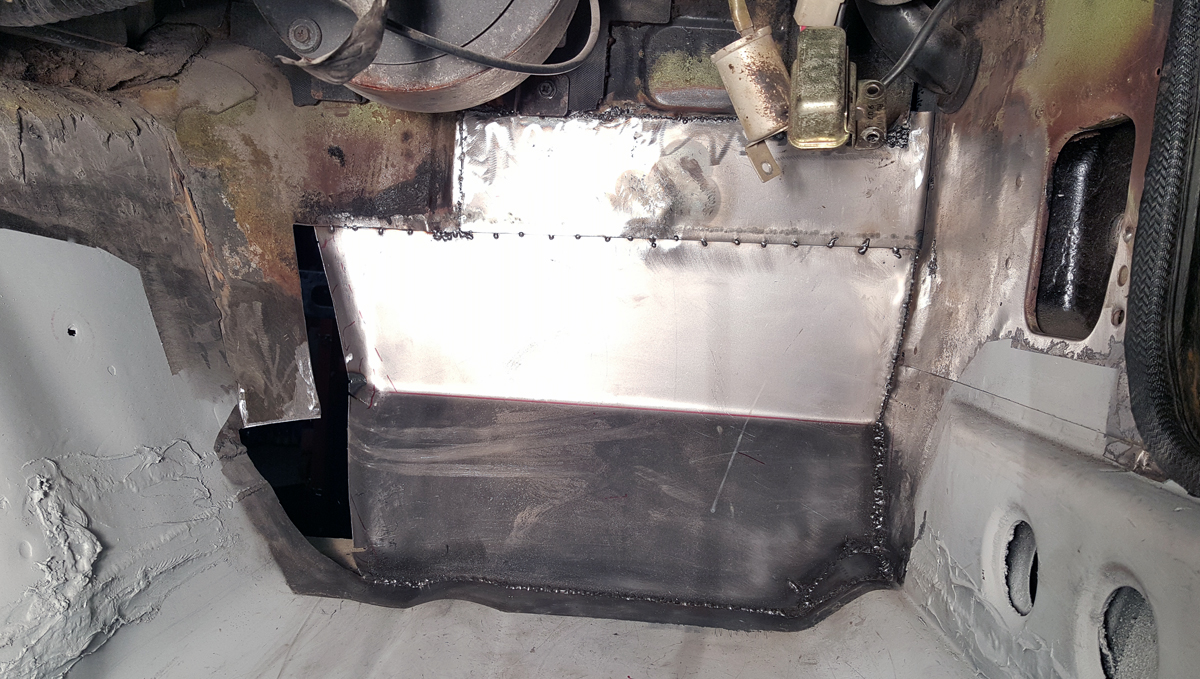
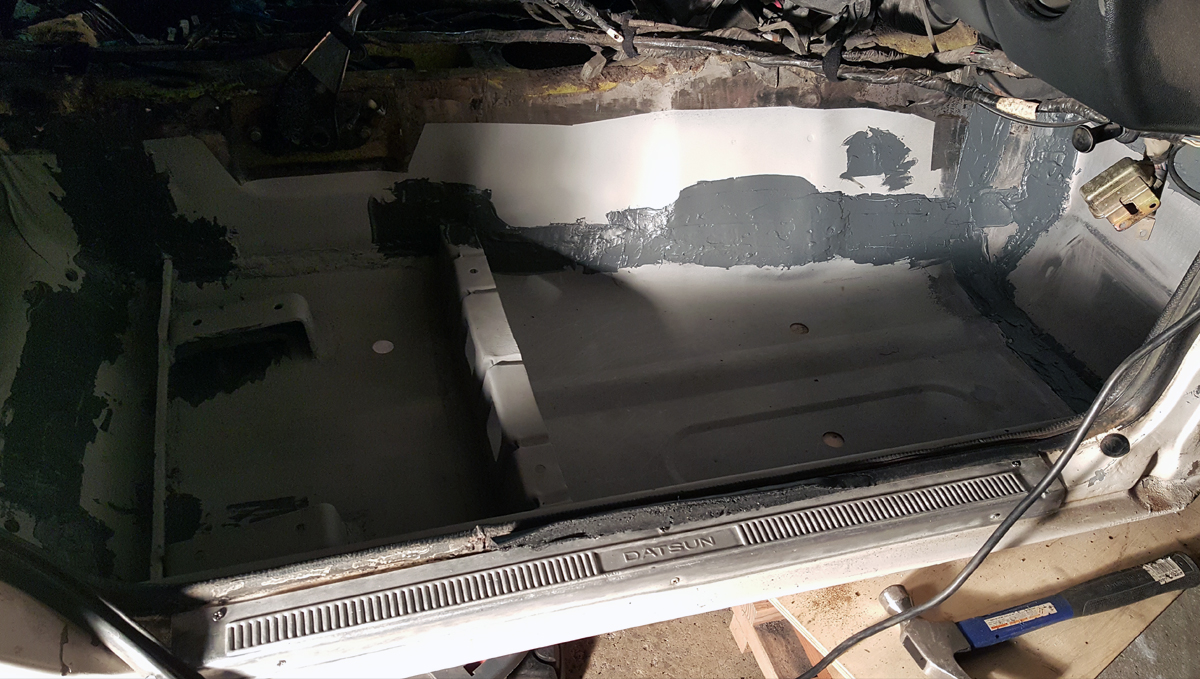
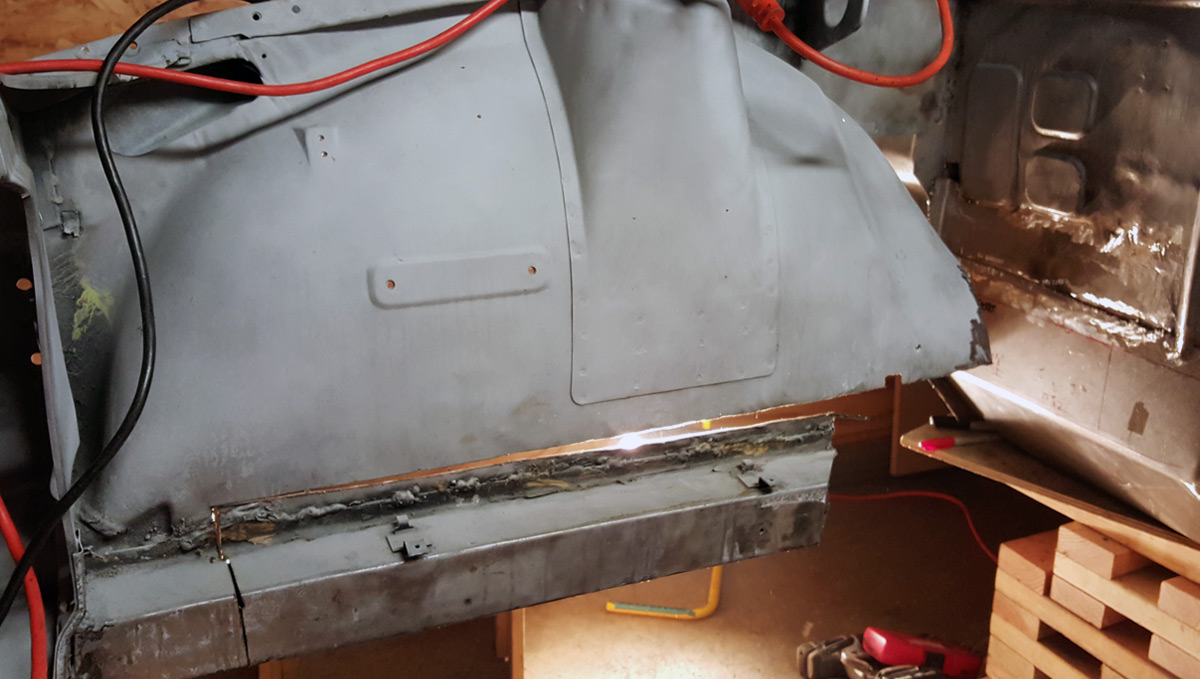
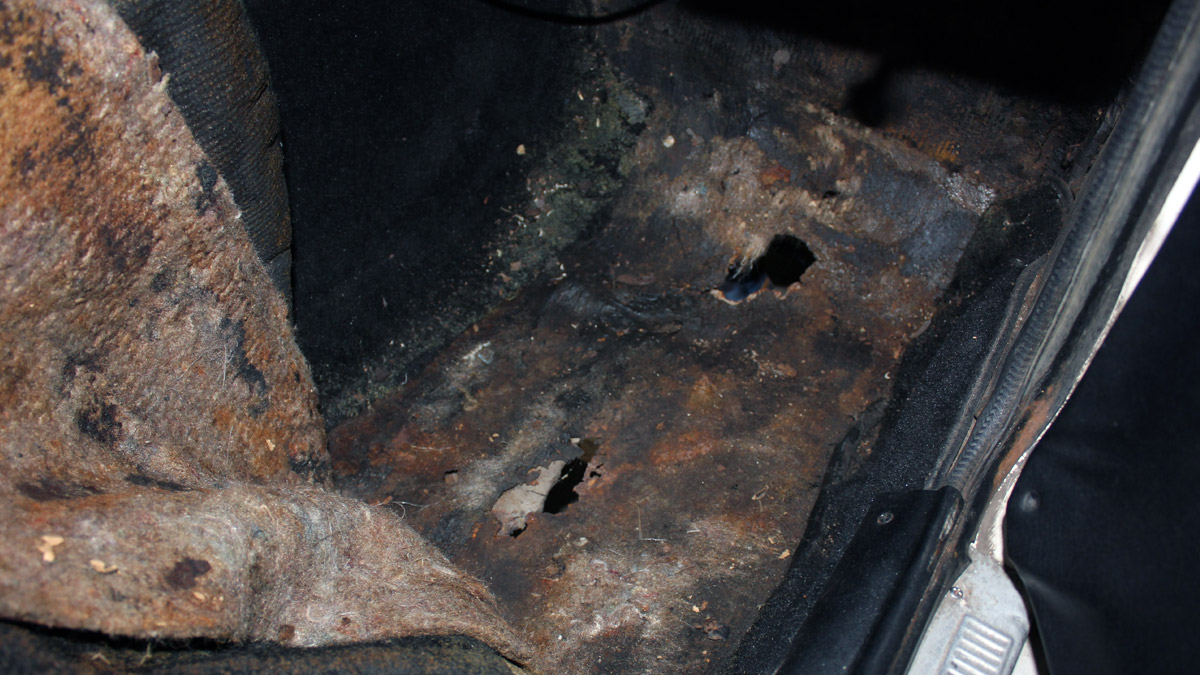
Passenger side floor board:
Image

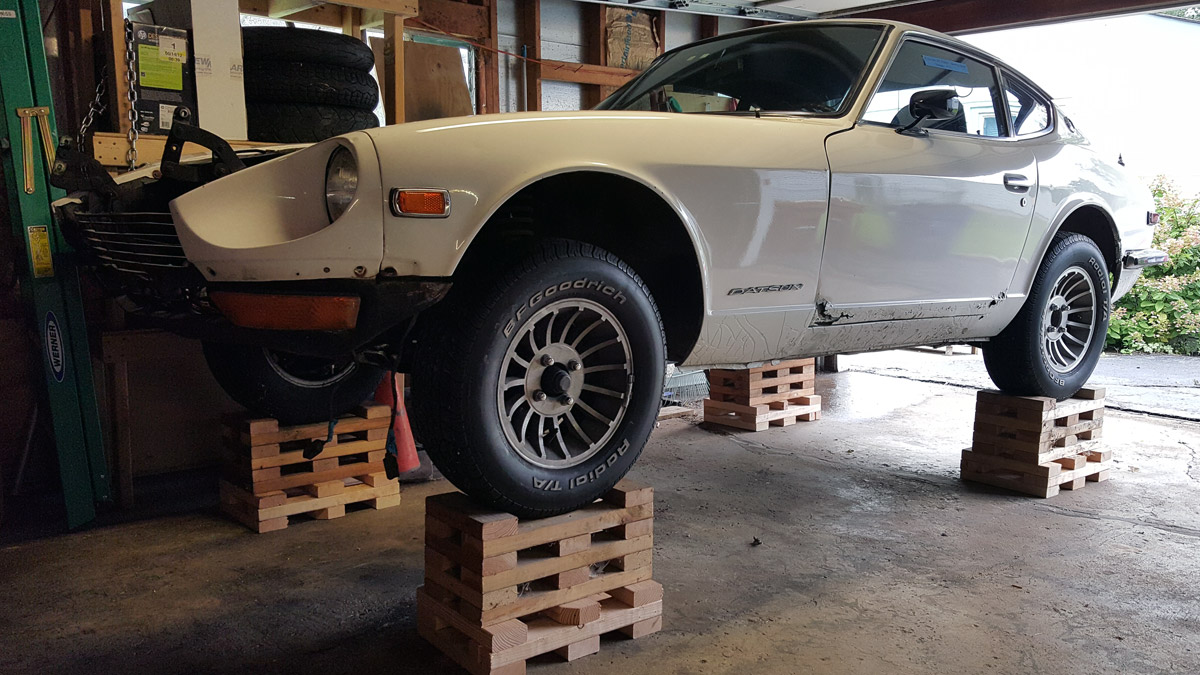
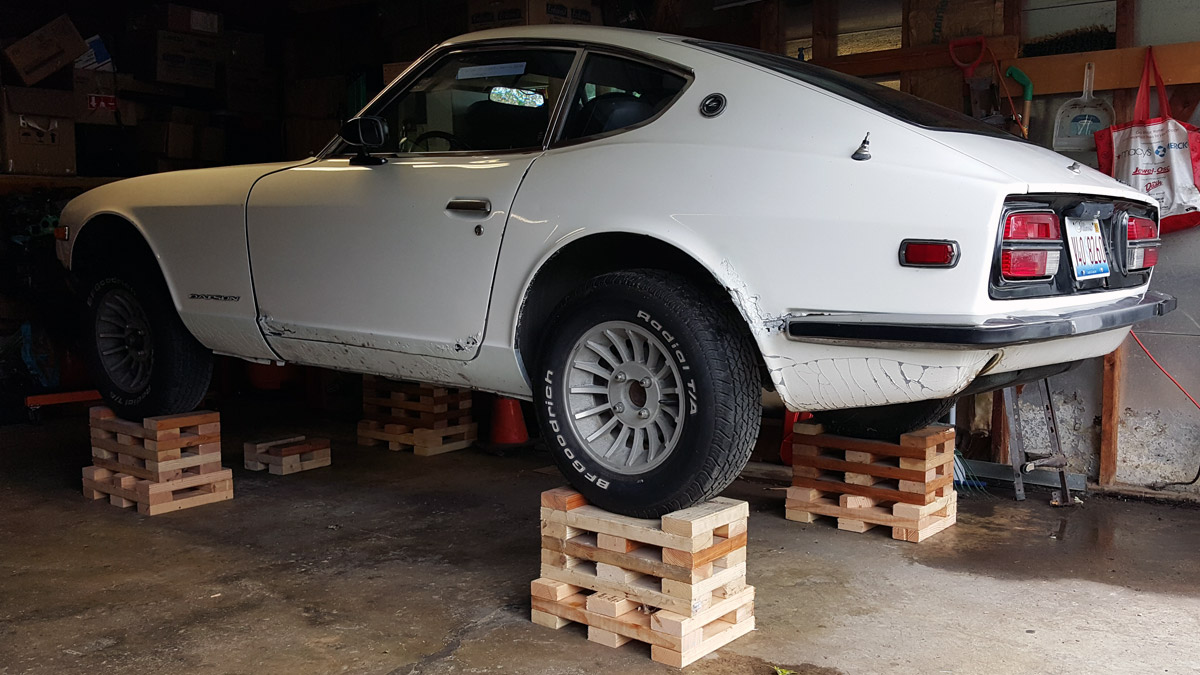
Well, I got it cheap for a reason. Now I just plan on approaching the car in stages...

Stage I: Safety
Stage II: Performance
Stage III: Appearance

Between there being an endless amount of build threads out there and most of them unfinished, I'm hoping that my passion and determination will allow me to see this through and make it interesting along the way as I've wanted this car for a very long time and now the rest is up to me. So follow along if you'd like.


User avatar
djwarner
Posts: 407
Joined: Sat Jan 23, 2010 6:07 pm
Car: 1971 240Z Series I
2006 350Z
Location: Central Florida

Post

Double check under the battery for firewall corrosion. You can get replacement front rails from baddogparts.com. Check ebay for floor panels. Good luck.

Before going much farther, the removed serial number panel is a red flag. Verify the serial numbers match with the dash VIN tag, tag in the drivers door frame and stamped on the firewall over the steering column.

The radiator is definitely not stock. You may want to verify the serial number on the passenger side of the block against the number on the photographed tag. Having a matching numbers '72 car will have some additional value but replacing the engine with a rebuilt engine is certainly not a deal breaker. Just nice to know.

datsun-s30
Posts: 48
Joined: Tue Dec 15, 2015 5:30 pm
Car: 1972 Datsun 240z
Location: Chicago, Illinois
Contact:

Post

When I got the car, that vin tag was on it and covered in a tar like coating, I removed it myself. The car is a numbers matching 240z all the way around. One of the photos I've previously posted shows the battery tray / firewall and it's bad. I can fit my fist through both. I've also already begun taking the car apart and am well ahead of what I've posted here and those gaping rust holes have only gotten bigger. I knew this was going to be bad when I bought the car (a mechanic friend and I inspected it pretty closely before I bought it) so I've already purchased frame rails and floor boards from Zedd Finding a few months back.

Image

Image

Image

User avatar
djwarner
Posts: 407
Joined: Sat Jan 23, 2010 6:07 pm
Car: 1971 240Z Series I
2006 350Z
Location: Central Florida

Post

As I said before, I wish you good luck.
You are about to launch upon a journey traveled by many Z owners.

User avatar
AZhitman
Administrator
Posts: 71063
Joined: Mon Apr 29, 2002 2:04 am
Car: 58 L210, 63 Bluebird RHD, 64 NL320, 65 SPL310, 66 411 RHD, 67 WRL411, 68 510 SR20, 75 280Z RB25, 77 620 SR20, 79 B310, 90 S13, 92 SE-R, 92 Silvia Qs, 98 S14.
Location: Surprise, Arizona
Contact:

Post

Excellent!

Welcome aboard, and keep up the great updates. We'll definitely help wherever we can. The community is really good about rallying around projects like this, so don't be afraid to ask for guidance, tips and tricks, or just to vent!

I'll link a few 'old hands' to this article so they can throw in their 2 cents. I'm on my 3rd S30 resto right now, so I feel your pain!

datsun-s30
Posts: 48
Joined: Tue Dec 15, 2015 5:30 pm
Car: 1972 Datsun 240z
Location: Chicago, Illinois
Contact:

Post

Thanks guys, really appreciate the support.

Alright, so the first step was to pull the engine so I could get to everything. I've already removed the hood and the cowl panel. A neighbor was supposed to lend me his engine hoist, but that didn't end up happening. I'm on a tight budget, so buying one was out of the question right now, maybe when I go to put the motor back in. I ended up cobbling together some wood I had lying around my garage and an electric hoist I use to pull motorcycle engines. I dropped the tranny, removed the carbs and anything else I could to reduce the weight because to be honest, I think I was pushing the weight limit on my hoist... but it worked out well.

Image


This same neighbor did have a engine stand however, and I was able to mount it to that. You can see where I replaced my exhaust gasket just last year. The old one was practically non existent and let out so much exhaust.

Image


As you can see, the engine bay was covered in a tar like coating to hide all the hideous repairs and rust.

Image


I saw a couple hot rod builders make these wooden jack stands and it looked like a good idea to me, so that's what I did. A lot of the wood was donated from the recently constructed / deconstructed engine hoist I made.

Image

Image

User avatar
AZhitman
Administrator
Posts: 71063
Joined: Mon Apr 29, 2002 2:04 am
Car: 58 L210, 63 Bluebird RHD, 64 NL320, 65 SPL310, 66 411 RHD, 67 WRL411, 68 510 SR20, 75 280Z RB25, 77 620 SR20, 79 B310, 90 S13, 92 SE-R, 92 Silvia Qs, 98 S14.
Location: Surprise, Arizona
Contact:

Post

Good work. Getting a car up in the air like that makes the work a lot easier.

I think, considering the work ahead of you, it might be wise to check out media blasting. If there's a local company that will do it for a reasonable price, you'll save a ton of time and misery with relation to the rust repairs - not to mention making the welding a lot easier.

datsun-s30
Posts: 48
Joined: Tue Dec 15, 2015 5:30 pm
Car: 1972 Datsun 240z
Location: Chicago, Illinois
Contact:

Post

Thanks AZhitman, I figured that I'd be under the car enough to justify it.

And You're probably right, I should have the car blasted, but with the way my bank account is set up... hahaha. Seriously though, I'm planning on doing the car a section at a time for a few different reasons, and I'm pretty handy with a wire wheel. I'll probably regret that decision later, but I'm sticking with it for now.

So now that the car is up on blocks, I've removed the fenders and set them aside for later. Some of the rusted on bolts made this harder than it needed to be. The fenders themselves aren't too bad off rust wise, just a couple spots in the corners which I'll deal with later.

Image


I decided to set up the car with jack stands in conjunction with the wooden blocks to make working on the front end a little easier.

Image


Then I began to remove the front suspension assembly.

Image


Did I mention that this car had been "restored" once before in the 80's? Well it had. And it looks like they decided to weld the suspension assembly to the frame rails. Awesome.

Image


Luckily, their welding sucked and it wasn't too much trouble to cut them off while leaving the suspension relatively unscathed.

Image


There we go, front suspension assembly removed. I'll dig a little deeper into that when the time comes.

Image


For now, I'm just going to set it aside with all the other parts.

Image

datsun-s30
Posts: 48
Joined: Tue Dec 15, 2015 5:30 pm
Car: 1972 Datsun 240z
Location: Chicago, Illinois
Contact:

Post

As I mentioned earlier, I'm ahead of where these pictures show me at in the restoration of my z. So in an effort to catch up, these posts are coming in hot.

Now that the suspension assembly is out, I can really see what I'm getting into.

Image


And it ain't looking too good. Honestly, I can't believe it drove as good as it did.

Image


Once I got the battery tray out, the firewall and wheel well began to crumble apart.

Image

Image


And it didn't look any better from the bottom either.

Image


I was able to peel back the frame rail and there was literally a pile of rust over an inch deep.

Image

User avatar
evildky
Posts: 14713
Joined: Sat Jan 31, 2004 9:23 pm
Car: 71 240ZT, 87 300ZXN/A-T, 06 350Z GT, Tundra TRD RW
Location: Louisville, KY
Contact:

Post

Wow, this rust makes mien look minor, I look forward to learning from your repairs and hope it inspires me to get back on mine.

datsun-s30
Posts: 48
Joined: Tue Dec 15, 2015 5:30 pm
Car: 1972 Datsun 240z
Location: Chicago, Illinois
Contact:

Post

Haha, yeah, it's pretty bad in some spots. This is probably one of those situations where ignorance is bliss and smarter people who have dealt with this type of rust before would be screaming at me not to take something this bad on. But I look at it like, I get to save a z, learn a new skill and become more knowledgeable about the car.

Iv'e seen your car around before too. I mean, in forum posts and what not... I don't know what all needs to be done to your car, but you should definitely get back at it.

Alright, so where did I leave off...

Oh yeah, back in the engine compartment. And here's what I'm dealing with, this tar like undercoating and a bunch of surface rust.

Image


I wanted to get it cleaned up before I jumped into the repairs, so I began by removing all the wiring and other components. That way I could scrape off that black sealant using my 5-in-1.

Image


I worked my way around the engine bay the best I could, then broke out the wire wheel to take off the remaining paint and primer, leaving the bare metal.

Image


I quickly realized it was going to take more than just the wire brush, so I started using Aircraft paint remover to get the majority of the paint off, then would come back in with the wire wheel.

Image


This method worked well, but is messy and smells horrible (even with a respirator).

Image

Image

Image

Image


After what felt like weeks, I finally got the engine compartment cleaned up. From the outside looking in, I know it doesn't seem like it would take that long, but trust me, this took some considerable time and I'd be lying if I said the thought of blasting the car didn't cross my mind more than once. Just the engine compartment alone took more than a week to do, and I've still got the core support, outer wheel wells, undercarriage and transmission tunnel / interior to do. But it's not really in my budget to get the car blasted, so wire wheels and elbow grease it is.

Image

User avatar
evildky
Posts: 14713
Joined: Sat Jan 31, 2004 9:23 pm
Car: 71 240ZT, 87 300ZXN/A-T, 06 350Z GT, Tundra TRD RW
Location: Louisville, KY
Contact:

Post

You sir are quite tenacious.

For some reason your stands do make me want to jenga.

datsun-s30
Posts: 48
Joined: Tue Dec 15, 2015 5:30 pm
Car: 1972 Datsun 240z
Location: Chicago, Illinois
Contact:

Post

You're not the first person to say that... either statement. However, I ran across a kid on Instagram the other day, who had done the exact same thing, down to even making similar comments about how blasting looked more and more like a better alternative to the endless wire wheelin' it off. I'm guessing tenacity is common among those who are financially challenged.

That said, It was at about this time that I had grown pretty impatient with the whole wire wheel thing and had to change it up. So out came the seats and carpet...

Image


Then off came the doors.

Image


The interior was looking pretty bad.

Image

Image


Because I can't ever things alone, I began to chip away at the rust until the holes were even bigger and it reminded me that I actually had passengers ride in my car at one point... on the highway. Yep, not showing them these pictures.

Image

Image

User avatar
evildky
Posts: 14713
Joined: Sat Jan 31, 2004 9:23 pm
Car: 71 240ZT, 87 300ZXN/A-T, 06 350Z GT, Tundra TRD RW
Location: Louisville, KY
Contact:

Post

At least most fo your rust is centered on the pans and rails which are available.

datsun-s30
Posts: 48
Joined: Tue Dec 15, 2015 5:30 pm
Car: 1972 Datsun 240z
Location: Chicago, Illinois
Contact:

Post

I don't know what is going on with these forums. It's apparently having an aneurysm. Double posting when I'm trying to preview, not allowing me edit within the one hour allotted time. Going stupid slow.

Well, all that frustration aside, here's the comment that was supposed to be part of the last post, but I'm not able to make it so.

It was somewhere around this time that the panic attacks set in. I kept thinking to myself, what have I gotten myself into? I mean sure, I know how to weld (sorta), I can use a measuring tape and know how to use an angle grinder like no one's business. But had I bitten off more than I could chew?

So naturally, I started cutting up the car.

Image


The last time they addressed these rusty floor boards, it looks like they layered another sheet of steel on top of the rusty floor pans, beat it into shape, welded it into place then covered the whole mess in a 1/2 to 3/4 inch thick layer of bondo.

Image


After a little cleaning of the wound, I test fitted the floor boards from Zedd Findings and realized, there's going to be a lot of adjusting of these to get them to fit just right.

Image


But first, I needed to take care of a bunch of little spots like these. I don't have any steel fabrication tools other than a framing hammer and a wooden work bench, but I was able to break it down into little pieces until it somewhat reseambled what it once was.

Image

Image

Image

Image

datsun-s30
Posts: 48
Joined: Tue Dec 15, 2015 5:30 pm
Car: 1972 Datsun 240z
Location: Chicago, Illinois
Contact:

Post

I forgot to mention, that before I cut out the floor pan, I took the transmission support off the greasy, grimy transmission...

Image


Took it apart and cleaned it up the best I could...

Image


Primed and painted it, then installed it back on the car. Because, from what I've read, the car can change it's shape enough that you can't get it back on if you don't. I've also read that it's best to only cut one floorboard out at a time to limit car body distortion as well. Which makes sense to me, so that's the plan.

Image

User avatar
gmac708
Posts: 1913
Joined: Thu Jul 31, 2008 1:59 pm
Car: :o)
1970 240Z
1972 510

Post

Looking Good Jason!
I'm going to be watching this build for sure. Looks like you will have your hands full. Keep the faith.

Gord

datsun-s30
Posts: 48
Joined: Tue Dec 15, 2015 5:30 pm
Car: 1972 Datsun 240z
Location: Chicago, Illinois
Contact:

Post

Thanks gmac. I appreciate the support.

On a side note, does anyone know how to reduce the loading time caused by the ads here? Or maybe it's just me, but sometimes posts here on forums.nicoclub.com takes minutes to load or won't load at all. And I get it, I've got a website myself (DIYskate.com - shameless self promotion) and it has ads on there too, but I try to make them as unobtrusive as possible and they don't effect loading times. Maybe it's not the ads at all, but the list below are the ones I see the most when pages won't load.

Image

datsun-s30
Posts: 48
Joined: Tue Dec 15, 2015 5:30 pm
Car: 1972 Datsun 240z
Location: Chicago, Illinois
Contact:

Post

Well would you look at that. Turns out that my internet provider has been experiencing an "intermediate, degradation of service in my area" over the past couple weeks which they failed to mention until the third time they were at my house for troubleshooting. And interestingly enough, these degradations seemed to coincide with my visits here and still have yet to be fixed. But I digress.

So back to the story at hand... I bought a basic sheet metal bender. Figured I'd get some use out of it on this build and it was stupid cheap. Although I don't know about the 16ga it claims it'll bend, cause this 18ga seemed to be pushing it.

Image

Image


But for the most part, it did it's job and helped me repair all the rusted spots required to fit the floor pan. I used self tapping screws to hold the floor pan while I welded it in place. Apologies for the bad picture. This is one of those rare occasions where I didn't take enough photos before I moved on to the next step. Excited to get it done I guess.

Image


Then I cut and fit smaller pieces of 18ga to fill the gaps.

Image

Image

Image


Unfortunately, I'm still getting the hang of mig welding.

Image


Although I did manage to lay down a couple decent welds.

Image


All in all, I'm alright with the way it turned out. The welds may not look that great, but they'll hold and will end up being covered by seam sealer anyway.

Next, the seat brackets...

datsun-s30
Posts: 48
Joined: Tue Dec 15, 2015 5:30 pm
Car: 1972 Datsun 240z
Location: Chicago, Illinois
Contact:

Post

So the seat brackets were attached to the floor pan I removed from the car. And my first thought was that they were unsalvagable. But I figured what the hell, and spent hours removing them in an effort to assess how unsalvagable they really were.

Image


I started with the front bracket, cleaned it up and determined that I could repair it by adding some steel to the bottom.

Image

Image

Image

Image


This worked out well, so I approached the back brackets in the same way and wouldn't you know it, the unsalvagable, was salvaged! I was pretty proud of the fact that I was able to fix those.

Image

Image


After test fitting the brackets, I actually attached the passengers seat to the brackets, then placed them in the car and tack welded them secure. Removed the seat, then finished welding them in place. This way I was confident the seat would fit later. Next, I cleaned the area, masked it off and got ready for the next step.

Image


Which was acid etching. I wanted to make sure my epoxy primer had a good bond to the steel, so I acid etched the cleaned floor pan.

Image


Next, I covered the seams and welds with seam sealer. It had been pretty cold for a while and I was lucky it warmed up enough to do this on that day. But I had to take advantage of the weather and complete the last few steps all in that one day.

Image


Now I just had to wait for it to dry and I could throw down a layer of epoxy primer.

OleKnees
Posts: 6
Joined: Thu Jan 21, 2016 9:06 pm

Post

I came across this thread while doing some research and ended up reading the whole thing. I even signed up with this forum just to respond. I just want to say that I'm rooting for you and will be following this to the end. Keep up the good work and Good luck

Chris

datsun-s30
Posts: 48
Joined: Tue Dec 15, 2015 5:30 pm
Car: 1972 Datsun 240z
Location: Chicago, Illinois
Contact:

Post

Right on OleKnees. I appreciate your support and I'm sure nicoclub forums do too.

It's unfortunate though, this place is like a ghost town. At least the vintage z portion of the forums. I didn't realize that before I started this thread and am now having second thoughts of continuing it here.

OleKnees
Posts: 6
Joined: Thu Jan 21, 2016 9:06 pm

Post

Understandable. I'm not that familiar but it does seem to be fairly quiet, particularly on a thread like this.

If you happen to move it, or update through some other media, let me know.

Chris

User avatar
evildky
Posts: 14713
Joined: Sat Jan 31, 2004 9:23 pm
Car: 71 240ZT, 87 300ZXN/A-T, 06 350Z GT, Tundra TRD RW
Location: Louisville, KY
Contact:

Post

Quality > Quantity

Yes, our Classis Z section isn't the most active, honestly all the Z forums seem to have slowed with the popularity of social media, probably forums as a whole. I think we have the best community. I am a member of a number of other forums and I've found the old stand by's to have become even less friendly places to be. While we might not have as much content as some of the others we do have some of the best build threads on some of the best S30's, IMHO.

datsun-s30
Posts: 48
Joined: Tue Dec 15, 2015 5:30 pm
Car: 1972 Datsun 240z
Location: Chicago, Illinois
Contact:

Post

At this point I cut out the passenger side fire wall and most of the passenger side frame rail, then I had to figure out how to replace it all.

(You may notice that some of these photos are out of order, but it shouldn't become too confusing)

Image

Image


First, I had to take care of the smaller areas like this before I could get to the larger repairs.

Image


Cardboard template and replacement piece.

Image

Image

Image


Once those were out of the way, I cut, bent and hammered a sheet of 18 gauge into the shape I needed to fill the gaping hole in the fire wall.

Image


I didn't have high hopes as I did this by hand with a framing hammer and it wasn't looking all that great.

Image


But it ended up working out pretty good.

Image


Just filled in the missing pieces and it was done.

Image


Then I cleaned up the welds on the inside, and covered them with some seam sealer.

Image


Next up, passenger side frame rail.

OleKnees
Posts: 6
Joined: Thu Jan 21, 2016 9:06 pm

Post

:bigthumb: great job.

Question for ya. What tools are you using to perform these jobs? I recognize in most cases it's obvious or you include that detail in your write up, but in cases where you use something different or unusual, please let us know.

Also, do you use any social media for this kind of posting? Instagram?

Thanks
Chris

datsun-s30
Posts: 48
Joined: Tue Dec 15, 2015 5:30 pm
Car: 1972 Datsun 240z
Location: Chicago, Illinois
Contact:

Post

Thanks man , I appreciate it.

At this point the only tools I had were:
  • • Framing hammer
    • Framing triangle
    • 3' and 1' plastic and aluminum levels
    • Tape measures
    • A couple of angle grinders with cut off discs and flap wheels
    • Cordless drill with wire wheels
    • 18" small sheet metal bender (up to 18ga - supposedly)
    • Set of metric wrenches and sockets
    • Floor jack / Jack stands
    • Sand blast cabinet that doesn't work
    • 110v / 135amp - Mig welder
    • 5hp / 30 gallon - Air compressor
Honestly, I came from a woodworking and construction background, although I have done some mechanical work and motorcycle repairs in the past as well as worked in a steel fab shop, but this was new territory for me and I've had to accumulate tools along the way as I needed them.

I bought the floor pans and frame rails from Zedd Findings (datsunzparts.com) and a few sheets of assorted gauge steel, along with some 1"x3" steel tubing from MetalsDepot.com for misc repairs and frame rail support replacement.

Image


And yeah, I do have an Instagram account. It has some of the build documented, not nearly as in depth but it's way ahead of what you see here (spoiler alert). There's a bunch of other s*** thrown in there for good measure, so proceed at your own risk @motors.jpg

User avatar
gmac708
Posts: 1913
Joined: Thu Jul 31, 2008 1:59 pm
Car: :o)
1970 240Z
1972 510

Post

Good to see some real progress! I got my Z floors and rails from the Zedd Findings too. Real good stuff.
Keep up the good work.

Gord

datsun-s30
Posts: 48
Joined: Tue Dec 15, 2015 5:30 pm
Car: 1972 Datsun 240z
Location: Chicago, Illinois
Contact:

Post

Thanks man. And I agree, Zedd Findings are great reproductions, although I have my opinions on the fitment of the floorboards.

So now that the firewall and passenger side floor pan is in, it's time to move on to the passenger side frame rail. I removed half of it already to have room to work on the firewall, so taking the other half out wasn't too much of an issue.

Image

Image


Here's the former frame rail in all it's glory. It was in seriously bad shape and it was the good one.

Image


Now I was able to test fit the frame rail from Zedd's. You can kind of see the brace I made to keep the dog house from getting all out of whack while I removed a bunch of steel. It attached both strut towers to the hood latch mounting point.

Image

Image


It took some work to get it right, but once I was satisfied, I welded it (poorly) in place. This picture looks kind of wonky, but it was level in all three directions and perpendicular to the firewall.

Image

mmmdowning
Posts: 1
Joined: Wed Feb 03, 2016 12:53 pm
Car: 1973 240Z

Post

What a great job. My son and I are just starting ours a '73 240z. I thought I had a lot of rust. Thank you for sharing.


Return to “Datsun Z Forum”