Before you start, refer to the Field Service Manual (FSM) page FA-8 for wheel hub and knuckle removal instruction. A parts diagram is also located on page FA-20.
Some pictures and notes from my DIY driveway job are listed below.
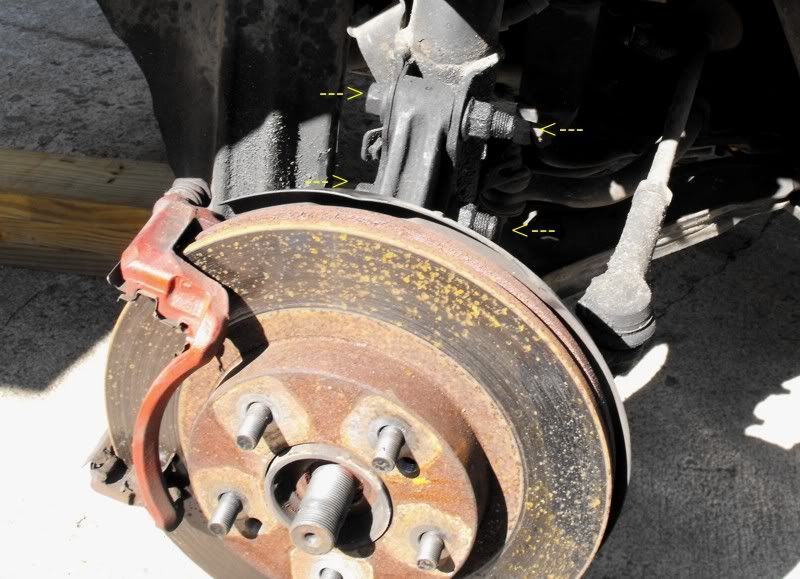
1) Remove lower strut mounting bolts (yellow arrows) below.
2) Before completely removing the wheel bearing lock nut, I used a rubber mallet to tap and separate the drive shaft from the knuckle.

3) Once the strut mounting bolts have been removed, the knuckle will swing down so it can be separated from the drive shaft.
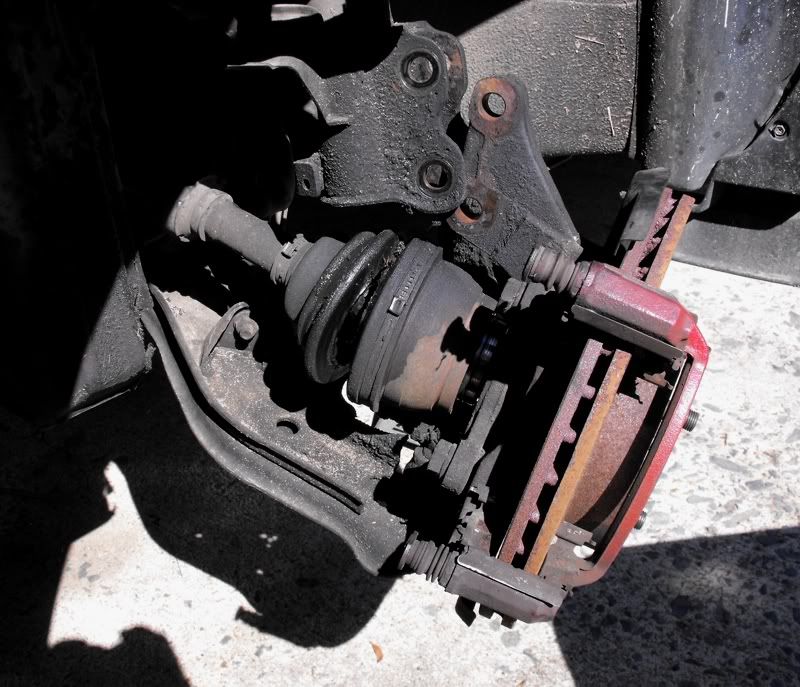
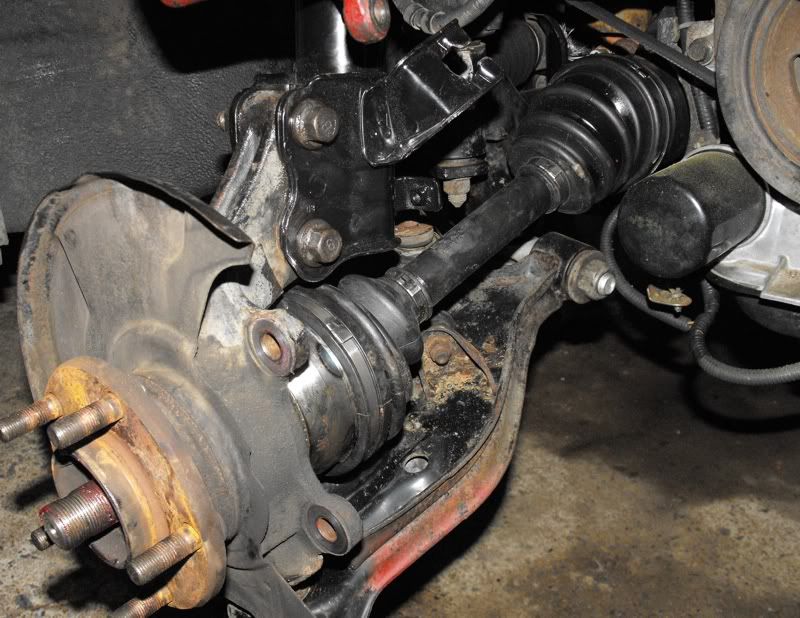
4) The following picture shows the drive shaft and knuckle after separation as described on the FA-13 of the FSM.

5) In some cases, the drive shaft carrier and bolts will need to be sprayed with penetrating oil in advance of removal. A 14mm swivel head Gear Wrench turned out to be valuable tool for removing the carrier bolts.
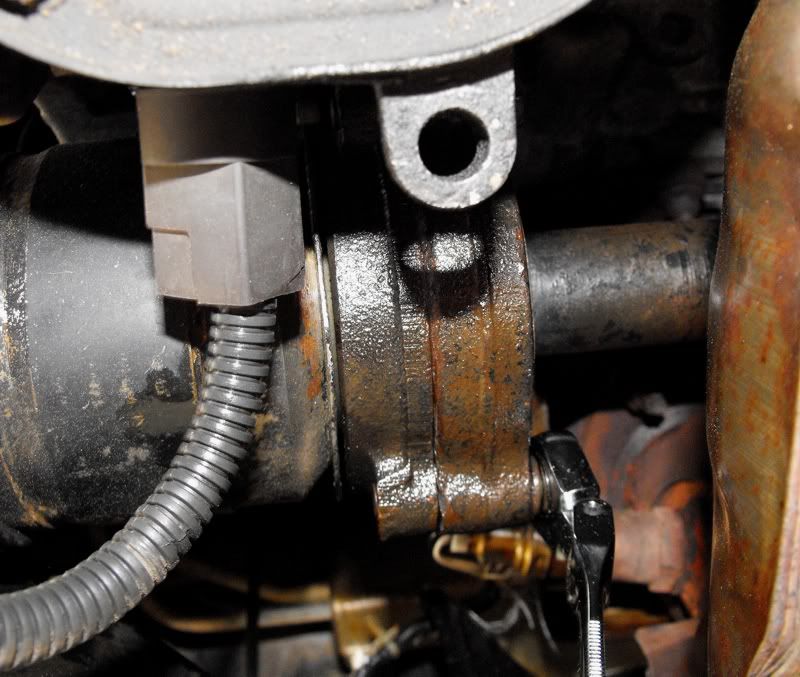
6) Once the bolts were removed, a chisel was required to separate the carrier from the drive shaft support bearing. Refer to page FA-15.

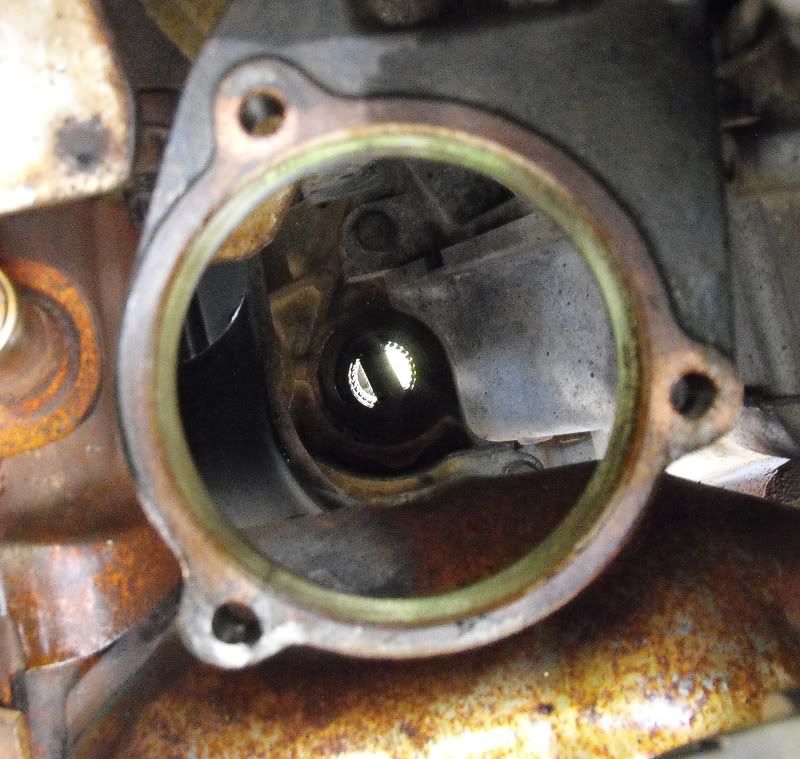
7) With the drive shafts removed on the manual transmission model, you can actually see through the transmission.
8) A drill with a steel wire brush was used to remove rust and polish the carrier. Lubricate the carrier before installing the drive shaft.

9) The drive shaft will slip into place with a slight movement to align and mate shaft splines into the pinion.

10) The following picture shows the knuckle reattached to the strut mounting bolt.
11) Later I had to replace the driver side axle seal. I found a piece of pipe at Lowe's that was an exact fit for "outside of the lip" seal rim. I used a file to smooth the pipe edge so it could not damage the seal. The coupling was good for gently tapping the pipe with a rubber hammer so seat the seal. BE CAREFUL ABOUT TAPPING THE SEAL IN TOO FAR OR YOU WILL DRIVE IT PAST THE MOUNTING EDGE AND IT WILL DROP INTO THE TRANSMISSION.