According to Haynes, the water pump can be replaced through the access. So I tried it, but upon threading long bolts into the threads to remove the pump, one of the bolts broke inside. I have been wrestling with the pump for hours, but can't seem to slip it over the chain to remove it. The chain has passed the sprockets but is hanging up on the left side of the pump housing.
Do I have to extract that screw first? It's not holding on to the pump.
Or maybe my tensioner is not providing enough slack? I backed off more than the 20 degrees counterclockwise that the manual stated.
3.5 water pump replacement FUBAR
Re: 3.5 water pump replacement FUBAR
Even according to the Nissan FSM, the water pump can be removed through the access.
When I removed a water pump, however, my timing cover was off so I just went at it. IIRC, even then I had to wiggle it a little because the o-rings had a pretty good seal in there.
If the bolt broke but is not holding the pump, is it stuck onto the engine block? Did you turn both bolts in half-turn by half-turn each or by some similarly equivalent force on both?
I believe with the one good bolt you can wiggle it around a little lower and slip it past the chain. Why not screw another bolt into the pump's 3rd hole... or just advance the chain forward and backward a little until you find a sweet spot.
-
rgk
- Posts: 588
- Joined: Tue Dec 23, 2014 4:48 am
- Car: 02 Pathfinder LE 3.5 auto 4x4
- Location: Indiana Dunes National Park
Re: 3.5 water pump replacement FUBAR
Yes, 1/4 turn increments. Yes, it's stuck in the block. 
I gave up after wrestling with it for a few hours. I had it very loose, but there was no way the chain would let me take it out. And there was no way I was going to put an more of my POS bolts in there.
I put the pump back and sealed it with 2 of the 3 bolts. I hope that will be enough, and that I didn't damage the o-rings too much wrestling with it, to keep it from leaking.
I will look around for a screw extractor tomorrow, but I don't have high hopes. Hopefully it will last long enough in this state to where I can get to the hardware store two hrs away and get a couple of extractors and some hardened bolts.
Even then I may end up pulling the timing cover.
OR I may pull the timing cover tomorrow and put in the new pump, as I probably did mess up the o-rings. Then I'll fasten it with 2 bolts and get an extractor down the road.
Re: 3.5 water pump replacement FUBAR
If you were gonna replace the pump anyway, then that's where I'd apply my elbow grease. Always nice to see how simple jobs turn into a huge mess.
If you end up pulling the timing cover, don't forget those 2 bolts coming from the oil pan up into the timing cover. Don't ask why I'm cautious ... Would be a good time to put some new RTV around the sometimes leaky cover.
If you end up pulling the timing cover, don't forget those 2 bolts coming from the oil pan up into the timing cover. Don't ask why I'm cautious
Re: 3.5 water pump replacement FUBAR
RGK, google "vq35de timing chain tensioner" and you should see a youtube video DIY water pump / timing chain tensioner by a guy named Turkov. I think you can remove the timing chain inspection cover and release tension on the tensioner, then spin the crank a little counterclockwise to get the slack in the chain you need. You can see a diagram on em-27 on how to release tension on the tensioner. Not the best vid, but I think it may get you there.
Nice and easy so you don't jump a tooth with the tension removed!
Hope that helps!
Nice and easy so you don't jump a tooth with the tension removed!
Hope that helps!
-
rgk
- Posts: 588
- Joined: Tue Dec 23, 2014 4:48 am
- Car: 02 Pathfinder LE 3.5 auto 4x4
- Location: Indiana Dunes National Park
Re: 3.5 water pump replacement FUBAR
Is the timing chain slack guide supposed to fit nicely into the tensioner piston hole when the tensioner is pushed in? Mine is sitting a little below the hole, and I was thinking that this might be the reason why I can't seem to get enough slack on the chain.
Also, how quickly is the piston supposed to pop out when you remove the pin? Mine is slow, and really only pops out when you turn the crank clockwise. Time to replace the tensioner?
Also, how quickly is the piston supposed to pop out when you remove the pin? Mine is slow, and really only pops out when you turn the crank clockwise. Time to replace the tensioner?
Re: 3.5 water pump replacement FUBAR
Well, let's try this - found this picture of what the tensioner / guide will look like. Note how the tensioner piston is pushing flat against the guide. The tensioner piston can be pushed back into the tensioner housing some and the guide wiould then rest on the flat face of the housing (zoom and lighten up some in your photo viewer):
http://i896.photobucket.com/albums/ac16 ... G_1022.jpg
Here is a picture of a bad guide - note how the flat portion of the guide has slipped down, and the tensioner piston has pushed way out:
http://i896.photobucket.com/albums/ac16 ... G_1040.jpg
If your guide looks similar to that, you need to replace the guide. The plastic has actually broken and let the guide slip downwards.
If your guide looks good, I guess you will need to remove the tensioner to get enough slack on the water pump side when you turn the crank counterclockwise.
I think slow is fine on tensioner speed, but I have not actually done a timing chain on a VQ, so when in doubt order a new one online and return if you don't need it!
-
rgk
- Posts: 588
- Joined: Tue Dec 23, 2014 4:48 am
- Car: 02 Pathfinder LE 3.5 auto 4x4
- Location: Indiana Dunes National Park
Re: 3.5 water pump replacement FUBAR
OK, my guide is good, and after much work I was able to remove the cover, slip the chain over the pump (still not that easy!), and get the new one in position.
However, I'm a little worried that I may have skipped a tooth. The chain at the top, between the two camshafts, is slack and I believe it was tight before. Would anyone be so kind as to provide a resource that will show me the timing marks?
And if I did skip a tooth or two, what would be the best remedy? Remove the tensioner altogether?
-
rgk
- Posts: 588
- Joined: Tue Dec 23, 2014 4:48 am
- Car: 02 Pathfinder LE 3.5 auto 4x4
- Location: Indiana Dunes National Park
Re: 3.5 water pump replacement FUBAR
Nvm, I found that info and will report back with the results.
-
rgk
- Posts: 588
- Joined: Tue Dec 23, 2014 4:48 am
- Car: 02 Pathfinder LE 3.5 auto 4x4
- Location: Indiana Dunes National Park
Re: 3.5 water pump replacement FUBAR
OK, the slack between the camshafts was taken out once I moved the crankshaft around and applied tension to the chain.
My chain does NOT have the two silver links that align with the camshafts. It DOES, however, have the one copper link that is supposed to (?) align with the notch in the crankshaft sprocket. After about twelve or so passes of the copper link around the crankshaft, I finally achieved what I believe to be the proper alignment:
Copper link and notch in crankshaft sprocket at 3 o'clock.
Crankshaft pulley key at 11 o'clock.
Bank 1 camshaft sprocket notch at about 10:30.
Bank 2 camshaft sprocket notch at about 1 o'clock.
Does this sound right? I can make another twelve or so passes and see if everything lines up correctly again. If the timing was off by a notch, I believe none of this would line up correctly again, would it?
In regards to the pump, I got it in late last night. I had to use a wooden block and a hammer to get it in, as it wouldn't go in by tightening just the two bolts. Even when I did get it in, I still had about a 1/16" clearance (I think), and it seemed like the bolts wouldn't thread in very tight. I'll try again today or tomorrow.
It may just be a good idea to order a couple of screw extractors and wait a few days before putting everything together. Hopefully I can actually drill into this bolt that is rated 10.9. I have a titanium bit, I hope that works.
-
rgk
- Posts: 588
- Joined: Tue Dec 23, 2014 4:48 am
- Car: 02 Pathfinder LE 3.5 auto 4x4
- Location: Indiana Dunes National Park
Re: 3.5 water pump replacement FUBAR
I am now wondering whether I didn't accidentally move one of the camshafts, since there was slack between them in the chain, and now there is not. Without a properly color-coded chain, and short of taking the cam cover off, how am I to know?
-
rgk
- Posts: 588
- Joined: Tue Dec 23, 2014 4:48 am
- Car: 02 Pathfinder LE 3.5 auto 4x4
- Location: Indiana Dunes National Park
Re: 3.5 water pump replacement FUBAR
OK, I've figured out how to tell whether everything is aligned. Even if the primary chain slipped, there is no way the secondary chains would have slipped. Ergo, if the large camshafts slipped out of alignment, the small ones would be off as well. I'm assuming those are exhaust cams, or VVT cams? In any case, THOSE sprockets DO have marks on the rear timing cover. So as long as my copper primary chain matches up to its notch, and both secondary sprocket marks match up with their marks on the rear timing cover, everything should be all good.
I actually removed the new water pump. I have decided that removal of the bolt is priority number one. I was hoping the pump would go in its crevice a little better, but now I see how crucial that third bolt is - for installation as well as alignment. Removal was easier, but the pump and o-rings still got scratched up, as did the inside of the water pump crevice. I will be removing the burrs inside the crevice and maybe ordering a new pump.
At this point, the plan is to make a small punch mark and try to drill a hole in the bolt, then extract it. The bolt is sticking out a little bit, but not enough to file down and grab with a pair of channel locks.
EdBwoy gave good advice regarding moving the chain back and forth to slip the chain over - that, along with a couple of pry bars, helped to get the pump out. Getting the new pump in was not as difficult, but still required some prying.
This madness is for all of you, I'm sure.
I actually removed the new water pump. I have decided that removal of the bolt is priority number one. I was hoping the pump would go in its crevice a little better, but now I see how crucial that third bolt is - for installation as well as alignment. Removal was easier, but the pump and o-rings still got scratched up, as did the inside of the water pump crevice. I will be removing the burrs inside the crevice and maybe ordering a new pump.
At this point, the plan is to make a small punch mark and try to drill a hole in the bolt, then extract it. The bolt is sticking out a little bit, but not enough to file down and grab with a pair of channel locks.
EdBwoy gave good advice regarding moving the chain back and forth to slip the chain over - that, along with a couple of pry bars, helped to get the pump out. Getting the new pump in was not as difficult, but still required some prying.
This madness is
Last edited by rgk on Fri Aug 21, 2015 1:01 pm, edited 1 time in total.
Re: 3.5 water pump replacement FUBAR
My chain didn't have colored links either, but someone painted it during one of the past assemblies.[not sure how this person found the right spots].
Perhaps if I located my picture that would help if you counted the links?
Also, I think the Maxima group had a way to mark the links. I have to Google that as I stumbled upon that some time back.
Perhaps if I located my picture that would help if you counted the links?
Also, I think the Maxima group had a way to mark the links. I have to Google that as I stumbled upon that some time back.
Re: 3.5 water pump replacement FUBAR
Yes, I was going to do a post with what you just said about the secondary chains and camshaft sprockets on each side needing to be aligned correctly when the crankshaft sprocket / copper link are aligned - so you beat me to it.
Nice job figuring that out!
Good luck with the bolt!
Nice job figuring that out!
Good luck with the bolt!
-
rgk
- Posts: 588
- Joined: Tue Dec 23, 2014 4:48 am
- Car: 02 Pathfinder LE 3.5 auto 4x4
- Location: Indiana Dunes National Park
Re: 3.5 water pump replacement FUBAR
I ordered a left-handed drill bit/extractor combo kit, but it won't be here until Tuesday. I did, however, find an extractor in the meantime, and I have a right-handed titanium bit. Is it OK to drill the hole with a right-handed bit and extract with the left-handed extractor, or would it be better just to wait until Tuesday?
-
rgk
- Posts: 588
- Joined: Tue Dec 23, 2014 4:48 am
- Car: 02 Pathfinder LE 3.5 auto 4x4
- Location: Indiana Dunes National Park
Re: 3.5 water pump replacement FUBAR
After drilling the bolt and d!ck around with the extractor, I finally asked a friend to help me tow the car to a shop, where the mechanic said he'd "seen worse."
A crack has also developed in the pump housing right above the bolt, but him and two other knowledgeable friends weren't very worried about it. Time will tell.
I've got the timing cover and just about everything else off, so if all goes well, and if this project was for nothing else, then at least I know how all this comes apart.
-
rgk
- Posts: 588
- Joined: Tue Dec 23, 2014 4:48 am
- Car: 02 Pathfinder LE 3.5 auto 4x4
- Location: Indiana Dunes National Park
Re: 3.5 water pump replacement FUBAR
Mechanic welded a nut to the bolt, extracted it, fifty bucks. Time to put everything back together.
-
rgk
- Posts: 588
- Joined: Tue Dec 23, 2014 4:48 am
- Car: 02 Pathfinder LE 3.5 auto 4x4
- Location: Indiana Dunes National Park
Re: 3.5 water pump replacement FUBAR
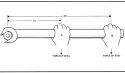
Now I realize my fatal error: the manual called for M8 bolts, which I mistakenly though to be the size of bolt holding the pump in place. Nope: the bolts which hold the pump in place are smaller than, and slip right through, the threads on the water pump. M8 is a larger bolt, which means that it does not thread into the block. Instead, it pushes on the indentation on the block just before the threads, allowing you to push the pump out. 
Re: 3.5 water pump replacement FUBAR
The 50 bucks was well spent I think. Getting broken bolts out is a pain!
You have done a boatload of work to that truck! How much more do you have left? Gonna be in great shape when you are done!
You have done a boatload of work to that truck! How much more do you have left? Gonna be in great shape when you are done!