2nd Retrofit project

A General Discussion forum for Altima owners, and a great place to introduce yourself if you are new to the NICOclub Altima Forums!
User avatar
Importroller
Posts: 1135
Joined: Sat Oct 26, 2002 10:12 am
Car: G35 and 07 Altima 3.5 6spd
Location: san diego
Contact:

Post

A friend of mine wanted to get his TSX projectors installed in his Altima. After seeing what I did with my retrofit, he asked me if I could do it for him. We all know how much some of the other shops charge (which is actually not a bad price for the amount of labor that goes into this) But i charge a lot less for people I know. But here is the project.

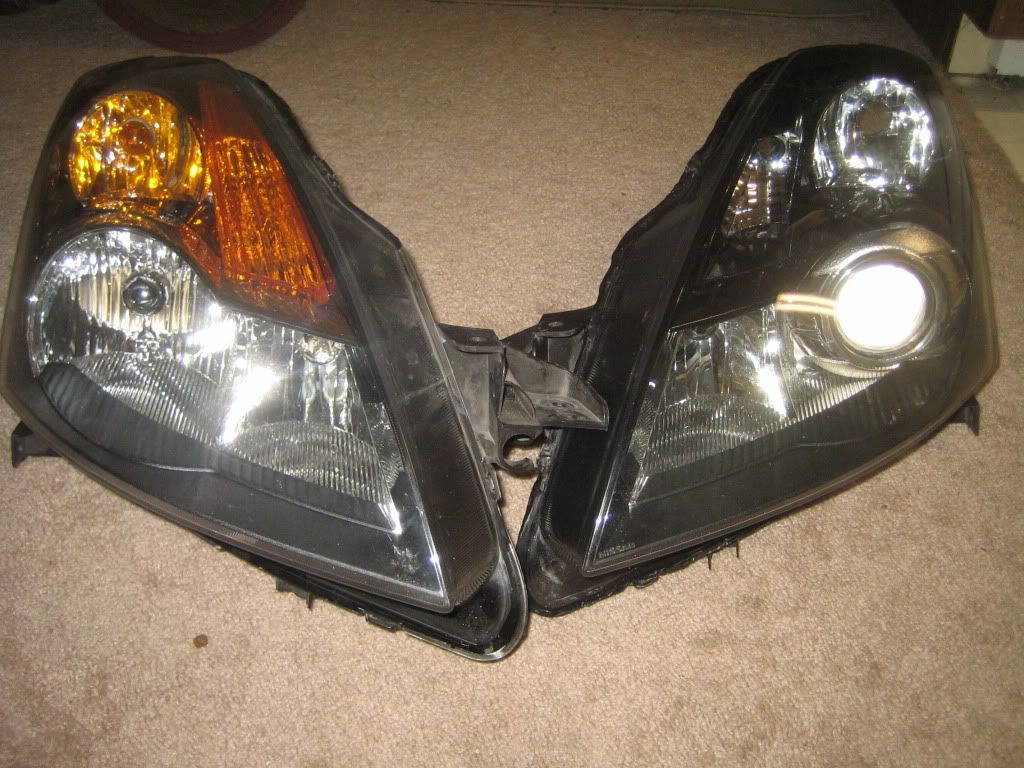
I already had a spare set of lights from when I did my car, so once he gave me the go ahead, i took them apart and started the painting process.

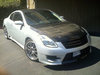
His car is black, so he wanted a gloss black theme going

Image

Image

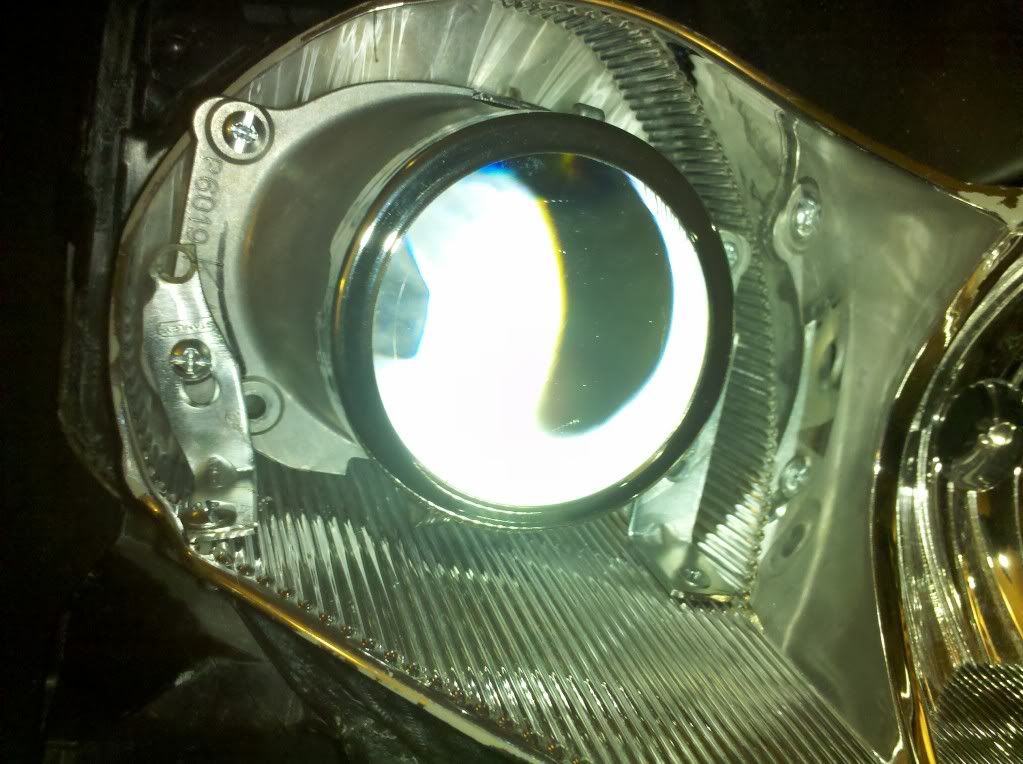
After I drilled out the back of the housing, i had to start doing some test fitting and firing of the lights to make sure everything works before I get too deep into it.

Image

Image

Image

After i got all the parts painted (3 coats of primer, 4 coats of Gloss Black paint, and 4 coats of Clear coat) i did a test fit just to get an idea of how things will look together

Image

Image

Image

Time to start fabbing up some Brackets. I used 2" L brackets from the local hardware store. I had to cut one part of the L down by 1" to make things fit the way I needed. Then I had to extend the holes that were pre-drilled so that I can adjust the hight accordingly so i can get everything nice and even.

The brackets are hidden from sight, so wasn't too concerned about how good they looked, just as long as they work.

Image

Image

Image

Image

The Ocular shrouds are too wide to fit in the housing, so i had to shave them down with my sander to get as good of a match as I could. Unfortunately, One was shaved down too much, so once the new shroud shows up, I can finish the job.

This is just a test fit
Image

Image
You can see the gap on the side

Image

as you can see, one side has little to no gap, and the other ....Well sucks
Image

Today cleaned and resealed the light that was good. Made sure the aim was good with a nice flat cutoff.

Image

Image

Image

Image

Image


User avatar
Ricko
Posts: 909
Joined: Sun Apr 26, 2009 4:56 pm
Car: 2008 Altima Coupe
Location: San Diego
Contact:

Post

Nice man. Very sexy.

User avatar
Importroller
Posts: 1135
Joined: Sat Oct 26, 2002 10:12 am
Car: G35 and 07 Altima 3.5 6spd
Location: san diego
Contact:

Post

Completed and installed

Image

Image

Image

Image

Image

Image

Image

Image

Image

User avatar
czonin
Posts: 434
Joined: Mon May 24, 2010 11:30 am
Car: White 09 Altima Coupe 2.5S
Location: Huntington, NY
Contact:

Post

What do you use to reseal them?

User avatar
Importroller
Posts: 1135
Joined: Sat Oct 26, 2002 10:12 am
Car: G35 and 07 Altima 3.5 6spd
Location: san diego
Contact:

Post

rubber butyl. $20 at napa. You can see the box upside down in this pic. basically you squeeze it like putty, get it in the channel on the housing and make sure you have no gaps. Then stick just that section of the lights in the oven at 280 degrees for about 8-10 minutes to get it soft, then you put the clear lens on and clamp it into place the best you can. Then put the whole unit together in the oven for another 5 minutes. take it out, and push everything together firmly. Once in place, put locking clamps on different corners to ensure a seal, and let it sit for awhile. I like to leave it for a few hours to let the glue cool off. You don't need to wait that long, but I change my clamping spots during the cool down process just to make sure its done all the way around. I didn't do this on my lights, which is why one of them has a leak, and i have to reseal it.
Image

User avatar
Importroller
Posts: 1135
Joined: Sat Oct 26, 2002 10:12 am
Car: G35 and 07 Altima 3.5 6spd
Location: san diego
Contact:

Post

last night i had to reaim the projectors i made for mike. I used my car to mount the lights on so i could aim them properly on the car & i also painted his bezel.

on the left is his TSX the light on the right is my H1 Minis.

the TSX wasn't bolted down, I was just doing a quick placement to make sure i could make the adjustment.

Image

after about an hour of playing with the adjustable brackets i made, here is the final lighting.

Image

Image

Image

Image

Image


Return to “Altima General Discussions”