1990 JDM 300zx Build Thread

The Nissan 300ZX (Z32) general community discussion forum
Fearspect
Posts: 164
Joined: Sun Sep 09, 2012 1:08 pm
Car: 1990 Nissan 300zx TT 2+2
Location: Edmonton, AB

Post

Been waiting for the right time to get this thread started, and my parts have started trickling in.

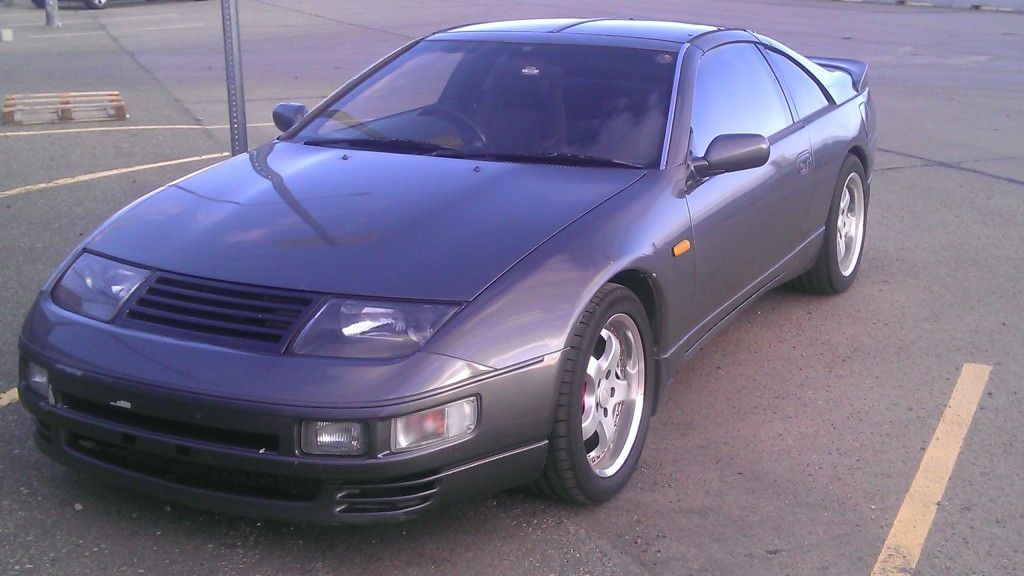
I have a Charcoal Grey 1990 300zx TT 2+2. I bought it in late summer 2012 with 115kkm on the odometer. Shockingly cheap for a running, fully operating car, but it definitely has its fair share of issues. Okay... let's not mince words, it's been beat to hell and treated poorly, but hopefully I can get that fixed.

I hope this can end up being informative for some people out there. I will preface all of this with a simple statement: I know absolutely nothing about cars, and got this because I wanted to learn. I do read voraciously, and feel I've picked up at least a few tips and tricks. Luckily I have made a lot of friends to help me out as I get time turning the wrench.

Stupid looking Nose Panel and paint chipped basically everywhere.
Image

Interior in about equal shape. Also Automatic, but I intend to fix that...
Image

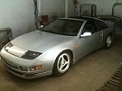
Engine Bay shot. Lots of attempts at sizzle, very little steak... Still pulls quite strong though.
Image

So, this build is going to be quite drawn out, but I do intend to keep this thread active. What's important to me is getting the chance to drive my car, instead of having it sitting on blocks for three years working on some 'ultimate build'. I don't have the confidence to track a 300hp car properly yet, so what's the point of getting it to double that, or more?

This build is going to go through the following stages:
1) Reliability: Get good cooling, replace as much of the rubber is reasonable, get it tuned
2) Convert to Manual
3) Track star: Suspension, Brakes, Wheels and Tires.
4) Looks: Exterior and Interior work
5) Power: If I ever get here. Also doing lots of background research on Engine Swaps.

All work will have one important underlying principle: Try to work with the best parts I can so I am not ending up having to go back and do the same things again, at least hopefully not too much.
Last edited by Fearspect on Sat Oct 19, 2013 1:40 pm, edited 2 times in total.


Fearspect
Posts: 164
Joined: Sun Sep 09, 2012 1:08 pm
Car: 1990 Nissan 300zx TT 2+2
Location: Edmonton, AB

Post

So, no pictures of previous work, but this is what I've gathered has been done (with a complete lack of professionalism :tisk:) by previous owners. All if it warrants inspection that I still haven't gotten to:
-SpecialtyZ Chip
-Single 'pop' charger of unknown make/quality
-Some kind of 4" Single Catback Exhaust, looks like it came from a Supra or something
-Stainless Braided Fuel Lines
-Unknown make/quality downpipes, Testpipes
-Unknown Spark Plugs
-New Alternator
-Silicone vacuum Lines
-Hardpipes for Upper Intakes
-Cruise Control delete
-AIV delete
-PRVR delete
-HICAS Delete
-KYB AGX shocks in front only. One side rattles, think there's an issue with the pillowball
-Decent looking equip wheels, other than severe curb grinding on all four
-Random hoses in the engine bay
-Generally hacking at the wiring to prepare it for big subs or something

Since I picked it up, I needed to upgrade the Driveshaft due to the entire centre bearing basically not existing anymore (rubber was worn to nothing, the two piece was giving what felt like kicks at low rpm). Inland Empire one piece heavy duty aluminum driveshaft went in.

Image

Also, I was advised to take care of a full timing kit service. With this I got a UR underdrive pulley, Nismo Thermostat, JWT VTC Springs and Kevlar belt off CZP.

Anyway, that was before the winter, and it's time to get to work. Our local car club is bringing in the SpecialtyZ guys on May 4-5 to do some dyno tuning and I'm on the list. This means I have a lot of things to do in a very short time period. First delivery came in today:

Image
Koyo Race Radiator, SZ Brackets, Hoses

Image
(Clockwise from Top Left): Trunk Lid Opener Cable, OEM High Pressure Fuel Hose, Fuel Filter, Fuel Dampner and Regulator, Balance Tube O-Rings, Powersteering Pump Reseal Kit and a few Oil Filters.

Image
Z1 Full Flow Oil Cooler with 25-row Setrab Oil Cooler and Thermostatic Adaptor

Image
The fun stuff: UR Overdrive Water Pulley (I didn't realize this should be paired with the underdrive crank until recently), Stock Thermostat (SpecialtyZ guys will write you essays about why the Nismo is bad if you email them), NGK Iridium Plugs, Nismo Radiator Cap, the new Greddy Profec Boost Controller (because it looks completely awesome).

I should have some build photos of this all mounted in the next week or so!
Last edited by Fearspect on Sat Apr 06, 2013 2:55 pm, edited 2 times in total.

User avatar
Ace2cool
Posts: 11650
Joined: Sun Apr 20, 2008 5:21 pm
Car: 1991 Nissan 300ZX TT
1966 Datsun Fairlady 1600
2005 Suzuki GSX-R 600
1974 Honda CB550 Four
2009 Ford F150 Lariat
Location: Murfreesboro, TN

Post

Nice! Looking forward to seeing this come together! And yeah, that nose panel. :eek:

User avatar
addicted4life
Posts: 548
Joined: Sun Jul 29, 2012 1:30 pm
Car: RHD '93 Fairlady 2+2, 3076s, Haltech, & Hoosiers. Go baby, go.
Location: Moncton, NB

Post

No kidding your in Edmonton? I'm in grande prairie man! I'm bringing my z out here from NB in July or August, we'll have to cruise together buddy.
Love JDM Zs :D

Keep up the good work

Fearspect
Posts: 164
Joined: Sun Sep 09, 2012 1:08 pm
Car: 1990 Nissan 300zx TT 2+2
Location: Edmonton, AB

Post

Started work tonight on getting all these parts in to get ready for my tune.

Image
Having access to a hoist definitely helps!

Image
We drained all the fluids and removed the radiator (we had to remove a hardpipe just to get it out). After that, the clutch fan came off to get access to the water pulley and thermostat.

Image
Shiney new overdrive water pulley in place. Also, thermostat is replaced. I was following a guide to get to the thermostat, but you can definitely remove the lower water pipe without removing the upper one, so do ignore the removal of the upper unless you have to.

Image
Here's the super stupid exhaust from underneath. This will be coming out as soon as my new parts come in. Let's give them another week...

Image
All belts back on and tensioned. Done for the night. Between inspections underneath to get more familiar with the system and messing around with tensioners for a while, I still think we got a lot done tonight.

Quiz time (I need help!):
Image
We found this sensor behind the AC system. Is it related to the AC? we couldn't find where it seemed to disappear too, but it seemed fairly loose and I'm planning on just deleting the full AC system anyway. Please let me know if you don't advise messing with this guy.

Next post should have the Koyo Radiator and Full Flow Oil Cooler system installed.

User avatar
NolimitZ32
Posts: 7042
Joined: Fri Jun 27, 2008 9:07 am
Car: 91 AG2 2+0 TTMT swap/E39 BMW 540i6/E53 4.6is Dinan S3
Location: Houston, TX

Post

That would be the Oil Pressure Sender, it threads into the oil tree.

Fearspect
Posts: 164
Joined: Sun Sep 09, 2012 1:08 pm
Car: 1990 Nissan 300zx TT 2+2
Location: Edmonton, AB

Post

The oil tree is on the other side of the engine, are you sure? Would a better picture help?

User avatar
DCaff300ZX
Posts: 4202
Joined: Sun Jun 14, 2009 8:18 am
Car: .
1993 CRP TT- Modified
Location: Tacoma, Washington

Post

Nice work so far, and I really like your attitude and plans for the car...you are going about this in a very smart way and should be happy with the results.
For a "beat on" Z it sure pictures up relatively nice, good luck with your build!

Fearspect
Posts: 164
Joined: Sun Sep 09, 2012 1:08 pm
Car: 1990 Nissan 300zx TT 2+2
Location: Edmonton, AB

Post

It's been one heck of a weekend:

Image
Old Oil Lines came out. Those hard lines were a nightmare, the stongest steel I've ever seen. It took a combination of just about every tool in the shop and 1+ hours just to get them out.

New Oil Cooler in place:
Image
The SS lines were another nightmare to run. This car is JDM, so the steering assembly goes right through all that nice free space that would normally be near the oil tree. Only solution was to remove the turbo drain pipe (not sure its actual name) and shorten it about a 1/4-1/2". Grr...

Image
Replaced the Fuel Filter and Pressure Regulator. Going to hold off on the dampner until I'm doing the spark plugs as the balance tube has to come off.

Here's the engine bay stuffed with the Koyo Rad now.:
Image
Had a real hard time with it until both throttle body hardpipes came out. After that, it slid right in. Had to shorten the upper pipe about .75" to remove kinks.

And the trash/kijiji pile:
Image

Car started up great, now its going to rest a bit. Next 'project' is going to be spark plugs and fuel dampner, then I have to figure out how to get this boost controller installed...

User avatar
bartZ32tt
Posts: 850
Joined: Mon Mar 09, 2009 8:12 pm
Car: 1990 300zx twin turbo, 1996 7.3 powerstroke
Location: Des Moines, IA

Post

Good choice of upgrades. Couple suggestions:
-looks like part of the stock airbox is still in-place underneath the right headlight. You can remove that.
-your PTU which has been relocated to the nose panel bracket next to the air filter is the old style. These are notorious for failing. In the US, Nissan recalled these and will convert it to the new style for free. Not sure if Nissan Canada does the same (I'd assume they would) but its something to keep in mind.

Rager
Posts: 758
Joined: Mon May 24, 2010 12:32 pm
Car: 1992 Nissan 300ZX 2+2
1999 Nissan Sentra
2004 Chevy Silverado
Location: 860, the Z, 802, oh ive got area codes

Post

sweet ride man. your my canadian twin . charcoal grey 2+2 Z FTW.

nice work on what you are doing. make sure when you get spark plus you get OEM. i dont have the serial number but im sure someone will chime in . spark plugs are very important for our cars.

gl with everything

User avatar
bartZ32tt
Posts: 850
Joined: Mon Mar 09, 2009 8:12 pm
Car: 1990 300zx twin turbo, 1996 7.3 powerstroke
Location: Des Moines, IA

Post

Rager wrote:sweet ride man. your my canadian twin . charcoal grey 2+2 Z FTW.

nice work on what you are doing. make sure when you get spark plus you get OEM. i dont have the serial number but im sure someone will chime in . spark plugs are very important for our cars.

gl with everything
The NGK Iridiums in heat range 7 are now the best plugs for our engines - that is what Specialty Z recommends and they use it to combat various running problems before tuning. The old oem PFRB11B (going off memory on that number) is no longer the best application.

Fearspect
Posts: 164
Joined: Sun Sep 09, 2012 1:08 pm
Car: 1990 Nissan 300zx TT 2+2
Location: Edmonton, AB

Post

I do have the NGK Iridiums in heat range 7. Can anyone confirm if/how much they need to be gapped?

Rager
Posts: 758
Joined: Mon May 24, 2010 12:32 pm
Car: 1992 Nissan 300ZX 2+2
1999 Nissan Sentra
2004 Chevy Silverado
Location: 860, the Z, 802, oh ive got area codes

Post

Fearspect wrote:I do have the NGK Iridiums in heat range 7. Can anyone confirm if/how much they need to be gapped?
do-i-need-to-gap-ngk-iridium-spark-plug ... 65691.html

http://www.b15u.com/sentra-specific-ins ... ssans.html

free fish for the day :squint:

Fearspect
Posts: 164
Joined: Sun Sep 09, 2012 1:08 pm
Car: 1990 Nissan 300zx TT 2+2
Location: Edmonton, AB

Post

Yeah, I read that thread before in my own attempt at research; the last dissenting opinion threw me off, and thus why I asked about it.

itsa300zx
Posts: 1287
Joined: Sun May 31, 2009 9:39 am
Car: 1990 300zx NA W/TT swap
2011 Nissan Rogue S
2008 Highlander SR5
Location: up North

Post

Looking good Tim! That sensor with the blue connector is the oil pressure sending unit, JDM' s are not installed on the oil filter tree; it's on the left side of the engine.(your passenger side). If you ever need a new style ptu, I have a spare.

Fearspect
Posts: 164
Joined: Sun Sep 09, 2012 1:08 pm
Car: 1990 Nissan 300zx TT 2+2
Location: Edmonton, AB

Post

Not the best picture, but I don't want to unwrap them fully until I'm throwing them on. Confirmed all the parts are there, so I'm happy:

Image
SpecialtyZ 3" Downpipes (4 Bolt) and Resonated Stainless Steel SpecialtyZ Testpipes with dual bung setup.

B&B just finished my catback and shipped it today. Excited to throw these on next week, get rid of that stupid exhaust and hear how this new one sounds!

User avatar
NolimitZ32
Posts: 7042
Joined: Fri Jun 27, 2008 9:07 am
Car: 91 AG2 2+0 TTMT swap/E39 BMW 540i6/E53 4.6is Dinan S3
Location: Houston, TX

Post

Fearspect wrote:The oil tree is on the other side of the engine, are you sure? Would a better picture help?
Better pic may help but that looks a helluvalot like the Oil Sender.

Fearspect
Posts: 164
Joined: Sun Sep 09, 2012 1:08 pm
Car: 1990 Nissan 300zx TT 2+2
Location: Edmonton, AB

Post

I'm installing my Greddy Profec Boost Controller this weekend. What's a good boost level to have it on until my tune at the end of the month? 14PSI? 15? 16?

Appreciate it.

Note: Stock Turbos (automatic trans). 3" Full Exhaust. Single Pop Charger.

itsa300zx
Posts: 1287
Joined: Sun May 31, 2009 9:39 am
Car: 1990 300zx NA W/TT swap
2011 Nissan Rogue S
2008 Highlander SR5
Location: up North

Post

Stock injectors? 91 octane? stay at 14 psi

Fearspect
Posts: 164
Joined: Sun Sep 09, 2012 1:08 pm
Car: 1990 Nissan 300zx TT 2+2
Location: Edmonton, AB

Post

Stock Injectors 94 Octane.

Fearspect
Posts: 164
Joined: Sun Sep 09, 2012 1:08 pm
Car: 1990 Nissan 300zx TT 2+2
Location: Edmonton, AB

Post

Alright, Spark Plugs are complete. The last owner actually glued the coil pack connectors to the coil packs. They still came out fine as a single assembly, just had to be really careful about the wires when taking them out. No photos, but it really wasn't anything noteworthy. NGK Iridium Heat Level 7 Spark Plugs.

Exhaust was next on the list. Here is the ridiculous thing I pulled off from under my car:
Image

SpecialtyZ 3" Downpipes in:
Image

Now we ran into another issue. I guess this is something known to everyone except me: the 3" B&B Catback doesn't actually bolt up to the SpecialtyZ 3" Testpipes, so, we got to work:
Image

And with some creative drilling of both bolt holes, we got them to line up, it wasn't perfect, but as my mechanic friend told me: "It's good enough for government work."
Image
We bolted them together on the ground and left them as a single piece.

Looking back, I would suggest for people looking for a similar exhaust set-up to look at a Labree 3" Catback. I love the tips on the B&B, but the SpecialtyZ guys designed the Labree exhausts, so I am pretty sure that they would match up a lot better. Additionally, for those that are curious, the SpecialtyZ 3" exhaust components are 3" interior diameter, whereas B&B 3" is actually a measurement of their exterior diameter.

Here's a couple more shots of it all in place. We couldn't get the Mufflers onto both hangars on the rear, they both had to be hung on the inside one. I wonder if anyone has managed to actually hang them 'properly'. That being said, they are absolutely not moving, torque together to just within the limits of the bolts.

Image
(From the front looking back, those are resonators on the test pipes and X pipe)

Image
Looking very nice. Not sure if the tow hooks are even usable any more though...

Now, just an EBC to install before my tune this weekend.

Fearspect
Posts: 164
Joined: Sun Sep 09, 2012 1:08 pm
Car: 1990 Nissan 300zx TT 2+2
Location: Edmonton, AB

Post

So that's what a tune can accomplish...

Image

Peak increased 50rwhp, 70ft/lbs, and more importantly, the mid end RPM had huge gains (~70+rwhp @5000rpm).

Fearspect
Posts: 164
Joined: Sun Sep 09, 2012 1:08 pm
Car: 1990 Nissan 300zx TT 2+2
Location: Edmonton, AB

Post

Well, recently came into some money and spare time. I wanted to list the mods going into the car so that, hopefully, I can get some feedback on a better path, if it exists. First off, I have developed a coolant leak going to the JDM passenger side turbo, which can't be reached with the engine in. While the engine is out, this is the work to be done over the winter:

1) Full conversion to Manual transmission, including SZ TT Flywheel, SZ TT Street 6 Puck Clutch, Woody Shortshifter (from tt.net), and Zspeed solid shifter mount - (Note: the 6 puck comes suggested from the SZ guys because it will give better survivability if I do get into drifting, which is my intent, at least to play).

2) Following Engine Stuff:
a) EGR Kit
b) BDE Engine Mounts (not sure if I want the low pro ones, can anyone explain the pros/cons?)
c) SZ Oil Pan
d) Replace Knock Harness and Engine Harness (both are very brittle and just waiting to go, and it makes the engine pull a dream)
e) Rear Main Seal with Transmission
f) MSP Manifolds
g) GT525 Turbos (From Z1 Motorsports) - My turbos are in rough shape, and these are modified stock turbos at a very reasonable price. I intend to go with the larger Manual Turbos for this.
h) Used Manual Camshafts, locally sourced.
i) Replaced coolant/oil lines as necessary throughout the car

Basically, I want to hit on all the items that require an engine pull in one go, and get things done. My compression numbers are still healthy, so thankfully I do not have to worry about a rebuild just yet.

Fearspect
Posts: 164
Joined: Sun Sep 09, 2012 1:08 pm
Car: 1990 Nissan 300zx TT 2+2
Location: Edmonton, AB

Post

My girlfriend was laughing because she said it was like Christmas for me. I tried to explain that it was better because I actually got what I wanted, which seems to have upset her for some reason...

Image
ZSpeed Heavy Duty Fork and Solid Shifter Mount

Image
SpecialtyZ Flywheel, RPS Sport 6-Puck Clutch and MSP Manifolds

Image
Z1 GT525 (0.63) Turbos, BDE Engine Mounts

Image
Wiring Specialties RHD Harness, Alt to Trans Harness (AT->MT), Slave Cylinder, Engine Bay Bolt Set, Smattering of Gaskets, Start Shim, and BDE Halfmoons

Time to get this to the garage and get pulling the engine. Still missing a Driveshaft and Oil Pan, but they're on the way.

User avatar
DCaff300ZX
Posts: 4202
Joined: Sun Jun 14, 2009 8:18 am
Car: .
1993 CRP TT- Modified
Location: Tacoma, Washington

Post

Fearspect wrote:My girlfriend was laughing because she said it was like Christmas for me. I tried to explain that it was better because I actually got what I wanted, which seems to have upset her for some reason...
Uh oh...Lakanooki and Rosie Palm are about to become a part of your life it seems... :chuckle:

Helluva a pic show there as well, can't wait to see it all together!

Fearspect
Posts: 164
Joined: Sun Sep 09, 2012 1:08 pm
Car: 1990 Nissan 300zx TT 2+2
Location: Edmonton, AB

Post

Really torn on something, and looking for some advice.

I intend to generally keep the factory colour on the car and touch it up at some point (KH2 Charcoal Grey). What I am looking at for inspiration is some of the options on the Aston Martin Vanquish in Grey:

Image

Basically, a lot of the trim pieces on the exterior are carbon fibre (or can be optionally), including the diffusers, roof, mirrors and door handles. With the dark grey colour, the CF seems to look less tacky and obvious and instead complements the colours to make a sportier looking luxury car.

I have a door handle that isn't working and have sourced an off-colour replacement. The other one is also heavily scratched and needs to be cleaned up. I am currently at a bit of a toss up weather I want them CF wrapped or repainted in the original colour. What do you think of the CF option? I couldn't find any images of CF wrapped handles for this car online, but to give you an idea of the colour, here is an example of the interior door handles done with a CF film:

Image

It will be a while before I reach my exterior looks goals, but meanwhile, I am not going to install a single white doorhandle on the car just for the door to be able to open from the exterior.


Return to “300ZX (Z32) General”