Great place ya'll got here. Lots of good info.
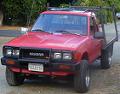
My son's 85 720 4x4 decided it wanted to run like like crap, missing on a couple cylinders.
After checking EVERYTHING, timing is good and consistent, all plugs get fire, etc. and then I dragged out the compression tester.
about 10psi in #3 and #4. #1 and #2 have 185 and 190...
adding some oil to these cylinders and re-checking gained 10psi in each cylinder.
I'm thinking the head gasket is blown between these two cylinders.
I pulled the valve cover off to verify that the valves were opening and closing, and they are. None appear to be sticking.
Anything particular to look for when tearing it down?
I was kind of hoping to get some feedback or confirmation from others on the diagnosis.
Thanks for any tips and tricks!
1985 720 2.4L No Compression #3 & #4 Cylinders...
Re: 1985 720 2.4L No Compression #3 & #4 Cylinders... (noface)
new here to! if you tear it down for a HG take some pics and post them! i might be in the same boat
-
flinterman2000
- Posts: 1011
- Joined: Mon May 04, 2009 5:32 pm
- Car: 2000 Nissan Wingroad, 85 Datsun 720 Pick Up.
Re: 1985 720 2.4L No Compression #3 & #4 Cylinders... (noface)
Only when you've pulled the head you can be sure. It could be burnt valves also, or damaged rings or piston, but these usually also show back pressure.
-
MetalFab
- Posts: 226
- Joined: Sun Feb 28, 2010 10:02 pm
- Car: 1985 720 4x4 reg cab flatbed.
- Location: Northern California
- Contact:
Re: 1985 720 2.4L No Compression #3 & #4 Cylinders... (flinterman2000)
I've heard that blowing the gasket between 3&4 is very common for the z24. I will be tearing the head off my rig, (same model as yours) this weekend. I however have a leak between one of the cylinders and the water jacket. I will be taking pics of the teardown as I can. (oily hands and digital cameras do not mix =P) I hope you are coming along with this project, there is a LOT of nonsense to pull off these motors to get the head free. Make sure you have a metric socket and wrench set, oh, and a stubby 12mm open wrench is a must to get that carb off Good luck!
Re: 1985 720 2.4L No Compression #3 & #4 Cylinders... (MetalFab)
***UPDATE***
Got it torn down to find the gasket between 3 and 4 is gone. No fire ring... just gone.
These little motors are a pain to disassemble this far. Everything has to come off, except the a/c pump.
Now will be a good time to replace the Hitachi carb, as I just yanked all the vacuum lines (they were rotted anyway), and I'll only be using ONE with the weber 32/36.. the vacuum advance.
The area on the head and deck between these two cylinders appears to be ok, but I'm going to have the head resurfaced so that I KNOW the head is flat.
It also appears someone has been here before on this engine. The head gasket is aftermarket. I believe FelPro since the blue writing/striping, and there's some chisel marks on the oil pan like someone used a screwdriver to aid in removal of the timing cover.
The timing chain assy appears to have been replaced as well. I marked locations on the cam gear, and was "timed" on mark #2, but the gear dowel was in hole #1... weird. I believe only the aftermarket cam gears have multiple dowel holes, so this is what leads me to believe it's not stock. I guess I should have paid more attention to its assembly, since I'm now a little confused on how to put the timing gearset back together. I will be buying a new set to re-install.
Anyone know a good write-up for timing gear/chain installation?
I'll try to take some pics tomorrow as well.
Thanks!
-
Mississippi1976
- Posts: 10
- Joined: Tue Feb 09, 2010 1:19 pm
- Car: 1984 Nissan 720 2.4z
Re: 1985 720 2.4L No Compression #3 & #4 Cylinders... (noface)
i found this helpful http://tinyurl.com/y934mw4
I'm still looking for a good explanation on how to set the distributor.
I'm still looking for a good explanation on how to set the distributor.
Re: 1985 720 2.4L No Compression #3 & #4 Cylinders... (Mississippi1976)
There are factory service manuals in a sticky thread in one of the Datsun sections at the top of the list. Either the technical or general discusions forums. Downloadable PDF format.Mississippi1976 wrote:
I'm still looking for a good explanation on how to set the distributor.
Re: 1985 720 2.4L No Compression #3 & #4 Cylinders... (seang)
Thanks for the info on the FSM pdf's. I used the 240 manual for torque sequence and torque values.
Should note that the manual is a trickery... the sequence illustration is kinda backwards in that the front of the engine is to the RIGHT. We all read left to right, and I torqued the bolts backwards as I wasn't paying that much attention to the illustration. Should be no problem though that I see...
Head rebuild cost $125 with resurface, clean, magnaflux, grind the valves, head and timing cover gasket sets.
I was really surprised at how clean the engine was internally. Especially with 190k on the odometer.
Cylinder walls looked good, though there were a few marks in #1 and #8 where it looked like the engine sat for some time and maybe got "stuck". Carbon ring was not bad at all.
Piston tops and comb chambers had no carbon buildup, just a nice dusting. #8 was washed out from engine coolant entering the combustion chamber.
Head is torqued down, will install timing chain and cover tomorrow.
Weber install after that. I'm waiting on the adapter...
Here's some pics
Anyone know where the crankcase vent tube gets routed to? I found the one in pic below was just venting to the atmosphere...
[/url]
[/url]
[/url]
[/url]
[/url]
Modified by noface at 4:44 PM 3/24/2010
-
MetalFab
- Posts: 226
- Joined: Sun Feb 28, 2010 10:02 pm
- Car: 1985 720 4x4 reg cab flatbed.
- Location: Northern California
- Contact:
Re: 1985 720 2.4L No Compression #3 & #4 Cylinders... (noface)
Nice to know on pricing the head work as I was contemplating on going without if there was no obvious damage. I hate to do a job twice but there's only so much one can do on a students salary I just hope I don't run into any more suprises. Anyway, seeing as how I'm right behind you on this project, same exact model truck, I can tell you that the vent tube in the last picture routed to the intake right smack dab in the middle on the head side. It routed under the intake and looped up and around.
Hope this helps.
Modified by MetalFab at 9:01 PM 3/24/2010
Hope this helps.
Modified by MetalFab at 9:01 PM 3/24/2010

The part on the intake that the hose connects to is the PCV valve (Positive Crankcase Ventilation) and should be changed periodically.
That is a great price for your head work. In the Phoenix AZ area it usually runs $200 +.
Great posting and pictures. this will help a lot of people.
Modified by Charlie69 at 10:39 AM 3/28/2010
That is a great price for your head work. In the Phoenix AZ area it usually runs $200 +.
Great posting and pictures. this will help a lot of people.
Modified by Charlie69 at 10:39 AM 3/28/2010
Re: (Charlie69)
Thanks for the info on the PCV connections. I have the nipple and tube that connects to the intake, but the hose was missing that joins it to the tube that goes behind the block to the drivers side. A new piece of hose and I should be good.
Installed the timing chain today, started raining cats, dogs, and small people, so that's all I got done today.
Here's some pics...
The head gasket that started this whole mess. Notice the fire rings between #2 and #3 were deteriorating as well.
Cam timing gear marks and alignment. This is an aftermarket gear. Note the three different timing options, 3 holes that engage the cam dowel, and 3 corresponding timing marks at the outer ring. If you install the gear in dowel hole #1, you align the shiny chain link on outer ring mark #1, etc... I used the center hole #2, as you can see by the white paint marker....
I didn't get a photo of the lower crankshaft gear, but you get the idea... the timing mark on it is meshed into the shiny link, just like the cam gear.
This is my solution for retaining the timing chain tensioner. Installed it with the zip tie still in place, once located and bolts tight, cut the tie...
Now this is complete, I can turn it back over to my son to assemble the rest. He's with me through all this so I can learn him something, that way I don't have to fix his stuff all the time!
I'll get some pics of the oil pump, dizzy, and Weber going on as well.
Stay tuned
-
breadbox

- Posts: 8549
- Joined: Tue Oct 17, 2006 4:09 pm
- Car: 89 Nissan 240SX
89 Koop
84 720 4x4KC - Location: Va Bch
Re: (noface)
Very nice.
-
lil89ram50
- Posts: 118
- Joined: Mon Jul 13, 2009 8:14 pm
- Car: 1985 nissan 720 1989 dodge d50 1979 chevy luv
Re: (breadbox)
ok so seriousley, evert z24 i have ever seen on the web with a blown head gasket always seems to be blown between 3&4
Re: 1985 720 2.4L No Compression #3 & #4 Cylinders... (noface)
so... I got it all put together and running. Well, WE did, my boy and I.
Runs good.
Took it down the road, and all seems fine... it's still won't get out of it's own way.
Weber didn't really make any difference other than I can tune the idle circuit now, and it's smoother running, and lights up on the first lick.
Came back to the house to set the timing and find no spark on #1.... no spark on #2.. no spark at all on the exhaust side. Intake side plugs are what's running the engine.
Pull out an ohm meter and check the coils. They ohm fine. Swap the input wires on the coils and now the exhaust coil fires, and the intake side is dead... so the coils are good.
What gives? Is the ignition module burned up?
I need a wiring diagram to find out where and what fires the second coil.
Anyone have one?
I didn't take the time to photo any of the remaining assembly, I ran out of time (dark) as it was... I'll take some shots of the completed install if anyone wants to see them.
I SO MUCH LIKE having only ONE vacuum line! Only one to distributor vac advance! And I guess the one for the power brakes, but that doesn't count!
Somebody please make it easy for me and tell me what's up with the ignition not firing on one of the coils!
Thanks!
JS
Re: 1985 720 2.4L No Compression #3 & #4 Cylinders... (noface)
OMG! I just looked up the ignition module at AutoZone dot com and find they want $180 for an ignition module!
HOLY COW BATMAN!!!!!!
A rebuilt distributor WITH new module is only like $10 more!
I sure hope it's not the ignition module!
HOLY COW BATMAN!!!!!!
A rebuilt distributor WITH new module is only like $10 more!
I sure hope it's not the ignition module!
Re: 1985 720 2.4L No Compression #3 & #4 Cylinders... (noface)
There is a couple members on here who can get discounts, I think. If you do end up needing the module, then maybe you can check all the sponser links off to the right ------------>> That way-------------------------------------->>
I forgot his name, but one our members who has been here since like 2002 has a link in his sig for Nissan parts. Shoot, you might be able to get a whole 720 for $180.
I forgot his name, but one our members who has been here since like 2002 has a link in his sig for Nissan parts. Shoot, you might be able to get a whole 720 for $180.
Re: 1985 720 2.4L No Compression #3 & #4 Cylinders... (seang)
checked it out again this morning.
cleaned and reseated the connectors inside and outside of the distributor, but this didn't help.
found a fuse blown in fuse box (don't know what it goes to as there's no labeling), replaced it as well, but still the same. Only running on one coil.
Distributor is advanced as far as I can rotate it to get it to 5deg BTDC, running on the intake plugs...
I need a wiring diagram, but I sure can't find one online.
There was a place on the internet where I once downloaded a PDF for an S10 I had for like $12... but I can't find that place either.
It sucks to be me!
Another member just informed me that AutoZone has online manuals & wiring dia grams. It works. You have to create an account (user account) and then you can add asm any vehicles as you nee to get the online wiring diagrams and manuals. I have 7 vehicles in my account and will add more today. Great tool for the Do It Yourself (DIY) people.
-
captainzeros

- Posts: 209
- Joined: Sun Jan 24, 2010 8:00 pm
- Car:
1981 Datsun 720 Longbed
1973 Datsun 240Z - Location: Independence, OR
Re: (Charlie69)
I bring you.... the OHMYGOD I DON'T OWN A SCANNER 1981 Factory Service Manual Microsoft Paint Photochop edition (edit: and practically useless) wiring diagram.
http://img638.imageshack.us/im...u.jpg
Modified by captainzeros at 8:29 PM 3/28/2010
http://img638.imageshack.us/im...u.jpg
Modified by captainzeros at 8:29 PM 3/28/2010
Re: 1985 720 2.4L No Compression #3 & #4 Cylinders... (noface)
thank you thank you thank you!
now I feel confident I can at least determine if the module is faulty before I drop coin on a new or used one.
Looks like these dudes would be real easy to hotwire... that is if you know anything about dc circuits...
thanks again!
now I feel confident I can at least determine if the module is faulty before I drop coin on a new or used one.
Looks like these dudes would be real easy to hotwire... that is if you know anything about dc circuits...
thanks again!
-
captainzeros
- Posts: 209
- Joined: Sun Jan 24, 2010 8:00 pm
- Car:
1981 Datsun 720 Longbed
1973 Datsun 240Z - Location: Independence, OR
Re: 1985 720 2.4L No Compression #3 & #4 Cylinders... (noface)
Reach under your dash, you can pull the plug out of the key switch without even taking anything apart. Easy to hotwire is an understatement, but this is true of a lot of older vehicles.
Re: 1985 720 2.4L No Compression #3 & #4 Cylinders... (noface)
and here he is trying to break it after we get it all fixed. First time he's really "played" in it... I guess the rear drivers tire is about an inch off the ground in this twisted shot.