Zach's S13 Build Thread!! LOTS OF PICS! VH45 SWAP!

General discussion forum about the 240sx, and a great place to introduce yourself to the board!
User avatar
speedeast
Posts: 1611
Joined: Sat Aug 01, 2009 7:01 pm
Car: 1990 240sx VH45 FB & 1993 300zx
Location: Orlando, Fl

Post

Well, I guess I am finally making myself at home here on NICO. So, time for my build (in sequence):

I bought this car almost exactly a year ago, and it was an impulse purchase of sorts.

1990 Nissan 240sx Fastback Zombie (it's dead and looks dead)

Image
Image
Image
Image
Image
Image
Image
Image
Image

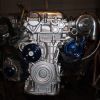
Before you puke, let me explain...I thoroughly inspected it before I bought it: 120,000 miles, normal suspension wear and tear, no motor/trans (obviously), the entire thing was speckled with tree sap and bird s*** (more tree sap), BUT... NO BODY/CHASSIS RUST WHATSOEVER! Oh and the guy before me started rattle canning the car yellow... ugh.

So I bought it: $200.00. Then I stuck it in a storage unit (in NC) where it collected dust for like five months until I finished up with basic/ait. In August '09, I put it on a trailer and brought it to where I live in NY.

I don't have a garage at my house, and it seems I'm the only house around that doesn't have one, lol. So, anxious to get things apart, I began some driveway stuff: cleaning, removing leftover parts in the engine bay (bagged 'em and tagged 'em), disassembling random body parts, etc.

Image
Image
Image
Image
Image

Finally, at the beginning of October I got a huge break. One of my friends offered half of his garage to my project. I accepted and quickly moved in and set up shop. I started taking more stuff apart, sanding and removing all of the old paint, and that awful tree sap mess I had goin on. Turns out Acetone is f***ing phenomenal in the tree sap removing category, unfortunately it damages the clear coat - which meant nothing to me, it was all coming off.

Image
Image
Image
Image
Image
Image
Image
Image
Image

I began sanding the rest of the car little by little until ALL the paint was gone. Please don't try this at home; it may lead to boredom, anger, and lack of motivation altogether. If I never have to sand another thing ever again in my whole life I would have ZERO issues with it.

And have a shop vac and dust mask handy, what a f***ing mess!!!!

But whatever, here goes the nakedness:

Image
Image
Image
Image
Image
Image
Image
Image
Image
Image

Ok, story time!

I had the entire thing sanded down to bare metal, cleaned the garage (thoroughly), and began messing with the mechanical stuff and other body work like bondo. Well, one day I was disassembling my fuel rails and removing my injectors on one of those little folding TV Dinner type tables and I left everything on the table laid out where it belonged when I left to go home.

A couple days later when more time had fallen into my hands, I went back to the garage to continue right along with my project at hand. When I got there, I found the table completely upside down five feet from where I had left it. ALL of the fuel injectors sustained damage. I was baffled at first, trying to put two and two together, but nothing seemed to equal four. Finally when my friend got off work, he wandered out to the garage and said, "we need to talk." So I was like, "yeah, it sure as hell looks that way." Then he started blabbering about how he knew my project was a big one and that I would be taking up a lot of space, but he was sick of it. Now this guy has like 20 years on me, I'm real good friends with his daughters, and I worked with him for a previous employer for a while. We partied at his house on numerous occasions (got real good at beer pong). Back to the story - he said he was pissed because he had to move his truck to get his lawnmower out because my car was in the way. And instead of moving his truck out, he backed it up in the garage as far as it would go so he could squeeze by. Well, he ended up needing his jumper cables which were behind his truck that he had wedged against a shop table in the back of the garage. Instead of moving the truck forward two feet, he had to come around to my side of the garage, weave through my miscellaneous stands and tables and back over to his side behind the table to get them. This pissed this pathetic, alcoholic fool off and on his way back, he supposedly swatted my table across my work area where it landed upside down and damaged every last injector... He spilled the beans and walked off without apologizing. My car and everything I had in that garage was gone in less than 24 hours. I had it all set up in a new garage all to myself across town. BTW, new at autozone, my injectors are $166 each. And to foreshadow later parts of my build, there were eight of them = $1400+ with taxes.

I will continue this tomorrow... getting rather late.
Last edited by speedeast on Thu Jun 17, 2010 6:29 pm, edited 1 time in total.


User avatar
Luis240
Posts: 36
Joined: Sat Mar 21, 2009 3:56 pm
Car: 89 240sx coupe(kade)

Post

it's looking a lot better with all the bird s*** and yellow stuff off what motor are you dropping in? I read about your injectors but didn't see waht motor they were from

carzy story tho!!

keep us updated on the car

User avatar
usdm_anon
Posts: 139
Joined: Fri Dec 04, 2009 4:30 pm
Car: 87 supra

Post

Awesome story I'll make sure to watch this one...

User avatar
pauliedrft
Posts: 471
Joined: Tue Oct 07, 2008 12:06 am
Car: 91 240sx

Post

To OP what motor are you dropping in there cause you can get some big injectors for that price .http://www.deatschwerks.com/catalog/pro ... cts_id=142

370cc for like 300 . and you can go turbo this way jmo , your there might as well rebuild for turbo or do a motor swap .

User avatar
speedeast
Posts: 1611
Joined: Sat Aug 01, 2009 7:01 pm
Car: 1990 240sx VH45 FB & 1993 300zx
Location: Orlando, Fl

Post

I am going the VH45DE route... it was gonna be in my next update, but I found 8 reman. injectors from Rock Auto for around $300. But def. keep an eye on the thread, I take tons of pictures!
^AWESOME! I found something on there for my motor that I haven't seen before!! Thanks.

I only listed the retail of the OEM injectors so y'all would hate him as much as I do, lol. I'm a little more resourceful than that.
Modified by speedeast at 8:40 AM 1/3/2010

User avatar
kpodj61240
Posts: 276
Joined: Fri Jul 06, 2007 11:11 am
Car: S14 Zenki

Post

yea i agree with the injector price......i paid like 600 for my 740's. take those back if you can. sorry to hear about your deal with that guy........id get back at him and get with his daughter!

Hoffman5982
Posts: 1805
Joined: Sat Sep 29, 2007 7:20 pm
Car: '95 sr20det 240sx

Post

^ Agreed. F*** his daughter, take pics, mail them to him.

User avatar
240sxJoe91
Posts: 474
Joined: Mon Sep 28, 2009 10:26 am
Car: 1991 240sx Ka24de

Post

Wow when i saw the yellow at the beginning i was like.. is he doing...But then i saw what you did lol looks way better

User avatar
speedeast
Posts: 1611
Joined: Sat Aug 01, 2009 7:01 pm
Car: 1990 240sx VH45 FB & 1993 300zx
Location: Orlando, Fl

Post

Continued...

So I moved everything out into the new garage and started hitting the body work hardcore. Lots of thanks to my dad for being a huge help through the process. He has some previous body work experience, so I learned under his wing.

I had tons more space in the new garage, nobody to bug me, and a lot more lighting.


I bought some suspension parts, and some coilovers. The red parts are Godspeed, which is decent for the money. I read into a newer company making a lot of parts for the 240 and I read about their presence at SEMA and how they're moving up. Well, they're prices are pretty hard to beat too, so I bought a set of fully adjustable coilovers from them. Oh, the company is E-Motor. They shot me an email saying that the coilovers they had shipped out were accidentally two different colors (front red, rear blue) and refunded a chunk of the money. Not a very good first impression, but when I got the coilovers I was still impressed with them nonetheless.


So, with body work moving along nicely, I began removing ALL of the old suspension. You can only sand for so long ya know. My dad ended up doing most of the sanding after that because I complained a lot, lol. Either way I got elbows deep in other stuff.

In that last picture you can see another goody I bought! It's a complete Energy Suspension bushing kit. Unfortunately with new sway bars, control arms, etc. most of the bushings aren't even going to be touched. Y'all can expect to see those in the Classifieds here on NICO in the near future.

Now what you see in the next couple pictures is disturbing, but let me elaborate. I know this has happened to several people before, and no doubt happened to me. As I was removing the rear subframe, the very last stud I came to broke!!! I researched the problem and saw where some people just tossed their shells. I read where some had welded a new crossmember in... I looked into Nissan and they don't sell individual studs, only the crossmember with the studs already mounted. Well, this wasn't going to fly for me, so I hammered out the f***ed up stud and left it to be dealt with later.

In order the remove that stud, I had to measure about where it would be in the hatch area and cut a hole in the sheet metal to access the top of the crossmember. I just used a 2" hole saw, worked nicely and I was almost perfectly over the stud. Now, in order to press the stud out, I had to get clever. I jacked the rear of the car 1" above the jackstands by the broken stud with a floor jack. Then I took the 36mm axle nut socket I have and placed it in the hole I cut so that the top of the stud was in the large opening of the socket. Then I hammered on the socket with a sledgehammer until the stud came loose and set the car back on the jackstands. I was left with a hole, wonderful.


After that stressful ordeal I needed to accomplish something to get my spirits back up. So I ordered some aluminum 30mm 300zx brake calipers from a guy in Philly. I went online and found some 300zx hubs with aluminum uprights all in one big package for the low low. It wasn't until I got them and continued my brake swap research that I realized the only things I got that I could even use were the rear hubs. Oh well, I can sell off the uprights easily enough. When I got it all, I disassembled the old cruddy brakes and cleaned up the hubs. I sprayed the hubs with some coating that prevents rust (don't even know if I believe it); either way they looked clean.


I bought some rebuild kits for the calipers...


At this point I was just knocking out all sorts of odds and ends here and there. It felt great to accomplish all of this s***, but I knew there would be more problems/difficulties in the future. I cleaned up the front crossmember and replaced the rack & pinion bellows:


Grease Lightning FTW!!!

I sent out a lot of my engine parts to get bead blasted. Also, I had already gotten my engine components back from being fixed up at the machine shop. The heads were completely cleaned, milled, measured, checked for spring tension, seals were replaced... everything! They looked great! The block came back, it had been cleaned out real well also, and it was inspected for discrepancies. The crankshaft was balance tested, cleaned up, measured, and polished. It felt like Christmas getting all of this stuff at once.

To go into some details... I got the engine for free from a really good friend of mine (practically family), who I helped out of a couple tough situations in the past.

VH45DE out of a 1991 Infiniti Q45

All of the chain guides had already recently been replaced! He bought the engine to put in his 240, but he also had a VG30E, an SR20DE, etc laying around. He had a KA-DE in his car at the time that he was trading out for a VQ35DE... so he gave me the option of the VQ as well. I didn't want to get that deep into trying to make a VQ work, so I went with the VH. No Regrets! So, a big thanks to him!

He is also the same person who rode with me from NC to FL and back in the same day to pick up a couple parts I needed from a fellow NICOer. I ended up in Gainesville where I picked up my VG30DETT 5-Spd Transmission, Q45 Differential, and Mazworx VH-VG adapter plate. The transmission had already been properly machined as well. Everything was in real good shape; it was an awesome find. I swapped the differential caps. I ordered an inexpensive aluminum radiator with dual electric fans. I ordered a Walbro 255. I ordered a Ralco RZ Short Throw Shifter. I ordered the long tube headers and custom driveshaft from Mazworx. I requested the driveshaft be 3" instead of their standard 2.5" steel. I junked an old 300zx starter. I also ordered a complete engine gasket set. I junked a Q45 left rear axle and ordered a 300zxtt rear left axle from some guy in Oklahoma (there's more to this as well in the following pictures).

Well, with all that being said, lets dive into a bunch of f***ing pictures of it all!!!


Like I mentioned above, I ordered the 300zx axle, and when the package was delivered it was oozing some yellow/cream mess about the consistency of hand lotion. I opened the package and found the end cap popped off from where I suppose UPS dropped and/or tossed it. It was the odd color because somehow water had gotten into the boot and compromised the Lithium grease that was in there. I can't find my picture of the gooey mess, so here's one of the Q45 Axle and the 300zx Axle that I cleaned out. I ordered a new boot kit and a tube of Motul Tech Grease 300, which is a fantastic lithium grease. That s***'s GREEN!


Bondo work DONE!!! Also, I disassembled the rest of the car to prepare for primer!

^Before body work, it looked like somebody literally tap danced on the roof, it was BAD!!!!!!!!!!!!!!!!!!!! The hatch also looked like it had been used as a seat a few times too many.

Then in my spare time when my dad wasn't available to help me prep for primer, I started working on the wiring harness. It's a tedious project, and quite the headache, but I eventually got it figured out. It's not done now, but I'm waiting for the engine to be in place with it's sensors so that I can properly wrap the harness with correct connector lengths/locations, blah, blah, blah.


Well, that's all for now (late again). I am much further along than this on the project, but I will have to update you guys with more later when I get a chance.

Thanks for tuning in.
Modified by speedeast at 2:37 AM 1/4/2010

User avatar
safin
Posts: 1138
Joined: Sun Jan 21, 2007 6:35 am

Post

fu** yeah man this the way to start the year

User avatar
IanS
Posts: 10090
Joined: Thu Dec 23, 2004 3:07 pm
Car: 2002 Subaru WRX, 2010 Subaru Forester XT, 2004 Infiniti G35 Coupe.
Location: Esko, MN
Contact:

Post

Looks like you are having fun. Keep it up.

laxands13
Posts: 724
Joined: Wed Dec 02, 2009 12:32 pm
Car: 93 240sx Hatchback - Sold and missed
80 280zx - sold
83 Honda Civic Wagon - Current DD, soon to be CA16 powered
Location: Ga

Post

wow. coming along real well man,
safin wrote:fu** yeah man this the way to start the year

User avatar
SkinnyKibbles
Posts: 348
Joined: Sun Nov 23, 2008 7:38 am
Car: 1990 240sx

Post

I'd kill for a nice clean place to work. Nice build so far.

User avatar
speedeast
Posts: 1611
Joined: Sat Aug 01, 2009 7:01 pm
Car: 1990 240sx VH45 FB & 1993 300zx
Location: Orlando, Fl

Post

It took me so long to find a decent place to work. And yup, this is definitely the way to start the new year!!!

I'm ready for the next update, lol, but I need to wait until this moves to the next page, cause it's gonna be another long one.

User avatar
nevertheless
Posts: 1379
Joined: Tue Jan 22, 2008 11:12 am
Car: 1993 240sx hatch
1995 Nissan D21
Location: Omaha, Nebraska
Contact:

Post

Do work! Nice to see another s-chassis getting saved. keep it up.

User avatar
nissanman04
Posts: 1600
Joined: Sun Nov 21, 2004 7:51 pm
Car: '90 240SX, '95 Subaru Legacy

Post

Awesome project...when it's finished, you should bring it to an auto-x at the army depot. I'd love to see this in person.

User avatar
speedeast
Posts: 1611
Joined: Sat Aug 01, 2009 7:01 pm
Car: 1990 240sx VH45 FB & 1993 300zx
Location: Orlando, Fl

Post

Yeah, I'm glad I saved it, such a great platform.

^Damn dude, you're close. They have autox at the depot?
Modified by speedeast at 4:15 PM 1/4/2010

s14derrick
Posts: 1322
Joined: Thu Jun 19, 2008 12:09 pm
Car: 1995 nissan 240sx
Contact:

Post

i like to see that youre doing this build right im excited to see where this is going

User avatar
240sxJoe91
Posts: 474
Joined: Mon Sep 28, 2009 10:26 am
Car: 1991 240sx Ka24de

Post

Coming along great man...Cant wait to see where you go with this.

YakshaXaio
Posts: 8
Joined: Fri Jan 01, 2010 12:53 am
Car: 1993 Ford F150 (Soon to be 93 240sx)

Post

sick car man sorry bout your bad luck tho with the bird crap etc.

User avatar
speedeast
Posts: 1611
Joined: Sat Aug 01, 2009 7:01 pm
Car: 1990 240sx VH45 FB & 1993 300zx
Location: Orlando, Fl

Post

I'll be back on a little later with an update!

User avatar
93sivliaUsdm
Posts: 292
Joined: Wed Oct 28, 2009 3:21 pm
Car: 1993 240sx coupe sold
1990 240sx hatch DE swap

Post

awesome job man, it makes me wanna save for a daily and then make mine a project

User avatar
speedeast
Posts: 1611
Joined: Sat Aug 01, 2009 7:01 pm
Car: 1990 240sx VH45 FB & 1993 300zx
Location: Orlando, Fl

Post

93sivliaUsdm wrote:awesome job man, it makes me wanna save for a daily and then make mine a project
Just buy something hella cheap and then sell it when you're done, or don't whatever

User avatar
speedeast
Posts: 1611
Joined: Sat Aug 01, 2009 7:01 pm
Car: 1990 240sx VH45 FB & 1993 300zx
Location: Orlando, Fl

Post

Ok, lemme see where I left off...

I started reassembling my block; I had new main bearings (even though the old ones were still pretty much perfect), new rod bearings, all new piston rings, etc. I organized everything and laid everything out because I wanted to be as organized as possible going into this; no cutting corners!


First up were the main bearings, I ordered them new from Nissan and they never asked questions or anything about engine codes, blah blah blah - so I didn't think they were supposed to. WRONG! I found out the long way that there are different size main bearings for different block/crank code combinations. Well, everything kind of went together, but the crank wouldn't sit all the way and definitely wouldn't turn... So I pulled 'em out and Mic'd 'em. The new ones were .102" and for the old ones I got .098" so I just put the old ones back in... you can tell they had been replaced, no signs of wear. So, If you're going this route, keep these facts in mind, it sucks to go through everything before you find out.

But finally I started making progress on the bottom end!


Then for some reason there was a period where I didn't take but a few pictures... missing camera or something I don't know. But I got the bottom end completely together, pistons and all. It was looking sexy too!


In this time, I also primed the entire car AND final coated the engine bay. All of this was done in December. Luckily I have gone back to taking s*** tons of pictures before I got too far.

Oh yeah, I also bought an inexpensive powder coating system and kinda taught myself how to do it. Well I got pretty good and decided to powder coat my valve covers, intake manifold, and fuel rails. Feast your eyes:


They look even better in person! Just gonna throw this out there to keep anyone from blowing a gasket... The fact that they were on my stove for the pictures is a coincidence, they weren't baked there, so stay calm.

Ever heard of 'Chassis Saver?' Well, this s*** is awesome! It's a high build coating that you apply onto bare metal, primer, whatever. It can't be broken down by chemicals (acetone, thinners, strippers, etc.), it repels excess crud build up, it stops oxidation and prevents it (rust for the newbs), and it never talks back. Well, whatever, the s***'s awesome! I coated my uprights with it, my subframe also got coated, and it is the final coat in my engine bay (easy to clean too). Well, another barrage of pics:


As you can see, I used some Homelite to hold stuff up; works wonderfully!


As you can see above, the subframe has been reinstalled and the Q45 differential is in there as well. The OEM differential bolts tight to the subframe while on the Q45 there are bushings on the forward most bolts. I'm not a big fan of old worn out bushings where there is potentially some weight. So I decided to f*** with it until I was more comfortable with it. I grinded the sleeve inside the bushing flush with the bottom side of the bolt flange and then fabbed up some square washers from 1/4" steel. I don't want it to go anywhere... I also had to drill new holes in the final drive flange to mate up with my driveshaft (which was designed for the 240sx rear end).

^ I took the final drive off the oem differential and matched it up to the Q45 differential, clamped them together, and drilled my new holes! I used a little motor oil to keep where I was drilling the holes lubricated. It worked beautifully; reduced friction/heat and the bits last a hell of a lot longer!!!


Here is the engine bay coating:


^You'd never be able to tell that this stuff went on with a brush... That's right, a brush. If you use this stuff, pay the extra few dollars at the hardware store for the premium nylon brushes; you don't want any bristles getting all over. It can also be sprayed on, but I only have one sprayer and didn't want to risk clogging it. And for the full benefit of the product, I'd have to spray it 3 times or so.

Next, we have the engine assembled further, transmission mounted, and the whole kit and caboodle dropped in for a test fit! (VH45ers, look close at the heads and see if you can tell what's wrong. Can't tell? I didn't realize it until they were mounted, but the machine shop switched the camshafts. Some people may think this is a simple mistake, but the damn things are labeled X1, X2, I1, I2. Even the sprockets are labeled (for example: LE for left exhaust). It's not as if I wouldn't have caught it when the valve covers didn't fit, but it's the principle behind it. Ugh.)

^That's Jim aka cypher02xd, a friend of mine who drove up here to NY from MD to give me a hand for the weekend.


And... (Drum Roll)

HERE'S ME!!!!!!!!!!!!!!!!!!!!!!!


I literally had to surfboard the engine/trans to get it in, but we got it in there!

^Test fit the headers... TIGHT!!!


^That is where she is currently sitting right now. Tucked in until I return.

That's all I have for an update for tonight. I have gotten some suspension done, but that'll be next post.

But before I go, here are some references in the event you need them:

Rack & Pinion Replacement Bellows: (EMPI)

VH45DE Connecting Rod Bearings: (Clevite)

VH45DE Piston Rings: (Hastings)
Modified by speedeast at 2:47 AM 1/5/2010

User avatar
David s12
Posts: 131
Joined: Fri May 16, 2008 12:16 pm
Car: 84 datsun s12 ka24 swap
Contact:

Post

full win

User avatar
speedeast
Posts: 1611
Joined: Sat Aug 01, 2009 7:01 pm
Car: 1990 240sx VH45 FB & 1993 300zx
Location: Orlando, Fl

Post

I'm headed out there today, I'll be sure to takes lots of pictures for my next post.

User avatar
neda240sx
Posts: 36
Joined: Mon Aug 24, 2009 5:54 am
Car: 1991 SE fastback

Post

yeeeehawwwwww

User avatar
nissanman04
Posts: 1600
Joined: Sun Nov 21, 2004 7:51 pm
Car: '90 240SX, '95 Subaru Legacy

Post

speedeast wrote:Yeah, I'm glad I saved it, such a great platform.

^Damn dude, you're close. They have autox at the depot?

Modified by speedeast at 4:15 PM 1/4/2010
Yep, there's usually at least 5 events a year, maybe more since at least 3 different regions use it. There is also an national tour event there in July I believe. It's one of the best sites in the northeast.

User avatar
speedeast
Posts: 1611
Joined: Sat Aug 01, 2009 7:01 pm
Car: 1990 240sx VH45 FB & 1993 300zx
Location: Orlando, Fl

Post

That's pretty awesome! I don't like New York enough to stick around though, lol. But I'm not gone yet.

laxands13
Posts: 724
Joined: Wed Dec 02, 2009 12:32 pm
Car: 93 240sx Hatchback - Sold and missed
80 280zx - sold
83 Honda Civic Wagon - Current DD, soon to be CA16 powered
Location: Ga

Post

wow.. i gotta say i love the huge updates at a time. and looking great man!


Return to “240sx General Discussion”