S14 Cluster Shroud: Molded Greddy Turbo Timer and Boost Con

General discussion forum about the 240sx, and a great place to introduce yourself to the board!
User avatar
Broadfield
Posts: 2681
Joined: Tue Sep 05, 2006 2:57 pm
Car: 1992 240sx
Location: Normal, IL
Contact:

Post

I want to start posting up my builds to share with everyone else. I will post as I do the work. This customer wants his Greddy turbo timer and Greddy boost controller molded into his S14 cluster shroud in place of the dimmer switch on the left and the on/off switches on the right.

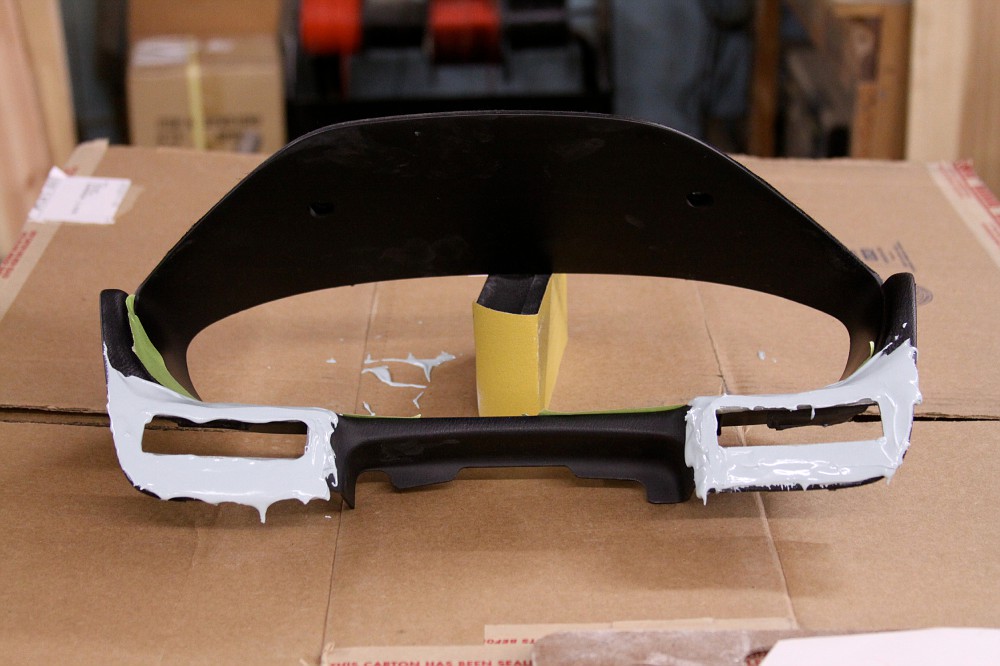
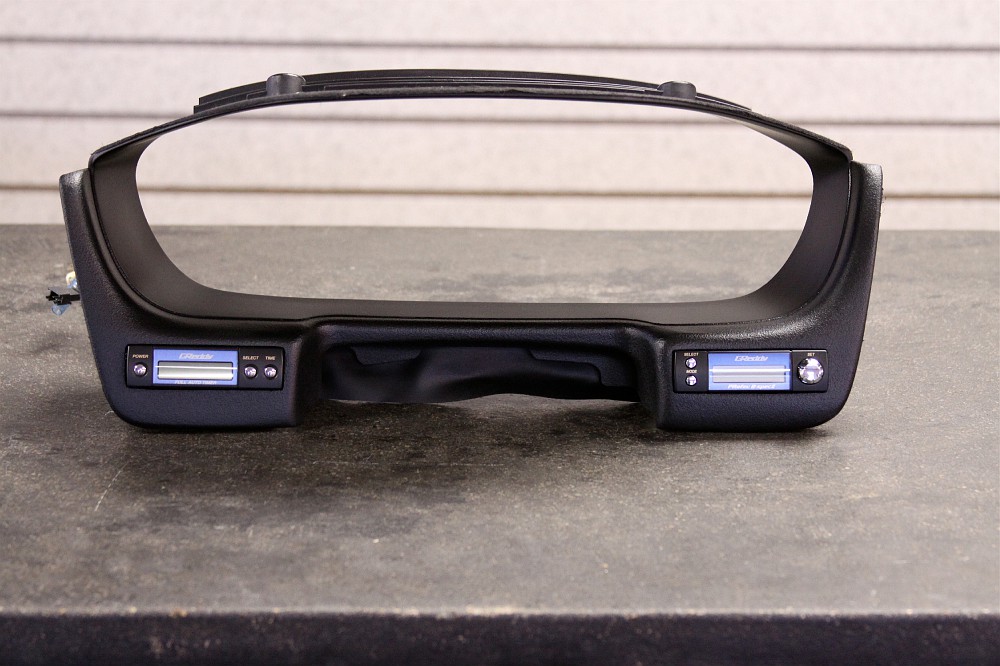
The customer marked where he wanted them located with masking tape and a pen, then shipped the shroud to me. Since the cavities for the switches are taller than the casing of the controllers, the extra area will have to be filled in for a nice finished look. I will also build the area out very slightly to where the units mount.

Image

Image

Image

First thing is to cut out the tape to reveal where I need to cut the plastic:

Image

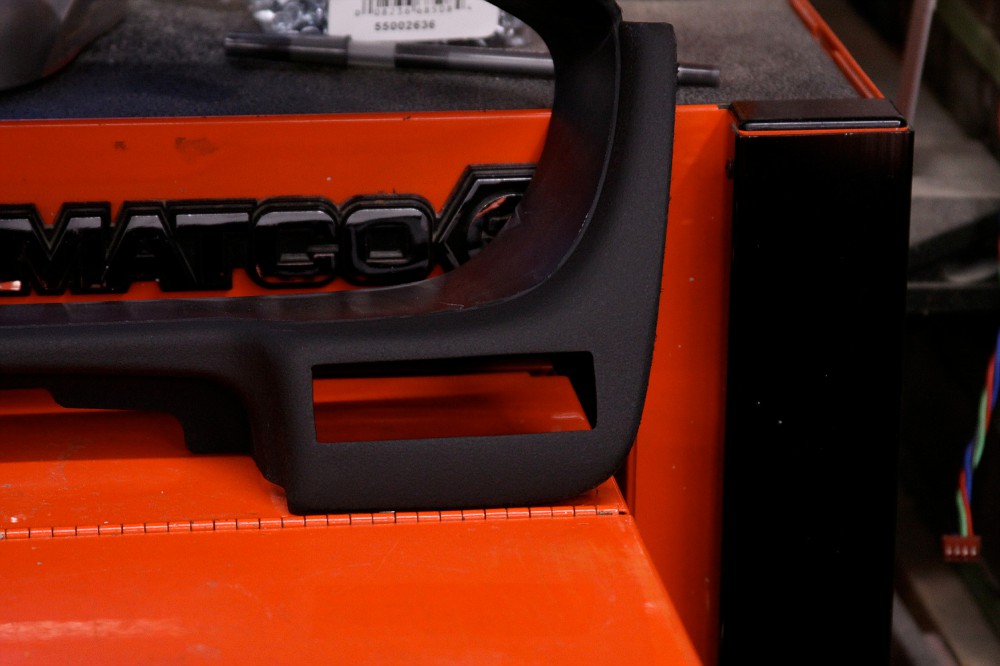
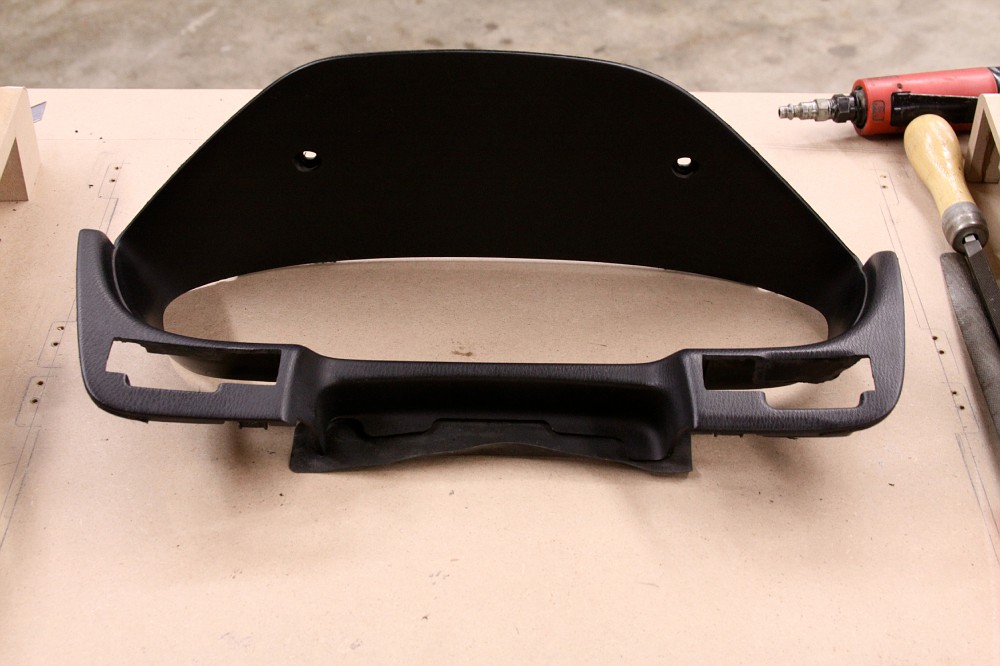
Even though I'm going to fill all around the edge of the controllers, I like to get the initial cut as close as I can. So basically everything but where the switch holes are will be close to a perfect fit. This will help hold the units in place while I fill around them:
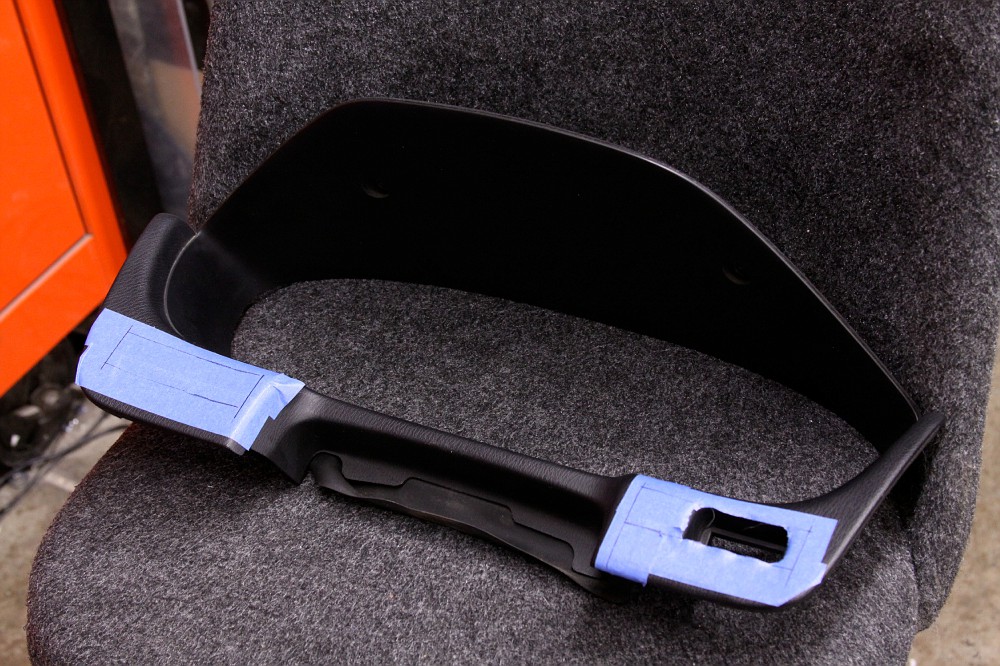
Image

Quick test fit:

Image

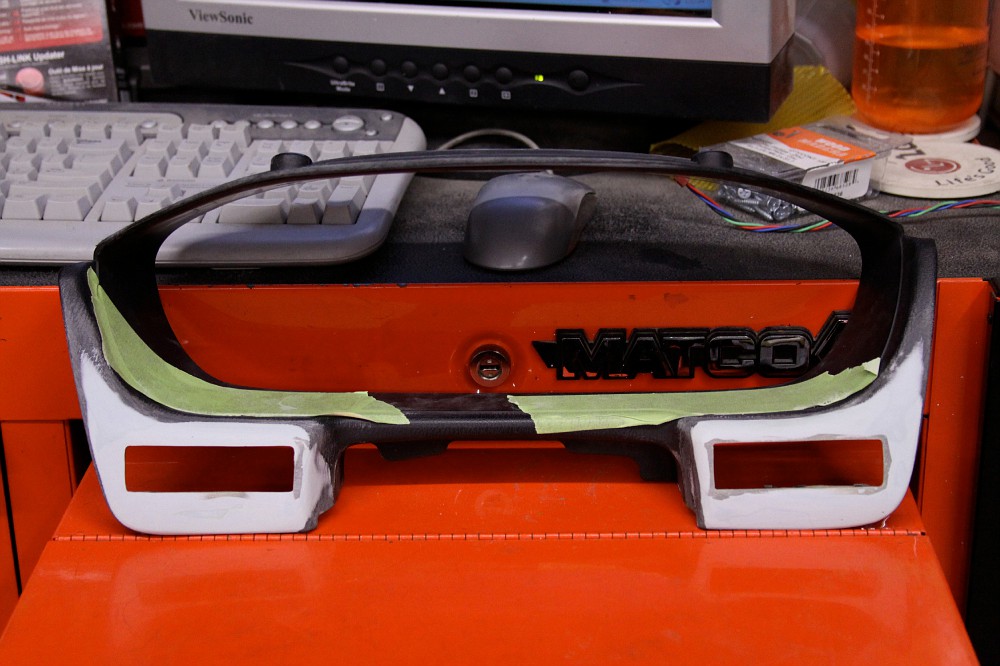
Next up is to use masking tape to cover the front half of the units. The outer side of the masking tape is kind of "waxy", so the glue/filler I use to fill the edges won't stick to it very well. This will ease in the removing of the units once the glue/filler has dried:

Image

I also roughed up the surrounding area around the opening with 24 grit sandpaper... you may be able to see it a little in the above pic. This will help the glue/filler stick to the plastic.


angelscrx
Posts: 246
Joined: Mon May 14, 2007 2:06 pm
Car: 1992 240sx

Post

Cool new project!!! I will be watching this one.

User avatar
badbob2121
Posts: 1989
Joined: Sat Jan 16, 2010 9:23 am
Car: '92 Nissan 240SXS13 Hatch ELLIS JUAN
'12 Ford Mustang GT RTR
Location: St. Louis

Post

like always....SICK!

User avatar
Broadfield
Posts: 2681
Joined: Tue Sep 05, 2006 2:57 pm
Car: 1992 240sx
Location: Normal, IL
Contact:

Post

This is with the glue/filler applied. I use a 3M product called Duramix 4247. It's a pretty expensive setup, as you need the product, a special application gun and tips. But there is nothing else like it. It's a 2-part mix that dries hard in a few seconds and it sticks to plastic. It dries rock hard in a few minutes and then can be sanded/shaped. However, it's not like an epoxy which is brittle. This stuff has a very, very slight elasticity to it... so it's perfect for plastic. It's thick enough that it will fill small to medium gaps, it can be easily sanded and painted.

Image

Image

Image

Hoffman5982
Posts: 1805
Joined: Sat Sep 29, 2007 7:20 pm
Car: '95 sr20det 240sx

Post

You already posted the final product on zilvia. Do you like them more than us??

what would this cost, but for one being mounted on the left side?

User avatar
Broadfield
Posts: 2681
Joined: Tue Sep 05, 2006 2:57 pm
Car: 1992 240sx
Location: Normal, IL
Contact:

Post

Hoffman5982 wrote:You already posted the final product on zilvia. Do you like them more than us??
LOL, no. But I'm technically not a paying vendor on here at the moment... so I need to be careful what I post. As this thread is basically advertising for my business.
Hoffman5982 wrote: what would this cost, but for one being mounted on the left side?
It would be $150.

User avatar
Broadfield
Posts: 2681
Joined: Tue Sep 05, 2006 2:57 pm
Car: 1992 240sx
Location: Normal, IL
Contact:

Post

With the units popped out. Next will be sanding the front of the opening down, which will yield an opening that fits the units perfectly.

Image

Image

This is after a quick, rough sanding to get the overall shape and high spots down. I used an air sander with 24 grit to knock the high spots down quickly. Then went back with a sanding block and 80 grit to get the front flat and true.

Image

Image

Image

I then built up the surrounding area with some Rage Gold body filler:

Image

Image

Image

Next, I will sand that down with 80 grit and fill some more where needed. Then fade/blend out the edges to the surrounding plastic. Stay tuned.

User avatar
kornmanz
Posts: 2926
Joined: Wed Sep 26, 2007 5:01 am
Car: 89 240sx Hatch SR Powa'd
Location: Santa Fe, NM
Contact:

Post

What a great idea. I will be buying one of these from you in the future no doubt about that.

If I wanted a whole new gauge cluster with RPM, Fuel Level, Water Temp, and a Digital Speedo. Where can I even search for the right gauges? I'll obviously have you do the handy work cause damn its so clean its impressive. I want to really flare up my interior at some point soon.

This thread also made me start browsing zilvia.net.

User avatar
Broadfield
Posts: 2681
Joined: Tue Sep 05, 2006 2:57 pm
Car: 1992 240sx
Location: Normal, IL
Contact:

Post

This is after the first rough sand. I use this step to get my overall shape and see if I like it. I then can go back and add more filler if I have to, or if I am happy with the overall shape, I will simply do a second coat to fill in the low spots etc.

Image

Image

Image

I was happy with the shape, so I added more to fill in the low spots. Then I sanded that with 120 grit:

Image

Image

Image

A quick test fit to make sure we are on track. I need them very slightly loose. That way after I add texture and paint, they will fit the way I want them to:

Image

Image

Image

Next will be a layer of glaze filler to fill in the tiny pin holes you see and to help feather the edge where filler meets plastic. Then it will be a texture coat on the original area that was textured, then satin black SEM over the entire thing. I'll be back.

User avatar
Broadfield
Posts: 2681
Joined: Tue Sep 05, 2006 2:57 pm
Car: 1992 240sx
Location: Normal, IL
Contact:

Post

kornmanz wrote:What a great idea. I will be buying one of these from you in the future no doubt about that.

If I wanted a whole new gauge cluster with RPM, Fuel Level, Water Temp, and a Digital Speedo. Where can I even search for the right gauges? I'll obviously have you do the handy work cause damn its so clean its impressive. I want to really flare up my interior at some point soon.

This thread also made me start browsing zilvia.net.
If you want all digital, I would recommend the Cyberdyne stuff. You can get them in in 4 different colors, and then the speedo and tach are the larger 85mm. All of the their other gauges are 52mm. So you could do a setup like mine with the tach and speedo as the two large center gauges, then a 52mm flanking each of the larger ones. Just a thought!?!

http://www.cyberdynegauges.net/products.php

User avatar
kornmanz
Posts: 2926
Joined: Wed Sep 26, 2007 5:01 am
Car: 89 240sx Hatch SR Powa'd
Location: Santa Fe, NM
Contact:

Post

Thanks man. Sounds perfect. How much roughly does one of these setups with your labor included cost?

I checked out the cyber gauges I noticed they don't have an rpm gauge. I guess what I would want is a large speedo gauge from cyber and a large rpm gauge like your setup with a temp gauge on the left and a gas gauge on the right.

Do you make your setups to hook up to stock wiring or is there more modification needed?

supersayianjim
Posts: 308
Joined: Wed Nov 26, 2008 6:02 am
Car: 89 240sx(s13)

Post

wow looks like a lot of work. i commend you on your patience and attention to detail. my lazy a** would had traced over the face of the units then dremeled it to fit as close as possible. but that is still good s***.

User avatar
Broadfield
Posts: 2681
Joined: Tue Sep 05, 2006 2:57 pm
Car: 1992 240sx
Location: Normal, IL
Contact:

Post

kornmanz wrote:How much roughly does one of these setups with your labor included cost?
They start off at $100. There is more info on my cluster thread:

broadfield-custom-clusters-etc-t506724.html

A cool thing you could do with the all digital is I could make a smoked plexiglass piece that goes over the entire gauge face plate. So it would be like the digital fuel gauge I have in the link above. When it's off, you can't really see the gauges at all... so it would be all blacked out. Then when you turn the car on the digital gauges would illuminate through the smoked plexi. You would need to use the all black gauges of course. The Cyberdyne come in the any of the four colors, with either a black bezel or silver one. So the smoked panel would go in place of my standard gauge plate. Then I would simply mount my standard gauge plate right behind the smoked plate. So the gauges would be flushed into the standard plate and butt up right against the back of the smoked panel. This is where you would get into a cluster that is more than the base price of $100.
kornmanz wrote: I checked out the cyber gauges I noticed they don't have an rpm gauge.
What are you blind? :)

http://www.cyberdynegauges.net/tachometersproduct.php

kornmanz wrote: Do you make your setups to hook up to stock wiring or is there more modification needed?
Well since you need to run all of the sensors to the gauges etc., there is no way to make it plug and play. So you would be responsible for all of the wiring.

User avatar
Broadfield
Posts: 2681
Joined: Tue Sep 05, 2006 2:57 pm
Car: 1992 240sx
Location: Normal, IL
Contact:

Post

Did a final coat of glaze body filler to get rid of the larger pinholes. Then sanded that down with 240 grit:

Image

Image

Image

Next I used the SEM Texture Coat as a filler... I will actually sand most of it off. I sprayed it on thick to help fill any little imperfections, sanding marks and to make sure I like the overall shape of the project. It will help me see if there are any hard lines I need to knock down etc. I want to make sure that all of the round over edges and the like have a nice transition. I can tell you already from these pictures that there are a couple lines I need to round over more and the the pin hole on the right side:

Image

Image

Image

Test fit the units again. You can start to really see the what the finished product is going to look like.

Image

Image

Image

I already hit it with another coat of texture to get rid of the pinhole on the right side. I will then sand it with 320 grit and make sure the hard lines are gone and that all of the rounded areas have the radius I'm looking for. Then I will do my final coat of texture for the final look, then simply paint it. Stay tuned!

angelscrx
Posts: 246
Joined: Mon May 14, 2007 2:06 pm
Car: 1992 240sx

Post

Absolutely sexy as hell!

User avatar
Broadfield
Posts: 2681
Joined: Tue Sep 05, 2006 2:57 pm
Car: 1992 240sx
Location: Normal, IL
Contact:

Post

Sanded the texture area down lightly and hit it with a final coat of texture:

Image

Image

Image


I then sprayed the entire shroud(the texture area and smooth area) with a SEM Satin Black. Turned out great as far as finish, but there are a couple areas on the edge where the texture meets smooth that I am not happy with... I'm PICKY!

Image

Image

So I will simply hit the edge area with texture without it taped off. Naturally I will get texture over spray onto the smooth area. However, the smooth area is raised a little, so I can simply go back with 320 grit and sand that area back smooth without effecting the texture area. Then I will simply spray the entire thing again with the Satin Black. Should be all done tomorrow!

angelscrx
Posts: 246
Joined: Mon May 14, 2007 2:06 pm
Car: 1992 240sx

Post

Dude you are a fab God!

User avatar
kornmanz
Posts: 2926
Joined: Wed Sep 26, 2007 5:01 am
Car: 89 240sx Hatch SR Powa'd
Location: Santa Fe, NM
Contact:

Post

Broadfield wrote:
kornmanz wrote:How much roughly does one of these setups with your labor included cost?
They start off at $100. There is more info on my cluster thread:

broadfield-custom-clusters-etc-t506724.html

A cool thing you could do with the all digital is I could make a smoked plexiglass piece that goes over the entire gauge face plate. So it would be like the digital fuel gauge I have in the link above. When it's off, you can't really see the gauges at all... so it would be all blacked out. Then when you turn the car on the digital gauges would illuminate through the smoked plexi. You would need to use the all black gauges of course. The Cyberdyne come in the any of the four colors, with either a black bezel or silver one. So the smoked panel would go in place of my standard gauge plate. Then I would simply mount my standard gauge plate right behind the smoked plate. So the gauges would be flushed into the standard plate and butt up right against the back of the smoked panel. This is where you would get into a cluster that is more than the base price of $100.
kornmanz wrote: I checked out the cyber gauges I noticed they don't have an rpm gauge.
What are you blind? :)

http://www.cyberdynegauges.net/tachometersproduct.php

kornmanz wrote: Do you make your setups to hook up to stock wiring or is there more modification needed?
Well since you need to run all of the sensors to the gauges etc., there is no way to make it plug and play. So you would be responsible for all of the wiring.

Love the ideas man. Gonna go with the smoked out and all digital idea. Would look so sick. How difficult is the wiring? I hate wiring with a passion. You should do a write up for it. :gapteeth:

I'd pay you 150 for all your work if you included the write up. Think of it as an installation manual with Broadfields custom cluster. :)

I wont be able to buy all this till my next disbursement from school (Sometime in Jan.) but I def will. The allure of having that sexy of an instrument panel is quite high. Among many other aesthetic things I want to do to my 240. Oh, and this turbo timer and boost controller shroud is also something I want. You are very very good at what you do.


Can you hook me up with an email I can contact you with?

User avatar
Broadfield
Posts: 2681
Joined: Tue Sep 05, 2006 2:57 pm
Car: 1992 240sx
Location: Normal, IL
Contact:

Post

Well, I got everything mounted up and glued in place. However, I noticed an area on the right side that had a weird low spot. I didn't notice it until I had everything mounted up. Sometimes that happens. Some imperfections don't pop out at you until you get the finishing coats of paint on. Unfortunately, I didn't notice it until the units were glued in place. You can see the weird spot I circled here:

Image

Image

That is not acceptable to hand over to the customer, so I need to fix it. The nice thing about this SEM Texture Coat is that I can go in and spot cover areas without having to re-shoot the entire project. So I first removed the unit on the right, then sanded down that area a little to get rid of the anomaly. I then taped off the smooth area behind it and hit the area, and a little of the surrounding area, with a little bit of texture coat. Next I had to put the final finish color back on. That is also the nice thing about the SEM paints is that they spot blend flawlessly. So I removed the tape from the smooth area and shot the entire right side of the shroud with the SEM Satin Black again.... DONE!

Finished results:

Image

Image

Image

The last thing I have to do is polish the customer's clear plastic front for his stock cluster. I sanded down the inside and outside today with 1200, 1500, then 2000 grit. I then buffed it with a Pinnacle XMT Heavy Duty Swirl Remover #4 Polishing Compound. I used an air powered 3" mini polisher with a wool pad to do so. I will follow that up with compound #'s 3, 2 and 1 using various foam pads on the same mini polisher.

User avatar
Broadfield
Posts: 2681
Joined: Tue Sep 05, 2006 2:57 pm
Car: 1992 240sx
Location: Normal, IL
Contact:

Post

I just realized I forgot to post up the polished plastic pics... crystal clear now!

Image

My customer also sent me an installed pic I figured I would share:

Image

angelscrx
Posts: 246
Joined: Mon May 14, 2007 2:06 pm
Car: 1992 240sx

Post

That came out real sweet.

User avatar
Dittoz7
Posts: 17694
Joined: Thu Sep 07, 2006 4:08 pm
Car: 1997 2f0WtY SE!
Location: Miami, FL

Post

Dayum...

User avatar
badbob2121
Posts: 1989
Joined: Sat Jan 16, 2010 9:23 am
Car: '92 Nissan 240SXS13 Hatch ELLIS JUAN
'12 Ford Mustang GT RTR
Location: St. Louis

Post

very tasteful


Return to “240sx General Discussion”